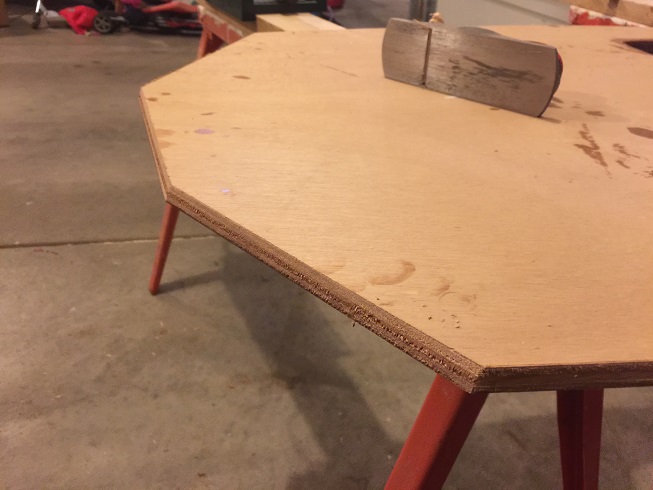
Build Log for the Hull of the SCAMP Argo
With the mast, spars, centerboard, rudder, tiller, oars, and build-jig complete, I will now begin building the hull of SCAMP #349 "Argo". So far the work has been done in the basement, over winter, and the timing is good with the weather warming up to the point I can epoxy in the garage. It is a stitch and glue design, and I purchased the pre-cut marine plywood SCAMP kit from Small Craft Advisor. I am very pleased with the quality and accuracy of the pieces from SCA.
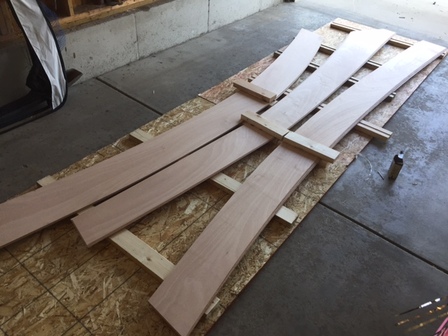
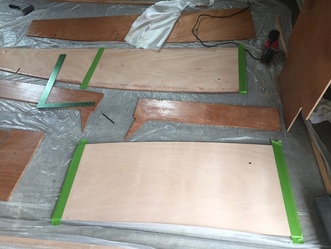
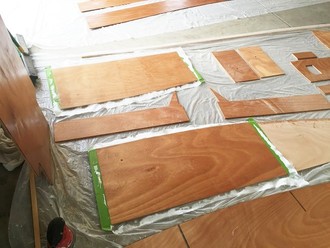
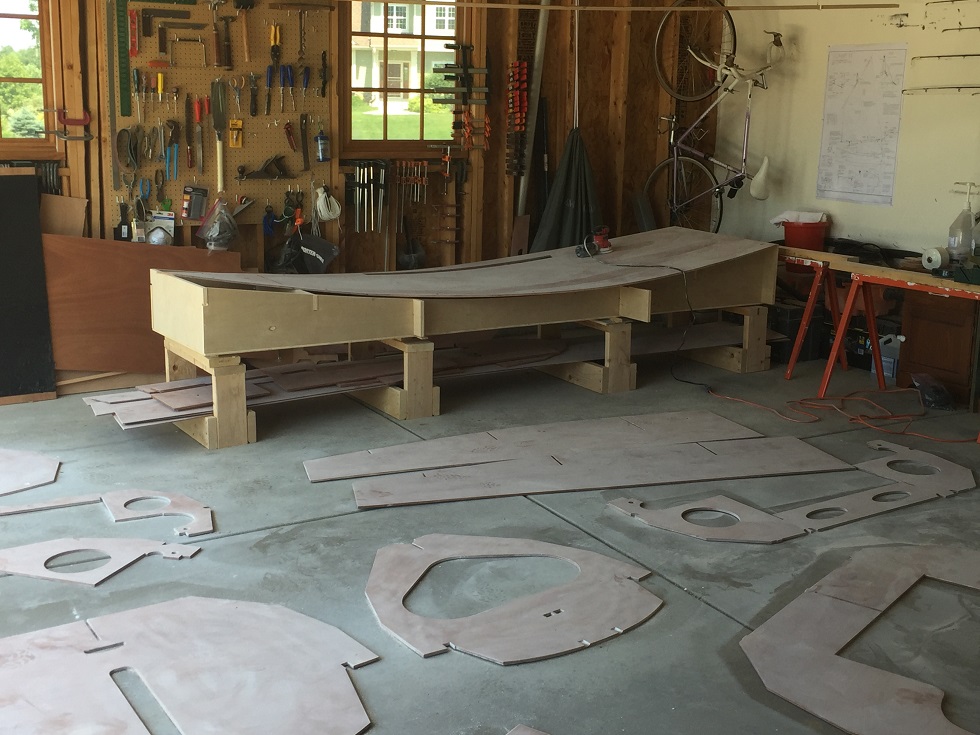
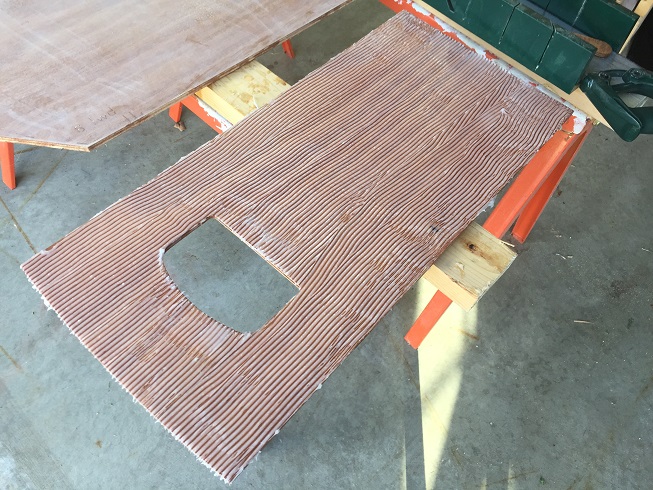
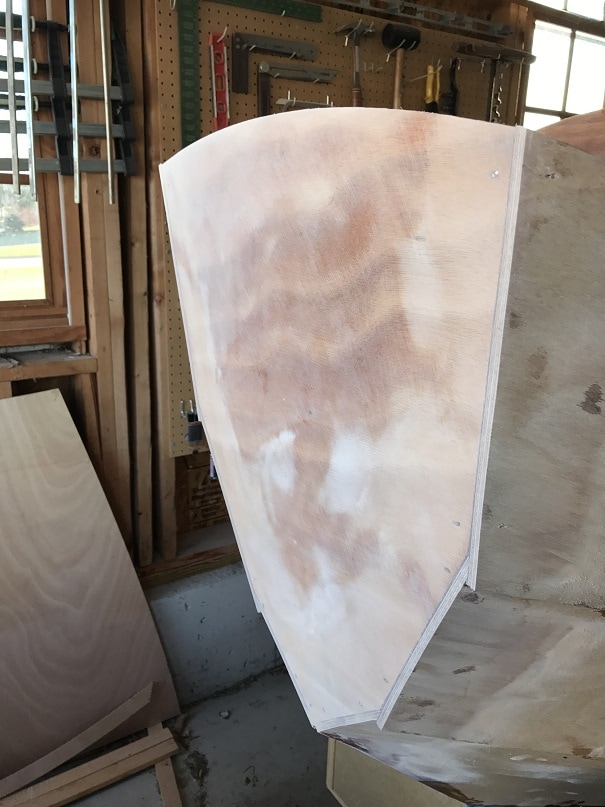
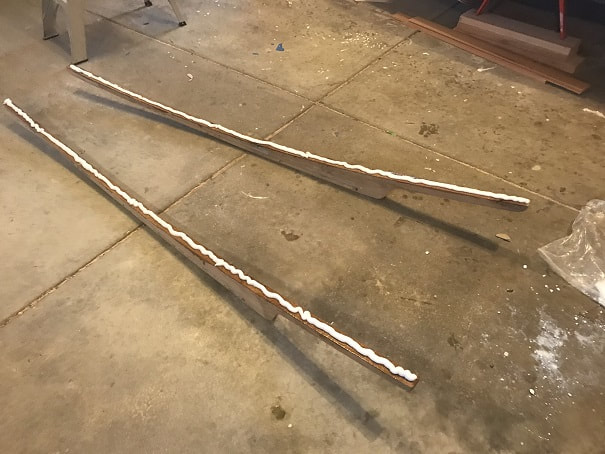
These are the hull planks prior to scarfing. I have them laid out approximately where they will be when glued up, but I did not dry test fit the scarf joints together for fear of damaging them. I planed the 2x4's so they are all flat and straight.
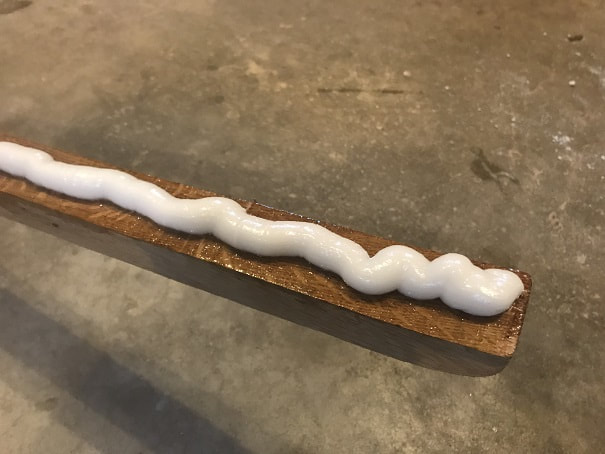
I used slow speed hardener epoxy thickened with silica as glue for the hull plank scarf joints. The kit pieces fit together perfectly and I did not sand the joint edges prior to assembly. The planks have plastic on both faces to prevent gluing them to adjacent wood.

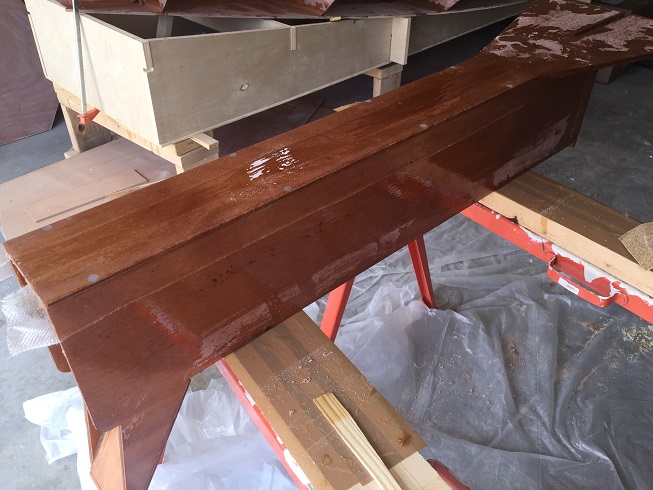
Finished glue-up of 6 hull-planks. The 3" deck screws at the ends of the 2x4's sink into a matching 2x4 under the planks, and creates a clamp. In each "clamp" are two glued up complete-planks consisting of four pieces total.
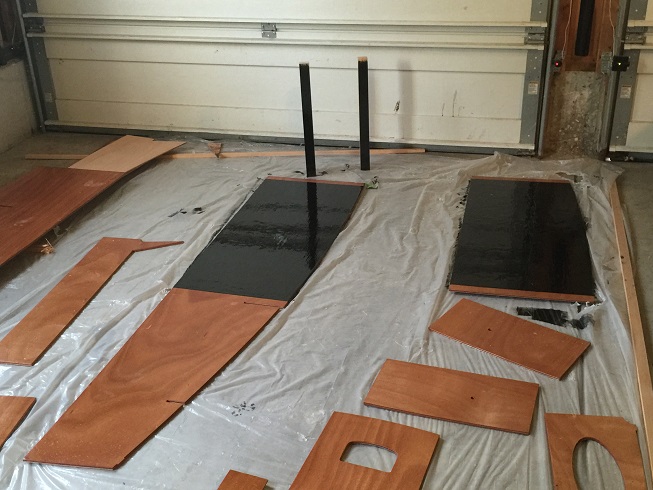
Used similar technique for scarfing the hull bottom, 3" screws provide clamping pressure at the ends of the 2x4's (with the addition of a very heavy rock due to the long length of the clamping 2x4. In the background you can see the one bulkhead that requires scarfing, clamped and straight as it dries.
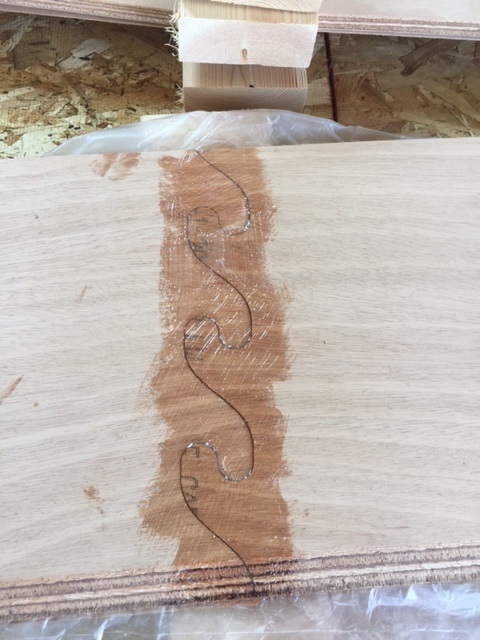
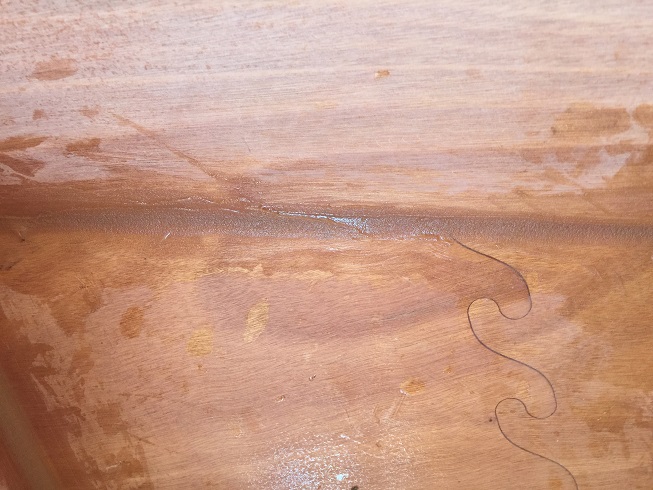
Sanded scarf joints, photo of sanded scarf joint after epoxy coating.
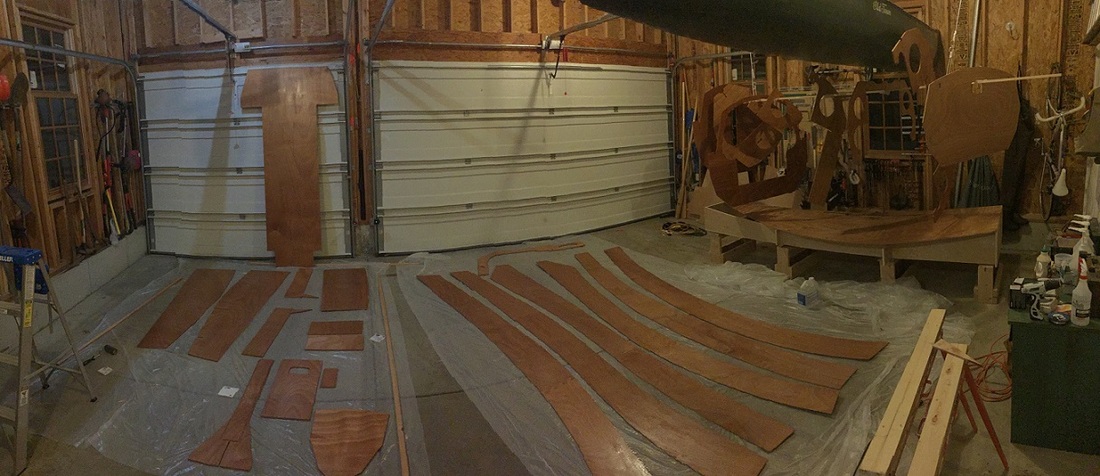
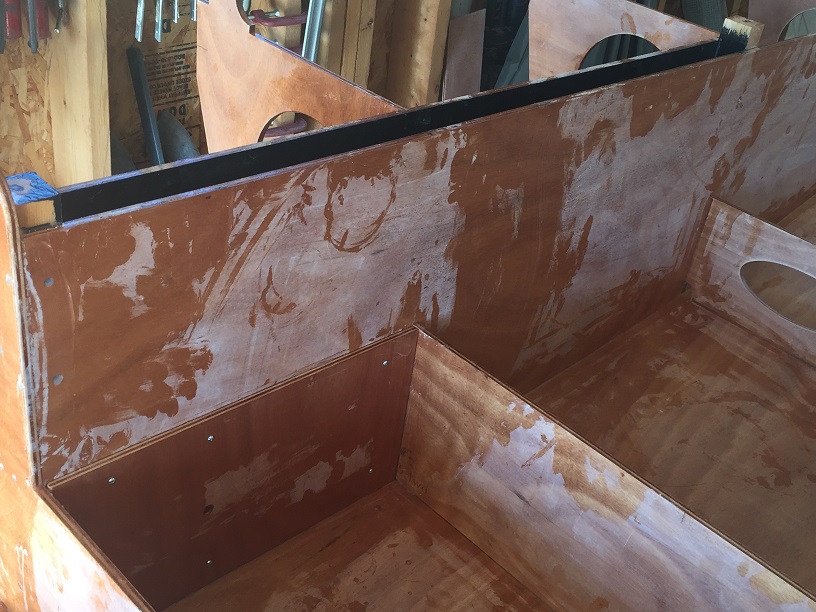
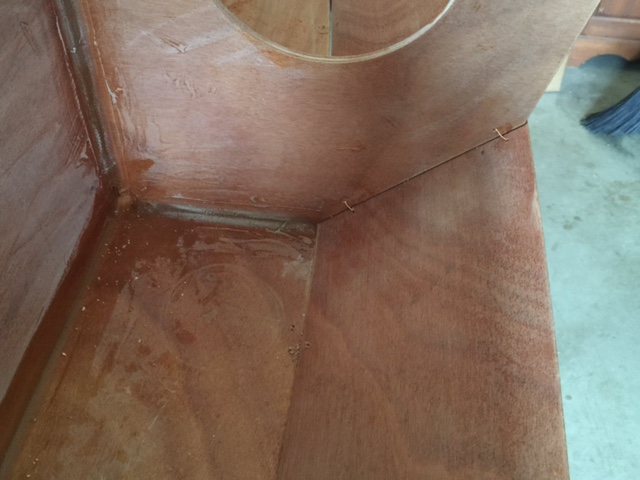
Filed round CNC slots square, rounded bulkhead edges that will be exposed edges in the finished boat, vacuumed everything, and put on the 1st epoxy coat. I hung the bulkheads on a horizontal pole (on the right in the photo) so I epoxied both sides of those. All the parts on the plastic on the ground are coated on one side only and tomorrow night I will coat the other side. If the picture or certain planks look a little curvy, that is due to some distortion in the panoramic photo taken on my iphone.
|
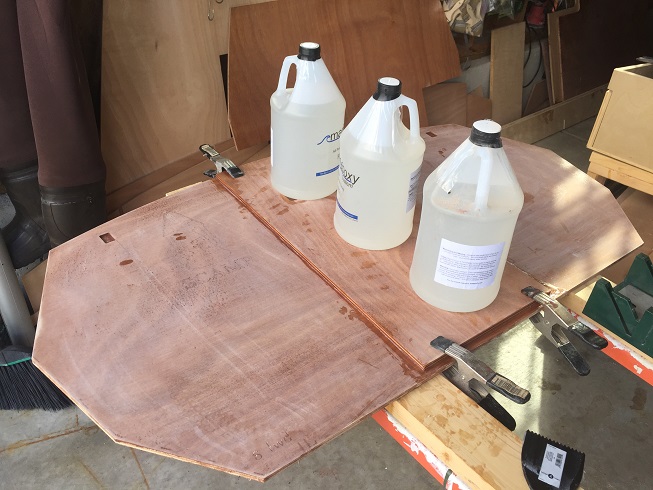
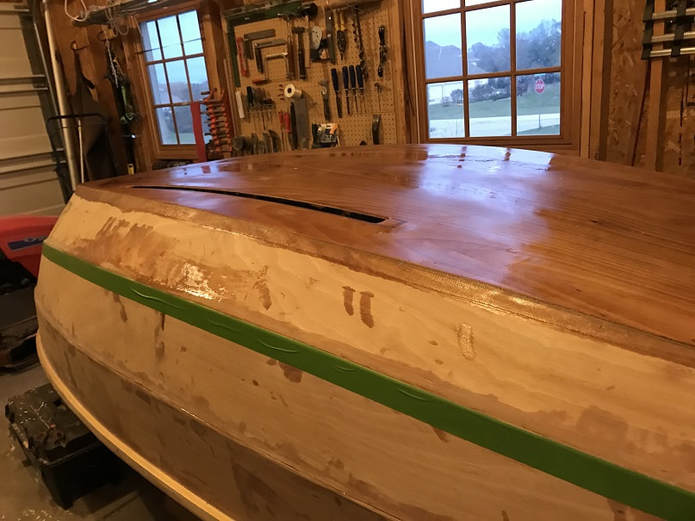
NOTE: the big bottom piece, the transom, and the hull planks should get 2 coats of epoxy on the inner faces, but should be left as bare wood on the faces that face outward. The outer hull will be epoxied and fiberglassed later.
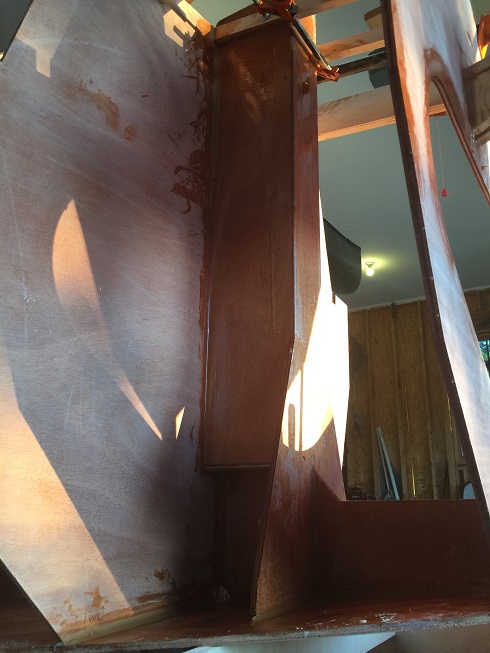
Interior faces of centerboard case masked off (I masked off 1.5" in from the ends, so that the when I glue the pieces all together I will not be gluing the end-posts of the centerboard case to fiberglass, but rather to the epoxied-wood surface.
|
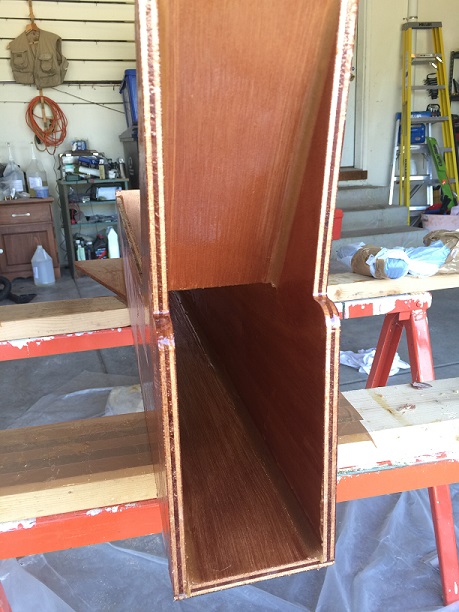
Interior faces of centerboard case fiberglassed
|
Interior faces of centerboard case with 1 layer of fiberglass, 2 layers of epoxy and a final coat of graphite-thickened epoxy. The centerboard posts can be seen in the back; they have 2 coats of epoxy on all sides, and a third coat of graphite thickened epoxy on the interior faces.
|
Let the sanding begin!!! Many random-orbit sanding disks later, the epoxy coat on the initial assembly pieces is sanded. whew.
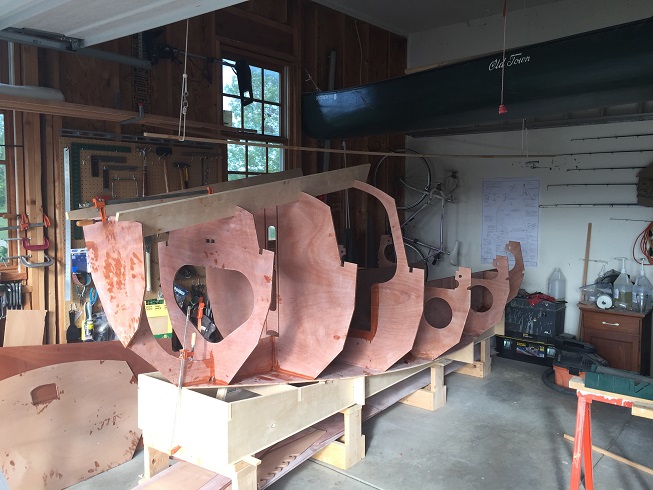
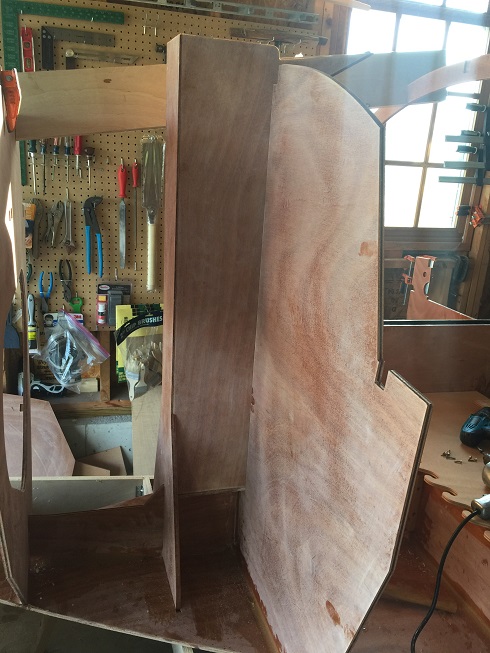
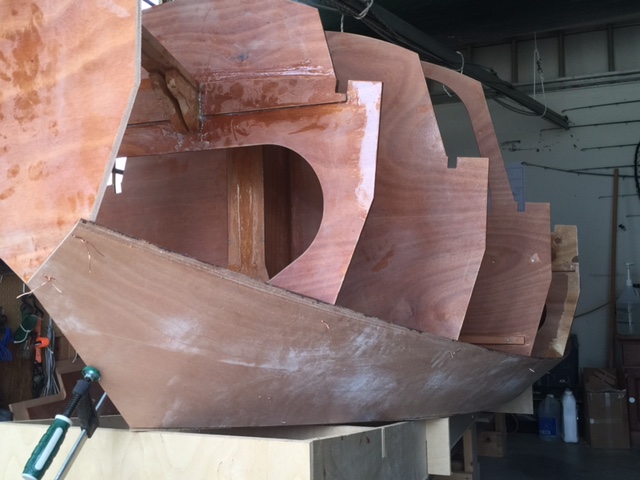
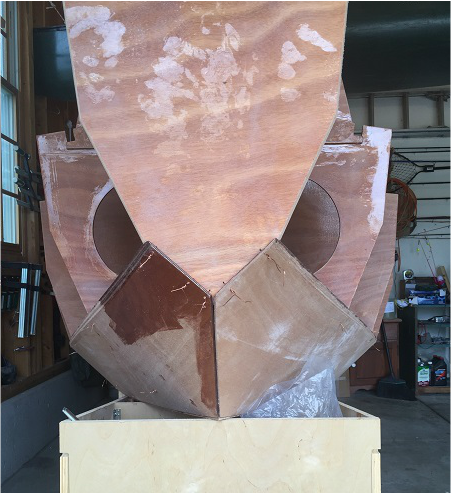
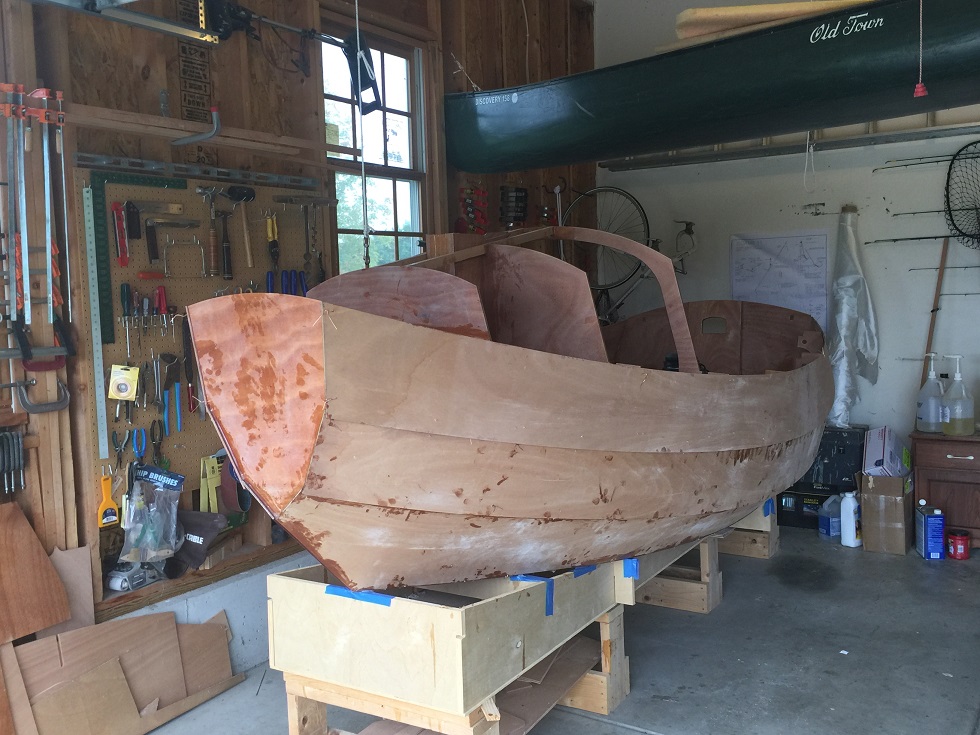
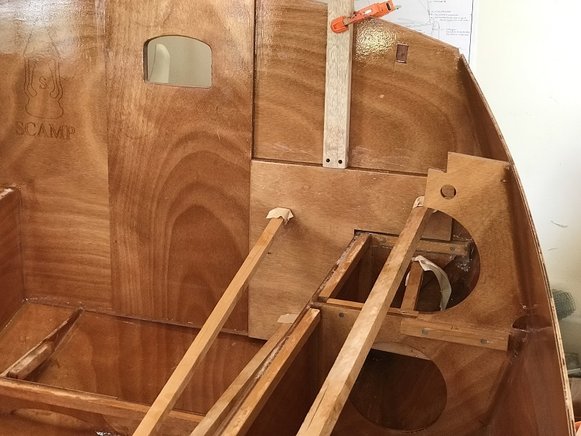
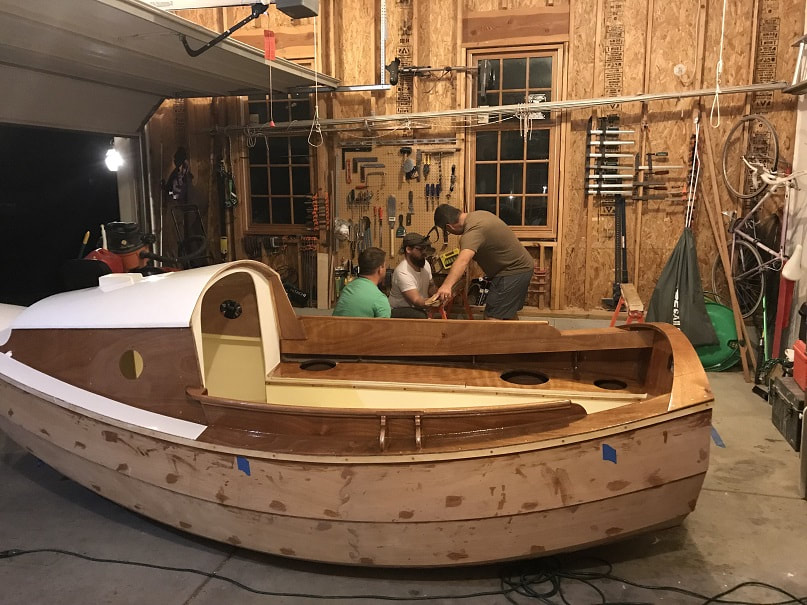
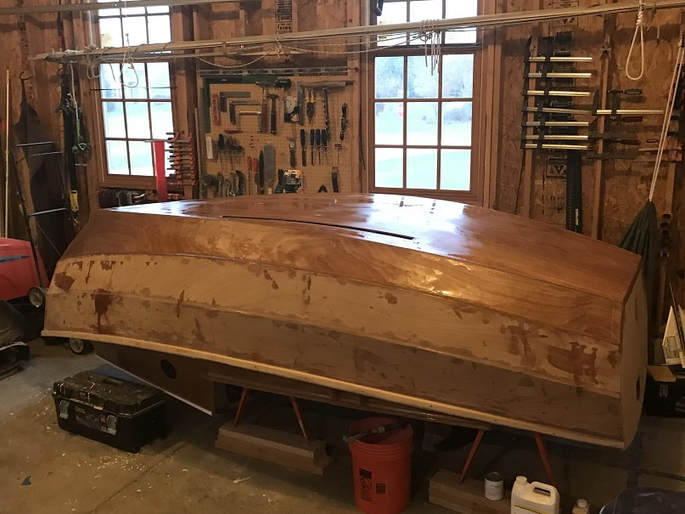
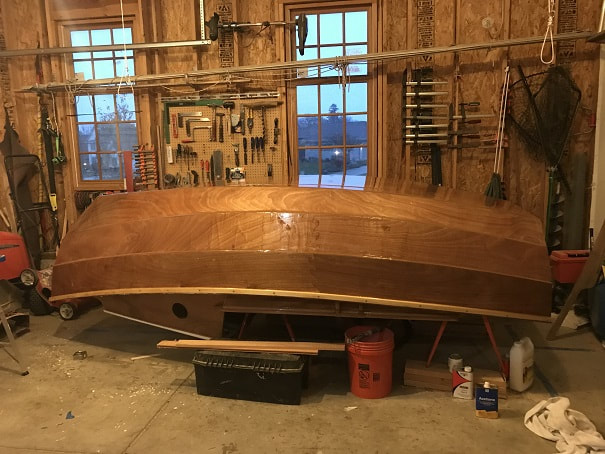
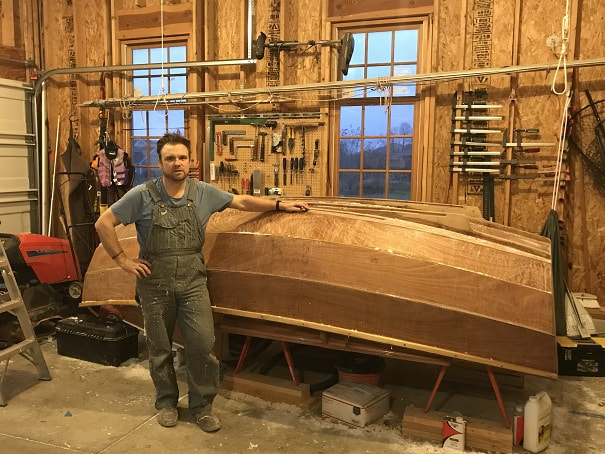
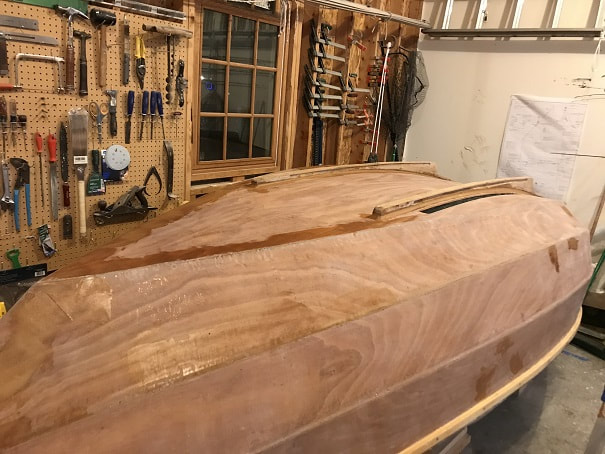
Now it's getting exiting, the boat is starting to take shape!! A monotonous period of sanding all the pieces was followed by big excitement when I dry fit the first bulkheads and seat longitudinals. Remember to screw the bottom down with two screws into cleats in the jig, per instructions.
Everything fits perfecto! This photo is of the pieces just dry-fit, and not even screwed yet. After all that sanding, this is a great stage of accomplishment and I'm gonna call it a day.
- Next I completed the dry-fit-up of the Scamp seat longitudinals and bulkheads shown above. Predrilled and screwed and ensured everything fit nicely. I am building the centerboard case in-place, and so far that is going well. Some other builders have decided to build the centerboard case on the bench top and then install it pre-assembled along with the seat longitudinal. Building it in-place worked well for me.
- Then I unscrewed, disassembled, and de-dusted all the pieces
- I mixed unthickened epoxy and precoat the edges to be joined immediately before applying silicone thickened epoxy glue. The edges looked like they could soak-up more epoxy after my first epoxy coat which had been done in the epoxy-coating stage. So on these edges I will have 2 coats of unthickened epoxy and a final binder of collodial silicone thickened epoxy.
- It was in the mid-80's F tonight when I did this and boy-o-boy did the epoxy cure faster than I have experienced in the past! I mixed a 6oz batch of silicon thickened epoxy glue, with the slow hardener, and that baby was smoking and going exothermic in no time; lost the batch before getting much use out of it. After that I went for 3 oz batches and even those I had to work fast with. There are some tedious moments in building this boat, but tonight was not one of them, this was a fast paced night! I got everything assembled, with nice thickened epoxy on the joints, and everything fit up well.
- Used #8x1" stainless steel square-drive screws, dipped in thickened epoxy prior to installing them
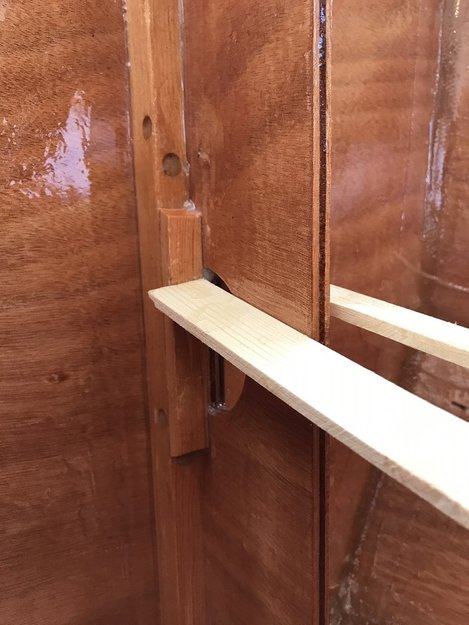
- When the centerboard case was glued and screwed in place, I used little pre-cut wood blocks to ensure that the correct spacing was maintained on the interior of the case and to transfer clamping pressure across the opening (this is per the instructions). The instructions advise to wrap these in packing tape to prevent them from becoming epoxied in-place. I neglected to wrap them in tape, and in the busy moment, I elected to just stuff them in latex work gloves, this worked well.
- I smoothed out and cleaned up the excess epoxy so that I wouldn't have to spend time chipping it away or sanding it off later. I also went through about 15 pairs of gloves, as I bought a very cheap box of gloves today that kept falling apart, argh. It was so hot and tropical in Wisconsin tonight, that I thought it fitting to play traditional Hawaiian music, which I love, during the build tonight, and it was a great night.
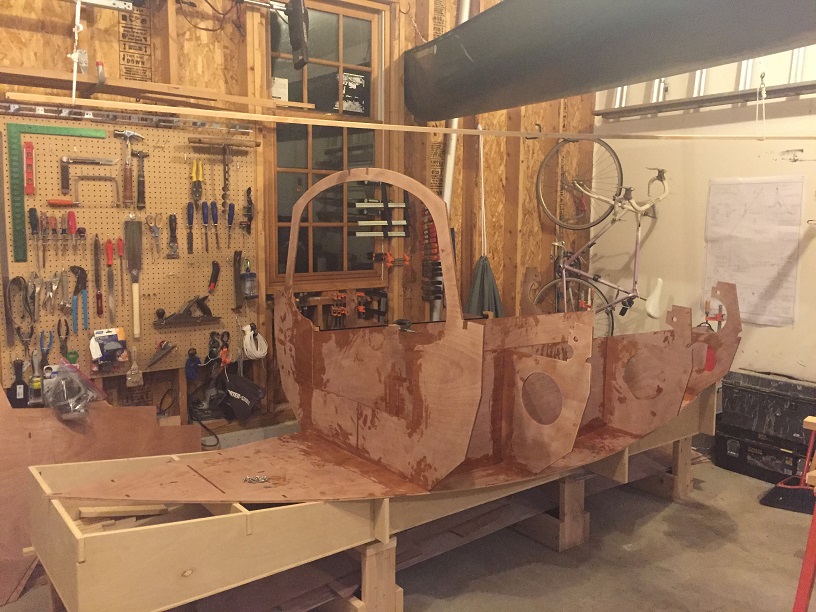
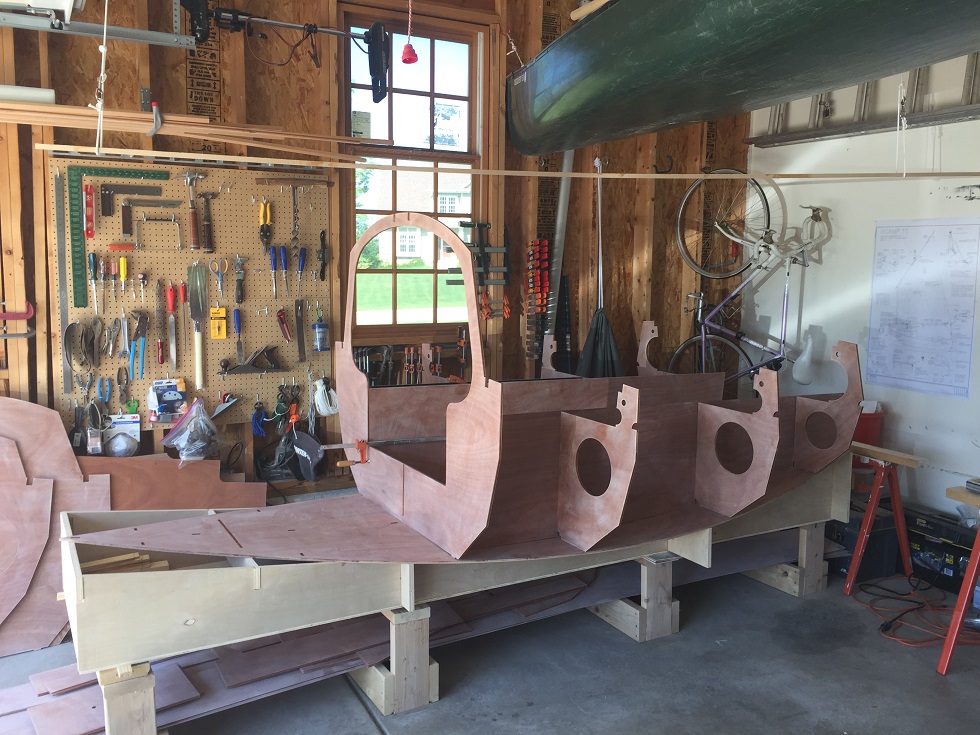
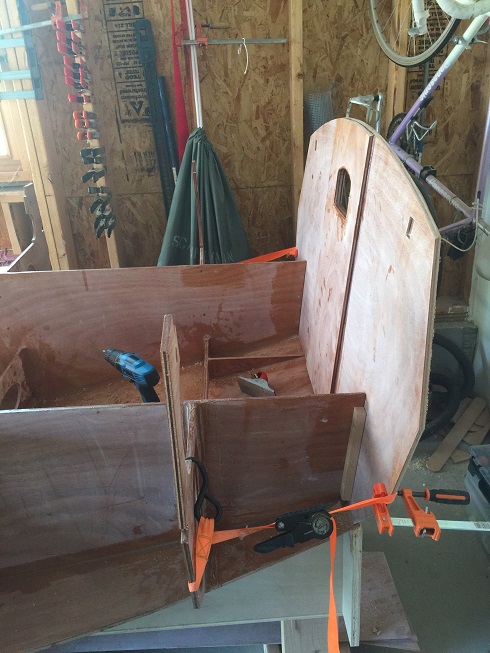
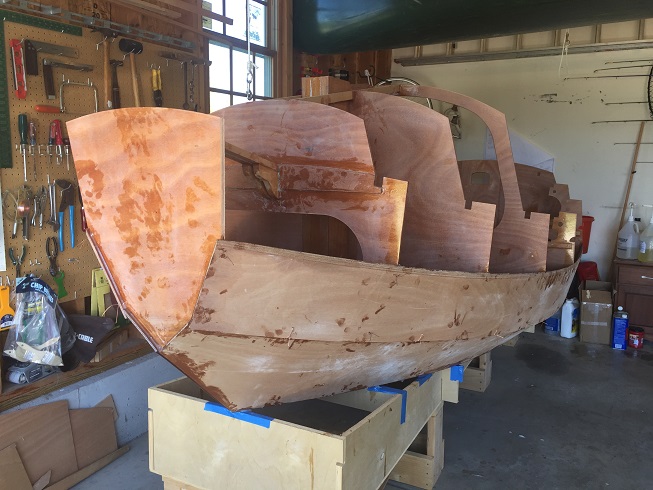
SCAMP Argo initial bulkheads, seat longitudinals, and centerboard case, finish assembled and epoxied in place
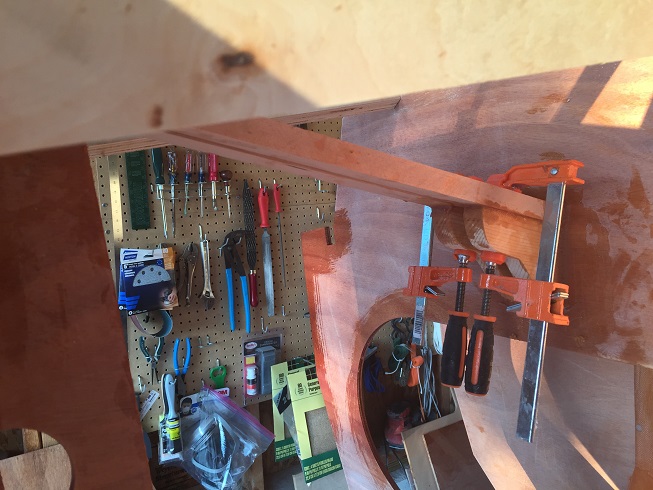
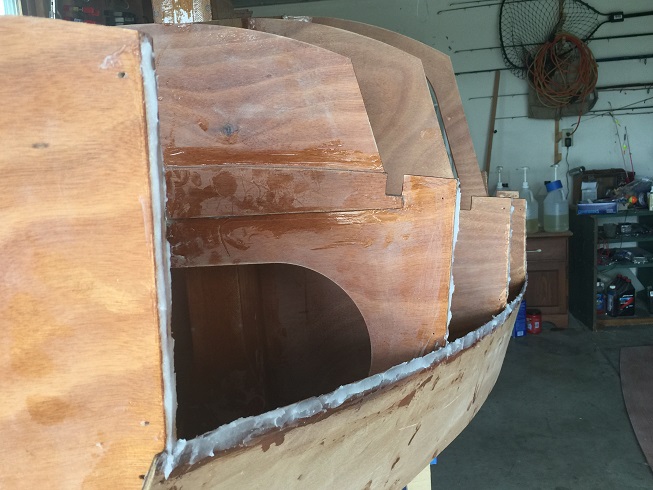
Installed the centerboard case doublers, one on each side of the outside of the forward section of the centerboard case. They are glued on with thickened epoxy spread with a grooved putty knife, and screwed in place with 6 screws each. Next, I will fillet all the pieces installed so far.
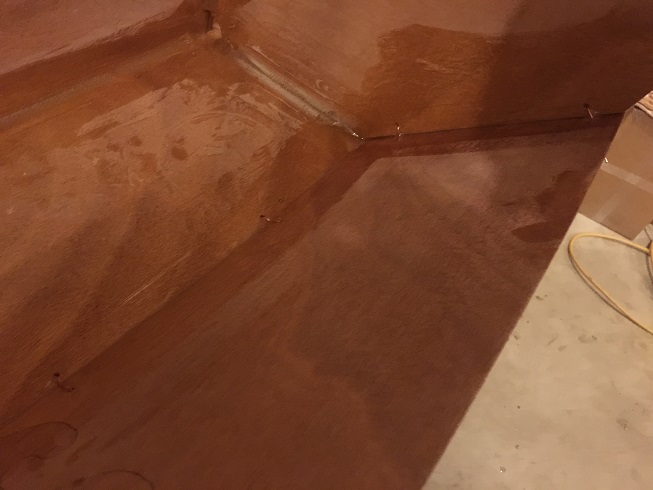
Filleting of the bulkheads in process. Using slow hardener epoxy mixed with mostly wood flour, but some collodial silicon. I am making these fillets with a rounded wood tool that has a rounded tip diameter a bit over an inch / 25mm.
- Didn't get to work on the boat for a while, so the epoxy had fully cured, so I sanded down all the epoxy from when I glued-up the bulkheads, in order to get smooth surfaces again, and also to provide a good bonding surface for fillets
- Completed fillets on bulkheads 4-7 and seat longitudinals
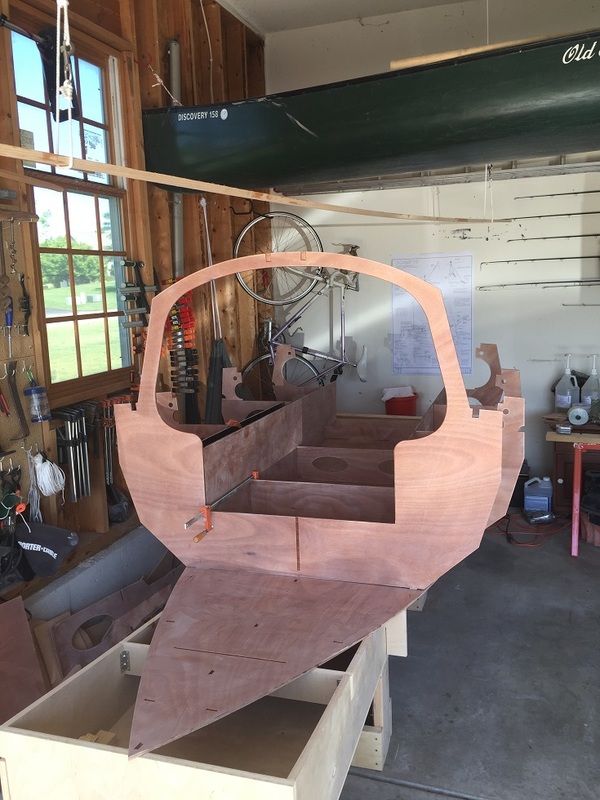
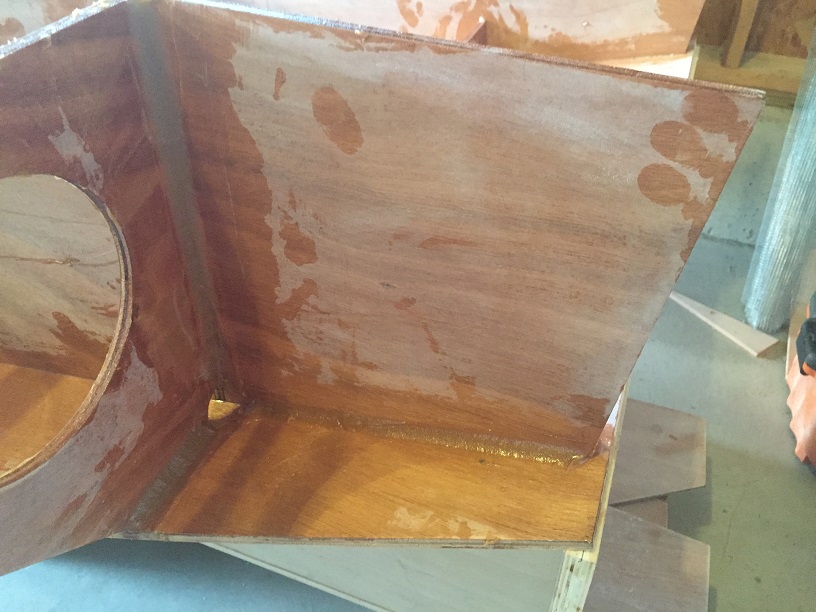
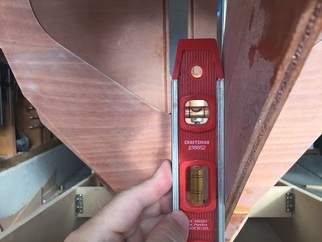
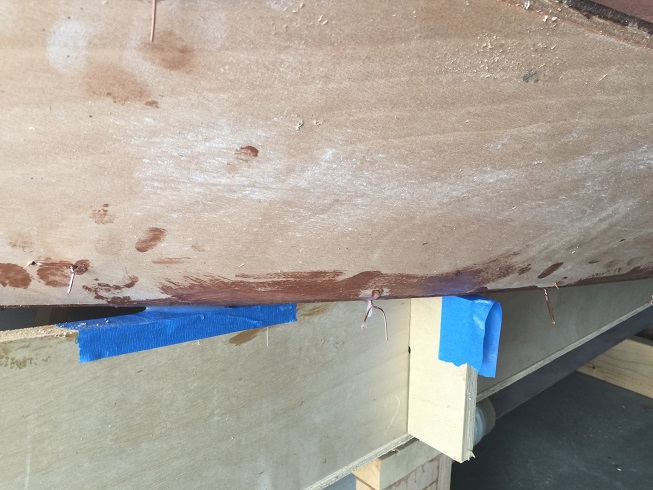
Final assembly of remaining bulkheads and the bow-piece. I first applied a thin layer of unthickened epoxy to both surfaces, especially to get fully soaked end-grains, then collodial silicon thickened epoxy glue on all joined edges. Everything is true and square. Look under the hull bottom and you can see some blocking to provide upward pressure for a tight joint between the bottom and the stem. The temporary alignment boards can be seen on top of the bulkheads. They came with the kit.
Stem is vertical. Tomorrow I'll fillet the remaining bulkheads.
Having got epoxy all over my screw-gun in previous stages, I wised-up and now put a grocery bag over my screw-gun to keep the epoxy off. Works great.
- Next, I installed the SCAMP mast trunk. I opted to do the initial assembly of the mast trunk outside the boat on a set of saw horses. This allowed me better access to lay down two of the internal fillets, and it was just nice and open to assemble with plenty of space.
- I dry fit and screwed the entire mast trunk into the boat, then disassembled it, then glued (thickened epoxy)and screwed the bottom, sides, and ramp together, then filleted everything on the mast trunk that I could while it was outside the boat, then I fiberglassed the outside corners.
- When it had set up, I screwed it in place in the boat.
- Some tips: used a file to widen the slot in the mast trunk "Y piece". Also, I used screws to pull the mast trunk assembly into the dados in the bulkhead; to easily locate where to drill the holes into the dado, I first drilled pilot/locating holes from the dado side through the bulk head, this was a very easy way to get a nicely located hole.
Scamp Mast Trunk, dry fit and screwed in place
Scamp mast trunk being assembled on saw horses. Fillets are complete, and inside of the trunk is brushed smooth to ensure easy removal/installation of mast blocks. I am still puzzled over how I will lay down the remaining two long vertical fillets after the trunk is installed in the boat.....
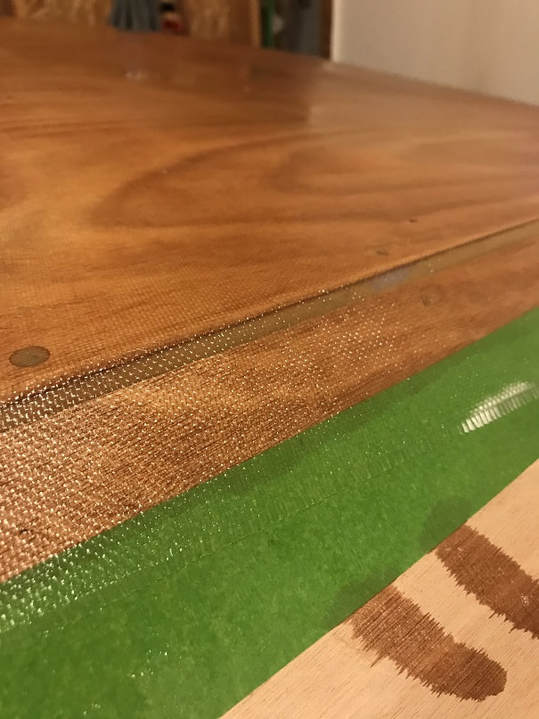
SCAMP mast trunk preassembled, interior filleted, and fiberglass tape on outer corners. It is difficult to see in the photo, but I also applied fiberglass on the bottom edge joints. I rounded the edges prior to applying fiberglass, to provide a nice corner to lay the fiberglass over.
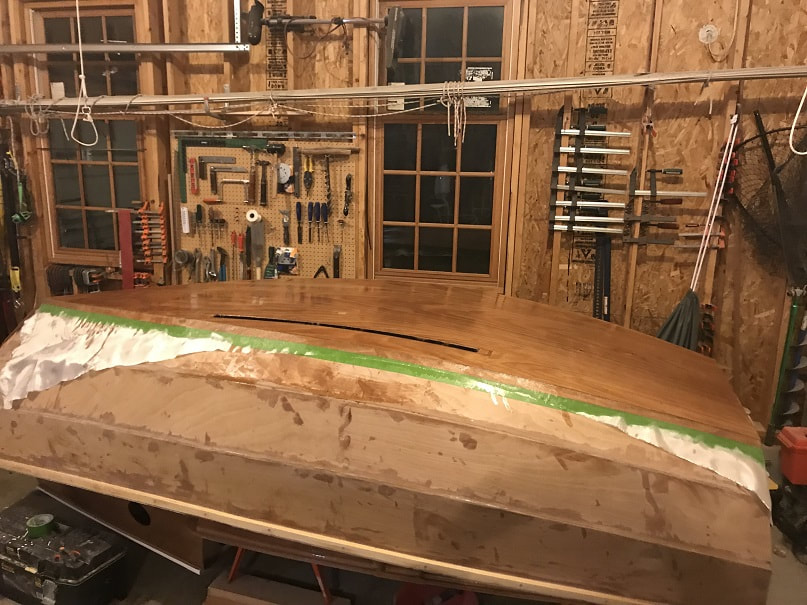
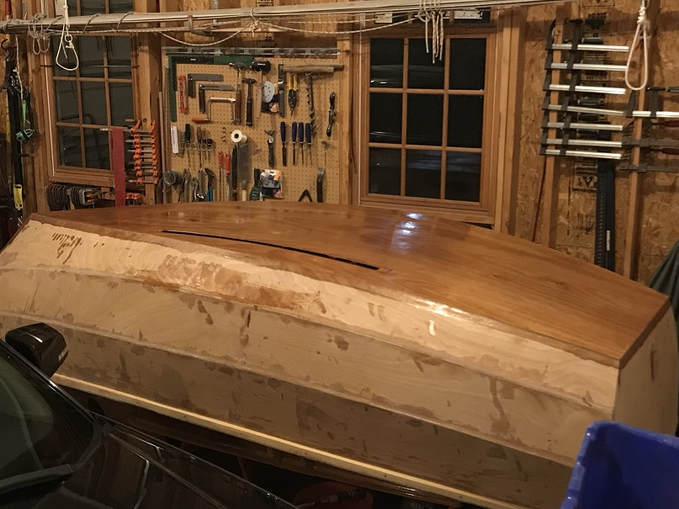
Completed mast trunk screwed and clamped in place. I installed Cabin top beams and deck beams at the same time.
- At this point I began work on the deck and cabin/veranda structure, additional details at: the SCAMP Cabin, Deck, Cockpit page
Slight addition to the standard plan; I added one spruce reinforcement gusset under each deck beam
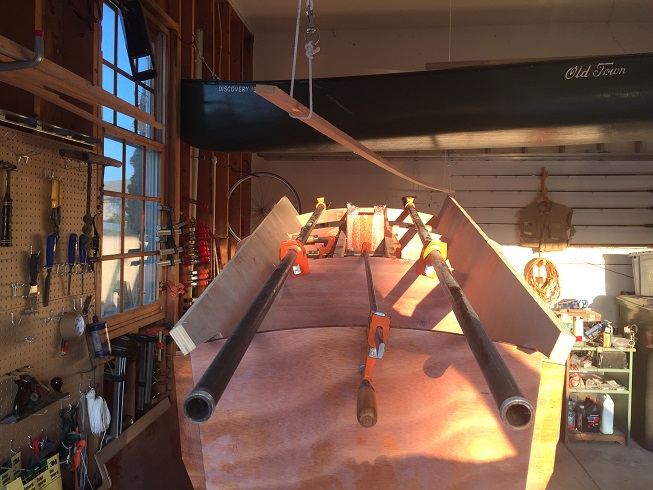
Clamping arrangement for Cabin Top Beams, and Deck Beams, and sideways clamps on mast trunk
Clamps removed, showing mast trunk, deck beams, and cabin top beams installed.
- Next I will glue up the transom doubler to the transom, bevel the transom edges to the angle at which the hull planks meet it, and then install the transom.
SCAMP transom doubler, with thickened epoxy applied with a grooved putty knife
|
Gluing up the transom doubler
|
- Sharpened all the tools today, though I have been doing little sharpenings all along. Scribed lines onto the transom, up to which I planed a bevel onto the transom edges per the drawing and instructions. The beveled edges will allow the hull planks to rest flush on the edges.
Scribed transom
Transom beveled with a sharp plane
It was a bit tricky to hold the transom while drilling and screwing it to the cleats on the seat longitudinals. I used a ratchet strap as shown to hold it while doing the dry-fit, and it worked well. The little adjustable clamps on the transom are there to keep the strap from sliding down.
Centerboard Case Bushings and Pivot Pin
- Next I installed the centerboard pivot pin bushings.
- Drilled a 5/8" hole square and level through the centerboard case
- Trimmed bushings to length and scored their O.D.'s to provide a key for epoxy to hold in
- Soaked the centerboard case hole I.D.'s with liquid epoxy, then coating bushing O.D.'s with thickened epoxy and tapped them into place, being careful not to insert them into the interior of the centerboard case
- Double checked alignment with a spare 1/2" bolt inserted through the bushings
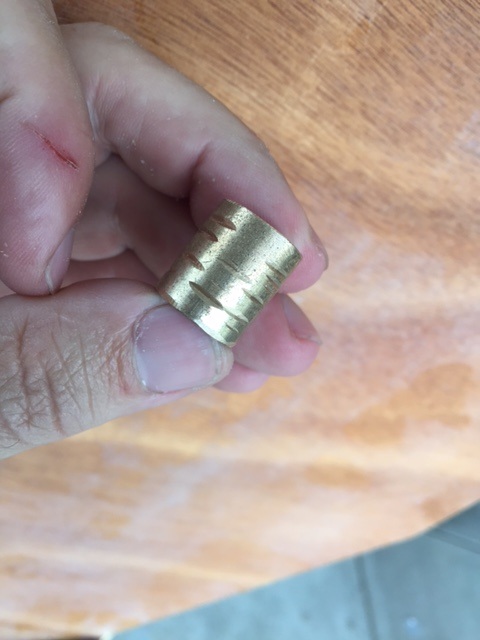
Centerboard case bushings, there are two of these. Scored with a file around the O.D. to provide keyways for epoxy to hold to.
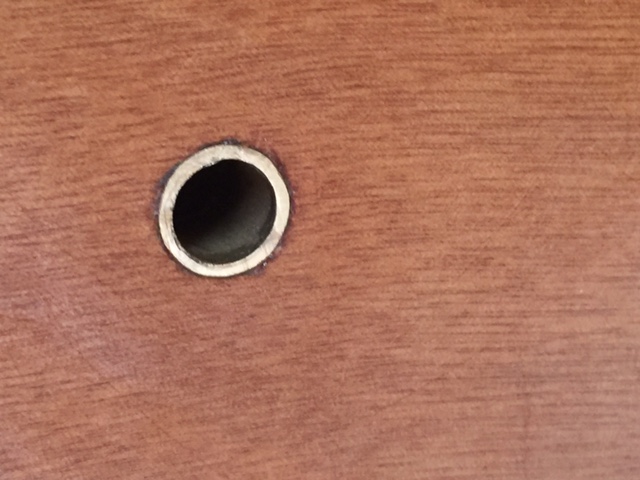
Bushing installed in Centerboard Case
Checked alignment of bushings when epoxy was still wet, just to be sure, everything lined up well.

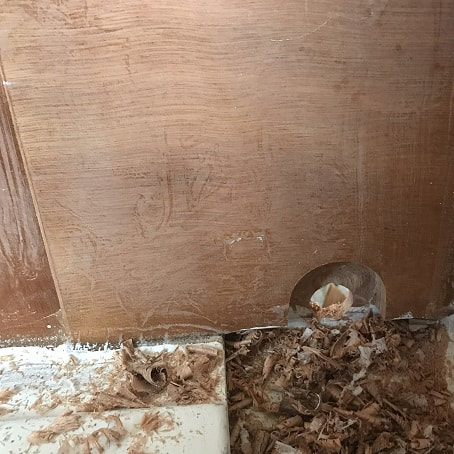
The centerboard pivot pin will be bolted into the inboard side of the centerboard case. The centerboard pivot pin hole is sealed on the outboard side with a piece of plywood. I decided to use this cool cnc carved SCAMP logo piece that came with the kit for this purpose. It is epoxied and screwed in place, so it ain't comin off easy.
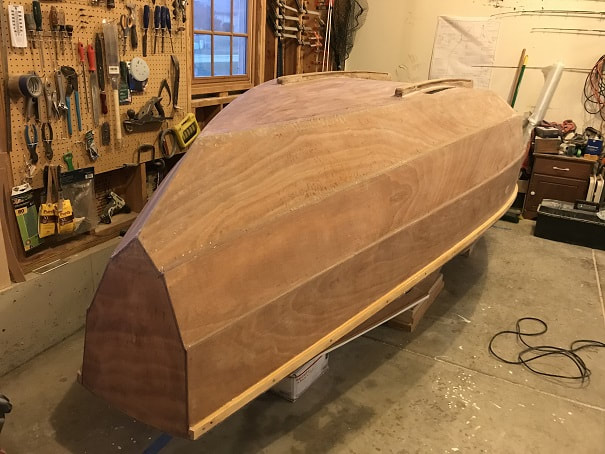
I've been working lately on the cockpit, footwell, cleats, etc.. and the build details for those can be found on the webpages dedicated to those steps. With the cleats all done and filleting all done up to this point, I will now begin attaching planks! First, I noticed that I hadn't yet beveled the bow piece, B1. The edges of this piece need to be beveled so that the planks and deck lie flush on the edges.
I used a mortise marking gauge to scribe lines on B1 to define the material to be removed/beveled. It would have been best to bevel these edges PRIOR to installing B1, as it would have been quicker and easier and I could have used a plane. I found even my sharp plane to be too forceful, as it moved the already-installed B1 around too much. The coarse side of the Shinto rasp made quick work of these edges and did a great job. I could steady the piece with one hand and quickly file in the bevels with the rasp.
I used a mortise marking gauge to scribe lines on B1 to define the material to be removed/beveled. It would have been best to bevel these edges PRIOR to installing B1, as it would have been quicker and easier and I could have used a plane. I found even my sharp plane to be too forceful, as it moved the already-installed B1 around too much. The coarse side of the Shinto rasp made quick work of these edges and did a great job. I could steady the piece with one hand and quickly file in the bevels with the rasp.
|
|
Installing SCAMP Planks
,
- I will dry-fit the planks with clamps and copper wire stitches
- Then remove the copper, apply thickened epoxy, reattach the planks with new copper wire (too worried about old copper breaking due to fatigue during final install), with th eamount of fitting time, I used slow set epoxy for all the plank work
- Then apply fillets and fiberglass tape per design
Dry-fit of the port-side garboard plank. I found that copper stitching worked well to hold this plank in place. One or two stitches in the plank into the bulkhead, and 3 or 4 stitches along the bottom edge between bulkheads.
Dryfit of garboard. Stitches are holding the plank nice and tight up to the bulkhead.
- I wanted the forces on the bulkheads and stem to be symetrical from port and startboard as I installed planks, so I followed the procedure below
- Dry-fit both the port and starboard garboard with copper stitches
- Remove the port garboard, apply liquid epoxy to bulkhead and bottom edges, then applied thickened epoxy to the same egdes
- Stitch on the garboard, and then go over all the joints and press in thickened epoxy to ensure complete joint fill. I will be leaving the stitches in the planks, so I pushed the wires into the joint corner with a flat screwdriver at this point, so that they would not obstruct the fillet later.
- Wait a half day, and apply fillets on along the bottom to garboard joint, and along both edges of the bulkheads
- Wait half a day and apply fiberglass tape to the garboard to bottom joint, between the bulkheads
- Let cure for a day and repeat the process on the starboard garboard (which was dry fit in place while the port garboard was being epoxied in place)
- repeat the process for the 2nd and third row of planks.
- I did the planks single-handed, so at times I used a bungee cord to help hold up ends of the planks as I worked.
Before starting, be sure to cover the jig with tape in certain spots to avoid gluing the boat to the jig.
Dry fit of garboards
Stitched and Glued plank.
Filleted plank

Stitched, glued, flilleted, fiberglassed plank joint
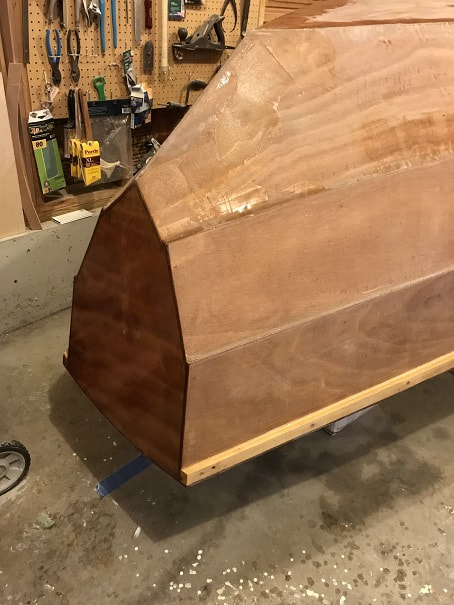
Second row of planking complete. Be sure to sand any surfaces to be joined that have cured epoxy on them prior to final epoxy glue up. You can see some bulkheads that have cured epoxy on the edges and those will be lightly sanded to provide a good key/adhesion surface for epoxy glue, fillets, and paint.
Third row of planking in process. The instructions advise that the internal joint between P2 and P3 needn't be fiberglassed, but I plan to do it anyway. The hull is really taking shape!!
Collodial silica thickened epoxy glue being applied to bulkheads and P2, prior to installation of P3. I am getting good "ooze-out" of glue as I install the boards, so am pleased.
OCTOBER 5th 2016: Nights are getting cool here, and with my travel schedule, my work will soon include nights in the 40's degF (7 degC). I intend to paint the interior of the hull of "Argo" prior to working on the seats and cockpit sole, so I am done for the year on working in the garage. I do not want to apply these products in this time of low temperatures and large temperature fluctuations
Over winter I will pick out which hatches I want to use, and I will cut out hatch openings. I will apply hatch doublers to sole plates and seats, which I can do in the basement. I will also complete the fixed ballast between now and spring. In April, I will begin work on the boat itself and I intend to launch her before Fall 2017.
Over winter I will pick out which hatches I want to use, and I will cut out hatch openings. I will apply hatch doublers to sole plates and seats, which I can do in the basement. I will also complete the fixed ballast between now and spring. In April, I will begin work on the boat itself and I intend to launch her before Fall 2017.
APRIL 1st, 2017: Still freezing at night, but it is a nice sunny day, and I have decided to start working on the hull again. There is still not that much I can do until it warms up a bit more, but today I sanded the bow flush, which was an easy rewarding project.
- Sanded exterior of P1 and P2, and sanded interior of the whole boat. Lots o sanding. Wear a mask. I will be glad to have this sanding over. I am sanding the bulkheads, and entire interior prior to attaching the cockpit sole and seat tops.
- Wow, that was a boat-load of sanding, glad it's over. That was a bear. The exposed surfaces look good, the interiors of the storage compartments are free of any sharp edges, but they still have some bumps and drips from the epoxy/thickened epoxy left over from assembly.
- Next I put a complete coat of epoxy on the entire interior of the boat from stem to stern, then I mounted the transom motor mount doublers using compression sticks that held them in place.
Installation of motor mount reinforcing doublers.
I wanted a larger bearing-surface for the bow-eye washer/nut to seat on, so I epoxied a block on either side of the stem where the bow-eye will be installed. Clamped in place with compression sticks that are compressed in-place between the blocks and the next bulkhead astern.
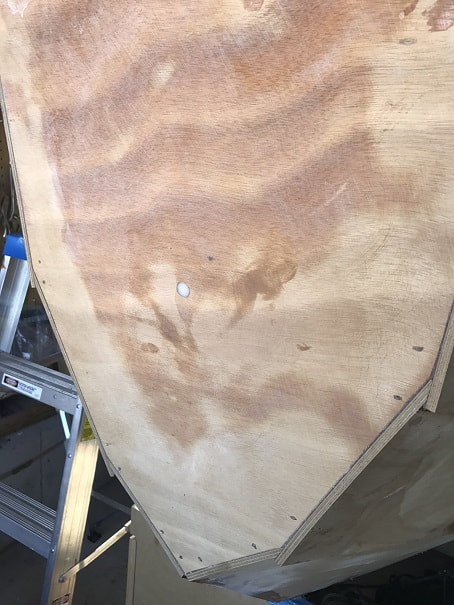
- One detail that I had missed earlier, is that the designer now recommends sealing off the compartment on the port and starboard sides that is between bulkhead 7 and the transom, so that these sealed compartments will act as flotation cells. I cut two 6 3/8" discs out of joubert marine okume, the same thickness as the bulkhead, and epoxied them in place. Also remember to seal off the limber holes at the bottom of the bulkhead....I will do this with a large fillet of thickened epoxy.
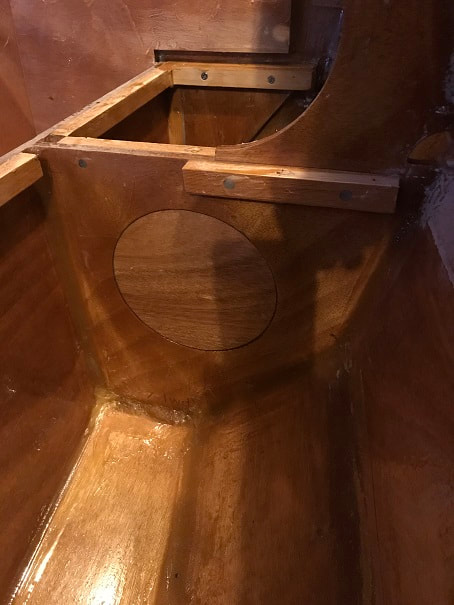
Filler piece, epoxied into Bulkhead 7 to seal off the compartment aft of this bulkhead, so that it will act as a flotation cell.
I used a sharp new 15/16" spade-bit to bore the holes for the drain plugs to be installed behind each scupper through the stern. On the port side, the motor mount doubled was in the way so I used a 2" forstner bit and chisels to make a nice little alcove back to the stern, then drilled the 15/16" hole. I will mount the plugs on the outside of the boat, such that the plugs will be removed from the outside.
I will be using a Witchard bow-eye that requires a 5/16" hole. I have drilled a 1/2" hole and filled it with epoxy, now I will drill that out with the final 5/16" hole.
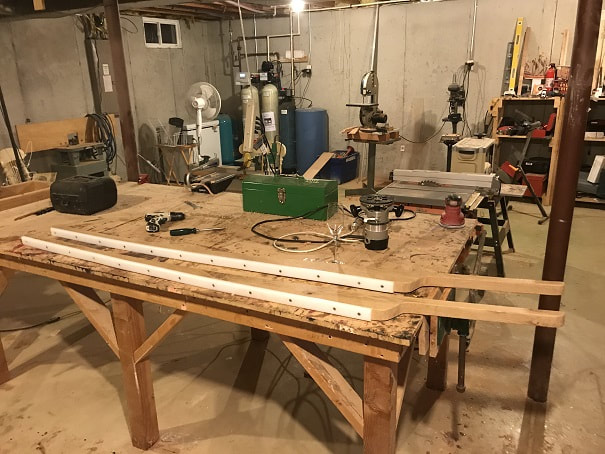
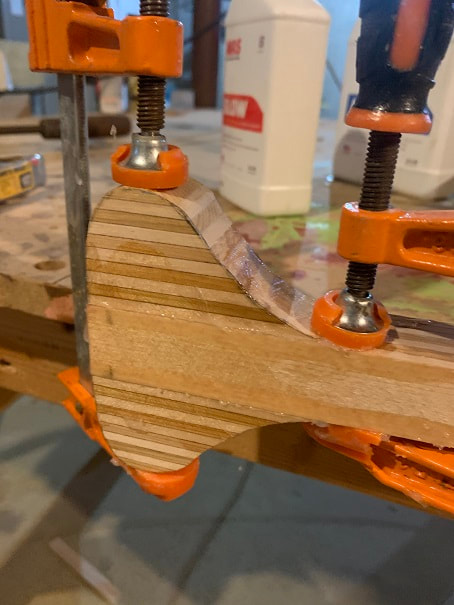
Making SCAMP Skegs
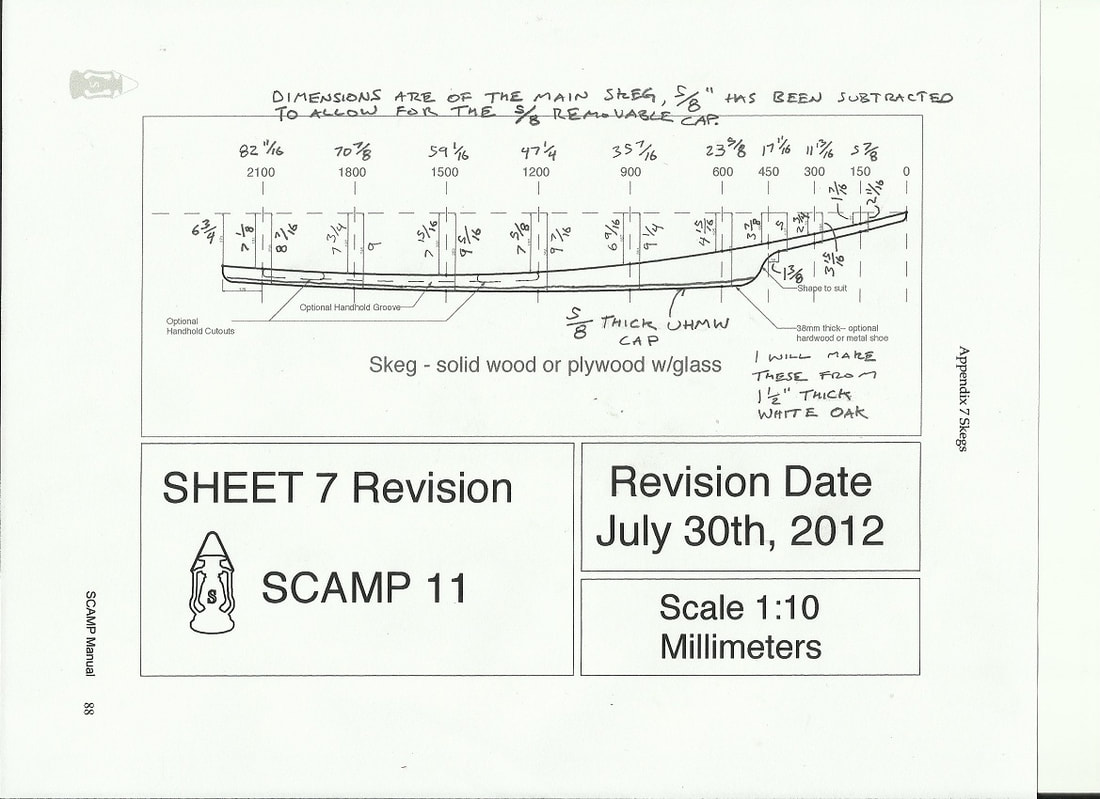
The SCAMP Argo will be fitted with white oak skegs which will have a 5/8" thick natural virgin UHMW plastic cap strip screwed on. Below you can see the dimensions (converted to inches for those of us in the land of feet and inches...) that I will use to draw out my skegs. The handwritten dimensions below are from the manual, less 5/8" for a screw-on UHMW cap.
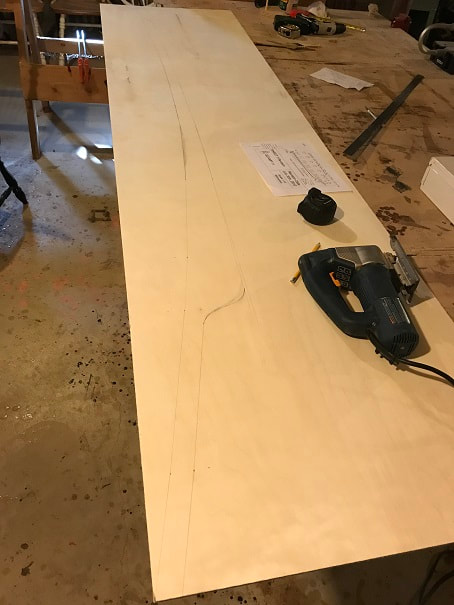
Measuring out points from the drawing, and sketching out the skeg on a 1/4" thick sheet of plywood
|

I cut out the SCAMP Skeg template with a saber saw and sanded and filed it fair. I added 1" to the front of the skeg and brought the leading edge to a point. As I built the skegs, I did away with this point, and built the skegs per plan drawings because the piece of wood I found was not long enough to include the pointy ends.
|
- SCAMP Skegs can be made by cutting out the skeg shape from 2 pieces of 3/4" material (solid wood or marine plywood) and then gluing those pieces together to get a 1.5" (38mm) thick skeg. These can then be epoxied and fiberglassed to seal them up strongly. For some reason, I wanted these ground engaging tools at the base of the boat, to be made from a solid piece of wood. Truth be told, amongst other reasons, I think that part of this desire was the difficulty in procuring and shaping a solid piece of hardwood to the shape of these skegs.
- And so it was, that I went and visited the special remains of an ancient and large white oak tree that fell down on my parents' property when I was in college many years ago. The tree was huge, must've been 4 feet across at the trunk, and my Dad had a guy come in an mill the tree down right in the yard. We all used this stout tree's lumber for many projects over the years, and still there is a quantity of very very wide solid boards, and some nice thick ones, aging away. I went and looked through the wood and found a beauty 2"x8.5"x110" piece of solid white oak that had waited patiently for 25 years to become the skegs for the Argo.
In my Dad's shop looking at the 2"x8.5"x110" piece of solid white oak, that will become the skegs for the Argo. In case you are wondering, one can cut both skegs from a piece this size....barely. This piece truly was destined to become SCAMP skegs, any smaller and they wouldn't have fit.
- I started surface planning down this big heavy piece from 2"thick to 1.5" thick, but the human effort and the planer seemed to agree that removing so much material unnecessarily was a bad idea.....so I took the big piece still at about 2" thick, and decided to cut the skegs out and then plane them down after cutting them to shape. This worked very well, and left me with some nice 2" thick drops for future use.
This is quite an impressive band-saw (my Dad has some tools like this in the basement), with a big ole 240V motor and a 3/4" wide blade; hungry and sharp, asking to cut through a 2" oak board to make SCAMP skegs. I would not have had the tools to do this in my shop, and if you don't either, I would encourage you to look around shops or people you know that may have a tool to use to get the job done.
Cutting through 2" white oak to make the skegs for SCAMP Argo. This saw was so strong and sharp that it cut through this wood like butter; amazing.

And here we have them, solid Wisconsin White Oak SCAMP Skegs.
Skegs and 5/8"x1.5" UHMW raw material.
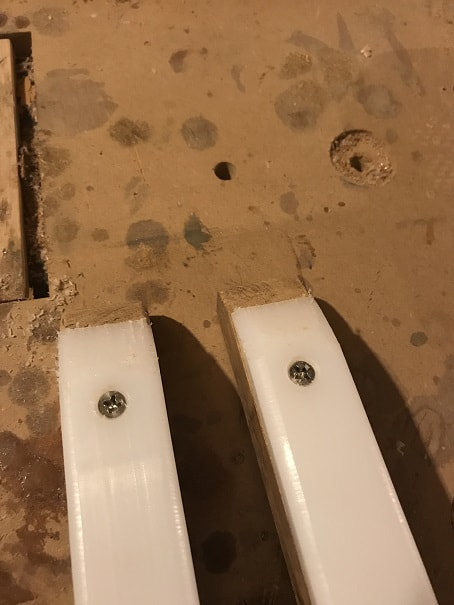
Drilling pilot holes in UHMW. The #12 screws fit through this hole perfectly but with no thread engagement.
Countersink-bit used to drill countersinks in the skeg cap.
This is a stainless steel #12 x 1.25" screw shown set in the countersink I have drilled into the 5/8" x 1.5" (16mm x 38mm) UHMW skeg cap.
Dry-fit of UHMW Scamp skeg caps. Here you can see the 1/4" round over made by the router on the edges of the 5/8" thick UHMW strips.
5/8" (16mm) thick UHMW skeg caps screwed onto whote oak solid skegs. Screw spacing is 6" and screws are #12x1.25"
UHMW Scamp skeg cap, tapered at the leading edge to meet the skeg.
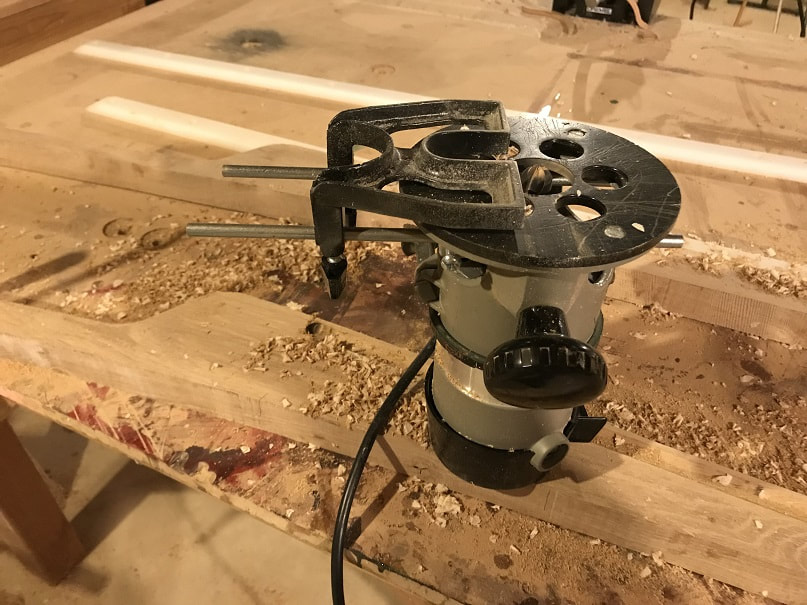
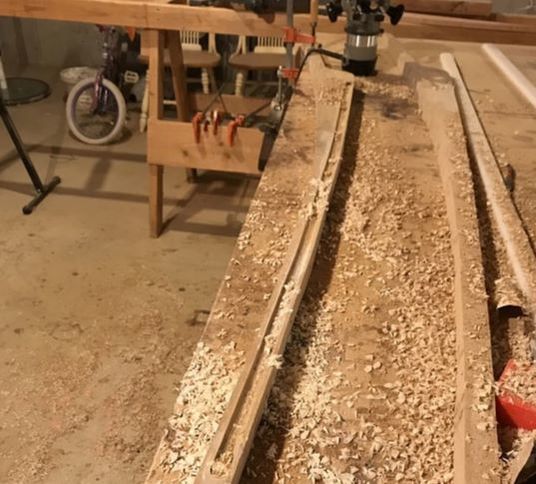
Router jig for cutting in the grab-grooves into the skegs. I used a 3/4" diameter round bit. The groove is about 11/16" wide and 5/16" deep, and it is 1/4" from the bottom of the skeg wood. Note that beyond the skeg wood will be 5/8" thick UHMW. Also note that I choose a single, long, groove along the skeg, on both the inside and the outside. I am happy with the result.
Details on how I attached the skegs to the hull may be found further down on this page.
Flipping Over the SCAMP
- With the cockpit and decks done and finished, now was the time to flip the boat over to finish the hull exterior
- Cleared out space in the shop
- Pulled together a four person crew, including me, and lifted the boat off of the jig and set it on the floor next to the jig.
- Cleared away the jig and set two sawhorses which will support the boat when it is flipped upside down, the sawhorses will contact the seat-tops. We measured very carefully in order to locate the saw horses in exactly the right spot so they would be properly located when we set the flipped-over boat on them.
- We placed blue masking tape on the hull on port and starboard sides so that we could help locate where the sawhorses should be relative to the boat.
- We tipped the boat on its side, two guys at the bow and two at the stern, then lifted it vertically, then tipped it the remaining 90degrees and set it on the saw horses.
- BE SURE THAT the saw horses are high enough to keep the roof off the ground when inverted. We blocked up the saw horses so that the sawhorse tops were 33 1/2" above the ground.
Scamp Argo has been lifted off the jib and set on the ground next to where the jig was. The crew is measuring proper location for the sawhorses that will hold up the boat in the bottoms-up position. Note the blue tape on the hull, which we applied at the location where the sawhorses will rest, this helped us when flipping the hull and locating it on the sawhorses.
Saw horses precisely located and blocked-up to a height that will ensure the roof doesn't hit the ground when the boat it lowered onto these sawhorses.
SCAMP Argo, flipped over, bottom side up, on saw horses.
- Next, I sawed off the protruding centerboard case posts flush with the bottom and gave did a general cleanup of epoxy on the hull bottom and sides.
- Rounded over the outside corners of the plank edges with a plane and sandpaper
- Filleted the plank joints and filled in the bottom to garboard joint with fillet material along with any screw heads on the bottom. I should note that it was at this point in the project that I started using pastry bags for applying fillet material. Boy do I wish I had started using them earlier, they really improved control and accuracy of applying the epoxy to the joint.
Centerboard case post sawed off and bottom cleaned up/sanded a bit.
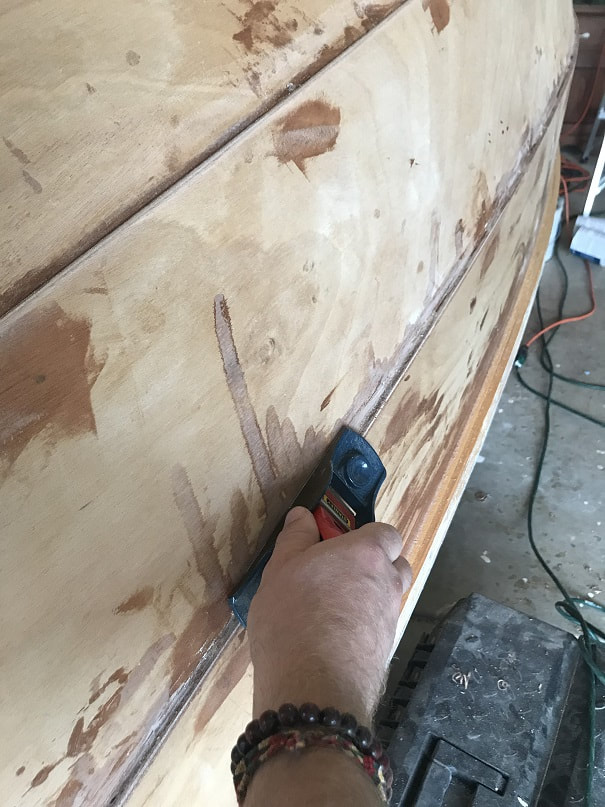
Rounding over SCAMP plank edges with a small plane, which was followed by sand paper.
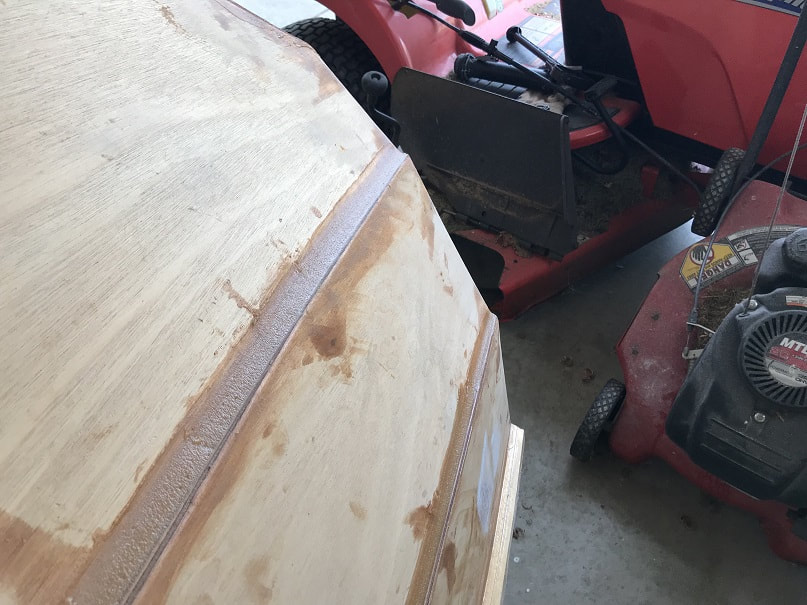
SCAMP exterior plank fillets, after the photo I brushed them smooth with unthickened epoxy, and they turned out perfectly smooth.
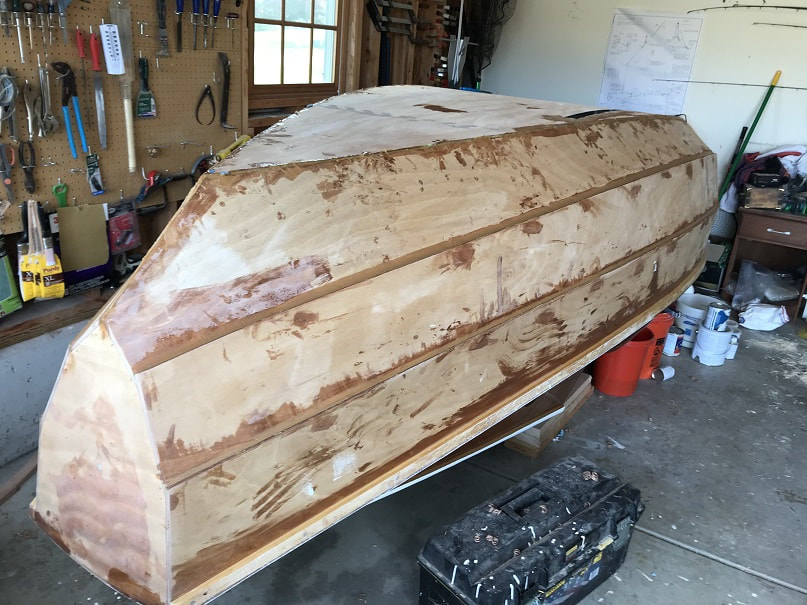
Fillets and bottom/garboard joint all filled in. This exterior hull work went faster and easier then expected (so far) due to the easy open access and location of the joints.

Then belt-sanded and random-orbit-sanded, and hand-sanded, hull exterior, with 80grit sandpaper. Went really well.
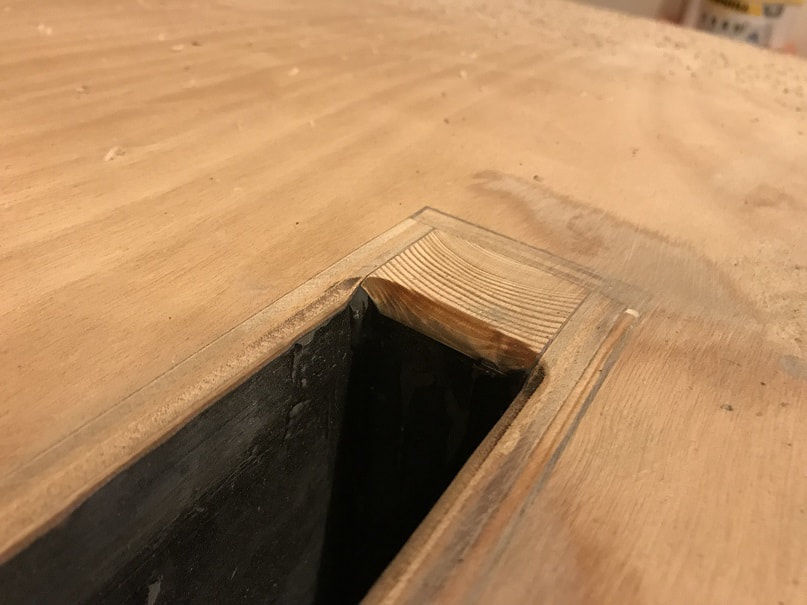
1/4" (6mm) round-over bit in a router, used around the perimeter of the centerboard case opening in the hull.
Fiberglassing SCAMP Hull
- With the hull sanded and prepped, I cut a 50" wide section of 6oz fiberglass fabric long enough to cover the whole SCAMP bottom. This will overlap onto the garboards and transoms about 1.5", 40mm. To facilitate a nice clean edge, I applied masking tape to the garboards at this offset.
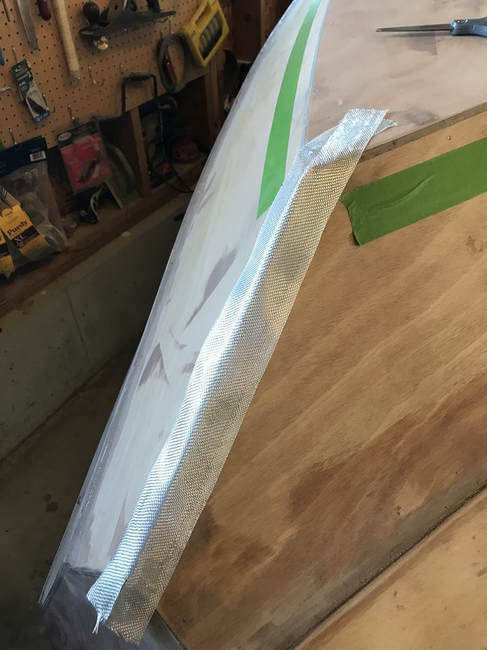
Fiberglass tape along the garboard to garboard joint fold up over the bottom.
1st coat of epoxy applied to single sheet of fiberglass on the bottom. The sheet was cut in order to allow fiberglass to lay into the centerboard case opening.
I then trimmed the fiberglass with a razor along the upper edge of the tape, and removed the excess cloth along with the tape. This photo is prior to that.
1st sheet of fiberglass, trimmed, on SCAMP bottom. One coat epoxy.
Same masking tape technique was used on the garboard fiberglassing. The garboard fiberglass sheet with come up and over the bottom, overlapping onto the bottom by 1.5". This piece will lay onto to the fillet/lap joint between the garboard and the middle plank.
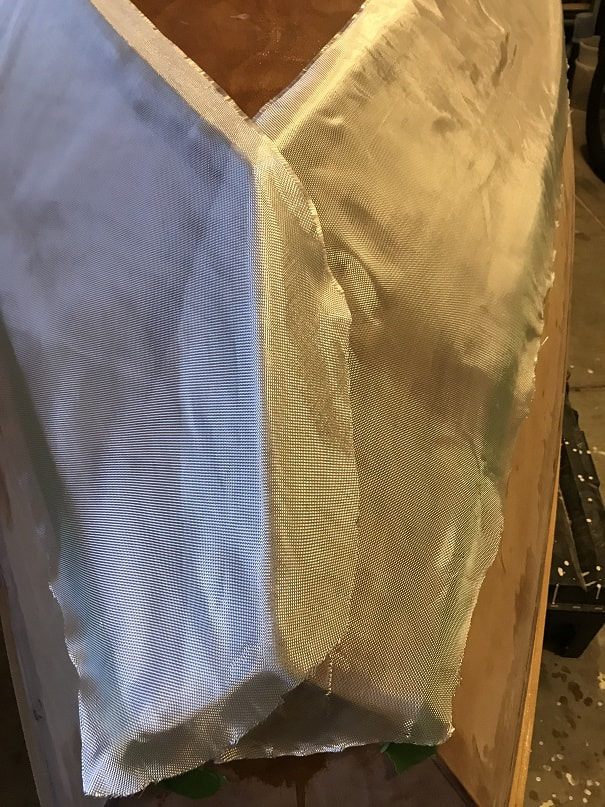
This is how I will overlap the fiberglass sheets on the garboards at the bow, these pieces overlap the fiberglass tape that already covered this joint.
Garboard fiberglass applied, and trimmed, with masking tape removed also.
2nd coat epoxy on bottom and garboards, and 1st coat on transoms and other planks.
Attaching SCAMP Skegs to the hull of the Argo:
- I laid the dry skegs in place and the fit was nice (varied from flush, to an 1/8" gap in some spots). A good bed of epoxy will adhere these well.
- Marked out the locations for the skegs on the hull for quick placement during installation.
- While the epoxy on the bottom was still "green", I put a coat of unthickened epoxy on the bottom of the skegs
- Mixed up thickened epoxy with silica thickener, and laid down a BIG bead on each skeg
- Laid the skegs in place and placed weights on them, major ooze-out of epoxy glue
- Formed the ooze-out into a fillet, while still green I will come back and apply a yet-larger fillet between skegs and hull.
LARGE thickened epoxy glue bead on skegs. I am not taking any risk of voids in this joint.
Skegs, in place, weighted down. Excellent ooze-out as I placed them down.
Then I formed a fillet from the ooze-out from the joint.
The small epoxy glue fillet was allowed to fully cure, and then I sanded the whole area with 80 grit and applied a large final reinforcing fillet. Skegs also getting epoxied as you can see.
5/8" Thick UHMW cap screwed down with stainless screws every 6 inches, and bedded in 3M 4200
Fairing, smoothing, and finishing SCAMP Argo's hull
The bottom stayed nice and smooth after epoxying, but the planks had drips. I began the smoothing and fairing of the hull with 4.5 hours of scraping the hull drips and any bumps smooth. This was laborious work; I was sweating bullets and my hair was dark with sweat, at least I burned some calories....
- I scraped the epoxy first, to eliminate epoxy drips and bumps. I scraped along the drips rather than across them, until the drip was gone. I think the scraper did a better job than a sander, as the sander would create more dust and would also likely leave higher spots where the drips were.
- Then I sanded with 80grit....with the tough work having been done by the scraper, the sanding went quickly and left a nice surface again. It's not perfect, but I'm done sanding. The plank fillets were perfect, but after 3 coats of epoxy, the epoxy from the planks above sagged down onto the fillets, and these uneven epoxy drips on the fillets were very difficult to smooth out, after using a section of dowel of the appropriate diameter, wrapped in 80grit belt sander paper, for a long time sanding, I got it back where I wanted it.
After some repetitive monotonous scraping and sanding, the hull again looks nice and smooth.
Wood-flour thickened epoxy used as fairing compound on low spots and fiberglass joints.
Gloss Epifanes Spar Varnish on bow and transom, first coat! I cleaned the surface with Pettit 120 brush thinner as a solvent wash, filtered the varnish with paper varnish filter, and applied the first coat with a nice brush. Still need to fair and sand the fairing compound that I spread onto parts of the hull....
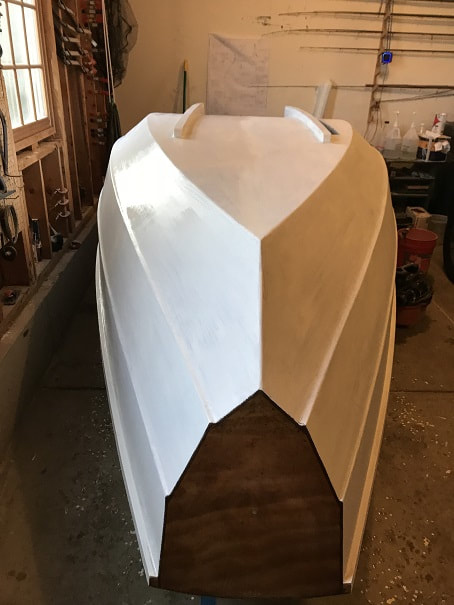
1st coat of primer on SCAMP Argo! Big moment.
- After sanding down the primer it will become clear that a nice sanding primer has an important role in filling and fairing the final minute inconsistencies in the hull. Along with the minor inconsistencies, I was forced to admit that the epoxy drips were unacceptable on the plank lap fillets. So......I grumpily got to sanding these again which I was hoping not to do. I used short sections of appropriate diameter dowel wrapped in belt sander sanding belts to sand the fillets smooth. They were PERFECT before all the epoxy coats, but after the coats, they were drippy with epoxy. I went back to sanding away at the epoxy drips on the fillets which I didn't want to be doing, but which I was happy I did. So my recommendation for the fairing process is....do it until you can't take it anymore, then take a break, then go back at it again, and then it might be ready.... At this point I am very pleased with the hull, and glad I went back and sanded the spots that were bothering me. It is not perfect, but I am happy with it. The steps I took for painting and finishing the hull may be found on the link below
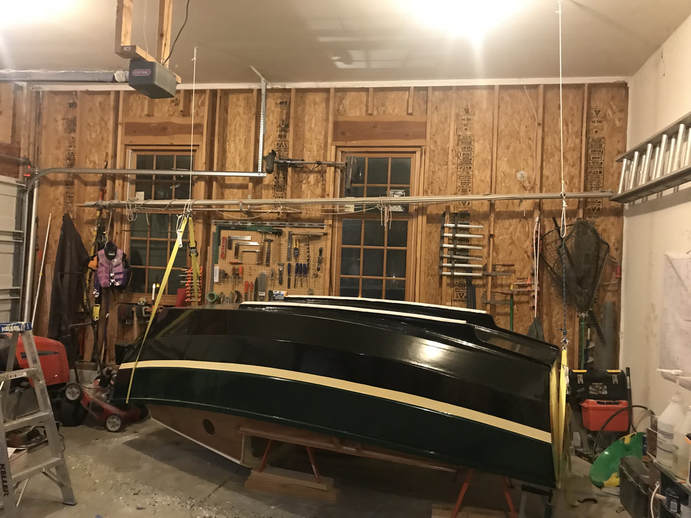
After completing painting the hull, I turned the boat back upright. I did it myself using some nylon straps. I got 'er done, but having done it, I do not recommend doing it yourself, it was a bit of a rodeo.
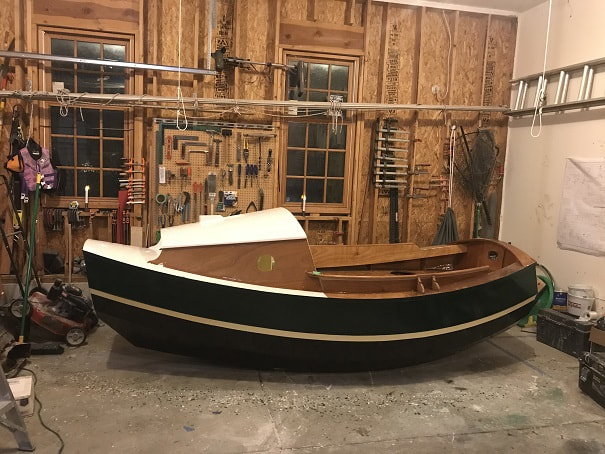
Scamp is flipped back over and sitting on her skegs.
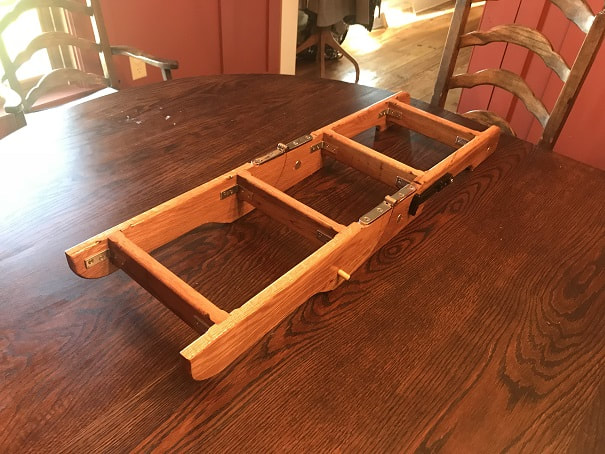
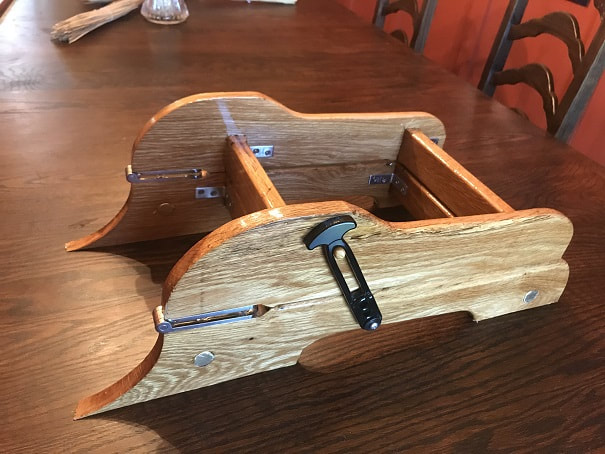
SCAMP "Argo" Boarding Ladder
I built a wooden boarding ladder, which I will mount to the transom of the SCAMP "Argo". The ladder is a folding boarding ladder, and is built of white oak with stainless hardware. The finished ladder is shown below. Here is a link to the detailed boarding ladder construction page.
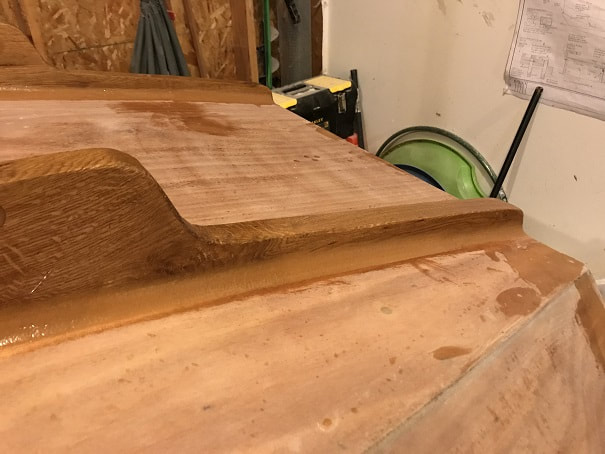
SCAMP Rub Rail
- SCAMP Argo will feature mahogany rub rails, including a curved rail across the bow
- I had some spare time as the deck varnish was drying, so I decided to make the bow rub rail piece from a piece of scrap mahogany.
- I held the piece up to the bow and traced the curve onto it. Then I use the mortise gauge to scribe a parallel curve to wind up with a 1 1/2" wide curved rub rail, 3/4" thick.
- I will be mounting a bronze fairlead (Davey & Co, 4" Closed Chock #1102) at the top center of the bow. I drew a raised platform as part of the design of this bow rail. The top of the platform will be beveled so that the fairlead is tilted such that the opening will point up to the cabin roof, which is where I intend to mount my anchor-line cleat.
Bow rub rail cut out on the band saw. The platform for the fair lead can be seen.
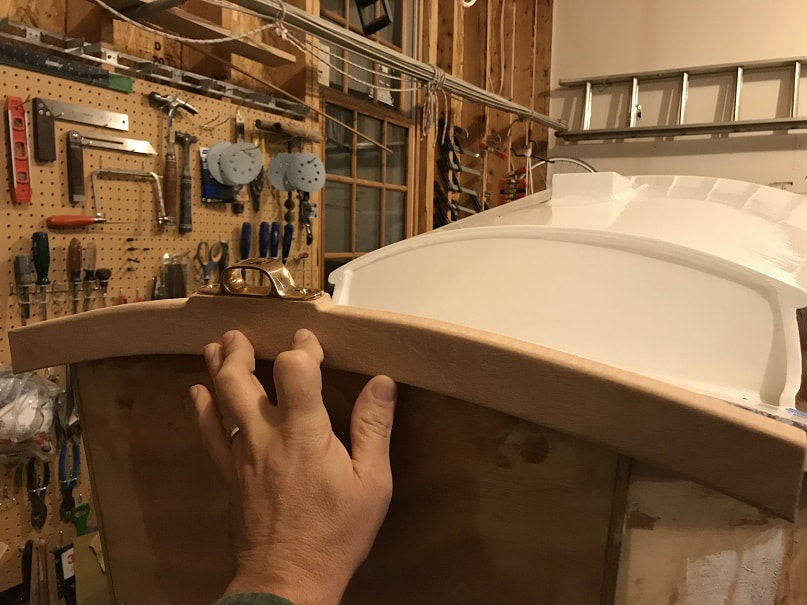
The platform has now had a bevel planed into it so that the fairlead points up to the roof top. A small round over bit was used to round over the front edges of the rail. I will trim the ends to length after the port and starboard rub rails are attached, which will be a while from now.
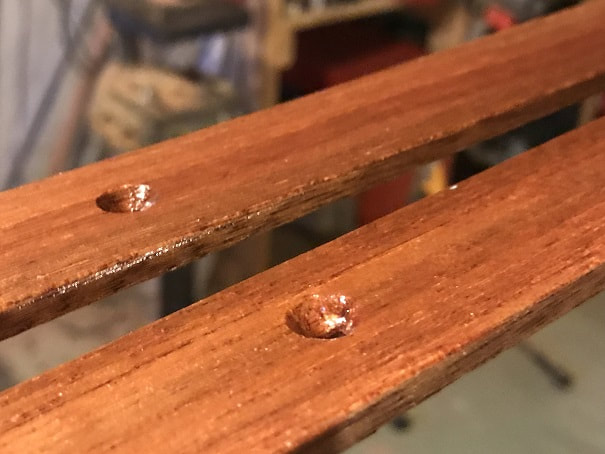
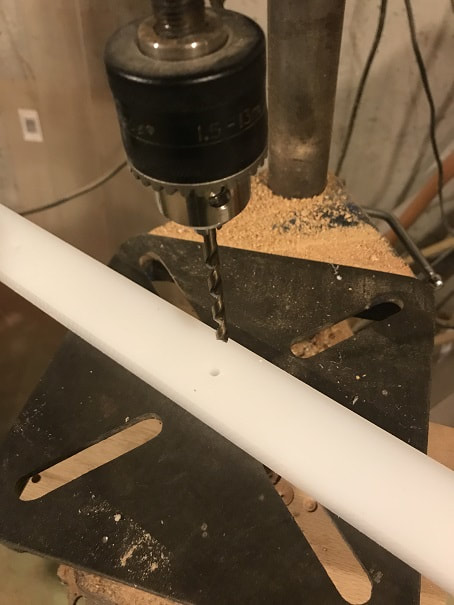
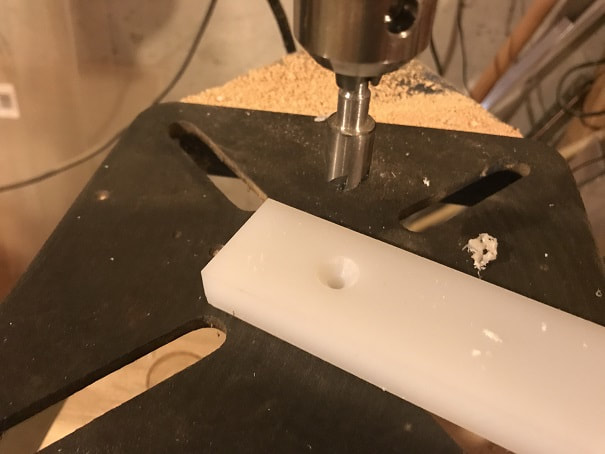
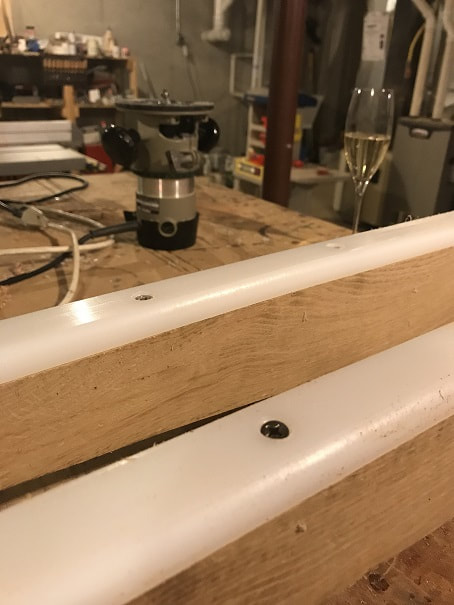
3/16" Mahogany rubrail. I wanted it to be 1/16" wider than my gunwhale, so that a 1/16" driprail would protrude down past the gunwhale. However, I must have taken my notes wrong, because I made it the same width as the gunwhale...and I'm stickin with it. The top of the rubrail will be flush with the deck. Holes drilled every 6". Oiled finish.
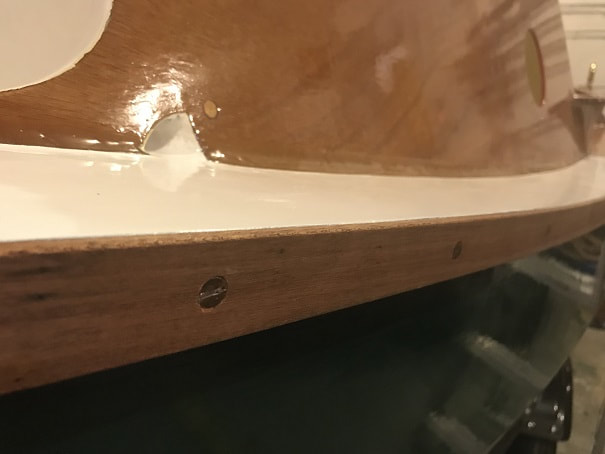
Dry-fit of SCAMP rubrail
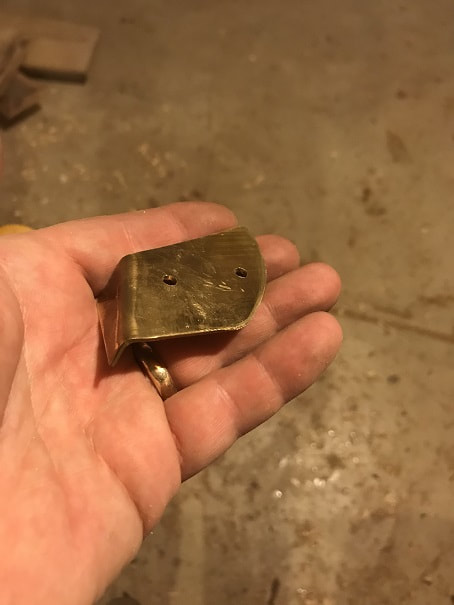
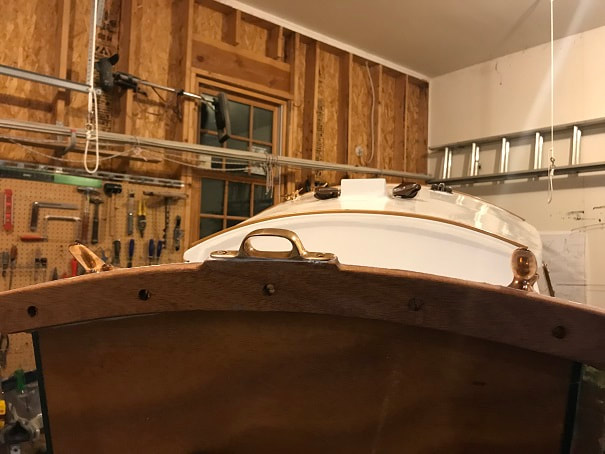
The SCAMP Argo will be fitted with a brass end cap that will guard the stern end of the gunwhale and transom. I formed this piece from a bar that was between 1/16" and 1/8". I heated it in a bed of coals, and then bent and cut it to shape.
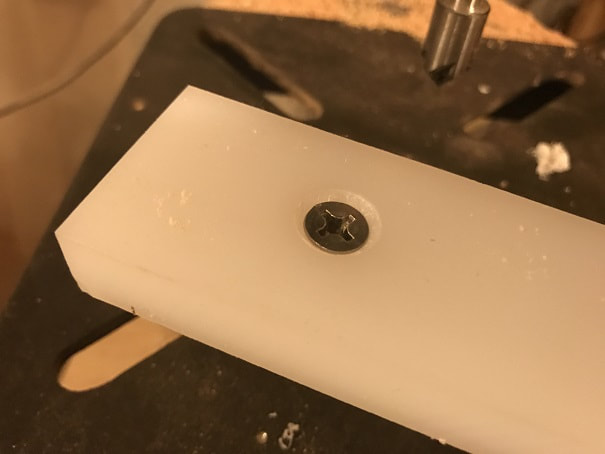
The holes mounting holes were a bit deeper on the bow rubrail which is 3/4" thick, so I plugged those with mahogany plugs.
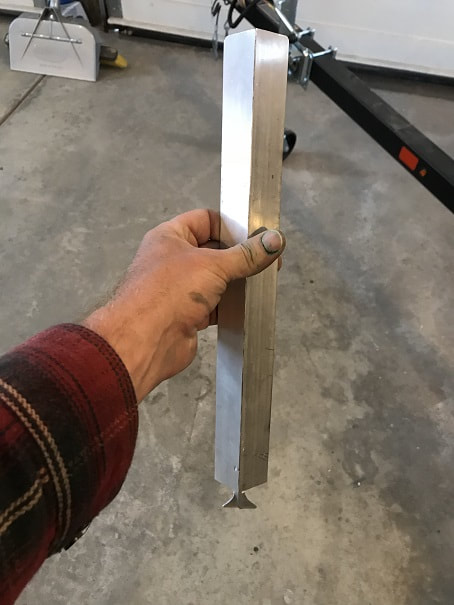
Many SCAMPS feature a metal strip fastened to the leading bow edge of the garboard planks, to protect from impact and abrasion in the event the ship knocks something or is hauled on a beach. I wanted just such a protective device, but I did not want all the potential water intrusion points that come with screwing such a metal strip to the bow of a boat. So, I will make run at gluing one on. I cut and bent a piece of 1/8" thick aluminum angle to fit the leadin gedge of the garboards, and a pounded a little foot to go down under the bottom. Note that the angle of the bow is not 90deg, so if yo use a piece of angle, as I did, you will need to pound, clamp, and shape it a bit to fit the hull well.
Another view of the bow guard
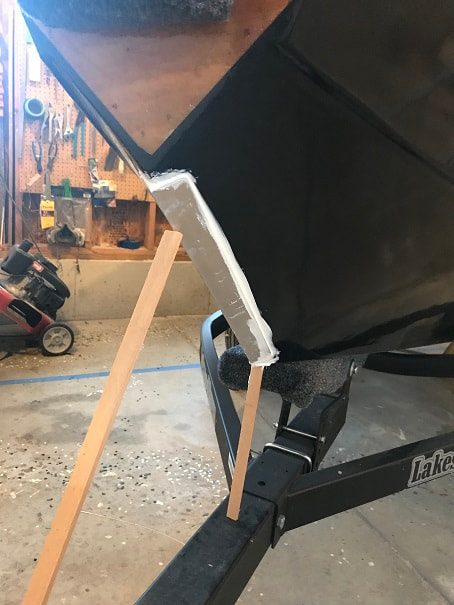
Gardboard protection plate being adhered to the hull with a huge bed of 3M 4200. I will clean this up and then paint it all with my black hull paint.

After the 4200 cured, I cleaned it all up and faired it to the hull with a razor-blade. I filed smooth all edges and got it all looking perfect, then painted it. Blends in well with the hull.
Installing the SCAMP Centerboard into the Boat
With the boat flipped back upright I installed the centerboard.
- Make sure the centerboard is supported from below so that it does not just fall through the centerboard case.
- In my case, the boat is on the trailer, and the trailer bunk is directly beneath the centerboard case.
- I dropped in the centerboard, careful not to pinch my fingers.
- I held a screwdriver (in my left hand) in the centerboard-pin-hole and shuffled the centerboard around with my right hand until the hole was found, then I held it tight with my right hand and pushed in the centerboard pin. This took a couple tries.
- The pin was then tightened down and I am very happy with the result.
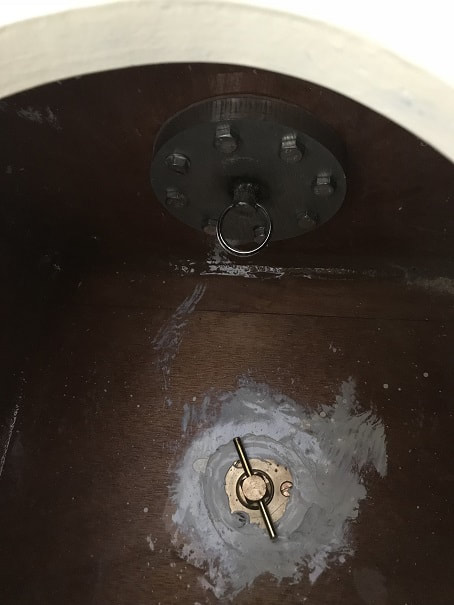
Centerboard Pivot Pin, installed. Also the water ballast drain/fill plug can be seen.
Installing Hardware on the SCAMP "Argo"
Now I will begin installing cleats, bow-eye, pad-eyes, chocks, motor-mount, drain-plugs, and such. This is the end of this page. All the hardware mounting details may be found on the Mounting Hardware on the SCAMP Argo Page