How to make Apple Cider: it's easy- breezy-apple-squeezy, simple steps noted below:
Quick version: Pick apples, crush them up, press them to extract the juice, this is Apple Cider, drink and enjoy!....to turn it into hard cider, throw in some yeast, ferment it, and bottle it, and voila, a nice hard cider.....details below.
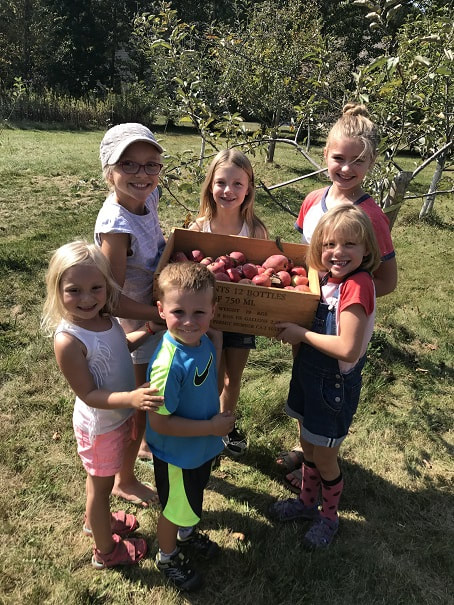
Harvesting apples in the backyard orchard, Autumn 2017
Mankind has existed-with, and appreciated, apple trees since Adam and Eve. Apple trees produce a beautiful flower in spring, and if pollinated properly, this turns into a fruit; in June many of these fruits die and fall off the tree in a natural thinning of fruits, resulting in a number of fruits remaining that perhaps the tree can support. The apple grows and is pursued by critters large and tiny (including humans) and then, when ripe, people harvest 'em to eat 'em. There is much that goes into maximizing a good harvest in an environmentally responsible way; I will not get into that here. At harvest, in Fall, they may be crushed and pressed to extract their juices in order to drink as fresh cider, or to ferment with yeasts into cider with a wee bit-o-something extra. Good luck!
I am not a professional so may I recommend reading a book on it! I recommend "Cider, Making, Using & Enjoying Sweet & Hard Cider" by Annie Proulx and Lew Nichols.
For how to grow amazing apples, the best book to have is "The Apple Grower" by Michael Phillips.
I am not a professional so may I recommend reading a book on it! I recommend "Cider, Making, Using & Enjoying Sweet & Hard Cider" by Annie Proulx and Lew Nichols.
For how to grow amazing apples, the best book to have is "The Apple Grower" by Michael Phillips.
Picking a Kingston Black from our orchard in Wisconsin
STEP ZERO: CLEAN EVERYTHING: Being a good janitor is the key to being a good cider, or beer, or wine-maker. Sanitize all your containers, utensils, hands and working area. Research available sanitisers; from bleach to star-san, to all the others. Making cider is ancient, and simple, but you can screw it up and create things that taste bad or make people sick, so keep it properly clean. Each year I alternate back and forth between Star-San and Iodophor; follow the cleaning instructions on the bottle and sterilize everything that the apples or cider touches.
STEP ONE: GET SOME APPLES: We are a small operation, so we go for 50-60lbs (22-27kg) of raw apples to start with from which we get around 4 gallons of cider. Last year we started with 64lbs of apples and made 4.5gal of cider. To make cider, you can use apples from your yard, or buy apples from someone; a store or better-yet, a farm or farmer's market. I use my own apples plus purchased apples. Photo's below of our backyard trees. DO NOT eat, or make cider, from apples that you find on the ground.
STEP ONE: GET SOME APPLES: We are a small operation, so we go for 50-60lbs (22-27kg) of raw apples to start with from which we get around 4 gallons of cider. Last year we started with 64lbs of apples and made 4.5gal of cider. To make cider, you can use apples from your yard, or buy apples from someone; a store or better-yet, a farm or farmer's market. I use my own apples plus purchased apples. Photo's below of our backyard trees. DO NOT eat, or make cider, from apples that you find on the ground.
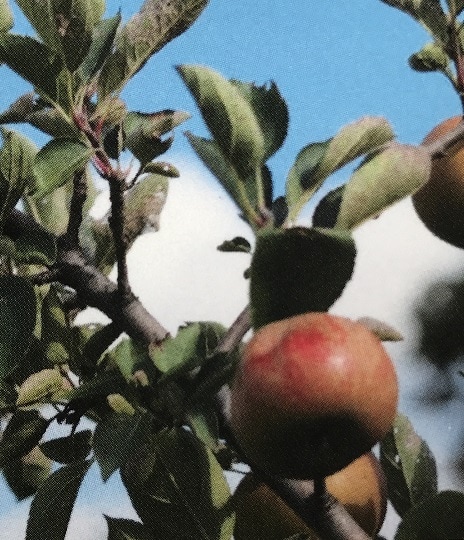
Ashmead's Kernel growing in our orchard.
STEP ONE, continued: Yummy ciders can be made from most apples, and excellent, fancy ciders can be made from proven cider apples. One-such proven cider apple is the Kingston-Black, from jolly England. We have Kingston Black, Ashmead's Kernel, William's Pride, Cornish Gilliflower, Isle of Wight Pippin, Esopus Spitzenburg, Belle de Boskoop, Duchess of Oldenburg, King David and Macintosh trees, and all the apples go into the cider. One can research the proper apples for a cider, which is great; and also worthwhile is making a cider from whichever apples you can find.
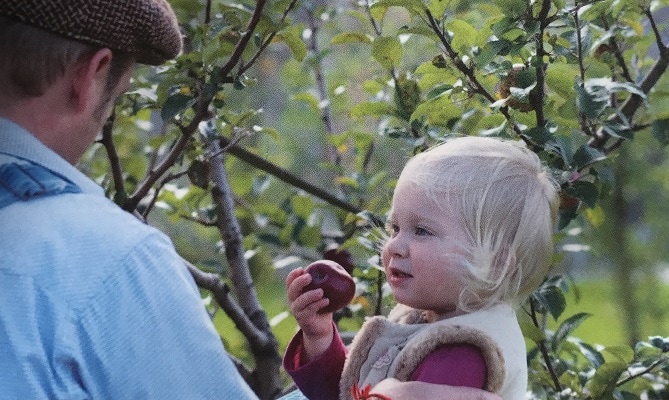
Ripe apples should taste sweet and pull-off rightly easy when twisted on their stem from the tree. Hard apples or apples that don't want to be let free should be let go and checked next week. When they're ready, gather up your apples in a bushel. DO NOT eat or use apples that you find already fallen on the ground. Dangerous bacteria may live in them.
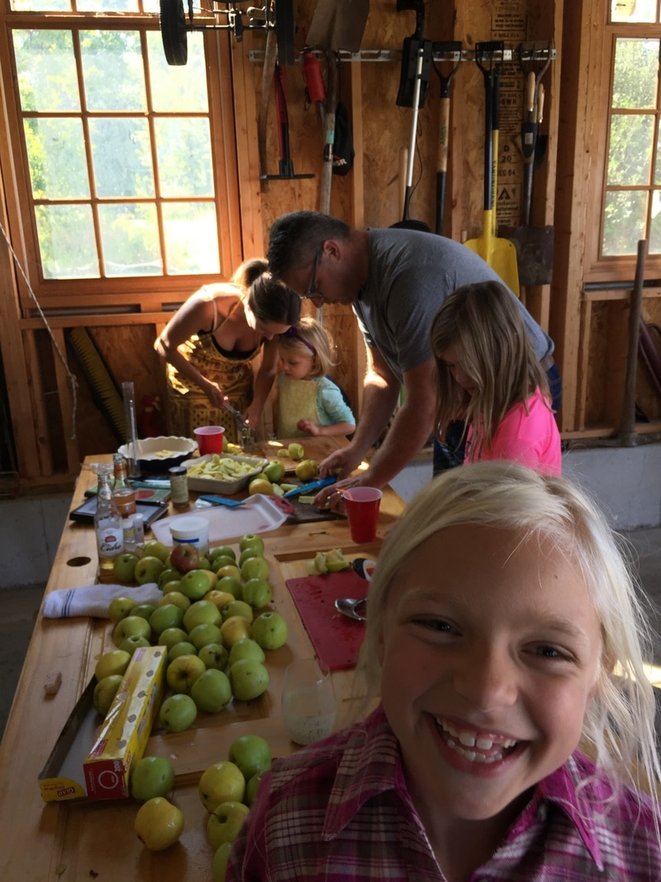
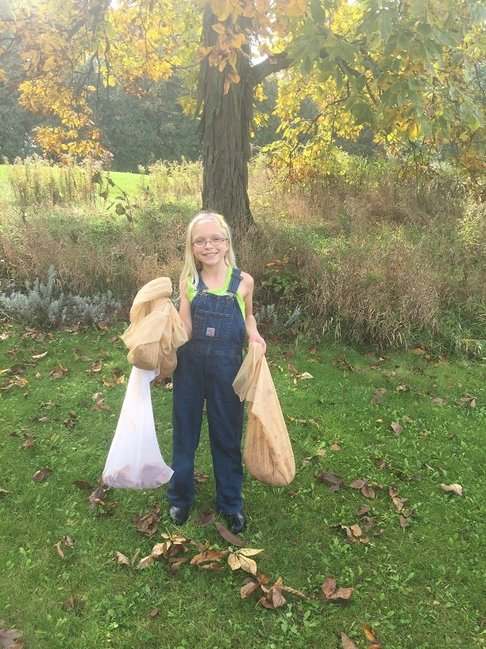
STEP TWO: CLEAN and RINSE and PREPARE THE APPLES: Wit yer apples all gather'd up from the orchard or bought from the store or a farmer, prepare for crushing and pressing. Rinse off your apples with a hose, if they are from a farm they may have pesticides or herbicides on them that you can rinse off. If you picked them straight off yer own trees that you know had noth'in risky sprayed on 'em, then you don't need to rinse 'em. My whole yard is organic, but I still rinse off the apples. Then, pick out the seeds; Right or wrong, I tell the crew to pick all the seeds out; all the rest of the apple, and skins, and core, can go t'wards the cider. It's best to have a whole crew for this.
STEP THREE: CRUSH THE APPLES TO A SLURRY PULP: With your apples rinsed and the seeds, out, now's the time to CRUSH them up. I push them through a kitchen disposal that I mounted in movable utility tub. The discharge of the disposal exits directly to an open spout, and I put a bucket under this to collect the crushed pomace. There are a variety of grinders and crushers available. With the apples crushed to a liquidy pulp, you are now ready to press the juice out.
STEP FOUR: PRESS CIDER OUT OF THE CRUSHED APPLES: We use a screw-press that I built from an old oak tree that fell down in the yard to press the apples from crushed apples to cider. What I have found is that filling up a whole press full of crushed-up apples, and then trying to press them, doesn't work. What works best is to set your press in place, put a press-bag into the press, fill the press bag with 3 inches (75mm) of crushed apples, fold over the top of the bag, and then press that. Then, don't pull that bag out. Lay a solid press-plate on-top of the old bag, and then lay a new open press bag on-top and fill it with another 3" of crushed apples, and then press it out, and so forth. In such a way, the lower sections keep on gett'in pressed and in each section you get a good pressure to press out the cider. We press out four bags, then when they are all pressed out, we remove 'em all and start again from the bottom up. The apple material left in the bags after pressing is called pomace, and should be a dry cake. Don't use a bag with wee tiny holes; my press bags have 1/8" holes in 'em and the slats in my home-made press have 3/16" gaps. The "basket" that holds the press plunger and the press-bags is just a vertical-walled basket of slats with no bottom.
STEP FOUR: PRESS CIDER OUT OF THE CRUSHED APPLES: We use a screw-press that I built from an old oak tree that fell down in the yard to press the apples from crushed apples to cider. What I have found is that filling up a whole press full of crushed-up apples, and then trying to press them, doesn't work. What works best is to set your press in place, put a press-bag into the press, fill the press bag with 3 inches (75mm) of crushed apples, fold over the top of the bag, and then press that. Then, don't pull that bag out. Lay a solid press-plate on-top of the old bag, and then lay a new open press bag on-top and fill it with another 3" of crushed apples, and then press it out, and so forth. In such a way, the lower sections keep on gett'in pressed and in each section you get a good pressure to press out the cider. We press out four bags, then when they are all pressed out, we remove 'em all and start again from the bottom up. The apple material left in the bags after pressing is called pomace, and should be a dry cake. Don't use a bag with wee tiny holes; my press bags have 1/8" holes in 'em and the slats in my home-made press have 3/16" gaps. The "basket" that holds the press plunger and the press-bags is just a vertical-walled basket of slats with no bottom.
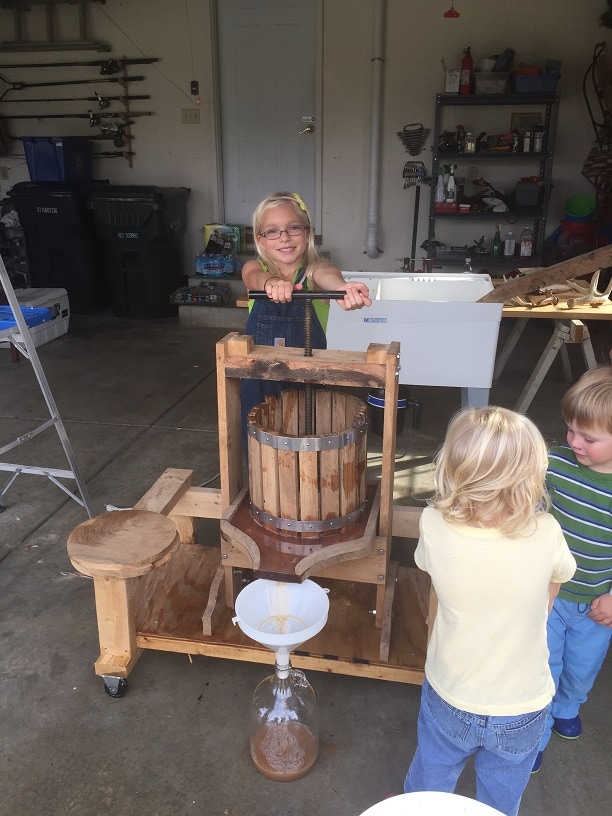
Our press; made from an old oak that fell down in the yard. The basket is made from slats held together by two stainless steel hoops through which screws hold each slat. Open gaps between the slats are about 3/16". The handle and drive screw feature an acme screw, and a nut which is bolted to the bottom-side of the main horizontal press beam. A collection tray gathers the juice and narrows it to a funnel and then into a jug or bucket.

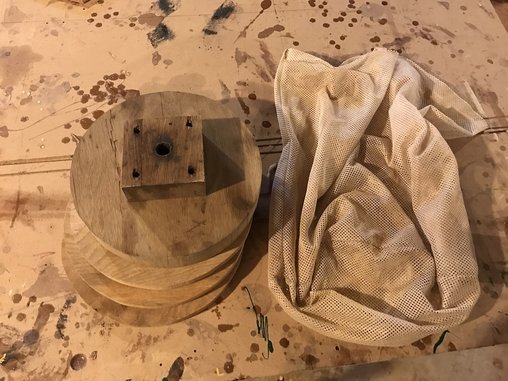
Here is a picture of the three oak "press plates" that I place between each press bag, and which I leave in the press, as I we press the cider. At the top you see the big press-plate upon which the screw presses down from above, and to the right you see a press bag. Note that the apple cider press bag has coarse openings to let liquid through.
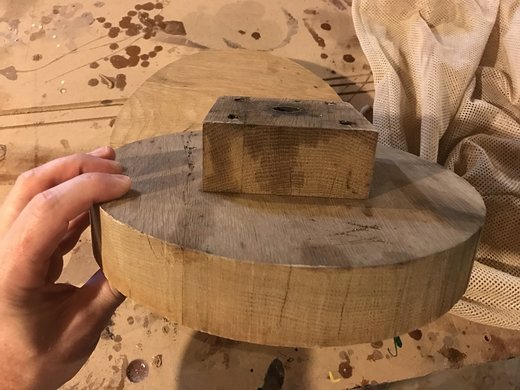
Even on a small press like mine the pressure is higher than you'd think. I have found that a good thick oak press-plate with a steel washer at the face where the screw hits the plate, makes for a job well done. The screw hits this plate about 3/4 of the way down that block that is fixed to the top of the press-plate itself. I got tired of the screw cracking through press-plates, so I came up with this arrangement.
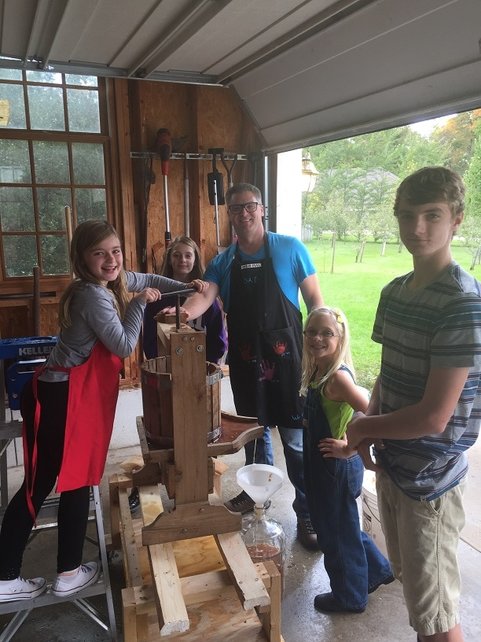
Pressin apples, the more the merrier! Pressing cider into a 3 gallon glass carboy (jug).
Taking the pomace out to the yard, the pomace should be a dry cake.
STEP FIVE: ENJOY! You can hold a glass under the press and collect up some fresh apple cider and serve it to the fine folks that are help'in out. This is cloudy, sweet, fresh , apple cider. Enjoy the special flavor and fun of fresh pressed apple cider, it's great to share with the kids and friends. You can bottle it in sterilized containers and refrigerate it and enjoy it fresh before it goes bad. PLEASE note that you drink these natural products at your own risk, bacteria in cider can cause foodborne illness; safe apples (not fallen on the ground for example) and safe sterilized processes are required and to be safe, you should pasteurize the cider before drinking it by heating it up on the stove to 160 degree's F for a half a minute or so. Then refrigerate it and drink within 4 days.
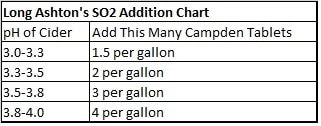
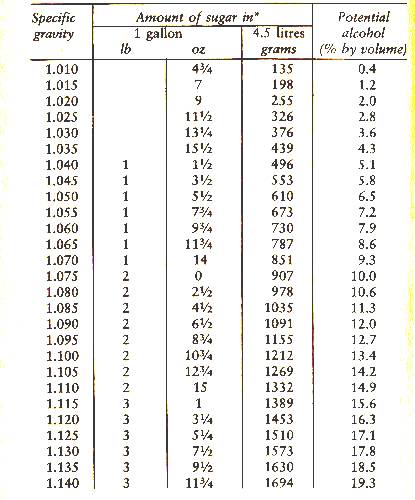
STEP SIX: For those so inclined, you may now ferment your cider and make it the harder sort first take some measurements and kill of unwanted yeast. To create a cider with alcohol in it you will need to add a yeast, which is a live organism, that will consume sugar in the cider and convert it into alcohol and carbon dioxide. Don't drink it if you are underage. Please drink responsibly. There are many, many ways to make cider and I do not claim that my way is the best, but here is how I do it. Check the pH with a fancy meter or with simple pH strips, pH should be between 3.1 and 3.5, last year our was 3.2. Check the specific gravity with a hydrometer this will tell you how much sugar is in the cider which will tell you how much alcohol % you will have. Last year our specific gravity was 1.052 which will yield 6.6 percent alocohol. See chart below which correlates specific gravity to potential alcohol content. I do not add sugar, but if you want a higher alcohol content, you can add sugar which will increase alcohol%. Know that the cider already contains wild yeasts and organisms that will begin to ferment it if left alone. It's best to kill those off so that you add a yeast with the characteristics that you desire, to ferment the cider, to accomplish this add crushed up campden tablets to the fresh cider and wait 24hrsI put the tablets in a big spoon and crush them gently with a smaller spoon, then pitch them into the cider. They dissolve and release sulphur dioxide which kills off wild yeast. With a pH of 3.2, I added 4.5 crushed up campden tablets.
STEP SEVEN: ADD YEAST FOR PRIMARY FERMENTATION: After 24 hours, with the cider in a large sterilized food grade plastic bucket, pitch in the yeast of your choosing. I use liquid Cider Yeast from White Labs or Wyeast. It is also a good idea to add yeast nutrient at this point in a quantity as indicated on the yeast nutrient bottle, this is basically a nutrient that makes the yeast happy and healthy as they munch up the sugar. Put the cover on the bucket and install an air-lock. An airlock will let carbon dioxide out, and will provide a liquid seal to prevent anything, including oxygen containing air, from getting at your cider. I use vodka or gin in my airlock. After a day, the yeast should be munching away at the sugar in your cider, and the airlock should be bubbling as carbon dioxide leaves the bucket.
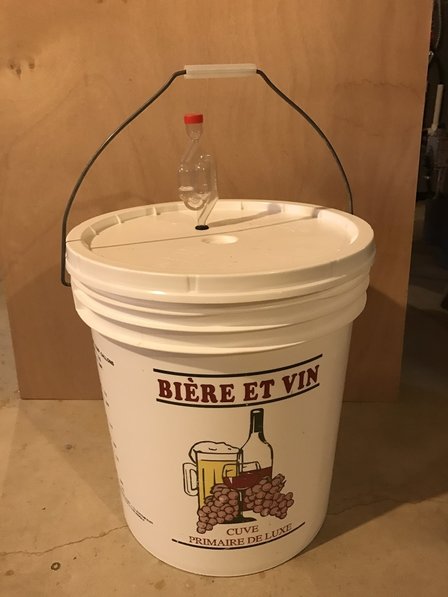
Primary fermentation bucket, with airlock installed.
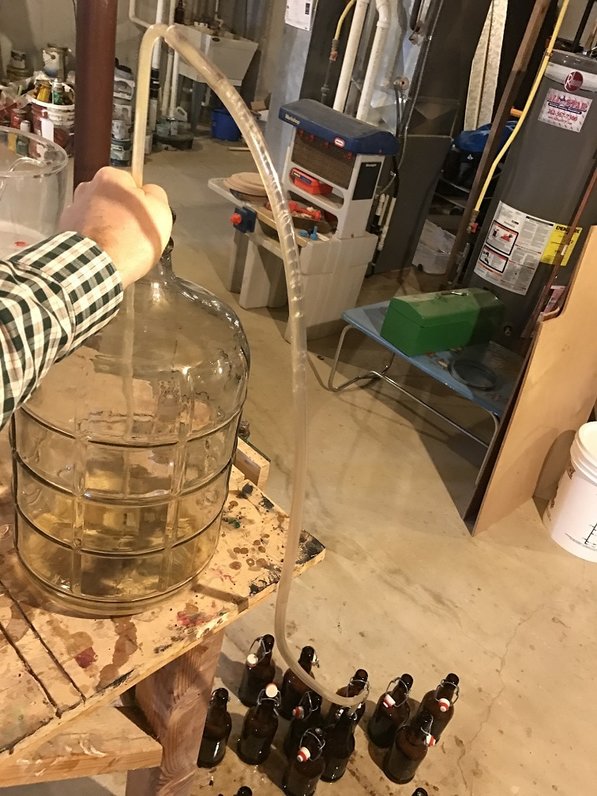
STEP EIGHT: RACKING AND SECONDARY FERMENTATION: After the vigorous primary fermentation slows down, maybe a week, transfer the cider from the primary fermenting bucket into a class carboy (jug). Only transfer over the liquid cider, there will be a significant portion of yeast and solids at the bottom of the bucket, do not transfer this to the new container. You will want to minimize exposure of the cider to oxygen at this point, so "rack" (transfer from one container to another" the cider using a food grade plastic flexible tube. Lift up the primary fermentation bucket and place it on a table, then on the ground place the container that the cider will be transferred to. Put the flexible tube into the cider and put the other end into the empty container on the ground. There are various siphons that you can use to fill the tube with cider, but the end-game is that once liquid is flowing, gravity will drain the cider from the higher container to the lower one. You could just suck on the tube until cider starts flowing, but this is a real contamination risk. Be sure to again sterilize everything that the cider will touch prior to doing anything. Fill the glass carboy to the top with cider, pick a glass jug size that you can fill, and if you are a little short you should top it up with apple juice. To limit oxygen exposure, the cider should be near the bottom of the neck of the jug...not right up to the top and not in the full diameter body of the jug.
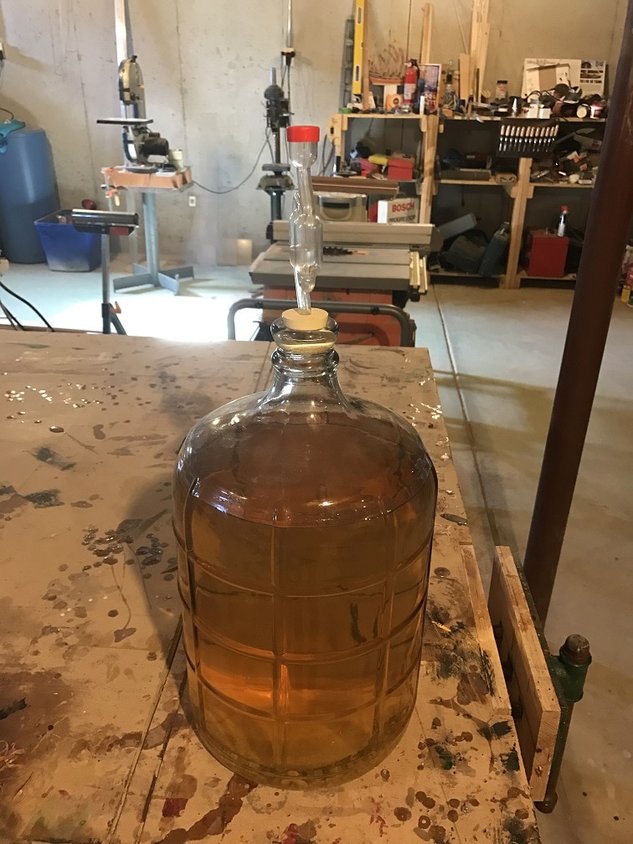
Cider fermenting in glass carboy, you can see how the cider clarifies as it settles and ferments. Airlock installed at the top of the jug to let carbon dioxide out.
STEP NINE: Wait for the cider to ferment completely. I wait four or five months and let the cider completely ferment and also clarify and settle. I do not filter the cider, is reaches a nice natural clear straw color on its own with gravity settling solids to the bottom. At this point, fermentation will have stopped, as the yeast will have eaten up all the sugar. This is called fermenting to "dryness". The airlock will have allowed the carbon dioxide to escape so the cider will have alcohol in it, but will be "still", that is it will not be fizzy carbonated.
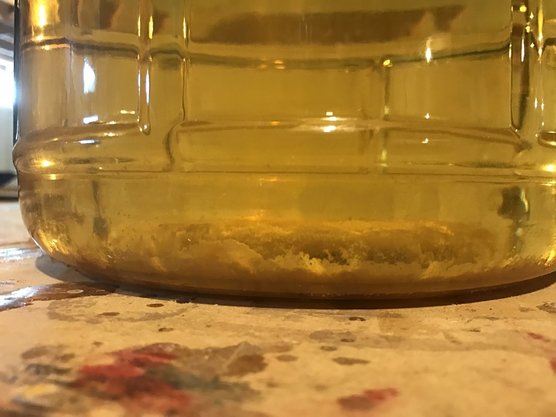
After 4 months, the cider is clear and has a light straw color, yeast has settled to the bottom. Be very careful moving the carboy so as not to kick up the yeast into the cider.
STEP TEN: BOTTLE THE CIDER: I use one pint, flip top bottles, that can be reused. Thoroughly sterilize them prior to bottling, along with any tubes or surfaces that the cider will come into contact with. I like my cider fizzy and carbonated, so I "bottle condition" the cider, which creates the pop and fizz when you open up the bottle. There will be trace yeast in your clear cider, enough to start eating sugar and creating alcohol and carbon dioxide again....so...put a small amount of sugar into each bottle as you fill it up with still cider; the yeast will create carbon dioxide which will be trapped in the capped bottle so that when you drink it it will be carbonated. I place a dose of sugar in each sterilized bottle, in the form of a thing that looks just like a cough drop, but it is just sugar, and I get these from the beer making store. Then I fill the bottles (using the racking technique) leave an inch or inch and a half airspace on top of the liquid, cap it with a high-pressure cap, and let the cider bottle condition for six months.
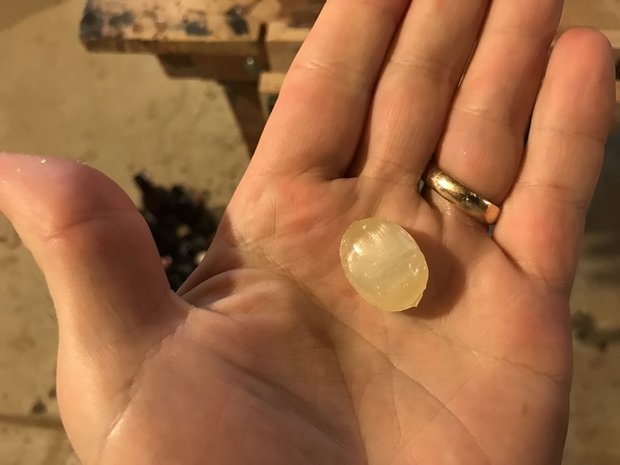
Sugar additive to bottle condition the cider in order to carbonate it.
Racking is now finished, the carboy is empty and you can see cloudy yeasty cider going into that last bottle, I should probably not keep that last bottle.

Now the yeast will go back to work and we will enjoy these between 6 and 12 months from now.

Cheers! When you open them, I recommend keeping them very still so as not to kick up the yeast that will be in the bottom of the bottle, and pour the cider into a pint glass that has a bit of ice in it. When the yeast starts pouring out stop pouring. Enjoy!

Our orchard in Wisconsin, June 2017. This is an organic apple orchard of 22 trees planted between 2011 and 2019.
Orcharding Thoughts:
- Foster a full web of life. Create an environment of health in the soil, air, and in living things. This will support healthy apples, and a wonderful place to be.
- You will see the tall natural grasses and flowers around the tree. I chop it down a couple times a year, but the semi-wild nature of the orchard floor is an area full of a wide array of plants and insects. A large wild prairie is kept just next to the orchard to support pollinating, and other friendly bugs. The wide array of plants provides many options for bugs to eat also, so they dont have to focus on the apple trees. The tall grass in the orchard provides a nice retention of moisture at the soil level, even on hot days. Our orchard is buzzing with life!
- The area may be organic and semi-wild, but the trees themselves are carefully pruned and trained for fruit and healthy growth
- We spread and spray many things on the orchard; supportive safe things, including:
- Wood chips
- Calcium
- Cold pressed Neem Oil (from Ahimsa Organics) as insect deterrent
- Ground up fish guts (from Neptunes Harvest) as fertilizer, sprayed on the ground and on the leaves
- EM1, friendly microbes. The idea is to populate the plant with these good guys to keep the bad ones from gaining a foothold. Also alternate in a spray of "Plant Guardian" from Gardens Alive, which is also a friendly microbial spray.
- Fine ground Kaolin clay, called "Surround", this clay is mixed with water and then sprayed on the trees and fruit. On a microscopic level, the clay particles are sharp and when bugs crawl around in the clay, the particles create a real nuisance and the bugs don't like it.........and therefore go elsewhere.
- I also use nets over my two cherry trees, because otherwise birds fly in and eat literally all the cherries in a couple days after they turn red.
- Make sure to clear out dead leaves and any pruned branches, do not leave them in the orchard.
- I paint the trunks white with latex paint to help keep the sun on winter or spring days from splitting the bark.
- Especially with smaller trees, a wire mesh trunk guard set firmly into the ground will keep mice from girdling the trees over winter. The mice create an impressive network of tunnels around in the snow in winter and if I do not protect my trees the mice will eat the bark off the trees under the top of the snow. I also do battle with the deer and they have had many successful incursions into the orchard....I use dried egg solids as a spray when deer pressure is high. The birds have not bothered my apples yet, but if the cherry trees are not netted-over, the birds will eat all the cherries very quickly after the cherries turn red.
- In the orchard, I have planted the following apple trees: Ashmeads Kernel, Kingston Black, William's Pride, Esopus Spitzenburg, Isle of Wight Pippin, Duchess of Oldenburg, Cornish Gilliflower, Reine de Pommes, and Roxbury Russet, along with Northstar and Montmorency cherries.