November 3, 2023
Below is a complete build-log of my progress as I built this guitar. First, some pictures of my finished guitars:

Here are photos of my finished hand-made Backpacker guitars.

Just finished making this Martin style Backpacker Guitar

Birdseye maple fretboard on my homemade packpacker guitar


Drawings for a guitar in the style of the Martin Backpacker Guitar:
Further down the page is the fun photo journal of building this guitar, but first some technical notes on the drawing I used. You will find these notes helpful if you intend to build this guitar using the drawings I also used.
I bought a full size set of drawings from ebay that say they were made by Jesus Raymond. It is an OK full size print, with metric and imperical calculations/dimensions shown for fret locations. I checked the overall outer dimensions, and they seem correct but there are real issues , in my opinion, with the drawing itself and the dimensions provided. The biggest issue with the drawing and dimensions regards the fret locations and scale. According to Stewmac, the scale is the distance between the front of the nut and the top of the saddle; and the distance from the nut to the 12th fret should be half this length. Be aware that Mr.Raymond’s design considers the scale to be the distance from the nut to the string pegs. On the drawing this would indicate a scale of 23.5”. The fret locations on the drawing are correct for this 23.5” scale but be aware that the fret spacing in the written charts on the drawing correspond to a true 24” scale and these dimensions do not match the drawn lines on the drawing. Below I show the recalculated fret spacing that I used, which was done using on Stewmacs standards and calculator based on a 23.5” scale. I had already glued on my bridge and drilled peg holes when I noticed this so I stuck with the 23.5” scale. If you want to use the written out fret spacing on the drawing, which correspond to a true 24” scale, then I would move the bridge back such that the saddle was 24” from the front of the nut. The internal construction details such as kerfing and bracing on Jesus Raymonds design are different than those on the Martin Backpacker; perhaps they are is improved recommendations. I will utilize the design elements from Martin, not from Mr.Raymond, as I think Martin must have thought their design through quite a bit and they build very many of these. This was the only drawing I could find to launch my project; just use this drawing with caution.
I found a youtube video showing the disassembly and repair of a Martin Backpacker, which shows the Martin design of internal braces and such. https://www.youtube.com/watch?v=IcMx2hm6y28. Thank you Dave Moore for this very helpful video. Here are some key photos from Dave Moore's video, showing the inside of a Martin Backpacker Guitar.
Martin Backpacker Guitar front, showing the inside braces. Inside of a Martin Backpacker Guitar.
Inside of a Martin Backpacker guitar. This photo shows the spruce bracing on the inside of the mahogony back of the guitar.
Fret spacing I used:
This is the distance from where the nut meets the fretboard to the centerline of the fret.


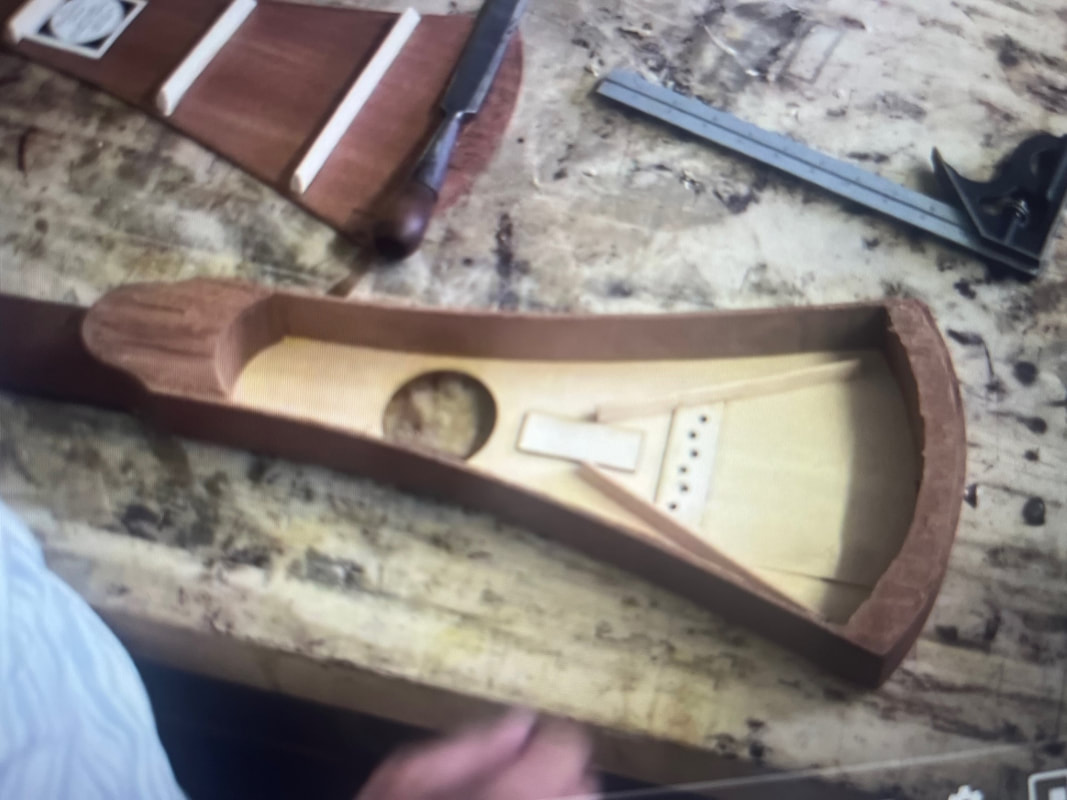
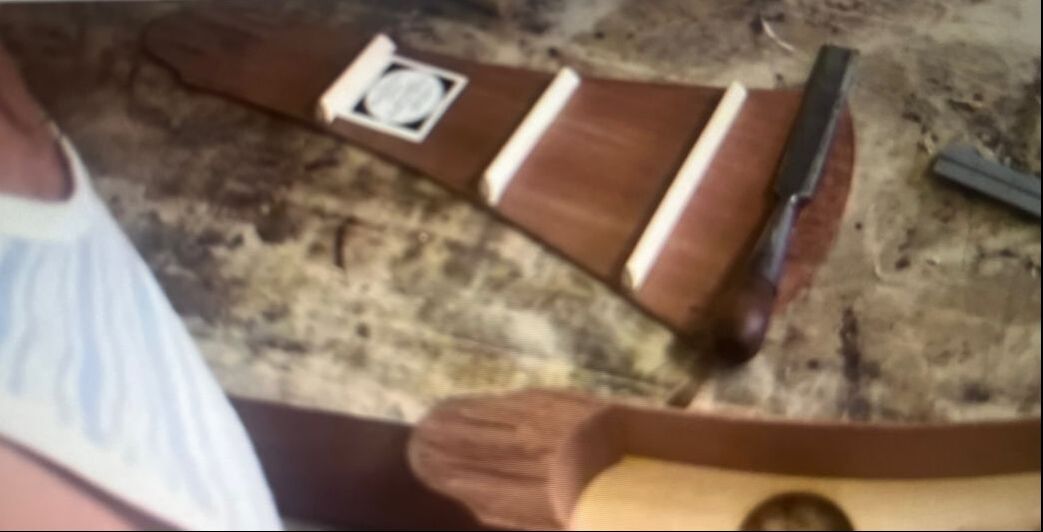
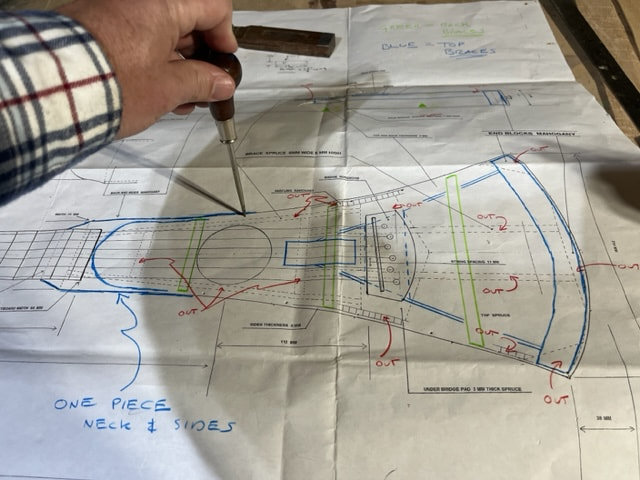
Very noticeable to me is the thick mahogany bracing/liner at the butt end of the Martin Backpacker. To me , this would add both needed counterweight, and also durability for when the guitar is set down. I will be using this very thick liner at the bottom of the interior of my guitar. Current Martin Backpackers are built with sides that are separate pieces of wood from the neck. I plan to build the neck and sides of my guitar from one solid piece of wood, as I think earlier backpackers were made.
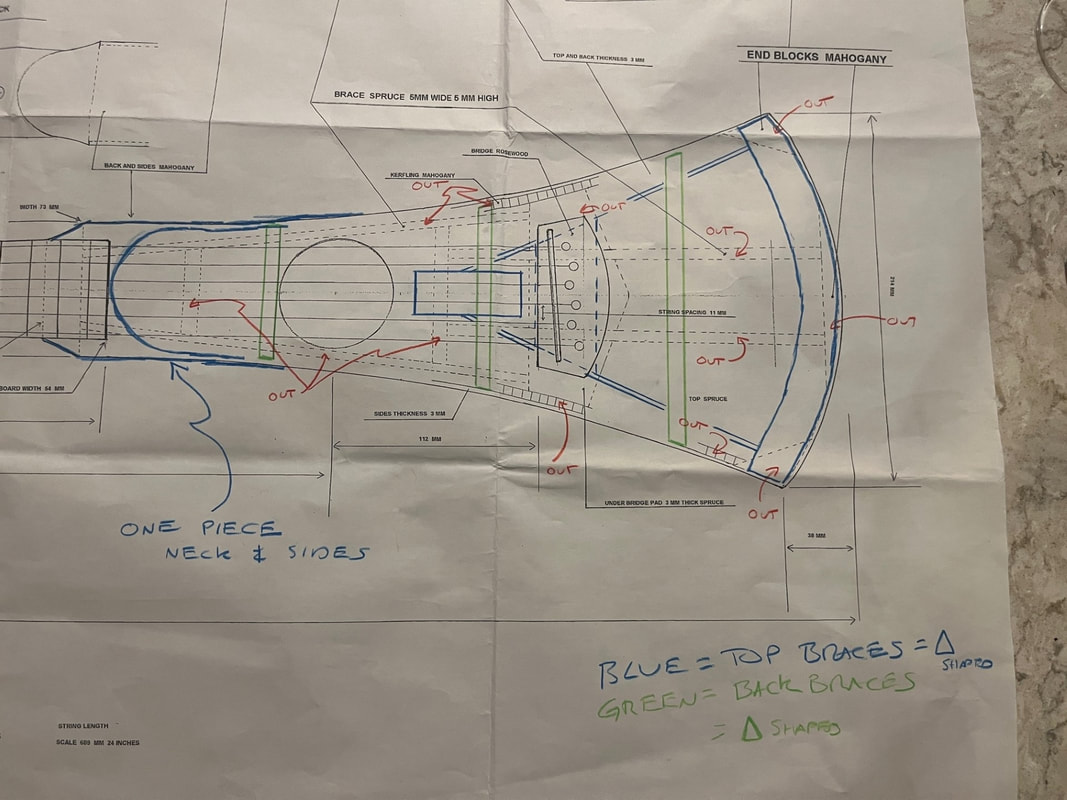
My markups of the drawing are shown here, to bring the drawings I bought back to original Martin design. Red shows bracing that is not Martin's design, in blue and in green, you can see what I will build to build one closer to Martin's oem spec.

I thought the bridge on the drawing also looked far too thin, so I will make it 11/32" thick as shown in my sketch below.

Other items that I will not make according to Raymond Jesus' design are:
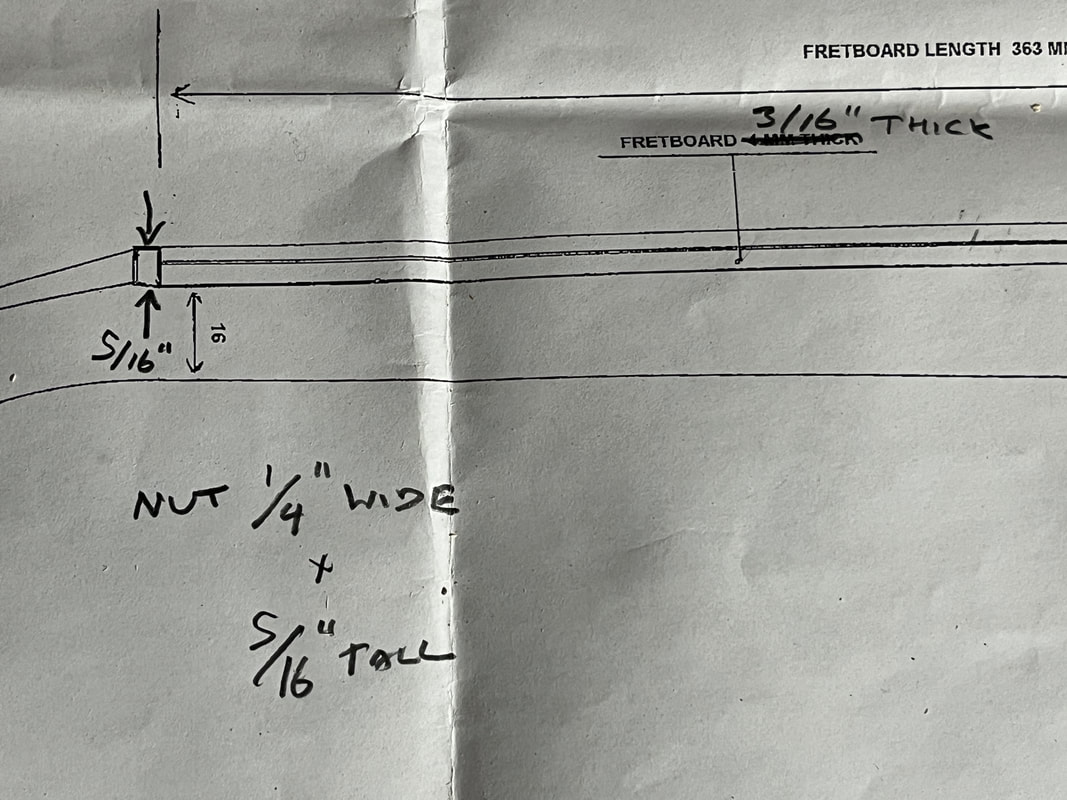
- The nut on his drawing looked narrow and short, I will make one 1/4" wide and 5/16" tall. NOTE that final dimensions will be determined when I finish the guitar and I will adjust the NUT height to achieve the correct spacing of the strings above the fretboard. Same story with the bridge and saddle, I will make final adjustments and dimensions may be different than my sketches/notes here.
- The fretboard on the drawing was 5/32" thick I will make mine 3/16" thick
Materials I Used For Building My Backpacker Guitar
Some ideas for places to look for these materials would be: Kettle Moraine Hardwoods, Stewmac, Ocooch Hardwoods, Bell Forest Products.
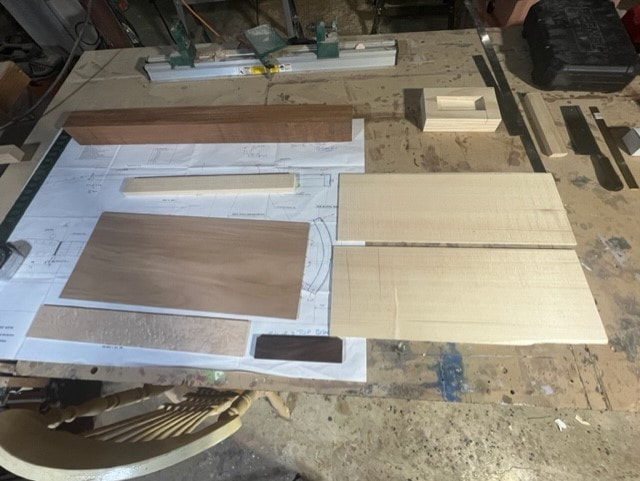
Large Mahogany post in the back, for the neck and body, Sitka Spruce for the braces, book-matched Sitka Spruce for the front, Mahogany for the back, Birdseye Maple for the fretboard, Indian Rosewood for the bridge, unbleached bone for the nut and saddle.
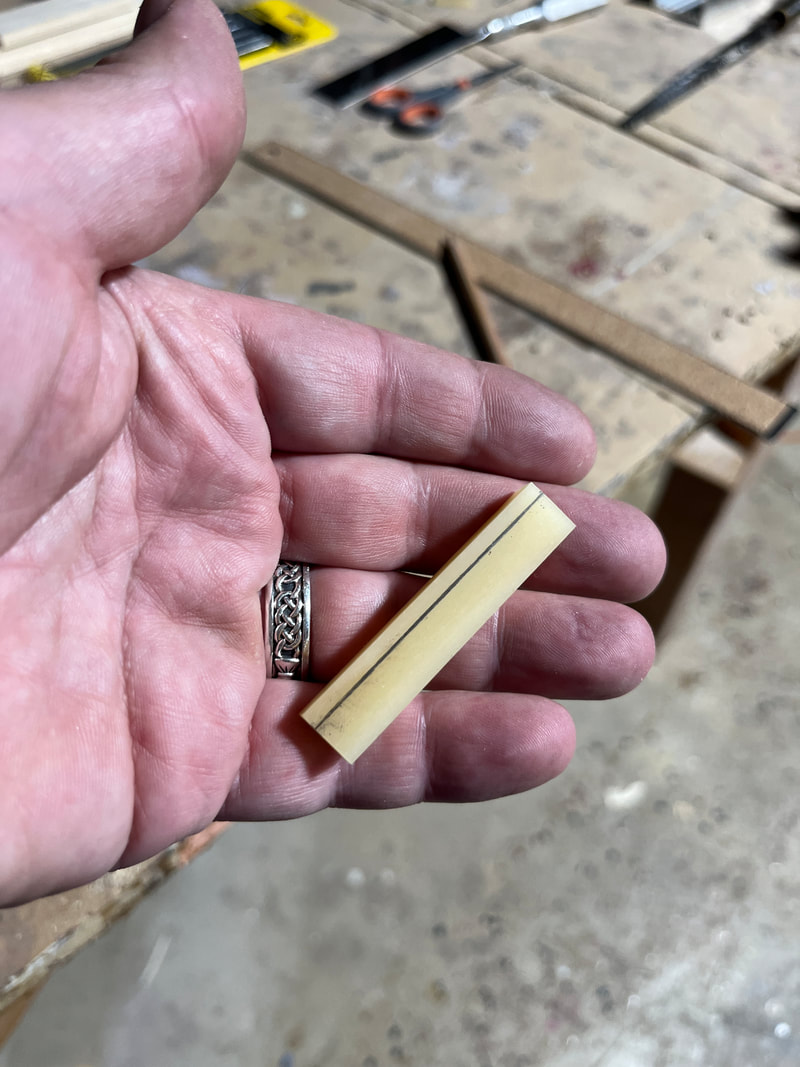
Unbleached bone for the nut and saddle

I went with medium jumbo precurved frets
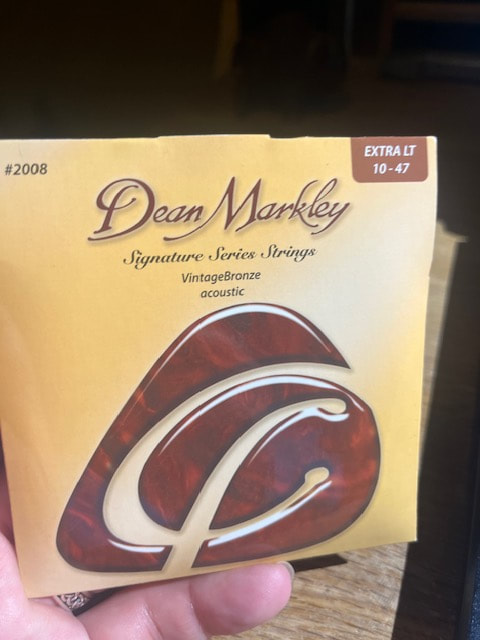
Extra light guitar strings on this wee little guitar. I saw a recommendation for the Dean Markley Extra Light Signature Series Vintage Bronze Acoustic strings, so thats what I went with.
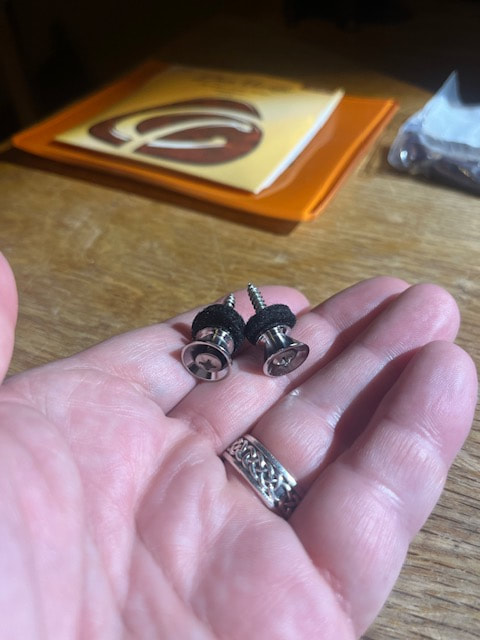
Guitar strap buttons
Wilkinson Tuner Posts

Tools: Straight edges, squares, sliding bevel, japanese pull saw, planes, xacto fine tooth saw, hammers, mallets, compass, awl, chisels, shinto rasp, spoke-shave, small and large files, files, drill bits and large forstner bits, clamps, measuring calipers, dremel, drill press, table saw, surface planer, band saw, random orbit sander, belt sander, miter saw, razor blades, bench vise....etc...
Now for some specialty fixtures and tools that I think will help me build this guitar:
Making a Saddle Routing Fixture
I ordered all of the wood for the guitar (learned these fine guitar-worthy woods are called "tonewood".). As I wait for it to arrive, I will build a little jjig to guide my dremel/router in order to make a properly oriented, and straight, and correct length groove in the bridge for the saddle to press into. A sketch of my design is below.

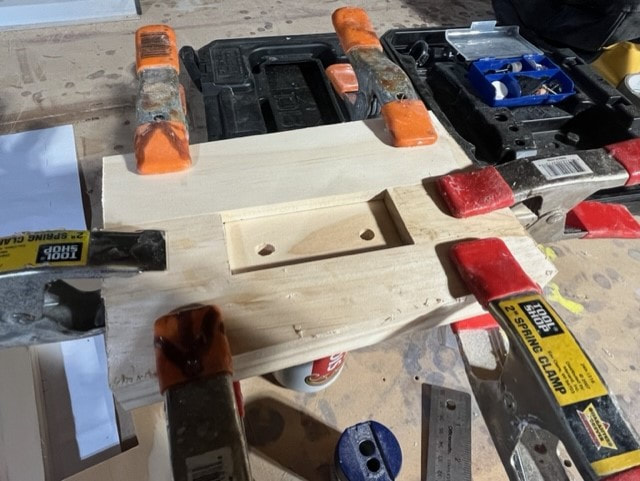
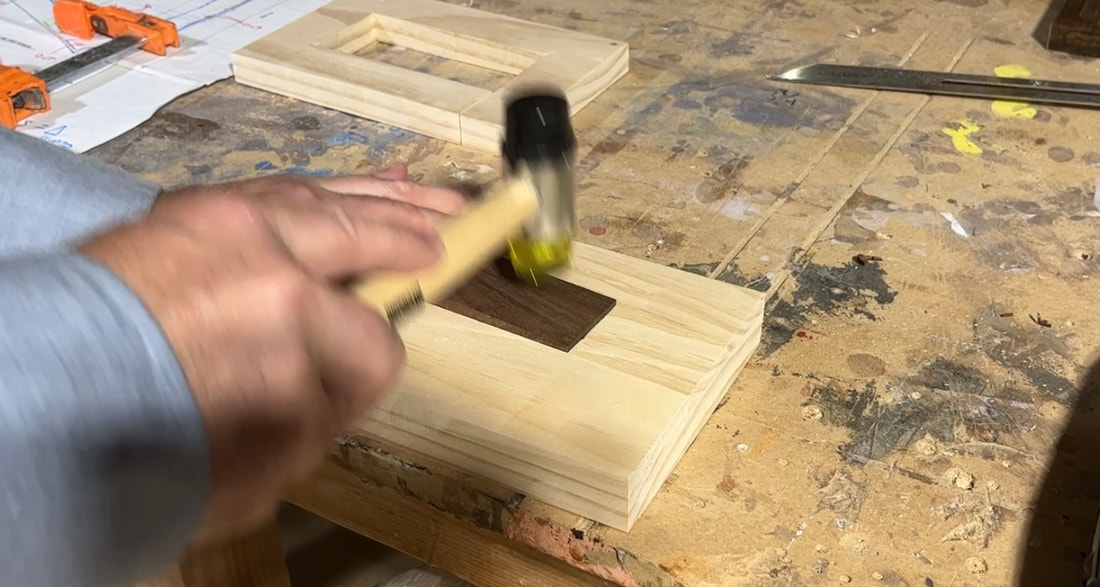
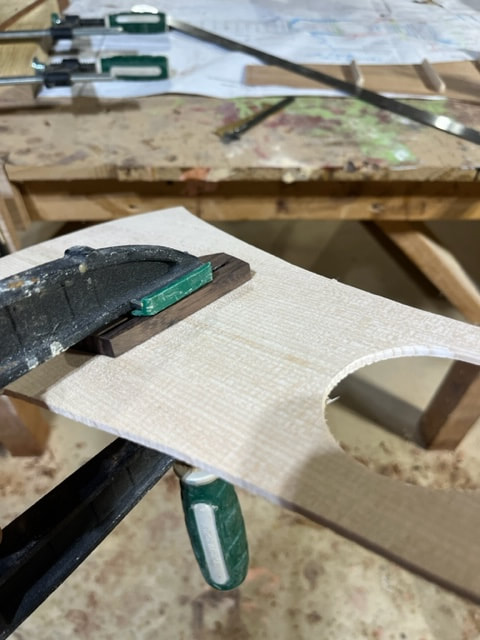
Gluing up the bottom plate and the middle layer that includes the recess for the bridge to fit snuggly into. I wil place the bridge blank in the recess, clamp of the top frame/router-guide frame, and then rout the slot. I drilled a couple holes through the bottom plate to allow me to pop out the bridge when I'm done.

Here are the completed upper and lower sections of the fixture.
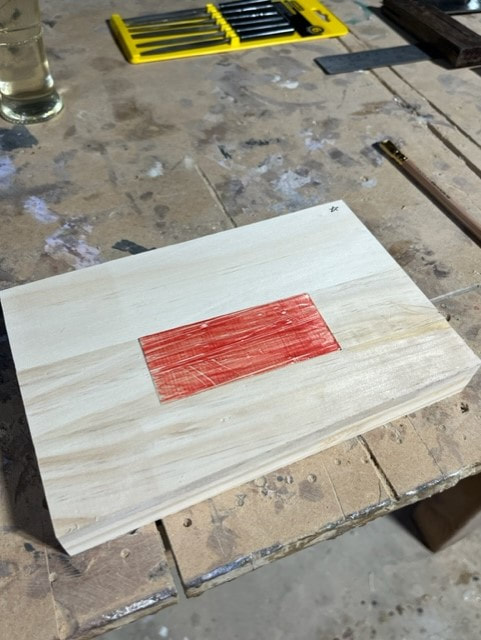
The red piece is a piece of scrap wood where the bridge will fit.

And here is the fixture clamped up and ready to use.
Making a Fret Saw
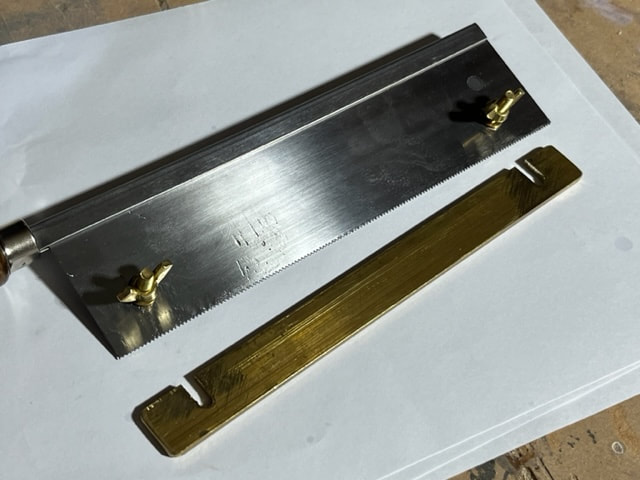
Or more accurately; improving a fret saw. I bought a fret saw to ensure the width of the blade was correct, but saw some photos of other fret saws that had nice adjustable depth-fences built right in. I decided to make an adjustable brass depth gauge/fence for my fret saw.
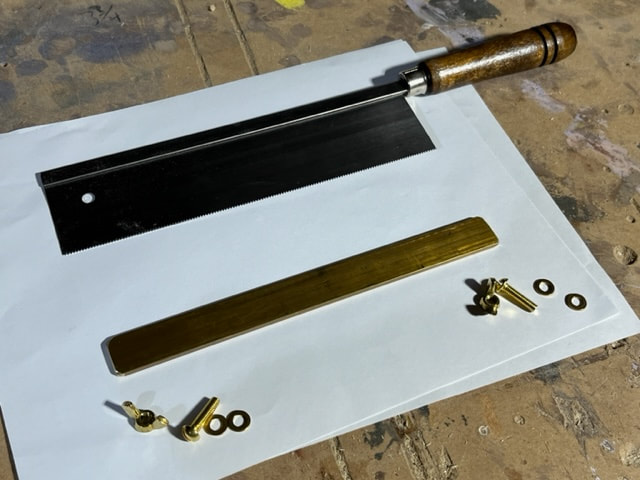
As-purchased fret saw, plus the 1/8" x 3/4" brass bar I bought, along with brass machine screws, wing nuts, and washers.
Holes drilled in the saw blade , slots cut into the brass depth gauge/fence.
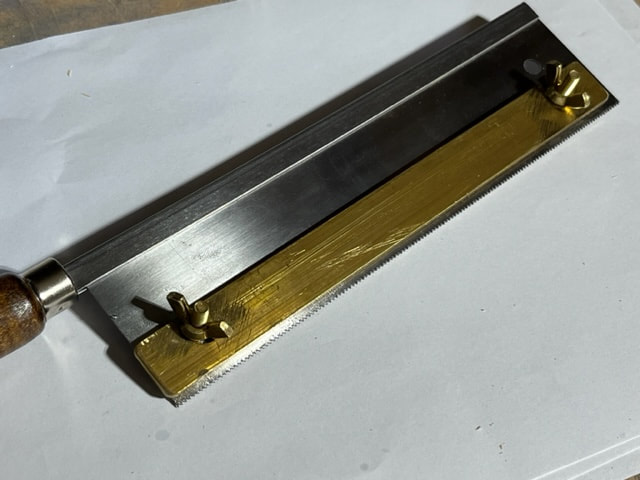
Completed fret saw with the addition of an adjustable depth fence.
Now, On With The Show! Building the Backpacker Guitar: First I will show how I built the various pieces and further below I will show final assembly and finishing.
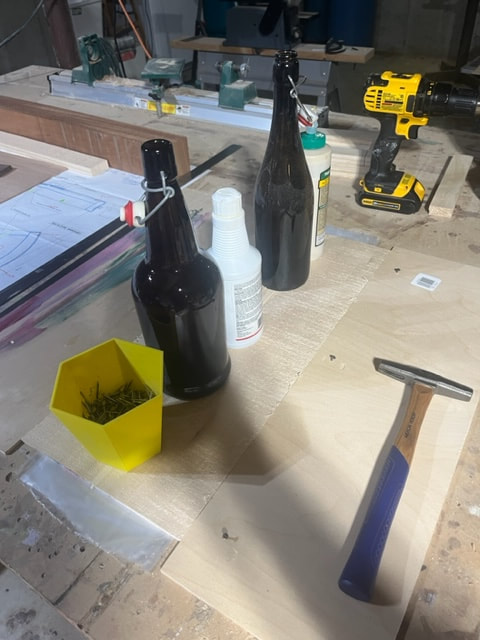
Making the nut and the saddle from unbleached bone
I cut the saddle to length with a fine-toothed x-acto saw, and used a file to shape it, then sanded with fine sandpaper.
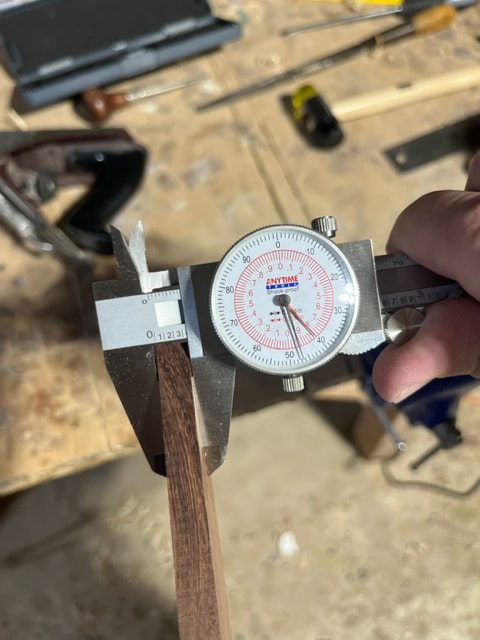
Unbleached bone nut blank was oversized a bit, which was nice. I sanded it down to 1/4" thick on my bench top belt sander and then to 5/16" tall on my benchtop belt sander.
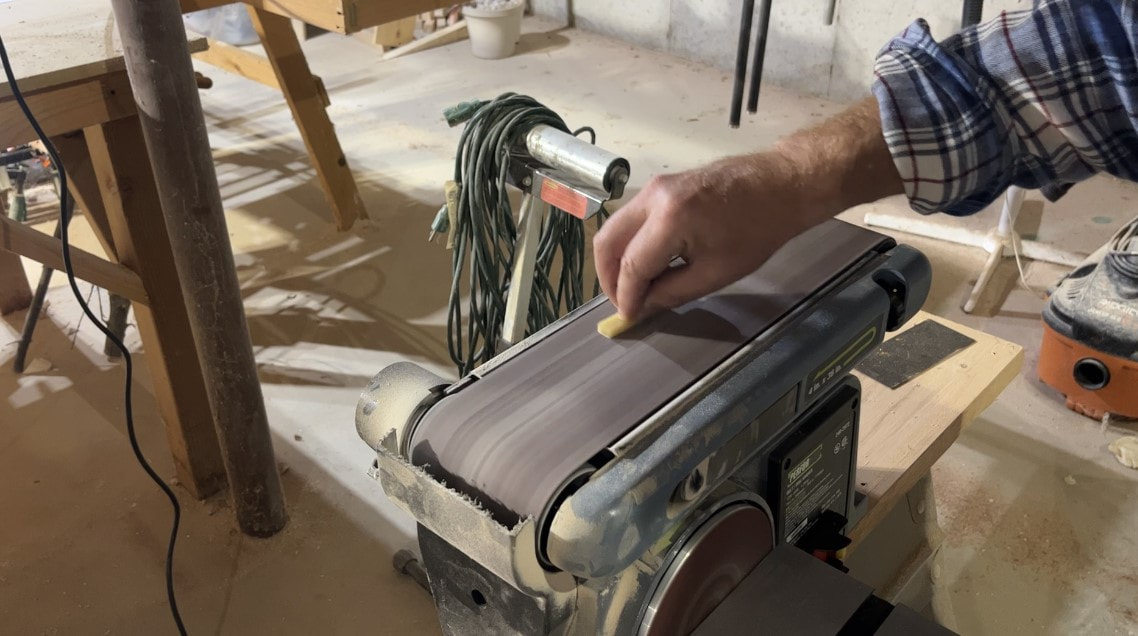
Sanding the blank to 1/4" wide, 5/16" tall. Then I cut it to length with a fine tooth x=acto hand saw.

I hand filed a slight arch into the nut, along with the front to back taper, and then marked out the string locations in pencil,

Using a radiused mini-file to file in the string grooves into the nut.
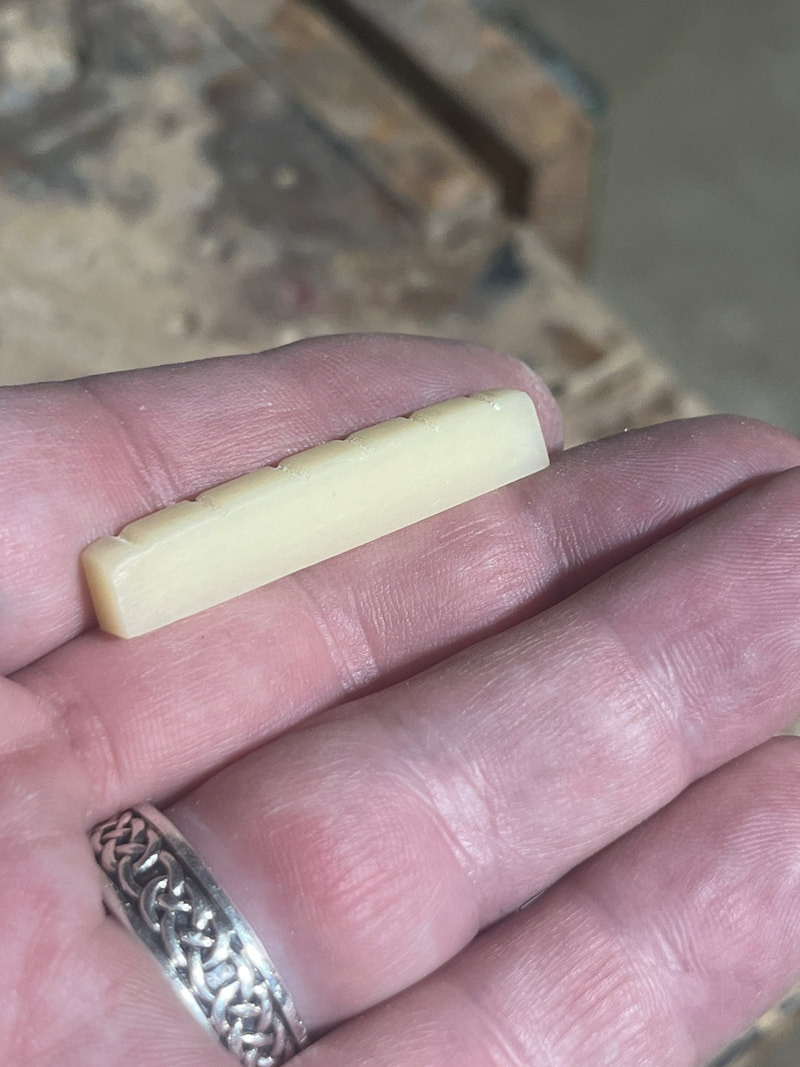
Finish filed, shaped, and sanded unbleached bone nut for my backpacker guitar. I will file the grooves to final width and depth later.
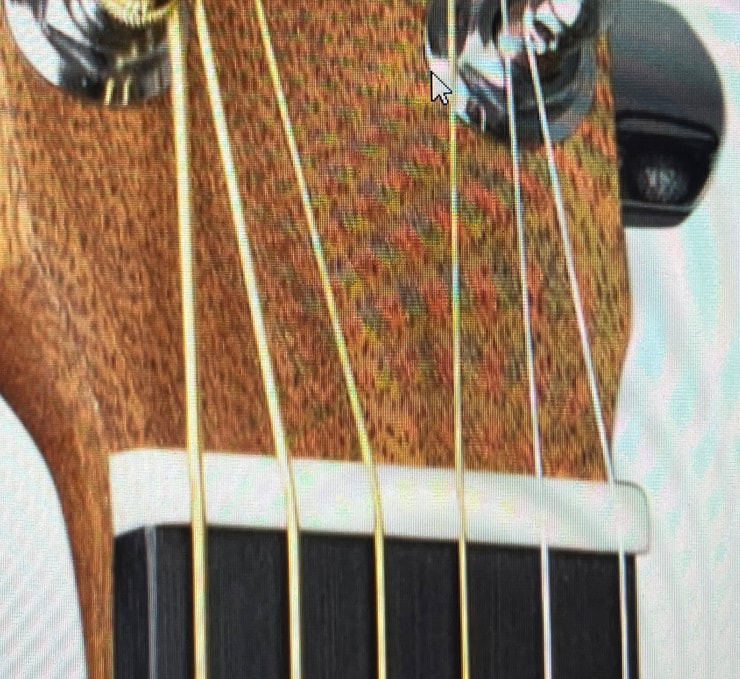
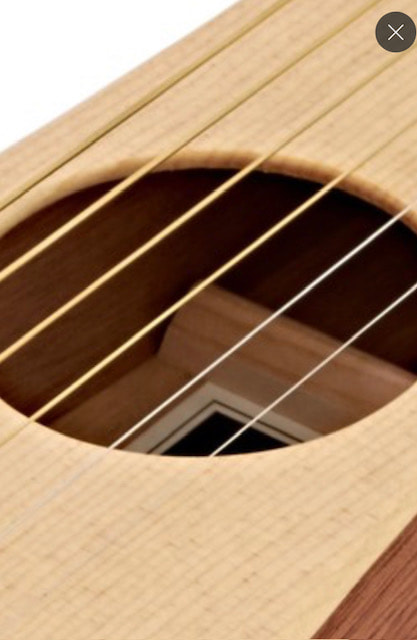
Photo of a Martin Backpacker nut, photo from Martin.
Cutting the saddle blank to length.
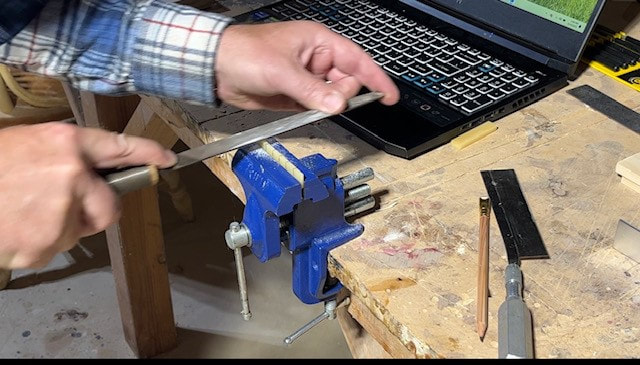
Using a file to shape the saddle.
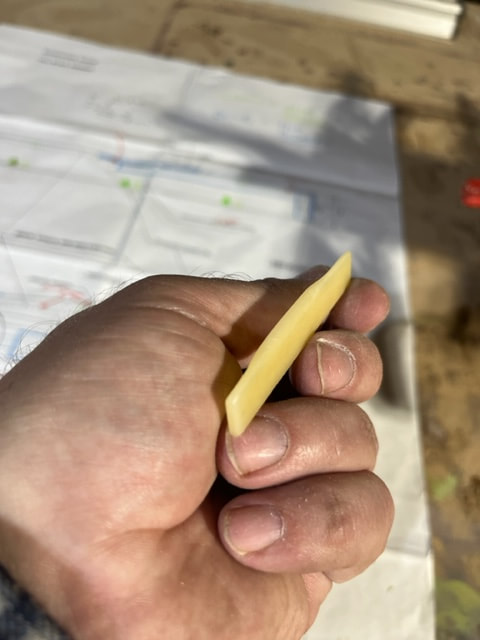
Unbleached bone saddle
Making the Front and Back Pieces
I straightened and trued up the edges of the two bookmatched sheets of Sitka Spruce and the glued them up over a piece of plastic. I used two pieces of scrap plywood nailed along either side to compress the two thin sheets. I put some objects on top along the joint to keep it flat.
Bookmatched glued up front, made from Sitka Spruce.
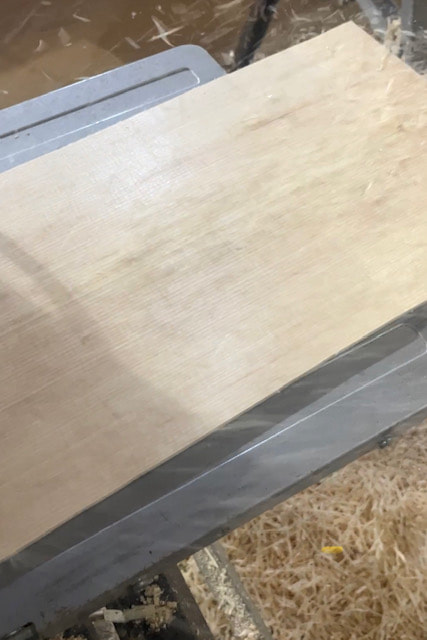
Using my thickness planer to plane the front to 1/8" thick.
I will make the back from a single piece of solid Mahogany, 1/8" thick.
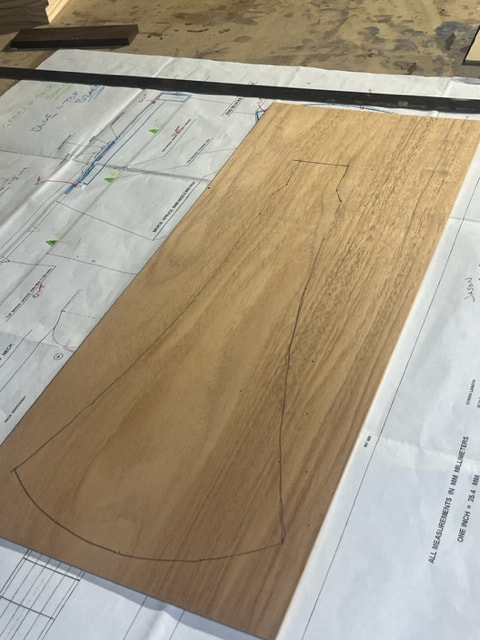
First I drew out the shape of the back on the mahogany, next I will use my bandsaw to cut this piece out by I will cut at about 3/16" oversize and trim it down to be flush with the body after gluing it up.
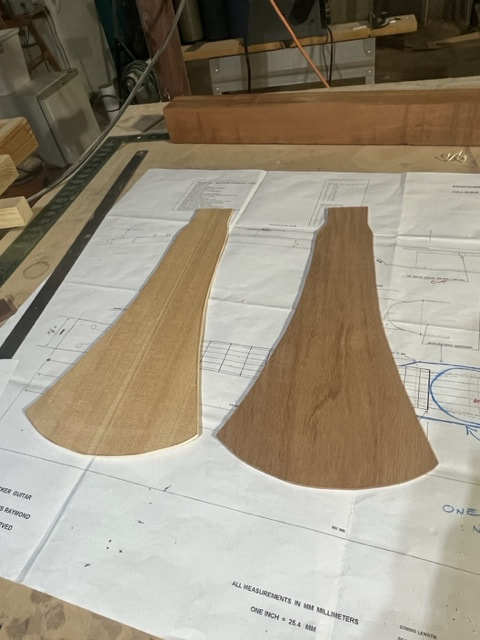
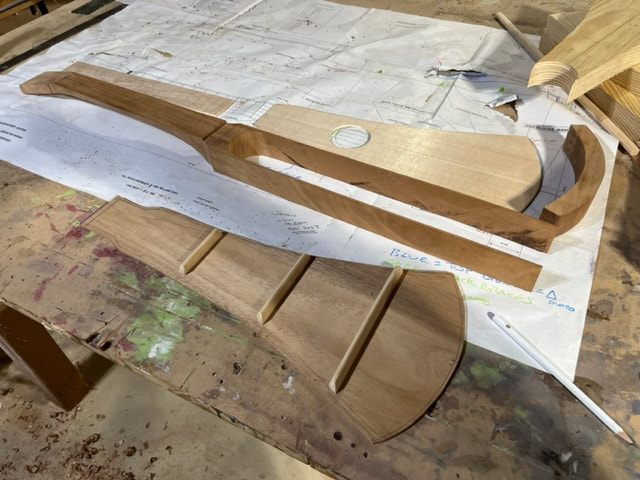
Here are the finished rough blanks for the front and back
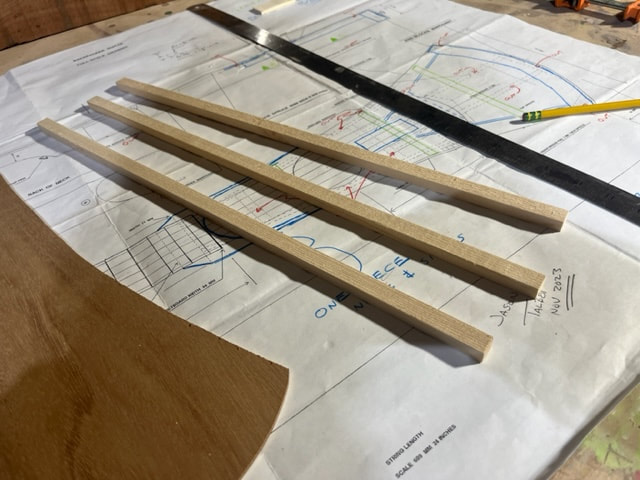
Blanks cut from Sitka Spruce for the front and back bracing

I used a plane to make this nice curved / half-oval profile for the reinforcing braces. Planed to shape, then sanded.
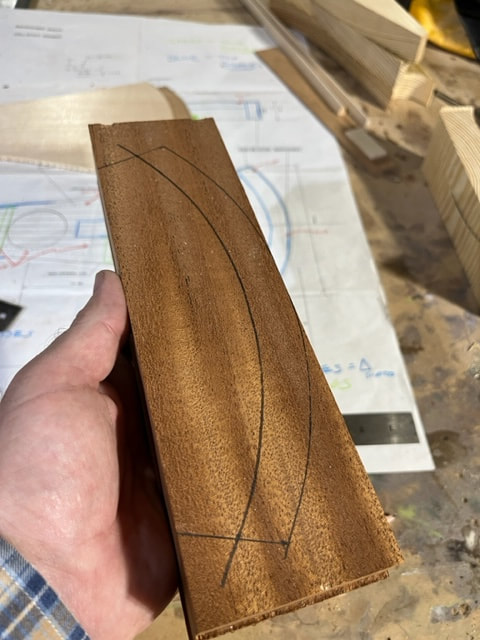
Solid chunk of Mahogany, 1 5/8" thick, just like the body. I carefully traced out the shape of the bottom of the guitar from the plans on to the wood.
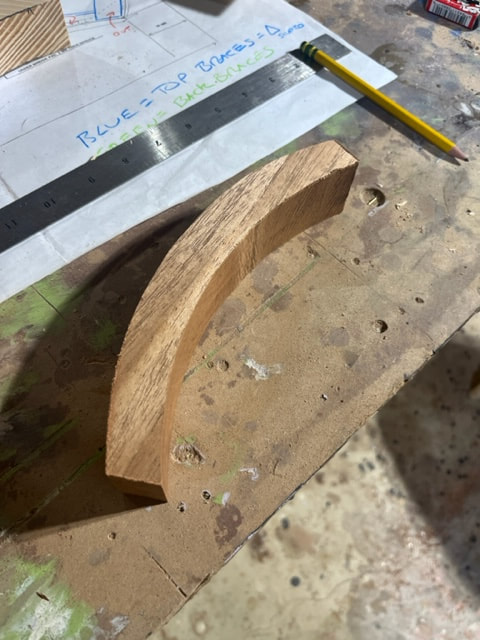
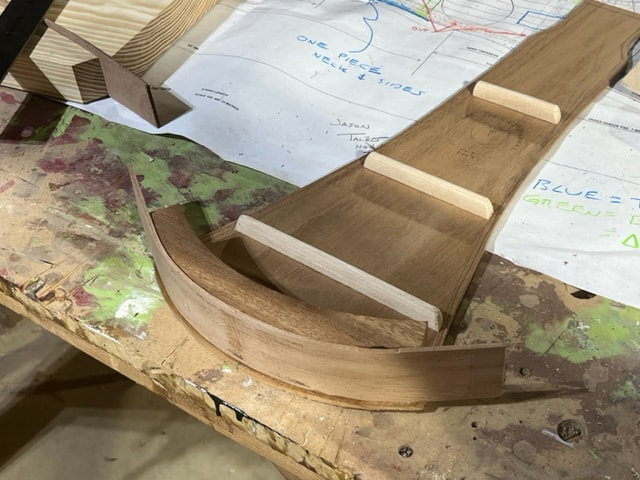
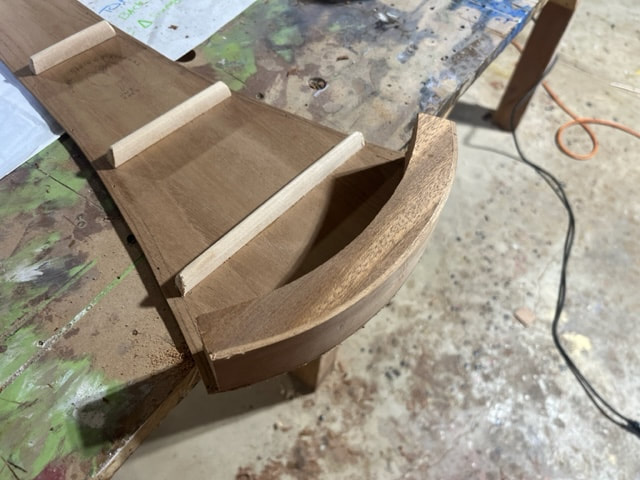
Here is the bottom reinforcing block for my Martin-style backpacker guitar.
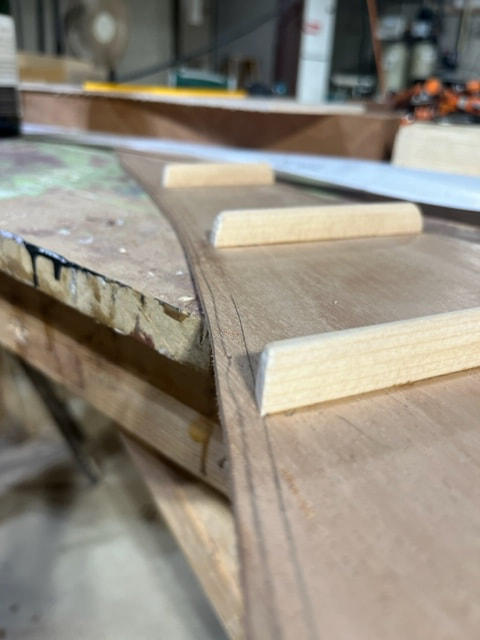
From this photo of an actual Martin Backpacker Guitar, notice the taper in the stock at the end of the piece. The reinforcing piece is not perpendicular to the back and is not flush to the side or glued to the side; it is tapered back. I will do it that way.
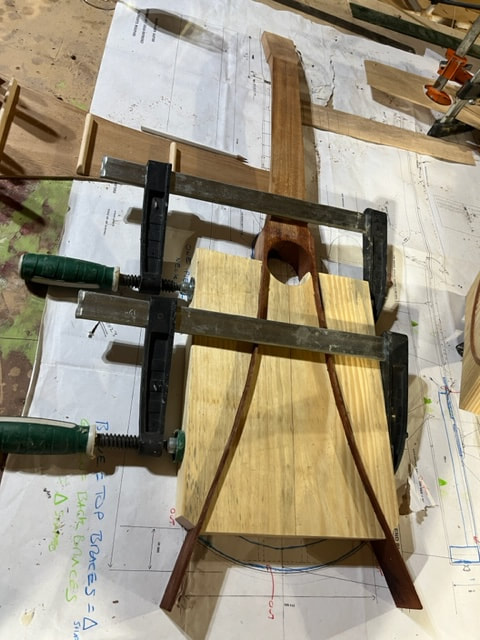
Braces shaped and glued to the back.
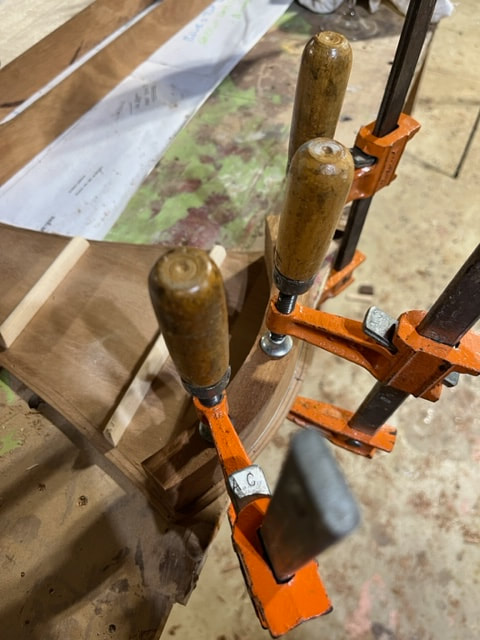
Gluing the butt end block in place.
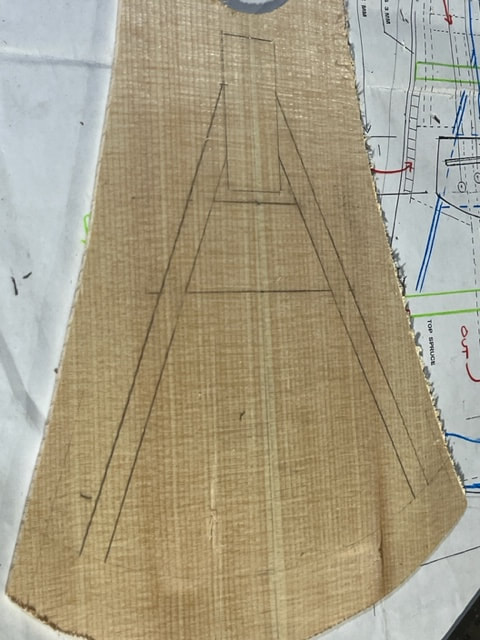
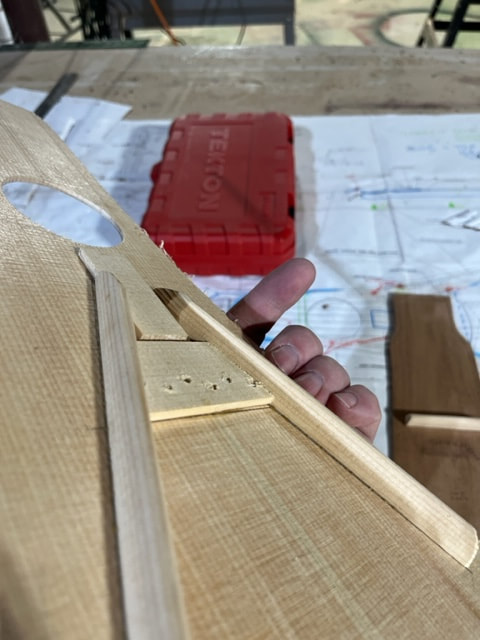
Laying out bracing and reinforcing pieces that will be glued to the underside of the front.

Precut under-front pieces ready to be glued in place.

Glueing up the bracing and reinforcements for the underside of the front.
Making the Fretboard
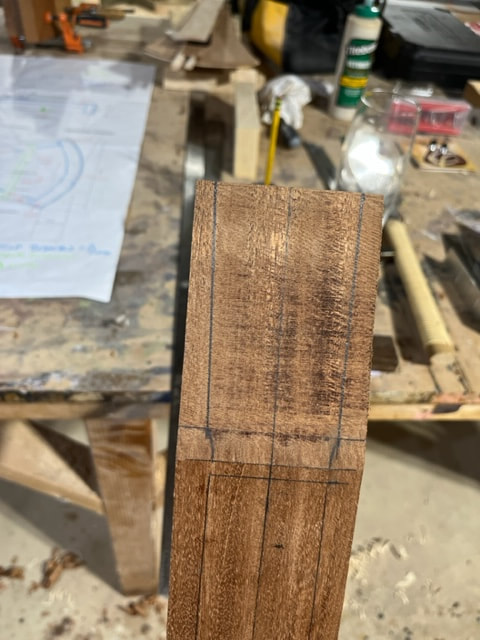
The fretboard will be made from birdseye hard maple. First I planed it to the correct thickness, then I cut it to the correct max width and length. Then before cutting the tapered shape of the neck, I marked out the fret locations and used a square to mark out nice perpendicular lines for the frets.
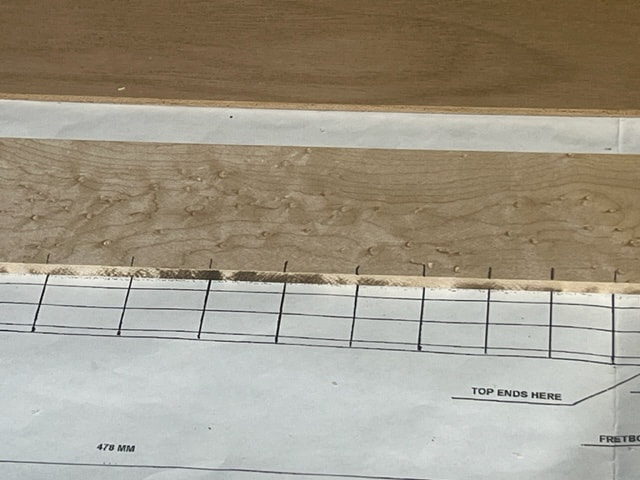

Using a square to draw cut locations for the fret saw.
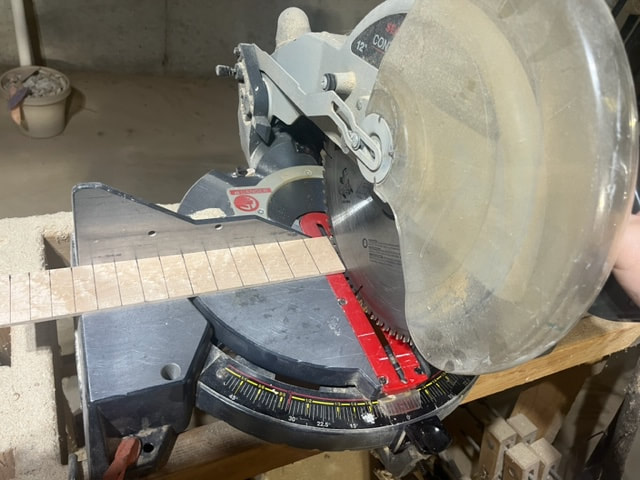
Cutting the fretboard to length.
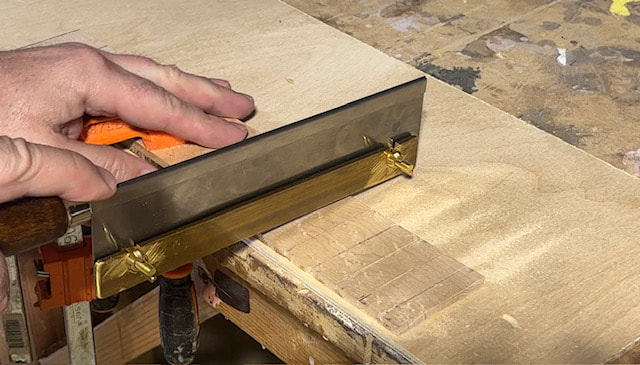
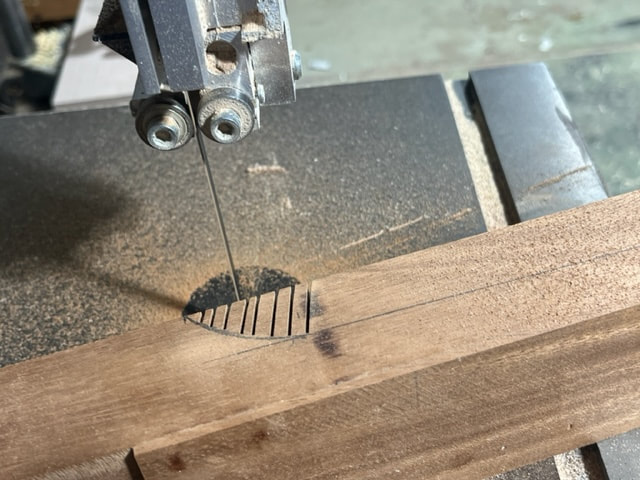
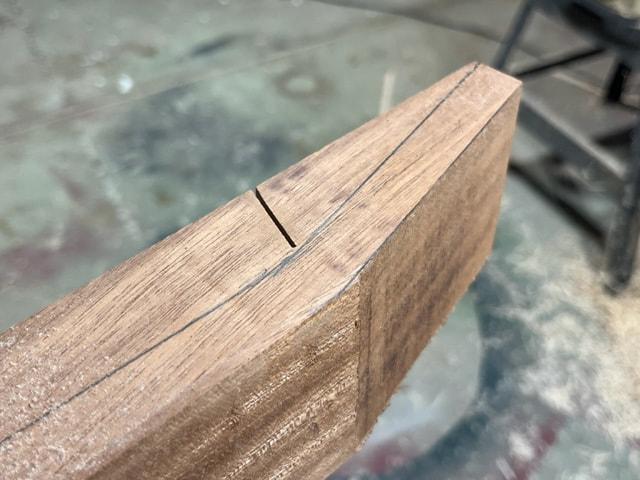
Cutting the fret slots with my fret saw.
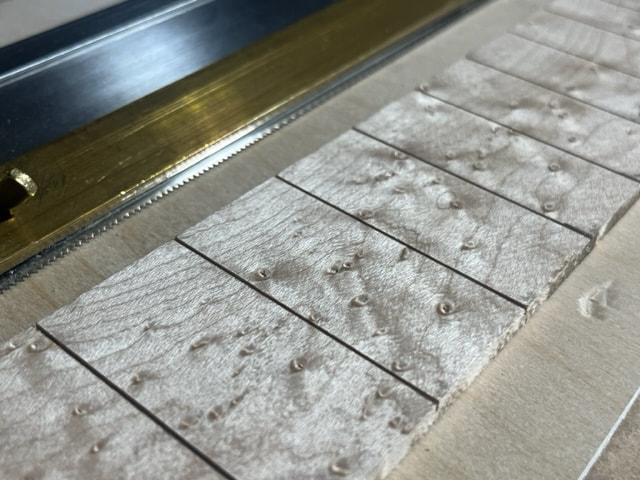
All the fret slots are complete! That was fun.
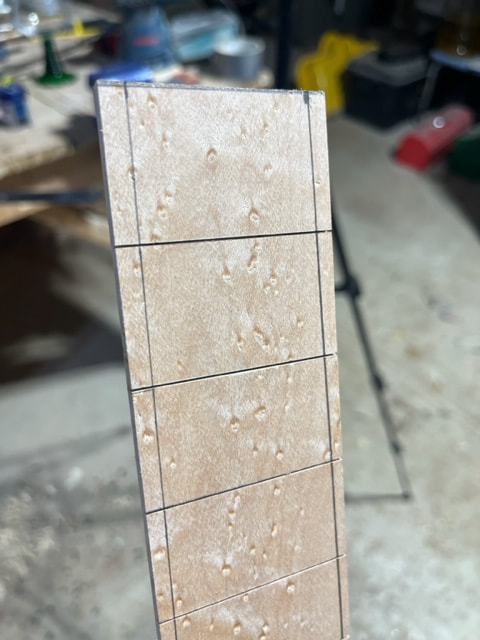
Taper drawn out on fretboard now that the frets are cut
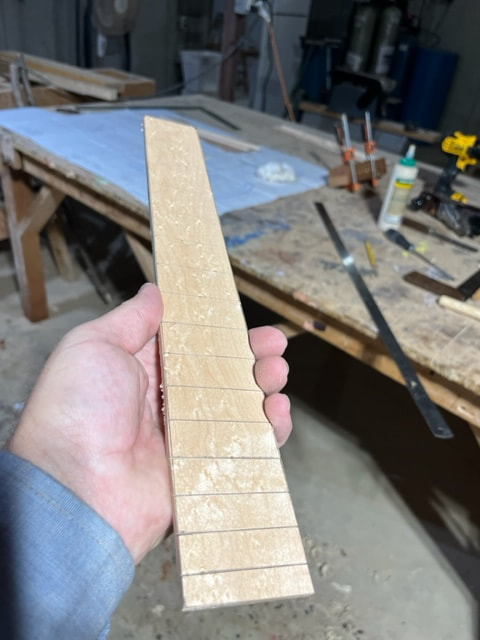
Here is the fretboard with fret slots cut and the neck taper roughed out. Next I will form a slight radius on the top face of the fretboard.

Radiused top of the fretboard
Making the Rosewood Bridge for My Backpacker Guitar
I practiced using scrap wood before making the Rosewood bridge. I needed to trial and error the slot cutting jig especially and try different router bits. I wound up buying some tiny metric slotting router bits that worked best as 1/8" bits made a slot to big. I also used scrap wood to get the depth of cut just right.
First , I planed it to .344" thick. Then I cut it to width and length.
Then I tapped the bridge blank sunggly into the saddle slotting jig I made.
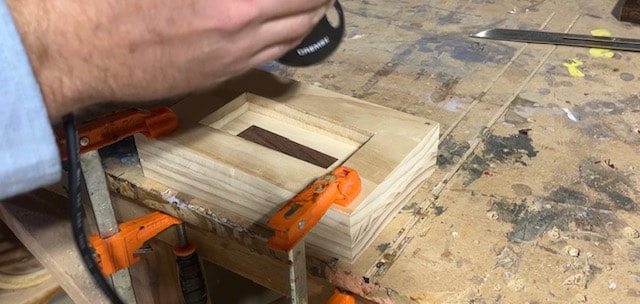
I then clamped on the upper portion of the slotting fixture.
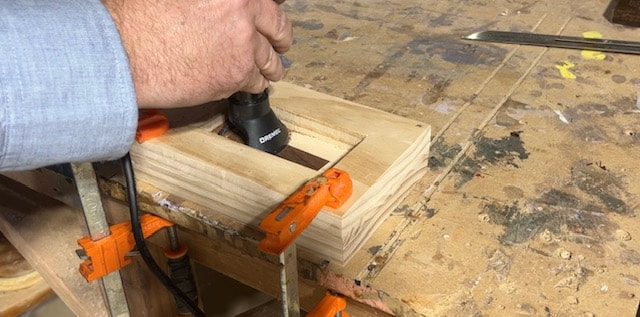
Using my Dremel as a router to cut the slot.
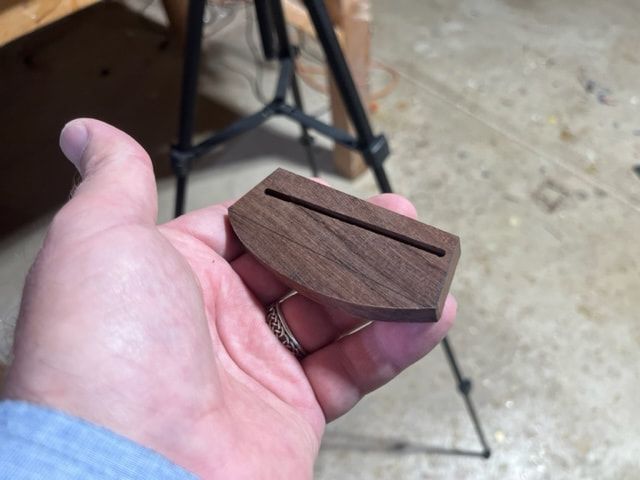
With the slot routed, I drew out the perimeter shape of the bridge and cut it out on a band saw.
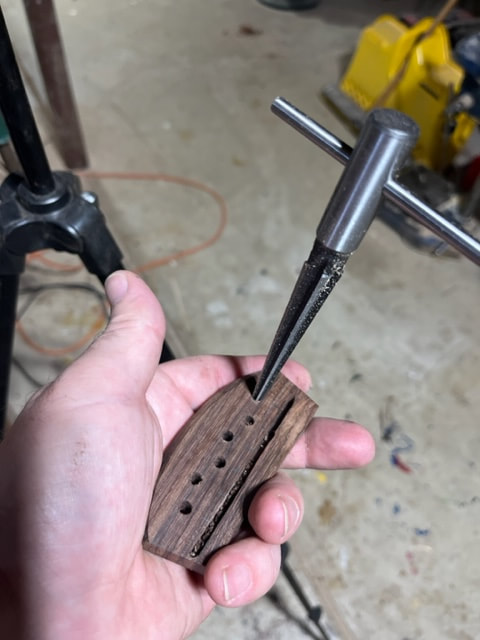
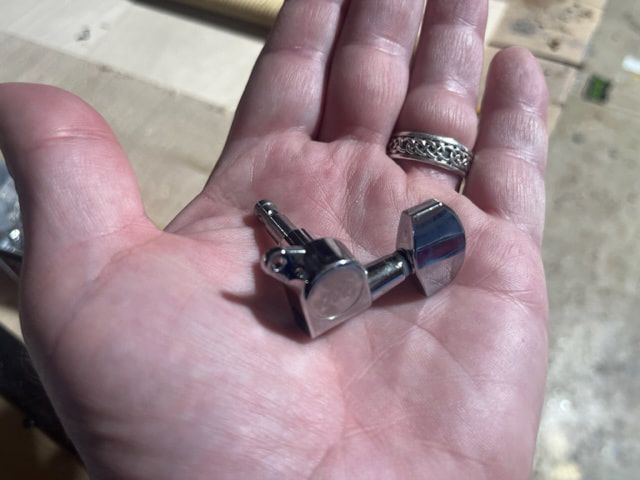
3/16" holes drilled and now using a reamer to form a nice taper into the holes. I will use solid bone bridge pins.

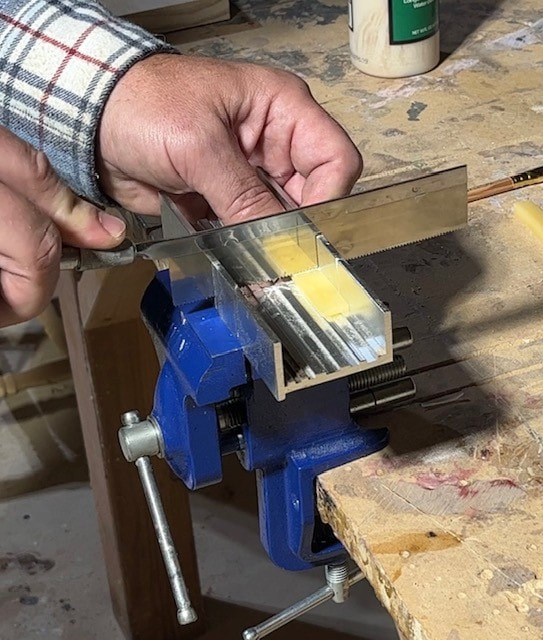
I used this wee little saw to cut slots into the bridge that will allow me to to use solid bridge pins. I will clean up these slots.
I carefully marked the location and then glued the bridge to the front.
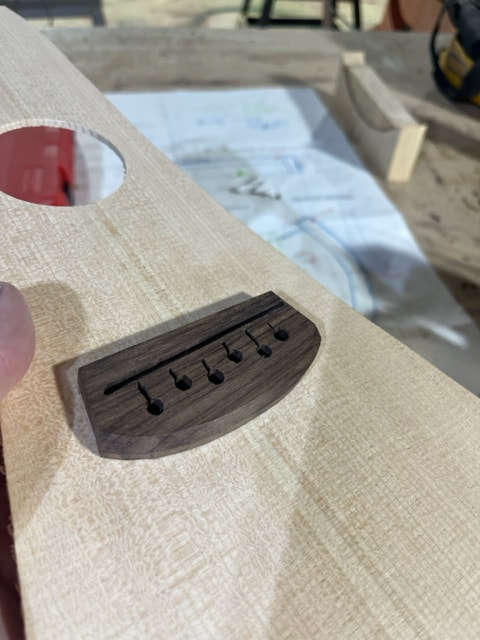
With the bridge mounted, I drilled the peg holes through the front piece and reamed the newly drilled holes lightly.
Making the Neck and Body for My Backpacker Guitar
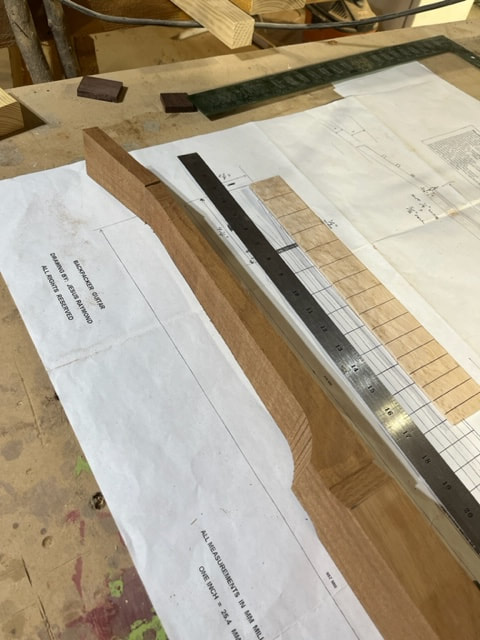
It seems that the current version of the Martin Backpacker Guitar has body-sides that are glued to the neck. I have heard that older Backpackers had body sides that were made in one single piece along with the neck, and that is how I will make mine. I started with a 3"x3" piece of mahogany that is a bit longer than the overall guitar.
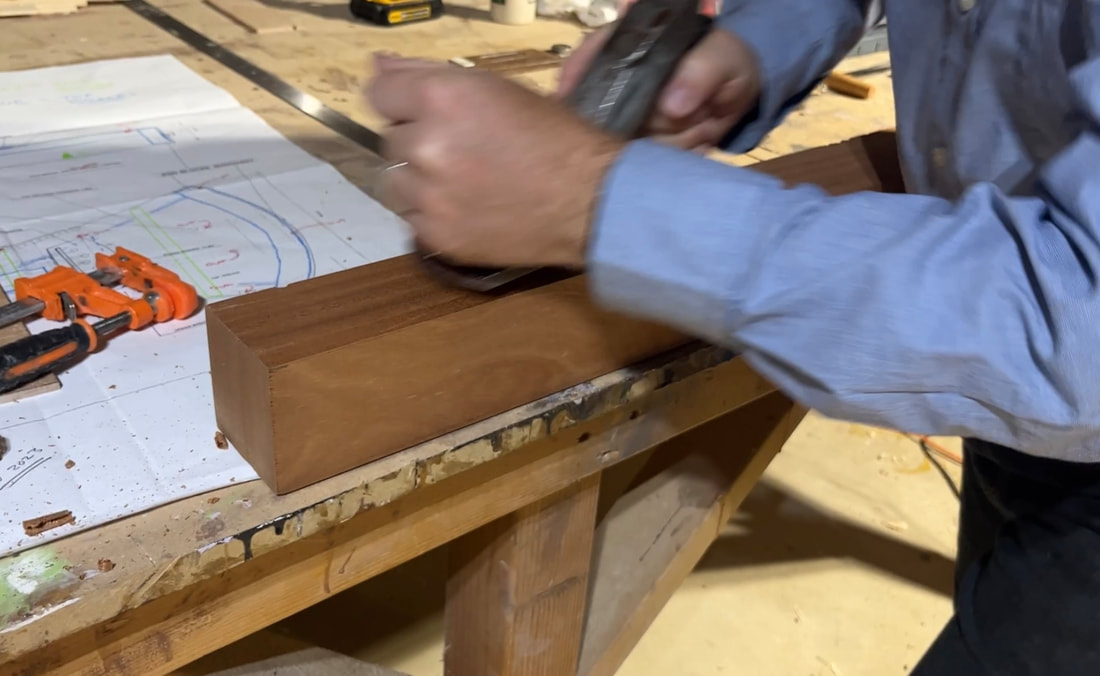
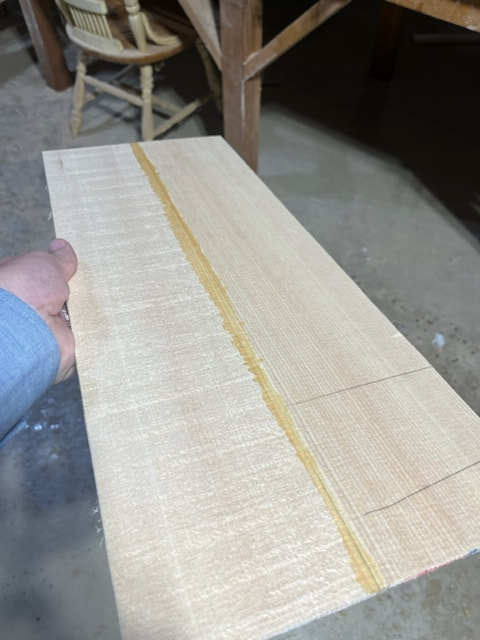
My piece of Mahogany was super straight along one edge, but had a minor curve in the other. I used a hand plane to create a straight edge of the imperfect one.
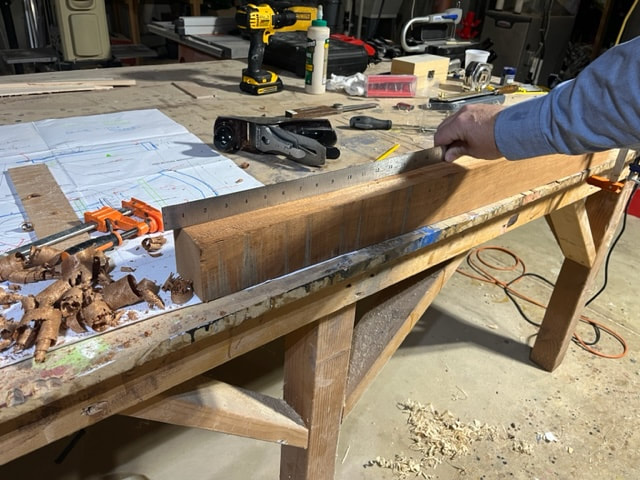
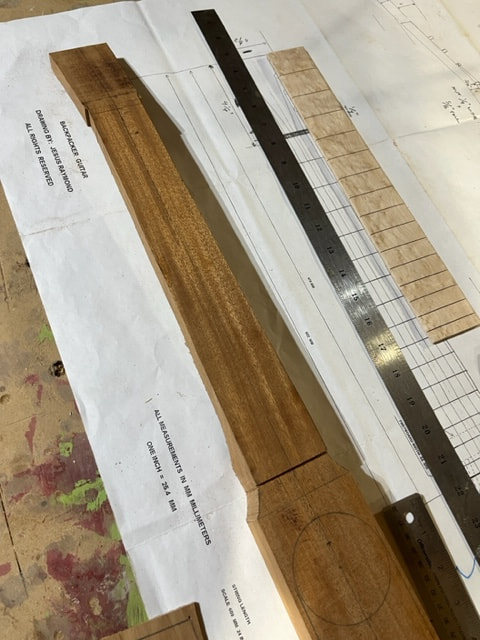
Using a stainless steel yardstick to check straightness of the previously curved edge. Now it is nice and straight and all is well with it.

With everything square and straight, I ripped my stock down to 1 5/8" x 2 7/8" on the table saw
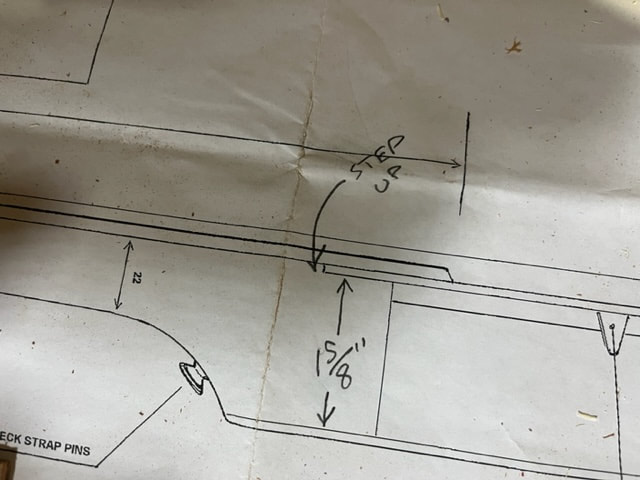
I miss things from time to time, and here is an example; I checked the height of the sides of the body and it is 1 5/8" but up at the transition from the body to the neck the top side of the piece of wood needs to step up and 1/8" at the point where the top ends, so the total height of the single-piece neck/body/piece would need to be 1 3/4".
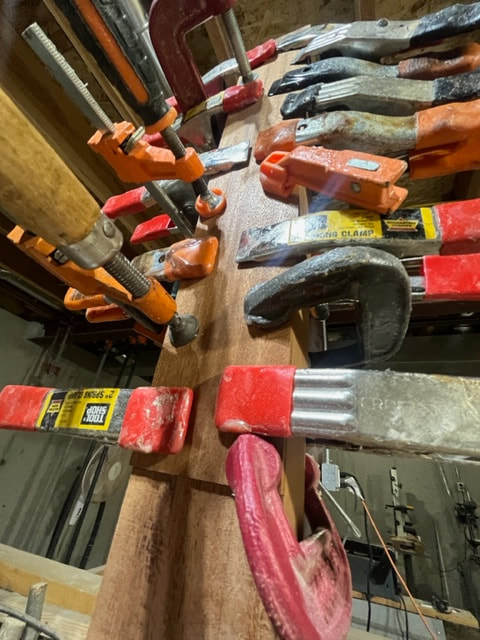
sooo....... I glued a piece of the mahogany left over from the original 3"x3" post to the neck to account for this step up. I measured the exact location where the top ends and this is where I began the glue-up of this piece to the neck.
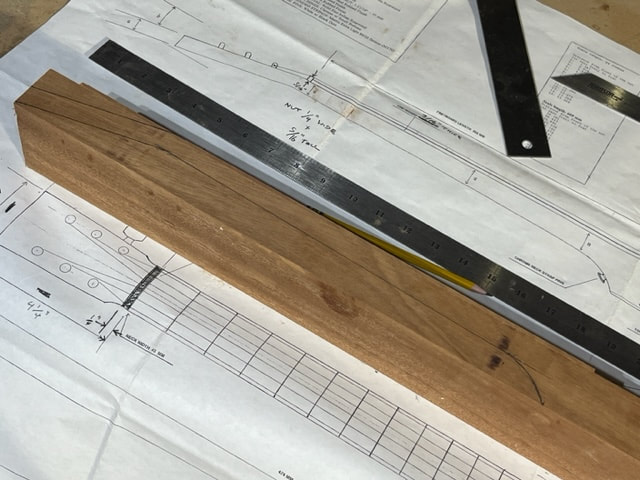
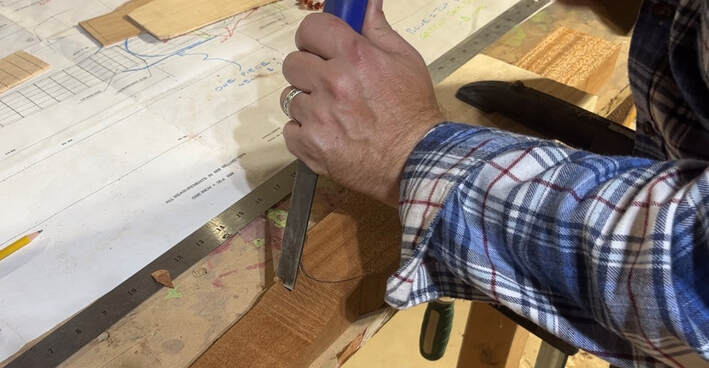
Marking out the neck.
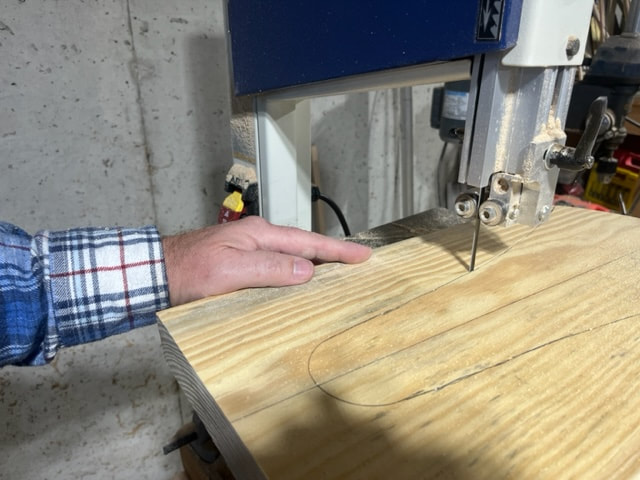
Cutting the neck profile on the bandsaw. I made the cuts with sides of the lumber on the bed of the bandsaw first. Second step will be to cut the taper into the neck looking down from the top. but do this cut first.

Still cutting the side-view profile.
I am pleased with the results so far. IT's all my little bandsaw has in it to make these cuts in approx 3" thick stock. She's gett'in it done.
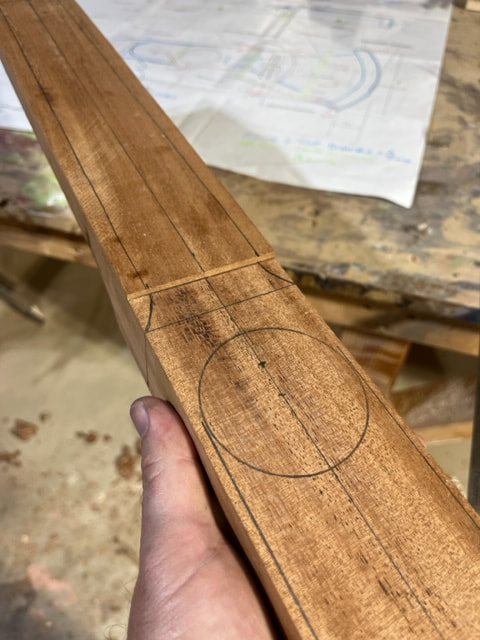
With the side profile cut out, I layed out the drawings on the top surface of the body/neck. The small details of the lines/shapes I am using are not the lines on the drawing I bought, note the curves above vs the straight lines on the drawing where the body transitions to the neck.
Drawing the headstock
I am very pleased with the roughed-out neck.body piece.
Now it will be an army of spoke-shaves, chisels, knives, files and sandpaper to carve this neck to shape.
Using a chisel and mallet to rough carve the neck shape.
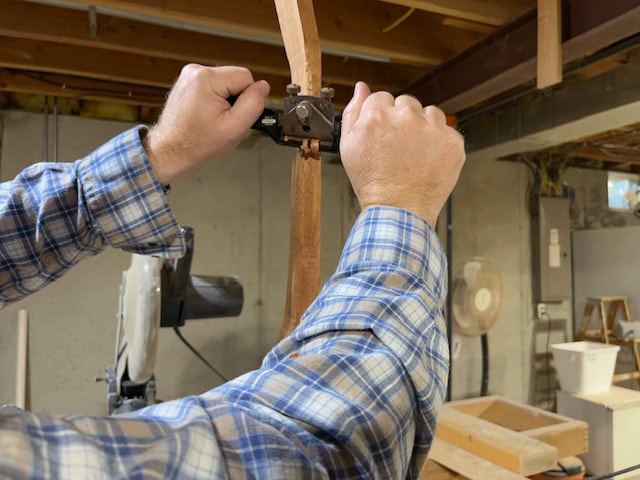
I used a spoke shave and chisels to shape the neck and the transition from the neck to the body
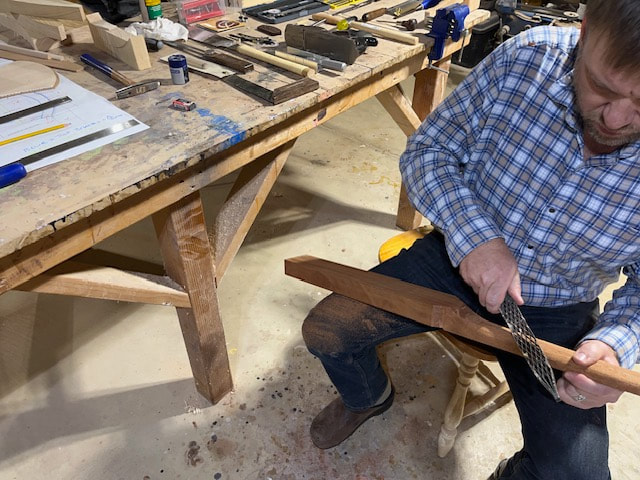
Further shaping with a Shinto rasp.
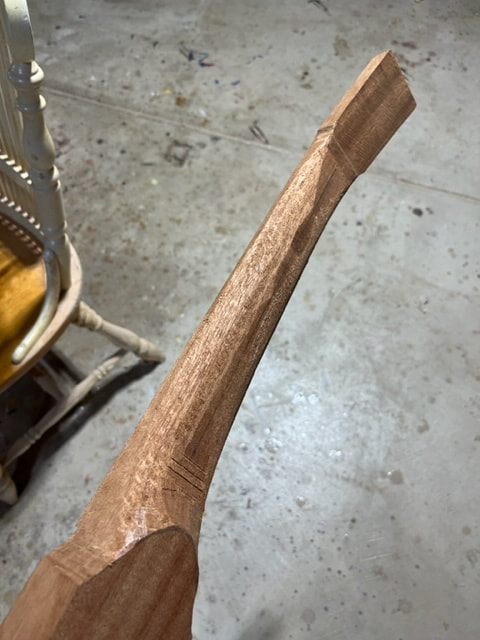
Rough shaped backpacker guitar neck.
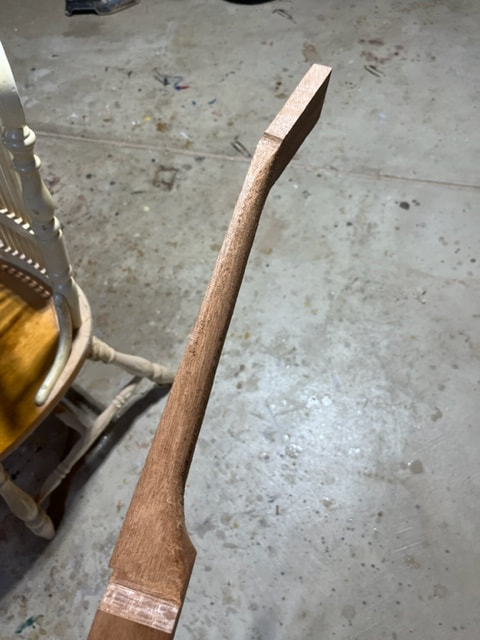

Sanding.......
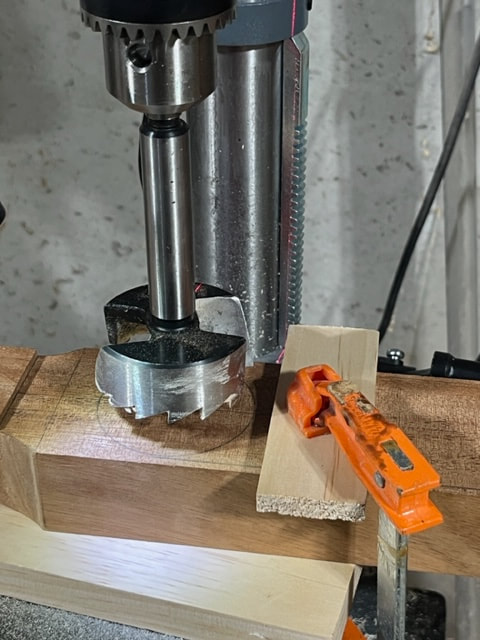
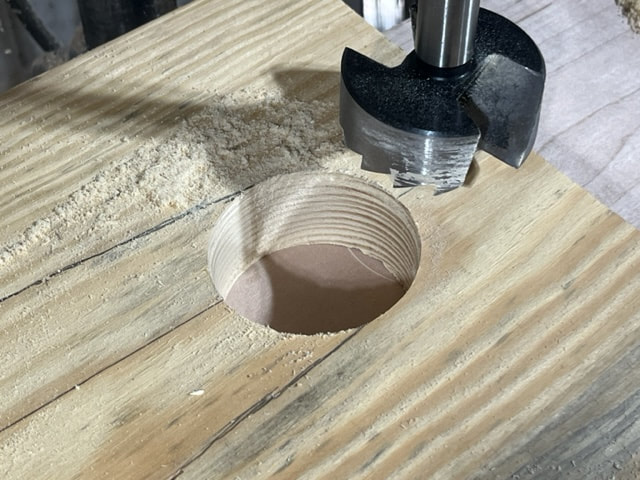
Setting up the big forstner bit

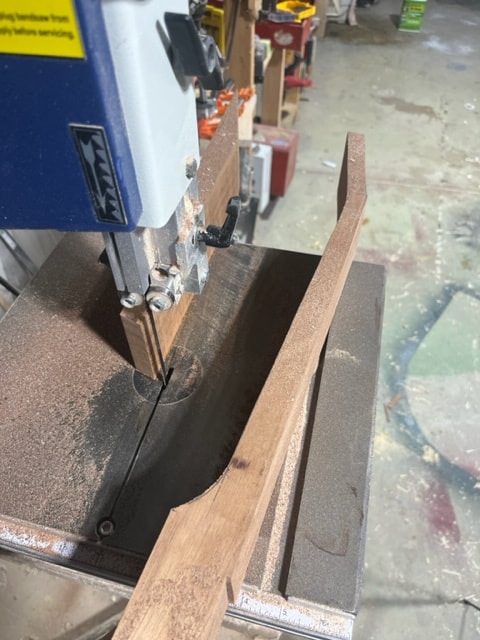
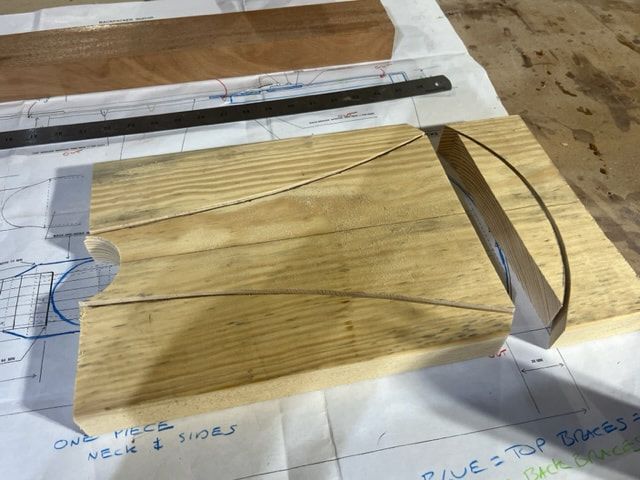
Hole is cut and now I will use the table-saw to cut the 1/8" thick body sides.

I used a bandsaw to complete the tablesaw cuts,
Here are the wooden backpacker guitar pieces ready for assembly.
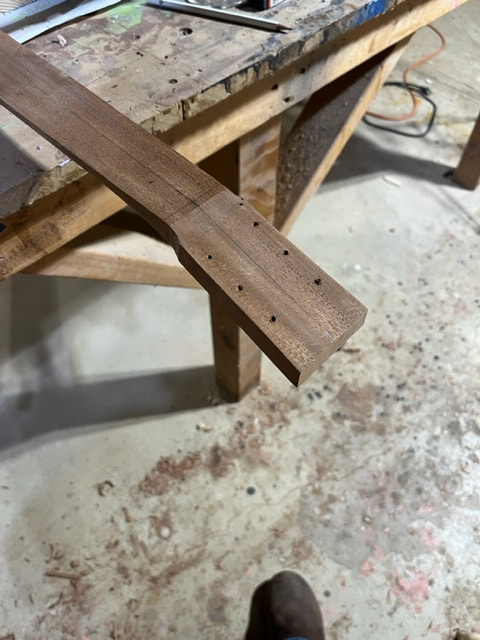
Laid out locations for tuner posts and used an awl to set the locations for the holes.

Drilling the tuner post holes to 3/8" didn't go well. I drilled a pilot hole which went fine but when I went to drop the 3/8” holes the wood split and I had significant blow-out of surface wood at the exit face of the bit! Uf-da. I epoxied the stock back together and used wood-flour-thickened epoxy to fill any voids. I wound up with a nice strong and smooth headstock with good tuner holes but I will need to enamel this section now due to the epoxy filler. Be careful when drilling these holes!!! I was going to fast and not careful enough.
Making the bending form for the body
To pre-bend the curved sides and the curved bottom wall of the body, I will be soaking the wood to be bent in hot water and then pressing it in a form. I have a few different sizes of stem boxes, but I do not want to steam the neck of this guitar so I will just soak the body portion and leave the neck above water. I made a form out of a 2 x 12 pine piece of lumber.
Transferring curve points from the drawing to the form by using an awl through the paper into the wood below. Next I will "connect the dots" with a pencil on the 2x12 beneath.
Form sketched in pencil and now being cut out on the bandsaw.
This hole doesn't need to be in the form, it won't hurt either and I wanted to test my 2.5" forstner bit so I did so on this 2x12. I don't normally change rpm of my drill press but this test showed me I need to slow this baby down for this 2.5" bit.
Completed backpacker guiter body forms. BE picky and make sure you get a straight and true 2 x 12, which is not easy.
Bending Pieces and Assembling the Body

Soaking the portions of the body that need to be bent in piping hot water. I left it to soak for 1.5 hrs.
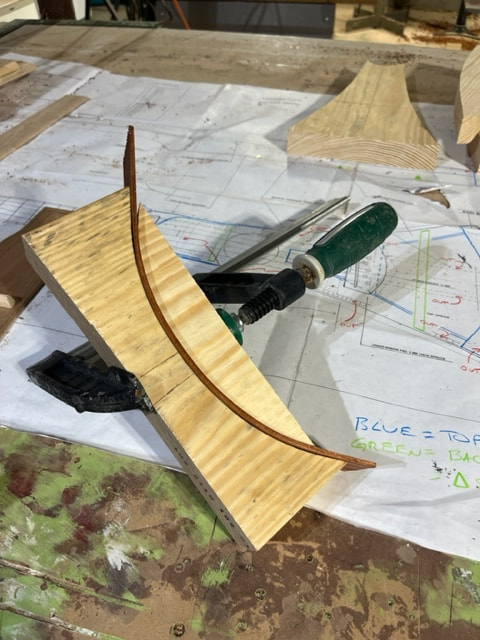
Clamping the soaked wood into the forms.

Gluing the curved butt piece on.
I unclamped the bent bottom piece and clamped it to the guitar body / butt brace.
Then I trimmed the visible bottom piece to length to match the brace.
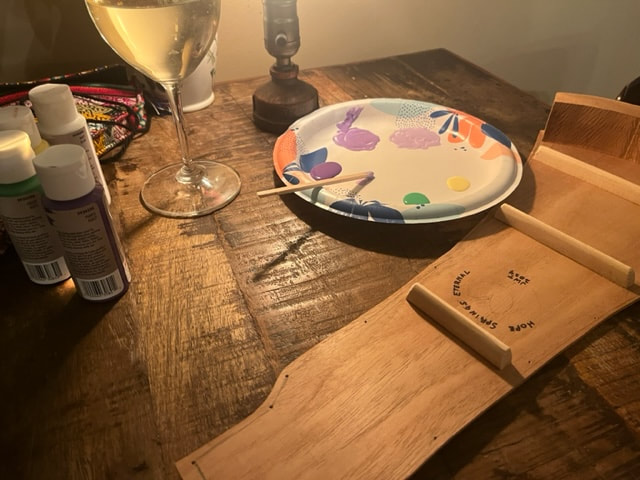
Painting a little design that will be visible on the inside of the back through the sound hole.
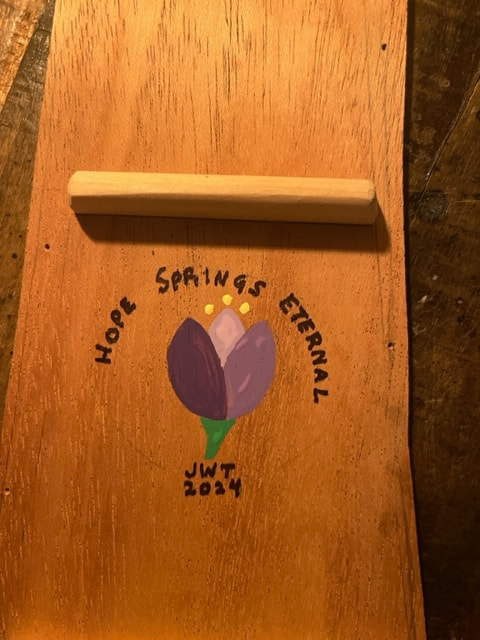
I love Crocus! Here is my little design painted on the inside of the guitar. Paint is still wet but it will dry to a consistent color.

Gluing the body to the back. I used the form pieces as supports for my clamps, and I put weights on a board over the top to provide downward pressure as well.

During glue-up the guitar and sides kept wanting to move around so I screwed blocks to the drawing at the head and butt of the guitar to hold it to proper length during glue-up.

Clamps removed. Back is well adhered to the body. Sawing off excess material from the sides.

Trimming off excess from the back piece on the bandsaw.

Used a nice sharp handknife to carve the bottom right flush up to the sides and neck.

Gluing on the top!

I unclamped the top of my backpacker guitar and trimmed it up on the bandsaw just like I had done with the back, and trimmed it up close to the body with a knife.

I carefully measured the distance from the nut to the saddle and located the final position of the fretboard and glued it on. I decided to glue on the fret board and sand it flush to the neck before installed frets....not sure if I should have installed the frets first.

Here is my backpacker guitar with fretboard glued on. I sanded the fretboard flush to the neck.

I will inlay these abalone dots into the fretboard

Carefully sinking 5mm holes (with a very sharp 5mm flat bottom bit) into the fretboard for the fretboard dots.

I put a very small drop of superglue gel into the bottom of each hole and then tapped in the dots with a mallet. I then polished the dots up nice with 600 grit sandpaper

My daughter was in the shop the install the frets! She set them in place with a mallet and then trimmed them to length with a cutoff wheel in a dremel tool.


Frets installed and here's a closeup of the abalone dot
Finishing my Backpacker Guitar

First I applied two coats of this grainfiller to the mahogany. Lettign dry and sanding between coats. Do no apply this to the spruce or the maple or the rosewood. Mahogany grain is very open and porous, and this filler fills those open grains with nice clear hard filler.

Taped-off and sprayed 7 coats of enamel hunter green on the head of the guitar. Sanding in between coats with 400 grit.

Double checking flatness across the frets. I think there is a 1/100th to 1/64th more height over the highest pitch fret vs the longest fret and this may be an amateur construction error. I intend to string it up as-is but if it presents a playing problem, I will file down the middle fret to level it out.

I will be using tung oil on the fretboard and bridge, so I taped them off. The guitar is sanded down to 400 grit.

I am using Color Tone sanding sealer and clear gloss nitro laquer as the finish for the neck and body. First coat of sanding sealer yielded whitish spots where I think I did not sand the grain filler sufficiently. I let the sealer dry and sanded these areas a bit more which fixed the problem.

4 coats of Stewmac spray on sanding sealer, sanding with 400 grit between coats.
Next I will apply 12 coats of Colortone Nitro Gloss Laquer from StewMac to my Backpacker guitar, sanding between every 3 coats with 320 grit paper.

Warm lacquer flows better when applied to the wood, so I heat it up in hot water in the sink. This can is about half full so if I add more water the can would tip over. The sink is full of water at full hot tap water temperature.

Leveling the frets. This fret sander has 4 grits of sandpaper, one on each flat side.

Using a fret file to reform the radius on frets I had sanded down.

Pure 100% Tung oil used on the fretboard. I applied it with a paint brush, let it soak in for 20 min and wiped clean with a cloth. 3 coats , 1 coat / 24 hrs. Also carefully oiled the sides of the fretboard.

I also put one coat of tung oil on the bridge.

Glued on the nut with superglue

Checking the action at the 12th fret and 1st fret. Many 7/64" at the 12th fret and 1/32 at the 1st fret. There are many articles and opinions on this and I am not an expert. This was my starting point and I will make adjustments later.

Moment of truth; stringing up the guitar!!

Happy daughter.
Weaving, Stitching and Making the Guitar Strap
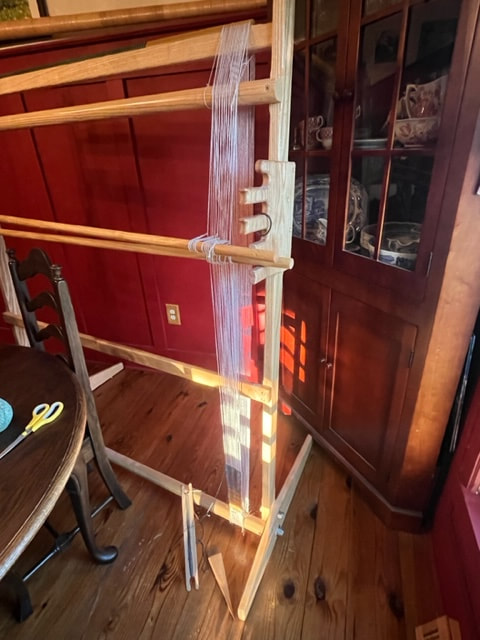
I set up my loom and will weave a guitar strap. I'll attach leather ends with the button holes.
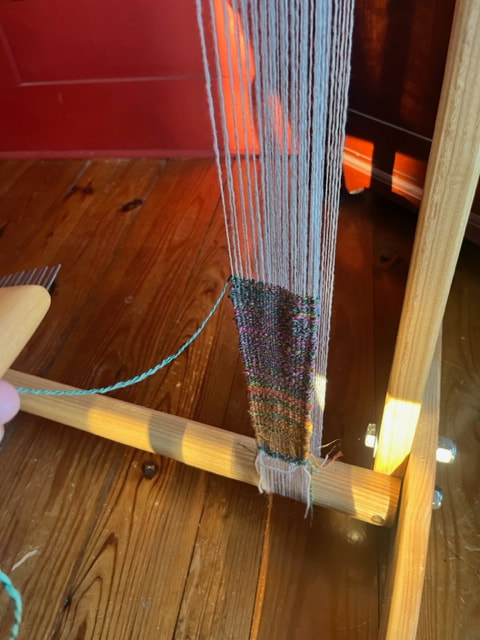

This strap will have a hand-woven center, canvas, and leather.

Canvas section has been made, and sewed to the woven section, and will now be riveted to the leather.


leather reinforcement on the backside.

Punching a 1/4" hole for the guitar strap button

Slot cut in 1/4" hole, to allow for buttoning on the guitar strap button on the guitar.
Making a Soft Case for the Backpacker Guitar
I will sew a soft case for carrying this guitar around. I think my daughter will want to play this guitar and carry it around so I think the case is a good idea. I will make it from durable canvas-type fabric with a protective liner, strap, and storage pocket.

Homemade Backpacker Guitar Bag. Canvas exterior, with cushioned liner and leather strap.


Fabric dimensions.

Drawing out the dimensions on the fabric.

With fabric pieces cut-out I set to stitching on reinforcing fabric where the straps will attach.

D-Rings sewed on in reinforced areas.

Then thinnest foam I could find was 1/2", which was too thick, so I chose this cotton quilt batting as the liner for my case. It is so soft! I cut it 3/8" smaller than the fabric to allow for connecting and hemming of the fabric.

cotton liner stitched onto the case canvas.

Case stitched together inside out. I will now inside out the case so that the hems are all inside and the liner is inside and the durable canvas is outside.

Making the flap that will open and close the case.

Here is the opening cover of the case, again sewed inside out so the hems will all be in the inside when done.

Here the lid is stitched on as well as the pocket. Reinforcing stitches are made around button holes. I made oak buttons from 3/4" oak dowel.

Making the shoulder strap for the carrying case from 1.5" wide leather.
