Autumn 2018 project
The detail of a painting above is from Knud Bergslien's famous 1869 painting of the brave and dramatic rescue of a royal child by Norse skiers. https://en.wikipedia.org/wiki/Knud_Bergslien
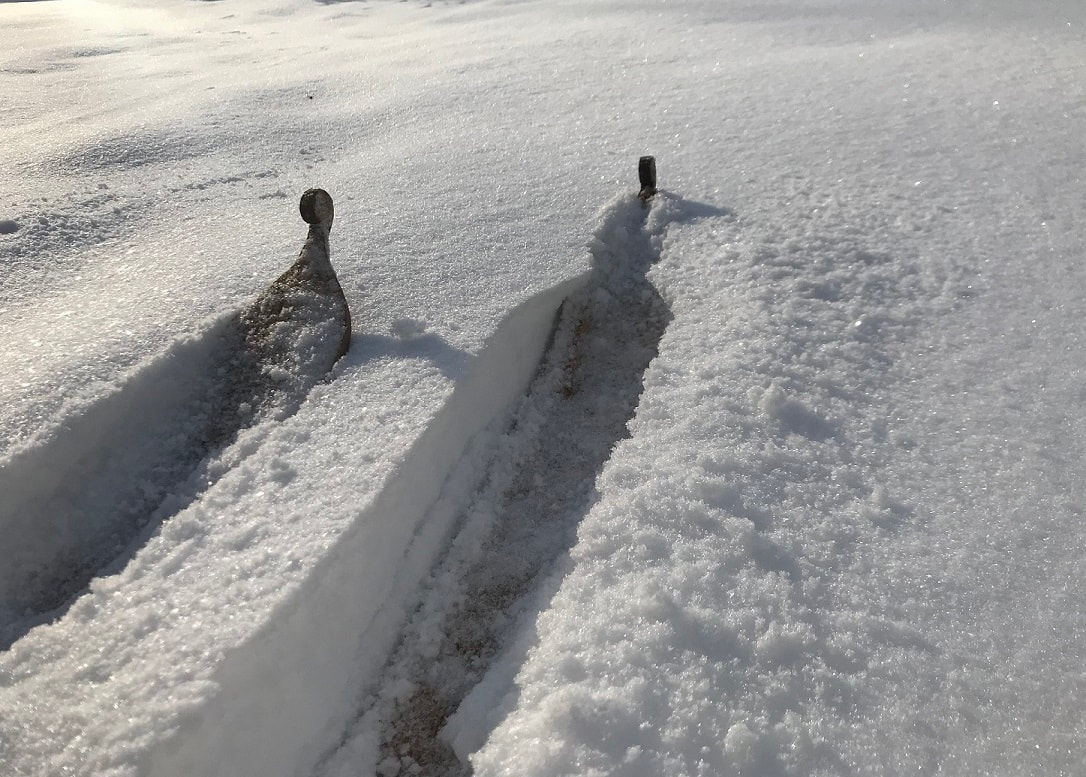
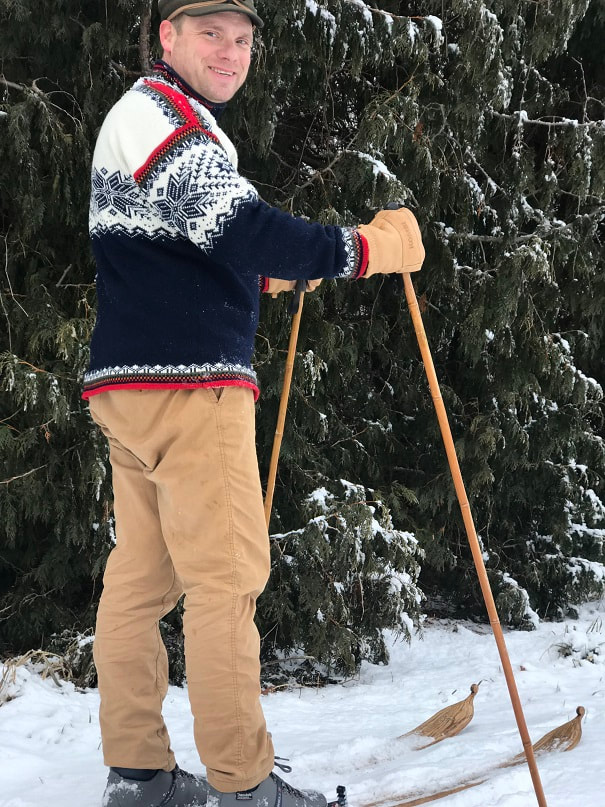
Enjoy tranquility, crisp air, and beautiful nature, while skiing through fresh snow. How much more rewarding to experience that on a pair of traditional wooden skis that you built yourself. Go for it! I took this photo after a nice snowfall, February 2019, Wisconsin USA.
Skiing on homemade wooden skis after a light fresh snowfall in Wisconsin.
Overview video showing the making of traditional wooden skis:
Building a Pair of Traditional Scandinavian Wooden Skis
|
Living in Wisconsin provides cold winter months in which one can hibernate indoors, or accept the reality, and go appreciate, and enjoy, the snow and ice. I enjoy downhill skiing, and at one point also enjoyed the fresh air and exercise of cross country skiing. This, combined with my interest in ye olde craftsmanship has led me to build a pair of traditional Scandinavian wooden skis which I will use to ski in the woods near my home.
The build-log with many photos of the making of these wooden skis may be found below. |
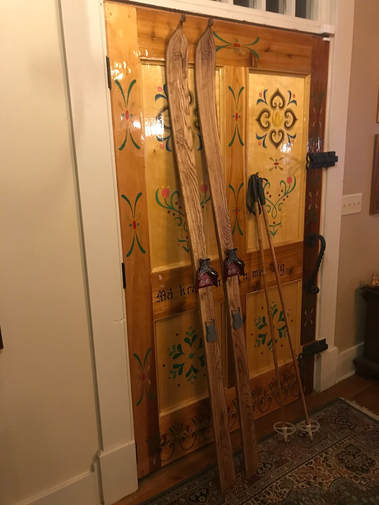
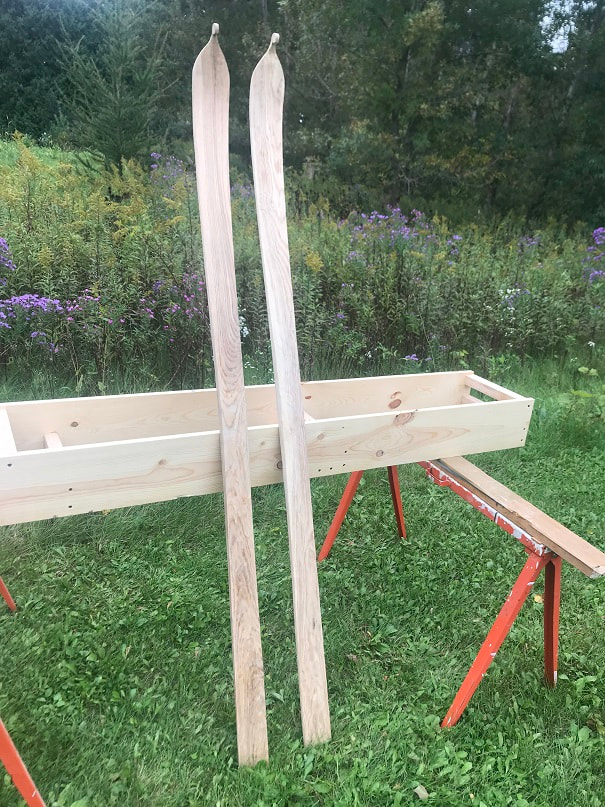
These are the skis which I built as shown below.
|
First some links to sites that helped me with research for my design and construction. It is amazing to see these truly authentic ski making videos. I am an amateur, but there are some pro's out there!
another Norwegian ski making video https://www.youtube.com/watch?v=UbPVqUbcjDY
vimeo.com/122003289 Norwegian traditional ski making video
www.dowe-ski.com
Now to the detail: Drawings for Traditional Wooden Skis

Based on information I could find, this is the traditional wooden ski that I will build.
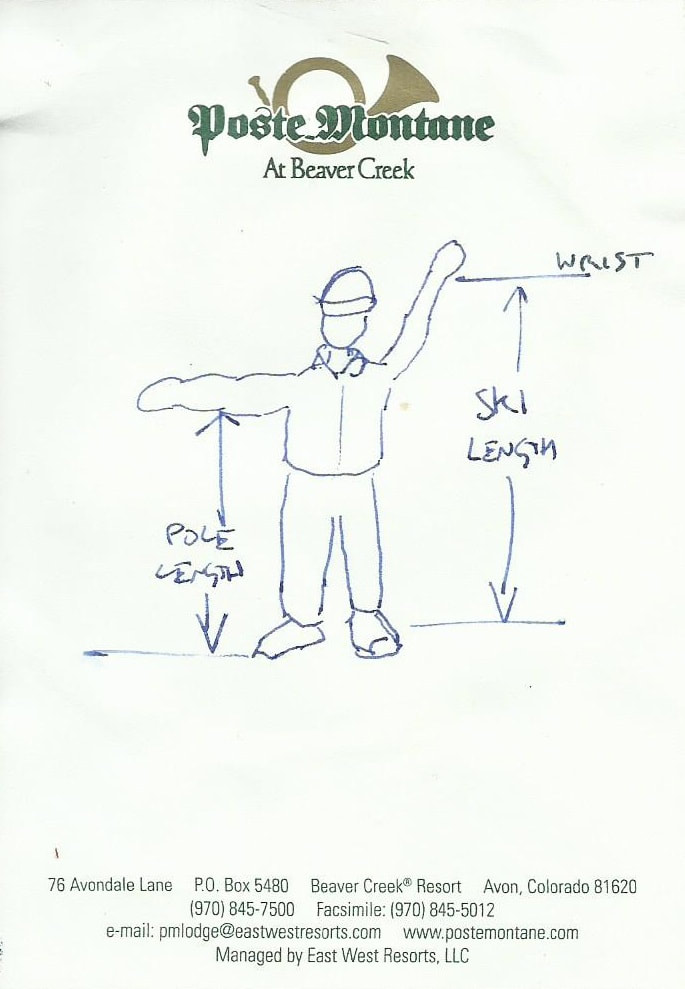
Again, based on what information I could find, this is how I will size my traditional cross country skis and poles. Poles from ground to the level of your outstretched arm, skis from the ground to your wrist with your arm pointing up.
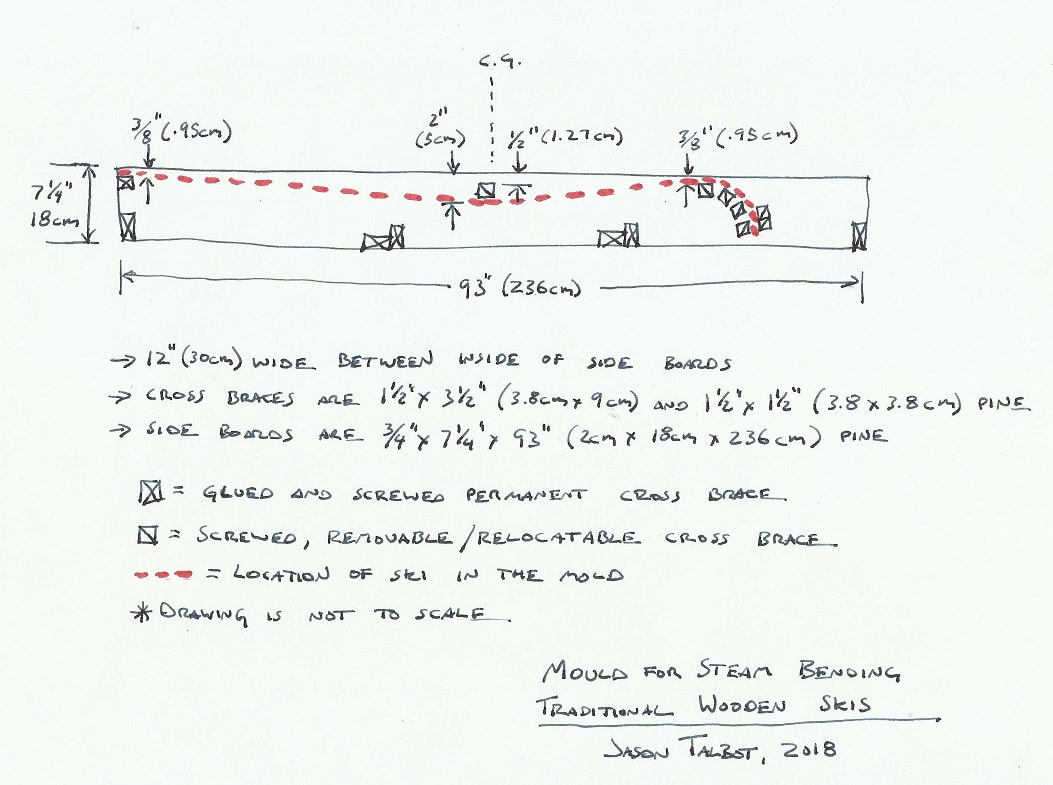
This is the design I have settled on for the mould that I will set the skis in after I have steamed them.
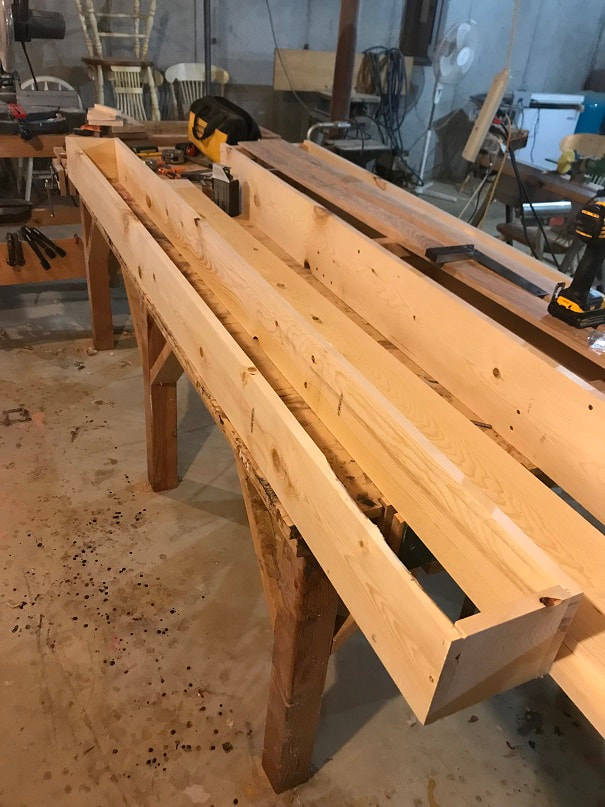
Step 1: Building the Form for Steam Bending Traditional Wooden Skis
First, I built the formwork that I will use to bend the skis to the curved final shape. I designed the frame to be adjustable so that I can build longer skis and skis of different camber and front-point-curve with this same mold.
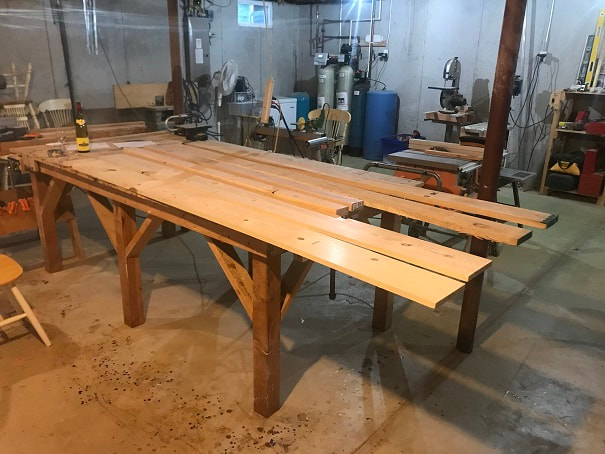
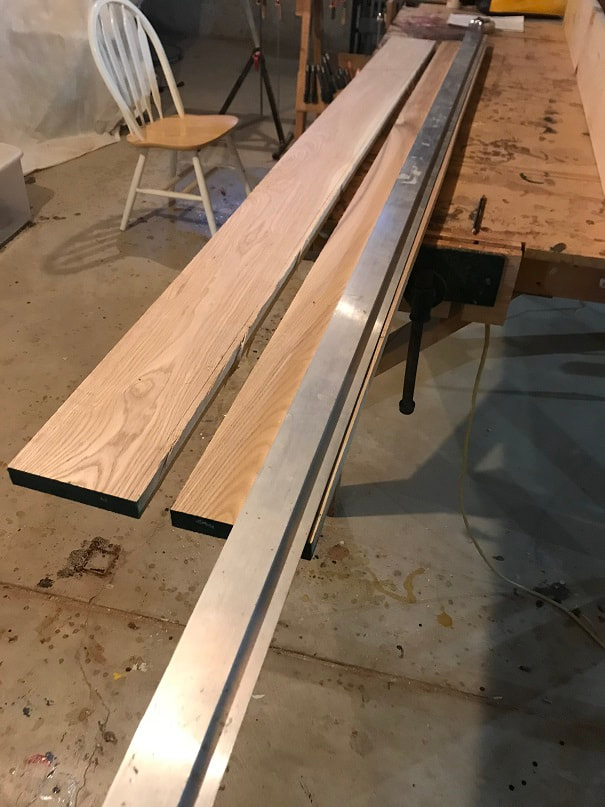
Raw materials: (2) 1x8x8' pine boards and (2) 2x4x6' pine boards for the form. The other two boards are the 4/4 rough sawn ash which I will use for the skis.
Gluing and screwing together the permanent support cross-braces. The cross braces are 12" long, so the inside width of the box is 12" which will be ample space to fit two skis at once.
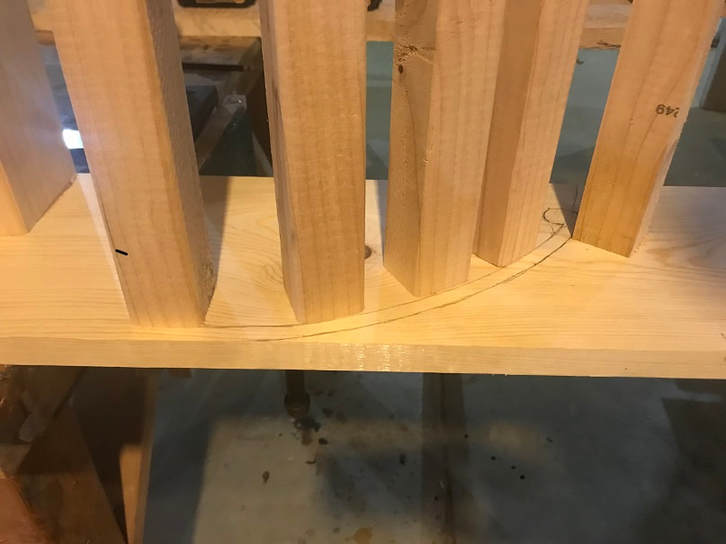
Next I hand drew the curve at the front tip of the ski. I drew it a bit steeper than what I want the finished ski to be, as there will likely be some bounce-back after the skis are removed from the mold. In this photo, the cross brace farthest to the right is the key brace to keep the ski tip from popping up out of the mold.
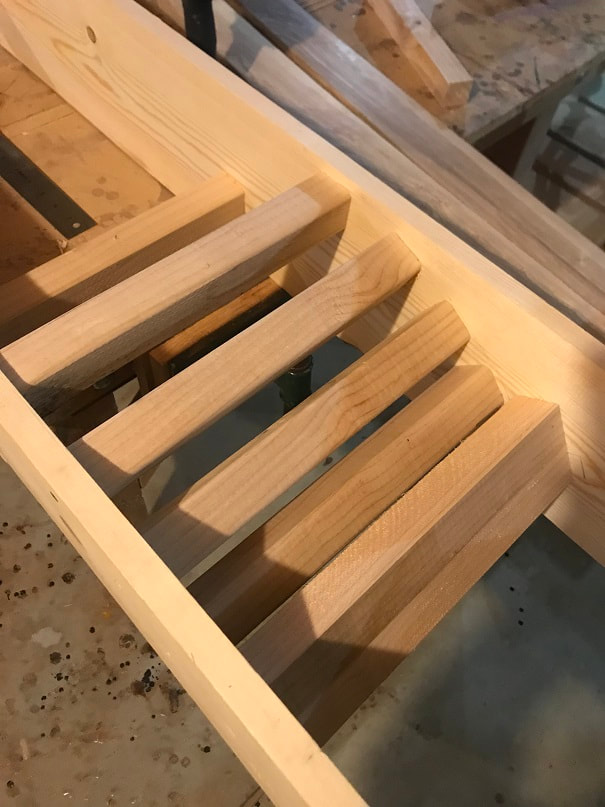
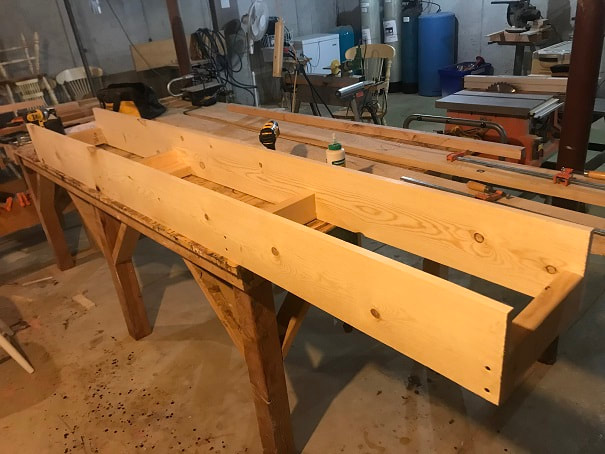
Here the tip curve pieces have been screwed in place. If I want to modify the shape later, I can unscrew and relocate these cross-braces.
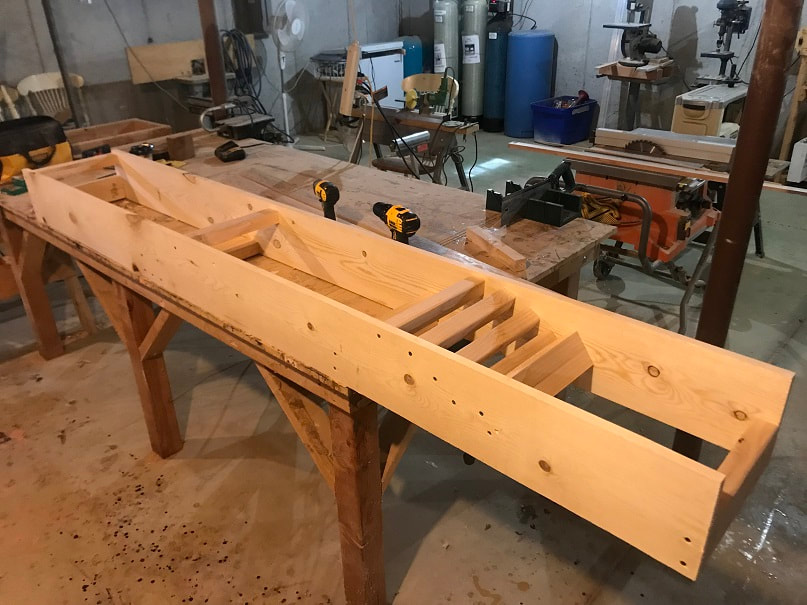
Completed form / mold for steam bending traditional wooden skis.
Step 2: Making a Template for the Shape of the Ski
I made a template using 1/4" (6.4mm) thick plywood. I think that by using a template I will have better consistency in shape of both skis. Also, I can reuse it in the future.
- I marked the length, and the width at the tip, tail and waist (middle).
- Drew the shape of the tip by hand
- Used a thin flexible wooden strip, that I would call a batten, to trace out the long curve on the sides of the ski.
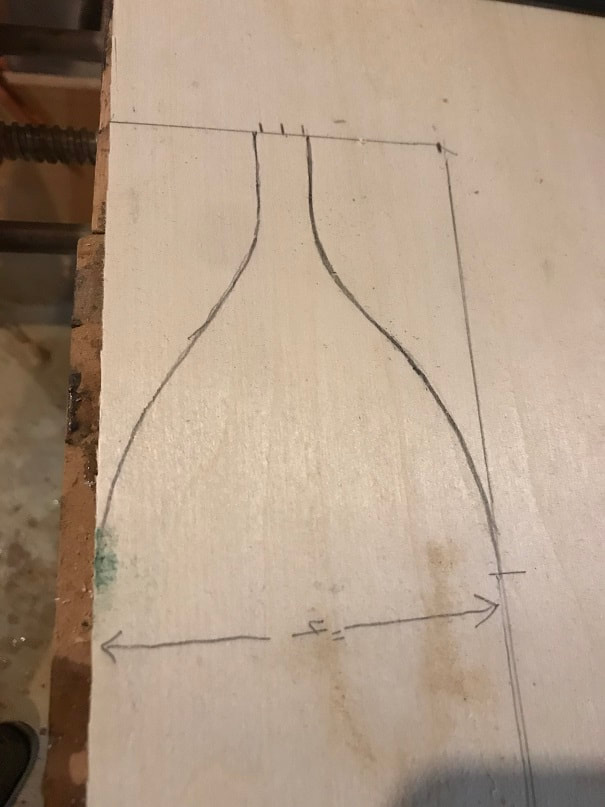
Hand drawn shape at the tip of the ski.
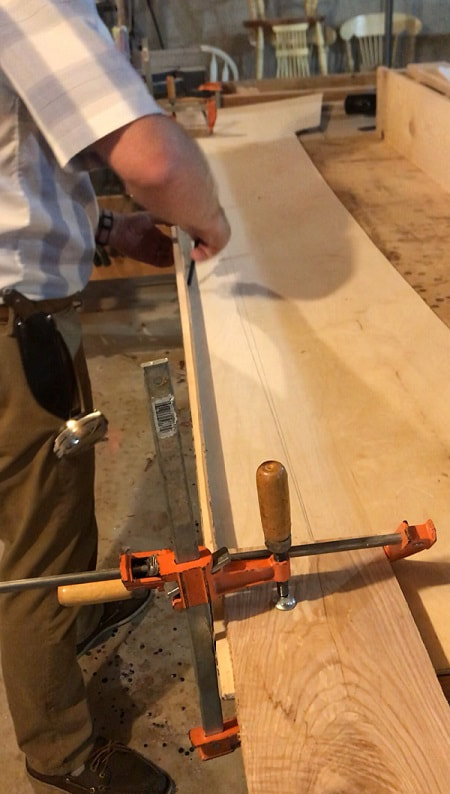
With the widths marked at both ends and in the middle, I clamped a flexible wooden batten in place at the ends and bent it to meet the correct width in the middle, then traced along the edge of the bent wooden batten.
Here's a video on using a batten to trace the long curve:
Step 3: Cut the shape of the ski from a square correctly sized piece of wood
Traditional skis in Norway were made from Ash, Elm, or Birch. Interestingly, in Norse Mythology Ash and Elm were the names of the first man and woman, as Adam and Eve are in Christianity. I will build my skis from Ash. I wanted quartersawn Ash, but I couldn't find any. Try to find air dried or lumber to work with rather than kiln dried, the former will bend, and retain the bend, better. The ski design and materials will be quite traditional, but I will use a semi-modern binding, and I will use modern tools to make the skis. I nice Swedish carving axe is a couple hundred bucks (carving axe is different than the typical hatchets/axes that we have), and I got this ash for $28, and I admit it will be quicker to use power tools for some tasks, so I am just going to use the tools I own (which will be a blend of power and hand tools) to make the skis. I may make another set using a carving axe in the future...
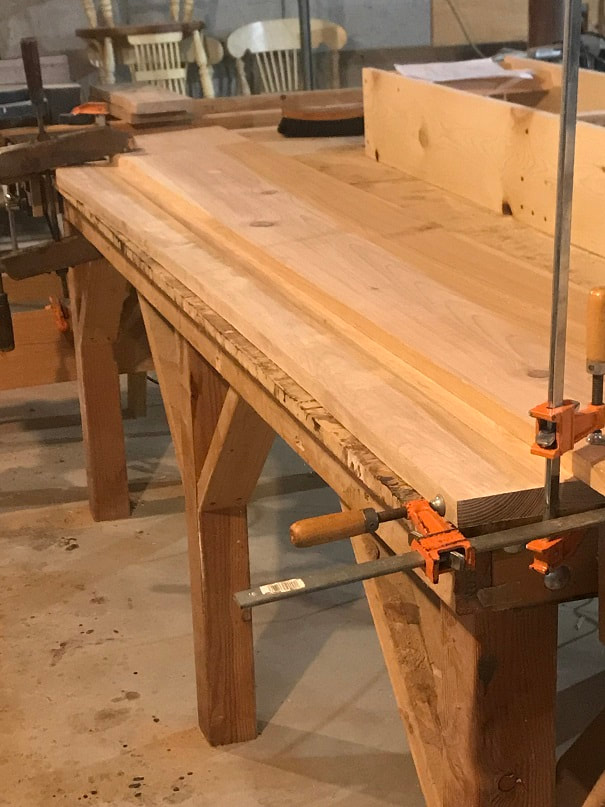
- I started with two pieces of rough-sawn ash 1.2" thick x 6" wide x 100" long. Rough sawn lumber is not uniform thickness, and is not straight, so it must be planed and trued up.
- First I used my power surface planer to create a uniform thickness with smooth top and bottom of the plank. The pieces are 1 1/16" thick (27mm)
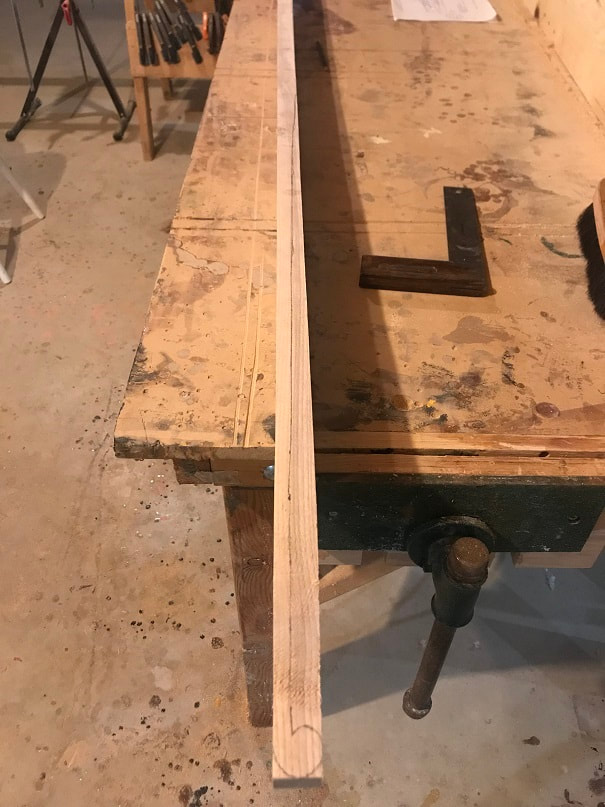
- Then I used a long straight edge to draw a straight line along the edge of the boards. I used a circular saw to cut along this line, thereby creating a straight edge on one edge of the board.
Here I am drawing a straight line along the edge of the plank. You can see the variation in straightness in the rough sawn plank. It is well dried and stable clear Ash lumber.
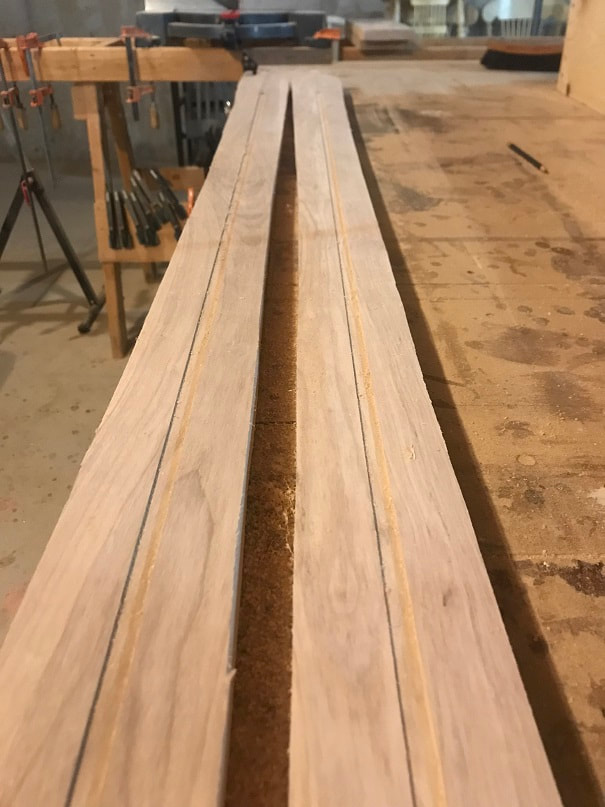
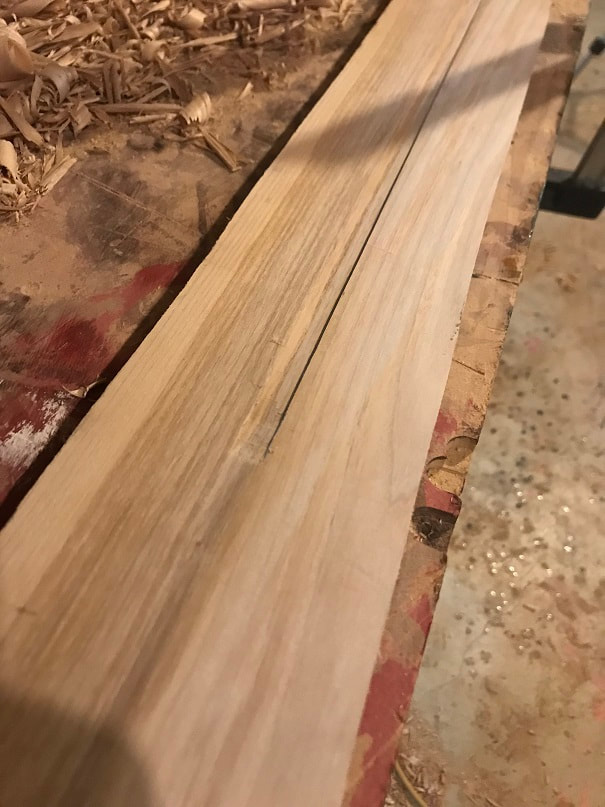
- Next, I used a table saw and cut the board to 4.5" wide, with the newly cut straight edge along the fence of the table saw. Then I flipped it over and made one final cut at 4" wide so that both edges were finish cut on the table saw.
- Then I cut it to length at 80". So I had two straight, square, pieces of Ash 1-1/16" x 4" x 80".
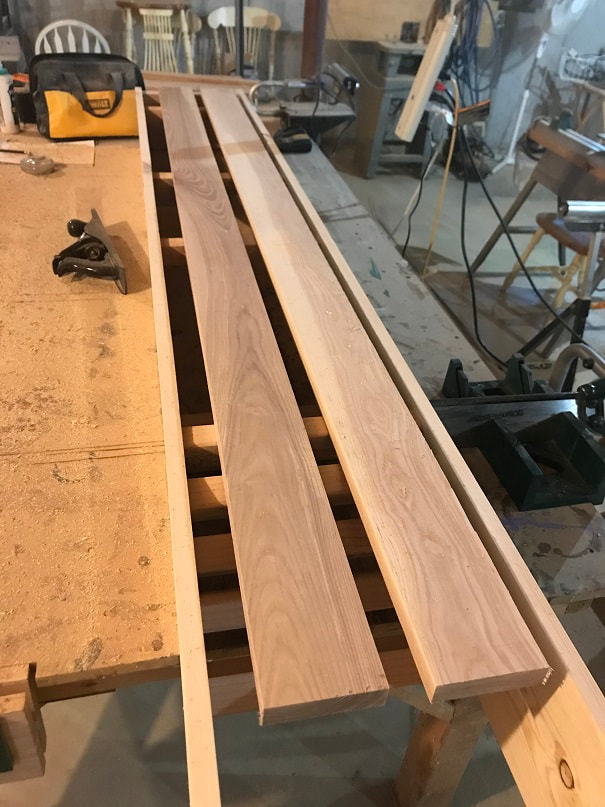
Finished Ash blanks for making traditional wooden skis.
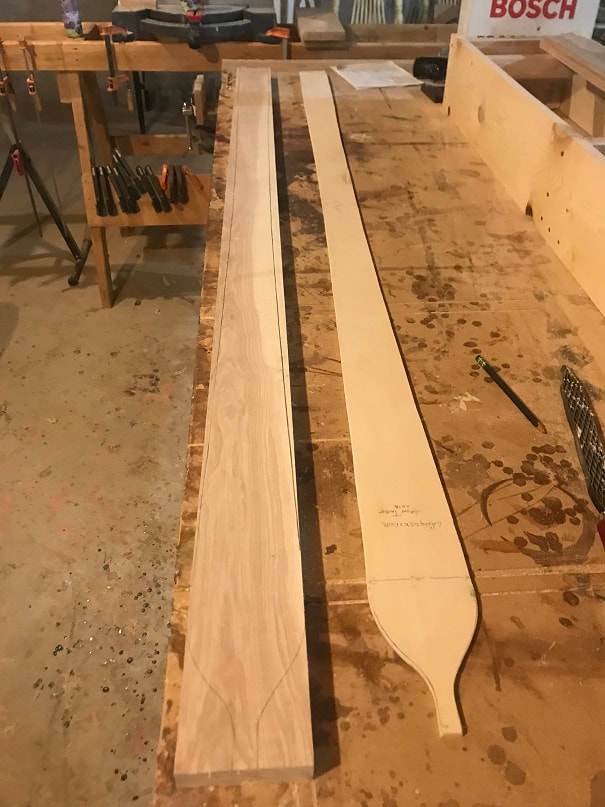
Then I used the template to trace the shape onto the Ash blanks.
Here is the first ski, cut to shape, but not with the tapers planed down yet.

I cut the shape using a saber saw with sharp new stout blade. Even with that, the blade was not able to hold vertical and it drifted at the bottom of the board vs the top of the board, so I cut a bit outside the line, and then used hand tools to square the edge and bring the shape up to the finished line. It would be best to use a band saw (or even better use a carving axe!)
Step 4: Sand Bottom and Cut Groove in the Bottom of the Skis
- Sanded bottoms with fine sandpaper on the belt sander; be careful as belt sanders are aggressive and can remove more than you want of you're not careful.
- I decided on a 3/8" wide x 1/16" deep groove for the skis. I chucked a 3/8" diameter, flat-bottom, router bit into my router, marked the centerline of the ski, set up a fence using a straight board, and cut in the groove. It starts 12" from the tip and finished 12" from the tail.
Here is a ski, bottom up, clamped down, with a straight fence clamped in position so that the router bit cuts right down the middle of the bottom of the ski.
3/8" wide x 1/16" deep grooves cut in the bottom of solid ash back country skis.
I used a 3/8" chisel to carve a tapered end the groove that I had cut with a router into the bottom of the ski.
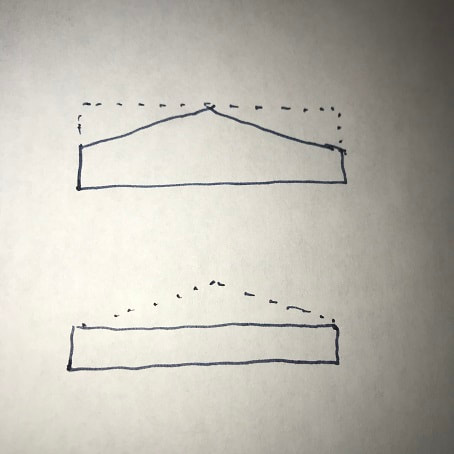
Step 5: Taper the Skis Down to 5/16" at the Tip and Tail
- First sketch out the taper on the side of the skis.
- Taper the ski with a plane on each edge, on a bevel, leaving a big ridge down the middle, then plan off the middle to achieve a flat top.
- It should be noted that the traditional method is to use a carving axe, which I do not own. A carving axe is beveled on one side only and would work great for shaping skis.....maybe I'll do it someday.
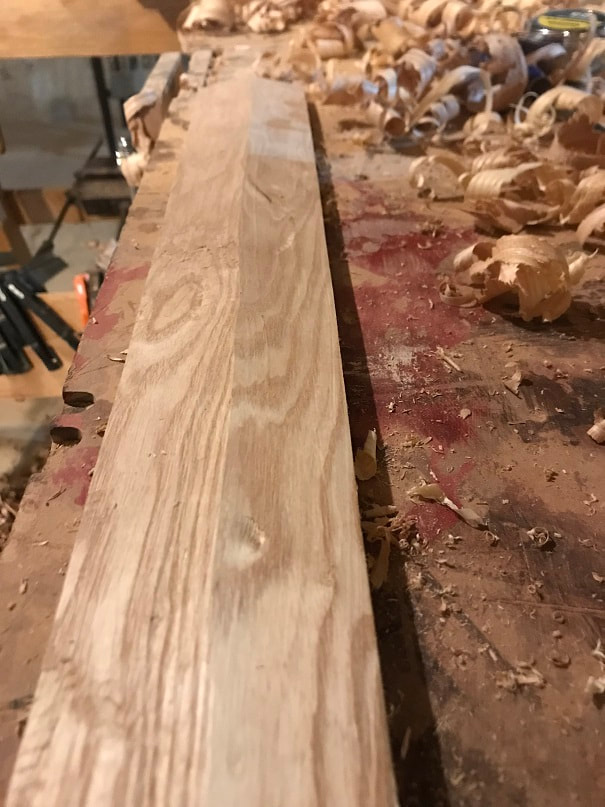
Taper, sketched onto side of ski.

First, I recommend making sure all your chisels and planes are razor sharp. I use a sharpening stone, and a fine sharpening stone, with oil, to sharpen my cutting blades. I sharpen them frequently and thereby avoid having to completely restore them from a blunt condition.
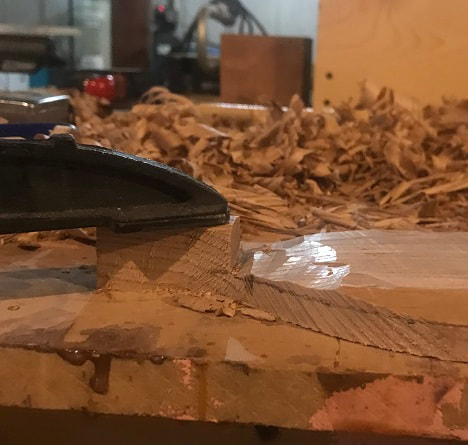
To plane the taper into the ski, I found it easiest to plane the corners off first, down to the finished thickness at the edge, and then next to plane the peak down to level.
Here is the planing in process. For planing off the peak, I found it useful at times to plan across the wood at 45deg, and at time right perpendicular across. Finish planing done parallel to the grain.
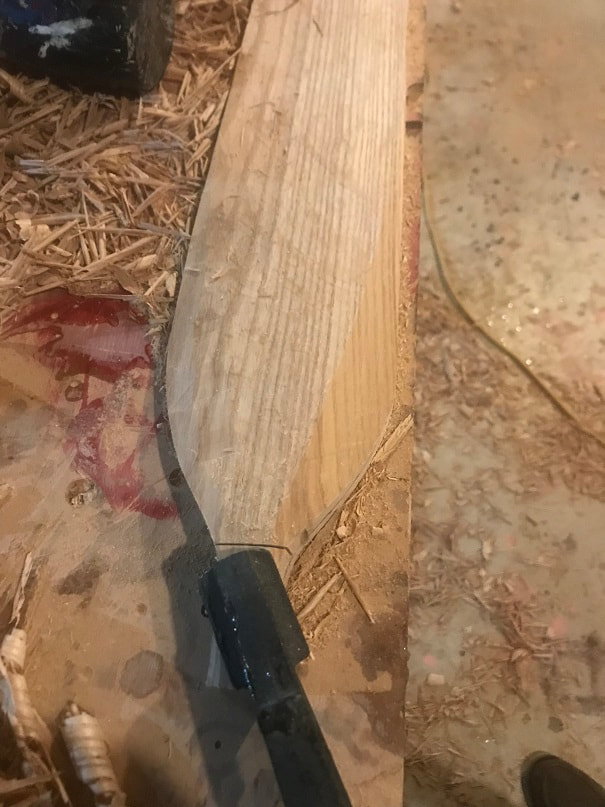
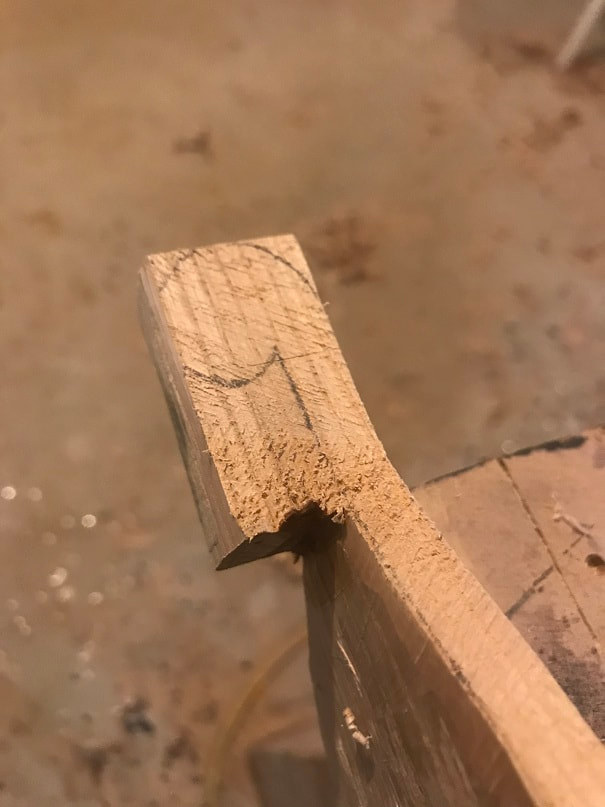
My skis will feature the traditional carved tip, called "the Ocean". This presents a challenge when tapering the front end of the ski, as one cant just plane right through the end of the ski. I reached a point where the tip was getting in the way of further planing, so I saw down just behind the tip and used a chisel to clear that area out.
Here is the area just behind the carved tip, with wood removed with a chisel. Now I will go back at it with the plane.
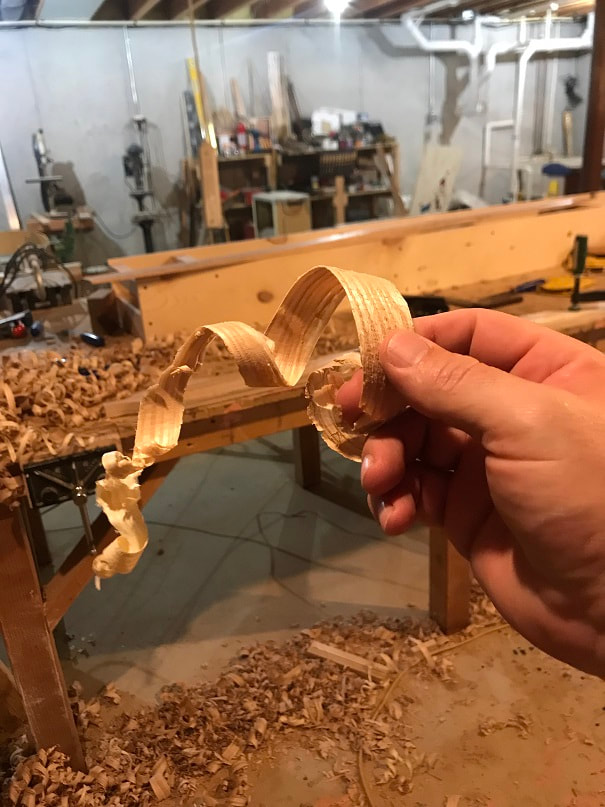
A nice curl of ash from the plane
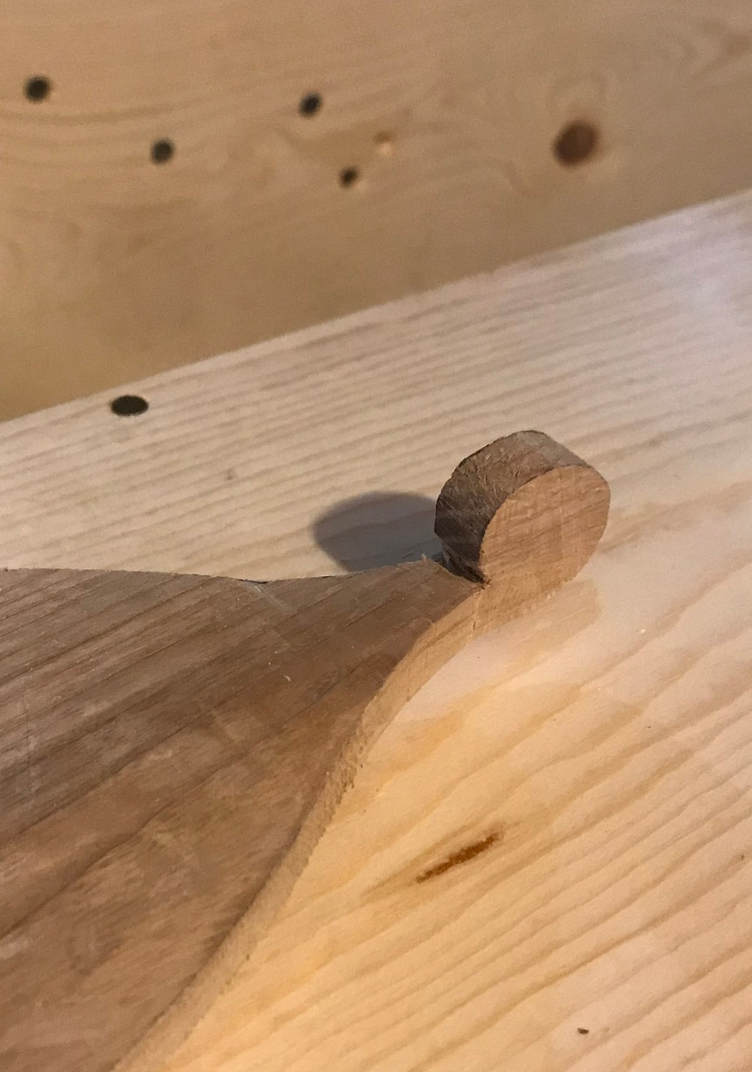
Step 6: Carving the Decorative Tip of the Ski (the Ocean)
The carved tip of the ski, called "the Ocean" of the ski by the Norse, can be personalized to extent of the imagination of the carver. I chose to go with a simple circular design like that shown in the painting above. With the ski planed down to thickness, I drew out the shape I wanted to carve and then sawed and carved it to shape. DESIGN NOTE: I have been advised by some people that the decorated "ocean" should be carved on the down-facing side of the tip of the ski, not facing up as I did on this pair of skis.
Tip shape sketched onto the wood.
Video of carving the ski tip:
Looking at pictures of old skis, it seemed that the carved ocean at the tip was more elegant and narrower (side to side thickness) so I narrowed mine up a bit, and I am happy with the result.
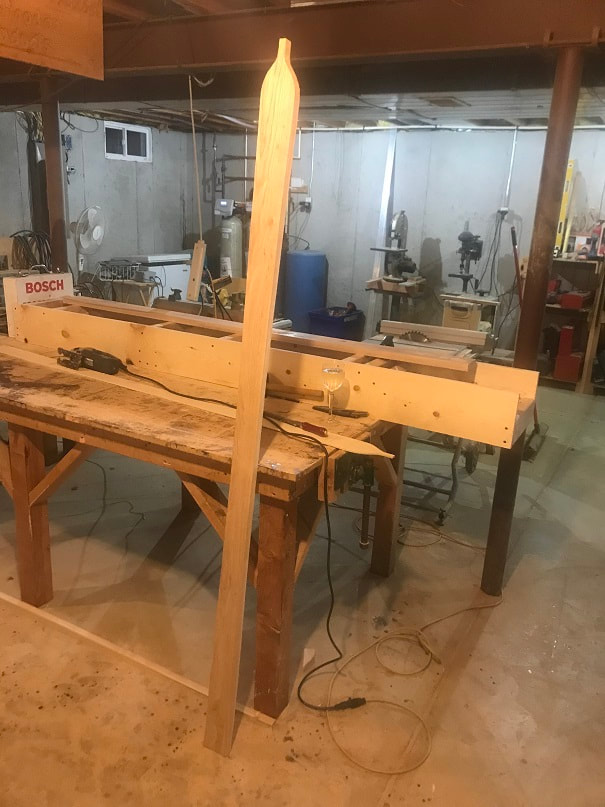
Finished carved ski tip.
Step 7: Using a Scraper to Finish Smooth the Skis
I used a scraper to scrape the ski tops and bottoms smooth.
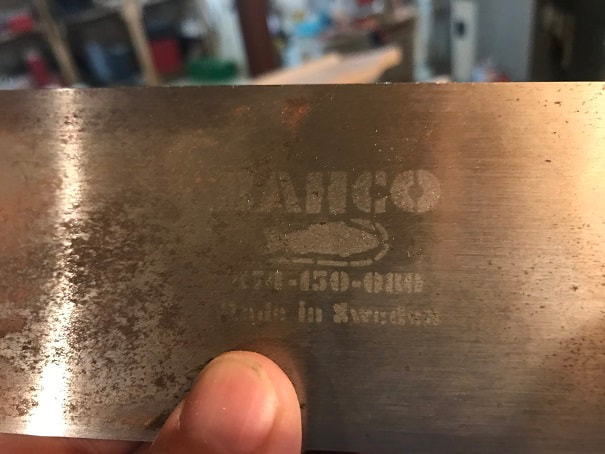
Mine is a BAHCO scraper from Sweden.
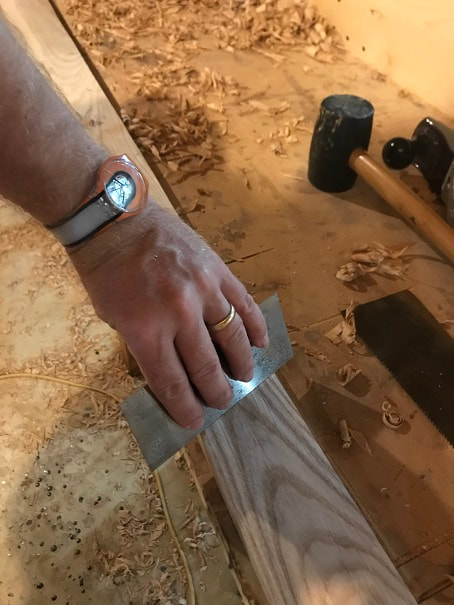
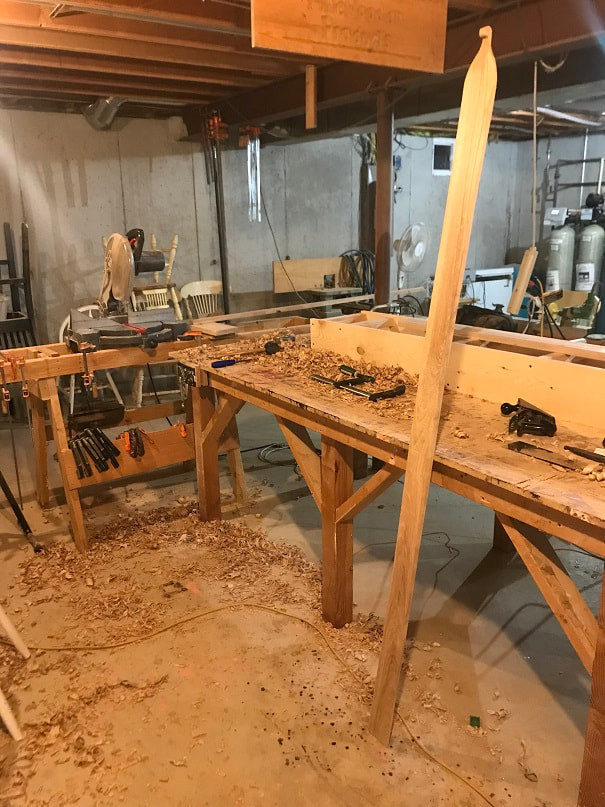
Here is the finish carved ski ready for steam bending. (this photo was from before I carved the ocean narrower)
Step 8: Building a Steam Box For Steam Bending the Skis
Here is a sketch of the steam box that I built. I tried to use the PVC steam tube that I used when building my boat, but the skis were too wide to fit in it, so I built this box.
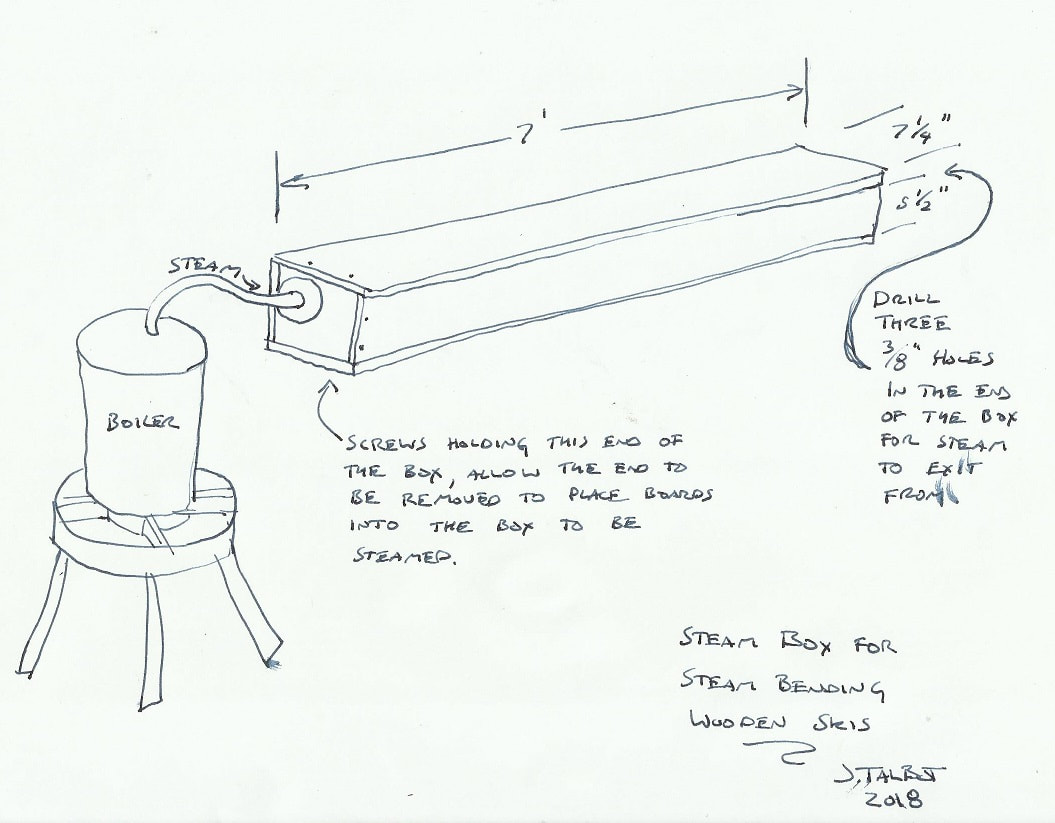
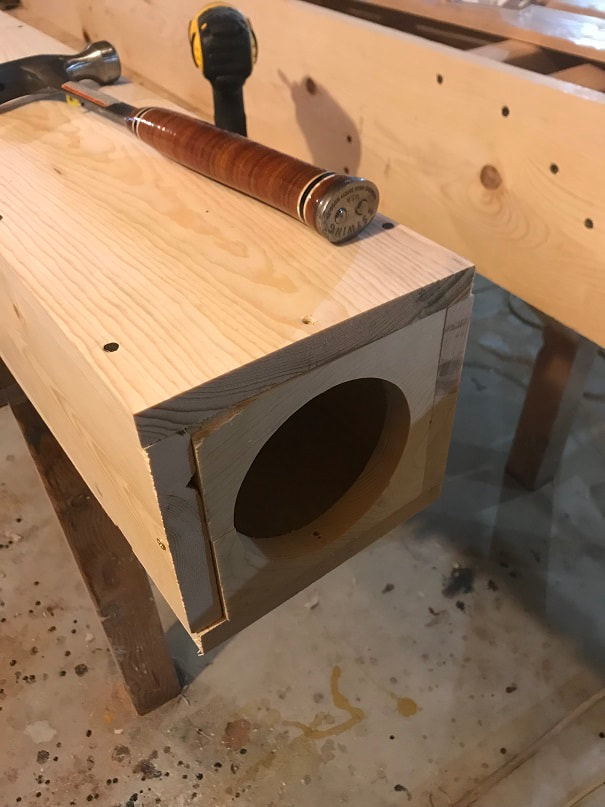
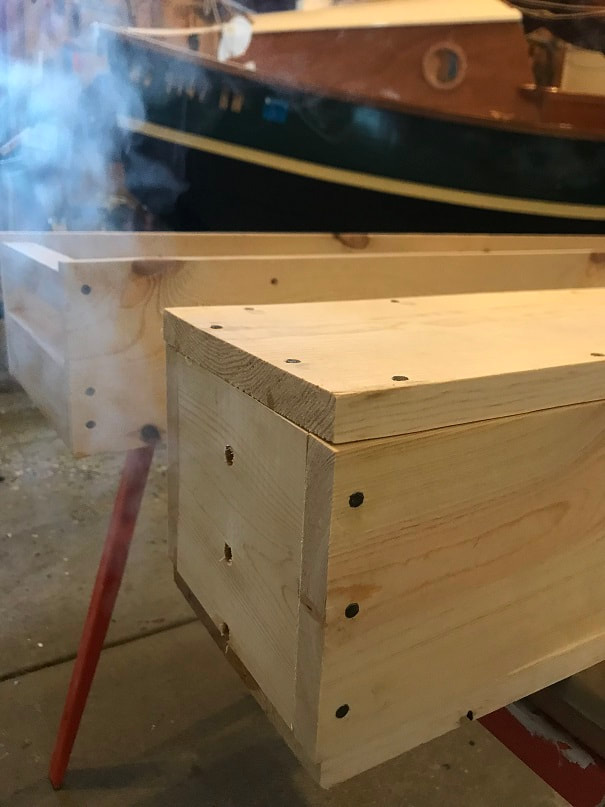
I nailed the top and bottom on with nails spaced at 6". Here you can see the hole at the end that my steam fitting will fit into. This end is removable with 4 screws. The steam enters the box through this end.
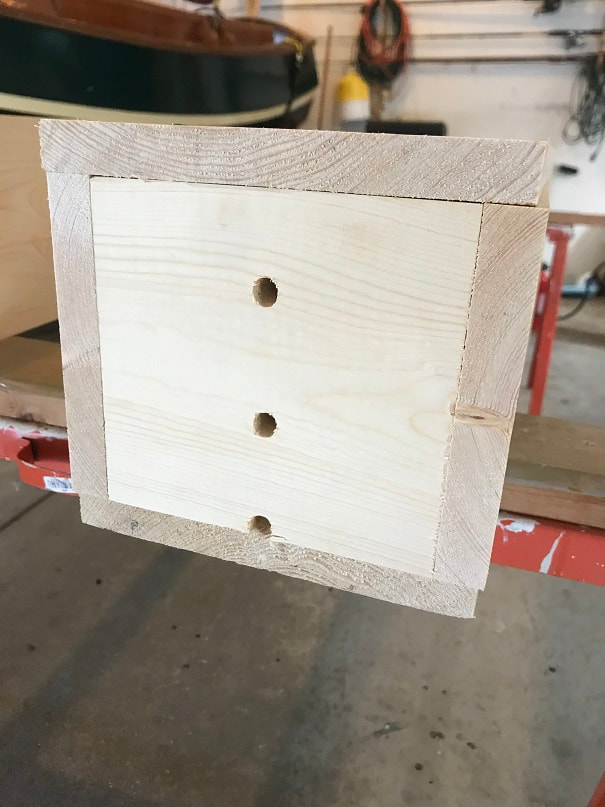
The steam leaves through this end. Three holes are drilled for the stream to exit from. The bottom hole is drilled right at the floor level of the box in order to allow any water that condenses in the box to drain out.
- SAFETY NOTE: You follow my actions and plans at your own risk! I am not a professional wood steamer, and am not a professional steam box designer. Steam is dangerous; it can build up extreme pressures at burning temperatures, and an improperly built steambox could build too much pressure and a component of it could explode under pressure. Do not force steam into an enclosure without a way for the steam to safely exit the enclosure. Do not use materials in areas where they could start on fire or melt. If you are using fire to heat the water, do it in a safe place where you wont start other nearby things on fire; probably best to do this outside. Have a hose or fire extinguisher handy. Use materials that can withstand the pressure and temperature. Do not open up pots, containers, or boxes that are under steam pressure.
Step 9: Steam Bending Traditional Wooden Skis
In the steam box, the skis will rest on little blocks as shown here to allow steam to circulate around the skis.
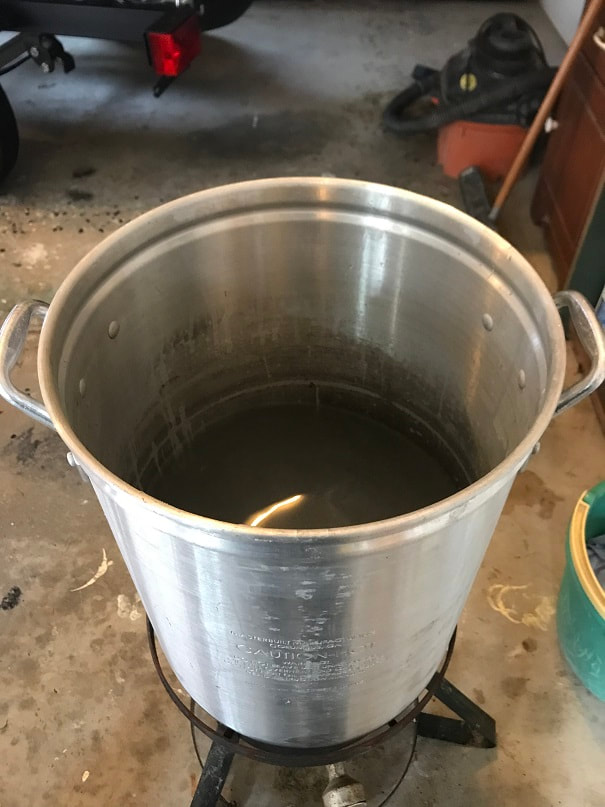
For steaming I use a large aluminum pot over a propane burner. It is about a 7 gallon pot, and I filled it half full with water, which was about half gone after an hour and a half of boiling.
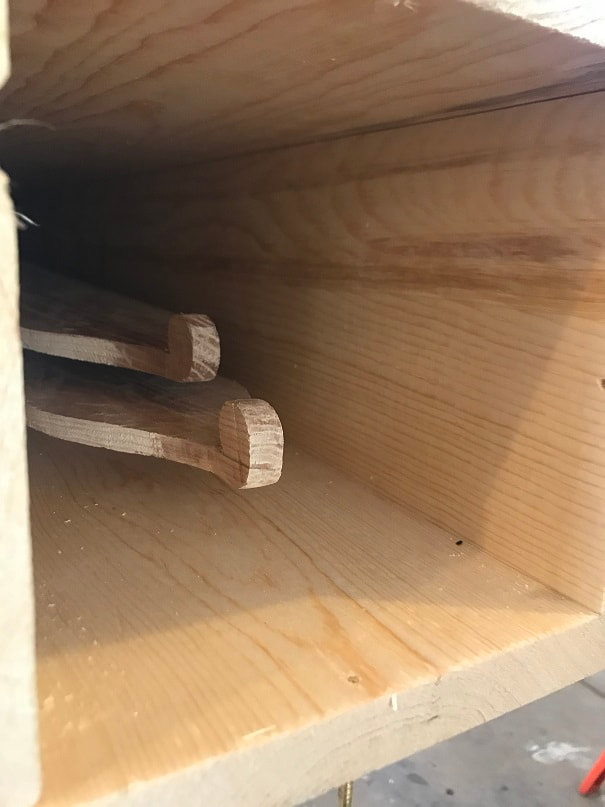
Here are the skis carefully placed on the spacer blocks in the steam box.
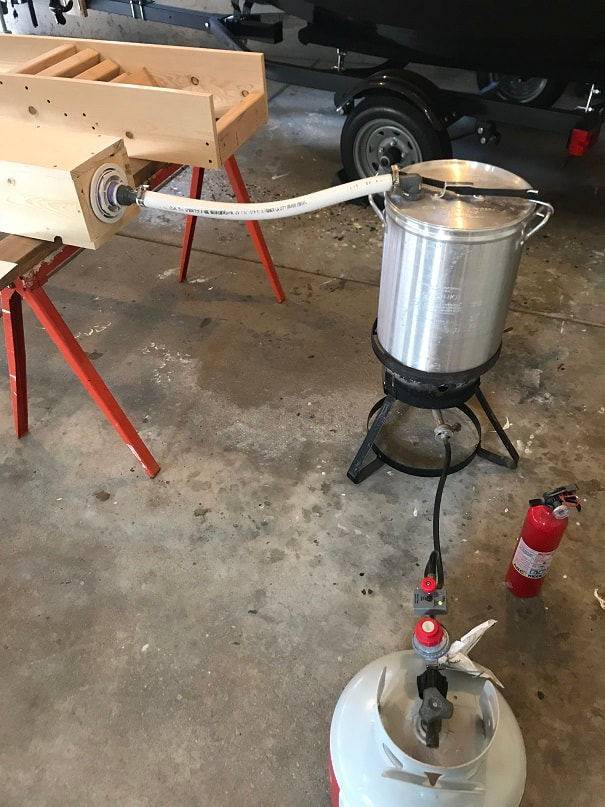
At this stage I screwed the end of the box in place and connected the steam hose.
Next I secured the boiler top and fired up the boiler. I steamed the skis for one and a half hours.
Next I secured the boiler top and fired up the boiler. I steamed the skis for one and a half hours.
Have a fire extinguisher at the ready for safety. Once the boiler reached a boil I added spring clamps on the lid to keep it down tight.
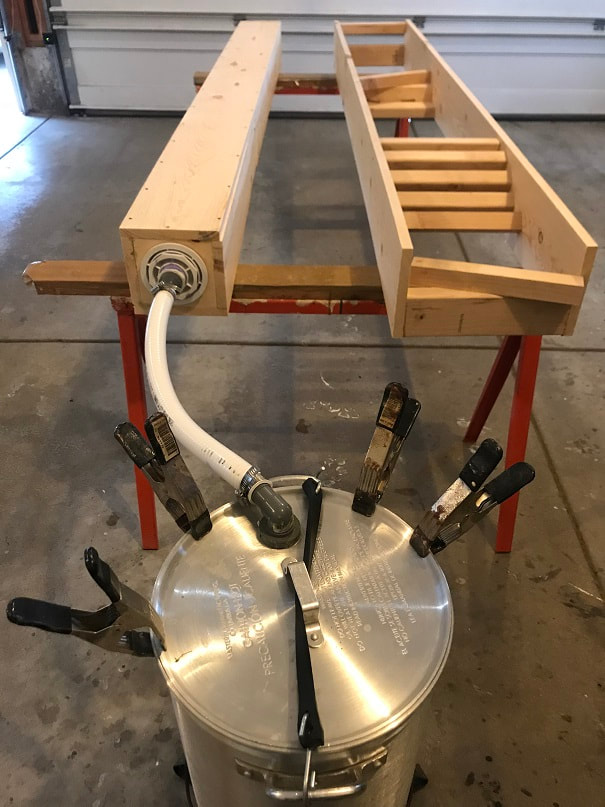
The skis are steaming in the box. The garage door to the left is open for ventilation. The mould is nearby ready to accept the steamed skis.
Steam exiting the far end of the box. The box is at a very slight angle, with the exit end slightly lower than the steam entry end, which allows condensed water to run down and drain our the lower hole in the exit end of the box.
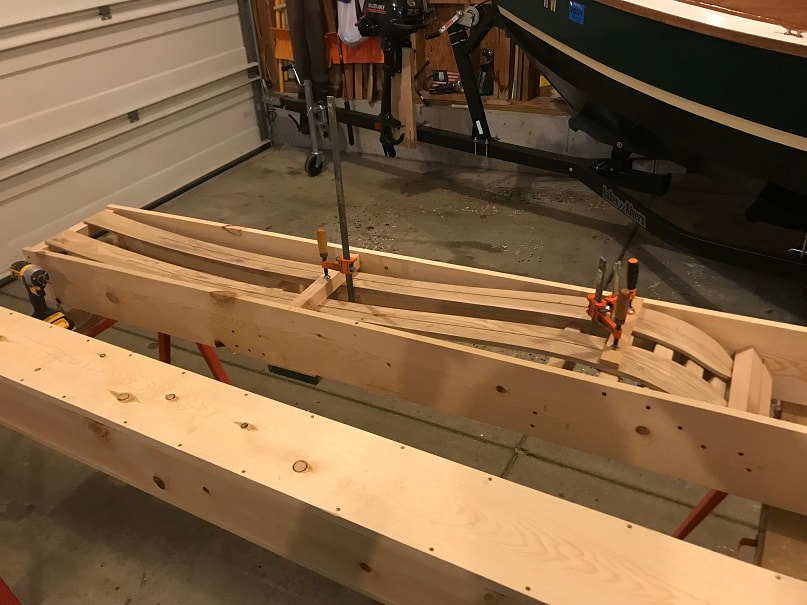
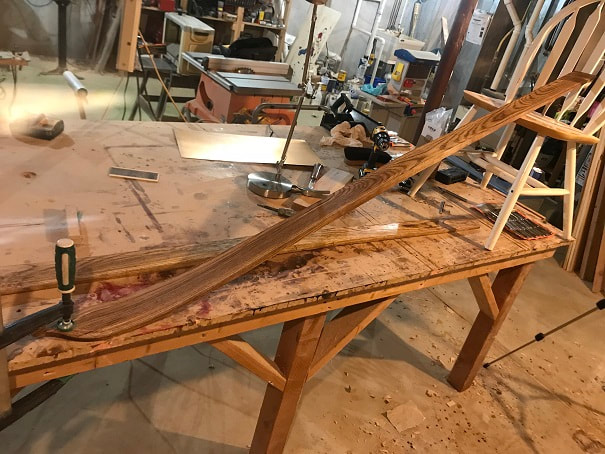
After an hour and a half I put on thick leather gloves (the skis are way to hot to touch), and removed the skis from the box. I quickly set them in the mould as shown, and everything went well. I will leave them in the mould for a couple days.
Step 10; Remove from Mould and Rescrape
Remove the skis from the mould after 3 days. The steam will have likely raised the grain of the wood, making the surface a bit rough again. I rescraped the tops, bottoms, and sides with the flat scraper.
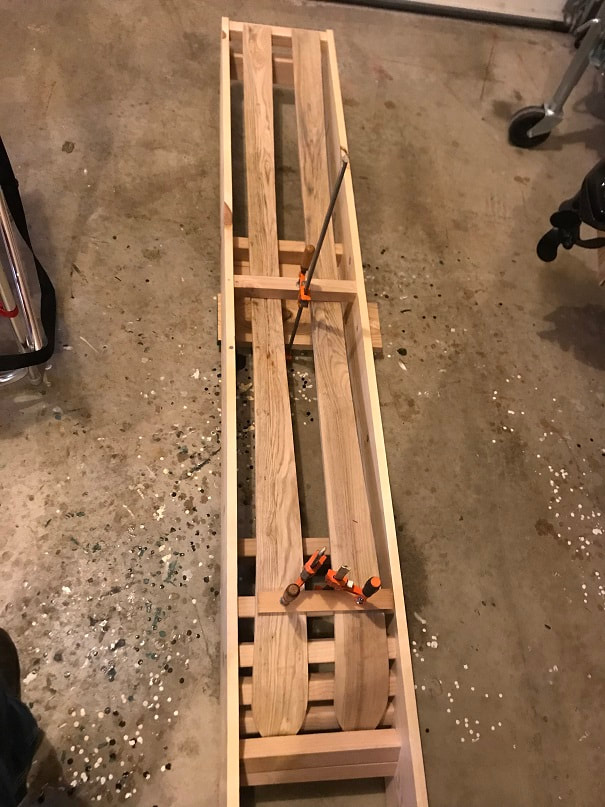
Here are the skis after being removed from the mould.
Step 11: Pine Tar The Skis
The traditional method for water-proofing and preserving wooden skis, was to treat them with pine tar; so that is what I will do also. In short, the pine tar is spread over the ski, then heated up to the boiling point, soaking itself into the ski, and then any residual surface pine tar is quickly wiped off.
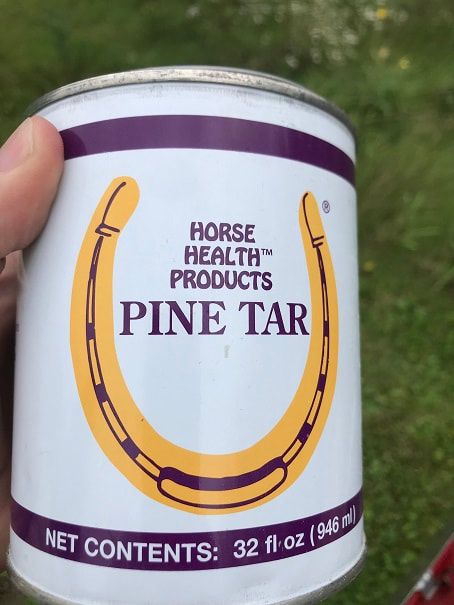
Pine tar from local farm store. Pine tar is used on horse hooves for something, I think, not sure, but I do know that this is 100% pine tar.
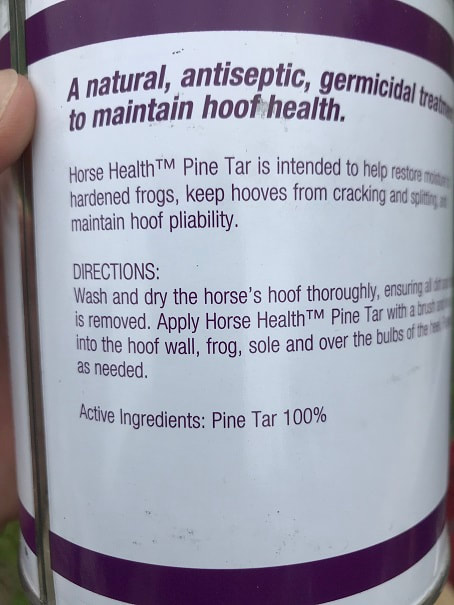
100% pine tar; I used this to treat my wooden skis.
What is pine tar? Here is a link to information on how it is made:
http://www.survival-manual.com/pine-tar.php
https://www.youtube.com/watch?v=PNf2Kre7ylI
http://www.survival-manual.com/pine-tar.php
https://www.youtube.com/watch?v=PNf2Kre7ylI
This is a potentially messy job best done outside or in the garage. Its late on September 28th and it in the low 50s and I set up saw horses to do this work outside.
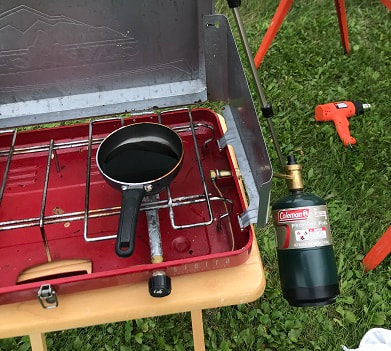
I have a small non-stick pan for workshop purposes, and I used it to liquify the pine tar. The pine tar is a thick, sticky, paste, which must be heated in order to make it liquid enough to brush onto the wood. Heat it just enough to melt it, then brush it on the ski.
Once the pine tar is liquid, use a chip brush to spread it over the ski. Some folks do a small bit at a time; I coated the entire top and sides of the ski at once.
Then use a flame-torch or a heat gun to heat the pine tar that has been applied to the ski. The tar will boil and soak into the wood. Work in 6" (15cm) sections heating and boiling the tar into the wood, and then wiping that section clean with a cotton rag. Work your way down the ski in this fashion. I did the tops and then each side. Then I flipped the ski and did the bottom. You will need to wipe off drips that drip from top-to-side and from bottom-to-side, as you go.
Then use a flame-torch or a heat gun to heat the pine tar that has been applied to the ski. The tar will boil and soak into the wood. Work in 6" (15cm) sections heating and boiling the tar into the wood, and then wiping that section clean with a cotton rag. Work your way down the ski in this fashion. I did the tops and then each side. Then I flipped the ski and did the bottom. You will need to wipe off drips that drip from top-to-side and from bottom-to-side, as you go.
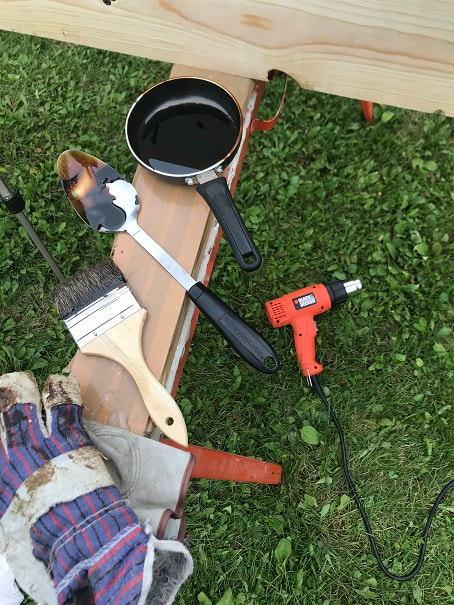
Tools for applying pine tar to skis. brush, gloves, heat-gun (or propane torch), pot to heat the pine tar in, and a bunch of clean cotton rags.
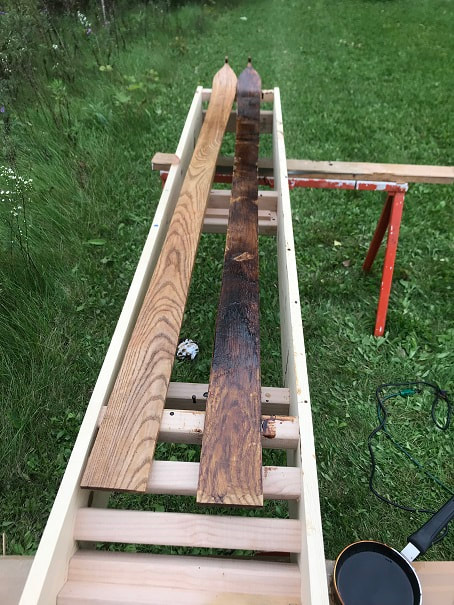
The ski on the left has had the pine tar applied and rubbed off, the ski on the right has had the pine tar applied but not heated and rubbed off.
Here are the skis, flipped over, ready to tar the bottoms.
At the end of the process, be sure to rub the pine tar off with a clean cloth so that no more comes off.
Step 12: Decorating the Ski Tops
I liked the look of traditional Scandinavian skis that had a pattern of parallel lines carved (or I would say scribed) into them. It was a quick fun project to make the 3 scribe tools below, from left over Ash from the skis. I drew out the distance from the edge that I wanted each scribed line, and set a nail at that distance in the tool. So, there is one scribe tool for each line on the ski. I also did not want to wear out my mortise gauge, so that's another reason I made these.
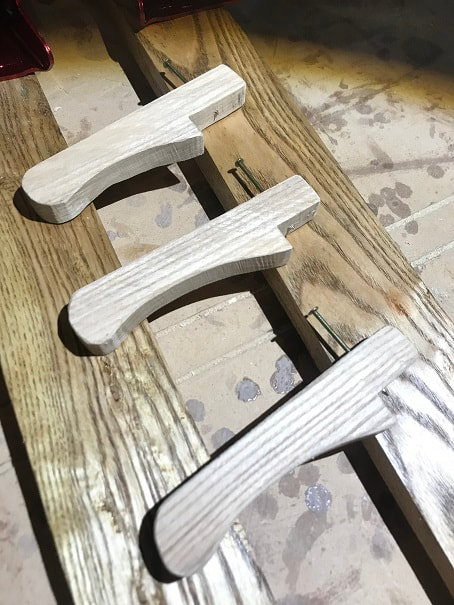
I hand drew the tool shape, cut them out, and sanded all the edges round so that they will not scrape or ding the ski surface.
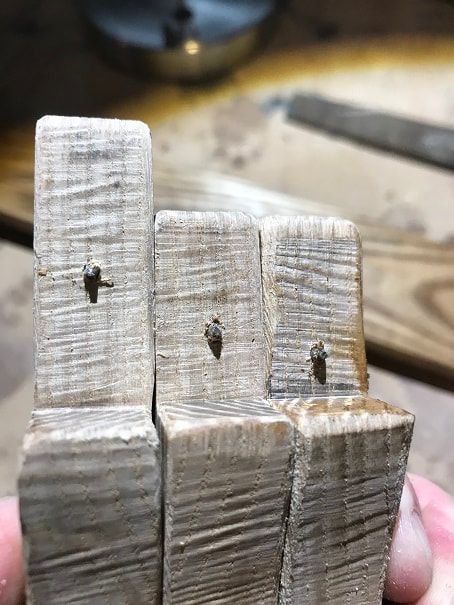
Here you can see that each will make a scribe line at a different distance from the edge of the ski. The steel nail point made too narrow a line, so I filed the points to get a wider scribe line.

I marked them 1, 2, 3 (outside line, middle line, inside line) and drilled holes in the handles so that I can tie them all together with a twine lanyard when I'm done (so that they don't go missing).
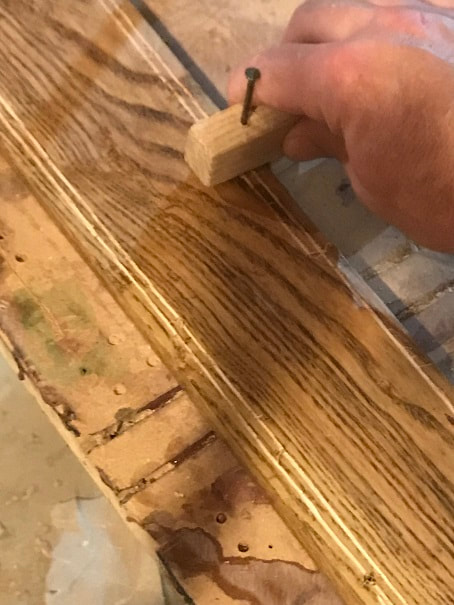
Scribing the middle line into the ski top. The tool must be held firmly to keep the point from drifting with the grain. Hold the tool fence-edge firming against the edge of the ski. Don't push too hard down and over gouge the ski.
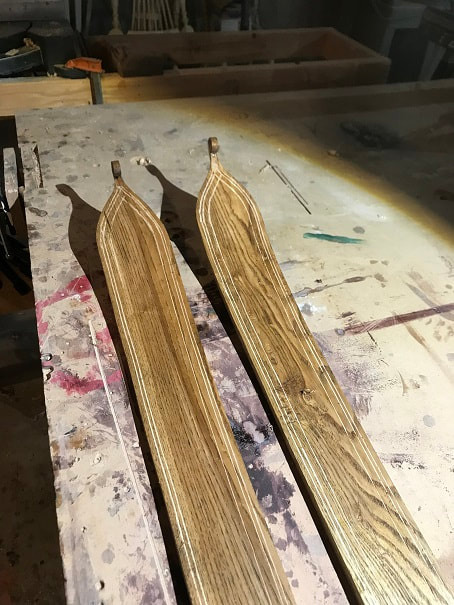
All three lines carved into the ski top.
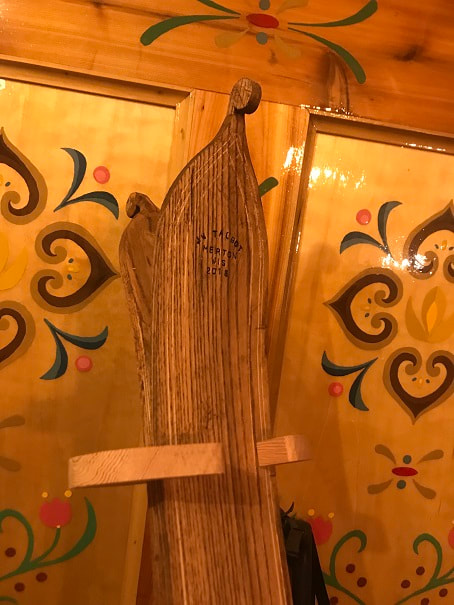
As I have seen on old classic skis, I decided to mark them with some details on the maker, location, and date. I did so with letter punches.
I wanted the letters to be at the tip of the ski, so to ensure that there was a solid surface to pound the stamps on, I tilted the ski up so that the tip was parallel with the table.
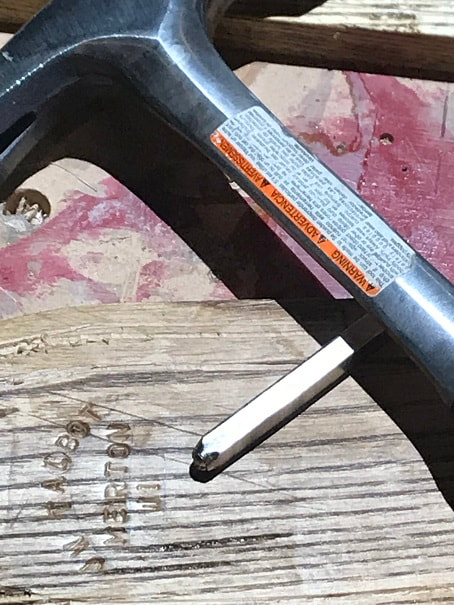
That is a small hardened steel letter stamp, which can be pounded into wood or metal.
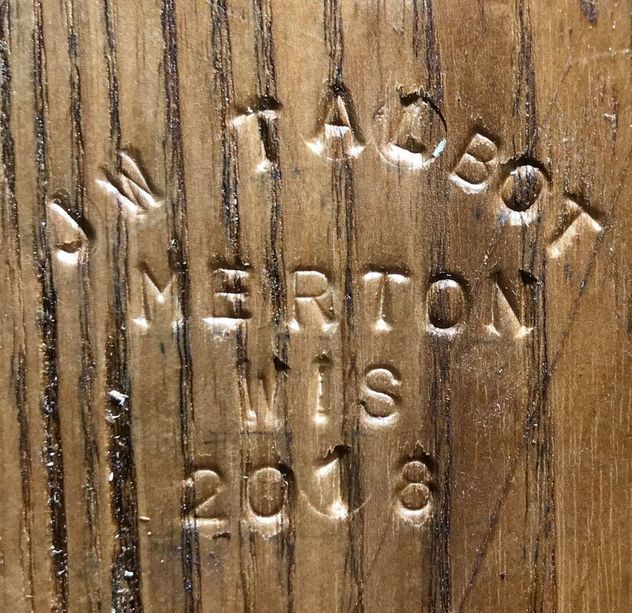
My lettering finished. I pounded the "A" and the "L" too hard and the entire circular face of the die made an imprint on the wood. All told, I am still happy with the outcome.
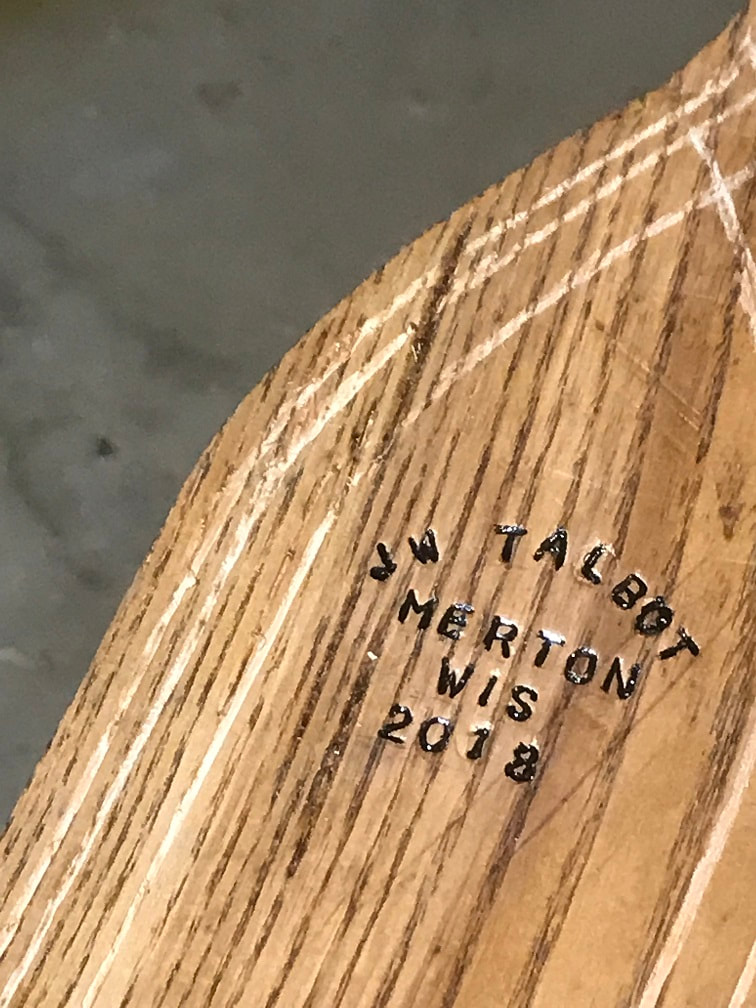
I liked the stamped letter, but I wanted more contrast so I used a very fine paint brush to apply black enamel to the letters.
Step 13: Mounting Binding On Traditional Wooden Skis
As seen in some of the links above, the most antique bindings used by the Scandinavians, were made of twisted birch shoots. I selected Voile HD Mountaineer 3 Pin Bindings for my skis.
First , I wanted to understand where on cross country skis the bindings are located: at the center of gravity? at the middle of the total length? at the middle of the length that actually touches the ground not including the curved tip?
So I did some analysis of my 1980s vintage modern composite material cross country skis. My findings are in the graphic below.
So I did some analysis of my 1980s vintage modern composite material cross country skis. My findings are in the graphic below.
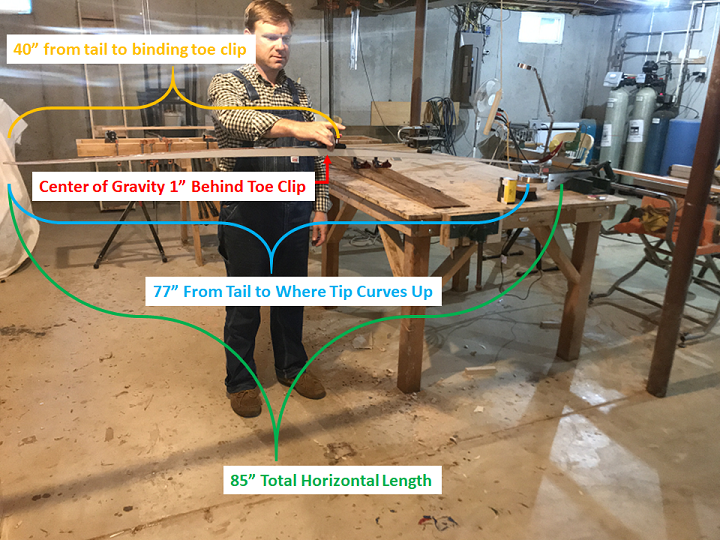
The pivot point, the toe clip of the binding, on this ski is located slightly forward of the center of gravity. If you raise your foot, the ski behind the clip will be slightly heavier so the tip of the ski will tip up. I think this makes sense, as it will help tip the ski up if you need to raise the ski tip over an obstruction in front of you when skiing.
So, with that, I needed to find the center of gravity of my skis. I did so by picking them up until I found the exact spot where they balanced level. I marked this spot with a pencil.
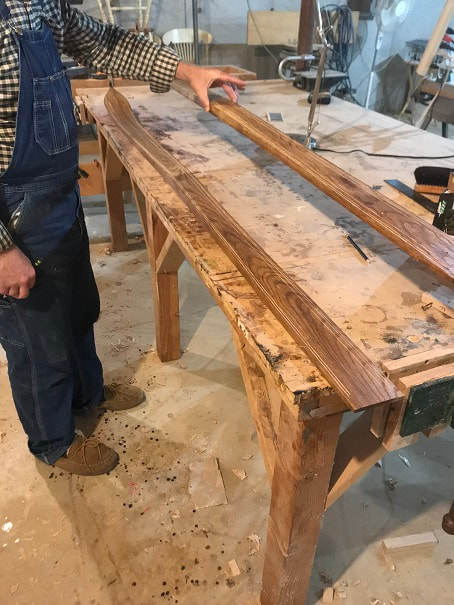
In this photo you can see the ski is balanced and horizontal. I am lifting it from the center-of-gravity.
I decided to mount the 3-pin location of the binding at a position 3/4" (19mm) forward of the center of gravity.
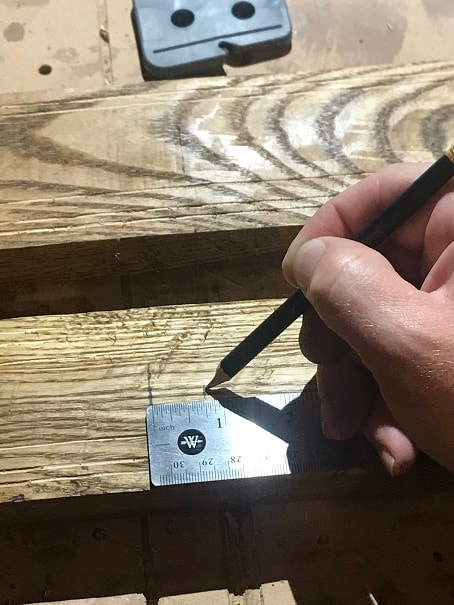
The long line to the left in the photo is the center of gravity of the ski. Here I am marking the location where the 3-pins will be located = 3/4" (19mm) forward of the center of gravity.

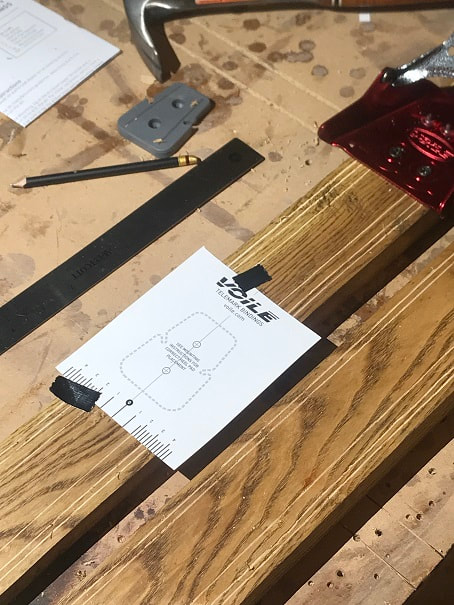
This is the Voile template. I have cut out the diamond shaped opening in the template with a razor blade. I measured and centered the template and then taped it in place. Then I used a sharp punch to mark the binding hole locations on the ski.
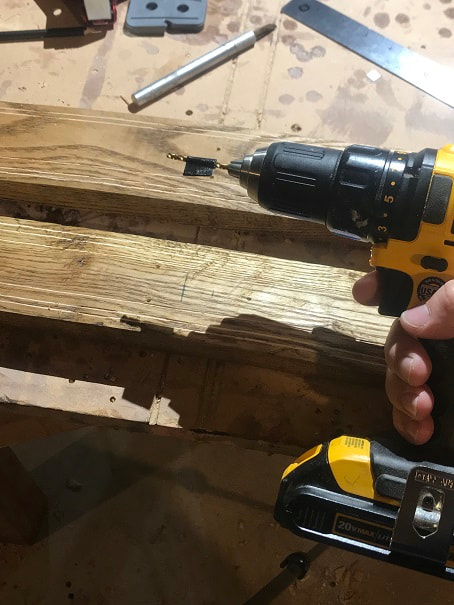
9/64" drill bit. You will want to be very careful not to drill the hole too deep. It would be especially unfortunate to drill the hole all the way through the bottom of your ski. I used a piece of tape on the drill bit to mark the exact depth needed for the screw that was provided by Voile.
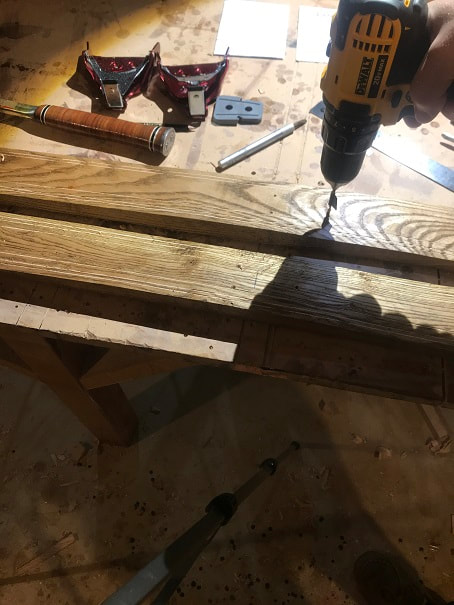
Then drill the mounting holes carefully.
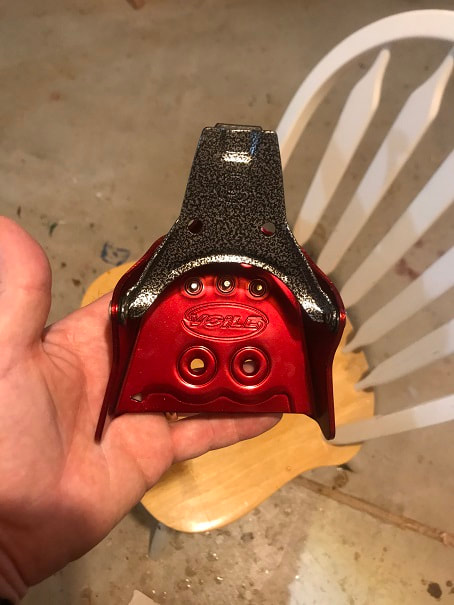
There is a different LEFT FOOT and RIGHT FOOT Voile HD Mountaineer 3 Pin Binding. The shape of the binding can be seen when you look at it from above, and it is clear which is right and left based on foot shape. The binding here is the left foot binding.
After drilling the holes, I mixed 2-part marine epoxy and filled the holes with the epoxy. This is a viscous epoxy that will fill the wood fibers and seal the holes to protect them from water intrusion.
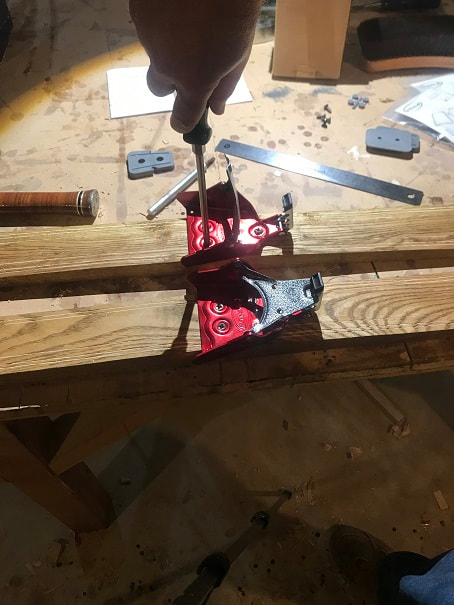
After filling the holes with epoxy I secured the bindings with the Posi Drive screws from Voile. I used a #3 Philips screwdriver which bit the screw very well. I was not going to go buy a posi drive screw driver, and turned out I did not need one. I tightened the screws very tight, but did not strip them.
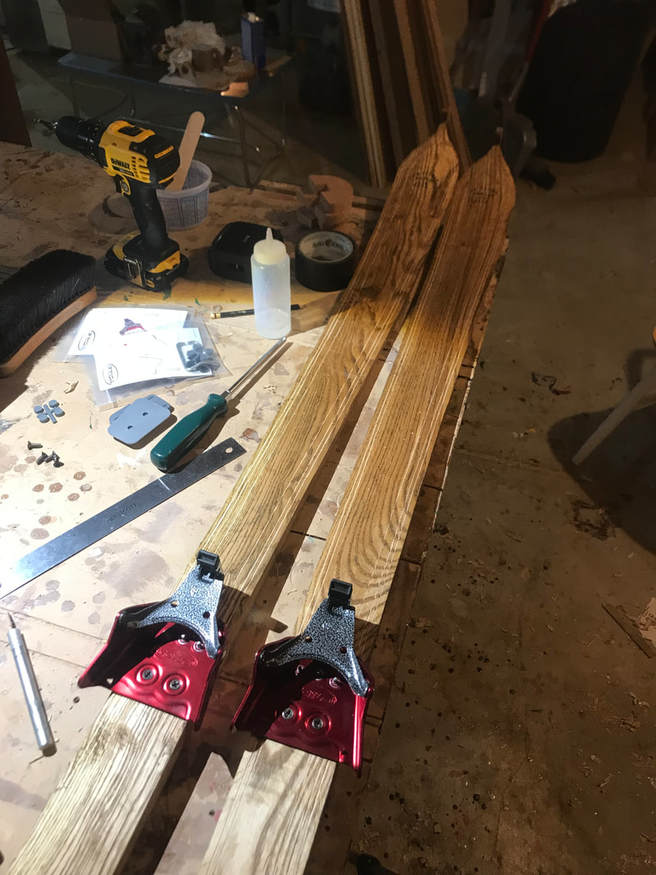
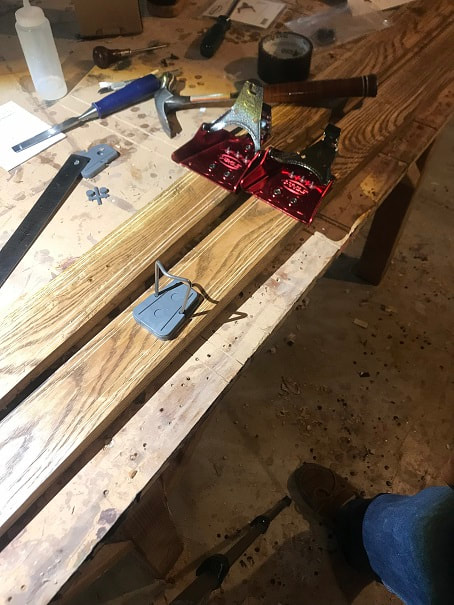
Here are the Voile HD Mountaineer toe bindings mounted on solid wood skis.
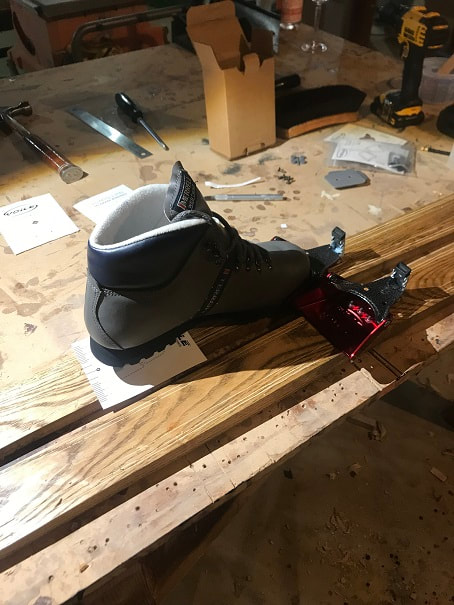
With the toe binding mounted, clip your boot into it so that you can locate the proper position of the heel plate for your particular binding and boot. Here you can see the template for the toe plate under my boot.
As with the toe-piece, tape the template in place and mark the hole locations with a punch.
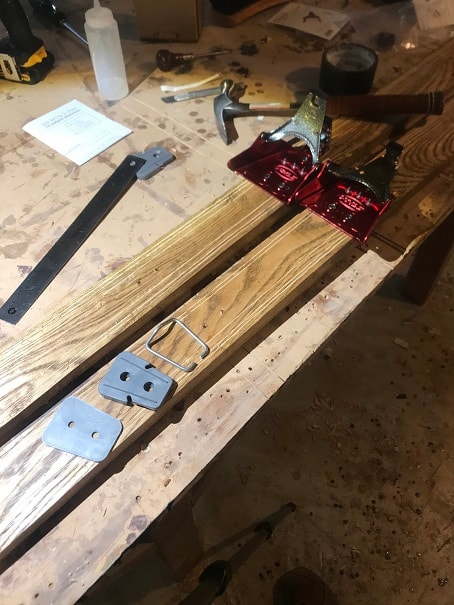
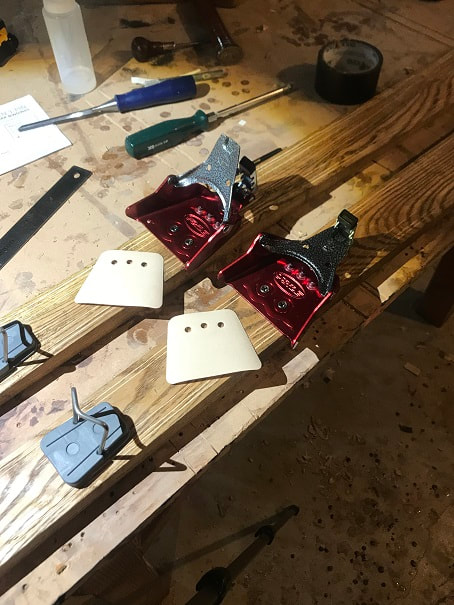
Here are the components of the heel plate of the binding. In the middle is the heel plate, to the right is the climbing bar and to the left is a plastic shim which is mounted on the ski-top to protect the ski-top from the abrasive rotation of the climbing bar.
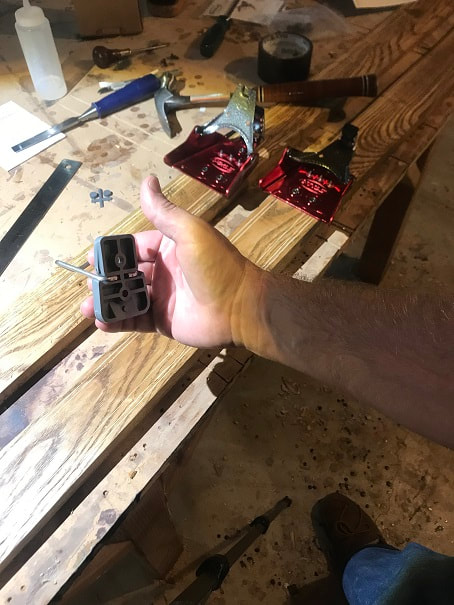
Here is the climbing bar clipped into the heel plate.
Here is the heel-plate assembly with the base plate shown under the heel plate and the climbing bar.
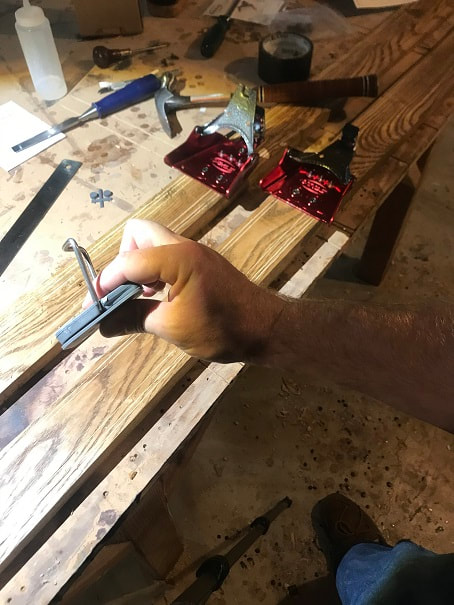
Drill 9/64" holes to a controlled depth as noted above for the toe-binding. Fill the holes in the ski for the heel plate with epoxy, so that they are sealed form moisture intrusion. Them screw them down tightly.
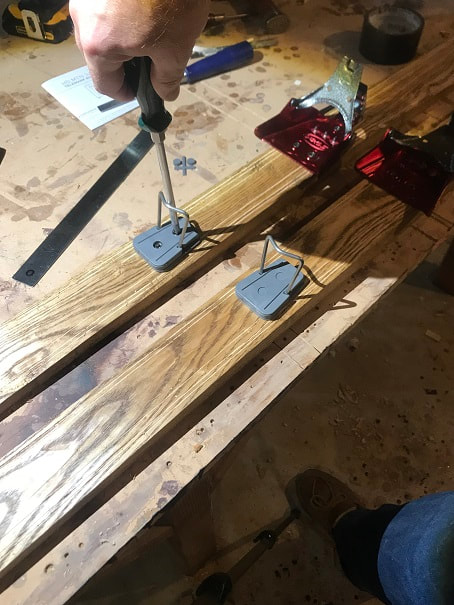
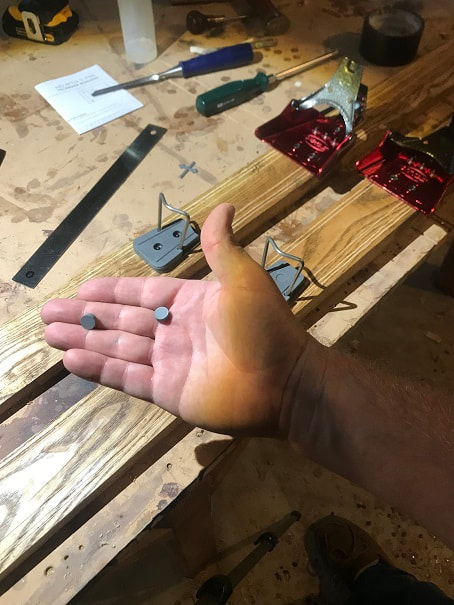
The bindings from Voile come with these plugs to fill the countersink holes in the heel plate. After the screws are tight in the heel plate, press these plugs into the holes over the screw-heads.
I also opted to apply the anti-ice tape from Voile to the toe pieces of the bindings.
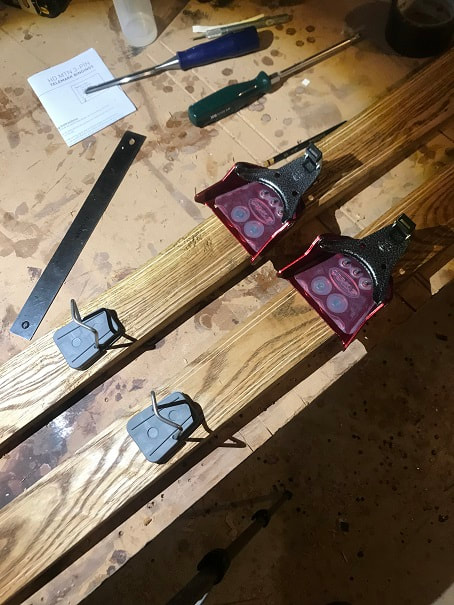
Completed Voile HD Mountaineer 3 Pin Binding installed on solid wood skis.
Poles....
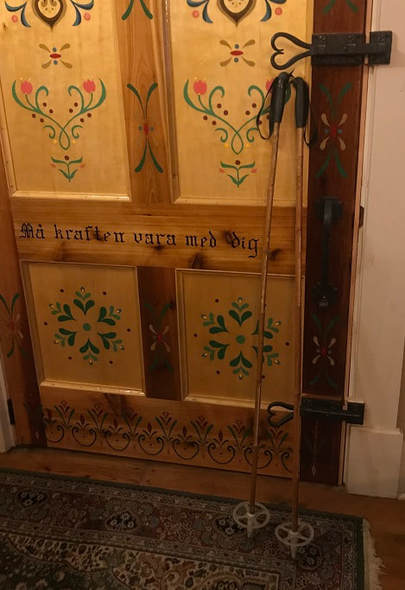
Bamboo poles, well aged, made by Nordic, bought on Ebay…$15.
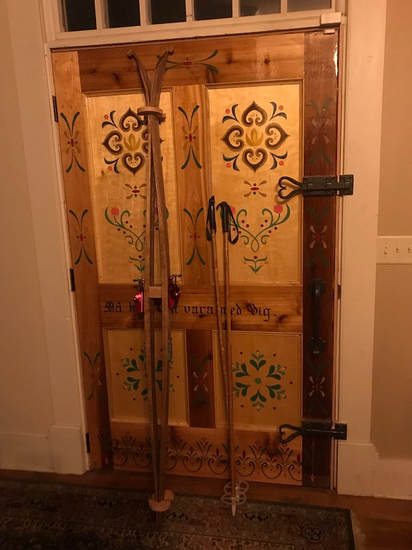
Completed Traditional Scandinavian Wooden Skis:
Handmade Traditional Wooden Skis
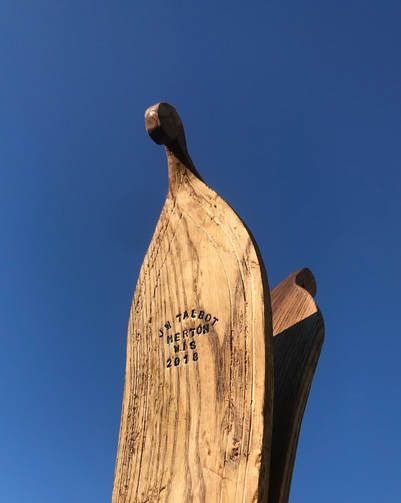
Hand carved tips of traditional Norwegian style wood skis
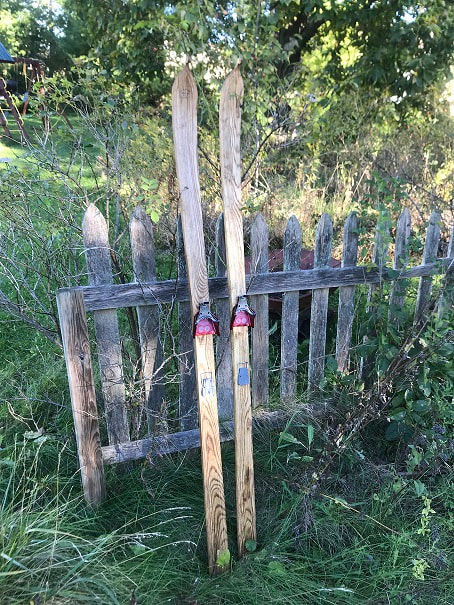
Wooden Nordic Skis with Voile HD Mountaineer Bindings
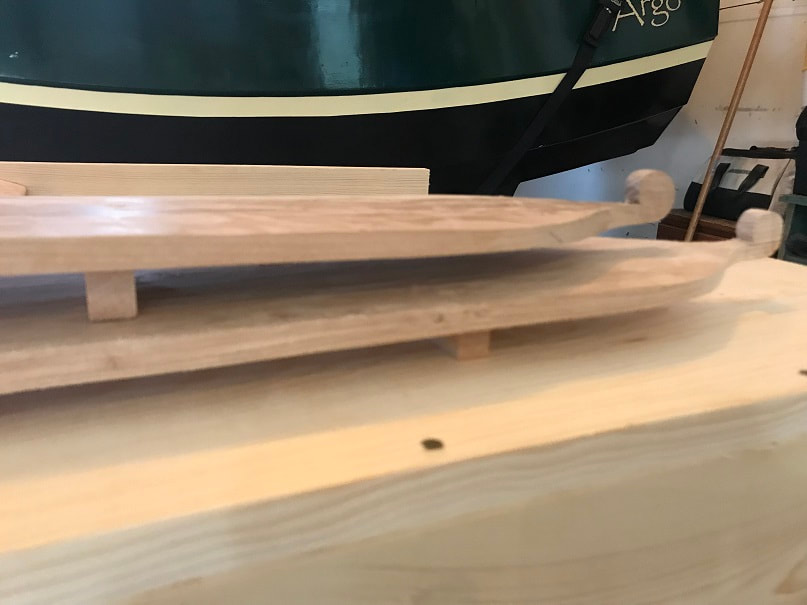
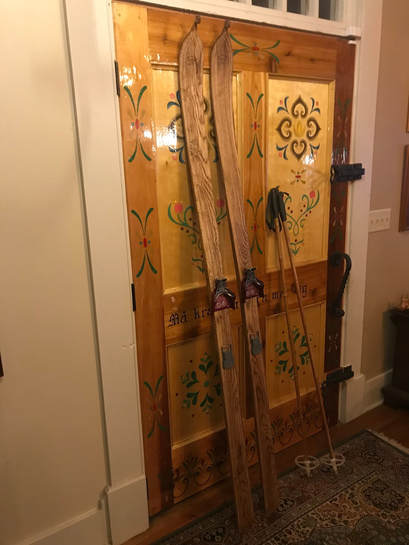
Storage of Wooden Cross Country Skis
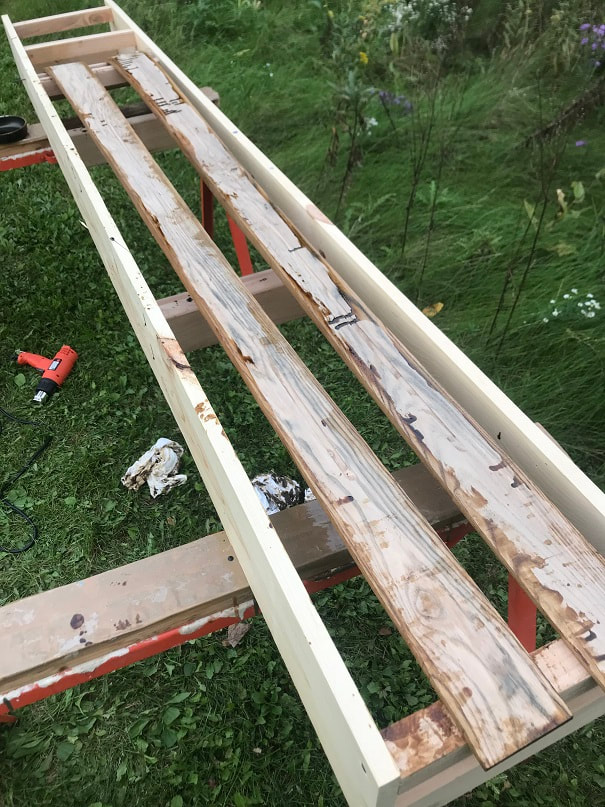
I made some braces to hold the tips and tails of the skis. The gap needs to be accurate, but the exterior shape was just rough cut. In the middle I used a solid wood block. I will store them as shown to help hold the camber in place.
Waxing Solid Wood Skis
After completing the pine-tar application on the skis, which protects them from water intrusion, the ski bottoms should be waxed. Solid wooden skis such as this may be waxed as follows:
1. Wax the entire length two to three times with polar wax. Rub the hard wax onto the ski bottom, then use a cork or synthetic cork to rub the wax into the ski bottom. The pressure and friction of the cork soften and polishes the wax to a glassy surface. This is your glide wax.
2. Apply kick wax, which will grip the snow and help you propel yourself forward, only under your foot. Apply kick-wax which matches the temperature you are skiing in, on the ski bottom, from the boot heel to 8" in front of the boot tip. Rub the wax into the ski base with the cork.
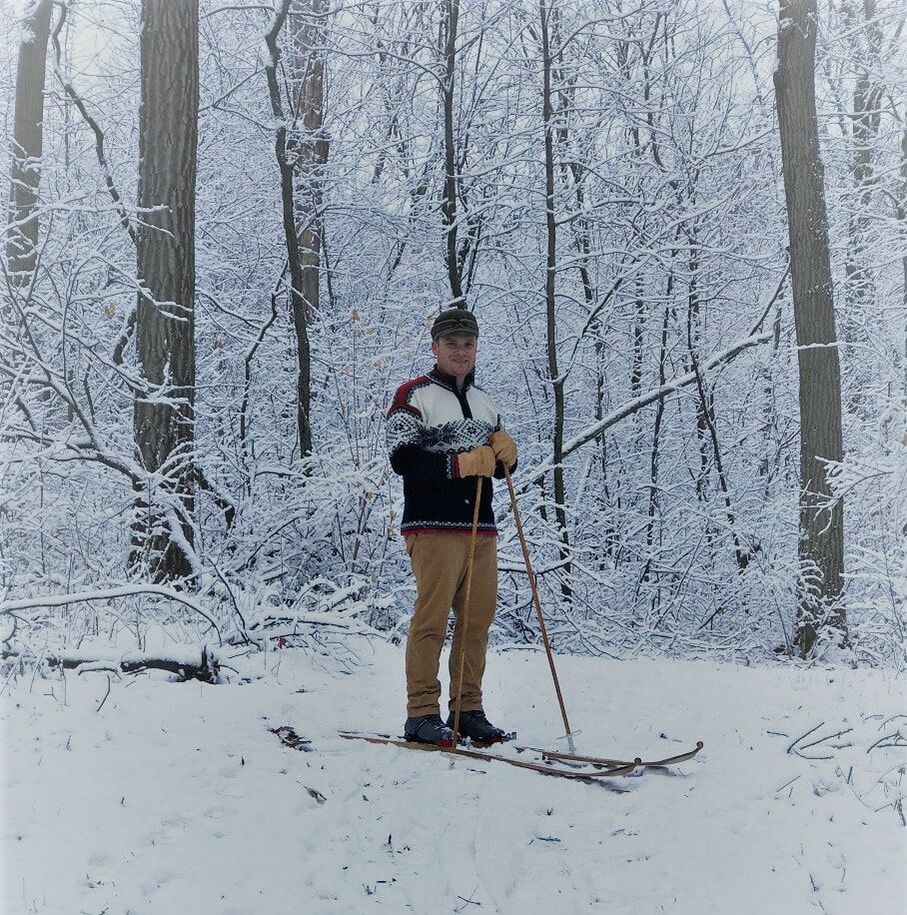
and finally; Skiing on traditional solid wood skis!
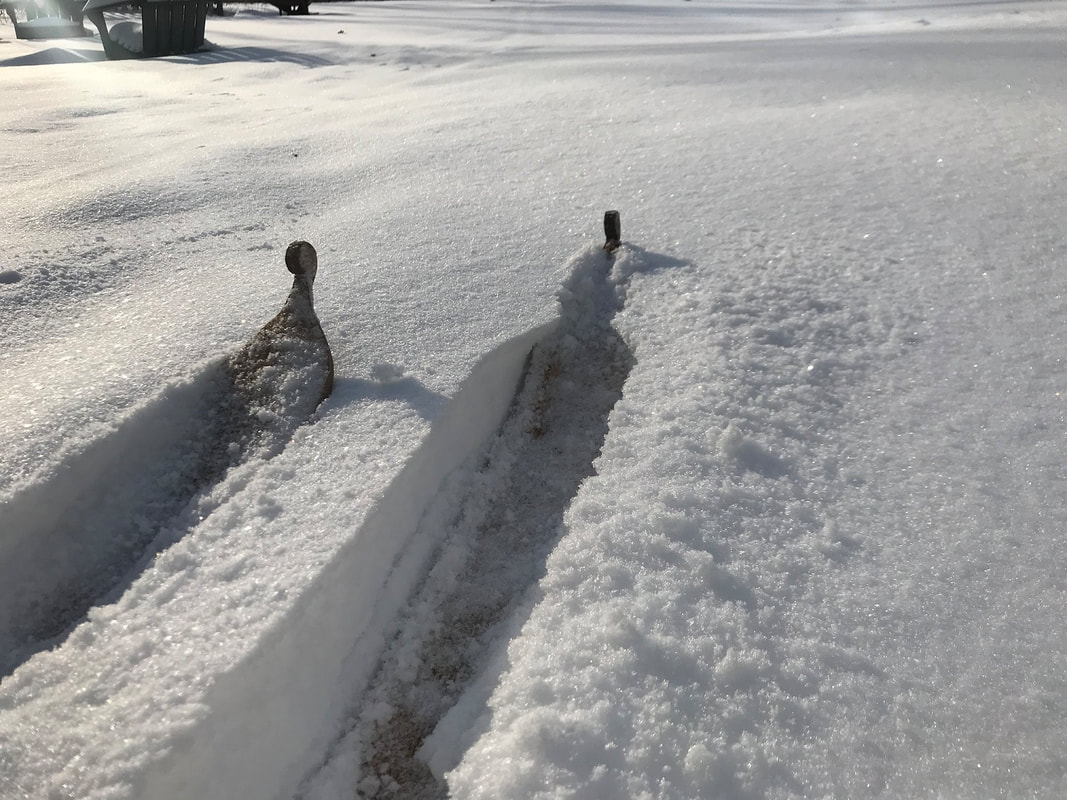
Skiing on my homemade traditional wooden skis; Wisconsin, USA.