A fully rigged ship in a bottle?!! How did that ship get in there?
Ships in bottles are magical works of art to look at in wonder. Here be the build journal of a ship in a bottle. How do these ships get into the bottles? Well here is the quick version..
- The craftsman builds a ship with sails of Chinese silk, ropes made from spider webs, palo santo masts, and a hull of magical wormwood.
- The finished ship fully rigged and assembled must measure about 3/4” tall so that it can fit through the neck of the bottle. The craftsman builds and finishes the ship completely outside of the bottle. The masts are installed standing upright and all the sails are set. It is tiny, as from the keel to the top of the masts is about 3/4” (20mm).
- The tiny ship is then pushed into the opening, and then the bottle must be quickly corked and thrown into the sea.
- If the bottle and ship toss and turn in the sea for long enough, and cross the equator enough times, the salt air and sea water are absorbed by the tiny ship causing to grow in size in the bottle until the ship reaches full size inside the bottle.
- A wanderer on a beach may find the bottle and marvel at the fine ship that will never again leave the bottle. Enjoy!
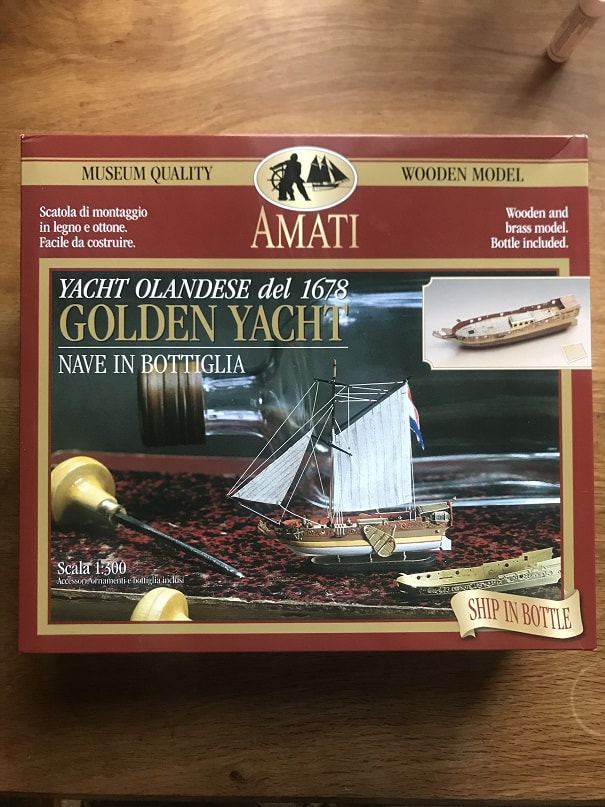
Now here I will document the detail of building my ship in a bottle. Mine is the Golden Yacht from Amati.
Package unopened, lets get started!
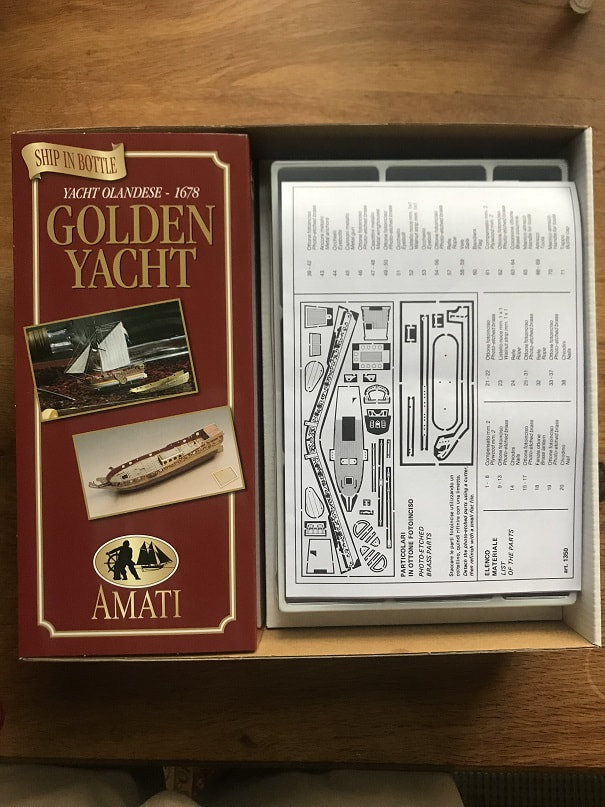
Opening the box, one sees the tiny materials on the left, along with drawings/instructions.
Building the Hull of the Amati Golden Yacht
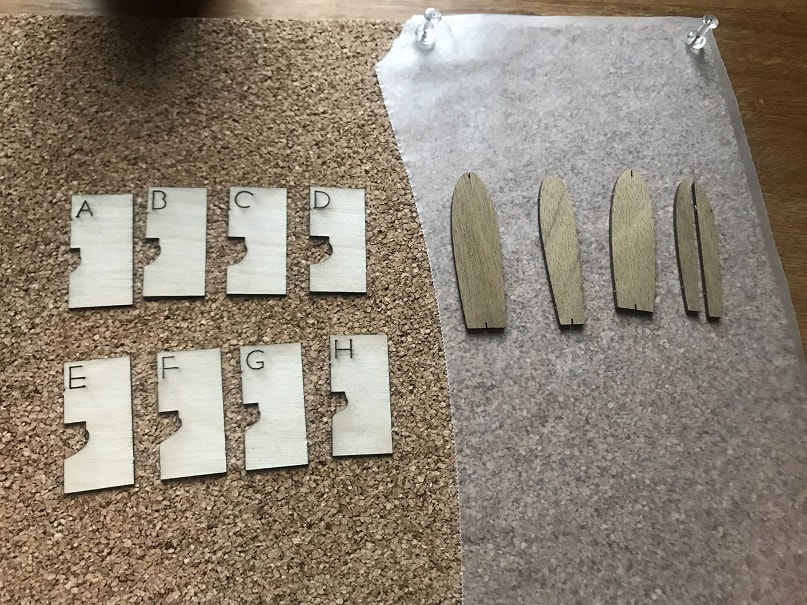
First step is to laminate the pieces to form the hull-blank. Then carve it to match the profiles which are provided.
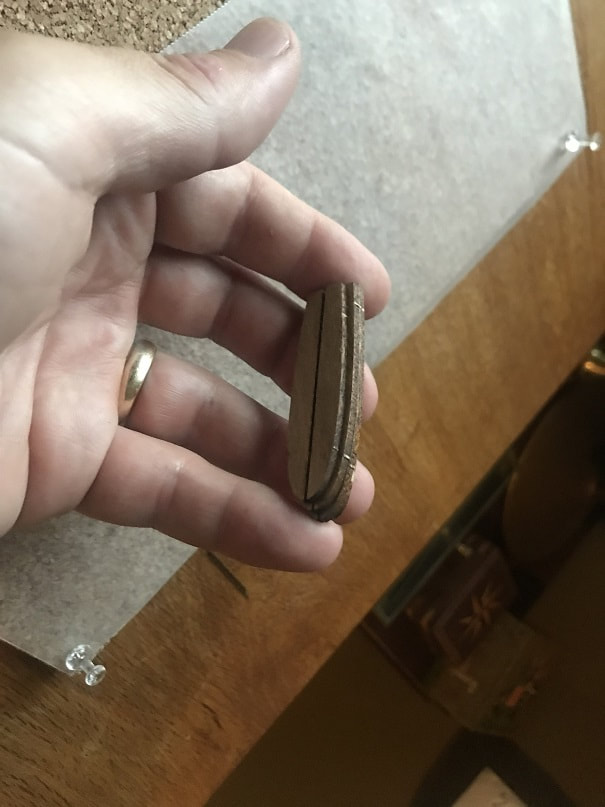
Walnut hull pieces, laminated together, ready for carving.
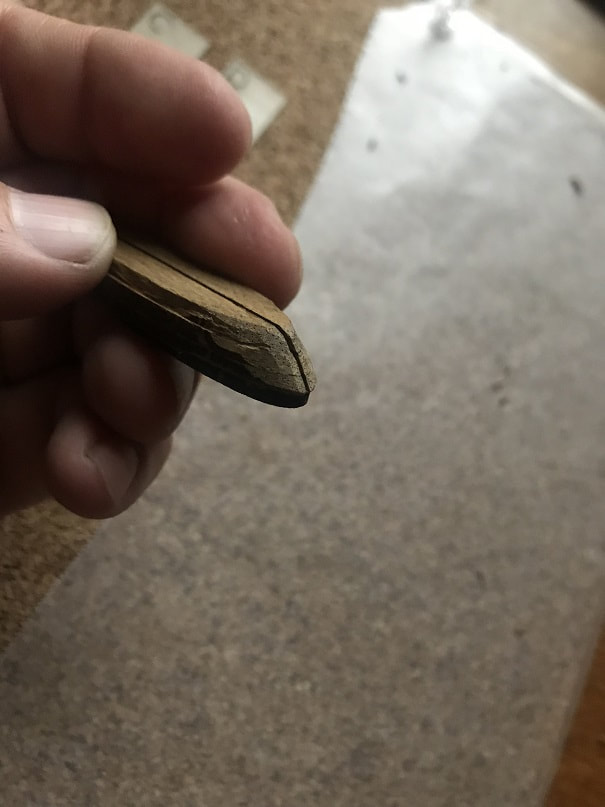
Starting rough carving with an exacto knife.
Rough carving of my little ship in a bottle is continuing
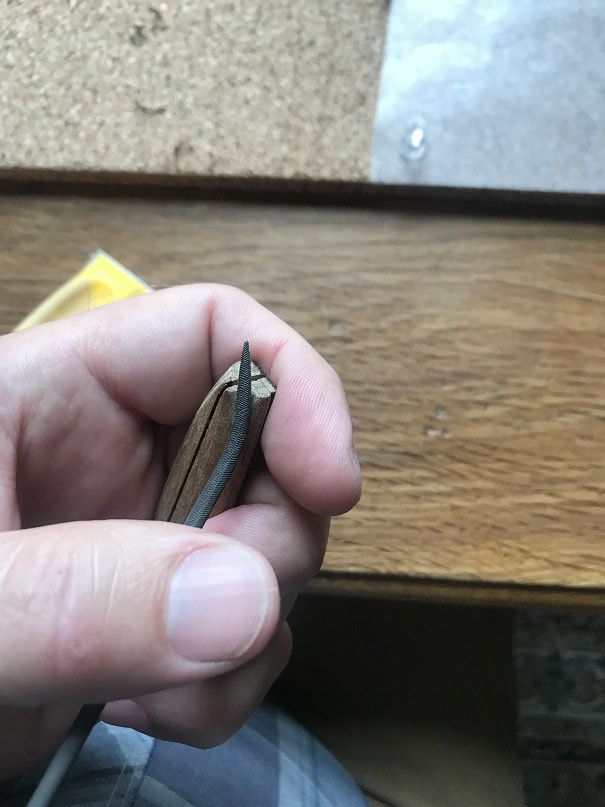
To make the fine convex stern, I used a special file.
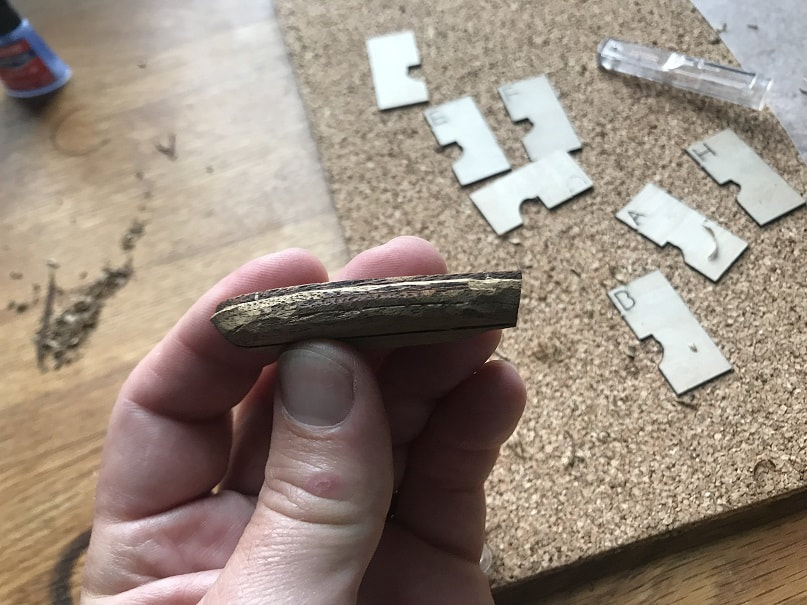
Carved and sanded hull
The aftcastle is also carved from little pieces that are laminated together then carved.
Carved aftcastle
Aftcastle glued to hull
Used manual modeling dril to drill mounting holes in base of hull
Work begins on the topsides and deck:
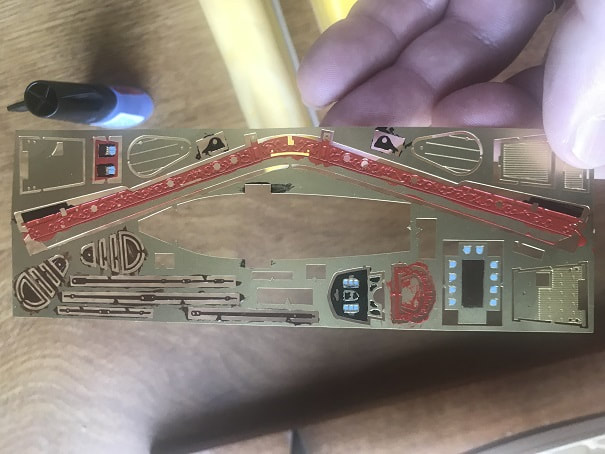
The Amati Golden Yacht comes with a substantial set of brass parts to clad the ship with. Here I have painted the detailed parts prior to cutting them out of the sheet.

The tiny cast cannons are about 4mm long and I painted three colors, brown wheels, red carriage, black barrel. Very small scale painting.
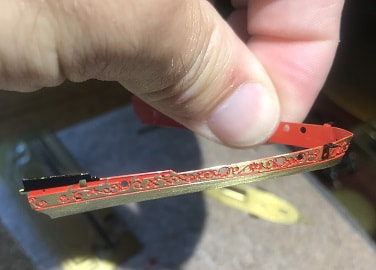
After painting the cladding red, I sanded the surface to reveal the shiny brass, leaving the recessed scroll-work painted red.
Here I am cutting the metal pieces out of the sheet and bending and assembling them for the deck.
Painting the hull of Amati's "Golden Yacht" Ship in a Bottle
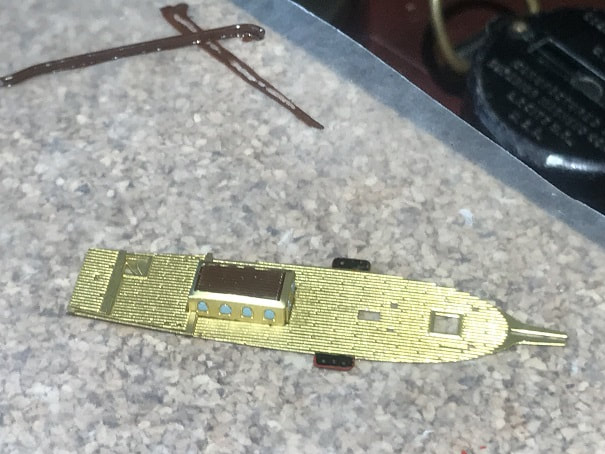
I preassembled some of the deck components, including the skylight, which I painted when it was flat (prior to bending it into shape). Here the deck has been attached to the hull. I am using 10 second modelling superglue for this build.
The windlass of the Golden Yacht. I carved the shaft from walnut, and the side frames are metal parts. I prepainted all components, then glued in place.
Hull has been painted and boot stripe applied with fine red sharpie.
The brass top sides and deck components are now being installed. I am using modeling "superglue" for adhesive on this project.
The stern and stern light are complete. The mast tabernacle has been installed with a nail into the hull.
Keel has been installed, and next I will paint it to match the hull.
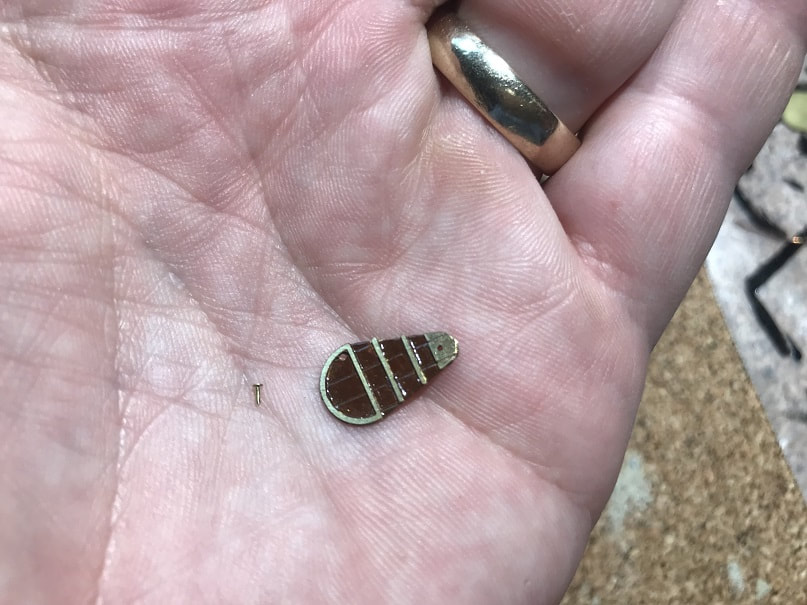
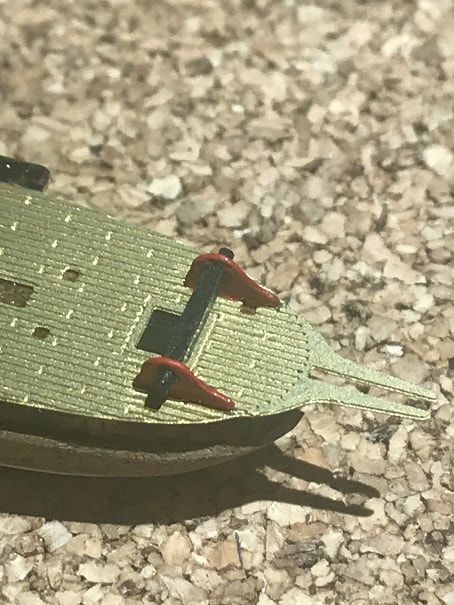
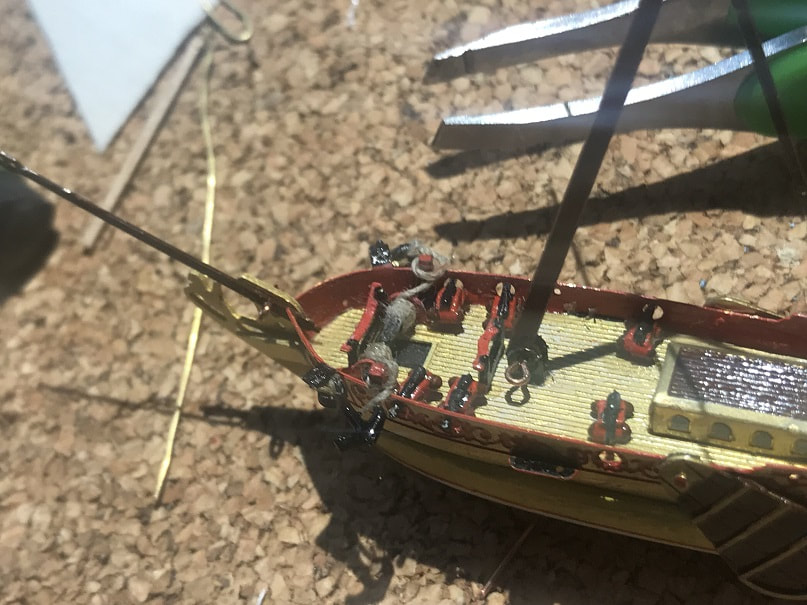
Here is a completed leeboard assembly. I cut a brass nail short, and will use that as the pin to install the leeboard.

I cut anchor rode bollards from 1mm x 1mm walnut and painted them black and red. Here the anchors are installed with the rode winding around the bollards and then wrapped around the windlass.
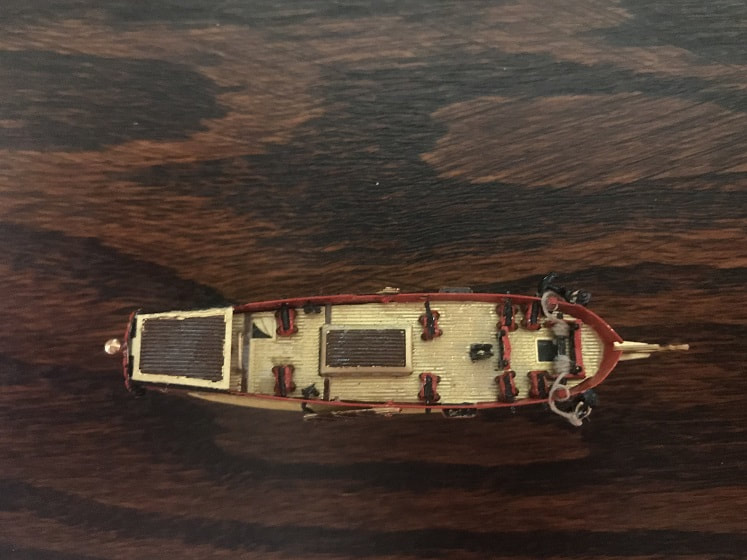
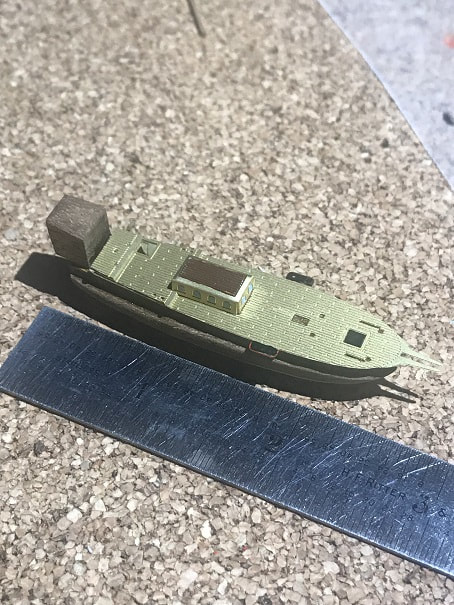
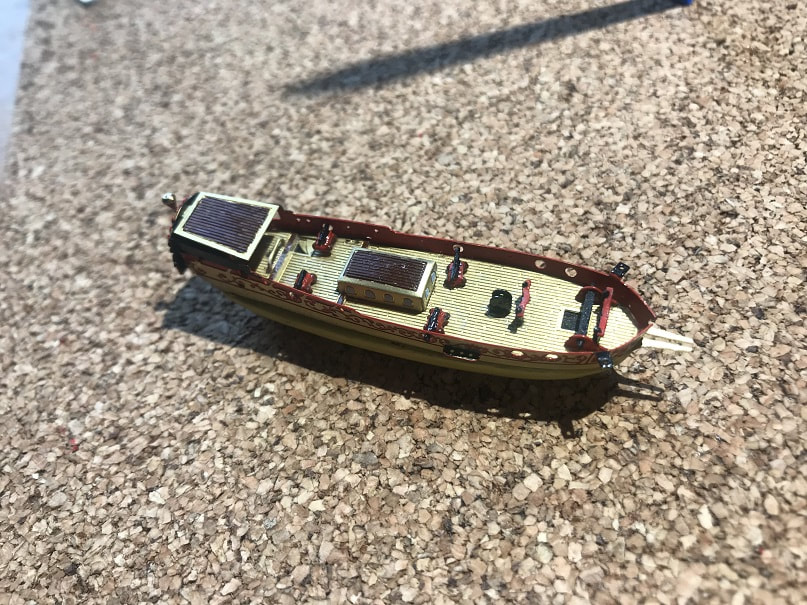
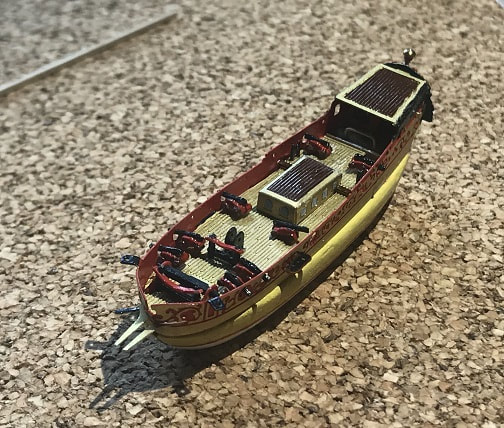
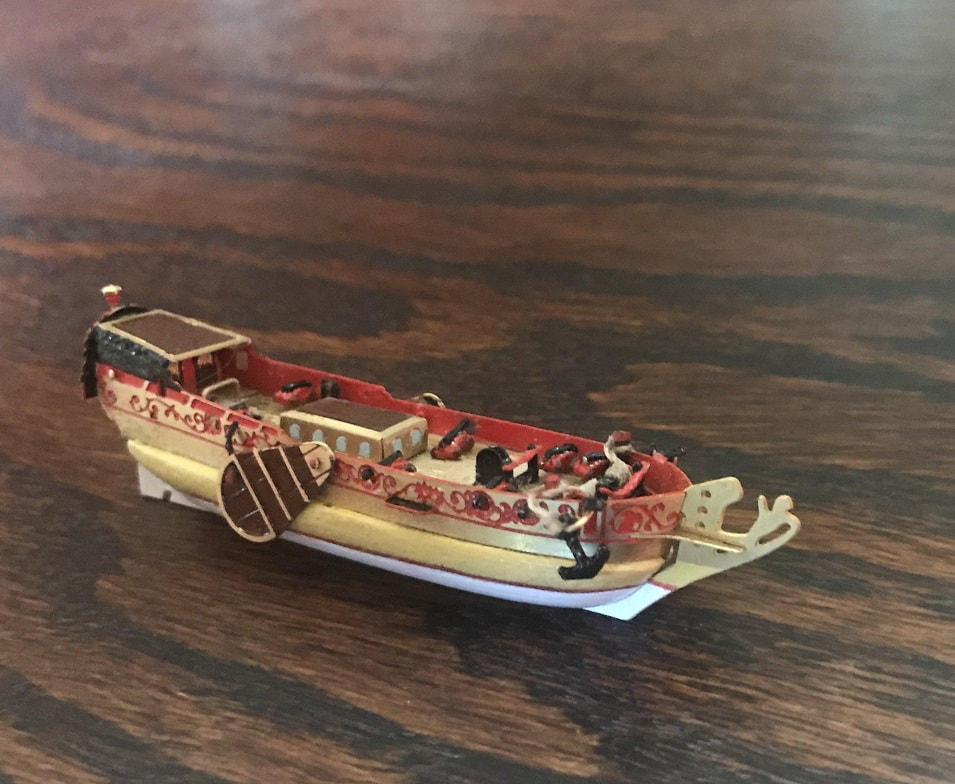
Completed hull and deck of the Amati Golden Yacht
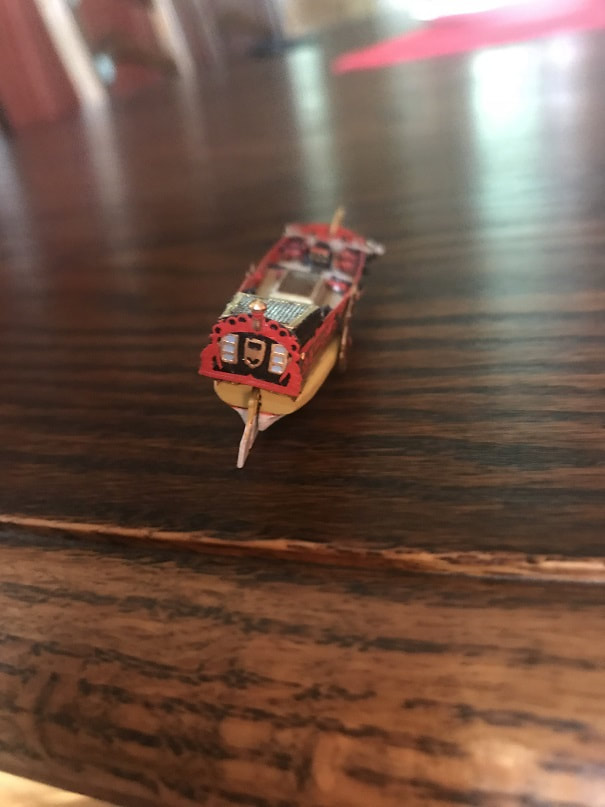
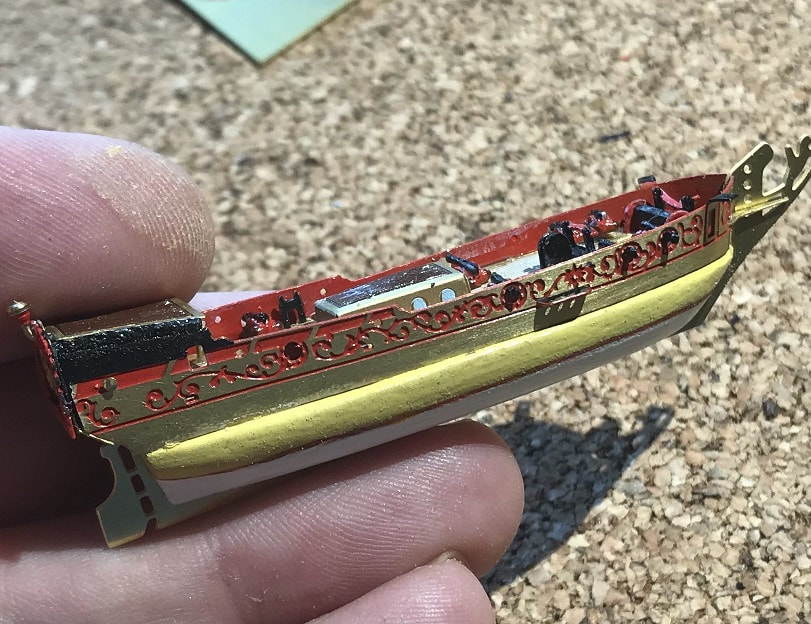
View of the completed stern
Completed hull, deck, leeboards, of the Amati Golden Yacht. Note: unfortunately my kit did not have the little bay windows for the aft castle, so those are not on this model. Doesn't bother me too much...not enough to go seek them out.
Here the bowsprit has been painted, and installed with a tiny eyebolt that will serve as a fairlead for the rigging.
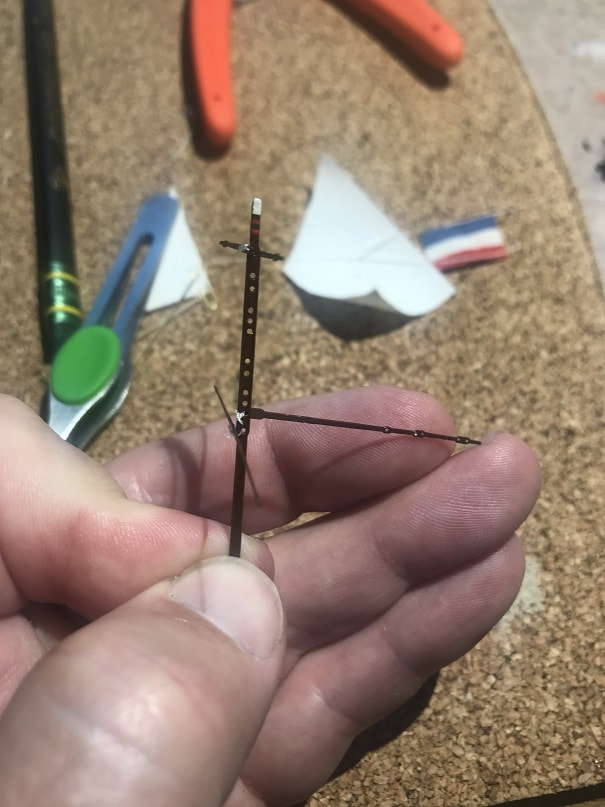
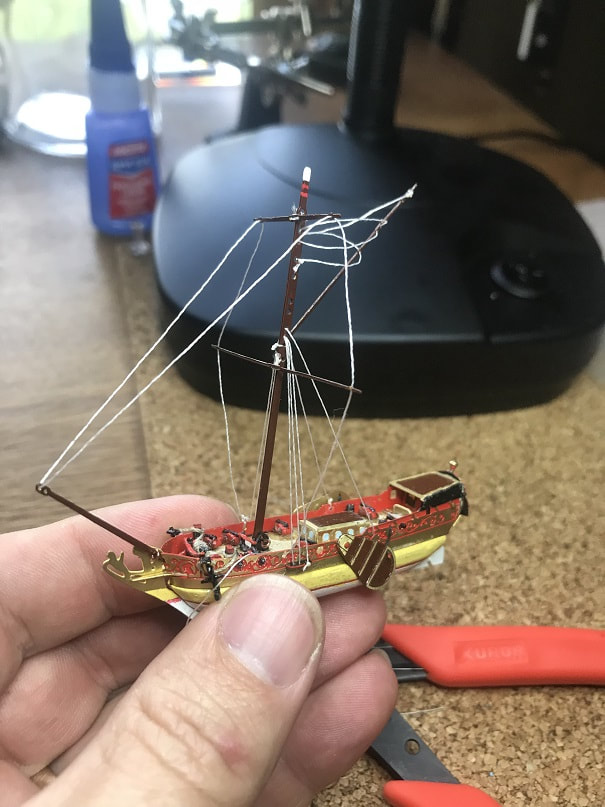
Mast, yards and gaff have been painted, and now I am lashing them together with fine thread and knots. The instructions say to melt/burn the ends of the thread as that is easier than tying knots, but I found that for whatever reason, the melt/burn technique did not work , so I am tying knots.
The mast has been stepped on my Golden Yacht 1678!! This was a fun milestone to reach. It is held into the little tabernacle on the deck with a eyebolt. The eye of which will be used to run rigging through later.

Now begins the task of fitting out the ship with standing and running rigging. It all has to follow a very precise and specific design in order to function properly when installed in the bottle.
The lines you see running through the bowsprit, mast and yards, is the line that will be used to raise them, after the ship is in the bottle. This line has been left 10" long so that the tail will extend far out the neck of the bottle. I have also installed the backstay.
Gaff rigged.
Now the shrouds have been rigged.
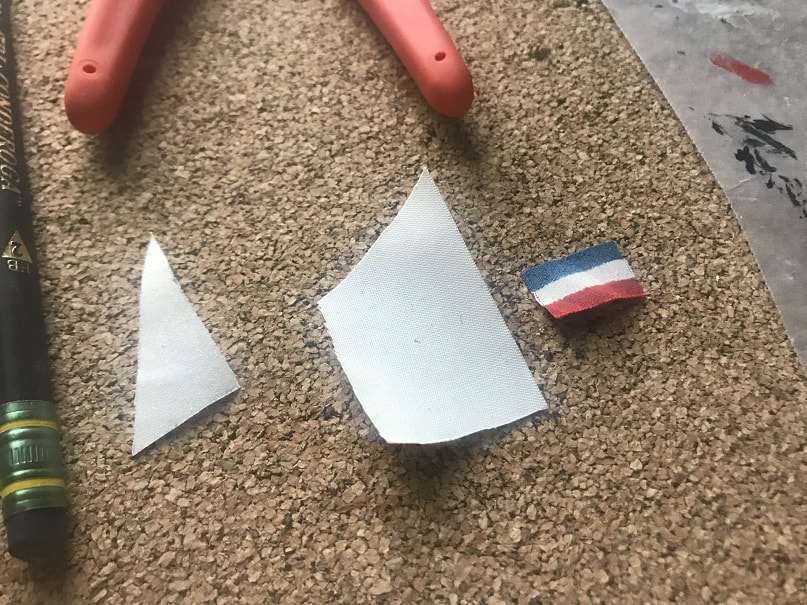
The sails and flag that came with the kit were from a shiny, bright white, polyester looking material that I did not like the look of. I cut new sails and a flag from some nicer fabric. I painted the flag with enamel.
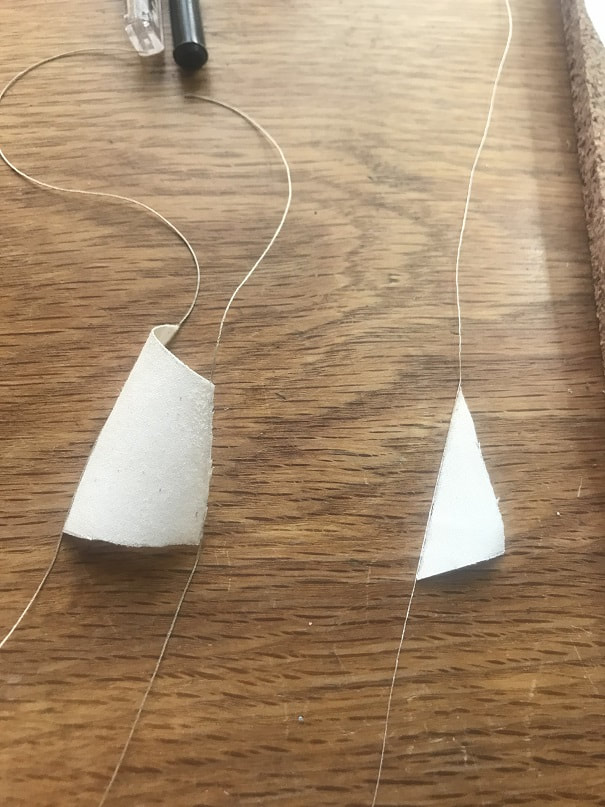
I used a tiny bead of superglue to attach the sails to the rigging lines.
Bending on the jib.
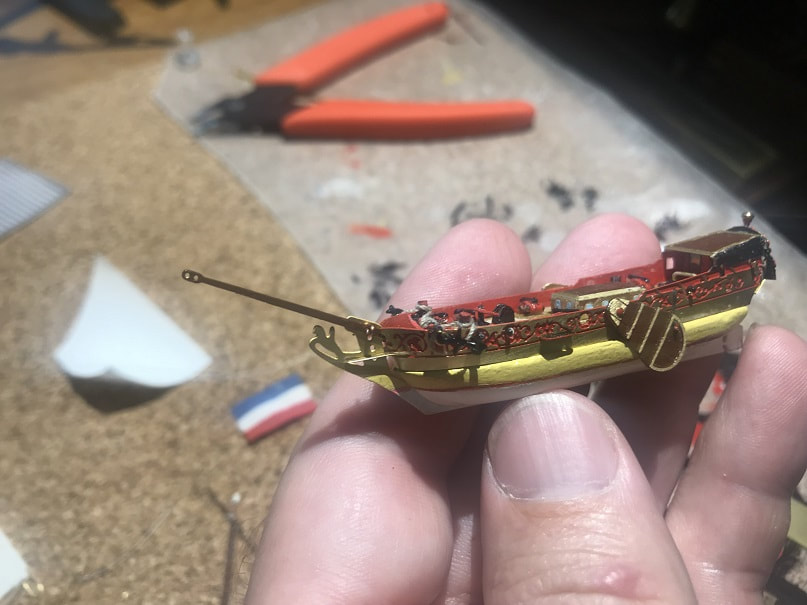
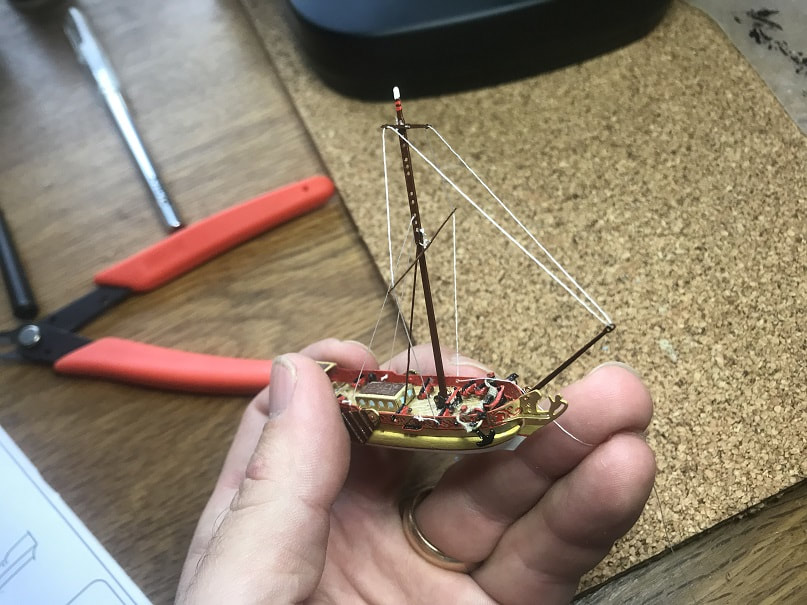
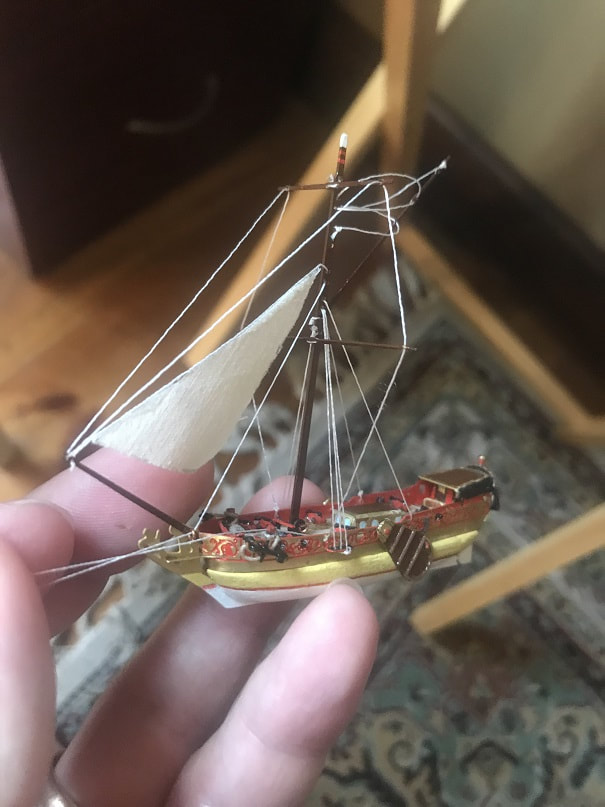
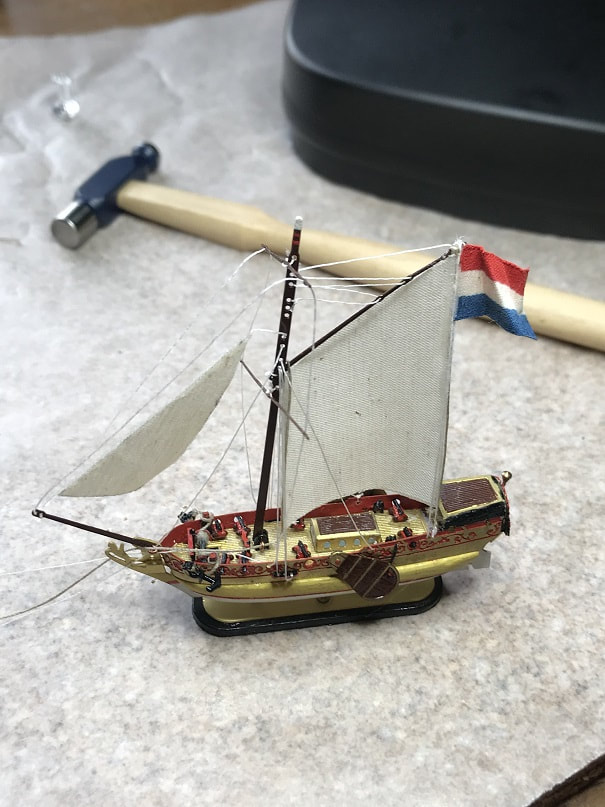
Both sails now bent on the Amati Golden Yacht! It's starting to look like a ship; very exciting.
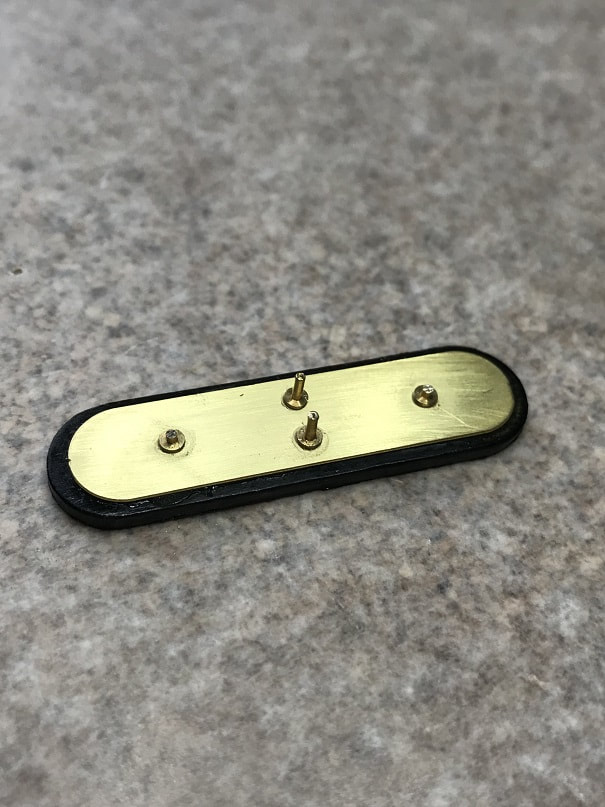
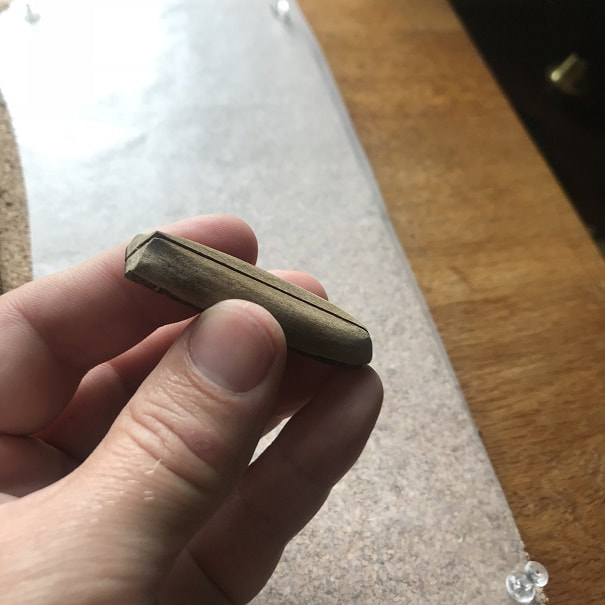
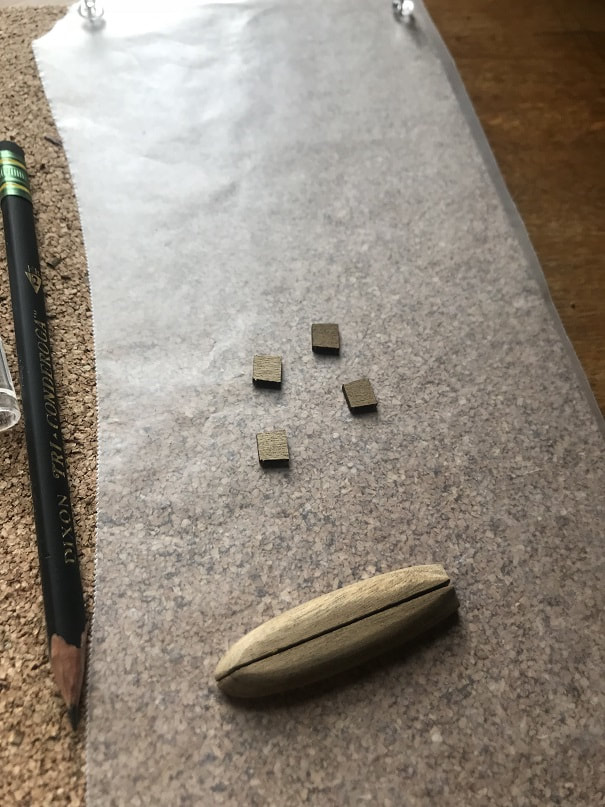
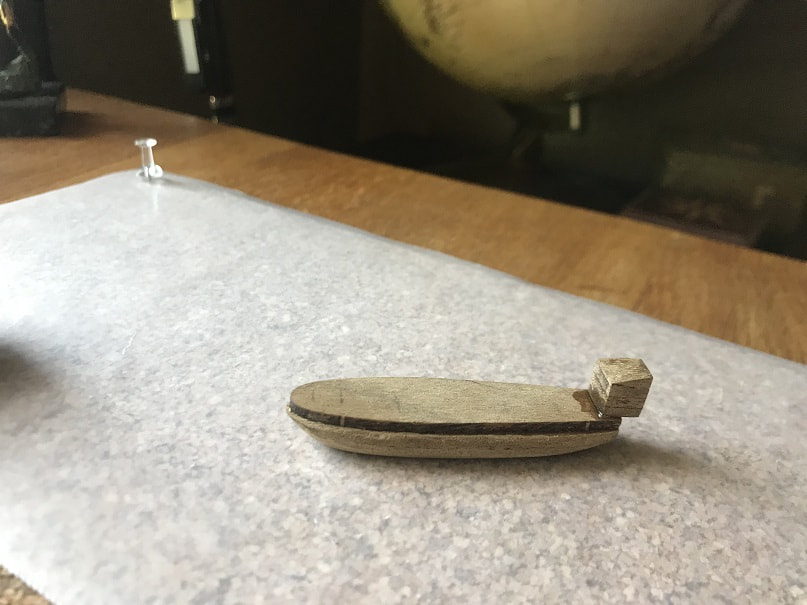
The base plate is made of walnut which I have painted black, along with a brass plate that is glued to the walnut, and finally brass mounting pins. Note that the fore and aft mounting pins need to be trimmed down to that the keel rests on them. The two longer pins fit into the two holes in the bottom of the hull.
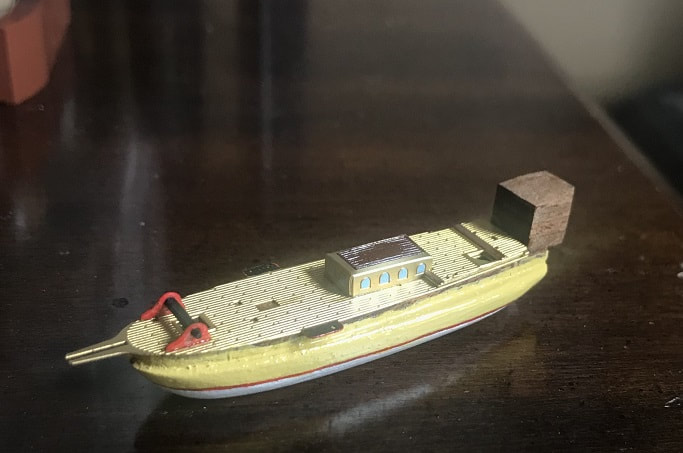
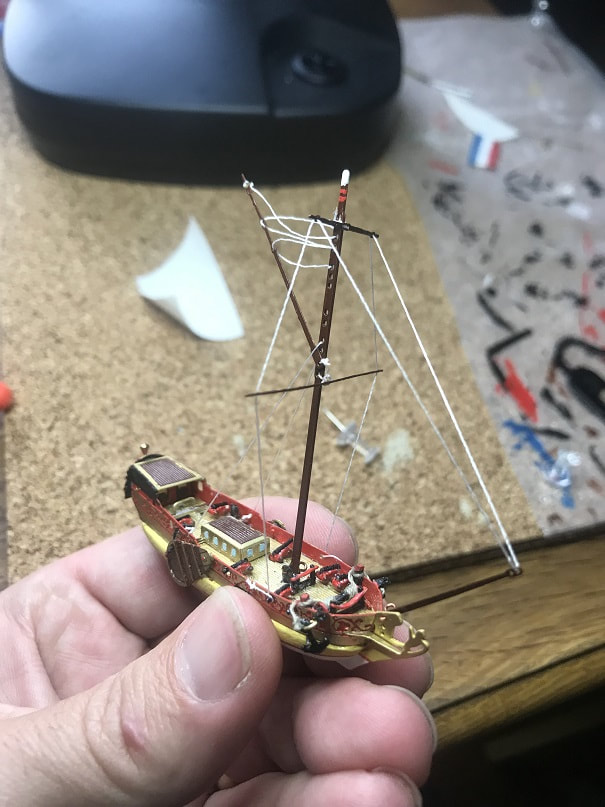
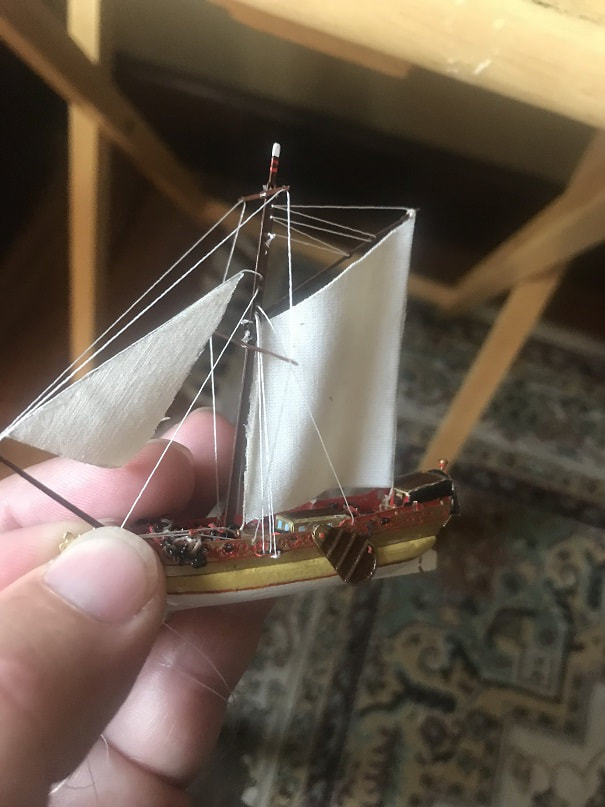
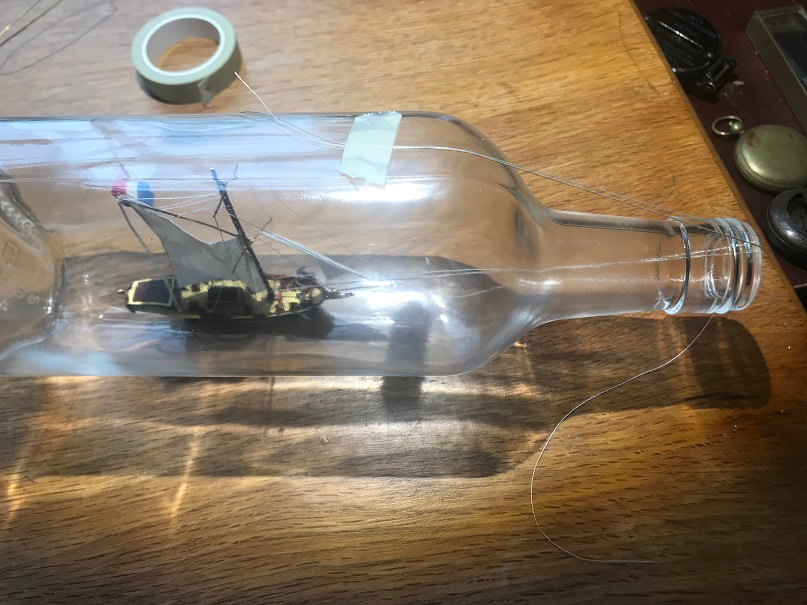
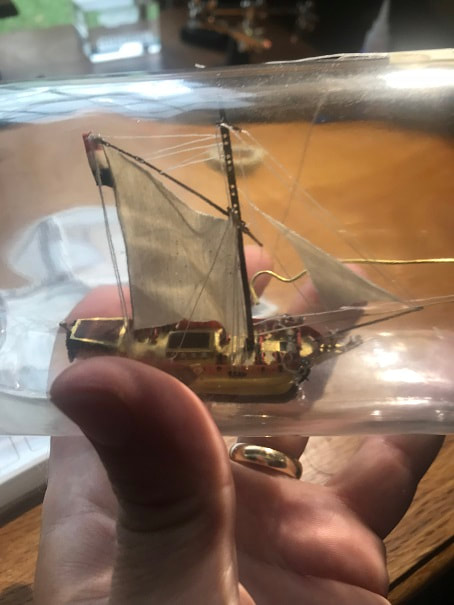
Here is the first good glimpse of the nearly finished ship resting on the base plate. I have also installed the final rigging and flag. The lines are not taut yet so they are a bit slack.

I laid out the location of the ship in the bottle and made some small marks on the bottom of the bottle where I want to mount the base plate.
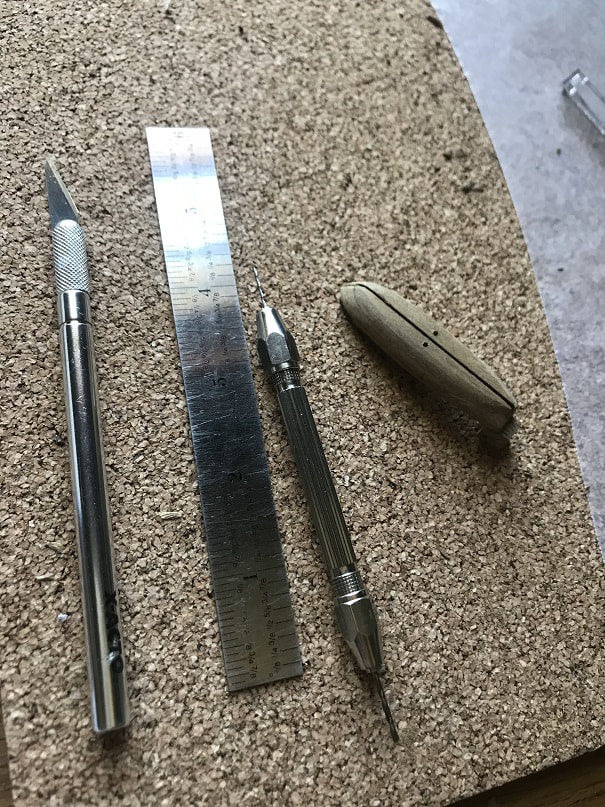
This little assembled tool is one of the tools used to insert the components into the bottle.
I lightly pressed some tape onto the tool and onto the base. I decided to use rubber cement to adhere the base to the glass.
Here is a video of mounting the base plate into the bottle:
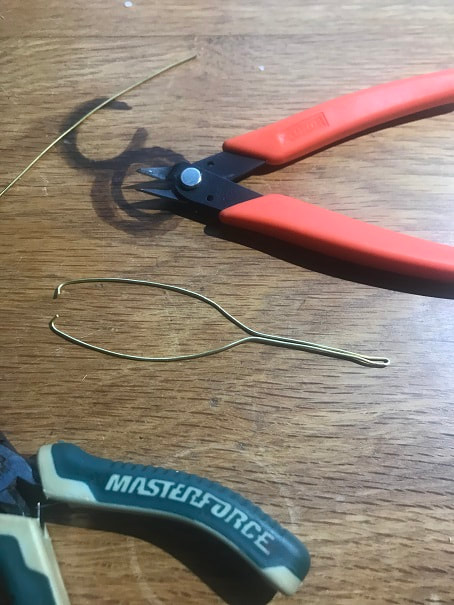
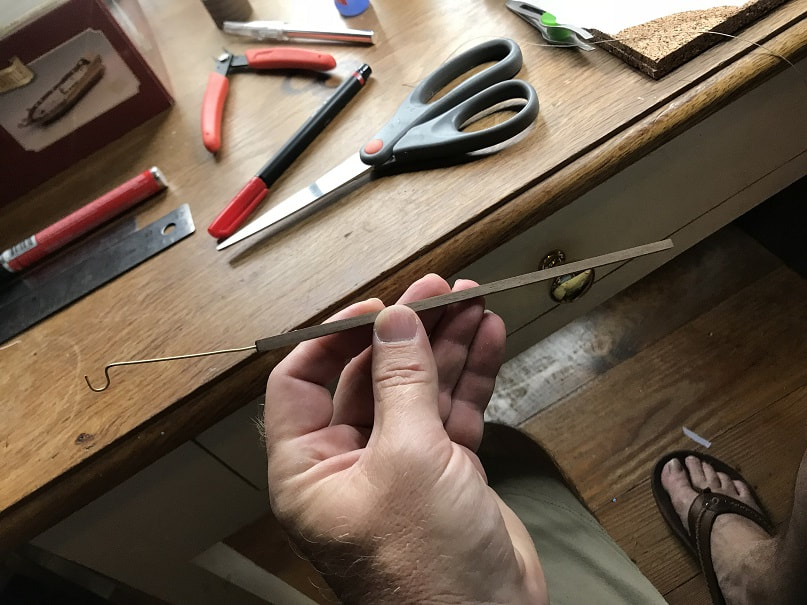
Bending a brass wire which will serve as the cradle on which the ship will rest as it is inserted into the bottle.
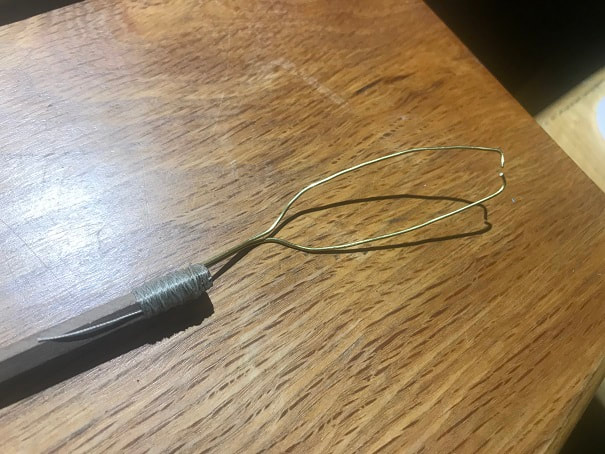
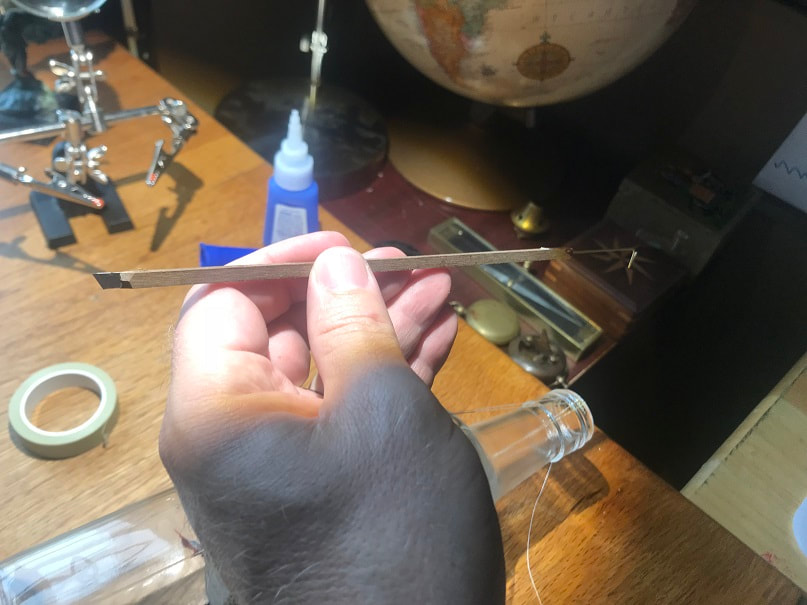
I then lashed the brass cradle onto a long narrow hardwood stick.
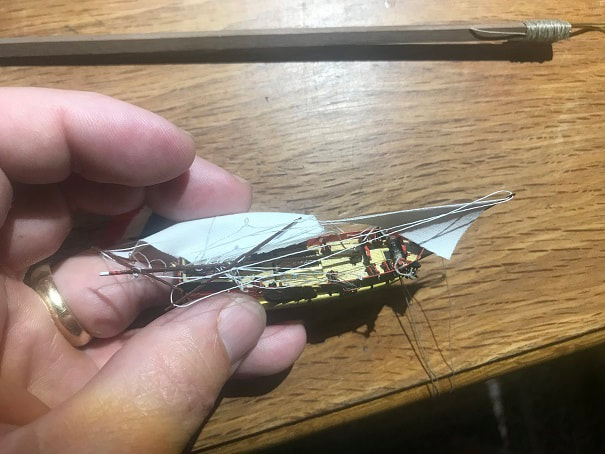
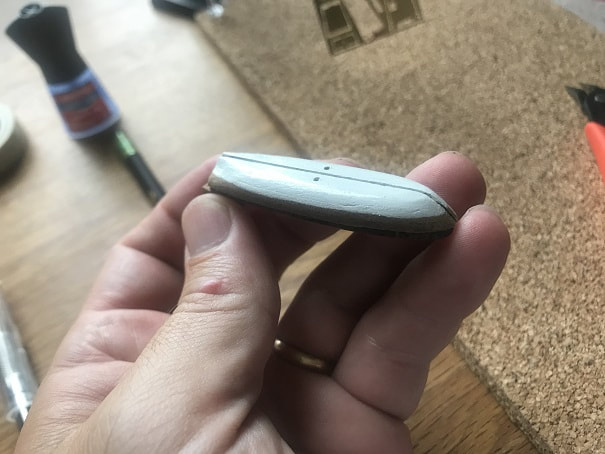
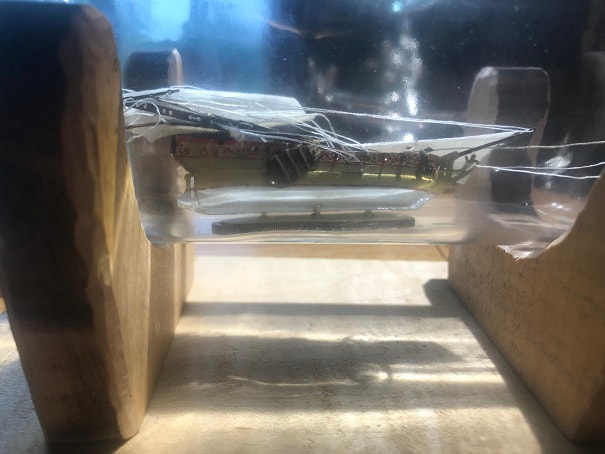
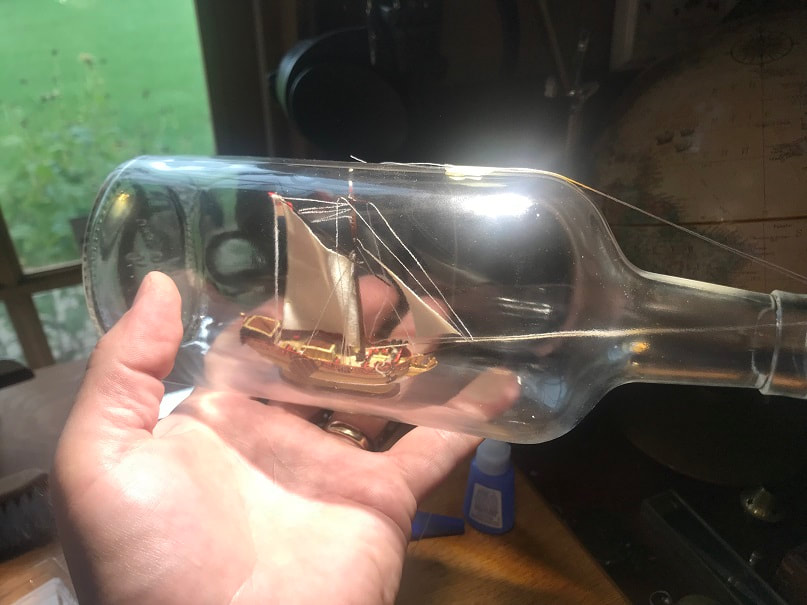
Here is the ship with the mast and yard and gaff and sails all tucked in as tight as possible in order to be inserted into the neck of the bottle.
Here is the ship passing through the neck of a bottle.
I mixed two part epoxy glue and put a dab on all four mounting pins and also into the holes in the hull, then I very carefully pushed the knocked down ship into the neck of the bottle and onto the pins. This took numerous attempts over about 5 minutes. Breathe, stay calm and steady; be careful and keep at it until it is positioned properly. It was not easy. Do not use fast set glue. Careful not to get glue on the inside of the bottle.
The Amati Golden Yacht has three lines that lead from the rigging out the neck of the bottle. After the knocked down ship is glued firmly in place, you pull these threads to raise the rigging, then you secure the ends of these lines on the model IN the bottle. Then you cut off the line on the model in the bottle so that no lines leave the ship. After the ship was firmly glued in place I GENTLY pulled all three lines individually and together, to slowly and gently raise the rig. Once that was done I proceeded to finish each line as described below.
This model has three such lines:
This model has three such lines:
- The first I raised was the line which raises the mast to vertical. I raised this line, glued the end in place using a tiny drop of superglue on the end of a bent wire, and then cut of the line right at the glued end using a razor on the end of a long stick.
- The second line pulls the mainsail into position, I pulled and secured this line second, in the same manner as above.
- The third line runs through all the yards, I pulled and secured this line last, in the same manner as above. Then I used a long bent wire to level out the yards.
With the mast raised and lines all slightly taut. I taped two lines off tight and started final attachment and cutting of the first line.
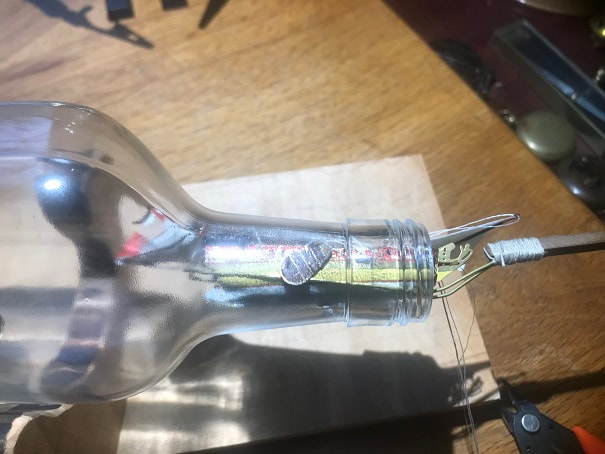
This is the tool that I used to place glue and cut lines IN the bottle. I cut a slot in the end and inserted a razor blade, which I used to cut lines after the ends were glued in final location.
First line taut, secured, and cut.
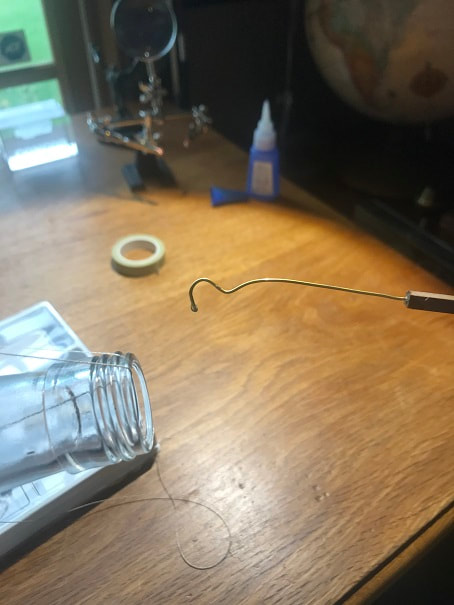
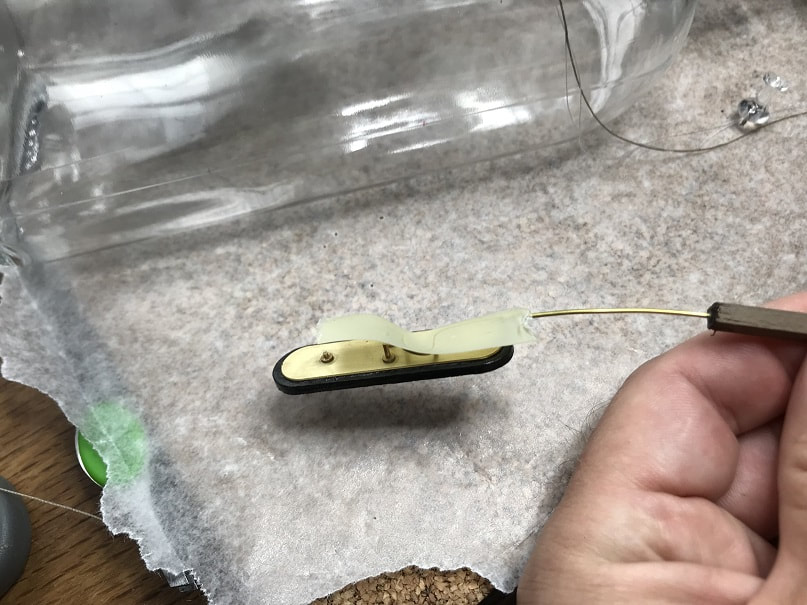
At one end of the long skinny hardwood stick is a razor, and on the other is this flexible brass wire, which I have been bending to suit the area I need to work on. Here you can see a drop of super glue, that I am preparing to place on the end of one of the lines to be secured and fixed in the bottle.
Here you can see the wire tool in the bottle. I am using it here to glue the second line to the base of the mast.
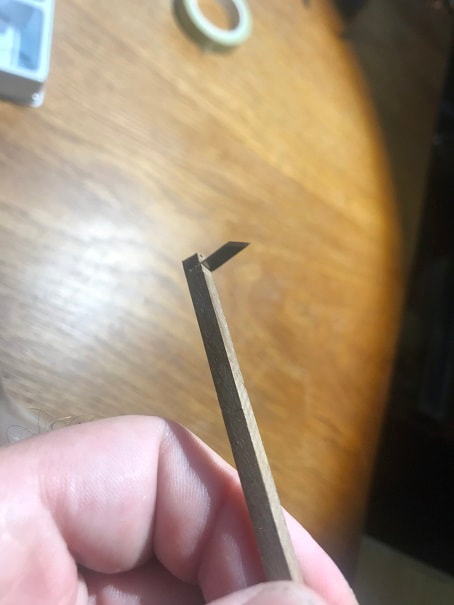
To cut the third line I needed to cut a new slot in my hardwood stick, in order to mount the razor in a perpendicular orientation.
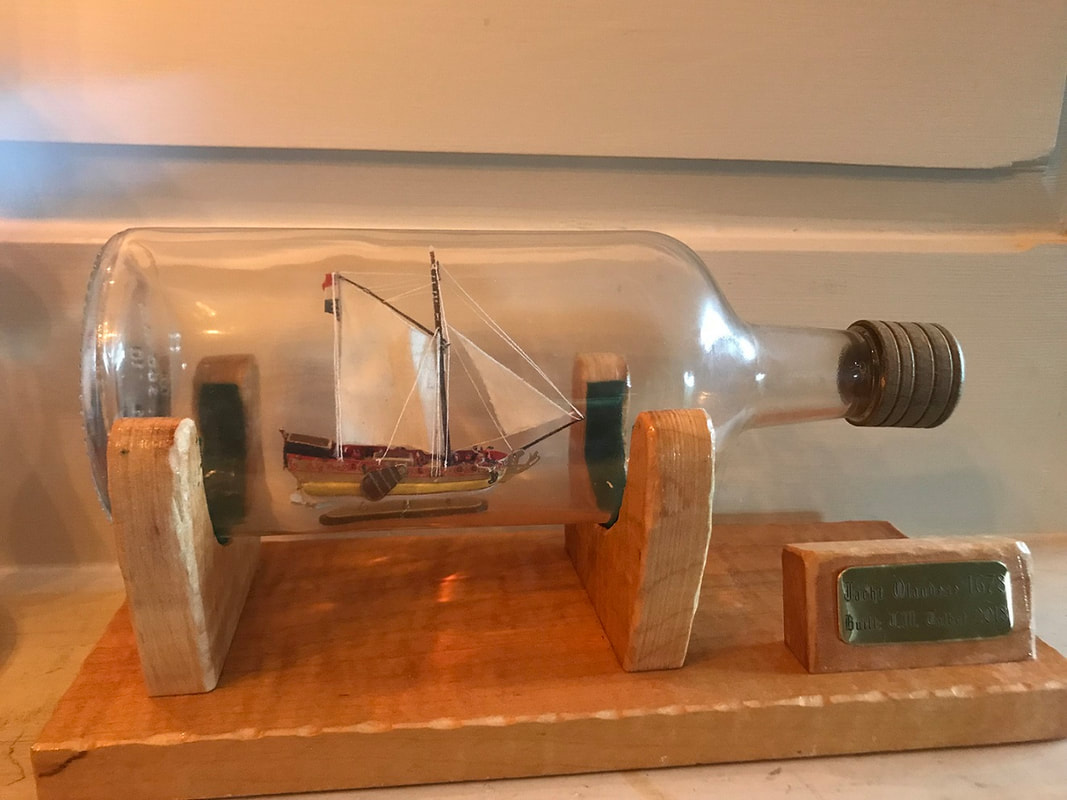
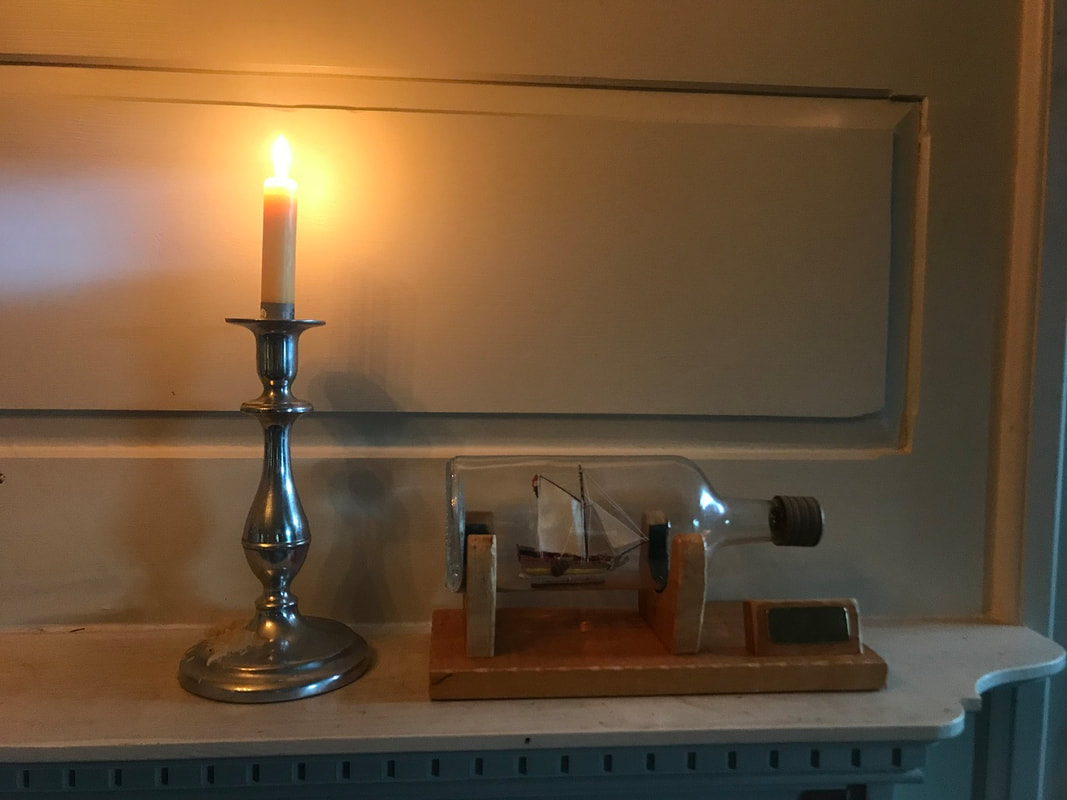
Here is the finished Ship In A Bottle!! This was a very fun project. I built a custom stand out of tiger maple, with crutches that fit the bottle. I lined the crutches with felt, and also mounted a brass name plate.