February 2022
Building a Model of the Disney Motor Launch from Scratch
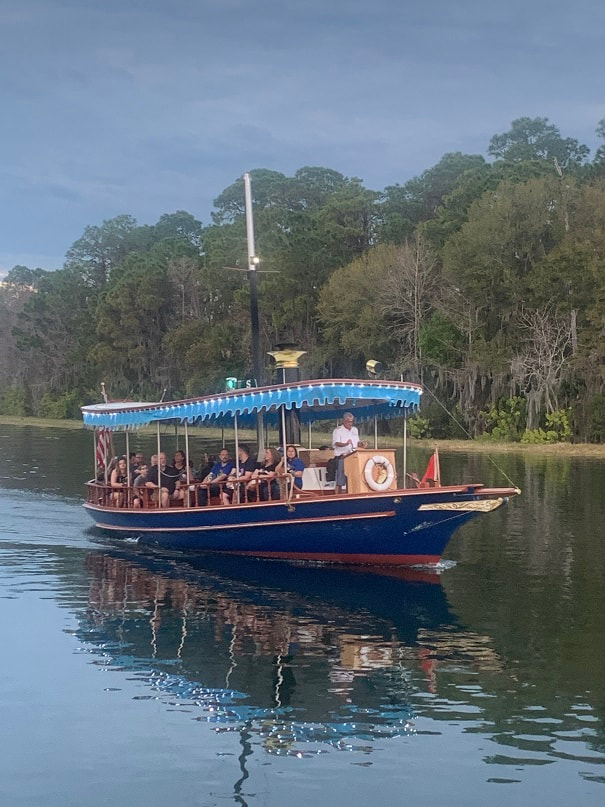
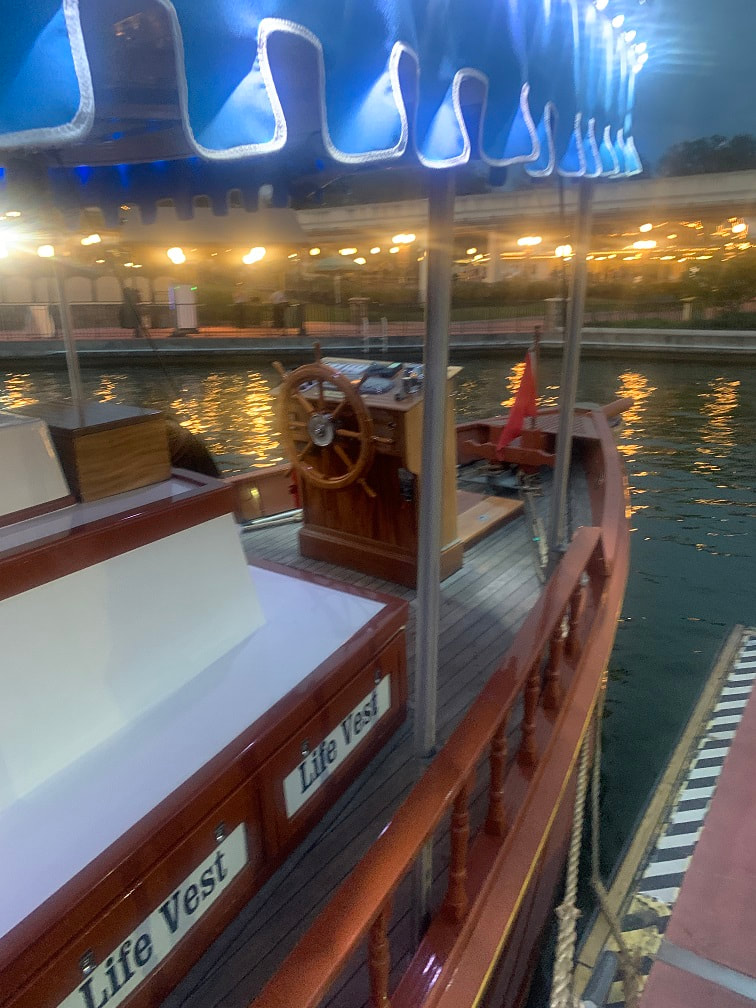
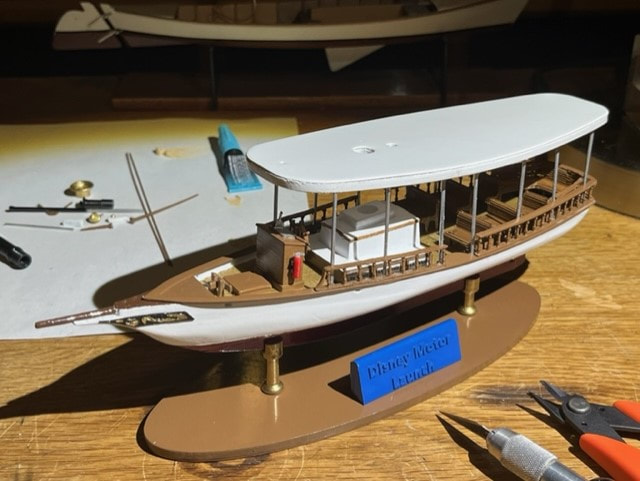
After seeing these fun boats plying the waters of the Seven Seas Lagoon and Bay Lake last week in Orlando, I decided to build a model of one. These graceful, cheery boats were built by Morgan Yachts in Clearwater Florida in the early 1970's. They are built to look like a steam launch but have diesel engines in them. The very skilled skippers of these water taxis pilot the boats around the lakes between Disney World Magic Kingdom and the resorts nearby. I spoke with one of the captains, who advised that the boats draft about 3.5ft and are about 41.5ft long and are loosely based on a Morgan 41 hull. I will design the model in Fusion 360, and will print the parts in PLA plastic on my Prusa i3MK3S 3D printer. Then I will sand, paint and assemble the model. A photo of the finished model is below, followed by the build log.
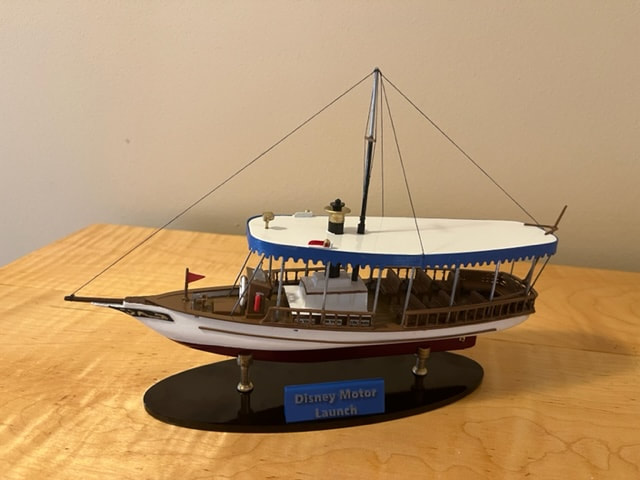
Photo of my finished model of the Disney Motor Launch.
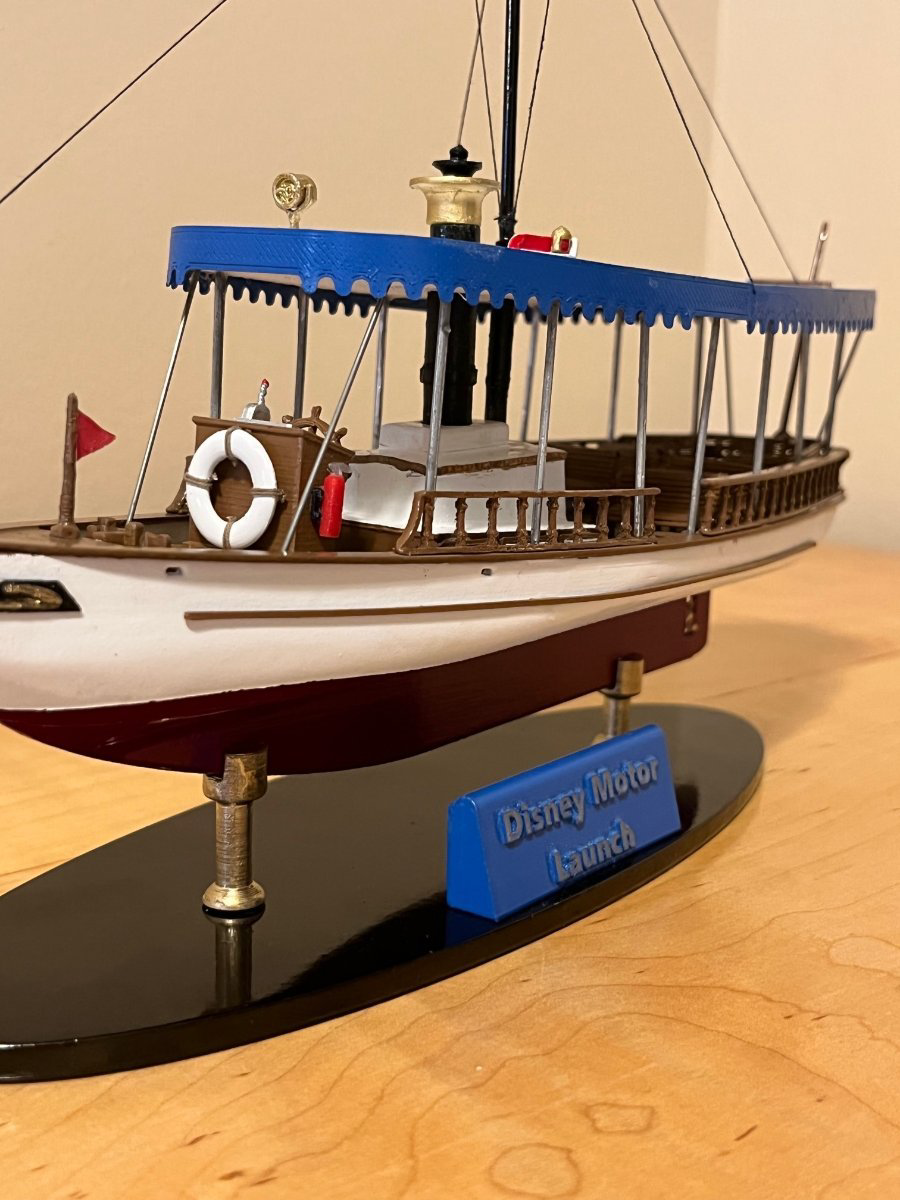
Another photo of my finished model of a Disney Motor Launch
The boats have either white or blue hulls.
First I found a drawing of a Morgan 41 and then I scaled dimensions from many photos that I took of the boats. From these references I created a CAD 3D model of the boat in Fusion 360. I designed the model with about 62 individually printed parts. There is quite a bit of detail so it will be interesting to see how detailed the printer can print.
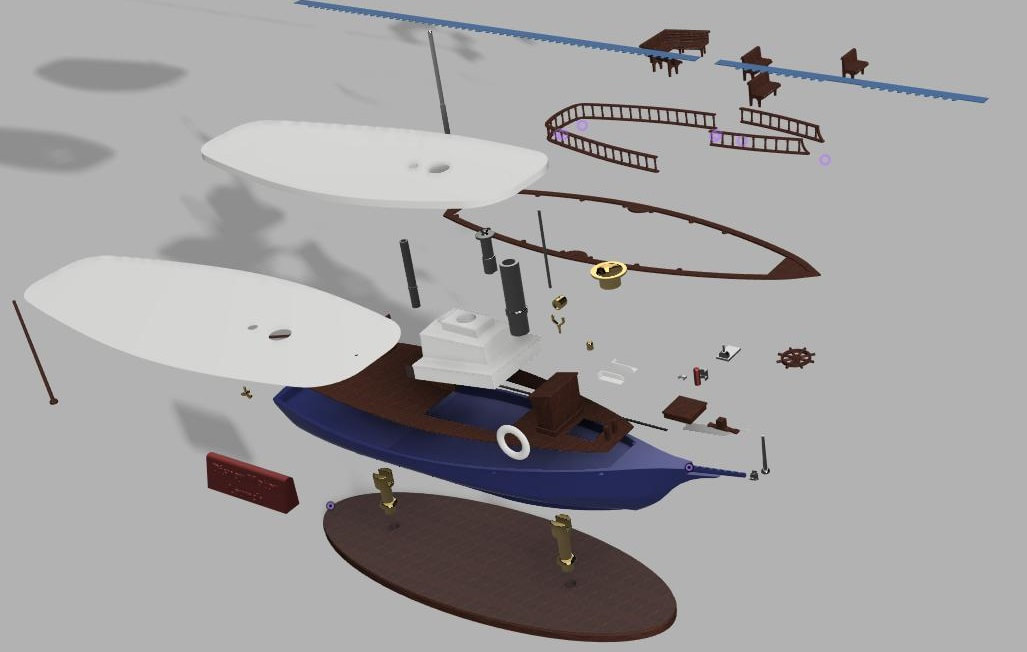
3D CAD model of the Disney Motor Launch.
As I worked on the CAD model, I began printing parts, and I checked the fit of parts as I went. I needed to change dimensions of parts slightly in order to get the parts to fit easily.
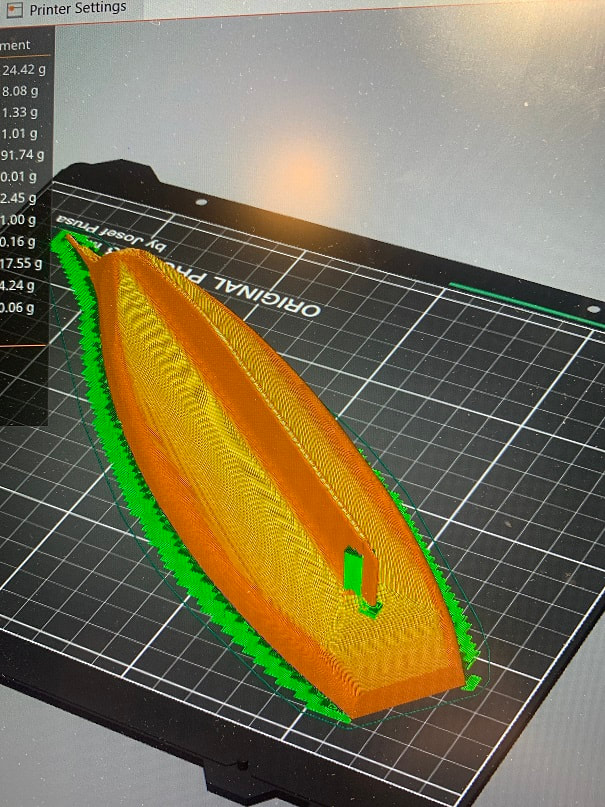
After drawing part in CAD, the file is exported to a "slicer" software that creates the instructions for the printer to print the part in a succession of very thin layers. Here is a view of the hull in the slicer software. The part is in orange, and the printed "support" material is shown in green.
I am not 3D design or printing pro, but for a very very basic intro into how I got started in 3D printing, you may visit this page.
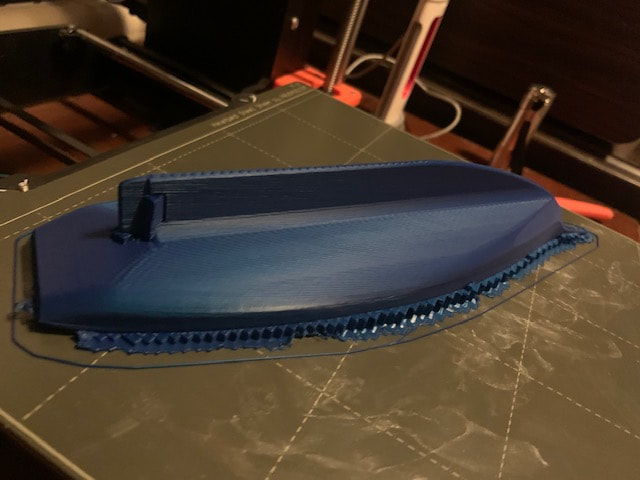
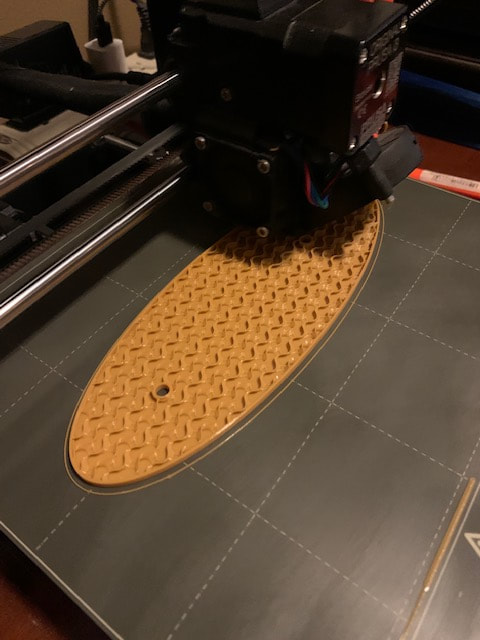
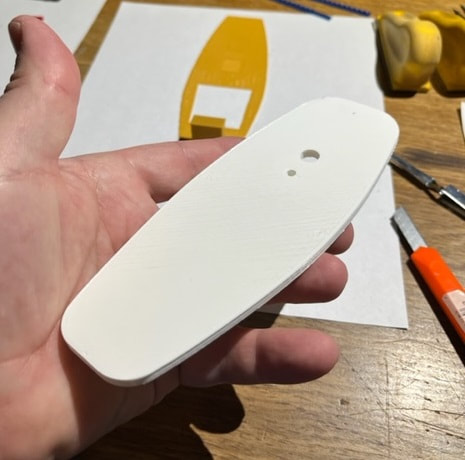
Here is the printed hull. I made the walls of the hull quite thick at 6mm, so that I could do some final shaping of the hull.
Here is the hull taken from the printer. The flat surface is all the "support" material that printed in the void under the hull.
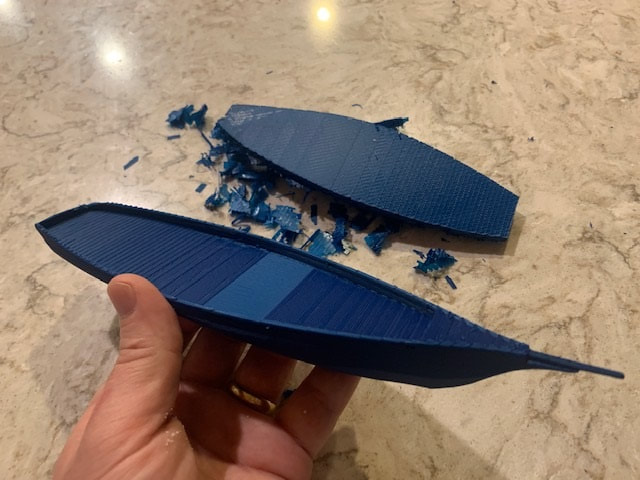
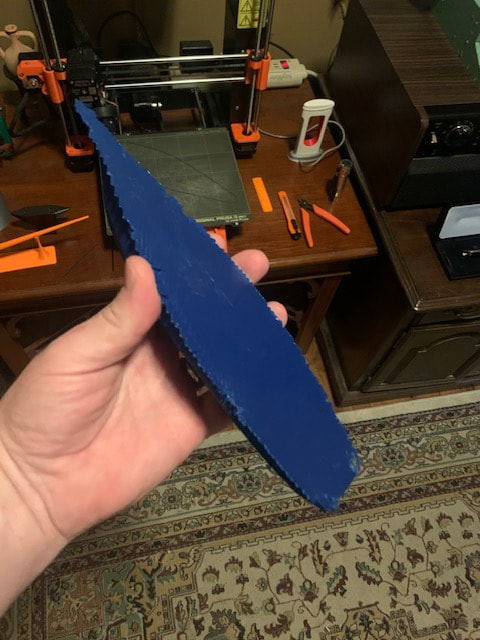
The support material was easily pulled out with a pliers and chisel.
I designed a simple base stand for the model and I will print that next, so that I have somewhere to set the hull.
Here is the stand base printing. 3D printed objects do not need to be 100% solid, in this case the wavy lines are filling up with inside of the part with about 15% plastic and 85% air.
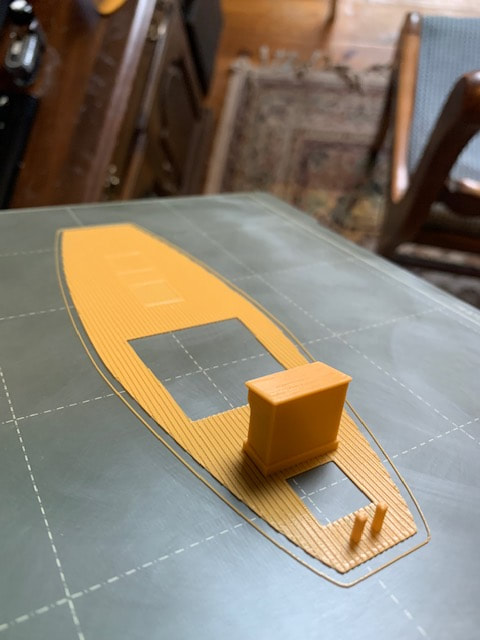
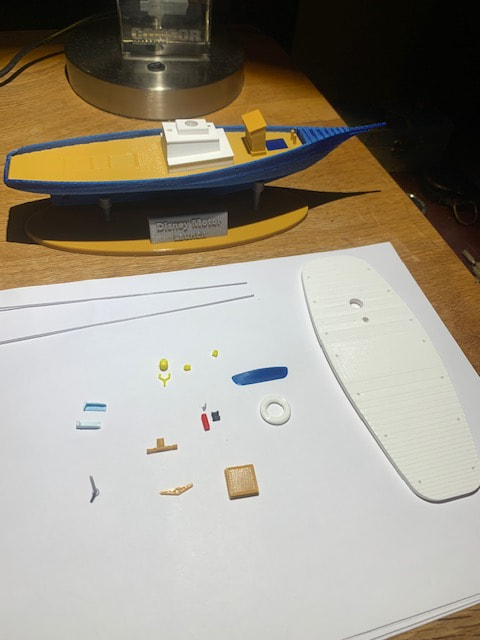
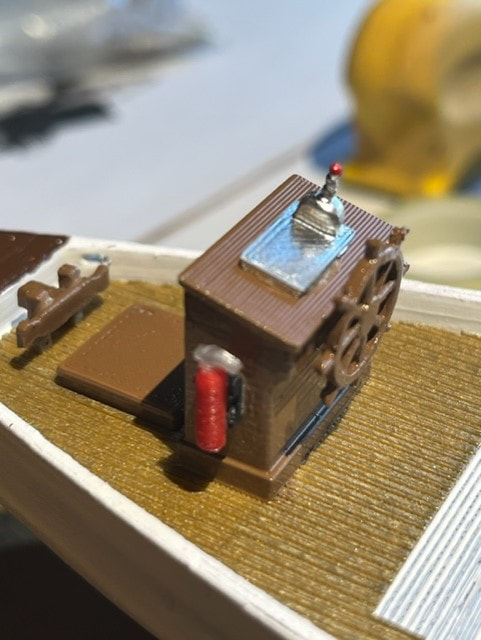
Next I printed the deck, which has the planks printed right into it. I also designed the helm-stand and the bollard posts directly into the deck so they printed right onto the deck as one piece.
Getting to printing some smaller parts now, and I am pleased with the outcome.
I will be painting all these parts, but will print them all up first and then I will start with sanding, assembly and painting.
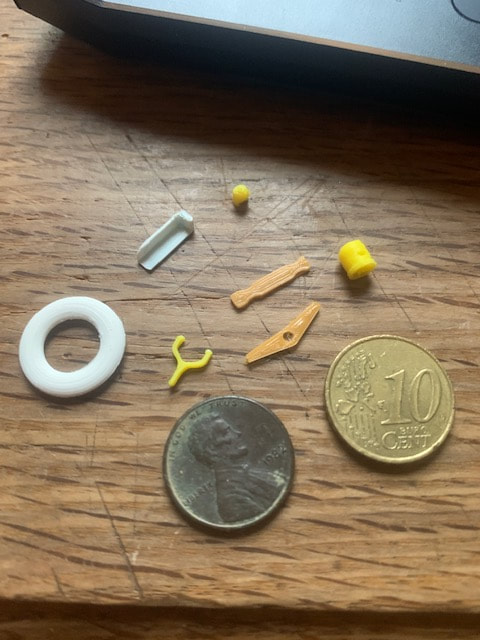
Current printed parts. The little red fire extinguisher turned out great.
After finishing the 3D model in Fusion 360 I completed printing the parts. While printing the parts I learned which orientation to print them in and how to print them best. In the end, I wound up with 69 printed parts which I will now sand/paint/assemble.
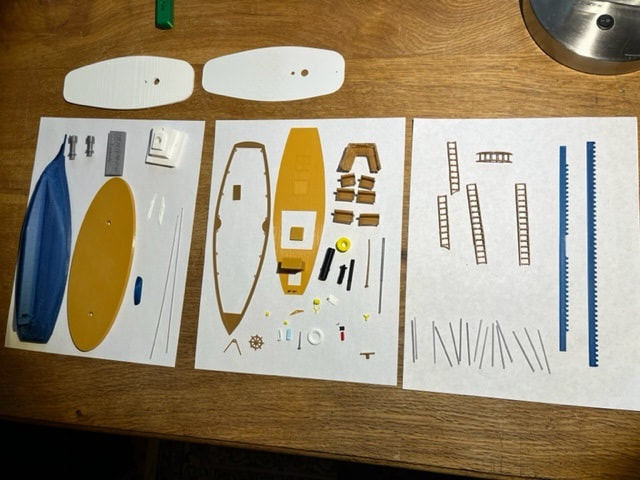
Here are all the completed printed parts. After working print orientation and finding the best way to print the parts, I wound up with 69 printed parts.
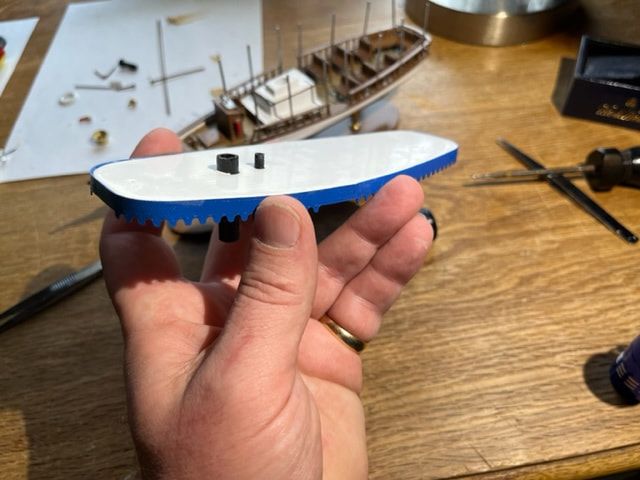
The curved top surface of the roof was a bit rough but I designed the roof in a laminated structure with a thin smooth sheet glued to the top of the curved roof structure. This saved me sanding time and made for a nice smooth rooftop.
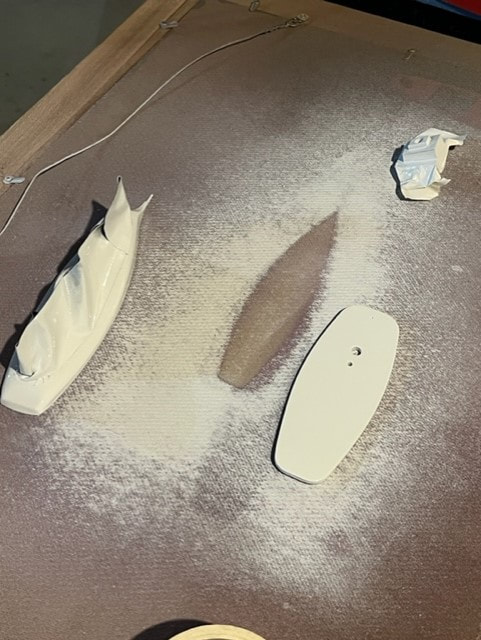
Sanded and now starting to paint the pieces. Mostly spray painting with some brush painting also.
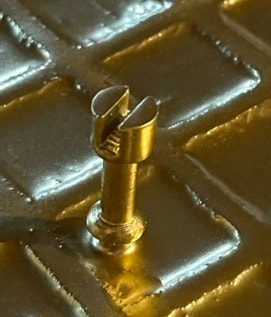
Metalic spray paint for the base brackets.
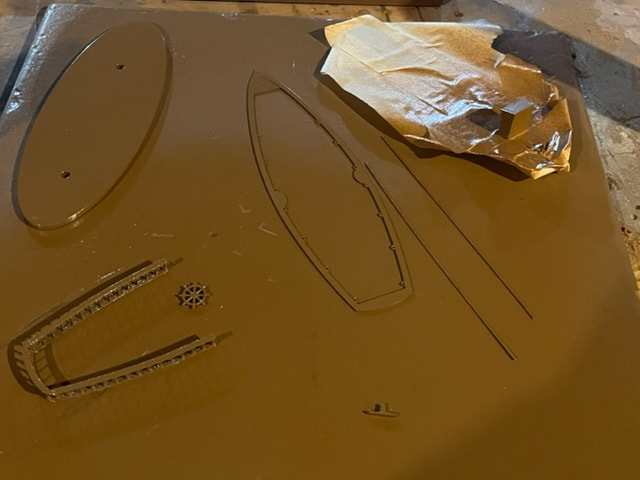
Taping and masking parts
First I painted the anti-fouling red paint below the waterline, then masked off the hull and in this photo am spraypainting the hull white, along with other parts.
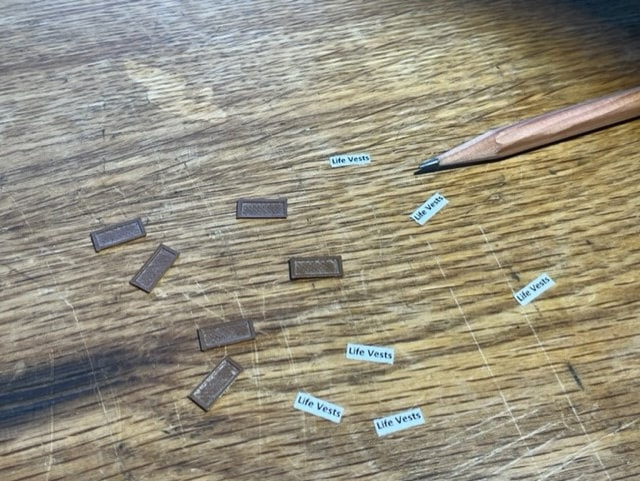
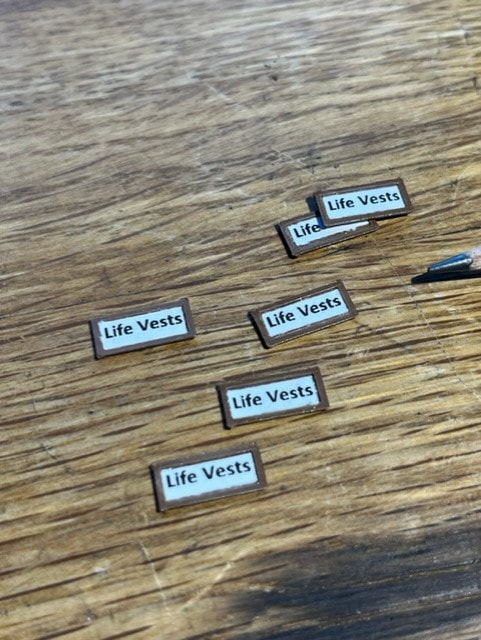
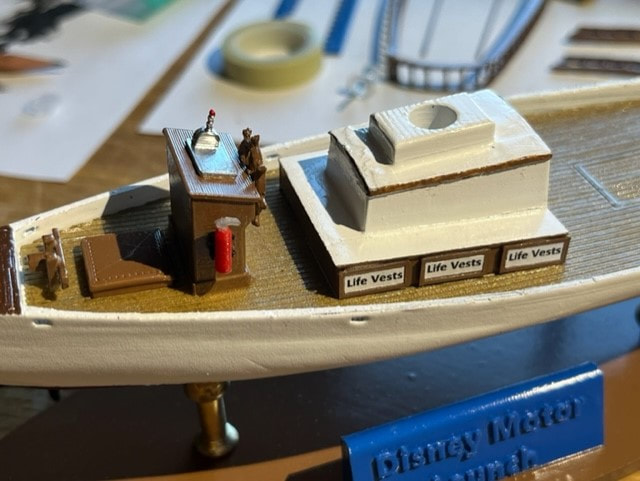
The boat has life vest hatches as seen in this photo. I printed the hatches in plastic and printed the text on paper.
So at this point I have printed 75 individual parts for the model of the Disney Water Taxi, also known as the Disney Motor Launch. Most of the spray painting of the individual pieces is done, so now I will begin assembly.
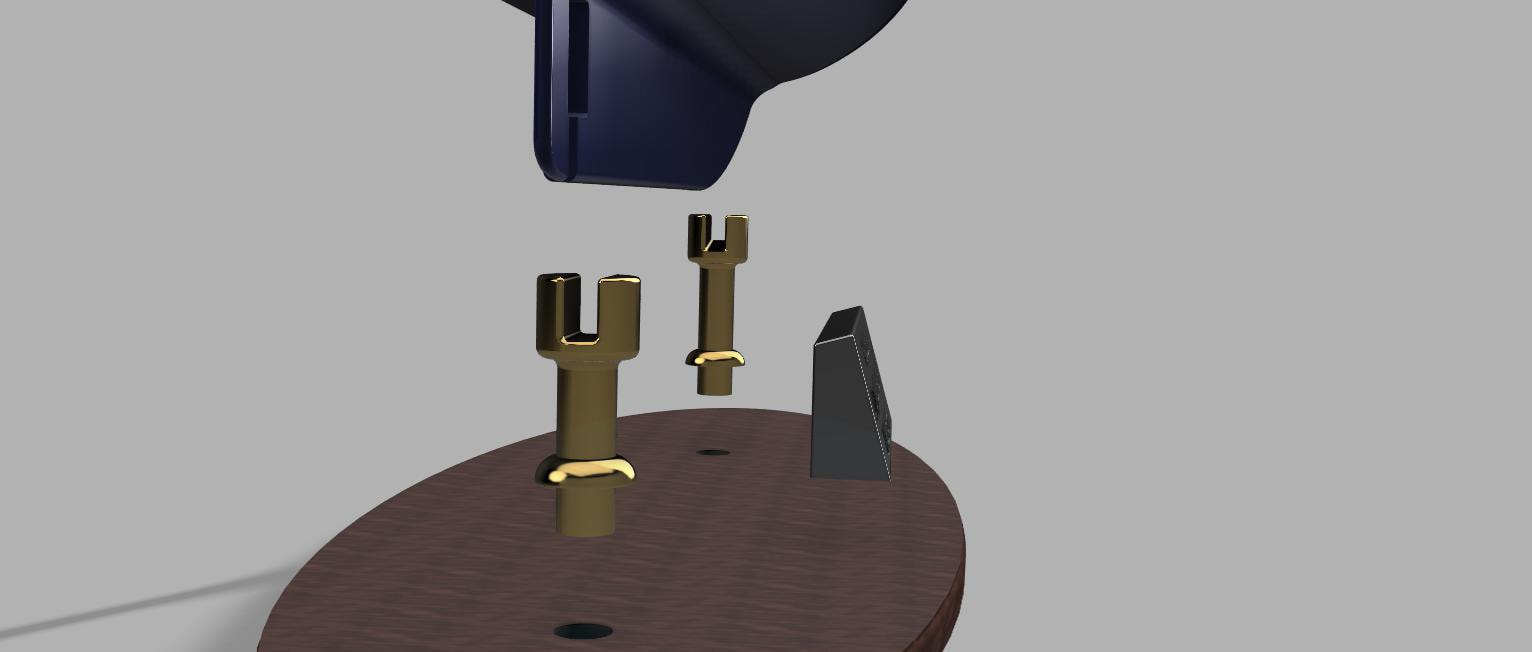
I designed and printed these fancy boards that are mounted to either side of the bow with raised filigrees which I painted in gold paint.
Glued on the deck, fire extinguisher, throttle, wheel, hatch, bollard cross.

Glued on the engine house, coaming cap, and railings.
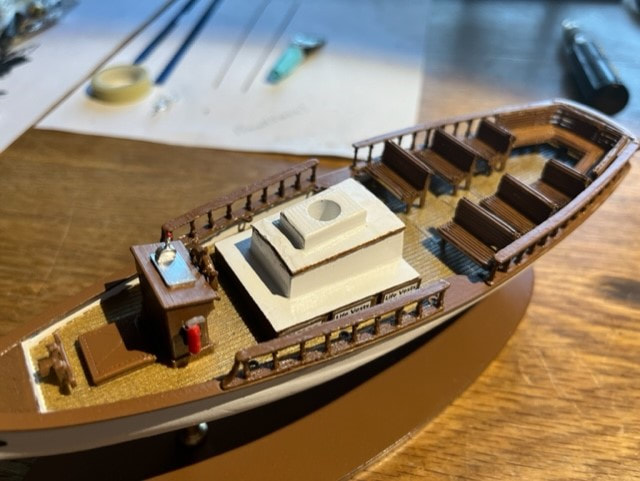
Then I glued on the chairs, which have finely printed slats, just like the real ones.
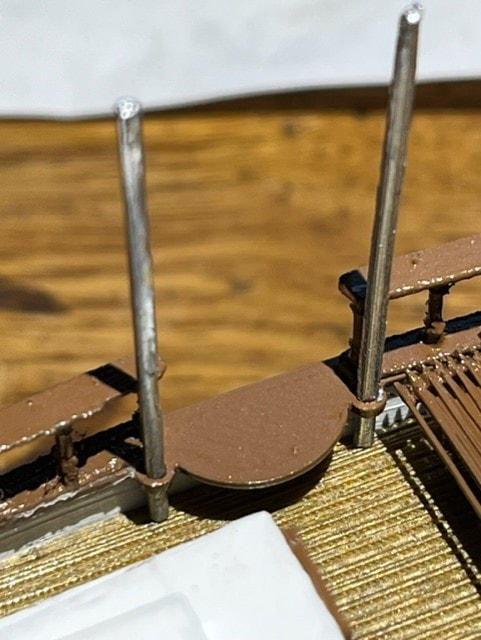
I designed mounting holes for the roof poles, printed right into the coaming cap. Here I am inserting the roof poles into those holes.
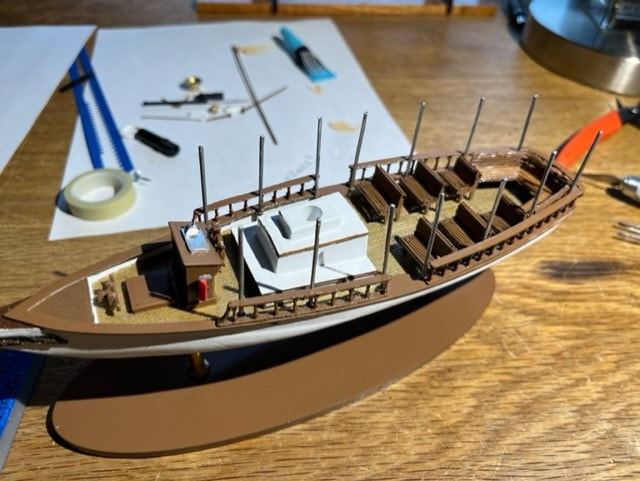
Roof poles installed.
Here is the model with the roof resting on the roof-poles (not glued on just resting there)
Attached the (very thin and flexible printed) awning to the roof.
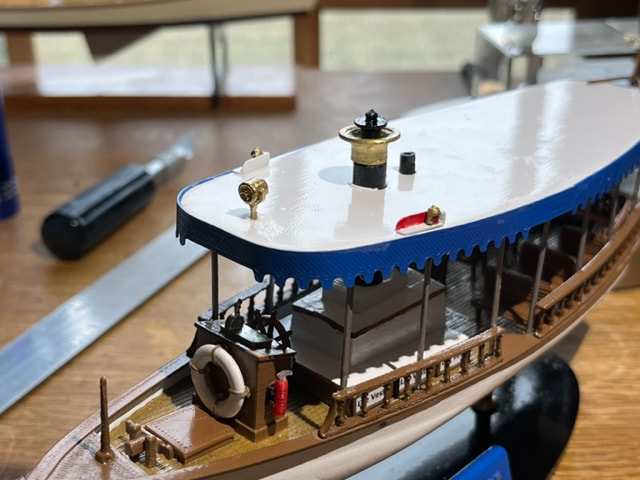
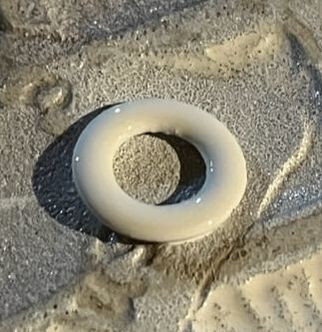
Glued the roof on, and then added navigation lights and spotlight. Also finished and installed the life ring.
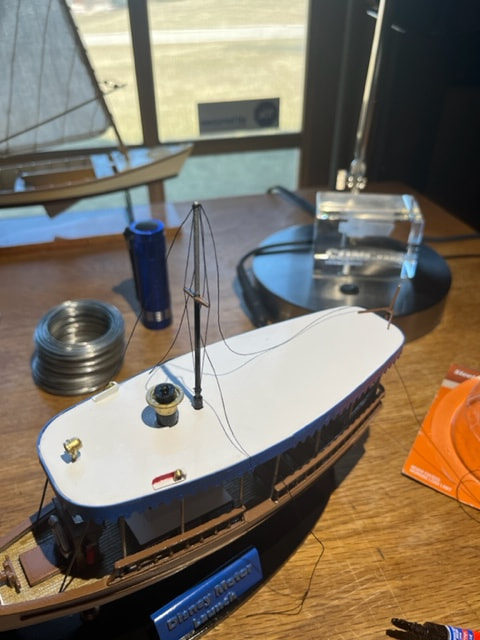
Mast and rigging.
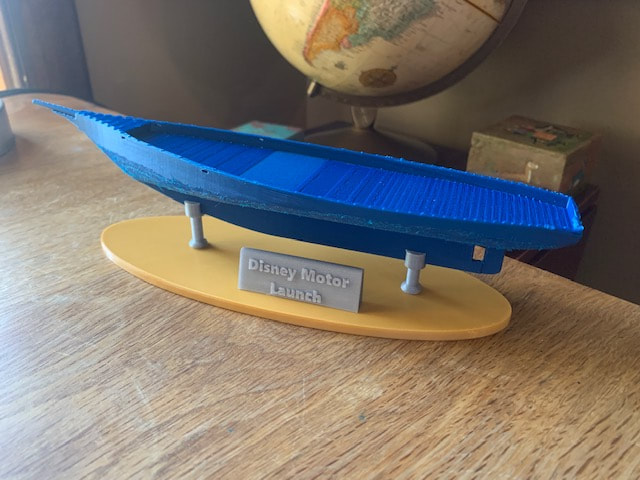
Completed model of the Disney Motor Launch!