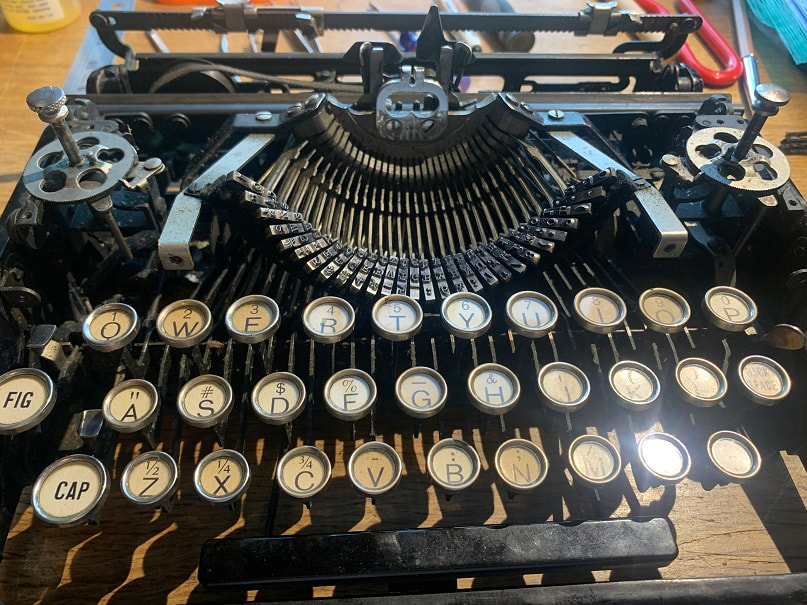
"3 Bank" simply means that there are three row of keys
I became interested in these typewriters because of the mechanical genius of their designers, because of their historical importance, and because many books that I like that were written in the 1920s were composed on these exact models of typewriter. Below, I document the repair of two Underwood 3 Bank Typewriters, which each had unique issues, including installation of new platen.
Here I will share what I have learned about Underwood Standard Portable Typewriters; there is much detail below that I think will only be of interest to those that are interested in these particular machines. Also know that I am not a professional, and I expect that some of the methods I use will be proved by my own learning or by others commentary, to be incorrect or inefficient. I am not that old but I am of an age that I used a typewriter in school in the 1980s. I now enjoy typing notes and poetry on these typewriters, and also encouraging others to feed a fresh piece of paper in and type their own words. On these machines, once a letter is typed, there is no going back! These machines are works of human ingenuity, expression, and design, and were used to communicate in a human, pre-digital age. Stay connected humans!, use a typewriter (writes the guy on a internet website, oh the irony). I have a spare Underwood 3 Bank typewriter and might send you parts for Underwood 3 Bank Typewriter from it if you send me a kind note and if the part is still on my spare typewriter; [email protected].
I document below the repair of two Underwood Standard Portable 3 Bank Typewriters from 1923. The first was in very good shape, the second needed a bit more work. I also include photos of replacing worn or missing Underwood Portable Typerwriter case parts.
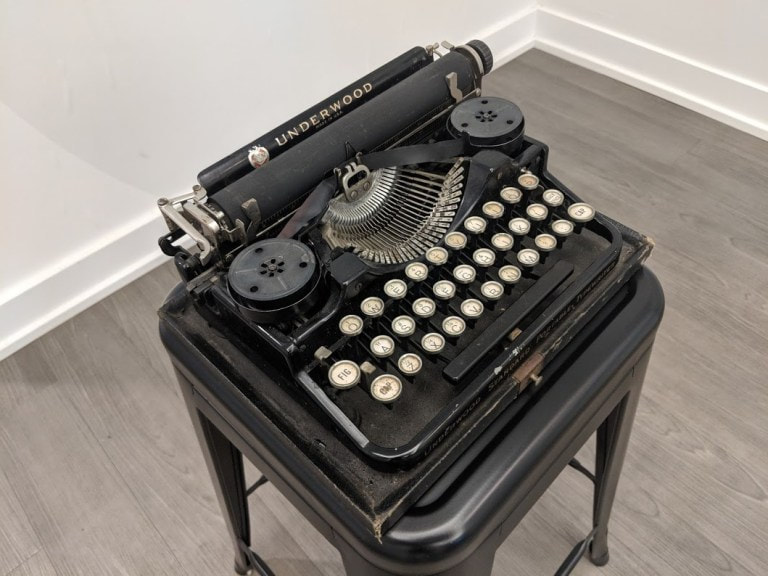
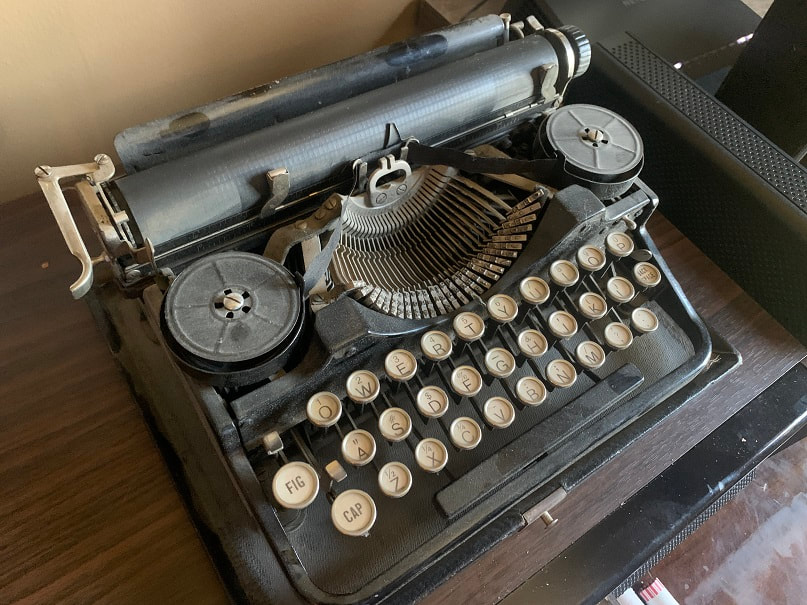
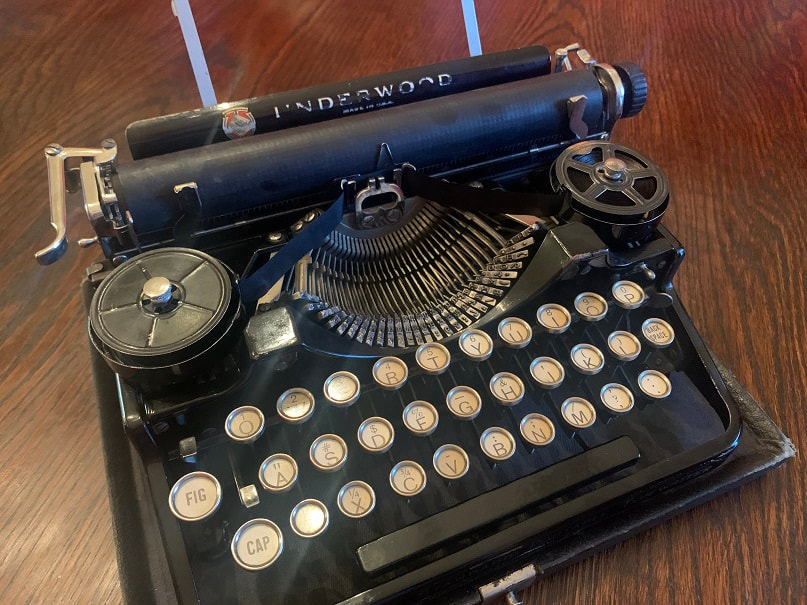
Underwood Standard Portable 3 Bank Typewriter sn 81381:
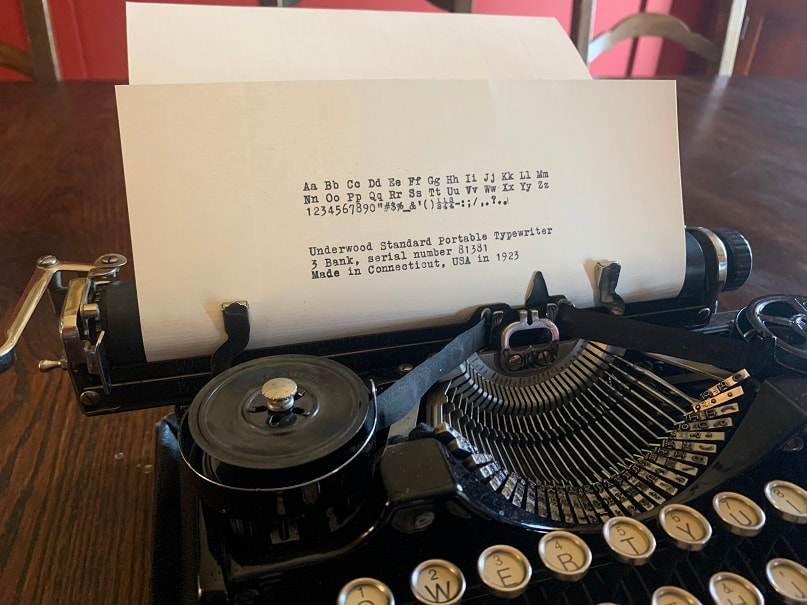
I bought this typewriter, serial number 81381 built in May/June 1923, and it was in great shape, but needed the followings repairs:
Items needing repair:
It was missing parts, so I bought an identical typewriter, sn92451 and stole parts off to make this typewriter whole. Documented further down this page is my more extensive repair of sn92451.
Items needing repair:
- The bell didn't work
- There were no paper supports.
- Rubber feet were missing and replaced with foam
- Rubber case feet missing and replaced with foam
- Remove and install new rubber platen
It was missing parts, so I bought an identical typewriter, sn92451 and stole parts off to make this typewriter whole. Documented further down this page is my more extensive repair of sn92451.
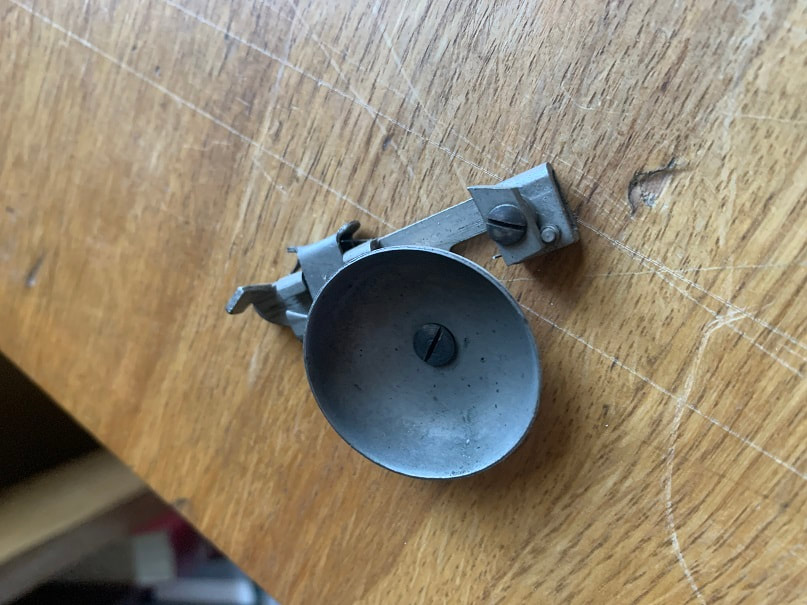
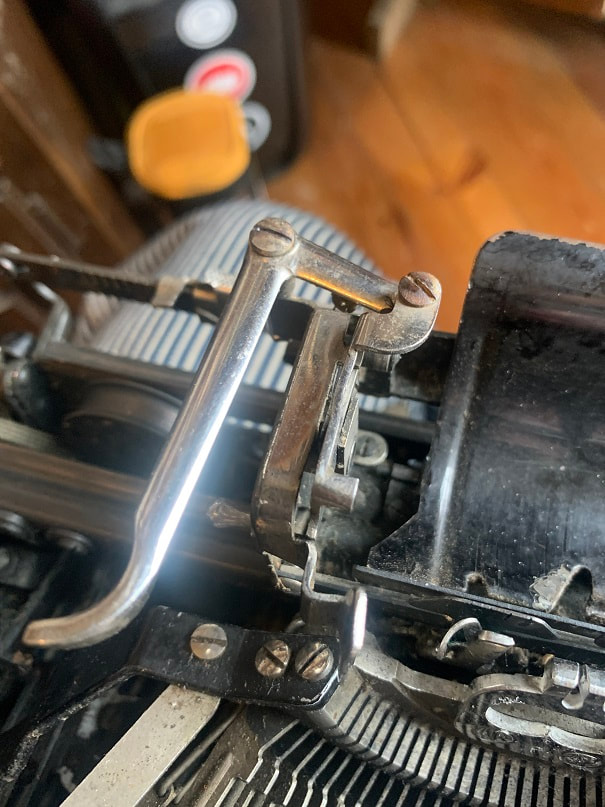
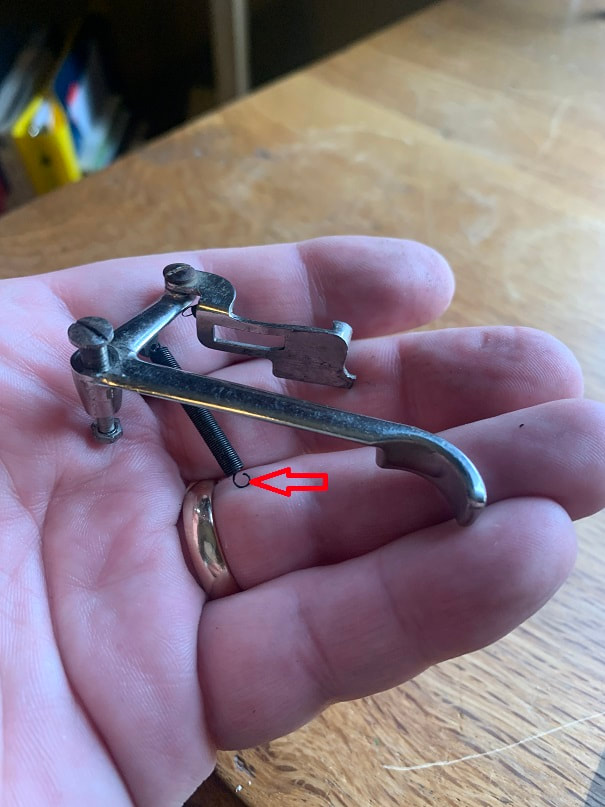
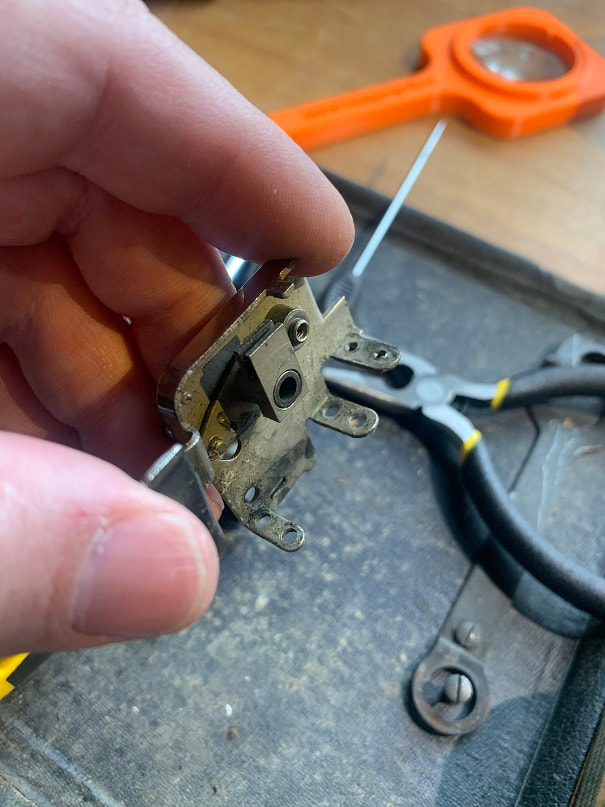
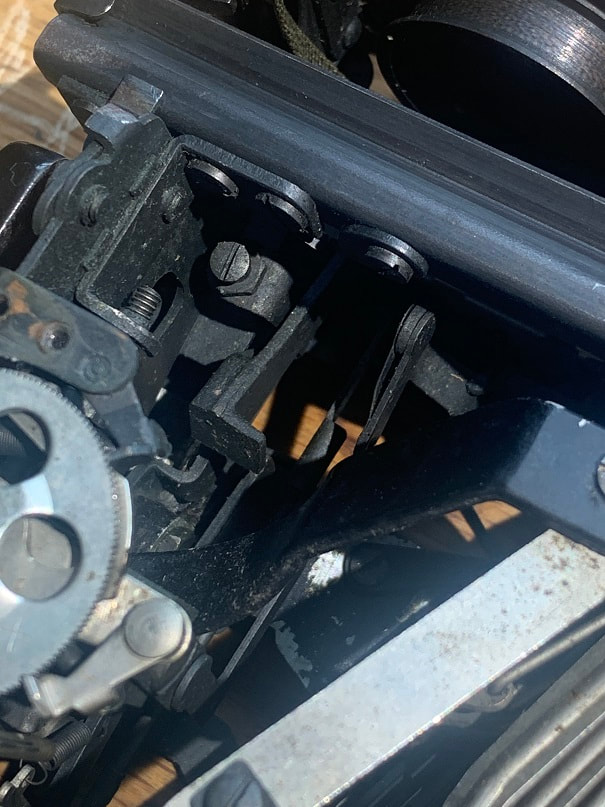
This is the fully functioning bell mechanism off of the 2nd typewriter, I transferred it to this type writer and it works well. The bell mechanism lifting wedge (on the right of the mechanism in the photo) was broken on the 1st typewriter I bought.
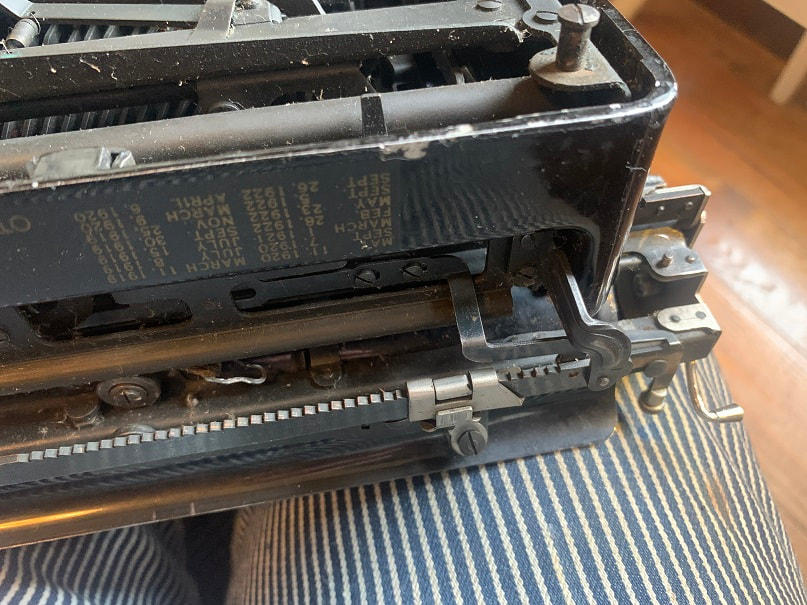
Unscrewing three screws allows for the removal of the marginal stop rack on which the marginal stops are installed. The bell can be seen in the photo as an integral part of the margin stop.
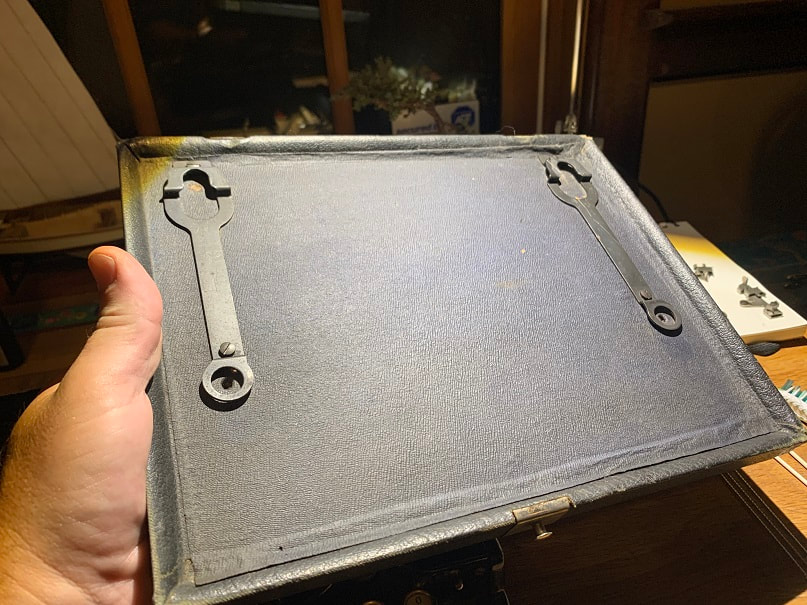
Removing Underwood Portable from the case board
The front of the typewriter is held down with two screws. The back of the type writer is held down by brackets that hold the rear feet. To remove the typewriter from the case board, remove the two screws that hold the front down, then, keeping the typewriter flat down on the case, slide the typewriter forward to pull the rear feet out of the brackets that hold them.
Close up of the screw holding down the right front of the typewriter.
location of front right screw
location of left front screw
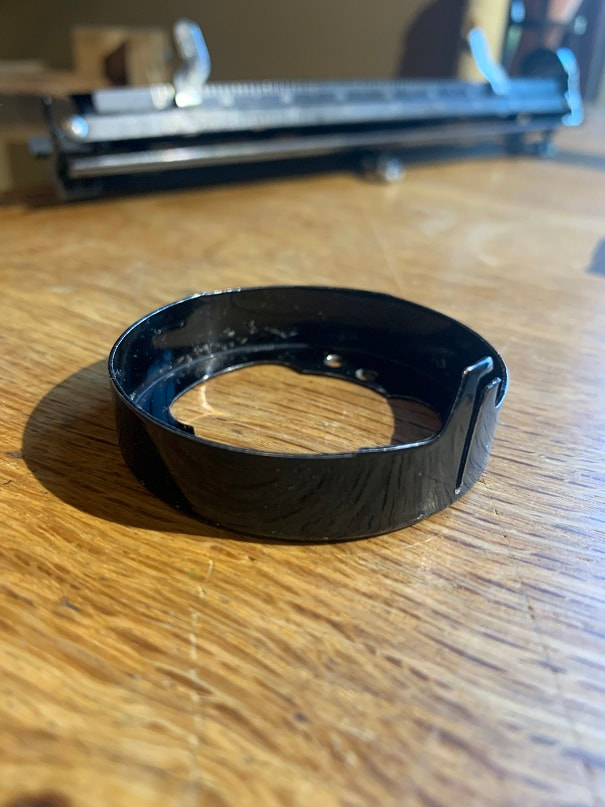
Underwood Standard Portable 3 Bank Foot reproduction
I 3D printed new typewriter feet to replace to worn and cracked feet on both typewriters above. Here's how I did it. The rubber on these antiques gets hard and cracks over time. The feet on both of my typewriters were cracked and defective. I drew new feet on Fusion 360 and went through about five design iterations, making small adjustments to the dimensions each time, until the feet came out perfectly on my 3D printer. I first printed these in 60A Durometer TPU material but it was too soft. I tried 30D durometer TPE and it worked great. Here are some photos of the new feet, along with a photo of the old foot that I used as a pattern for the design. I printed these on my Prusa i3MK3S 3D Printer.
Someone has done a good, functional job of making these foam typewriter feet, but I wanted screwed in rubber feet that matched the original design.
I patterned the foot from an original Underwood Portable 3 Bank Typewriter foot from another typewriter.

New 3D printed replacement Underwood typewriter feet patterned off the original feet.
New replacement typewriter feet installed. I printed these from 30D Durometer flex material.
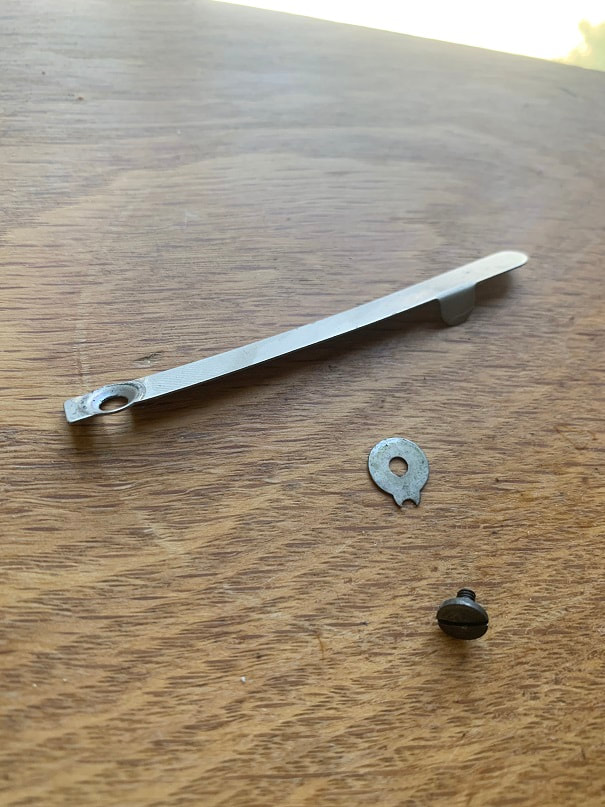
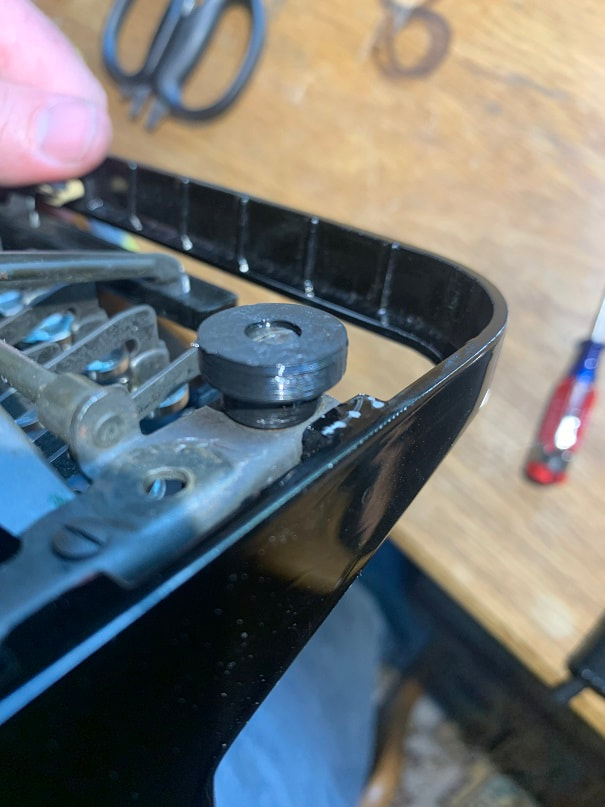
The paper supports include a custom washer, screw, and the support itself. Here is one of the supports that I took off the second machine to complete the first typewriter.
Complete and fully functioning Underwood Standard Portable 3 Bank Typewriter sn81381:
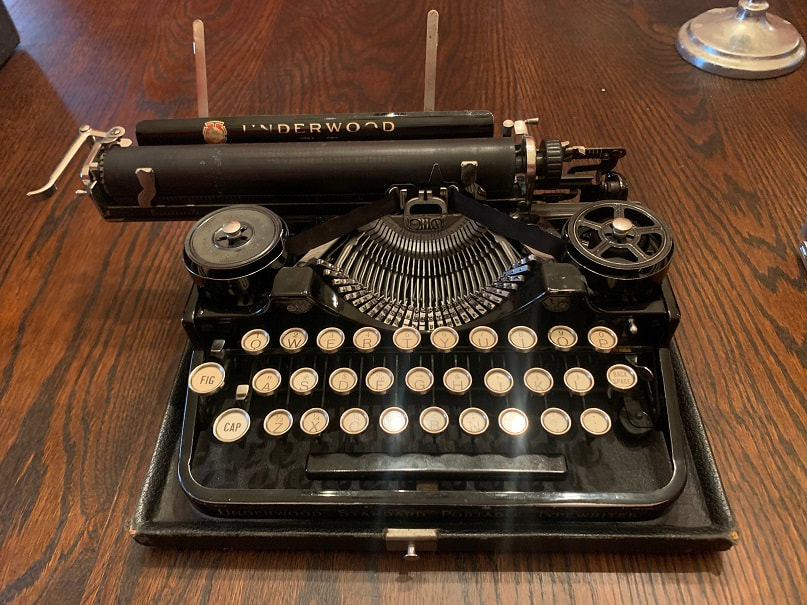
After restoration and replacing missing parts: My fully functional Underwood Standard Portable 3 Bank Typewriter, sn81381 made in Connecticut between May and June 1923.
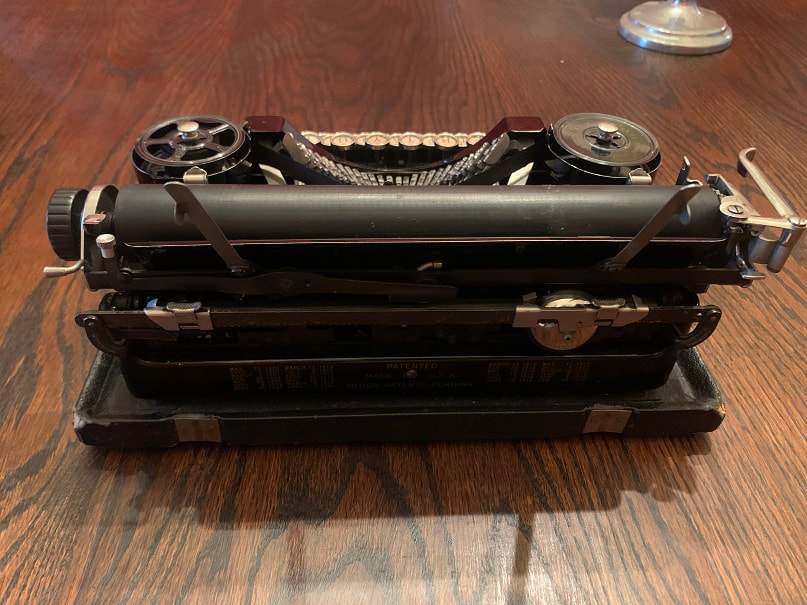
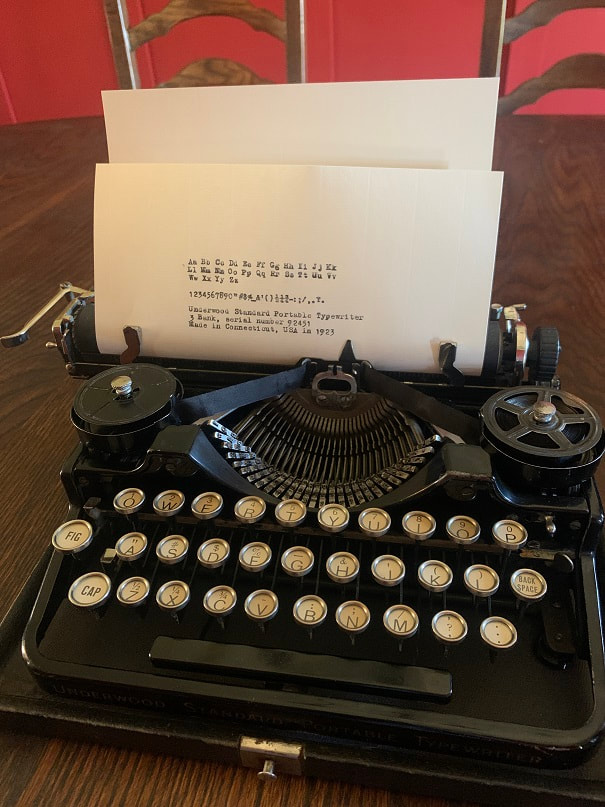
Underwood Standard Portable 3 Bank Typewriter sn81381, rear view, after installing paper supports and fixing the bell. This is now a fully functioning model and we use it at home.
Ernest Hemingway's Underwood Standard Portable 3 Bank which is believed to be the typewriter on which he wrote "A Moveable Feast". This typewriter is on display at the American Writers Museum in Chicago, Illinois.
Here is a Link to a website that lists these typewriters by serial number and year of manufacture.
and a great article on the design history of the Underwood Standard Portable 3 Bank Typewriter:
At the bottom of this page I share case restoration, including make new case feet and handles.
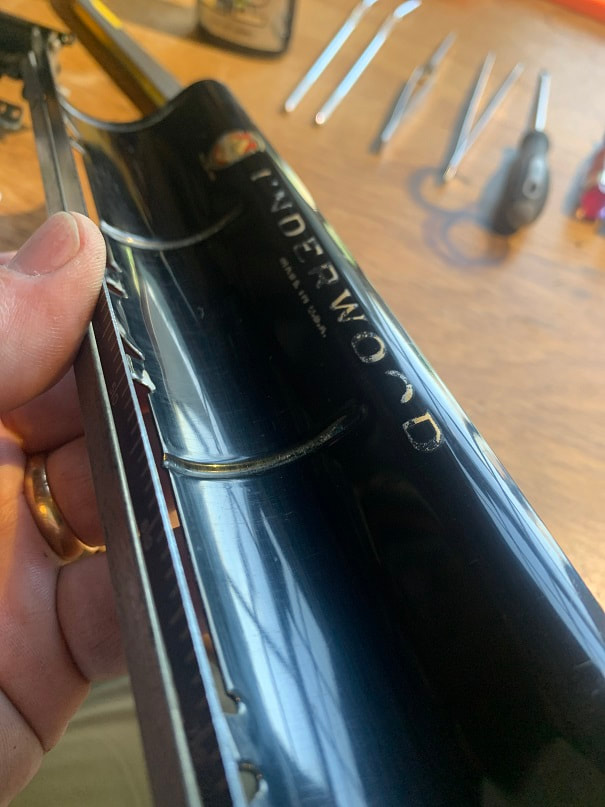
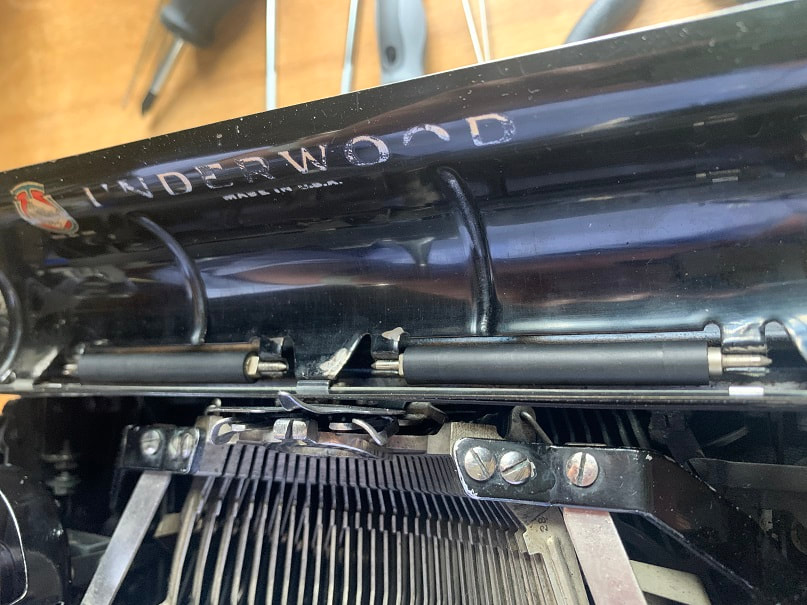
The platen on the typewriter above had become too hard. Click here to visit my page on making a new platen.

New platen rubber lagging installed.
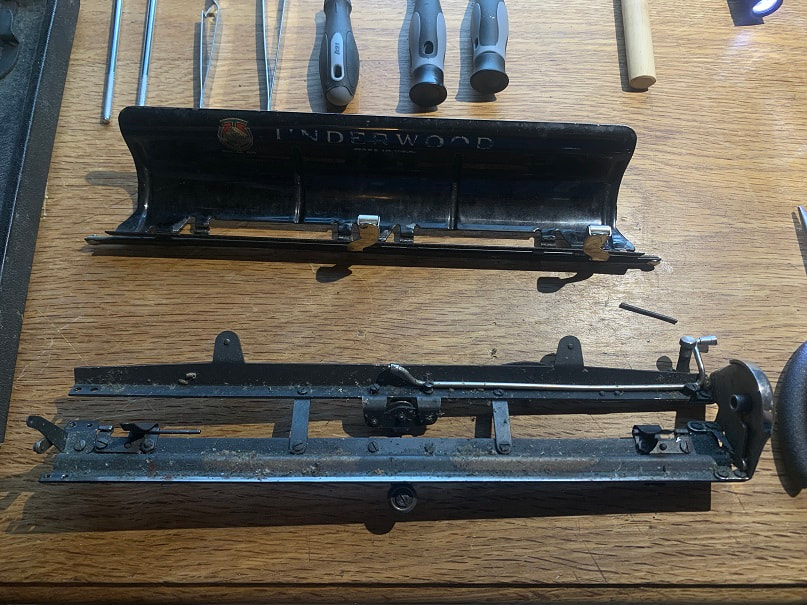
Repairing Underwood Standard Portable Typewriter Serial Number 92451
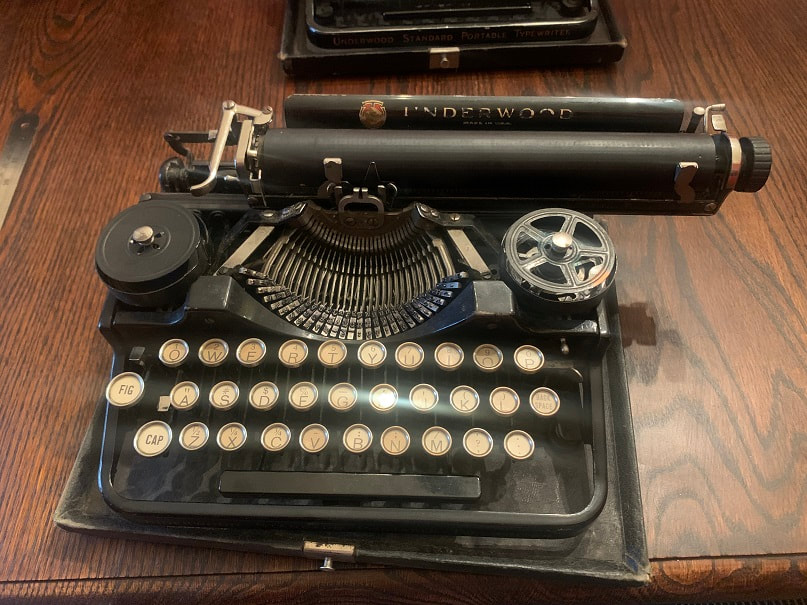
Here is a photo of the completed Underwood Portable 3 Bank sn92451 after making the repairs below.
This is Underwood Portable 3 Bank sn92451 made in Connecticut in Nov/Dec 1923, before restored it. From the outside this typewriter looks great, and it is a strong candidate for cleaning up and restoring. Below I list the missing parts and non-functional aspects of this machine.
Missing parts and functions that don't work on this typewriter:
- Bell is missing
- Paper supports are missing (took them off to finish another typewriter)
- Line space lever does not engage sprocket and does not advance the cylinder
- Rotating the cylinder knob does not advance paper; the cylinder does not grip paper
- Keys stick
- The left steel ribbon spool is gone and replaced with a paper one
- Fig and Cap keys raise the carriage but the carriage stays up and does not return down
- Feet are cracked and broken
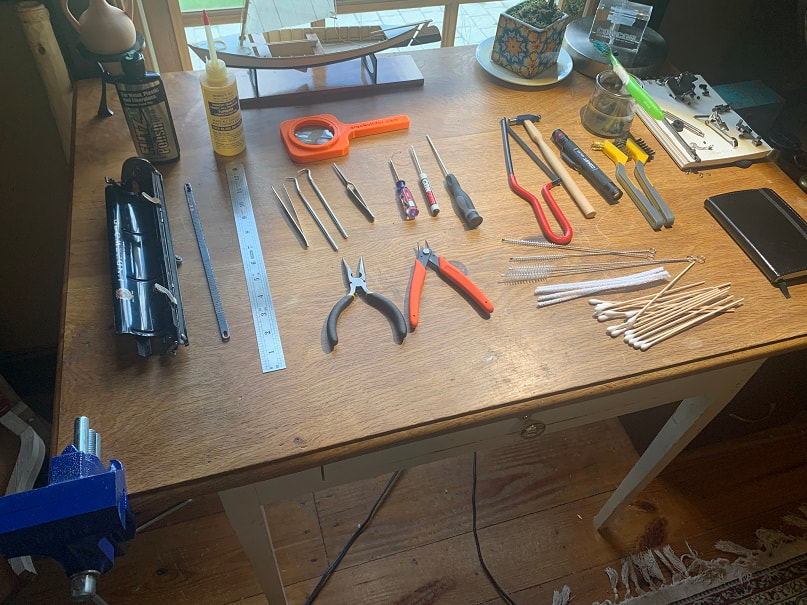
Various tools I am using for this project.
A note on solvents and lubricants:
- Pure Mineral Spirits work well to clean up parts but be careful not to over scrub or damage parts in an effort to clean them
- After the parts are nice and clean there may be a temptation to lube 'em up with various oils. Please note that in my opinion liquid oils in many applications, especially external exposed surface applications, will attract dust and cause dust to stick to the oil and gum things up more than if the oil had never been applied. Please keep this in mind.
Disassembling this machine is like a puzzle and I don't have a manual so I may not have done this the right way, but here is how I disassembled this typewriter.
The typewriter seems to be in good working order but needs new rubber and there is so much gunk and dust in all the parts, that it must be disassembled, cleaned, and reassembled; with missing parts replaced.
Now, onto the photo log of how I am restoring this typewriter.
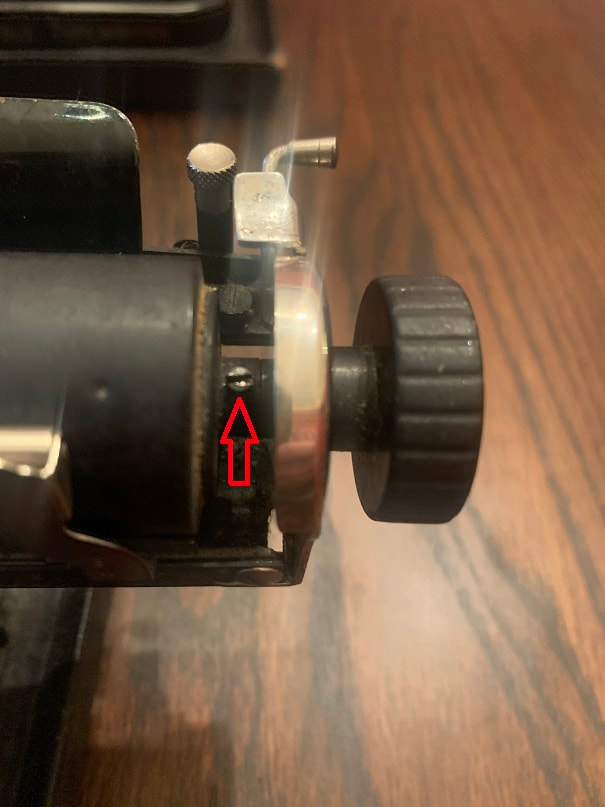
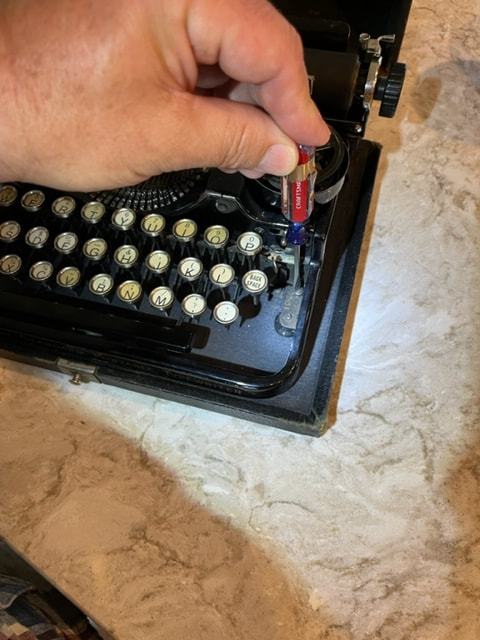
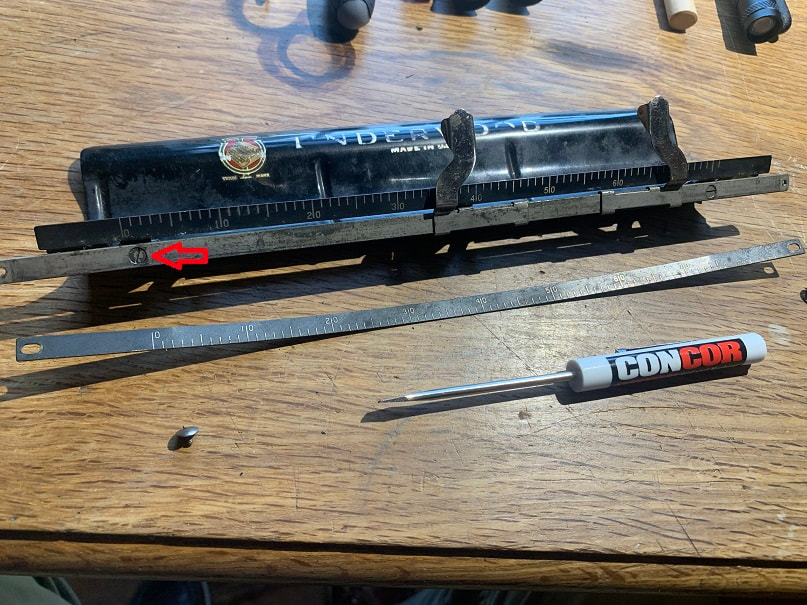
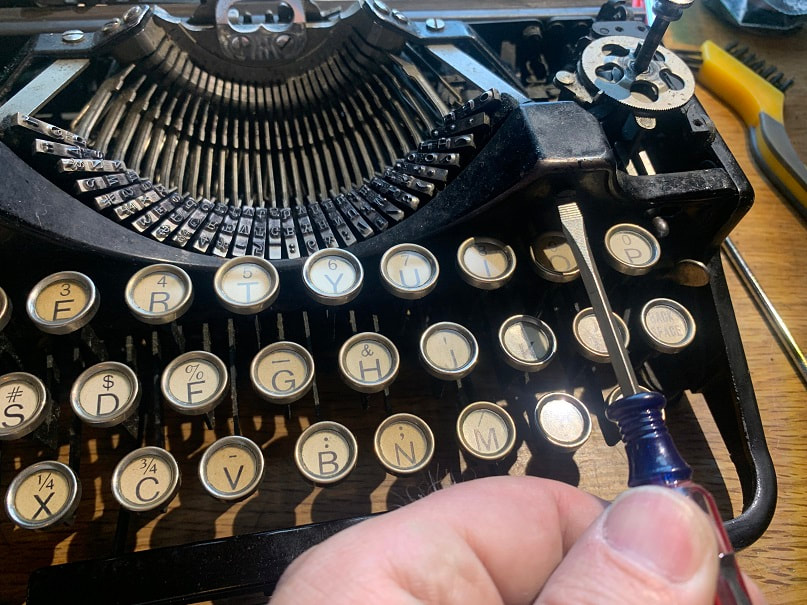
The platen is hard so the cylinder must be removed. First I removed this set-screw.
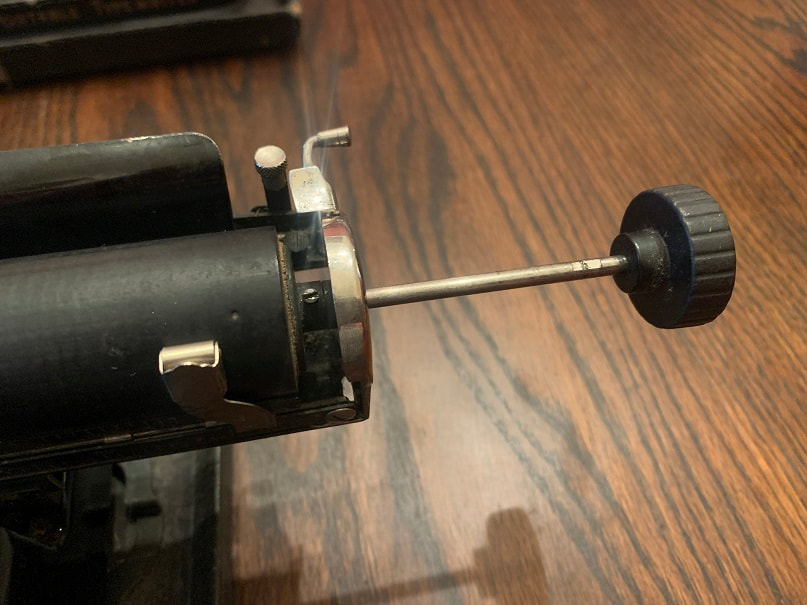
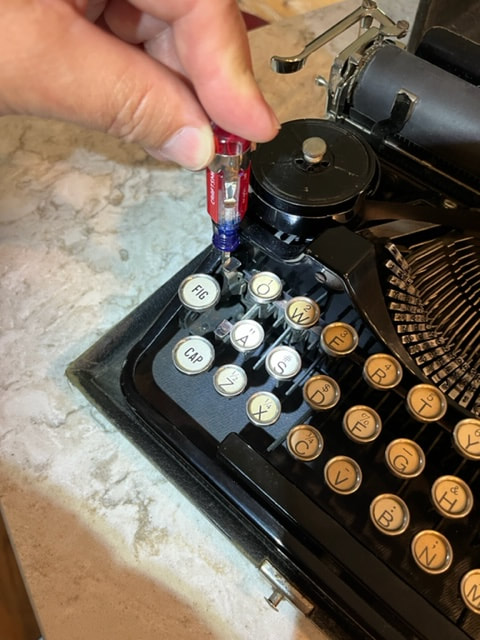
After unscrewing the set screw, you can pull the knob and it should draw out the cylinder shaft. Note the flat spot machined on the shaft for the set-screw.
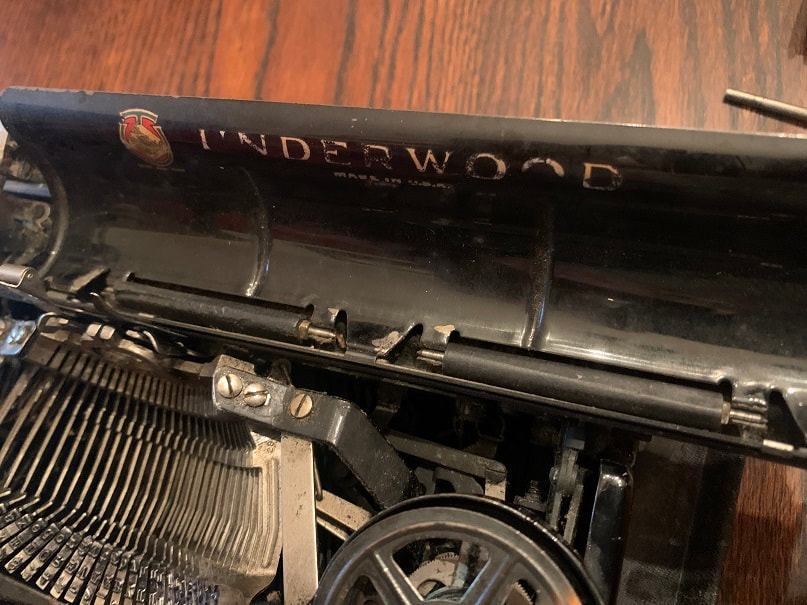
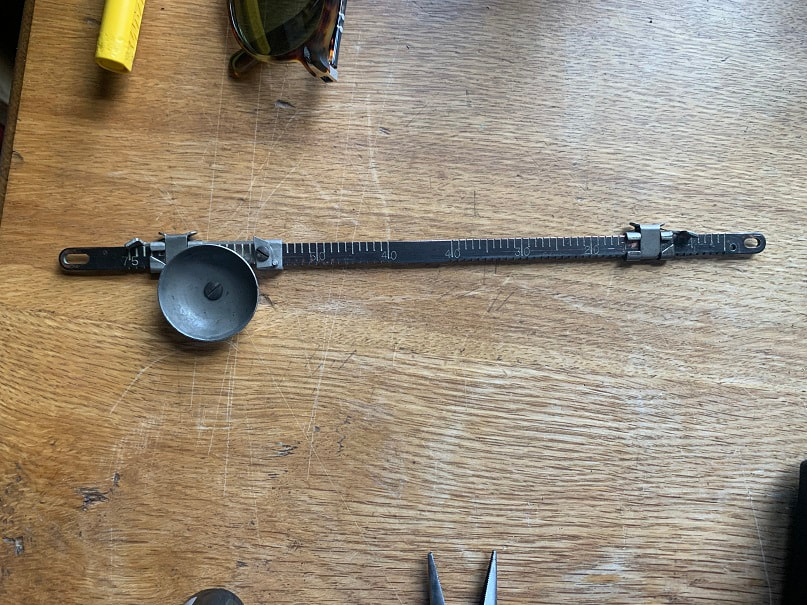
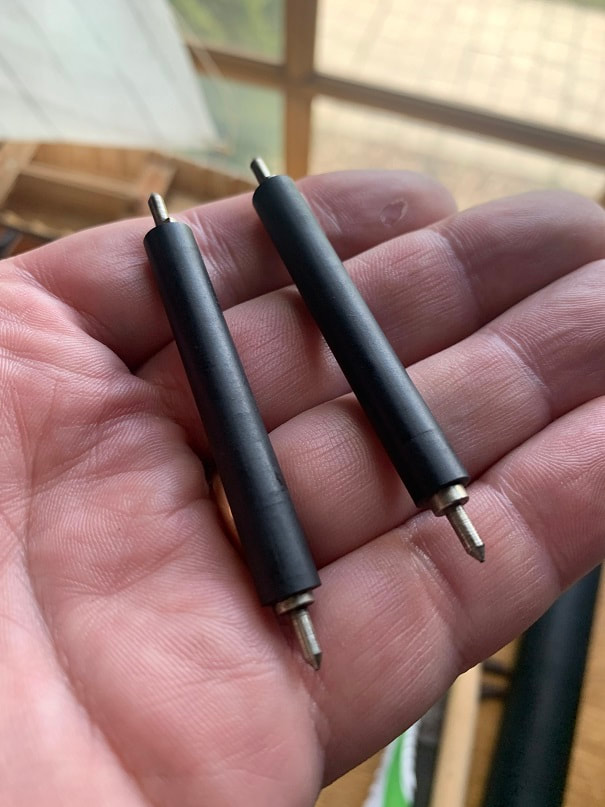
After removing the cylinder I could quickly see why this Underwood portable 3 bank typewriter was not advancing paper when rotating the cylinder: the drive rollers are deformed and flat.
The rollers are metal shafts clad in rubber. They are not retained with any clips or hardware, after the cylinder is out, you can just remove the rollers. Here you can see the deformed OD of the rubber cladding.
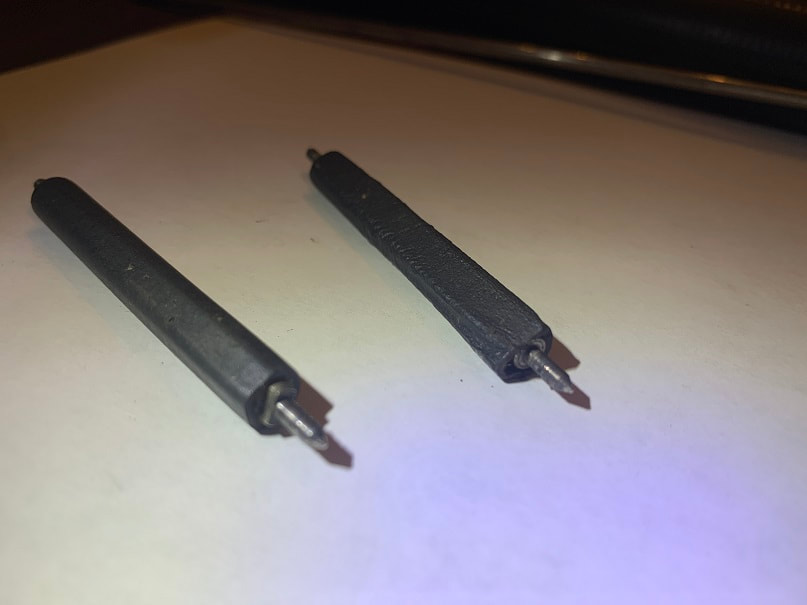
I measured the dimensions of the rollers, focusing on nondeformed sections.
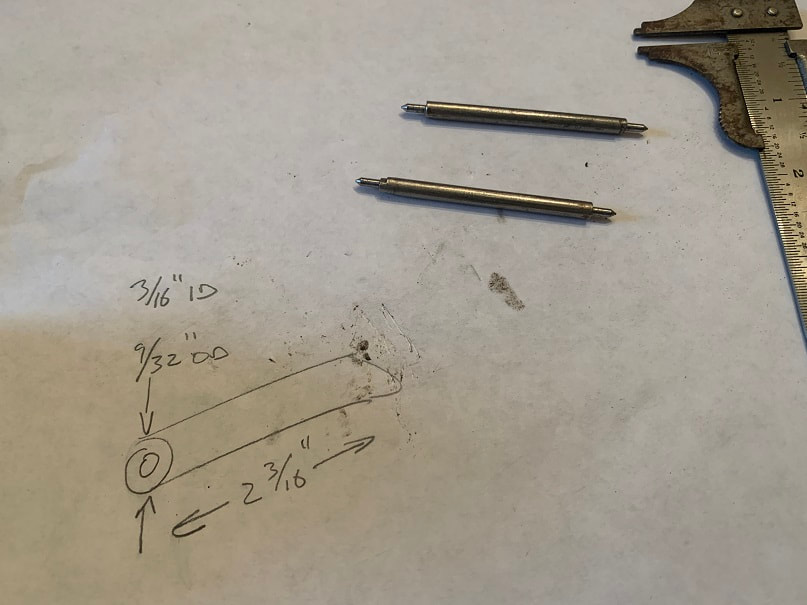
My take on dimensions of the rubber cladding on Underwood 3 bank portable typewriter rollers. I used a razor to strip off the rubber from the roller shafts shown in the picture. I am going to work on ways to reconstruct this rubber cladding.
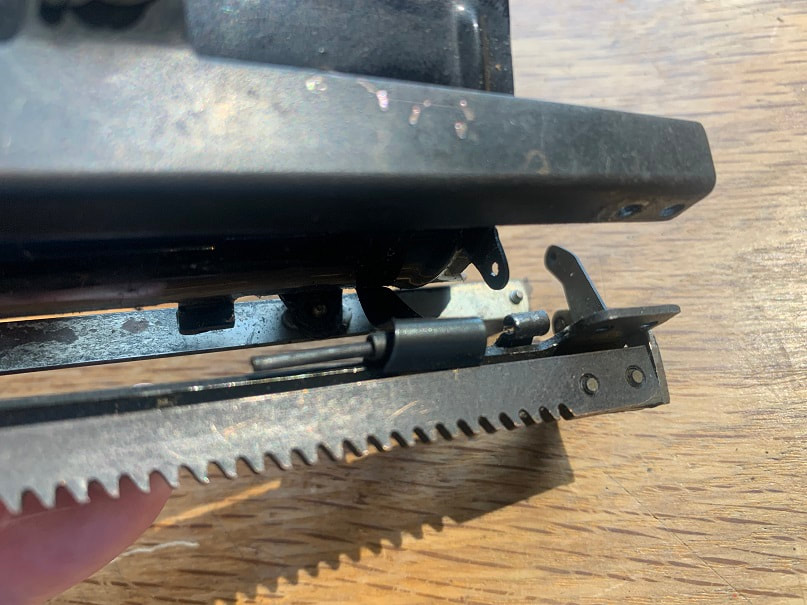
Removing the carriage from the Underwood Portable 3 Bank
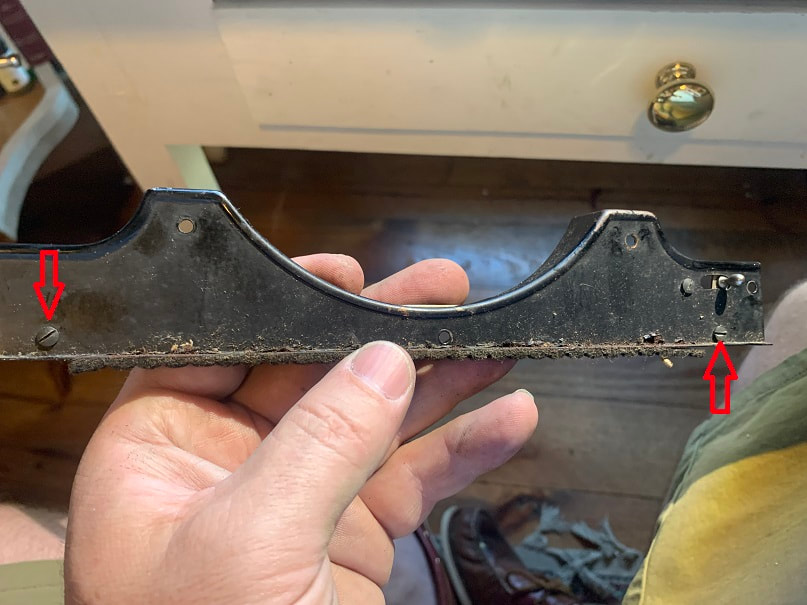
First I removed this stop screw on the right side.
There is a spring loaded wheel that provides the retraction force to return the carriage at the end of a line. In order to remove the carriage, I removed the nut as shown in order to pull off the end-clip of the retraction strap.
With the nut removed I carefully lifted the metal fitting at the end of the fabric draw- strap off of the stud, and I carefully led the strap backwards rather than letting it fly. It got caught up byt he bearing wheel as shown in this picture, but I was able to navigate it around this wheel, and then the spring-strap was totally out of the picture.
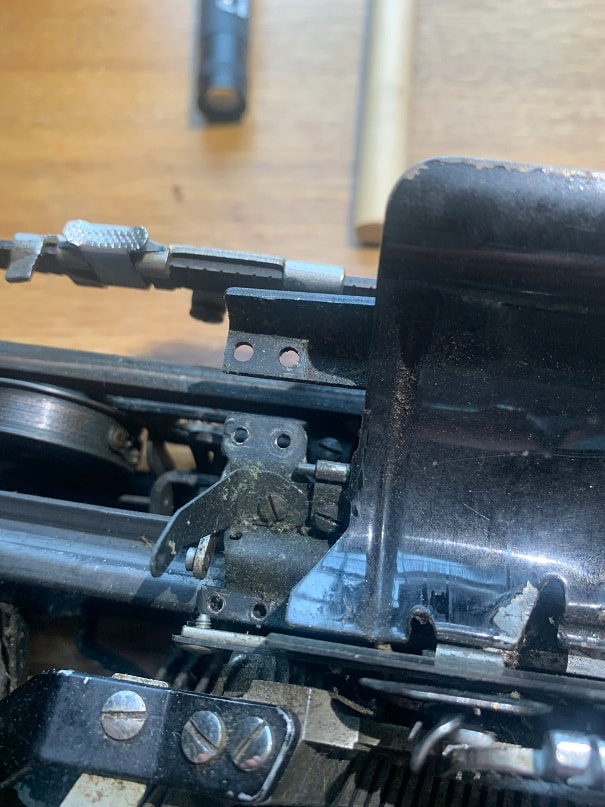
At this point, I tried to completely slide the carriage off the typewriter to the right, but the left side frame of the cylinder and the line space level and the thumb piece all interfered with the type guide and ribbon guides which prevented the carriage from being removed. Thus , I set out to remove the frame and hardware from the left side of the cylinder carriage.
I removed the line space lever and associated linkages. I found it better to un-clip the spring from the frame on the end with the red arrow, rather than removing the spring from the line-space lever end.
I then removed the Variable Line Space Lever from the left-end carriage frame.

I then removed the six screws that hold in the left end carriage frame. Some of these screws did not give up easily; do not rush and do not strip out the screws.
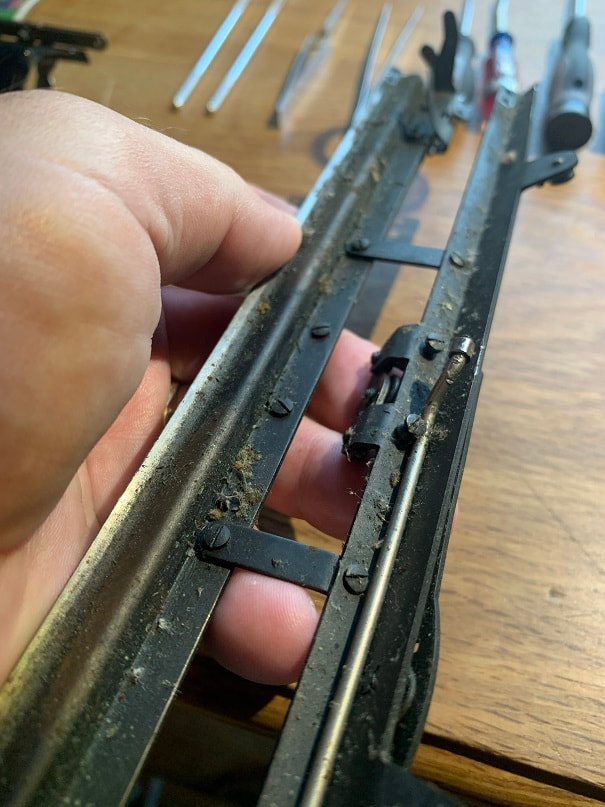
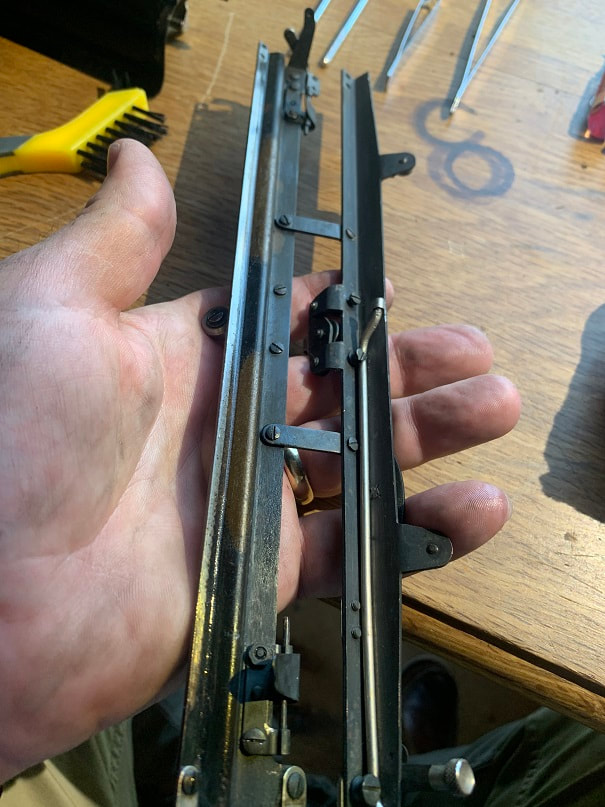
Here is the left side chromed frame of the cylinder carriage on the ole Underwood Standard Portable 3 Bank Typewriter, removed from the machine.

IT IS SO EASY TO FORGET WHERE EACH LITTLE PIECE CAME FROM!!! I am taking pictures as I go and I am also putting hardware back into holes as I set these pieces aside, so that I remember where the screws all go!
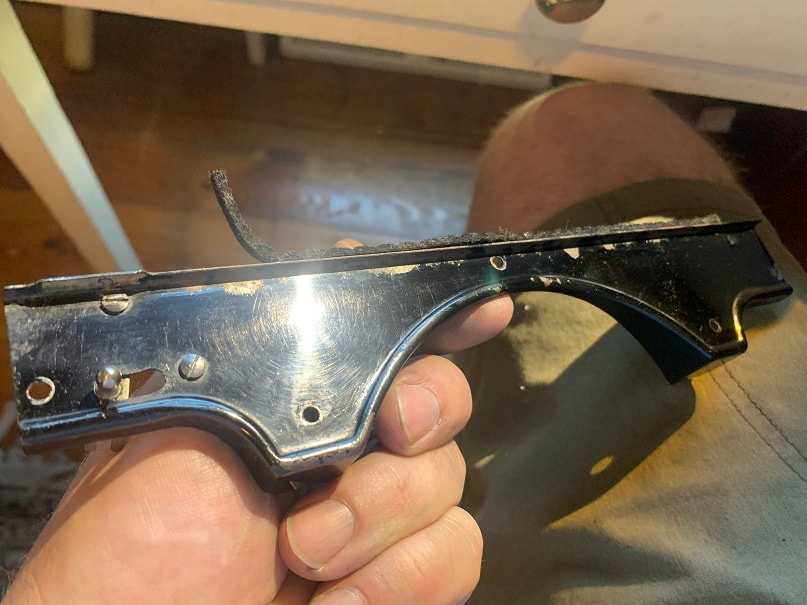
At this point I was able to pull the carriage assembly to the left, off of the typewriter. It took some jostling around a metal tab on the back and the central bearing wheel, but it came out.
Removing the cylinder carriage of the Underwood Portable 3 Bank Typewriter, unveils yet another very reliable and high quality device; the bearing wheel carriage that ensures 100years of smooth rolling! This is the correct orientation in the raceway. In this photo you can see all the dust and gunk that is keeping the machine from running smoothly.
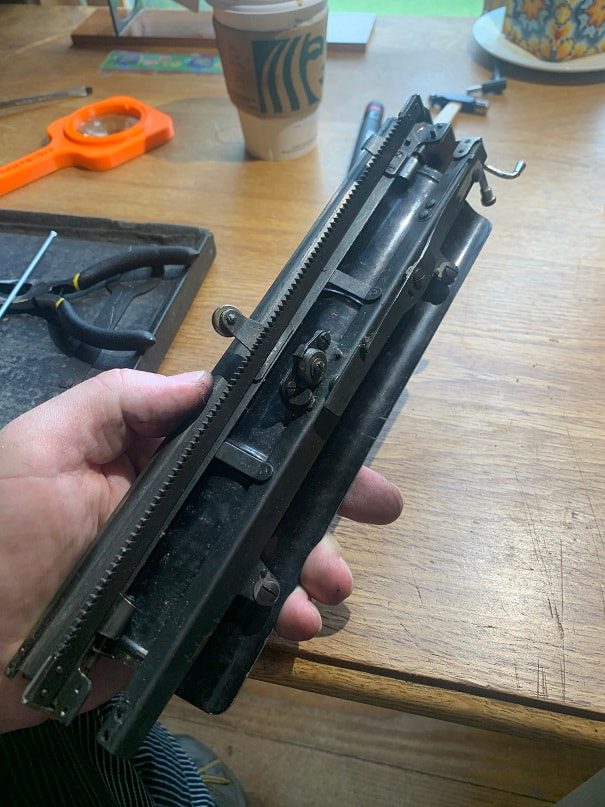
For reference, here is the underside of a Underwood 3 Bank portable typewriter carriage. I will now need to disassemble this and clean it.
Next I removed the curved sheet-metal paper in-feed piece. This can be removed by pulling out these metal pins, or by tapping them out with another pin and a hammer.
As far as my novice days of typewriter work go, this is a big moment; I have managed to remove the carriage and to disassemble it, without breaking anything.
Now to the actual work at hand: this residue, gunk, and dust must be removed from the components of this typewriter. Then it will type like the wind again!
Here is the same part after some scrubbing with a nylon brush. I will clean off all these parts and in some rare cases I will lightly lubricate some parts with light oil but liquid oils will generally only attract future dust and gunk.
Upon disassembly I noticed that the screw next to the arrow was missing a nut behind it; I will replace the nut.
Cleaned up and polished sheet metal parts.
Next I removed and polished the ribbon cups. There are three small screws, screwed in from the top, that hold the cups in place. I removed these and kept the screws in a ziplock with the cups. The photo above is of one of the cups after being cleaned.
Here's a view of the Underwood Standard Portable 3 Bank typewriter at this stage of disassembly.
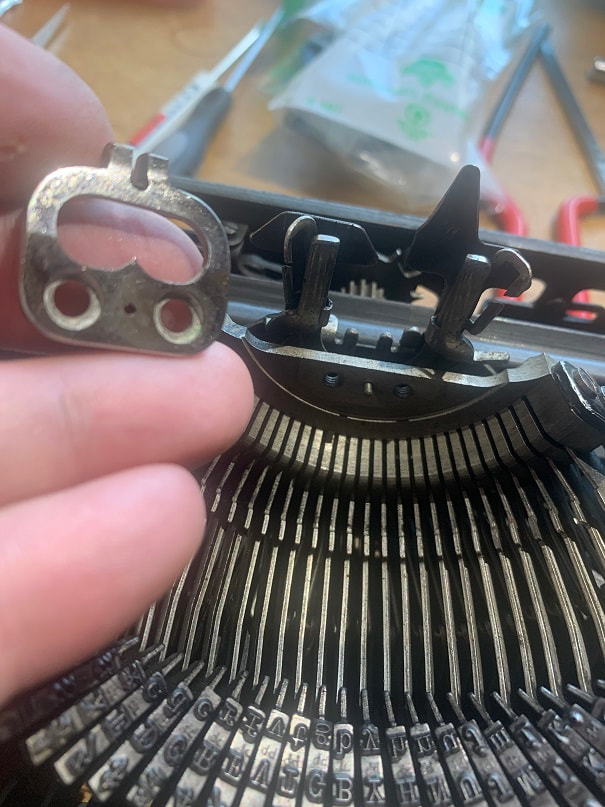
Next I set out to remove the faceplate (not sure if that the correct term), and I found that it can be removed by removing 5 screws from the front. NOTE that there are two screws, shown below, that should not be unscrewed in order to remove this plate.
These two screws secure the ribbon reversal lever linkage and should be left in place when you remove this piece of sheet metal.
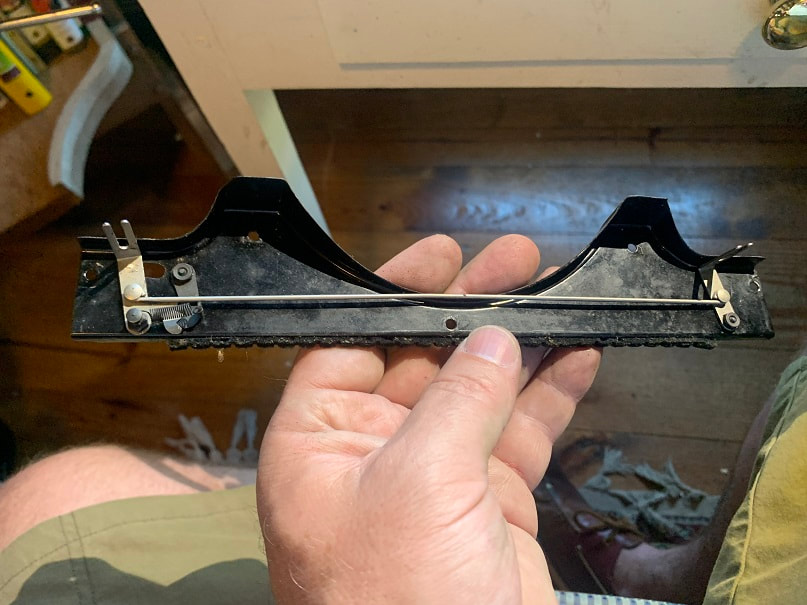
Photo of the back-side of the face plate of this Underwood portable. This is the linkage that reverses the ribbon. I will now clean this piece all up , including the linkage.
Here is the face plate after initial cleaning. There is a felt strip on the bottom of it that cushions the key levers, and the felt was coming loose. I superglued it back in place with a very very thin layer of thick-viscosity superglue. Thin viscosity superglue would wick quickly through the thickness of felt, making it hard, so I would stay away from thin viscosity superglue for this.
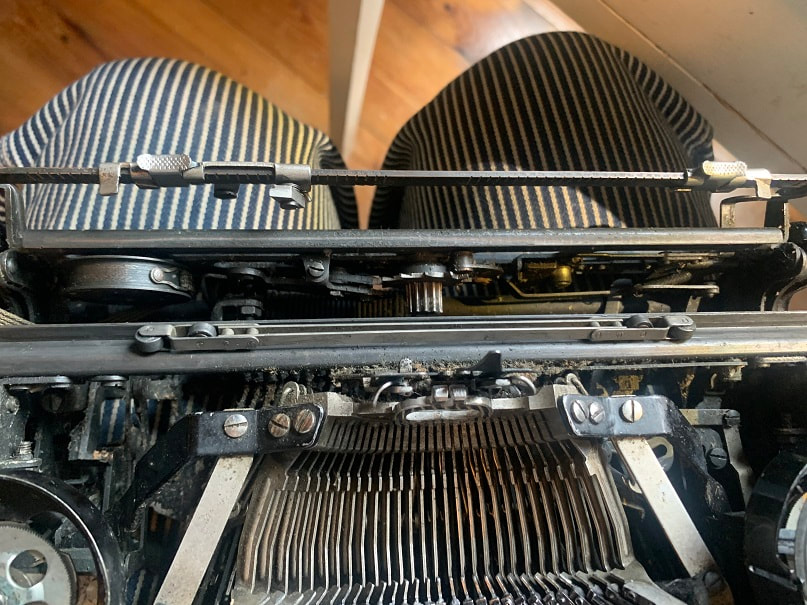
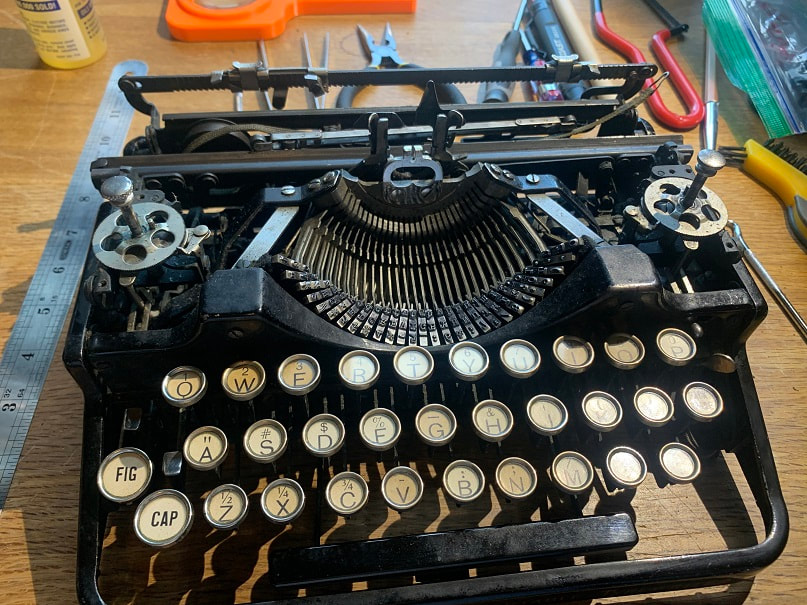
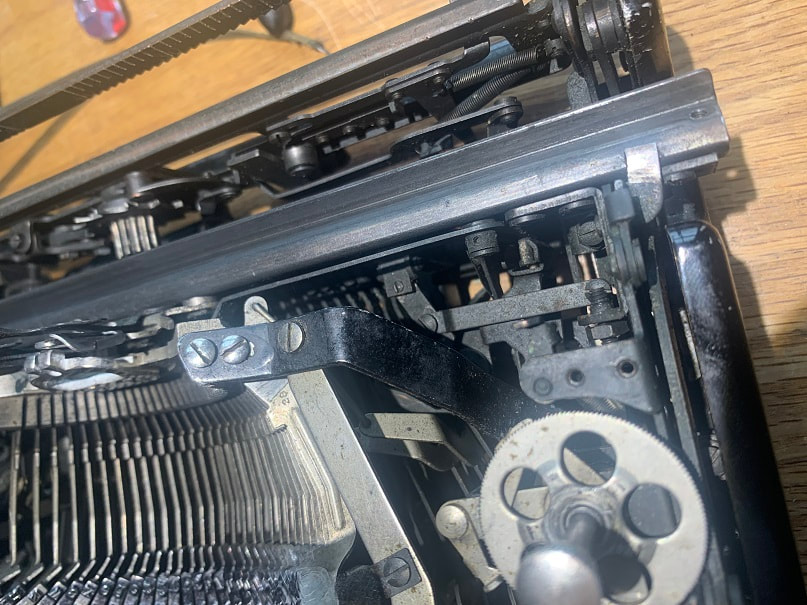
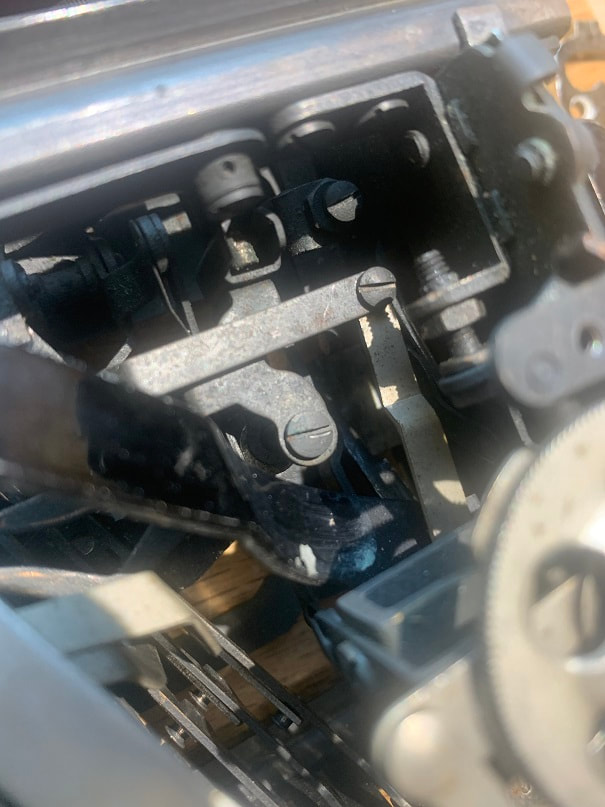
With the parts removed so far, I can now see the internal linkages and springs of this Underwood Portable 3 Bank. My hope is to get to a point where I can clean up all the linkages without having to completely disassemble the entire typewriter. I am going to make an effort now to clean and de-gunk the working of this typewriter without any further disassembly.
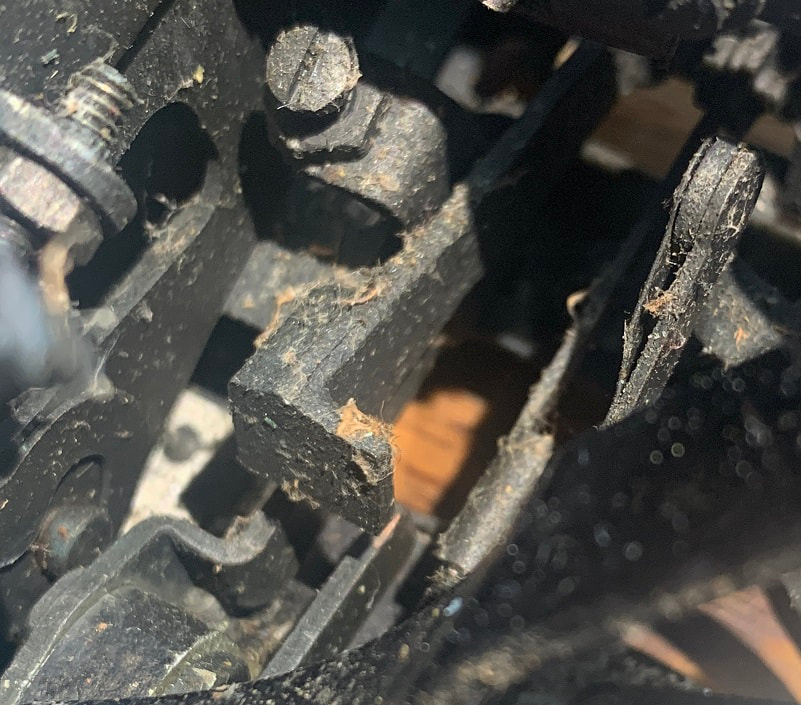
Here are some closeups of the gunk stuck to all the internal linkages.
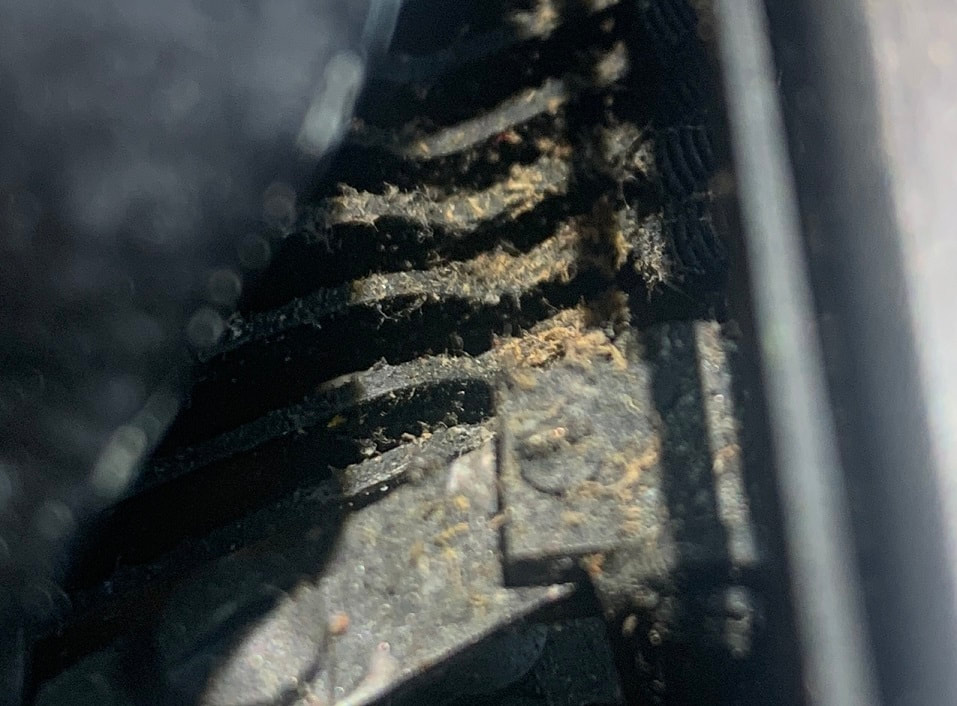
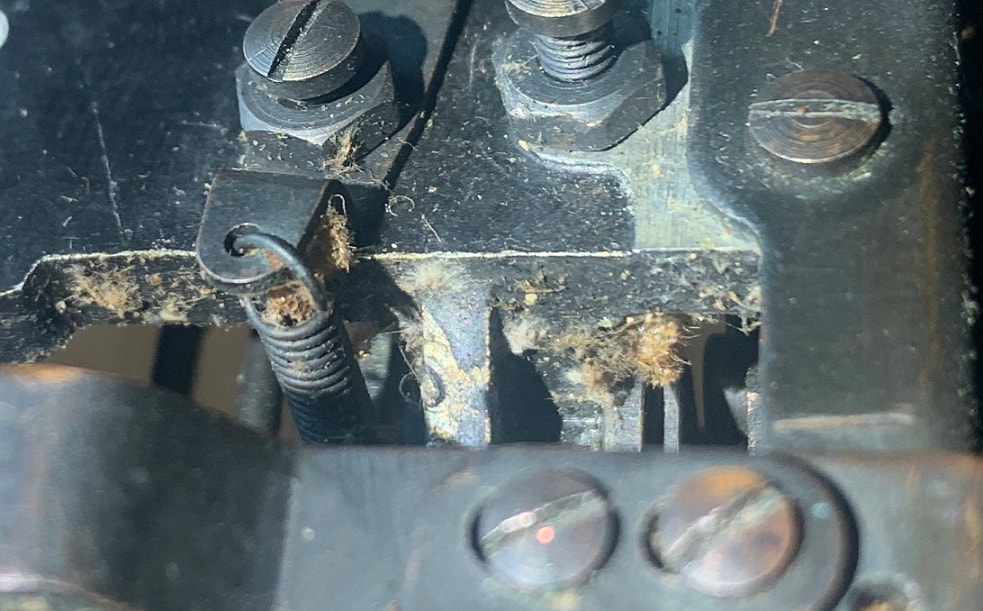
Cleaning out all this gunk will really make this baby type smoothly I think.
The first cleaning step I took was to blast it out thoroughly with compressed air. I used the compressor that I use for my nail gun, it's a decent size compressor not a little benchtop compressor. I had it at 120psi and blasted the heck out of all the linkages.
The compressed air worked great! I am very pleased with the progress from just the air.
Internal parts after air blasting
Turns out this typewriter was in good shape and needed dust and gunk removal but did not have any rusted or stuck parts. Had the machine been in worse shape I would have needed to further disassemble , and wash and soak the components.
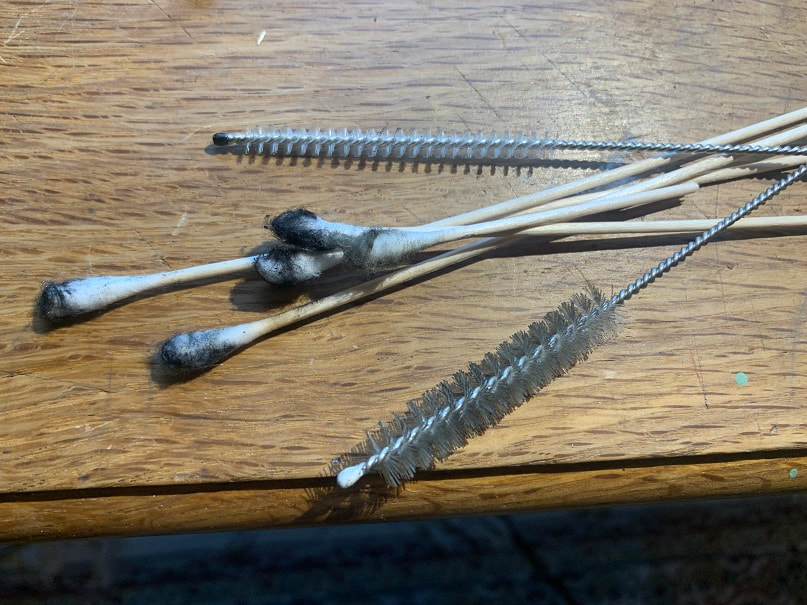
At this point I used mineral spirits, long cotton swabs and various diameters of small spiral nylon brushes to soak and clean certain parts of the machine.
The internal linkages of this Underwood portable 3 bank are clean and moving freely and crisply!
Removed and polished the type guide and the ribbon guides.
With the cleaning done and linkages all moving nicely. I re-assembled the typewriter in the reverse sequence vs disassembly.
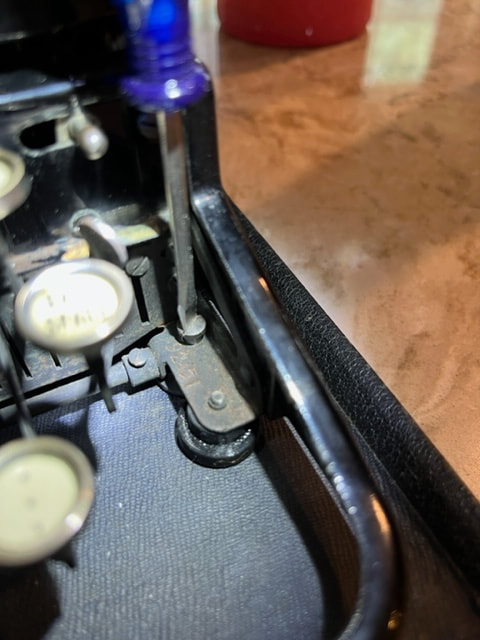
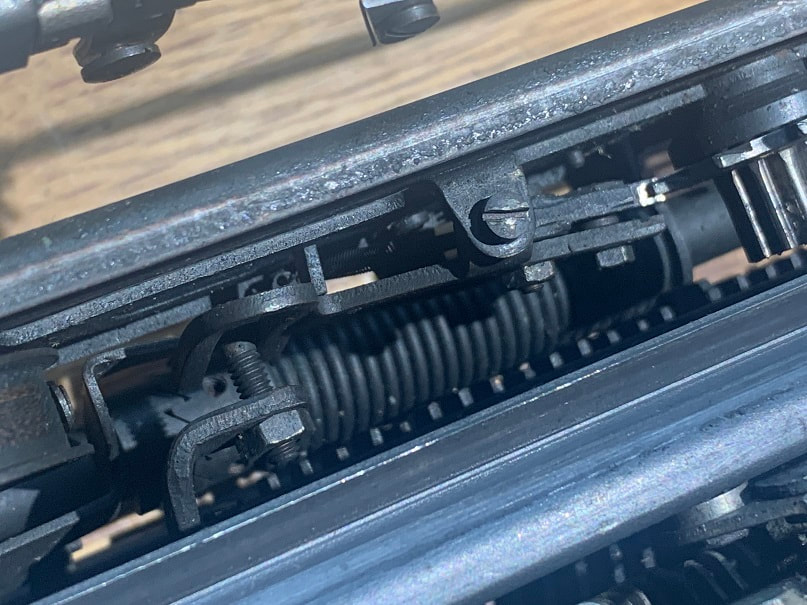
The above photo is of the re-assembled Underwood Portable 3 Bank. At this point I pressed the keys and felt all the nice linkages and was pleased, and then I optimistically pressed the FIG button and the carriage lifted, and to my dismay, it stayed stuck in the raised position. It is supposed to return back down when the fig key is lifted. I will say that a big part of the fun of this is the puzzle of troubleshooting the mechanisms so I was happy to dive back into the machine. I found that the big torsion spring visible from the bottom appeared to be providing upward force to assist the lifting of the carriage when pressing the fig and caps keys. If the force of this spring is too high then I thought gravity might not be able to overcome the spring force in order to return the carriage back down.
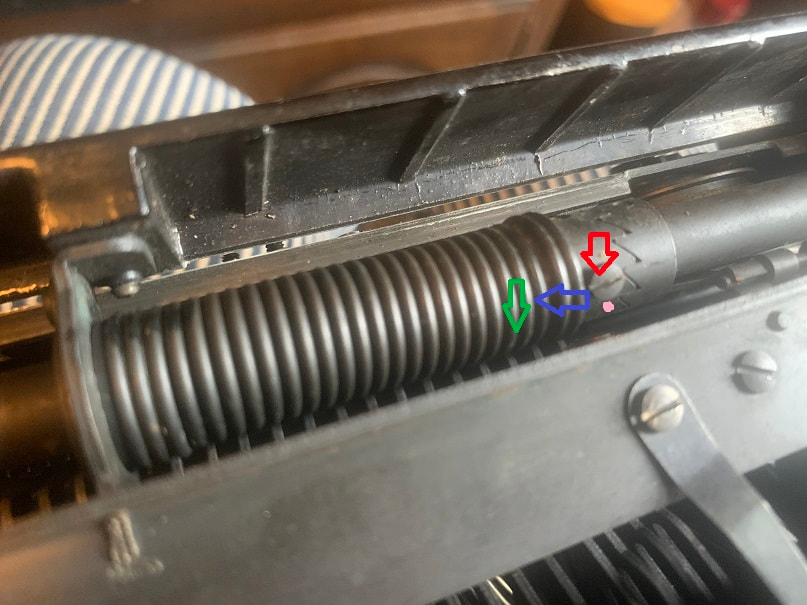
Do this at your own risk and BE CAREFUL. This torsion spring is like a mini-garage door spring and when the force is unleashed it can run away from you. I reduced the spring force by loosing up the screw RED ARROW only unscrew it enough to loosen it a bit, but leave it as fully threaded in as you can. Then
I put a flathead screwdriver under screw head (PINK DOT) and held this tight to keep the spring from unwinding too fast. With another flathead screwdriver push the screwhead to the left (Blue Arrow) do disengage the teeth. I loosened it by three teeth (screw head moved in direction of green arrow), and retightened it. It worked perfectly!!!!! The FIG and CAPs keys now lift the carriage perfectly and it comes promptly and smoothly back down.
At this point I bought a parts machine to take parts from. This is sn82121; I bought it at a charity auction, it doesn't work but it has the parts we need. Someone also painted the frame black at somepoint, so I can see all the original decals painted over. I do not intend to fix this one, I will use it for parts. IT's got great keys and many perfect parts on it.
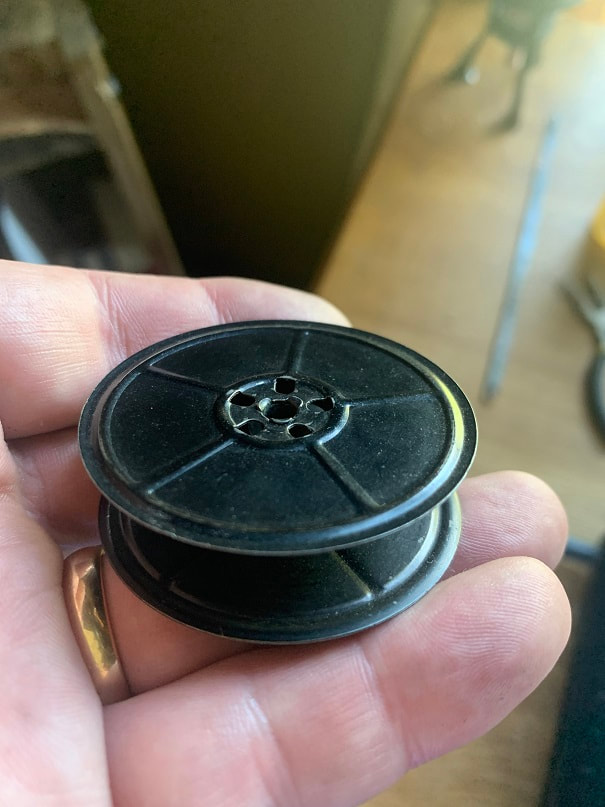
I took this left ribbon spool from the parts machine above and installed it in the typewriter to replace the missing one.

Here it is installed and looking great.
The grungy parts machine I bought had perfect rollers in it!
Here are the rollers installed in the typewriter I'm fixing.
I then took the bell (in perfect condition) from the parts machine and installed it into the typewriter. Almost done!!
Finally, I reinstalled the platen and was very pleased that the line space lever works perfectly in both the single space and double space positions. I installed the paper holders from the parts machine, and I installed a new ribbon. She's done!!!
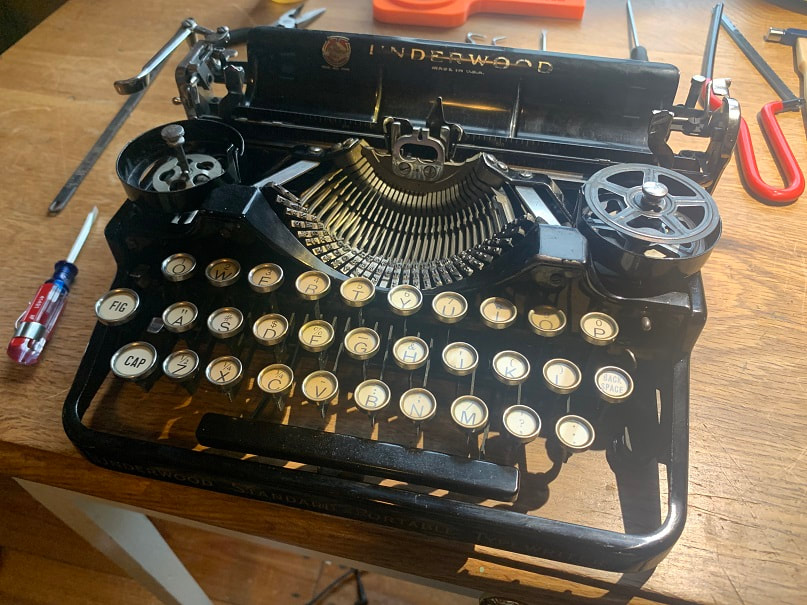
Here is the completed Underwood Standard Portable sn92451.
Underwood Standard Portable 3 Bank Typewriter Case: Restoration
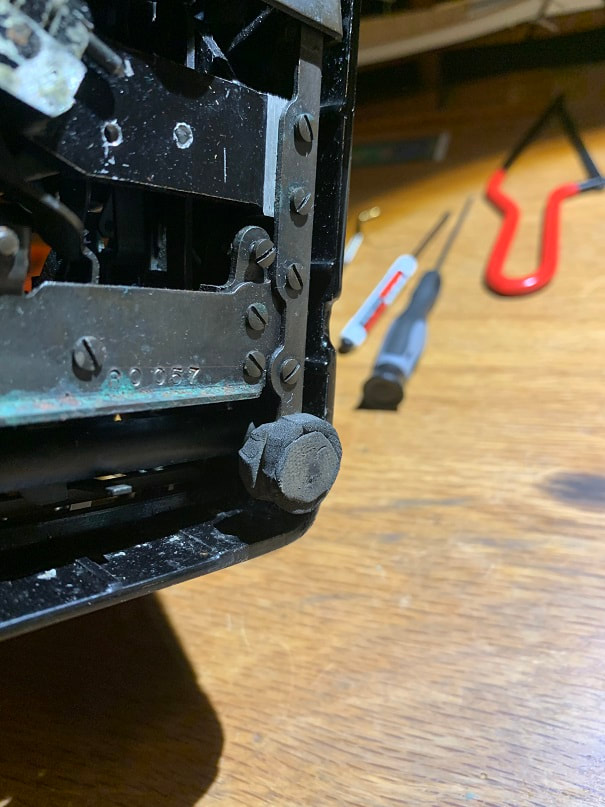
The Underwood Portable 3 Bank is screwed down to the base of the case, and is typed-upon while remaining screwed down to the case. These are rubber feet on the typewriter that cushion it from the case base (see above feet) and there are rubber feet on the bottom of the case base that cushion it from whatever surface one sets it on.
Typewriter Case Feet:
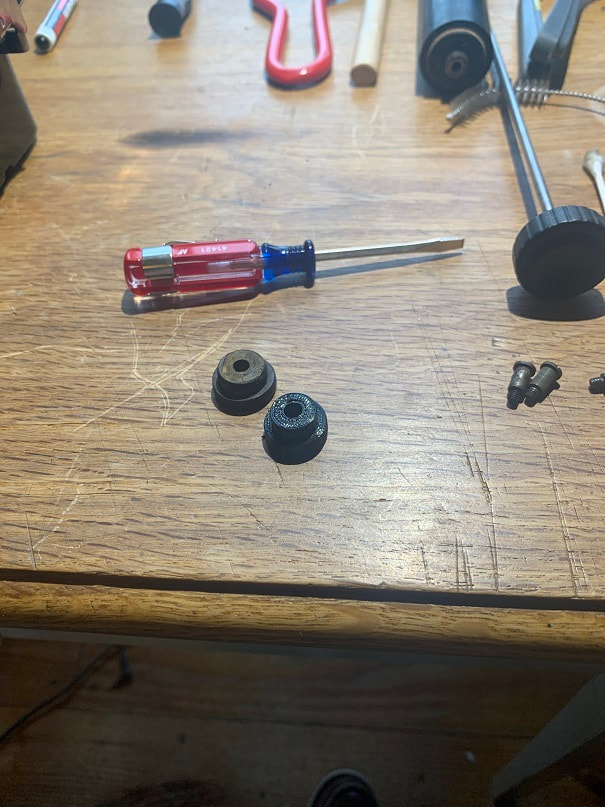
Often the case handles are weak, broken, or missing and the feet on the bottom of the case may be broken or missing. I had one case with existing case-feet. I measured these and made drawings, and printed replacement case feet for the cases that I had that were missing feet.
Typewriter Case Feet:
Often the case handles are weak, broken, or missing and the feet on the bottom of the case may be broken or missing. I had one case with existing case-feet. I measured these and made drawings, and printed replacement case feet for the cases that I had that were missing feet.
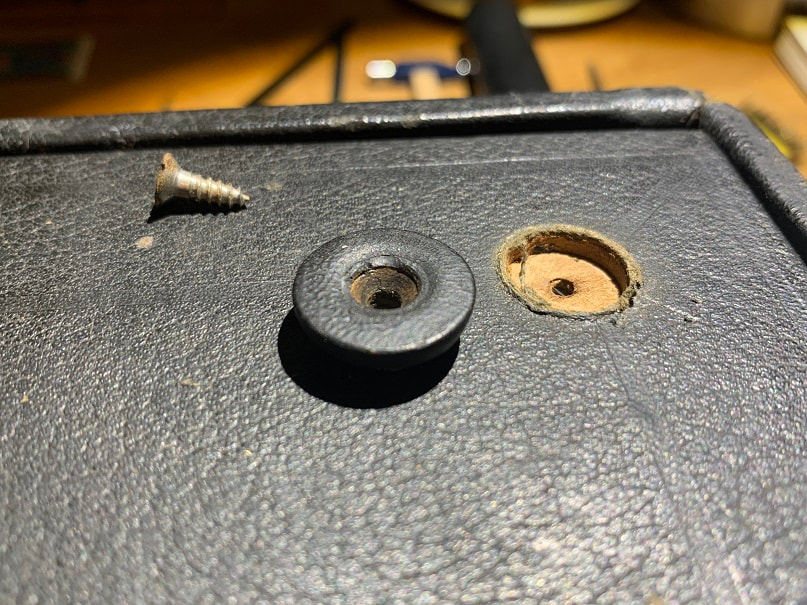
Here's what the bottom of the foot pad looks like. I will pattern this one for another case that is missing foot pads. This one will be reinstalled into this same spot, as it is in good original shape.
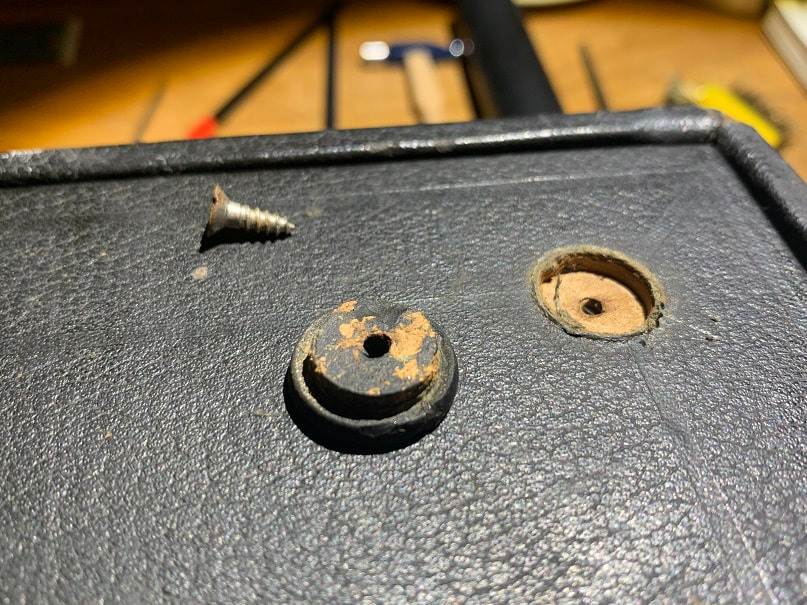
The case foot screws into the bottom. This foot pad was in good shape so I removed it and used it as a pattern to create drawings to make replacement foot pads.
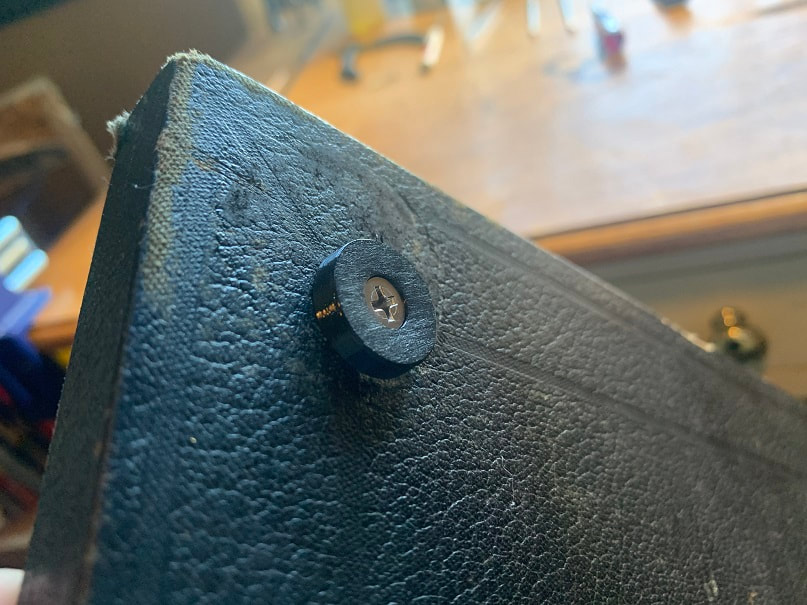
This case had large foam pads stuck to the bottom, which worked, but which were not to original spec. Here are new 3D printed replacement Underwood Portable 3 Bank Typewriter case foot pad installed into the case base (my only issue with this is that I would prefer a slotted head screw instead of the phillips!....my hardware store didn't have a slotted screw in the size I needed. Once I find the slotted head stainless screw in this size, I will redo this.)
Here is the case base showing the interior of the base plate, upon which are mounted the brackets that the typewriter attaches to. This photo is after a thorough cleaning with armor-all leather wipes.
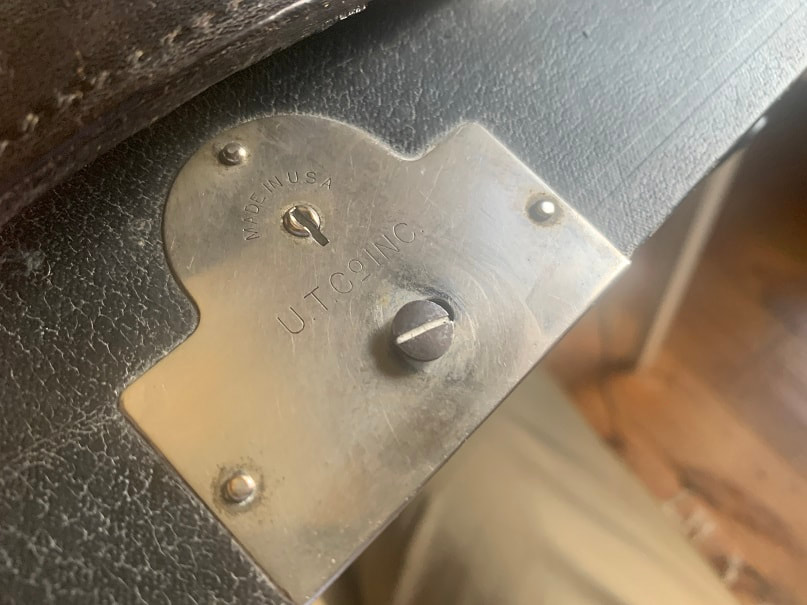
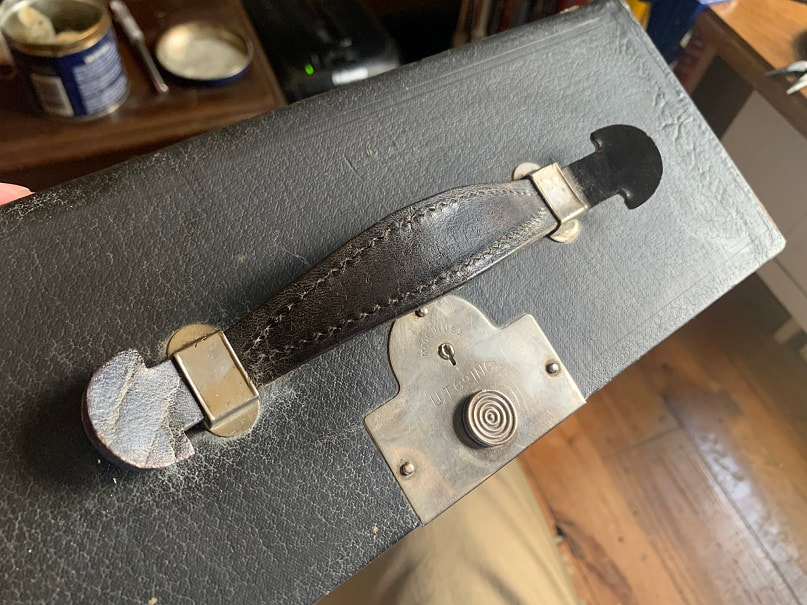
One of my cases was missing the nice release knob, which had been replaced at some point with a plain screw.
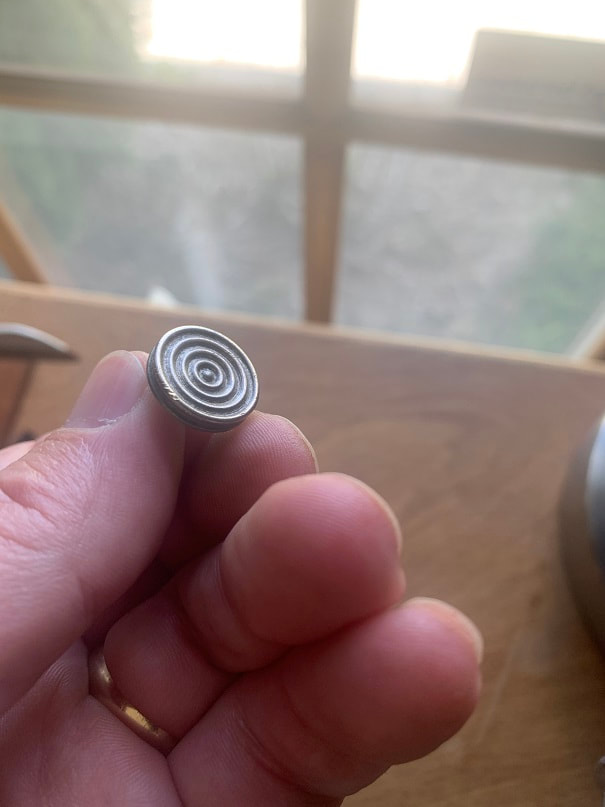
I removed and polished the knob from my parts machine and installed it into the case.
Completed Case for sn92451.
Handle for Underwood Portable 3 Bank Typewriter Case:
Of the 3 Underwood Portable 3 Banks that I bought, one was without a handle, one had a good leather handle, and one had a leather handle so brittle that I would never use it to lift the typewriter. In general, I would say don't lift an antique typewriter case up by the handle unless you are absolutely sure its strong and sound. I designed a replacement handle on Fusion 360 and printed it in 30D Durometer flexible material. It is thick and very very strong. The steel straps that are secured to the case for the handle cannot be removed so I designed the handle with barbs at the ends that once pushed through the strap, cannot be pulled back out.
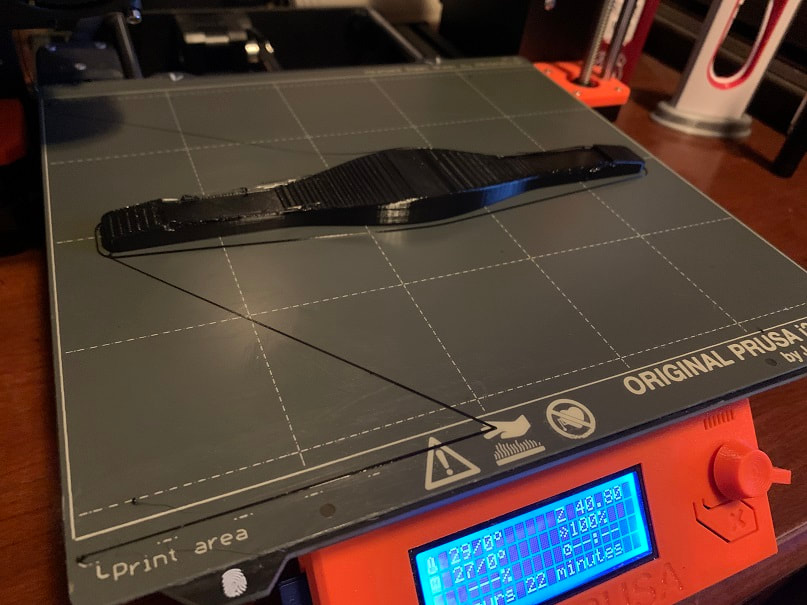
3D printed replacement handle for Underwood Portable 3 Bank Typewriter. Printed on my Prusa i3MK3s out of 30D Flex material.
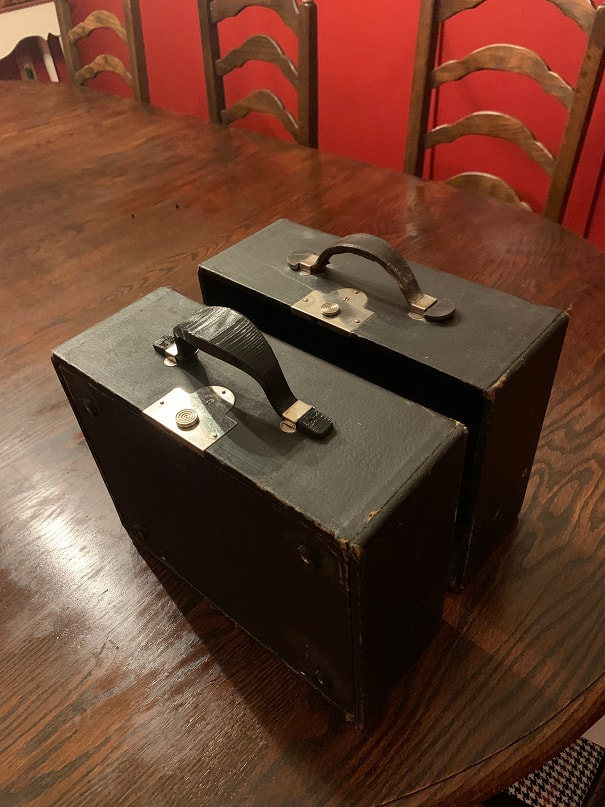
Here are the finished cases for my two complete Underwood Portable 3 Bank Typewriters.