Build log of the Steam Launch "Alexandra", a fully functioning steam engine-powered boat model.
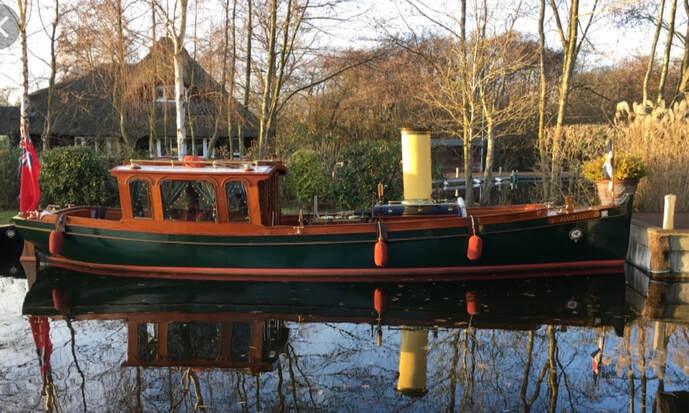
I became interested in how steam-engines worked and set out to build a model steam engine and a boat that the engine could power. I decided on a model of a classic English steam launch built in 1900; the model is called "Alexandra" and the kit comes from the German company, Krick; it is 35.5" long. I will make some modifications and customizations to the model which I will note during construction. Here are some photo's of actual steam launches, along with the stock photo from Krick, of the Alexandra.
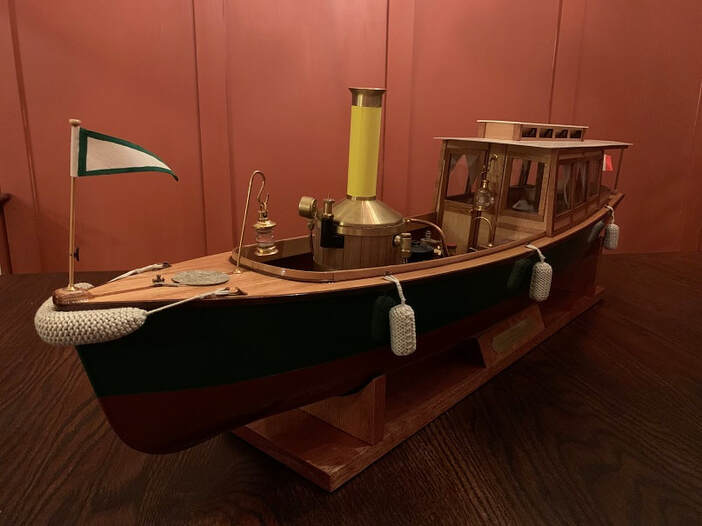
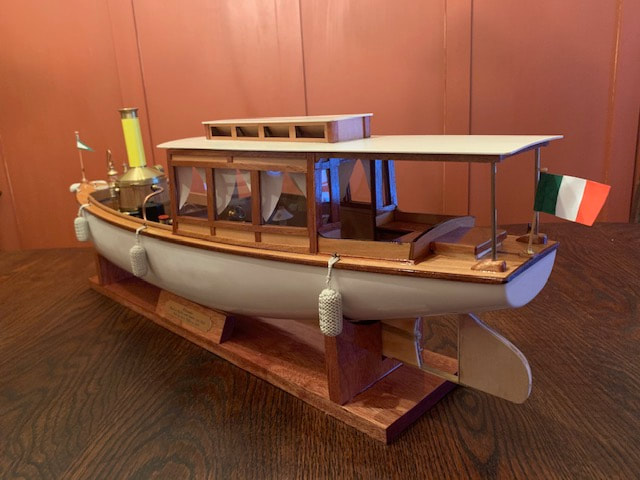
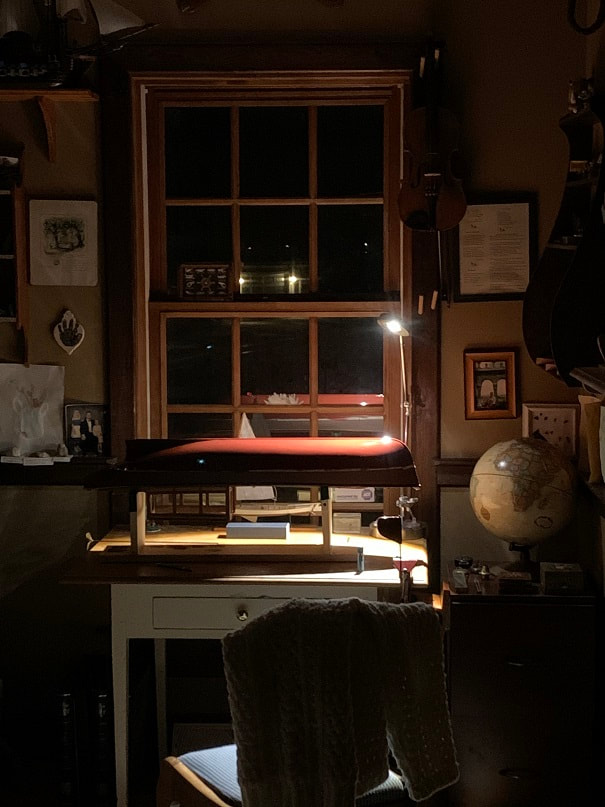
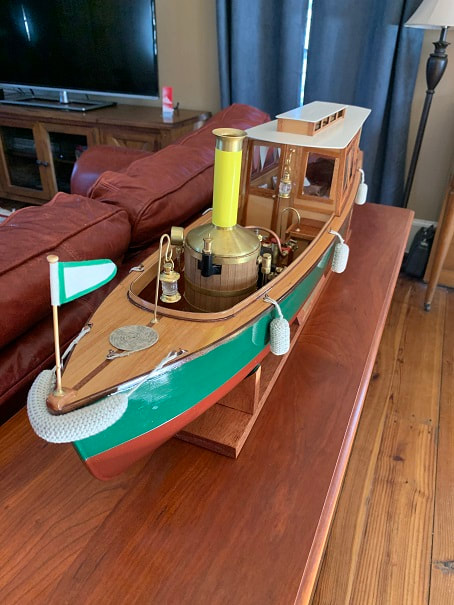
My completed model of the Krick Alexandra Steam Launch. More photos of the completed model area are at the bottom of this page.
The Amaryllis II, again from the Henley Sales&Charter website.
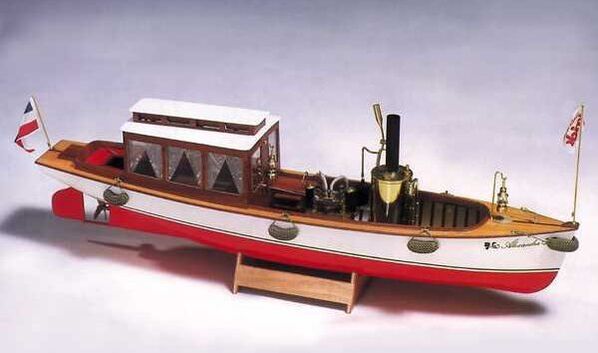
This is the stock photo of the Alexandra from Krick.
I selected the Miniature Steam Models (MSM) "Clyde" Steam Engine to power my Alexandra.
MSM is in Melbourne, Australia and I selected their "Clyde" twin cylinder oscillating steam engine to power the Alexandra. I bought the engine in pieces so that I could learn better how they go together and how they work. You will need to know the dimensions and mounting points for your engine, as you build the boat, so I decided to build the steam plant during the first stage of boat construction. You wouldn't want to glue down the sole without first knowing the steam plant mounting hole locations. It was a very enjoyable assembly process. Here is a link to the page where I detail the assembly of the engine:
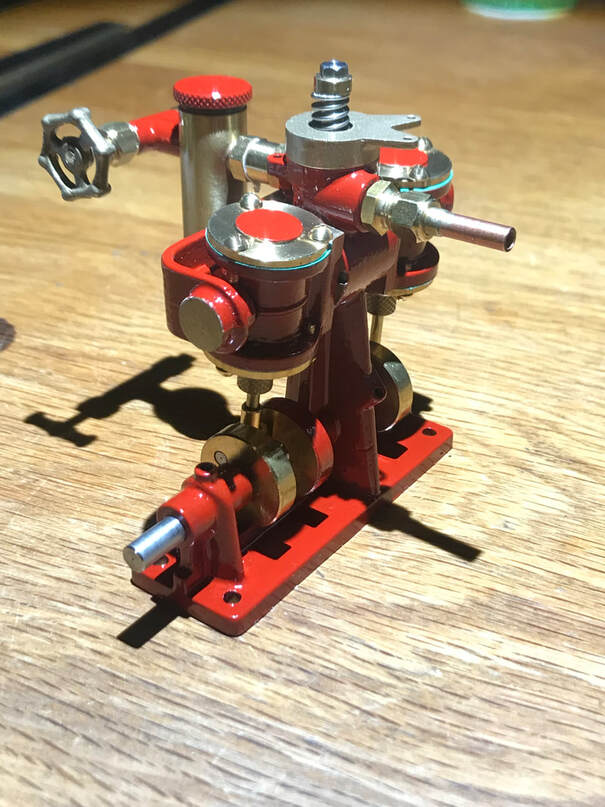
MSM Clyde twin cylinder oscillating steam engine. I decided to enamel it red, while leaving some components unpainted. (I clear-coated the unpainted parts).
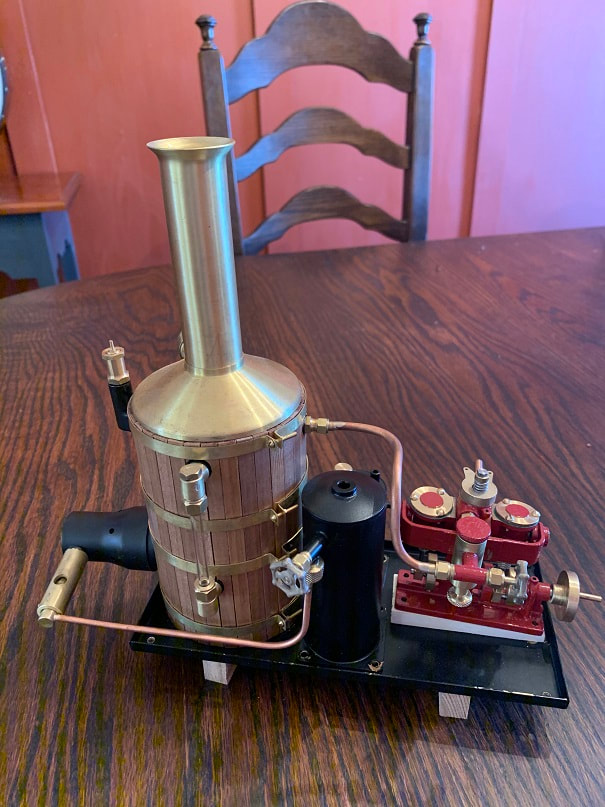
Complete steam plant for my Alexandra model. It is the "Clyde" engine from MSM. Note the wooden wedge shim that I built to raise the engine and tilt it to align with the propeller shaft on the model.
Instruction Book for the Krick Alexandra:
The English translation of the manual is missing illustrated figures along with descriptions of the first pages of part numbers. I edited the manual to add the illustrations from the German manual and also translated the parts lists to complete the English manual. Here is the updated set of instructions:
| krick_alexandra_revised_english_instructions.pdf |
Building the model:
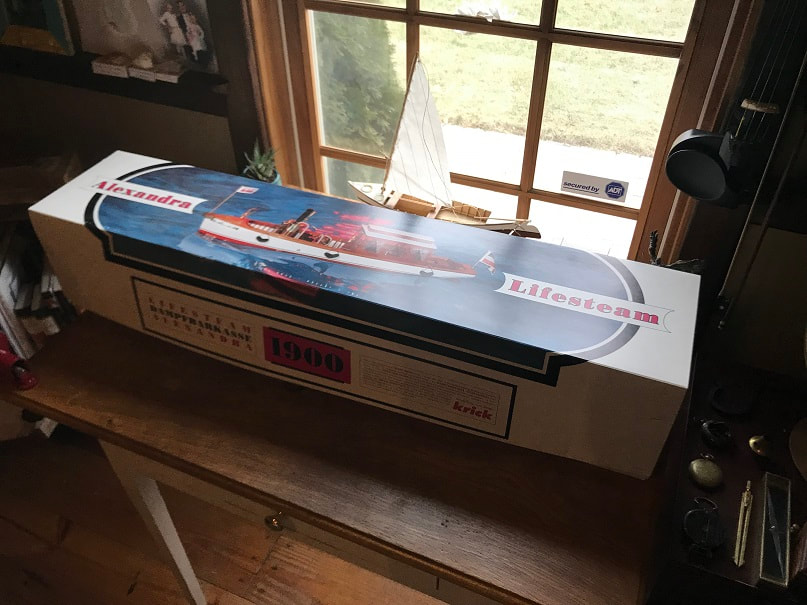
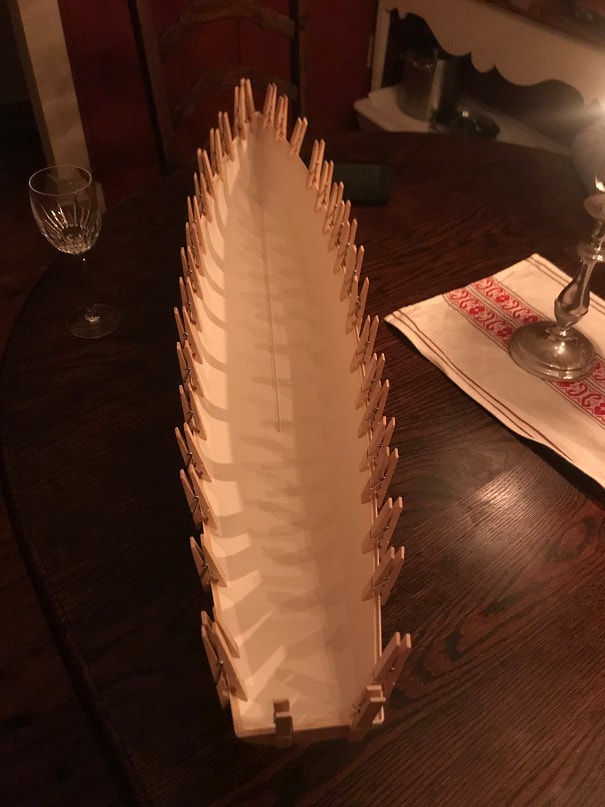
The box arrives! This is the largest model that I've built, and it'll push the capacity of my workspace.
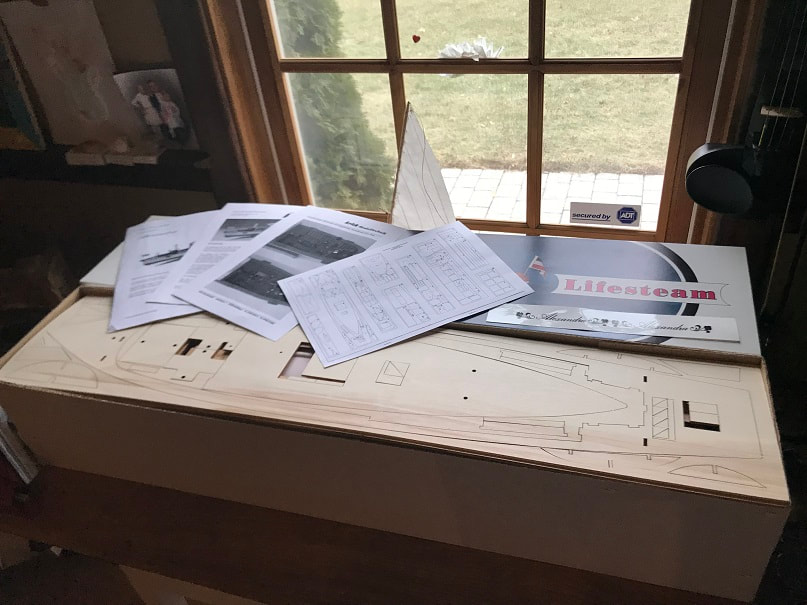
One nice full-size drawing, manuals, and the parts look to be of high quality.
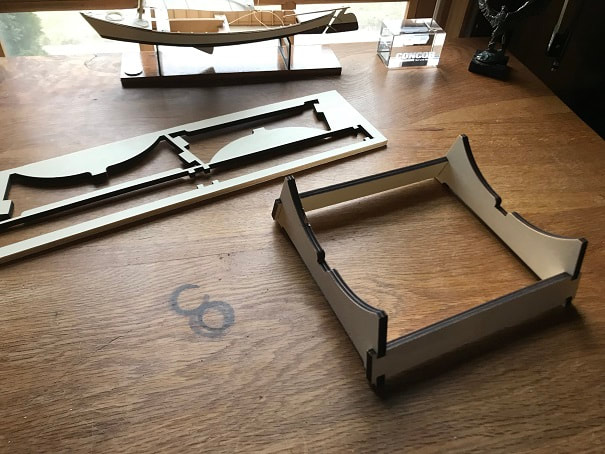
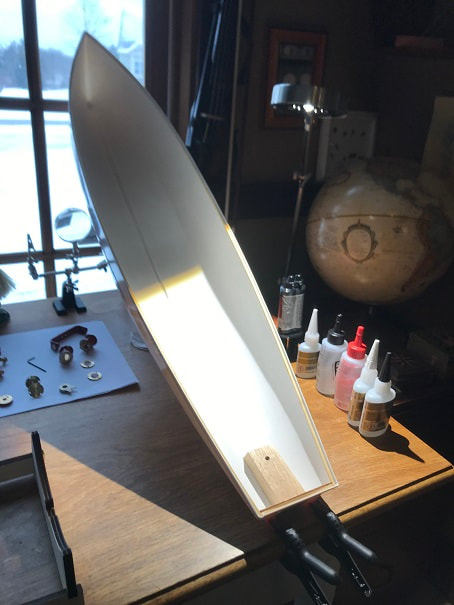
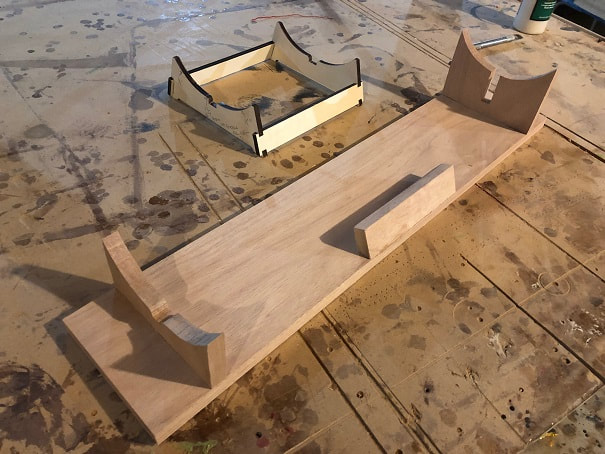
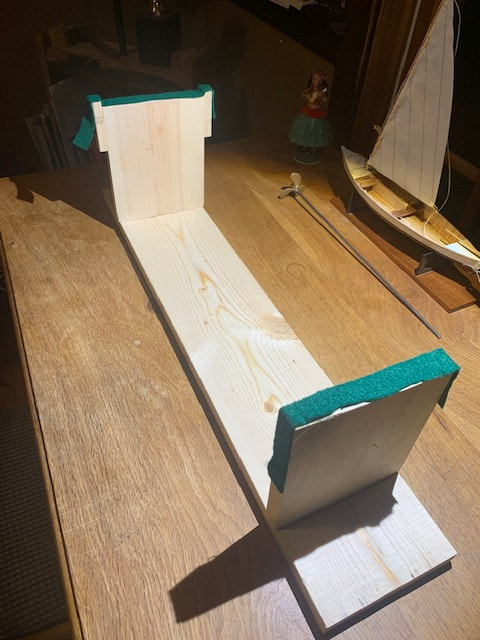
Simple stand. I assembled it first, and will use it to hold the hull during construction.
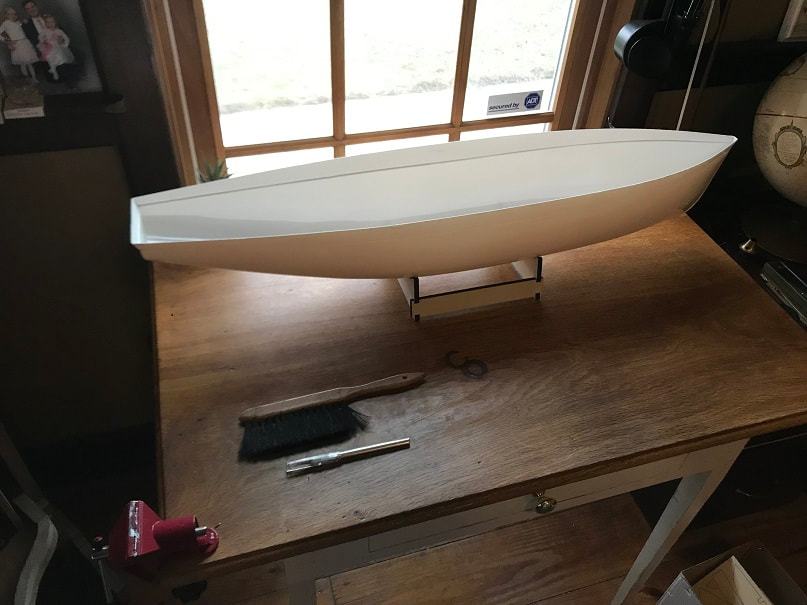
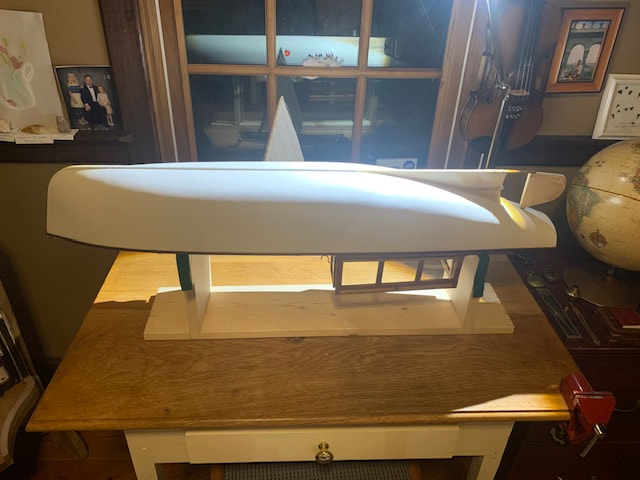
This is the first model I've built with a plastic hull. The rest of the model is wood and plywood.
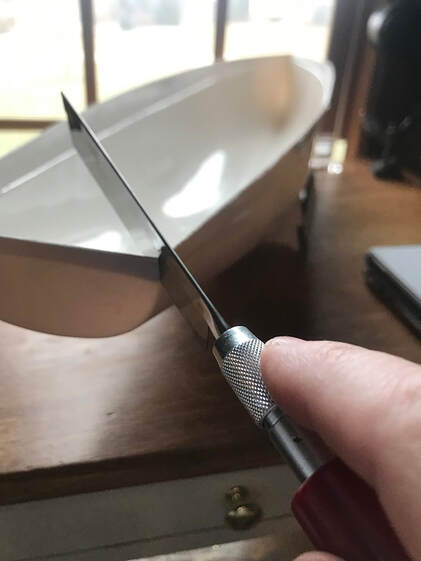
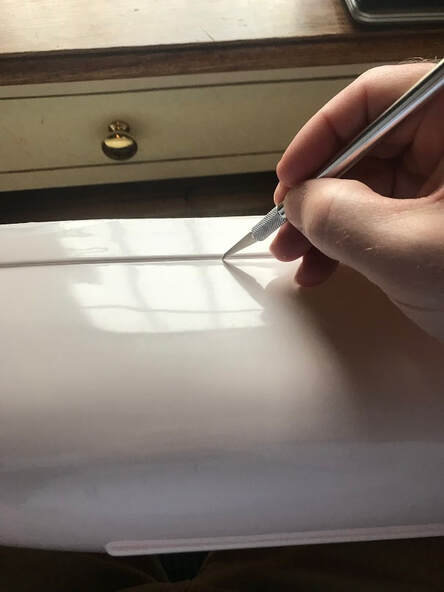
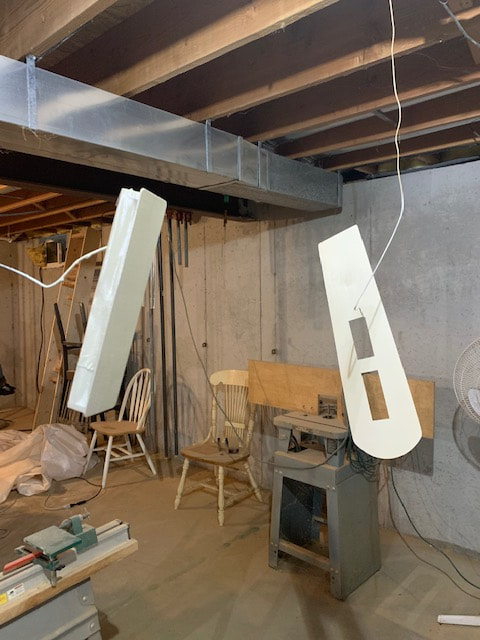
Trimming the excess plastic from the top of the hull.

Sanded the inside of the hull to provide a key for the glue when gluing components to the interior of the hull. Here, I am supergluing the first longitudinal cleat to the interior of the hull.
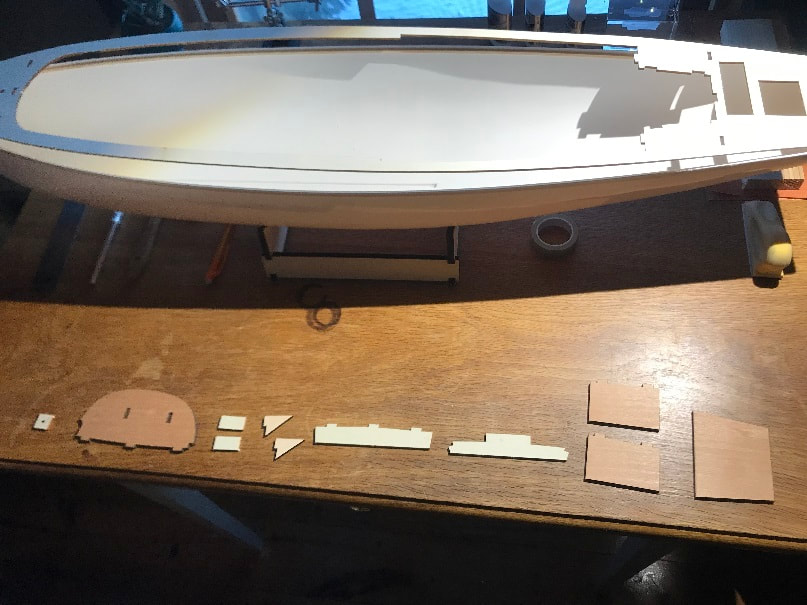
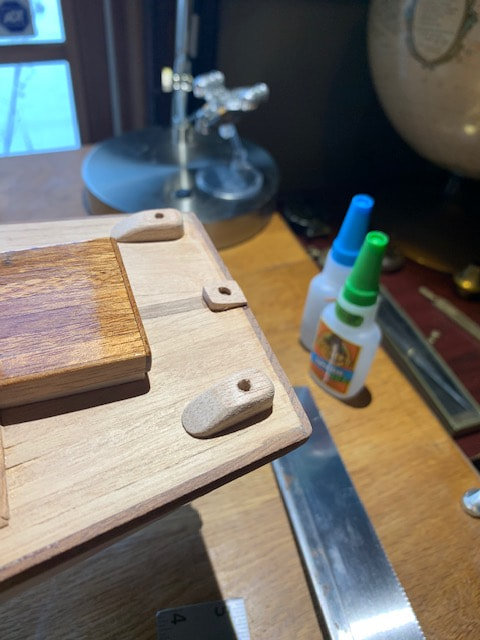
Next, there are a number of parts that need to be assembled to the underside of the deck. This needs to be done before gluing the deck down. The under-deck components are arranged at the bottom of the photo.
Epoxying reinforment and bracing to the underside of the foredeck.
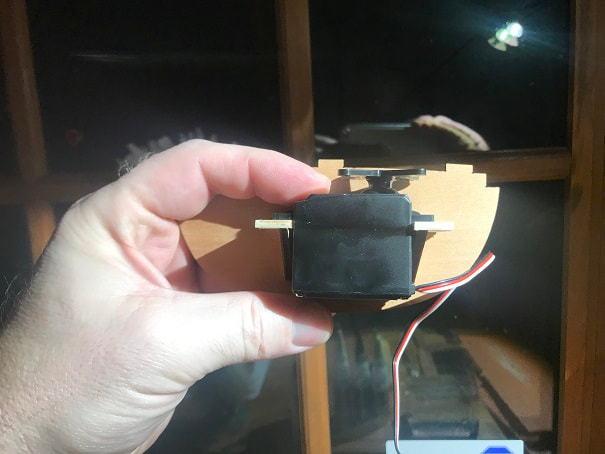
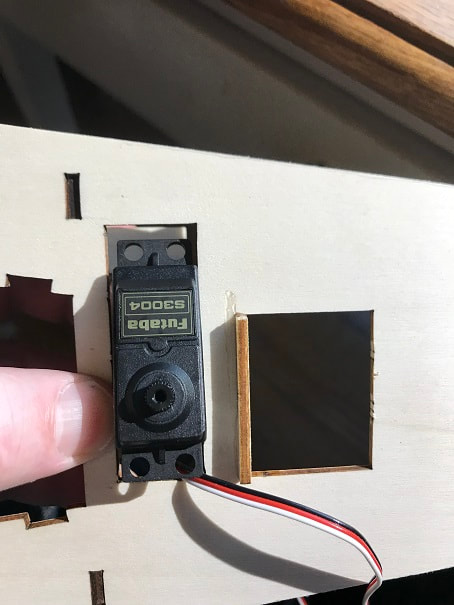
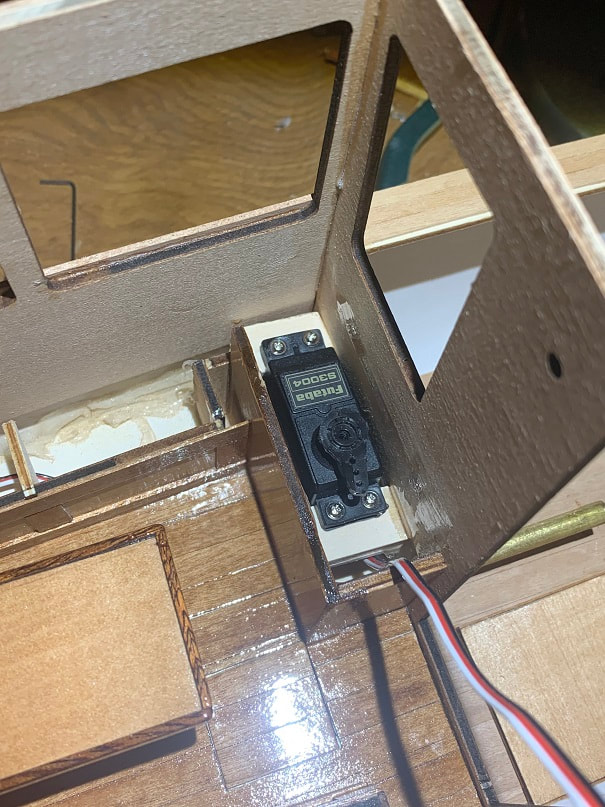
As with the steam-engine, I would recommend acquiring your electrical components in advance of building the model, this way you can build the model such that they will fit in the model. This is a view of the rudder steering servo which is mounted in the stern. I selected two Futaba S3004 servos for this model. One for the rudder, and one for the steam engine control.
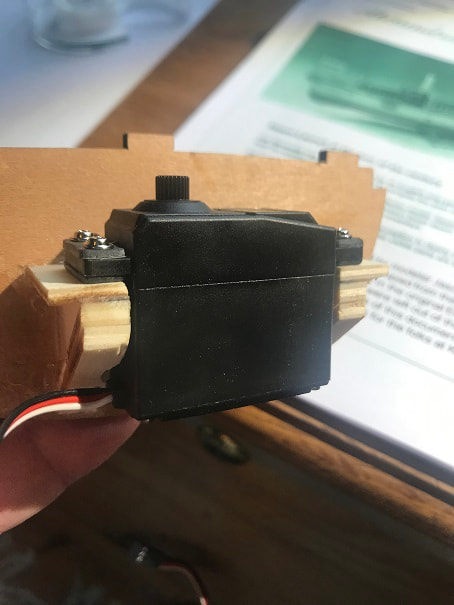
The brackets provided with the kit needed to reinforced and modified in order to accept my servo. They needed to be thicker in order to provide material for mounting screws to bite into.
The devil's in the details with this kind of thing. The wires would not fit down between the mounting brackets if the servo is installed or removed from above, so I cut a groove into the bracket on the left to allow for vertical removal/installtion (groove not yet cut as of this picture).
I am pleased with the outcome; a sturdy servo bracket, and the servo can be installed and removed through the hatch in the deck.
Rudder steering servo, installed.
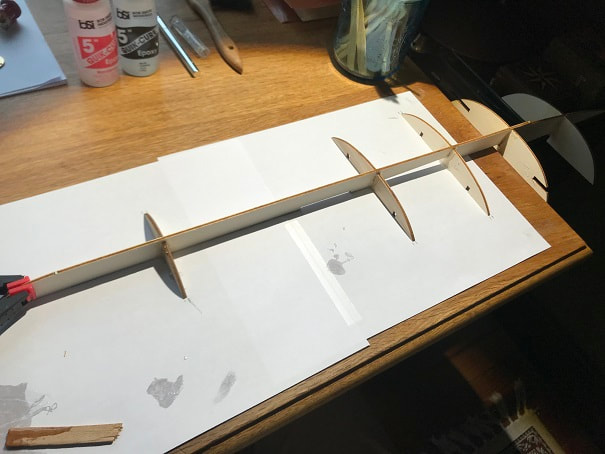
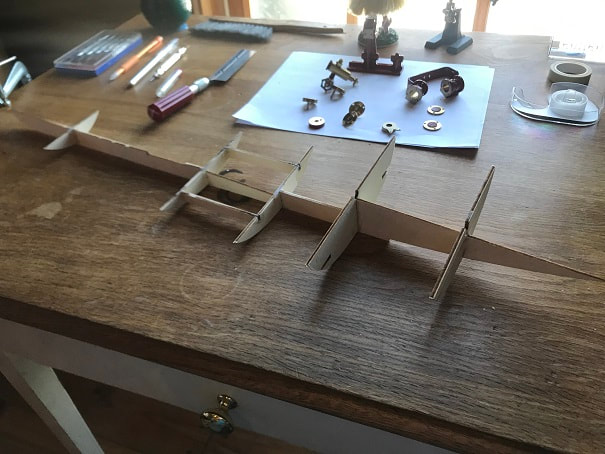
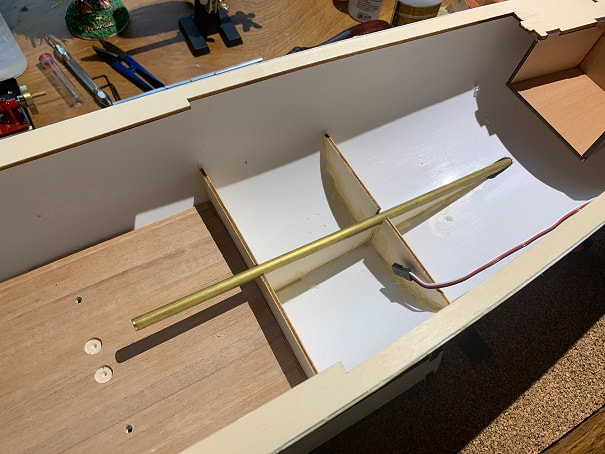
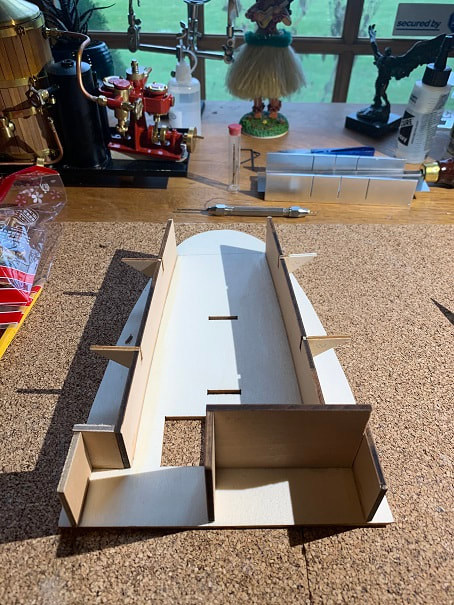
The sole and keelson framing is assembled with epoxy.
The rudder trunk tube support pieces that came with the kit looked rickety to me, so I made a rudder shaft tube support block of solid clear mahogany. I measured the angle and location from the print. I drew lines marking the installation location on the inside of the hull.
I used Devcon Plastic Welder, 2 part epoxy for all structural bonds between wood and plastic, including the attachment of the rudder support to the hull.
I tilted the hull up so that the block wouldnt slide down as it cured; though I will say, this stuff cures fast.
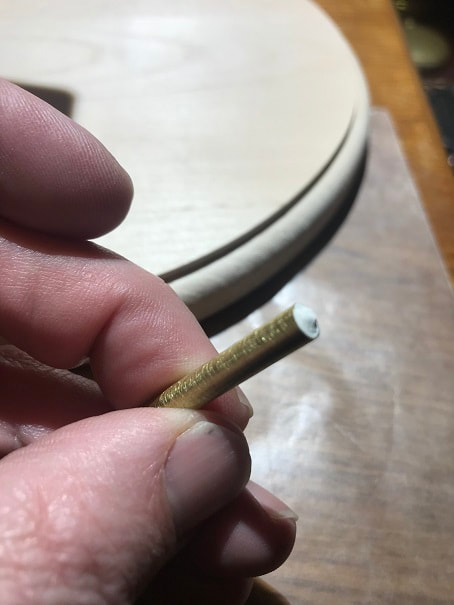
Drilling the hole through the hull for the rudder shaft tube. The hole is very slightly oversize, to allow for glue-space and to allow for final fine tuning of the position and angle of the rudder shaft tube when it is installed.
Now I will epoxy the rudder shaft tube in place. First score up the OD of the tube to provide a rough surface for the glue to hold to. I filled the end of the tube with clay/putty to prevent epoxy from getting in.
Coated the rudder shaft tube with epoxy and then lowered it into place. Then I inserted the rudder shaft and moved it slightly until true in all directions. Let the epoxy cure.
Top of the rudder shaft tube, showing nice thick bead of epoxy around the top. I am pleased with the outcome of this somewhat tricky step.
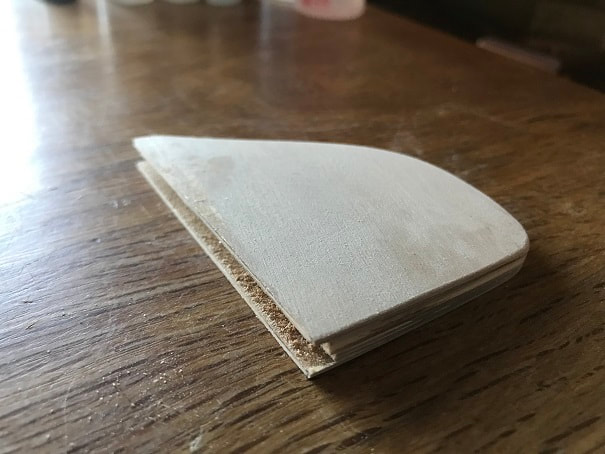
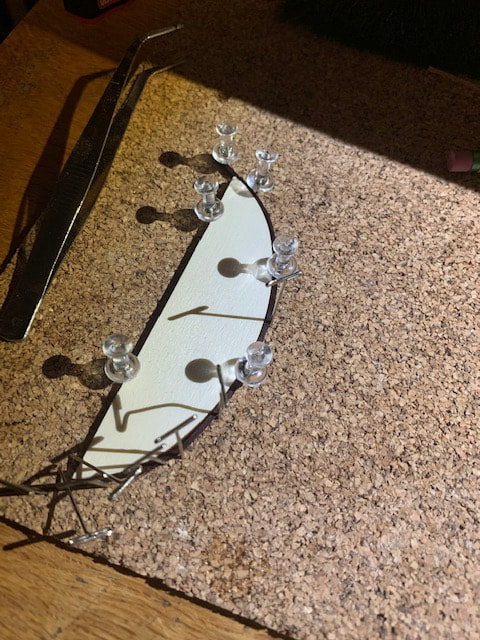
Next I laminated and sanded the rudder to shape.
Here is the rudder shaft epoxied into the leading edge of the rudder. The reinforcing pin is tough to see, but is also in place.
The Krick Alexandra plans did not call for this, but I wanted a more hydrodynamic leading edge to the rudder so I cut down a hardwood dowel and epoxied a half-section of it to the leading edge of the rudder.

The footwell was glued in place in the deck, and then I used the Devcon Plastic weld epoxy to attach the deck to the hull. Dry fit it first and make sure it fits perfect, trimming if neccessary. Gluing this down was hectic, as I almost didn't get it down before the epoxy started curing.

Decvon Plastic Weld epoxy used to attach the keelson, bulkheads and soleplate frameworks to the hull.
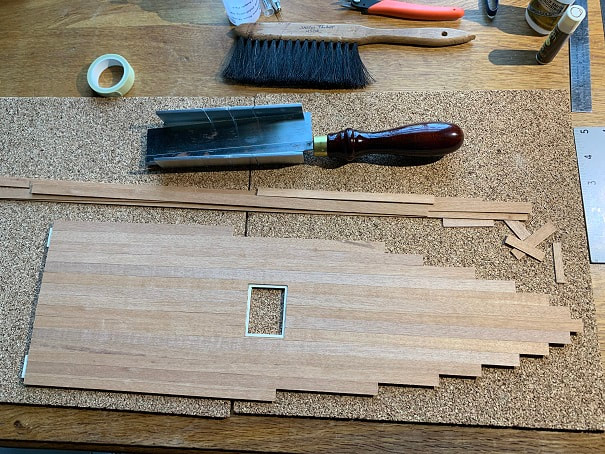
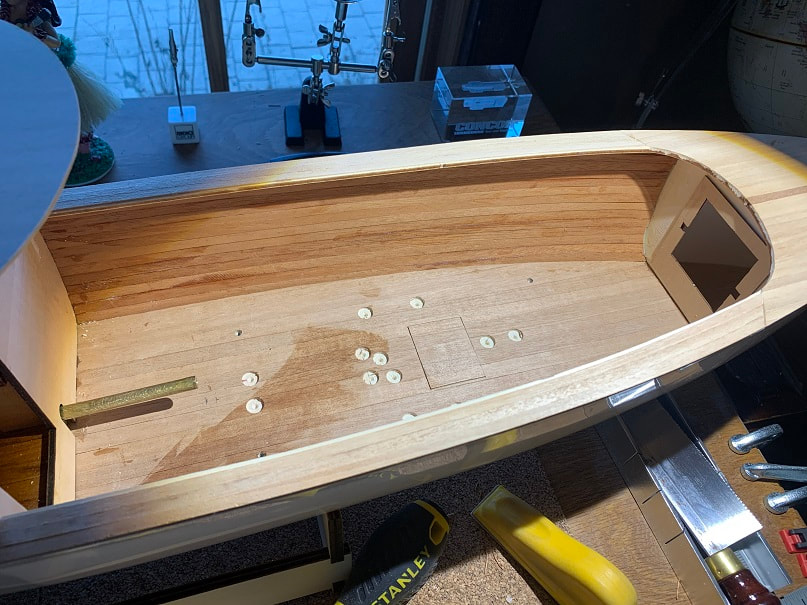
Planking the sole.
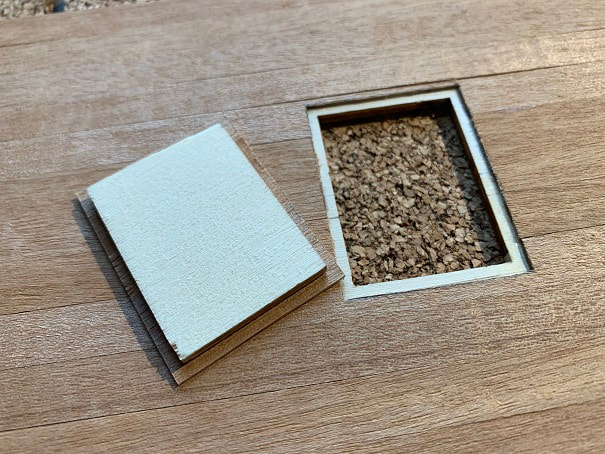
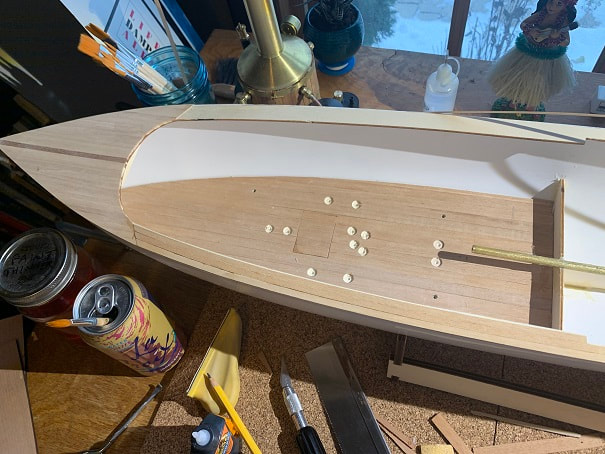
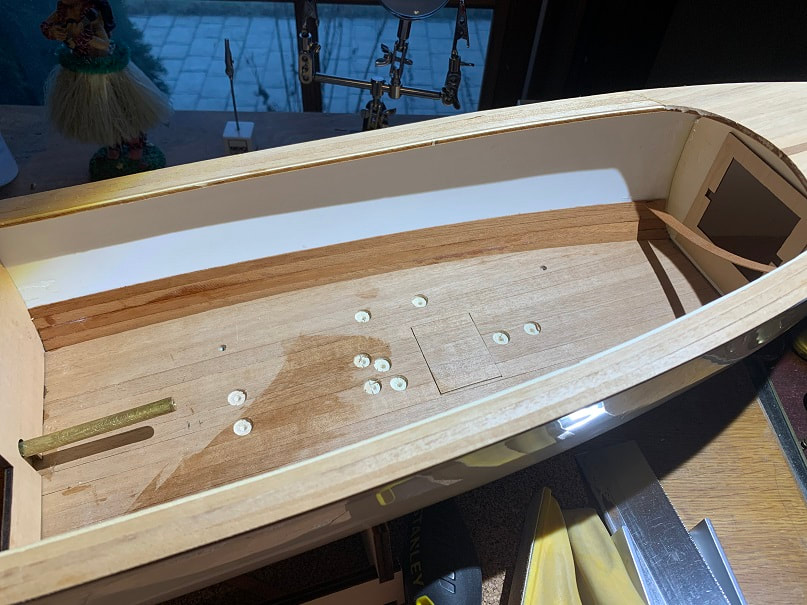
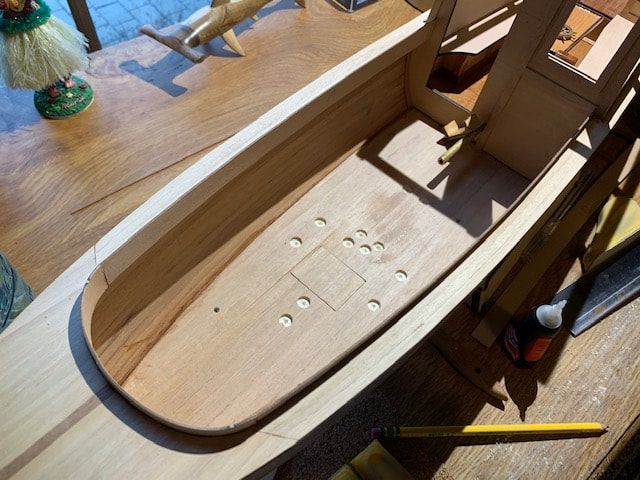
Ballast hatch in the sole.
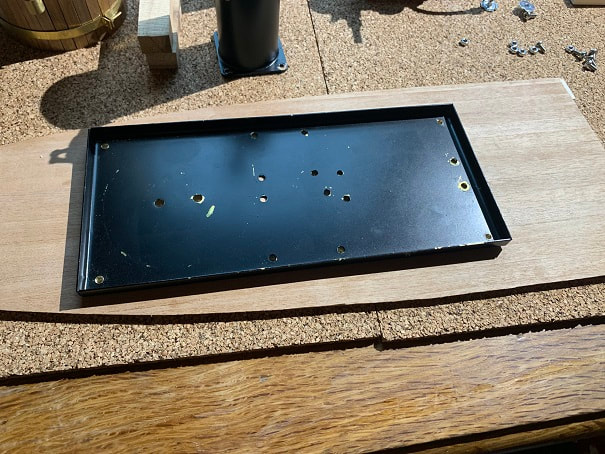
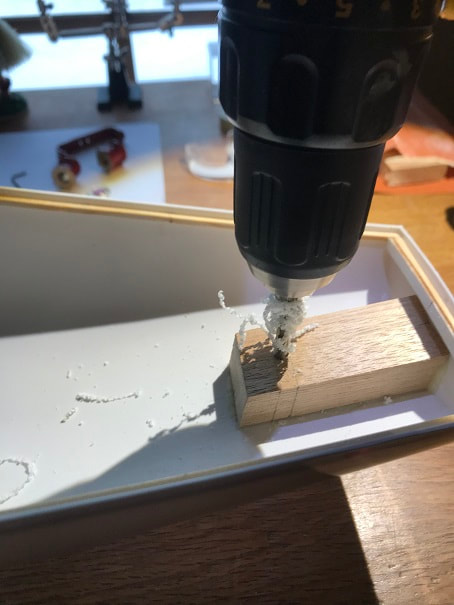
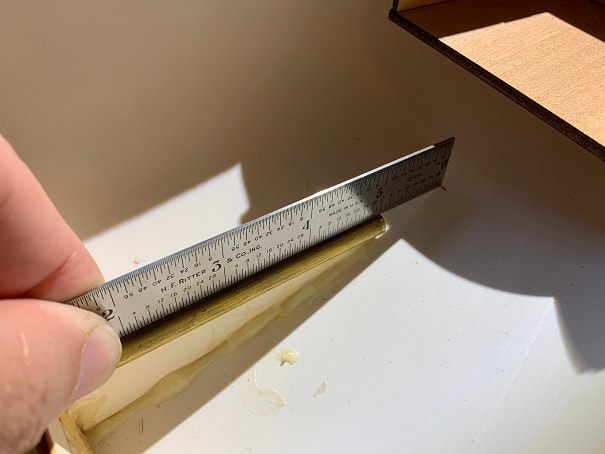
Marking steam-plant mounting hole locations in the sole.
Steam plant mounting holes drilled. I wish I would have taken a picture of the underside. I added wooden backing plates to increase thickness at the mounting bolt locations, and epoxied drive-nuts into the bottom of the sole. The drilled reccesses are used where screwheads protrude from the bottom of the steam plant base plate.
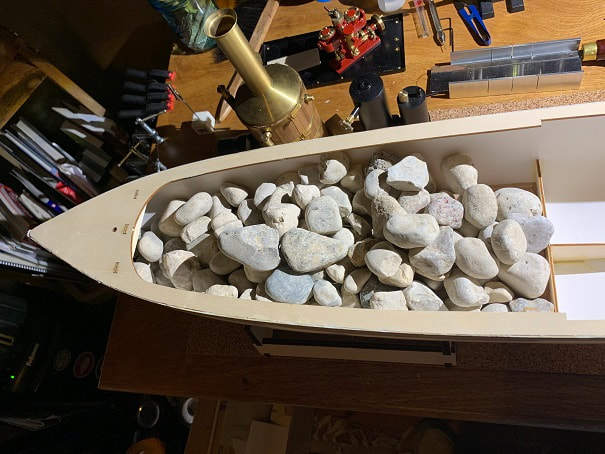
Here is the sole being epoxied down to the frames. I laid thick beads of epoxy on the frames and then weighted the sole down with stones.
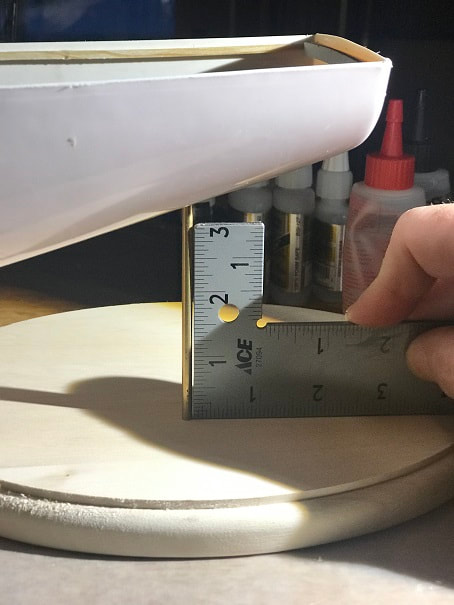
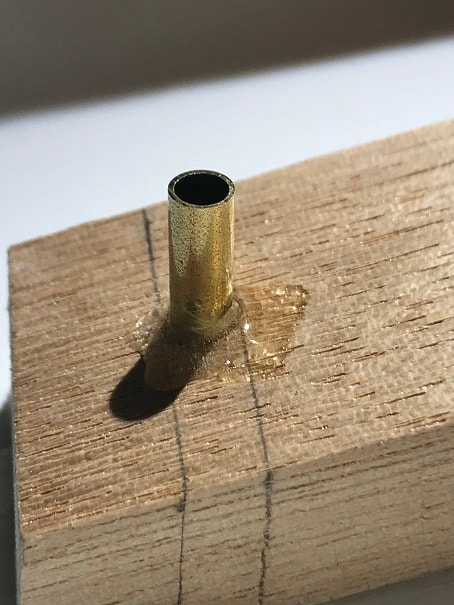
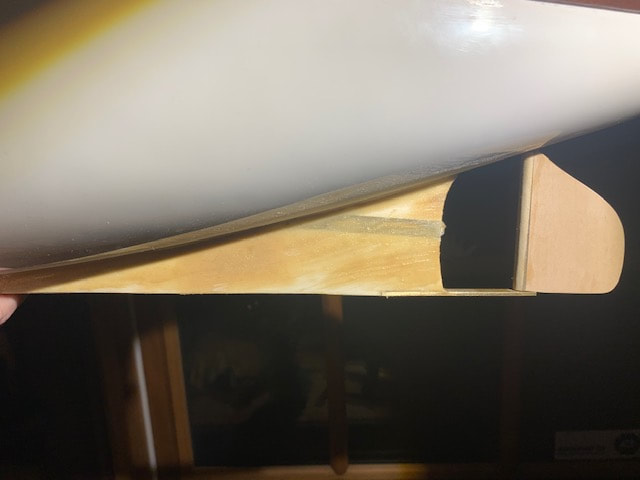
Marking out the hole in the hull for the prop shaft tube.
I roughed up the OD of the prop shaft tube with sandpaper to make a rough surface for the epoxy to hold to. I filled the end of the prop shaft tube with wax to keep any epoxy out during installation.
Dry fit of prop shaft tube
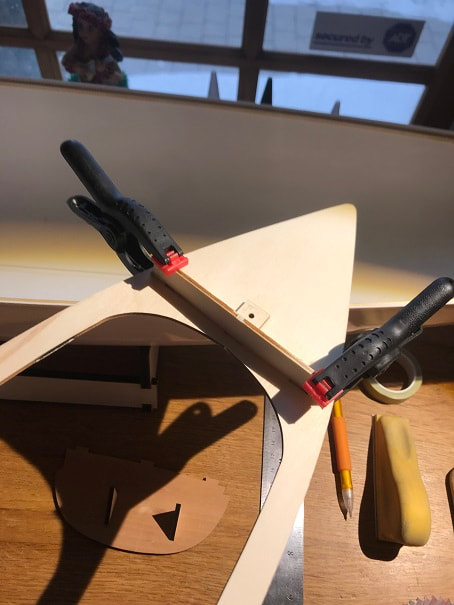
Laminated the keel pieces with epoxy.
Keel glued in place with Devcon Plastic Welder epoxy. I would recommend have the rudder in-place and ensuring that the keel is exactly in-line with the rudder.
Rudder and keel alignment.
Prop shaft tube and keel filler piece all epoxied in place. After this I layed down "fillets" of epoxy where the keel meets the hull , to add strength.
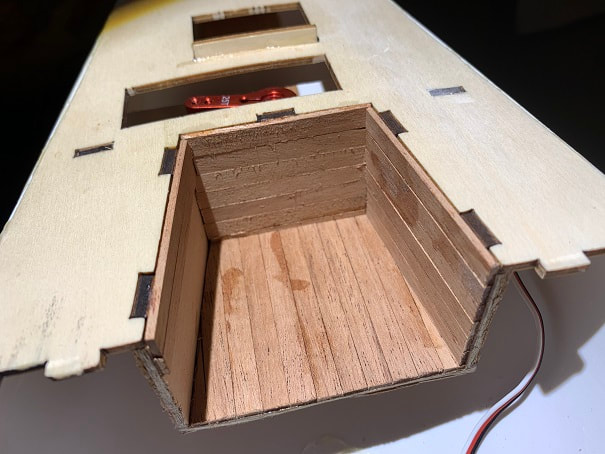
I bought a bunch of extra mahogany planking strips to plank various surfaces on the model, which is not called for in the plans. In many locations, I think the planking looks better than a solid sheet of plywood. I planked the footwell. Here is the planking in process.
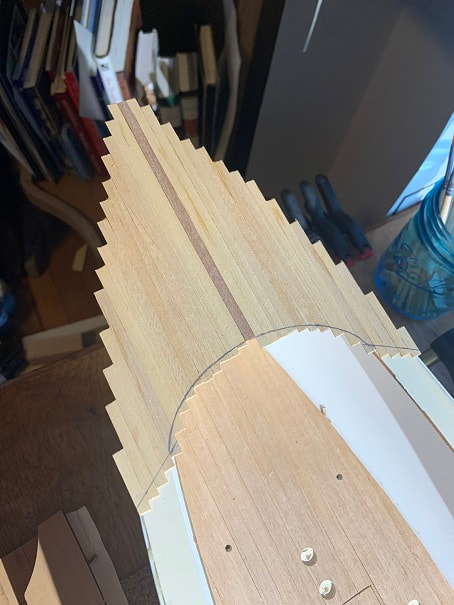
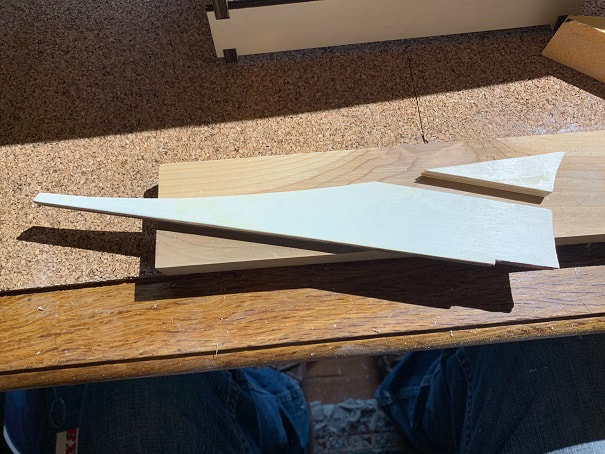
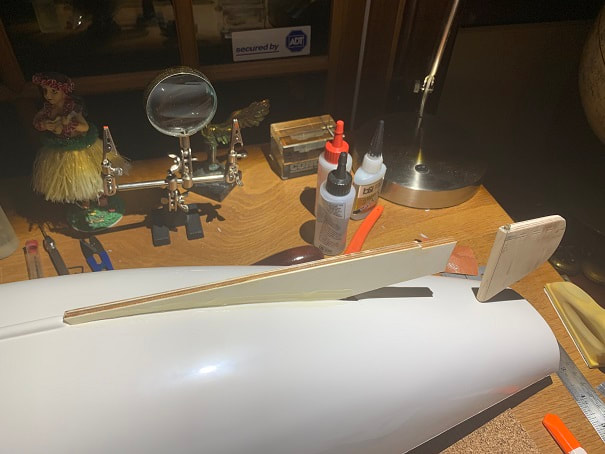
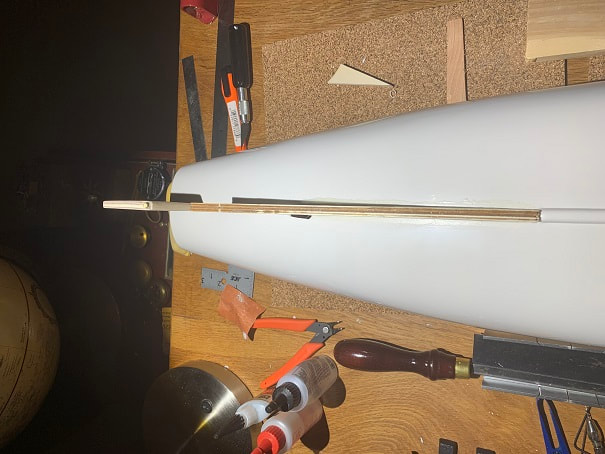
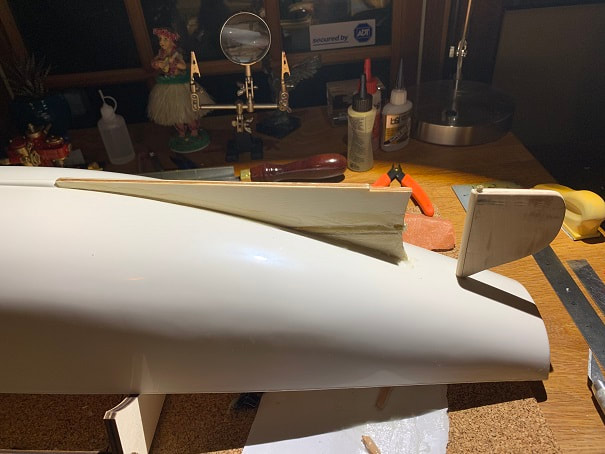
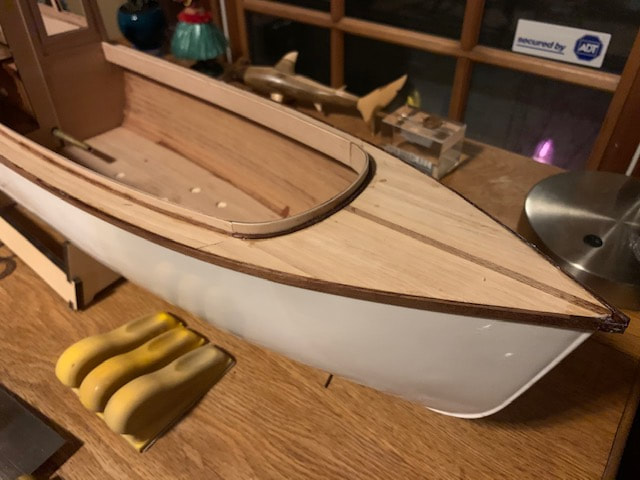
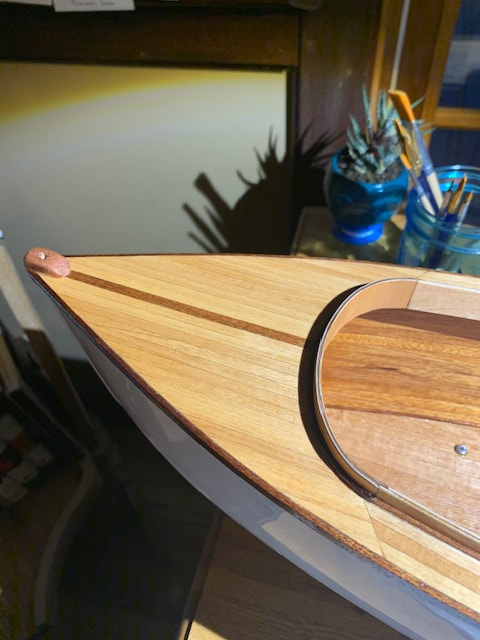
Planking the foredeck. This is a pretty part of the Krick Alexandra.
Superglued the aft wall of the cabin in-place. Trim and dry-fit it in place before gluing, mine needed some trimming. You can also see the sanded planked footwell.
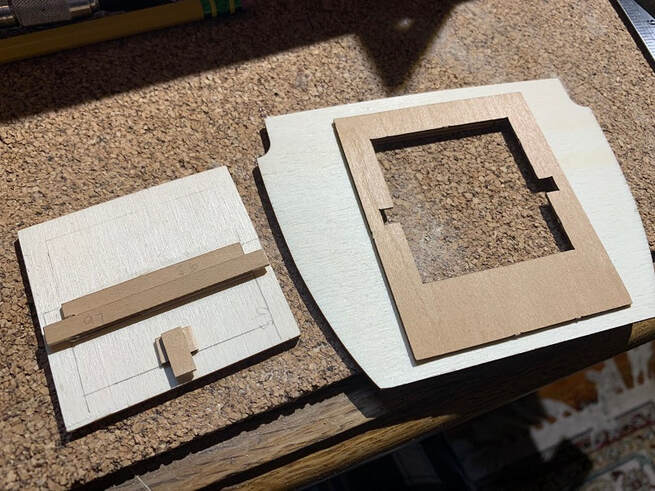
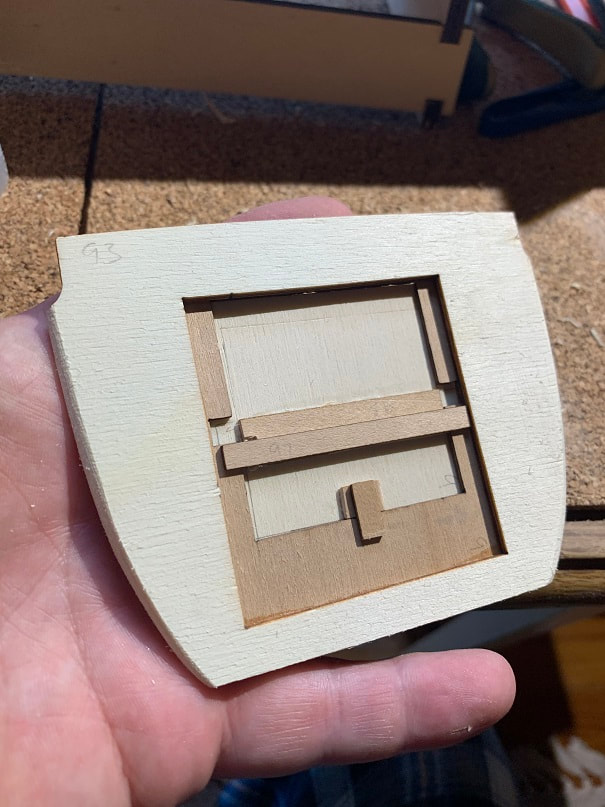
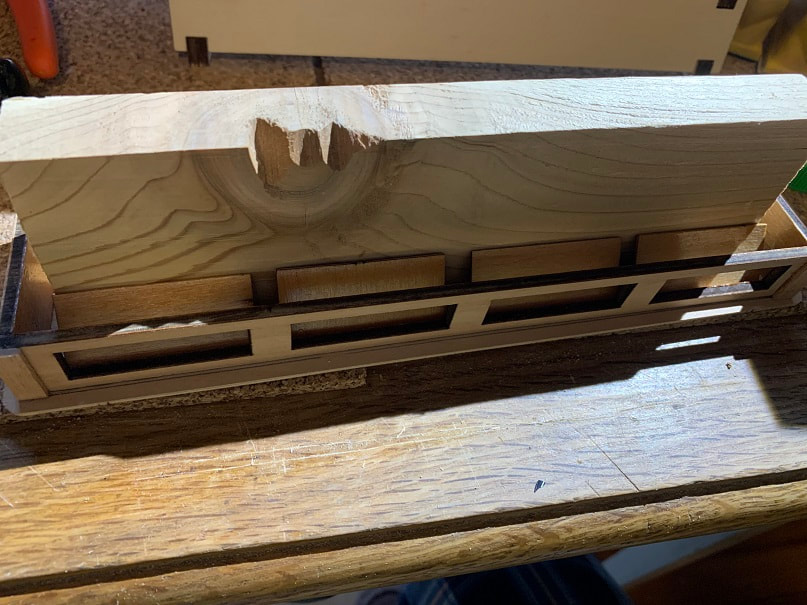
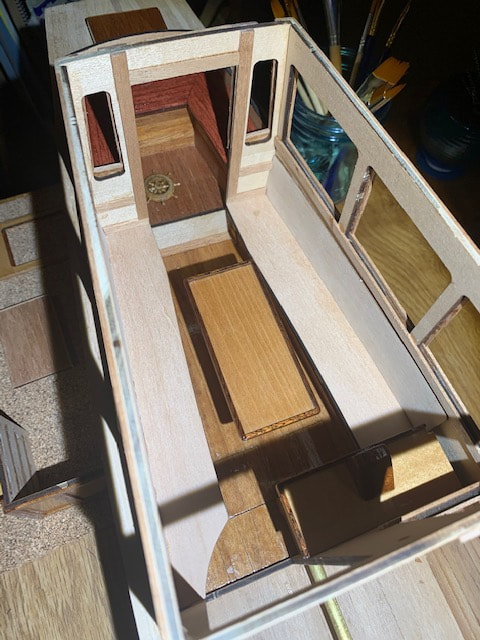
Starting construction of the cabin. I trimmed the edges of the sole here to fit the hull, but I made an error and did the trimming on the topside of the sole. This part is not symetrical, it has slots cut in it for parts 69 and 70 near the door. As can be seen in this photo, I therefore needed to make some parts to fit that area. The outcome is the same, so luckily my error was not unrecoverable.
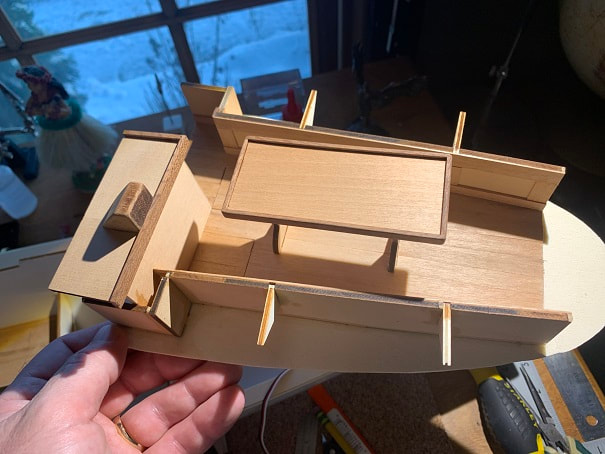
I built the cabin interior up to this stage. I added some trimwork in the cabin beyond what was called for in the plans. The table tops are not glued down yet. I will now varnish these parts and will attach the table top after that. Note that the hatches are both done also.
Deck planking has been trimmed to the hull, and I am continuing with deck planking, I am using 15 sec superglue for planking.
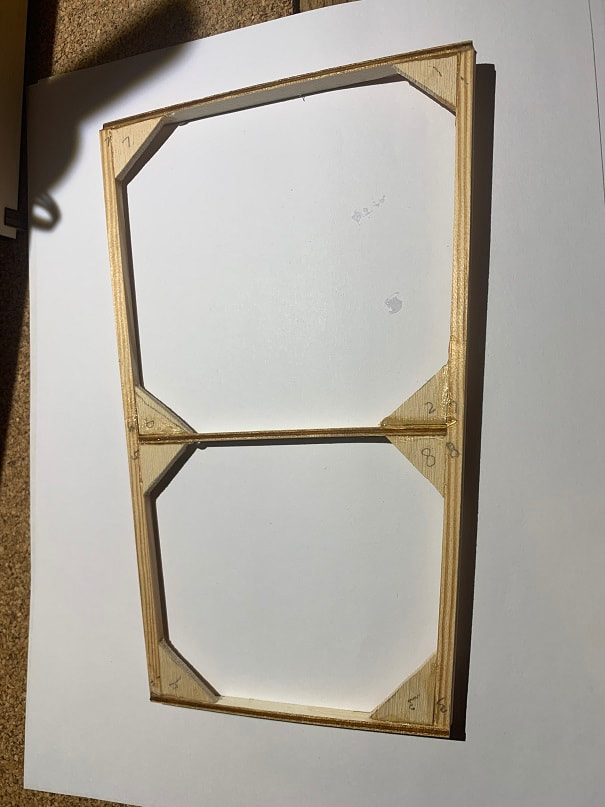
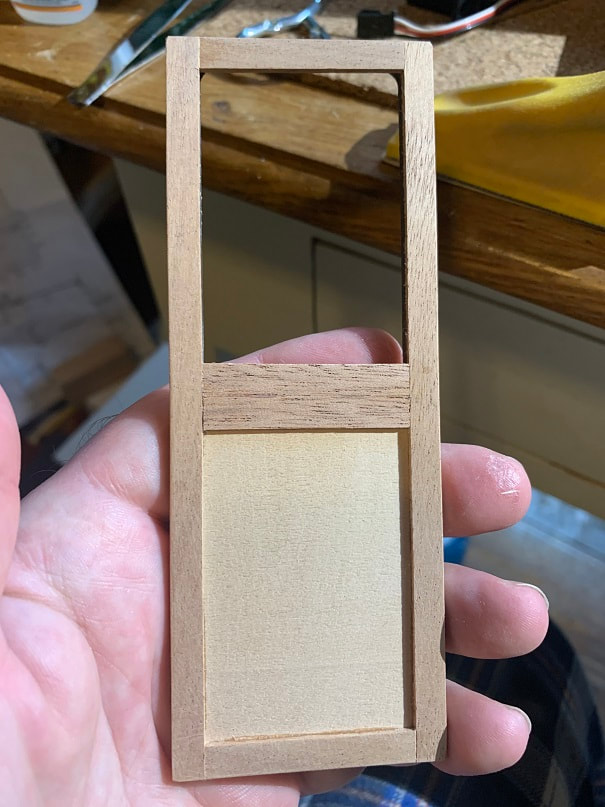
This is the forward bulkhead and hatch, showing the retention mechanism.
This picture shows how the hatch looks when installed in the forward bulkhead. Note the side edges fo the bulkhead have been carved to fit the hull shape.
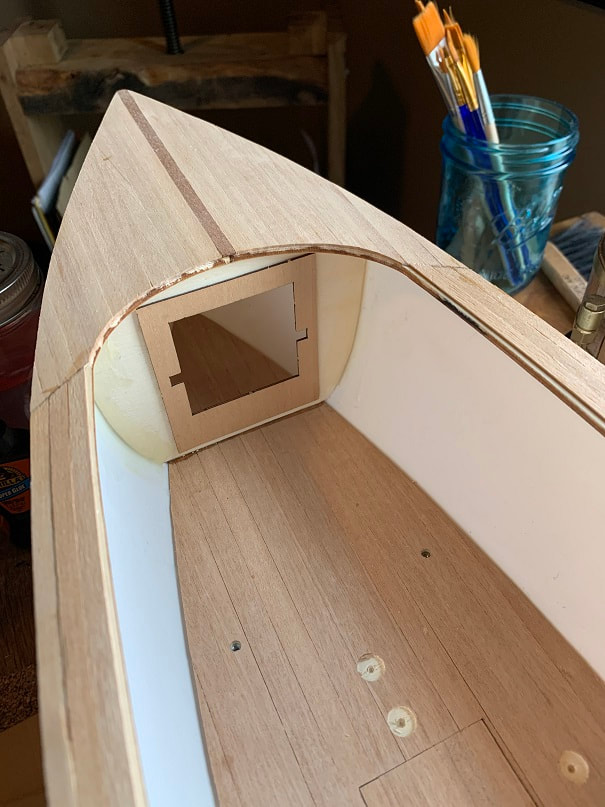
Forward bulkhead glued in place with Devcon plastic welder epoxy to the hull, and superglue to the sole.
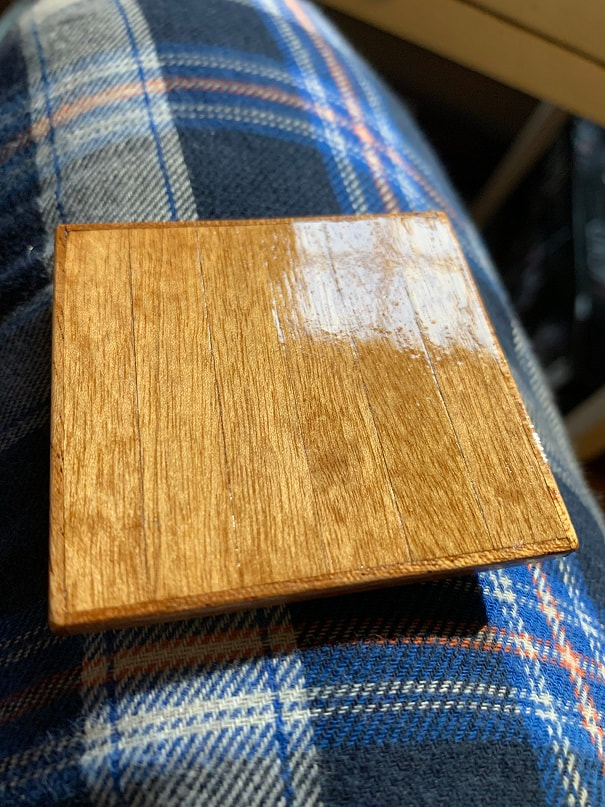
The Krick Alexandra is a model with a plastic hull and primarily plywood parts. In many cases there are large flat sections of plywood that would certainly look nice if just left as-is in the model, but I think the model is nicely enhanced by adding planking and trim in many areas, beyond what is called for in the plans. Using trim to cover exposed tenons and exposed plywood end-grains is a nice decision I think. Here is the forward bulkhead hatch with hardwood trim around the edges and hardwood planking on the face.
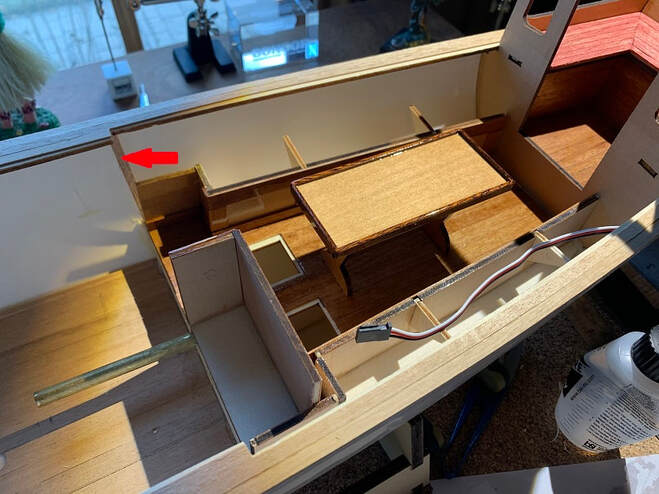
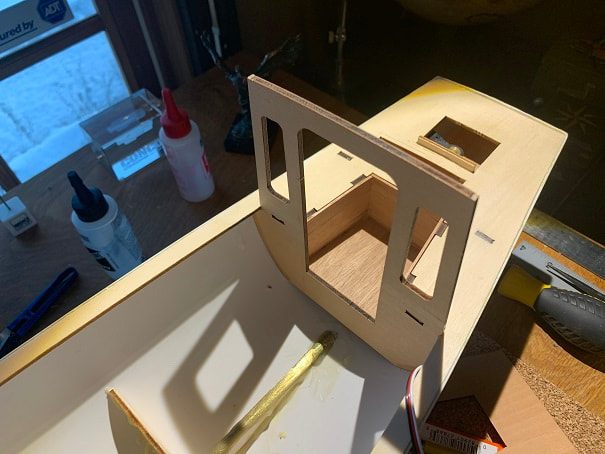
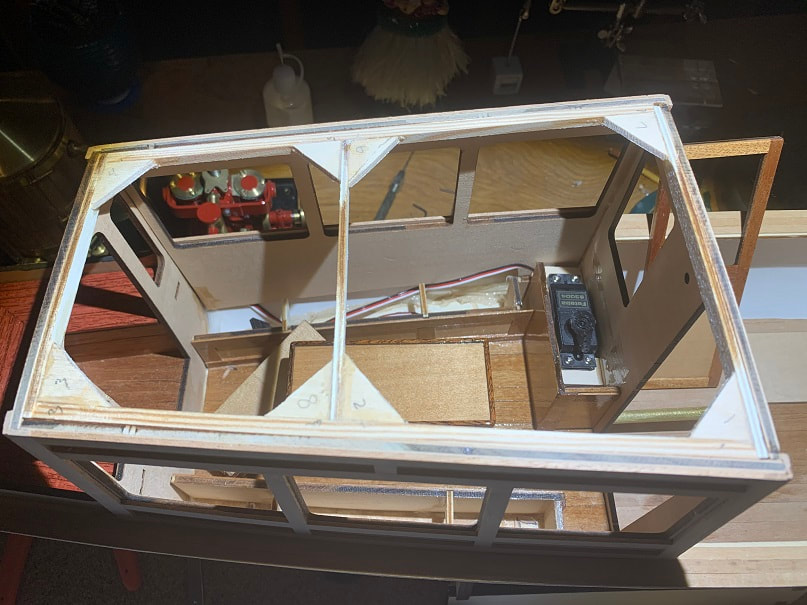
Here is the cabin assembly, glued into place in the hull using Devcon plastic weld epoxy. Note the compression braces (red arrow) used to hold the sole plate down flush to the framework below. I varnished the interior of the cabin prior to installing it in the hull.
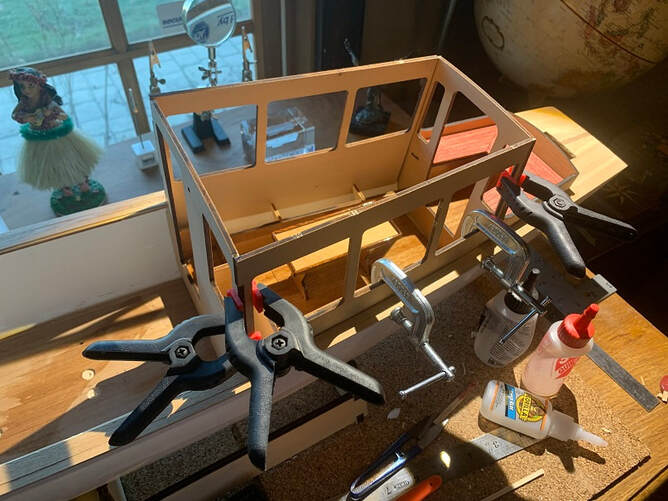
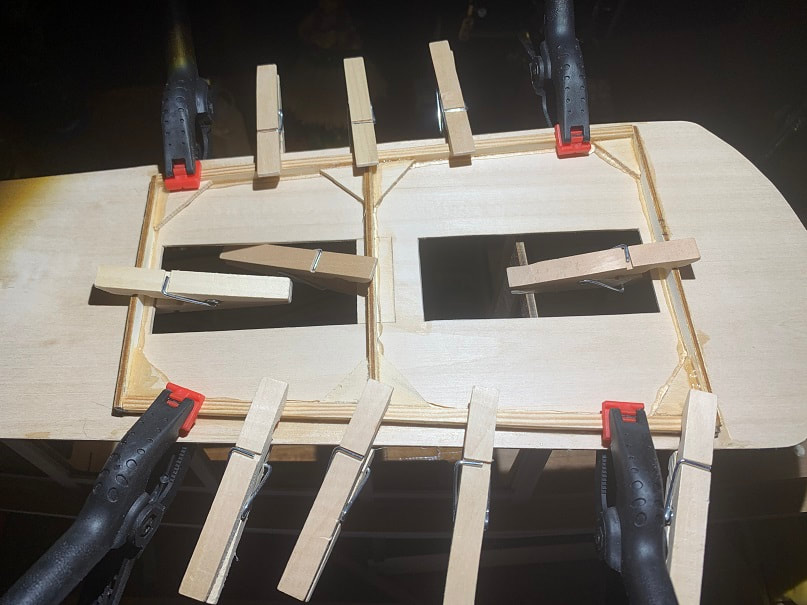
Epoxying the cabin sides into place. I used clamps to achieve the curved sides. The cabin bench seats are also curved to match this, so the cabin sides must be curved flush to the curve in the deck.
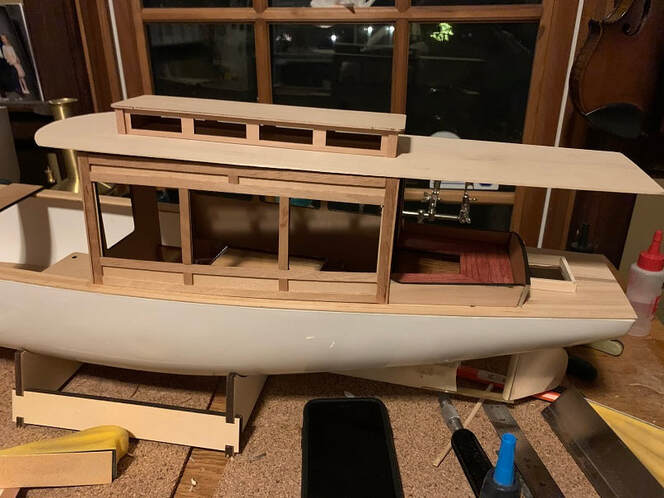
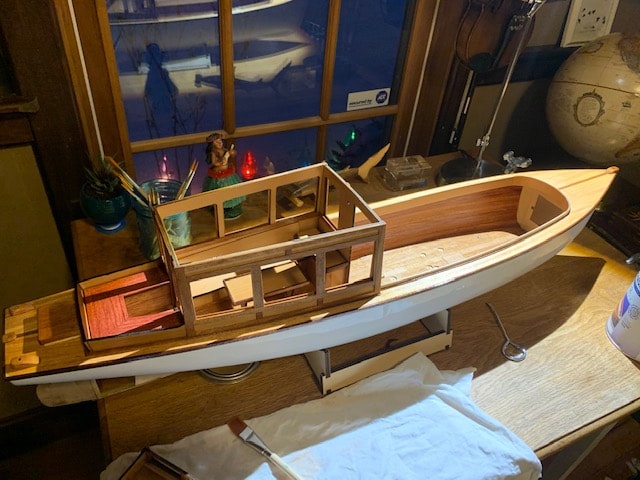
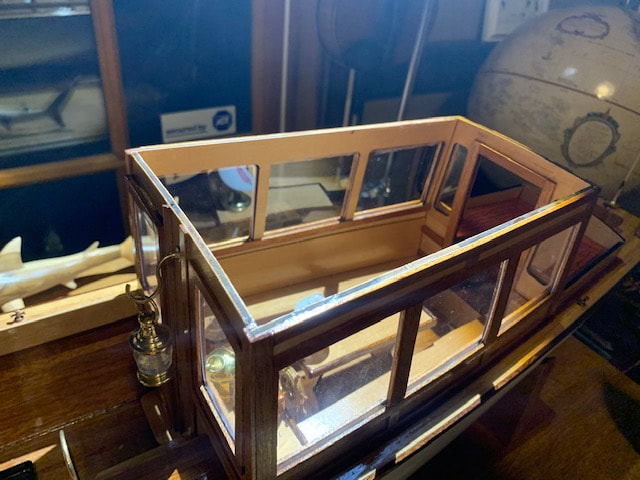
Cabin and roof vent with additional trimwork added. The standard Krick Alexandra features a cabin top that matches the size and shape of the cabin; I made a custom cabin top which extends aft to the stern, and which also extends forward of the cabin with a large radius forward.
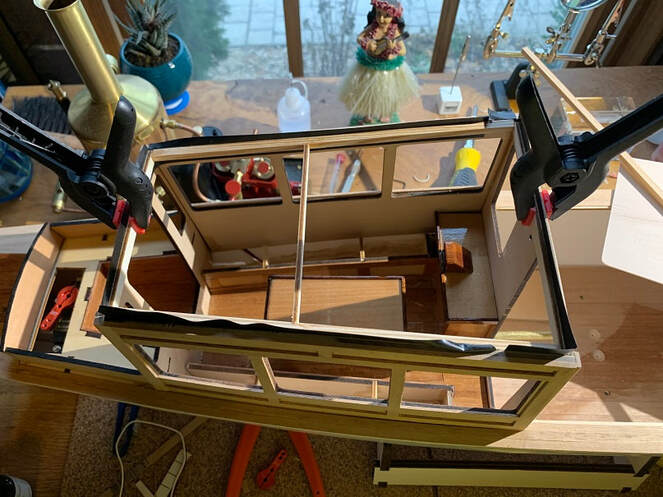
I applied electrical tape to the interior face of the top of the cabin sides, and then glued the roof framework components in place to each other. The roof frame is not glued to the cabin; the cabin top assembly is removeable, so this frame need to fit snug into the cabin sides.
I decided to plank the cockpit seat; here is that work in-progress.
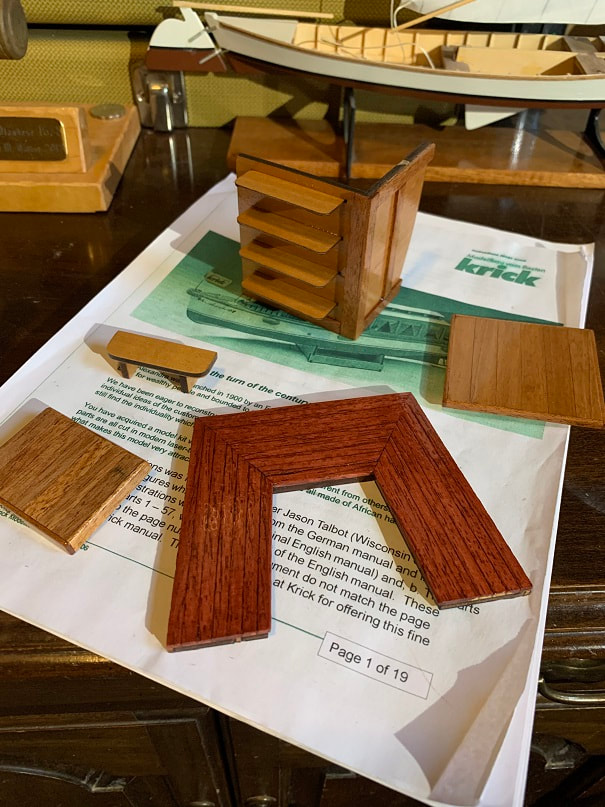
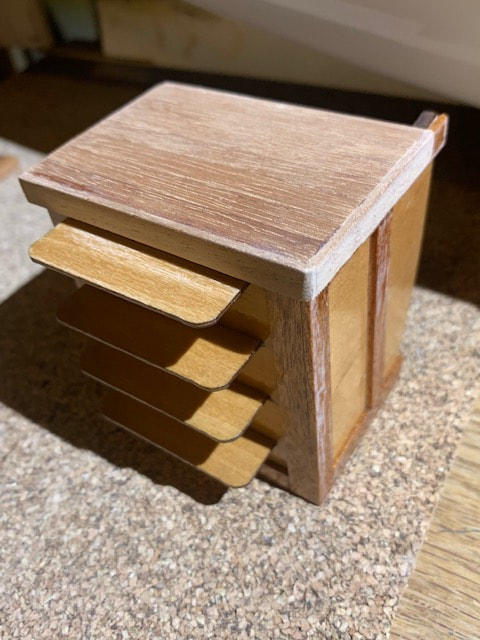
Building and varnishing some of the smaller assemblies; foreward and aft hatches, cockpit seat, cabin entry step, and the midships locker/cabinet. Note custom trimwork and planking on all these parts (except the step....I left that be).
Gluing the vent louvres in place. I set a 3/4" board down the center of the assembly and then just leaned the louvres up against it so that they would all be aligned as the glue dried.
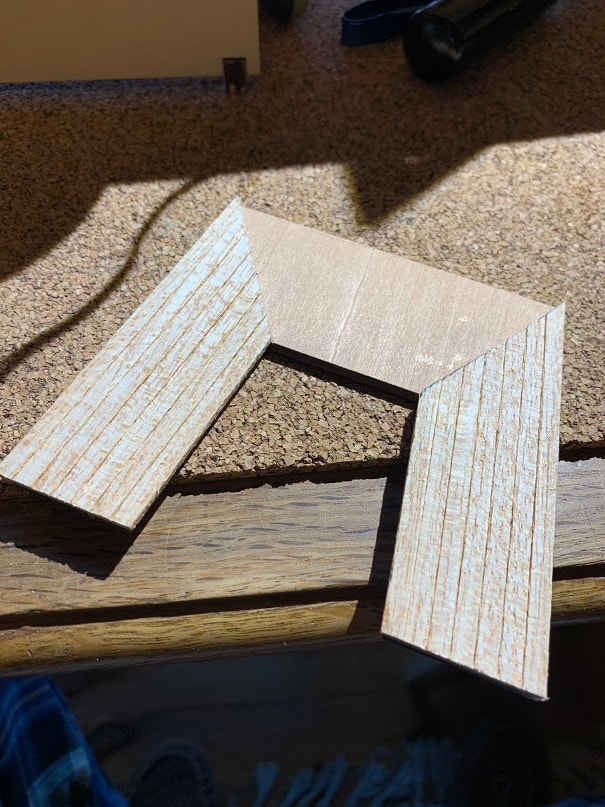
I lost the little roof frame gussets, so I cut out new ones and glued them the place.
The roof frame fits snug! Don't glue it in place in the cabin sides...
After sanding and fairing the roof curvature, locate it properly and glue it to the roof.

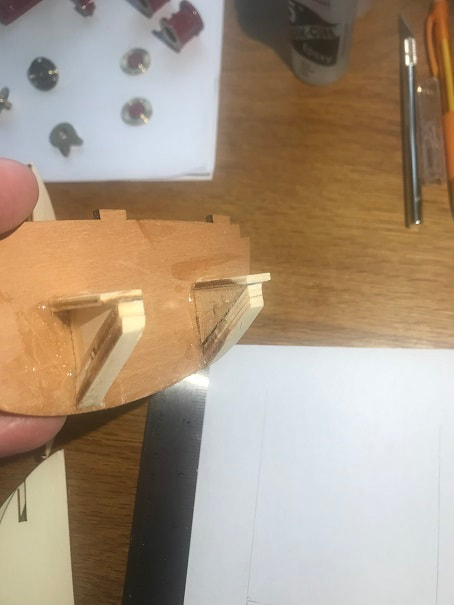
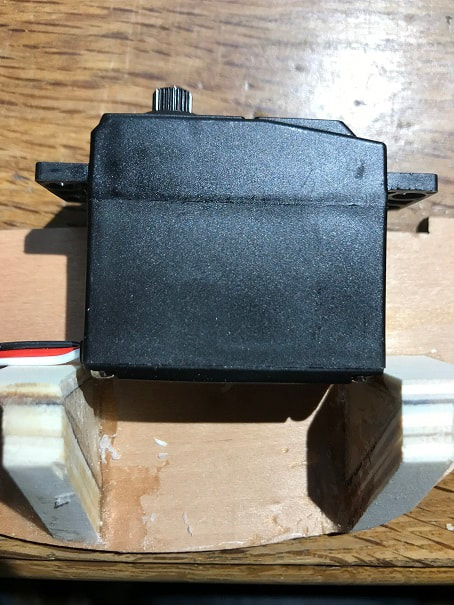
I laminated blocks about 1/2" thick to serve as the mounting blocks for the steam engine control servo. I cut a notch in one, to allow the servo to be removed vertically without the wires trapping it in place.
I measured exactly where the control rod will need to exit the front of the cabin to align properly with the valve on the steam engine, and I marked this location on the inside of the front cabin wall. I installed the servo so that the servo horn will align with this spot. Servo brackets epoxied in place.
Added some trim to the front door.
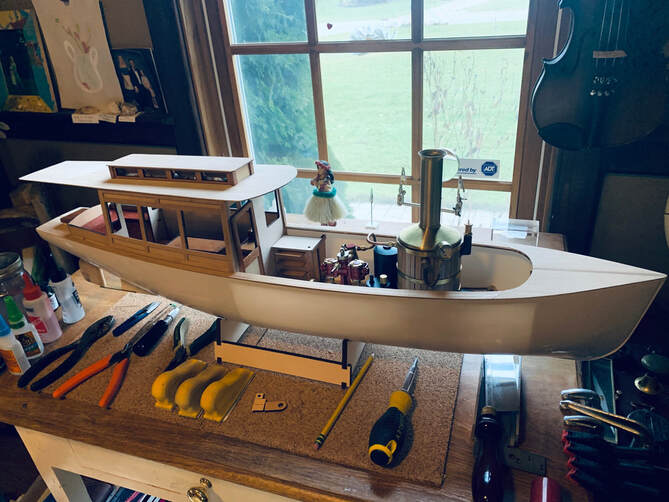
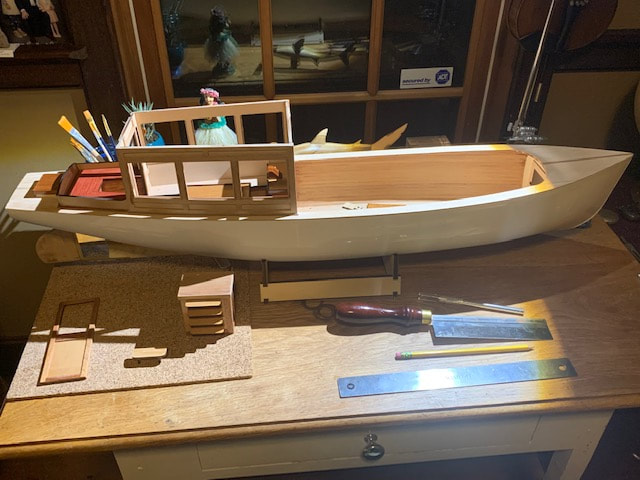
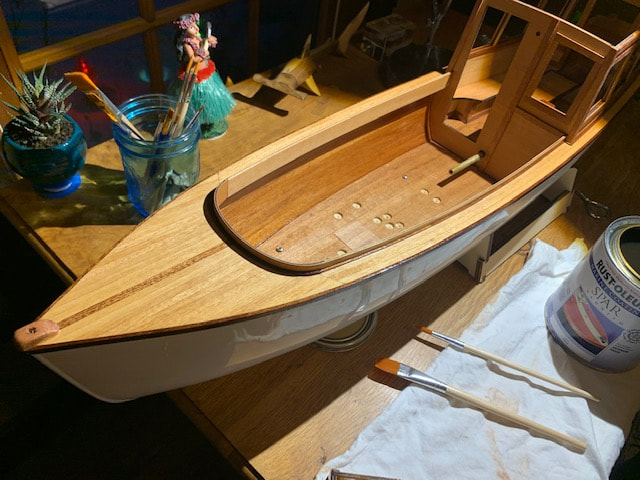
I set the roof on, and temporarily set the steam plant in place to get a feel for how she will look!
The plans do not call for planking the inside of the hull. I decided to plank this area to cover the plastic and to add more varnished wood area to the model. I used 1/64" x 1/4" mahagony from Northeastern Scale Lumber Co.
I think the Alexandra looks nice with the hull interior planked. Now I will need to snad and varnish this.
Seats and interior trim in progess. The port side seat top is held in place by cleats and can be removed to access electronics below.
Working on the locker that will be placed in the open bow section.
Soon the trim work will be done and I will varnish all the woodowork prior to installing the windows.
Spray painting roof sections.
Here I am working on installing the coaming. The coaming is made from two layers of reinforced plywood. Here you can see the first layer of plywood installed. I was able to bend the front curved section without steaming it. NOTE: the curved plywood parts meant for the fore coaming pieces, were wider than the adjacent longitudinal coaming boards in the kit. I cut them down so that the long coaming along the port and starboard side matched the nice curved coaming at the fore of the open bow area.
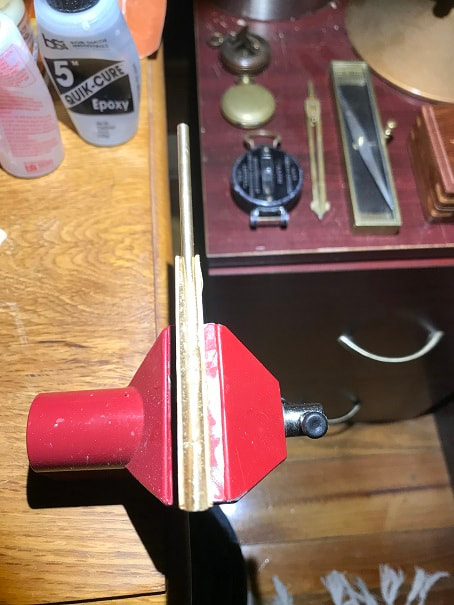
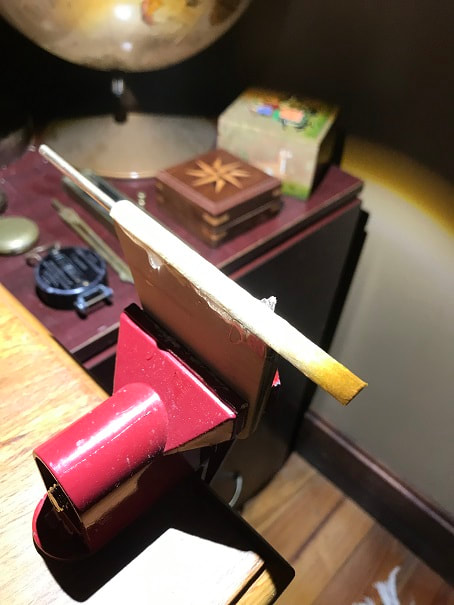
There is a mahagony trim that goes around the coaming, where the coaming meets the deck. I was not able to bend this 1mm x 1mm mahagony to the curve without breaking it, so I steamed a piece and then pinned it to shape on a curved form.
Here is the completed coaming included both layers of plywood and the mahagony trim. This curved coaming really adds style to the boat. i also glued on the rubrail.
I carved and installed brackets that will support posts that will hodl up the aft end of my custom extended cabin rooftop. I also made and installed the fore and aft flagpole bases. I also installed and sanded the transom rub rail.
After sanding and cleaning up all the woodwork (and vacuuming and tackclothing it) I applied the first coat of spar varnish, I love seeing the warmth of the wood appear when the finish is applied.
Varnished deck, sole decking, and internal hull planking. I threaded screws into the steam-plant anchor points to protect the threads.
The display base provided with the kit, is quite short and leaves the boat overhanging a long way fore and aft. A bit of downward for on the the stem or stern of the model makes it tip on the stand. To provide a bit more stability and a nicer display base, I built a longer one out of mahagony.
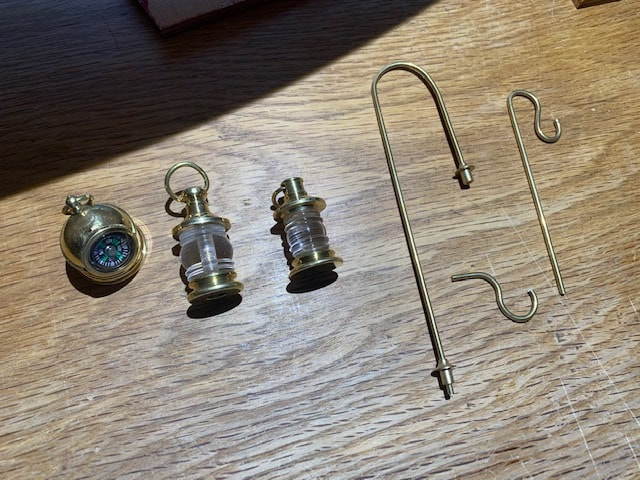
I am in the process of applying multiple coats of spar varnish. In the meantime I formed the brass rod parts. Also pictured are the brass lanterns and compass which I purchased separately from Krick.
6 coats of varnish and I'm done. Installing deck hardware now.
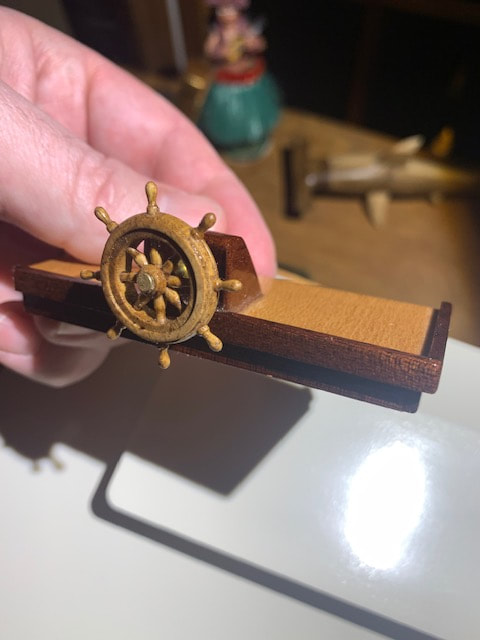
Varnished and installed the nice ships wheel from the Krick kit, there is a little brass bushing behind it also.
I am fairing the keel with epoxy fairing compound, and forming a nice rounded fillet for the transition from keel to hull.
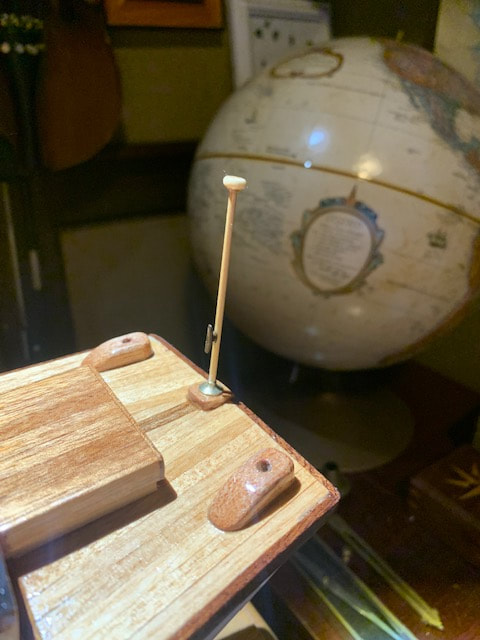
Made and varnished the stern flagpole.
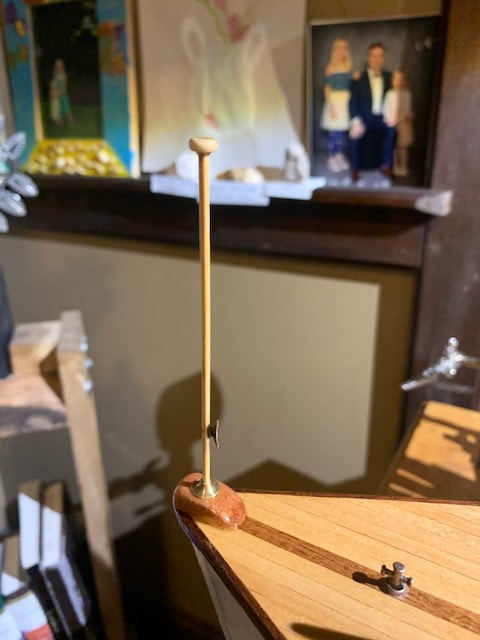
Made and varnished the bow flagpole.
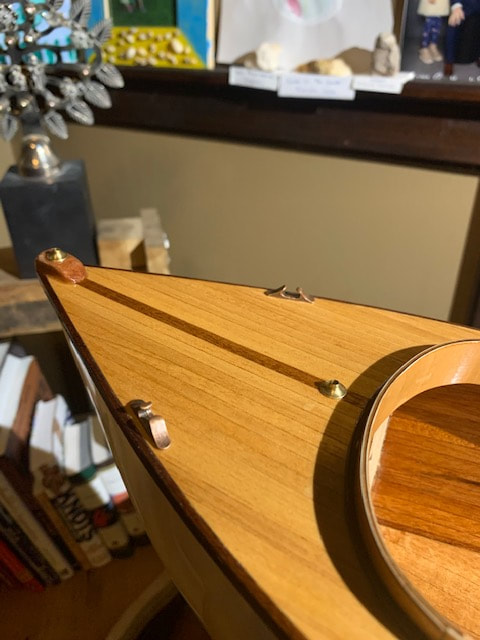
Installed the 7 cleats on the deck.
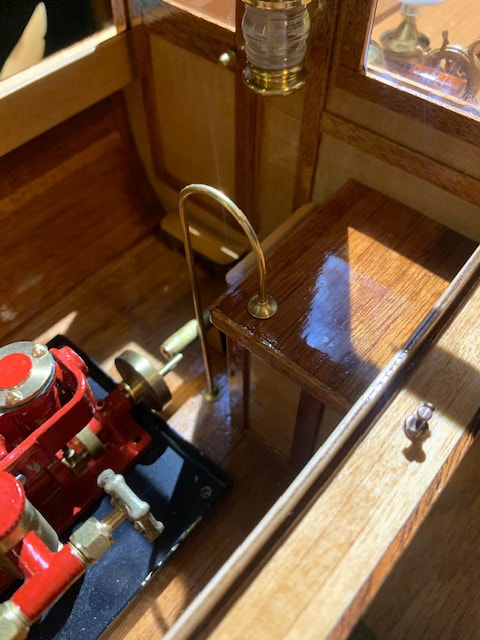
Here is the brass handrail that I formed earlier, installed in place.
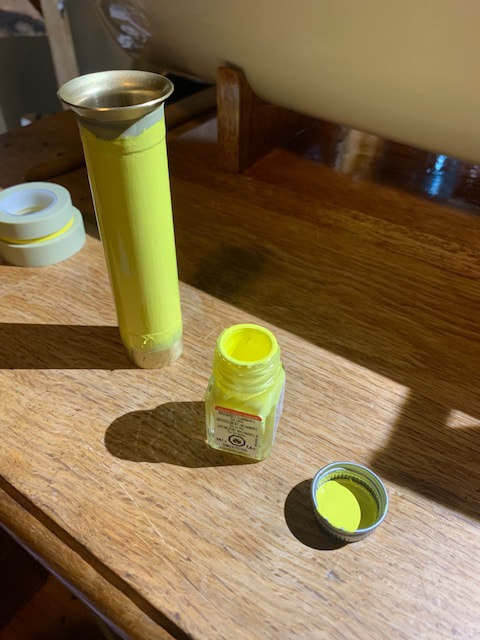
The smoke stack is taped off so that the brass will remain exposed near the top. It looks like it will take about 6 coats to get a nice opaque, glossy coat. Sanding with 600 grit between coats.
Window panes are installed; they all needed to be trimmed and cut to size in order to fit. I need to install the interior window trim now.
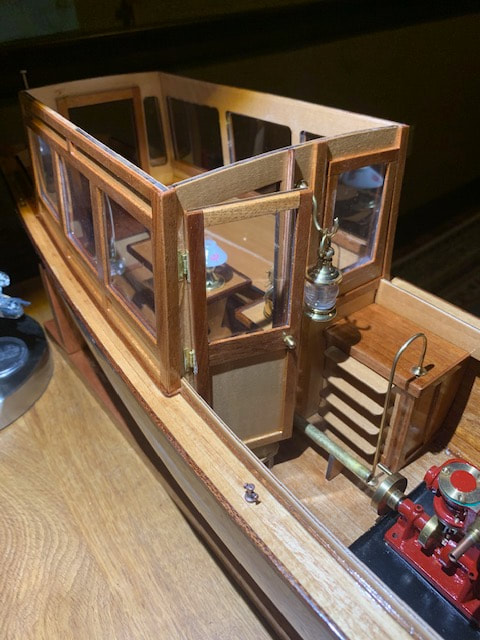
Brass door knob from the kit is installed. I got some nice, functioning, brass hinges from MicroMark and used those to hang the door. It is a functioning opening/closing door.
Cutting the curtains from white cloth. I installed the curtains on hardwood dowels that are compression-fit to be held into the cabin.
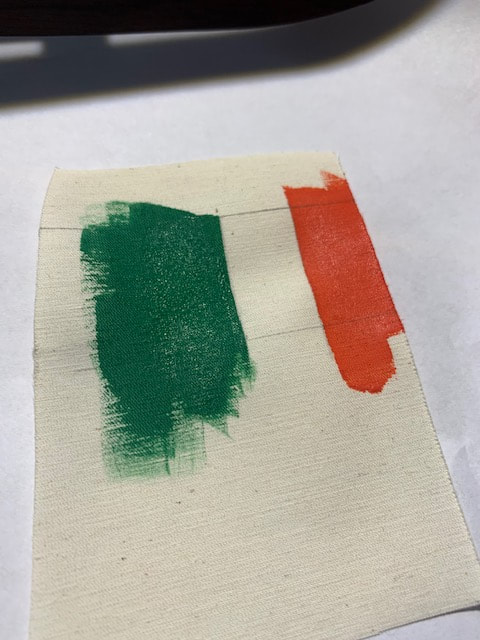
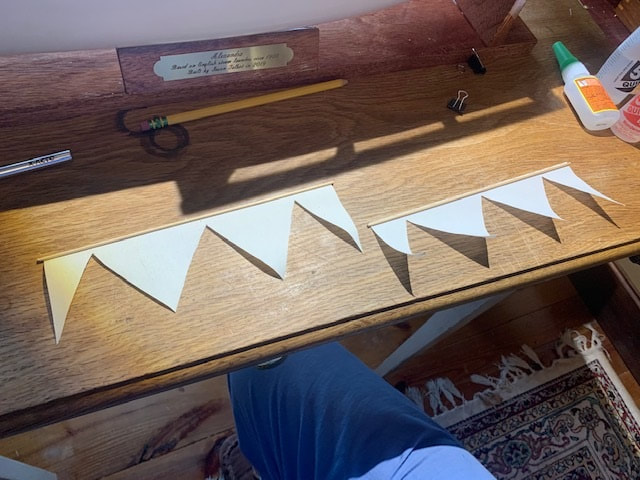
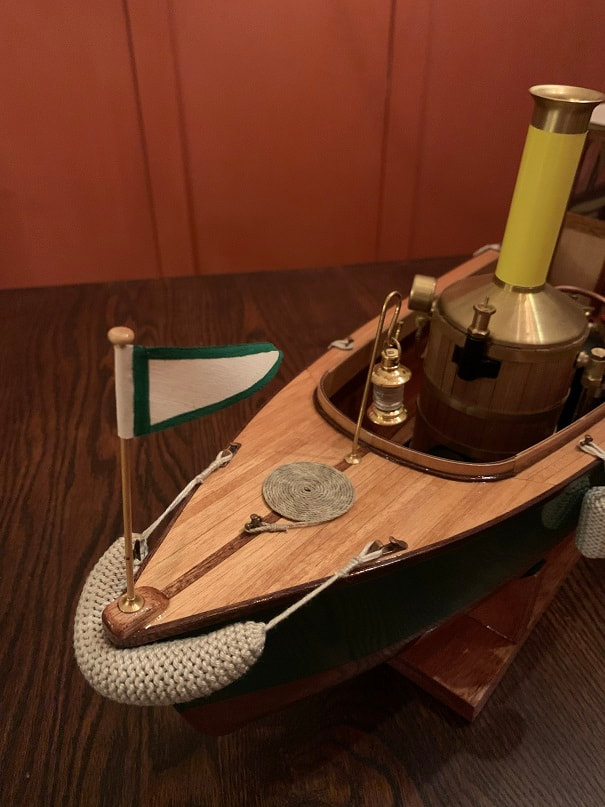
Making the flag for the stern.
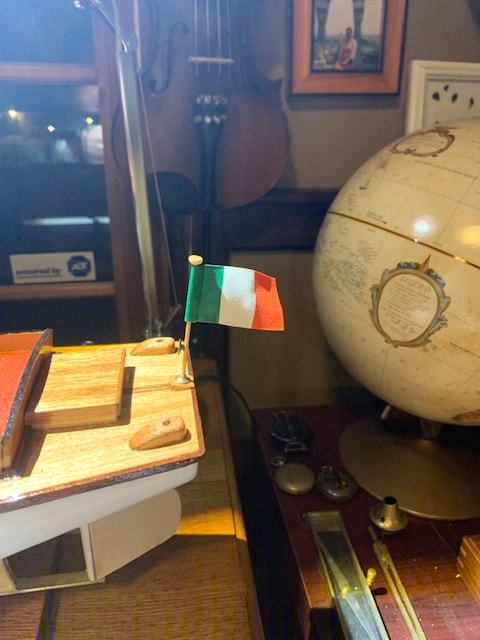
Here is the flag on my Alexandra; it was a nice moment to install the flag.
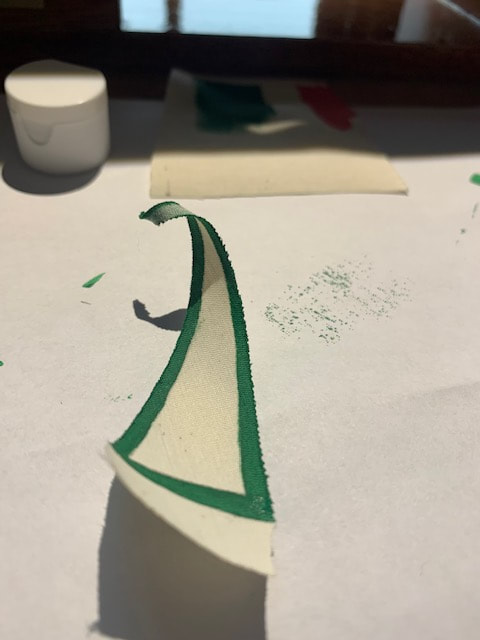
I decided to make a pennant shaped flag for the bow. I will need to trim up those loose threads when the pain dries.

Bow pennant raised.
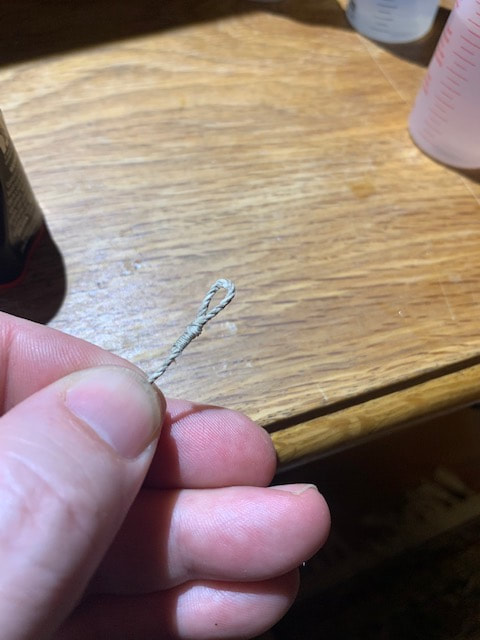
Tying and whipping end of dock-line
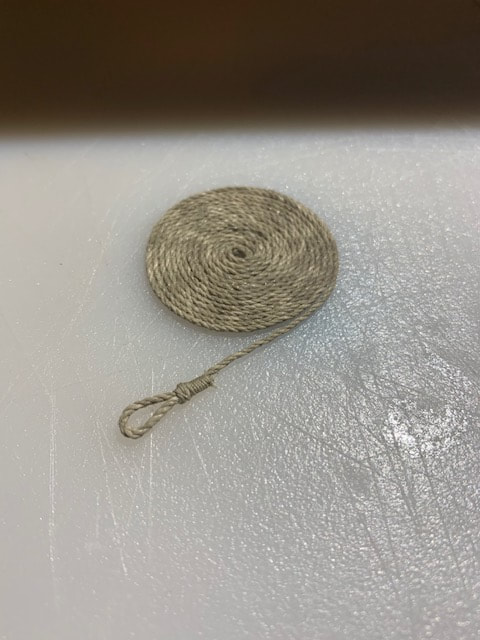
I made a flemish coil for the dock line at the bow. I superglued the coils together here and there so that it holds together.
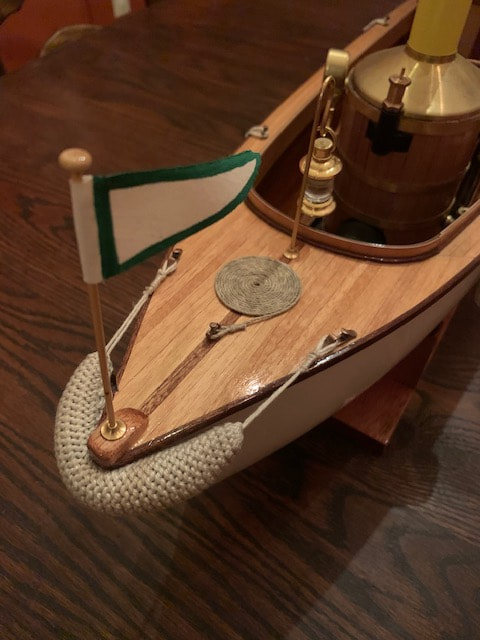
Foredeck of the Krick Alexandra, completed.
Fenders are from Krick, and were purchased as part of the accessories kit specifically for the Alexandra. All that needed to be done was to cut, tie, and wip the ends of the lines attached to the fenders.
Almost there! Need to mark the waterline, paint the hull, install the prop & shaft, bolt down the engine. When it warms up, I will see if she floats!
I made this support stand to hold the boat upside down when painting. It is made from scrap pine and felt and took a couple minutes to build. This will be a nice stable way to hold the boat over the comings week as I paint the boat.
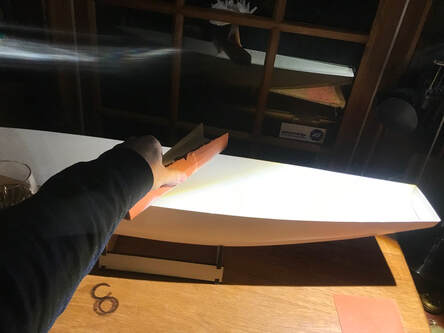
Sanded down the hull with 330grit in the basement, vacuumed and talk-clothed it off and here she is ready for primer.
Rustoleum primer applied
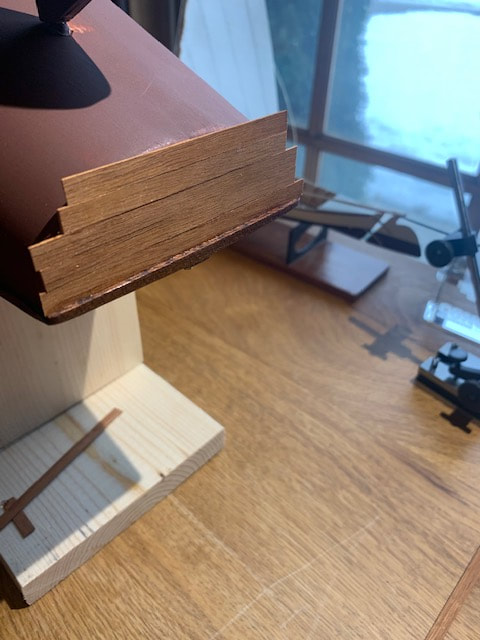
I have seen many wooden boats with painted hull, but with varnished transoms showing off planking. I will take this approach with the Alexandra. I planked the stern with 1/32 thick mahagony strips.
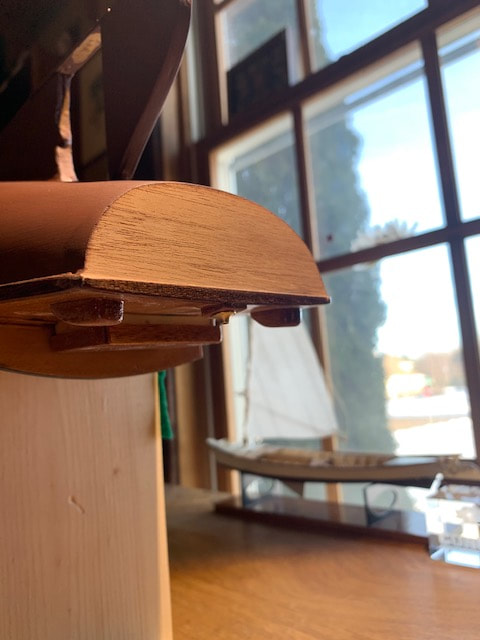
Transom planking trimmed and sanded. There is a small radius in the plastic hull from the hull sides to the transom, and this needed to be filled with epoxy filler and sanded smooth.
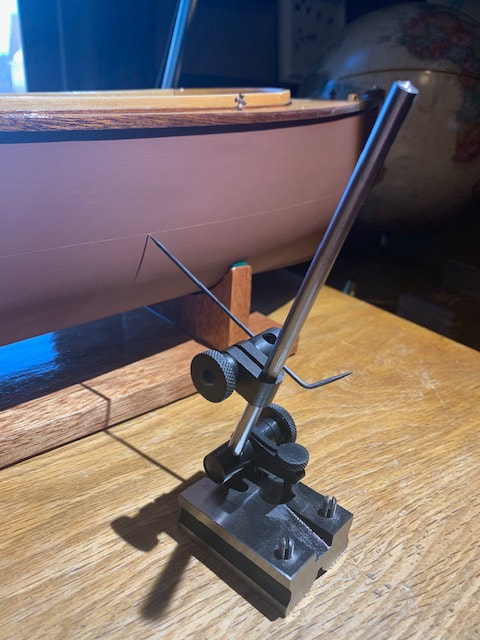
With the hull level stem to stern and starboard to port, I used my surface gauge to mark the water line.
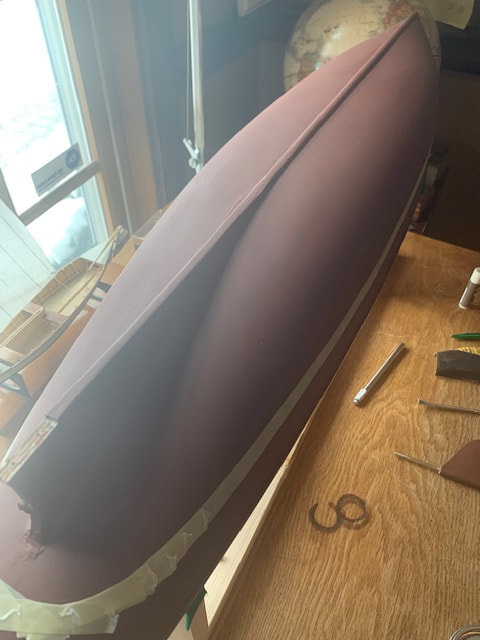
Hull taped off at the waterline.
First coat of gloss rustoleum on the bottom. (rudder removed and painted separate).
The bottom paint was too red, so I blended it with brown to achieve a better bottom-paint color. Closing up shop for the night.

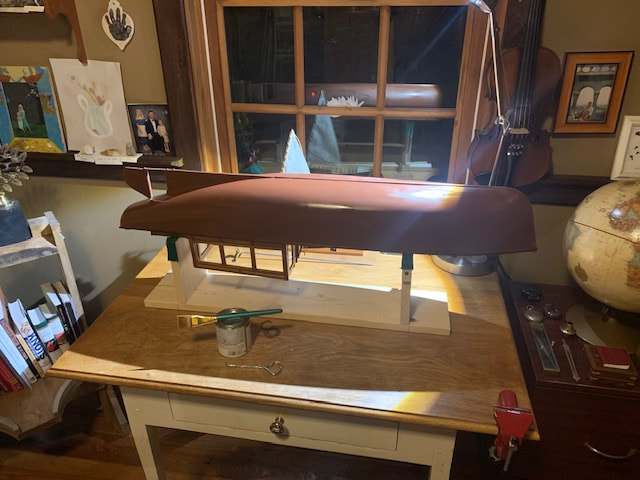
Both hull colors are painted and done. Attached the rudder.
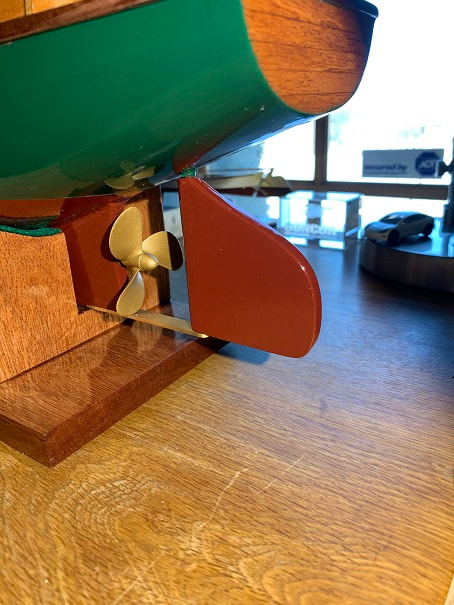
Installed the propeller shaft and propeller.
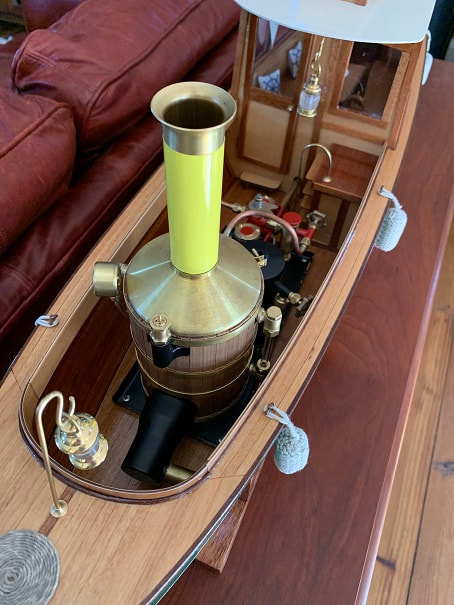
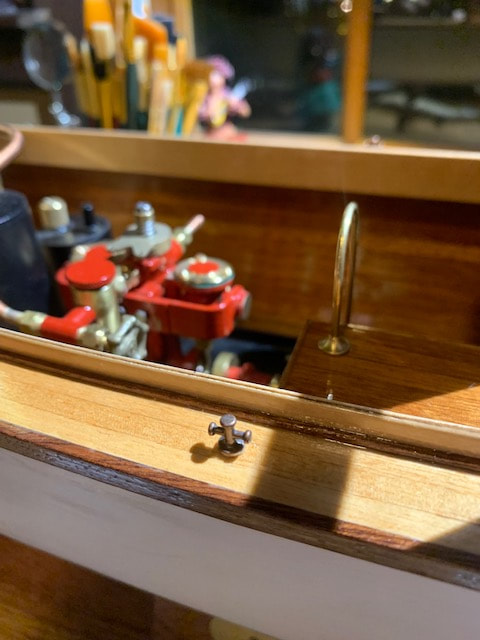
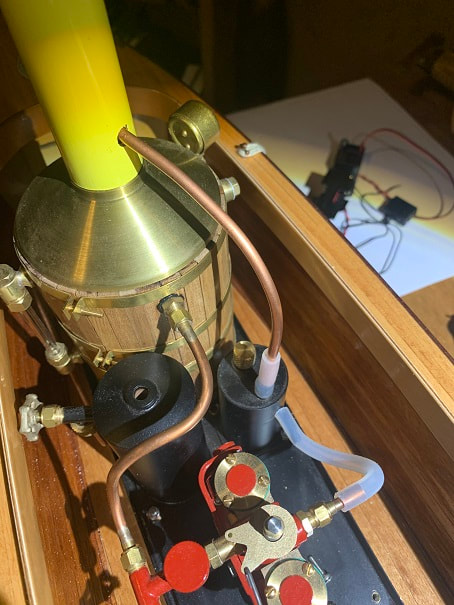
Miniature Steam Models "Clyde" steam engine and steam plant, installed in the Krick Alexandra.

Here is the linkage from engine output to prop shaft.
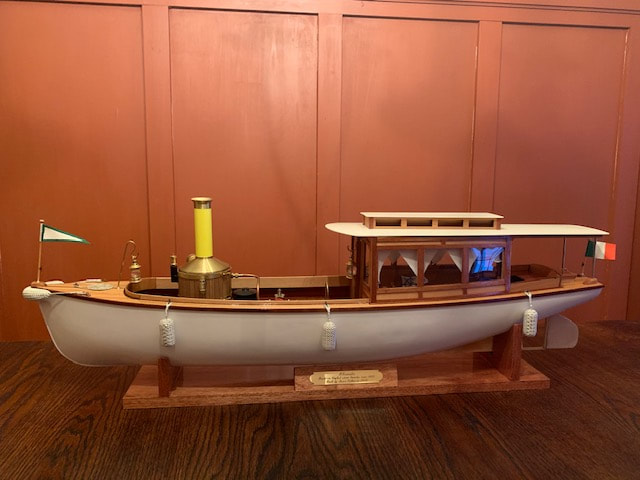
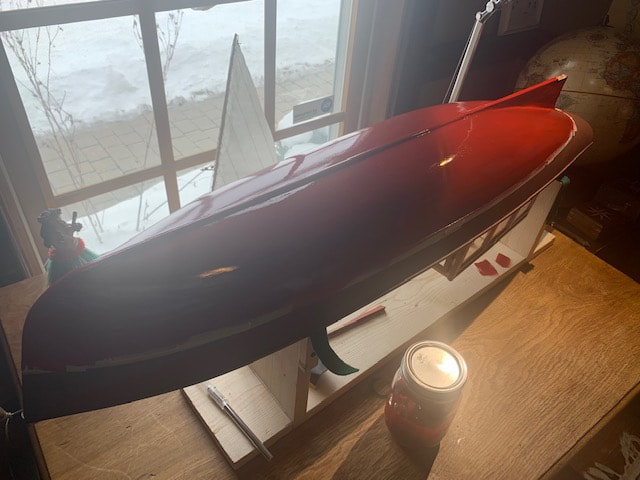
Completed Krick Alexandra! Big day over here at the model boat works.
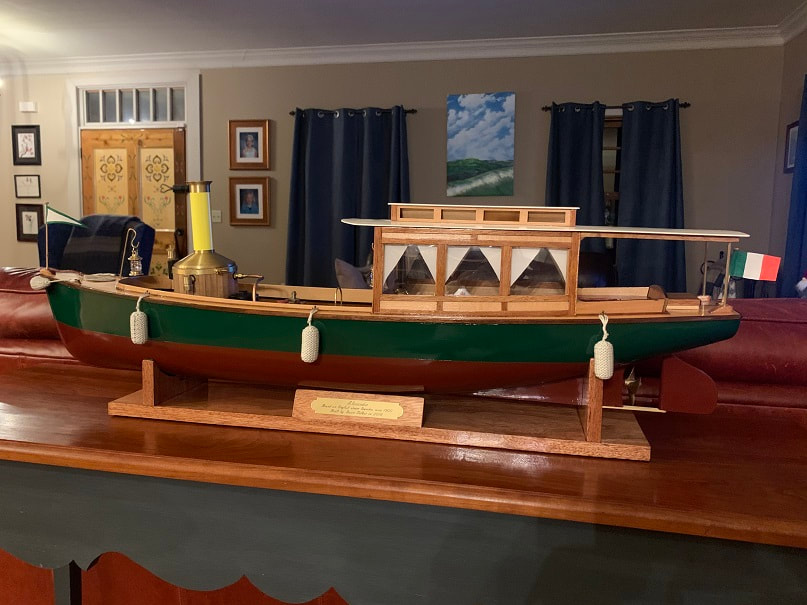
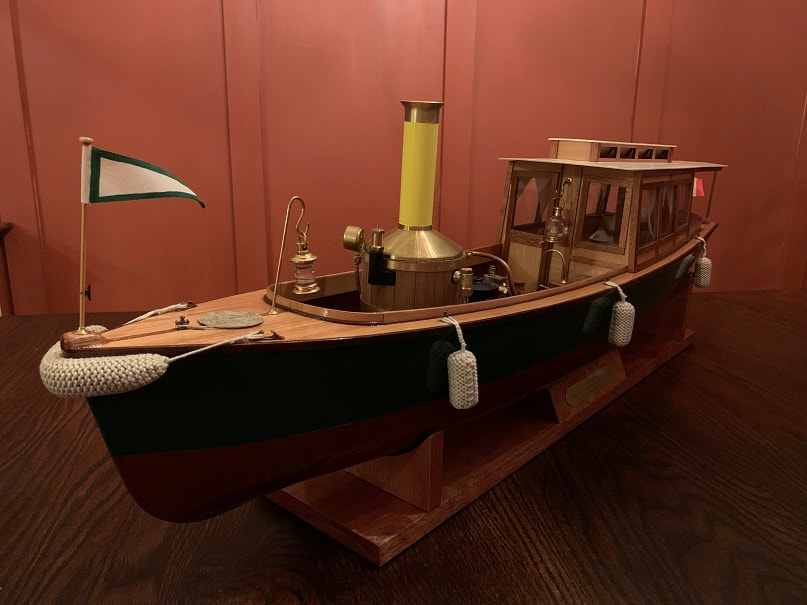
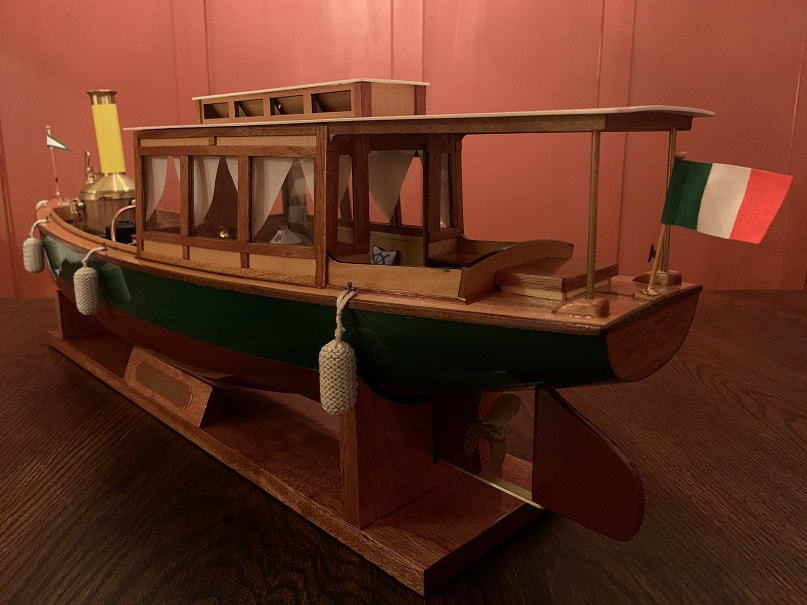
Completed Krick Alexandra Steam Launch, which customizations.
Setting the ballast and finishing and firing up the steam plant
The launch hull and trim is all done, but the ballast still needs to be set, the radio control needs to be completed, and the final steam fittings and relief valves need to be set and finished.
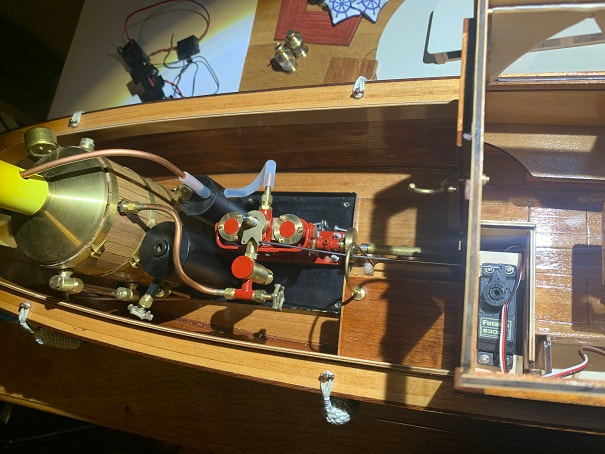
This overview photo shows the steel rod connecting the servo horn to the engine control valve. Also note that the silicone hose is connecting the engine to the condenser and condenser to the exhaust stack via a custom bent copper tube.
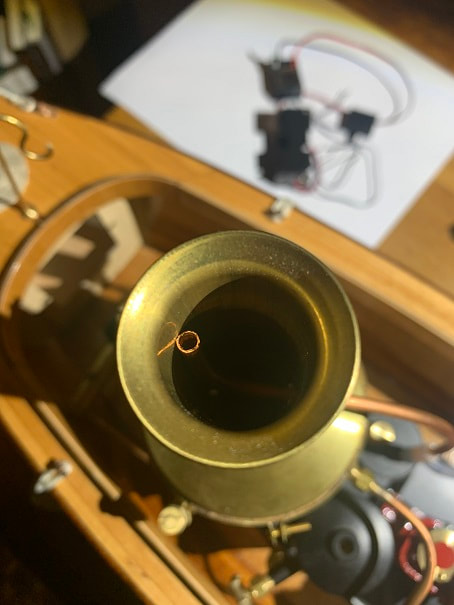
View down the stack