Argo will be fitted with a white oak, folding, transom-mounted boarding ladder.
The boarding ladder is useful for re-entering the boat which is an important safety feature. It will also be useful for kids and adults to re-enter the boat after taking a nice swim.
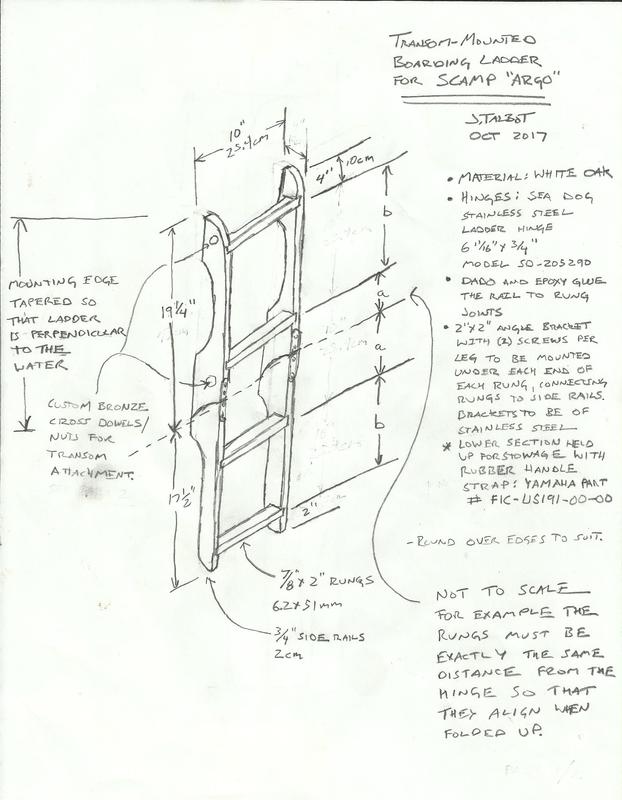
As an engineer, I must admit, this is a poor drawing, not to scale, and the dimensions are not even exactly right. This was my concept sketch and during the construction of the ladder I measured and built it right. Apologies for the shoddy drawing, do your own planning, the concept sketch above is a decent reflection of what I built, just not a good reliable construction drawing.
Mounting Hardware
- The ladder will be mounted to the transom with four 1/4" diameter through-bolted machine screws. These machine screws will thread into 3/4" diameter cross-dowels that will be fitted into the ladder rails.
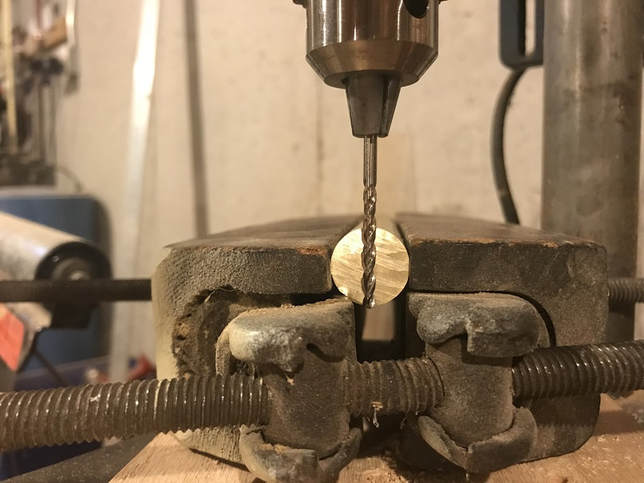
Started with a 3/4" diameter rod of 306 Bronze. Checking alignment for drilling holes to be tapped.
Holes predrilled for tapping 1/4" x 20 threads
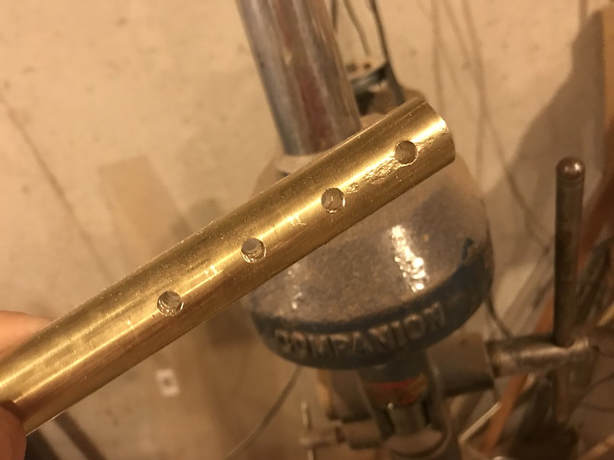
Tapping threads
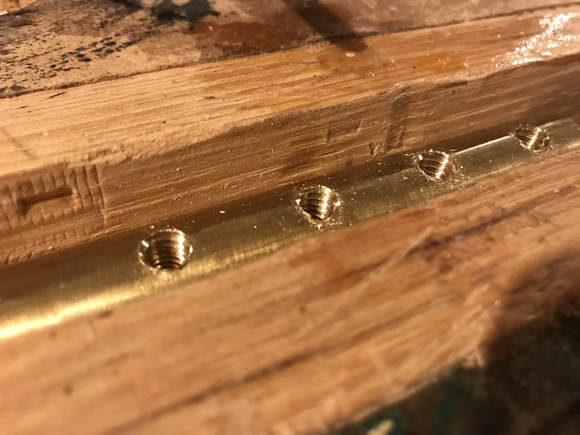
Threads cut
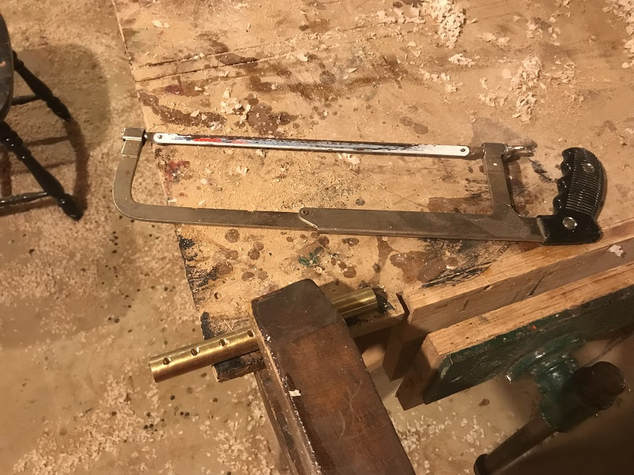
Then I cut the cross-dowel-nuts 3/4" long each, these will be the full thickness of the 3/4" ladder rails into which they will be pressed.
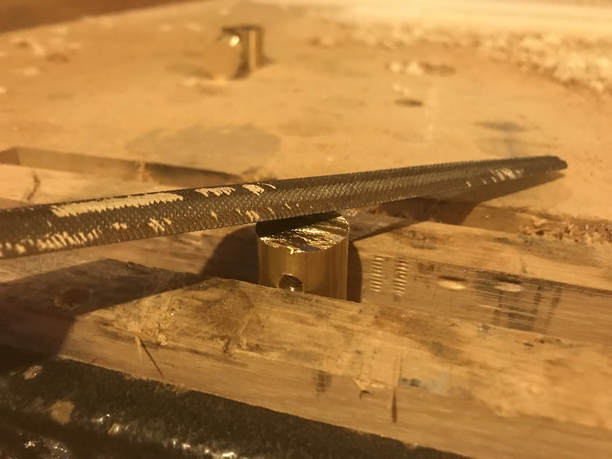
Filed the ends smooth and put a slight roundover on the edges

Finished 3/4" diameter bronze cross-dowel.
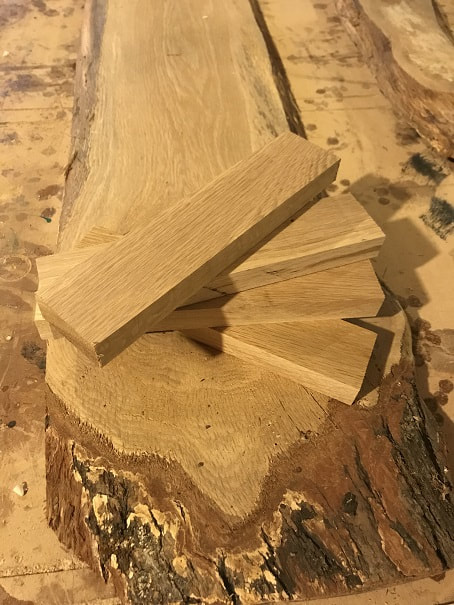
Four, 7/8" x 2" x 9.25" white oak rungs
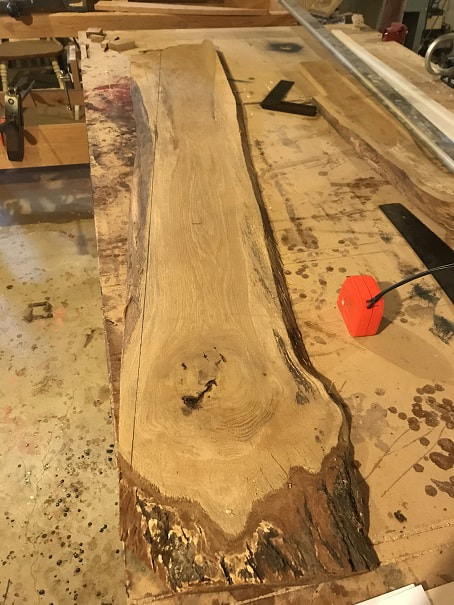
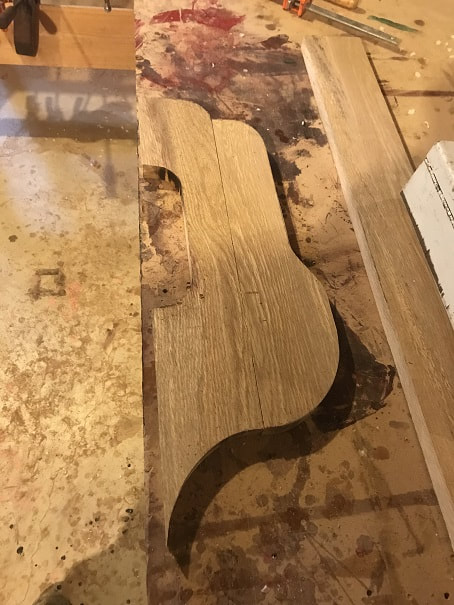
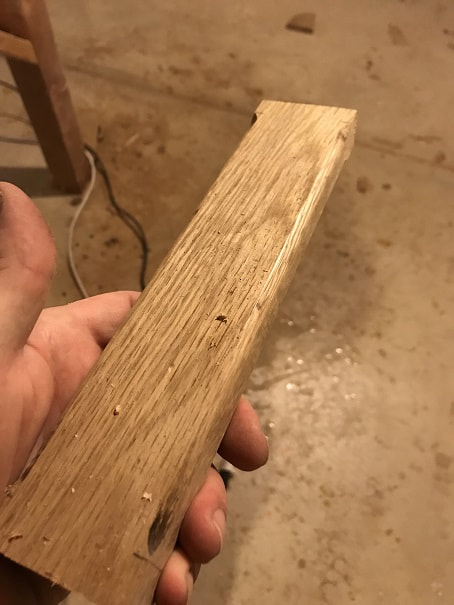
The white oak, as with other white oak used on this project, is from an old tree that fell down in the yard a long time ago. Many boards to not have milled edges, as seen here. First order of business is establishing a straight edge. I marked a straight line as can be seen, and cut to it with a saber saw.
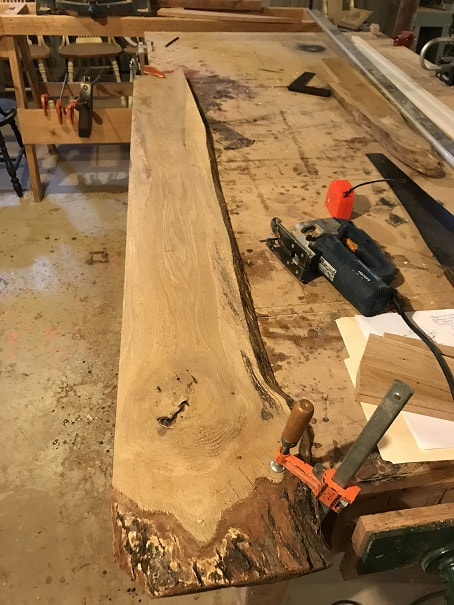
Straight edge established. Next I ripped and planed the side rails to correct dimensions.
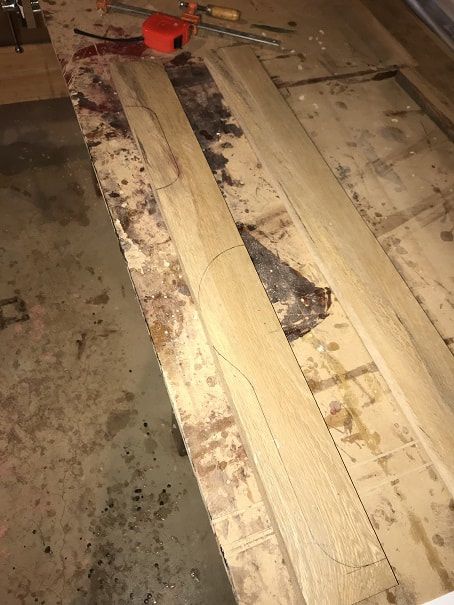
Marking up the cuts for the side rails of the ladder.
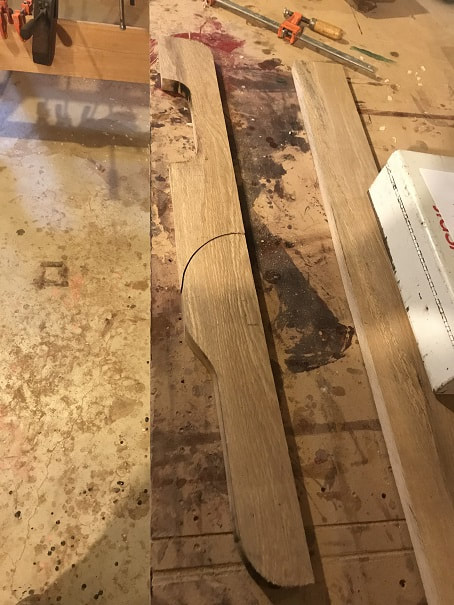
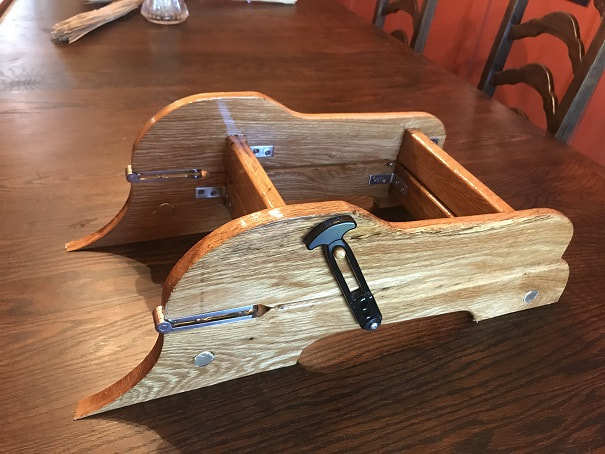
Side rails for the boarding ladder for me SCAMP! The curved joint in the middle should provide a nice large-surface-area compression zone for the ladder when it is extended. I drew the curves so that it will look nice when extended and when folded up.
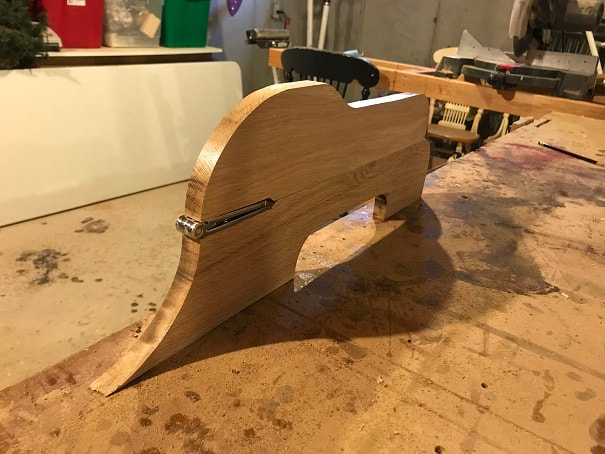
Here's how the side rail looks in the folded-up position.
Next I marked, and cut out, recesses for the stainless hinges.
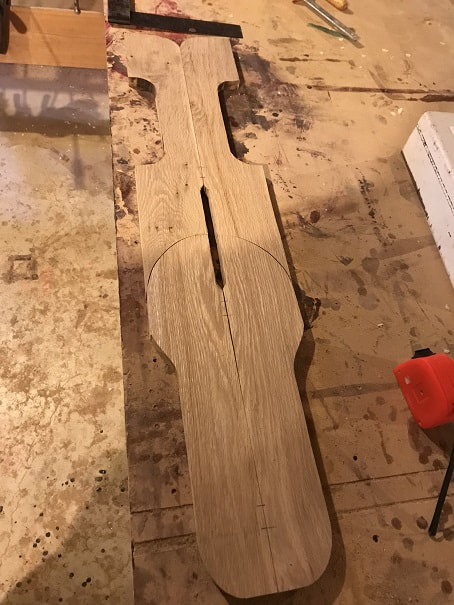
Marking locations for rungs. BE SURE to locate the rungs exactly the same distance from the hinge-pin so that when the ladder is folded-up, the lower rungs align with the upper rungs. I also made sure the rungs were exactly level on the left and right rails.
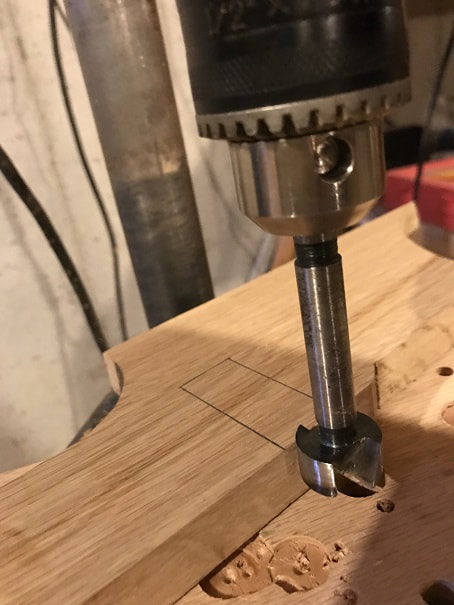
With the rung locations marked, I will carve out a slot for the rungs to sit in using 1 7/8" forstner bit and chisels.
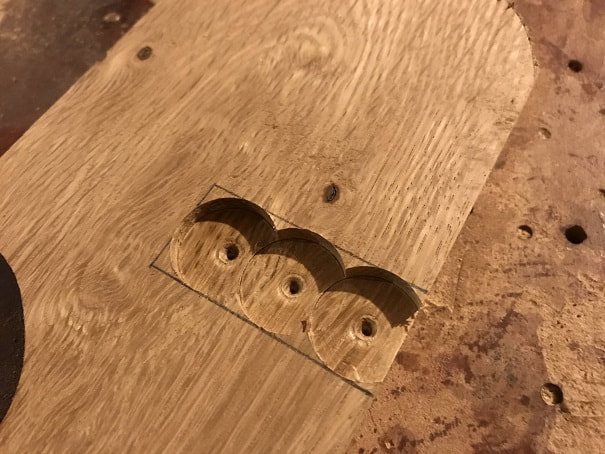
The forstner bit was set to bottom out at the proper depth, now I will square up the edges and corners with a chisel.
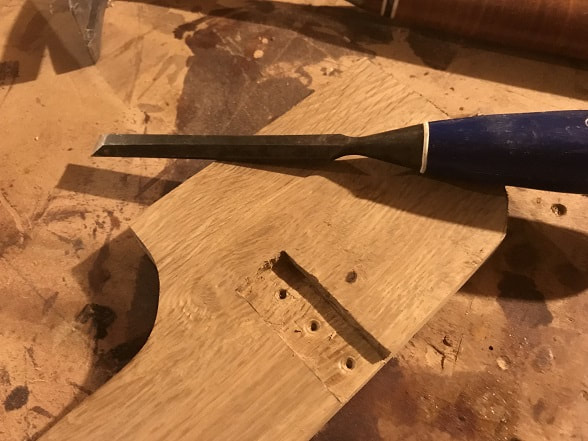
Cleaned up and squared up with a chisel
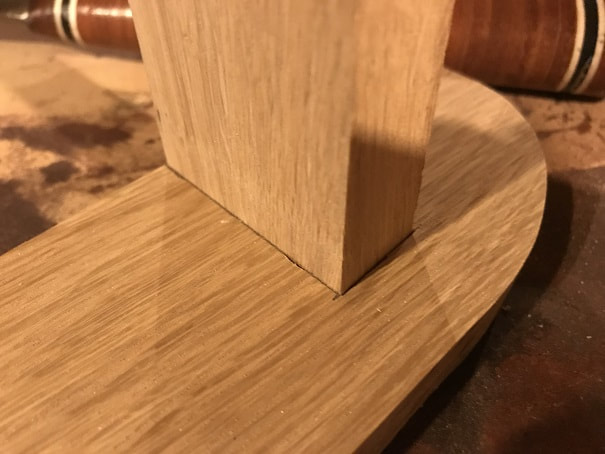
Nice tight, strong joint.
Rounded over exposed edges with a router, leaving square edges at the rung dados.
I also left the curved compression joint square, no rounding-over of edges here, I want a nice stable mating surface here.
Rounded over rung edges, leaving square edges to fit into the dado joints in the rails.
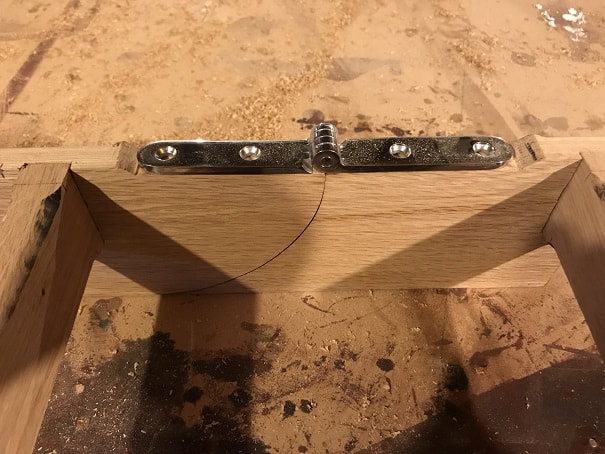
Marking hinge hole locations, I am using Sea Dog Stainless Steel Hinges Part# SO-205240
Hole locations marked with an awl
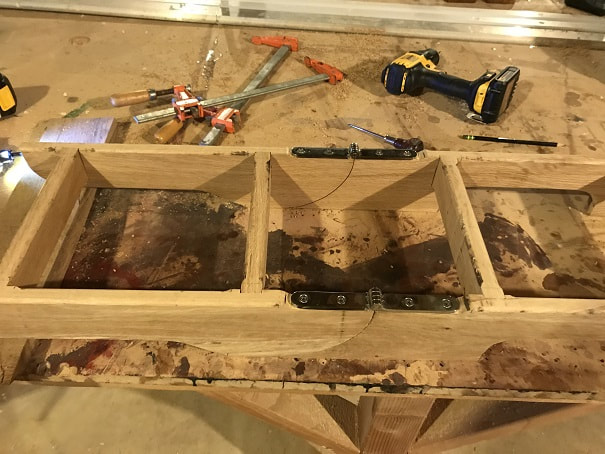
Hinges mounted with stainless steel strews. Dry fit at this stage.

Moment of truth....the hinges worked and everything lined up well!
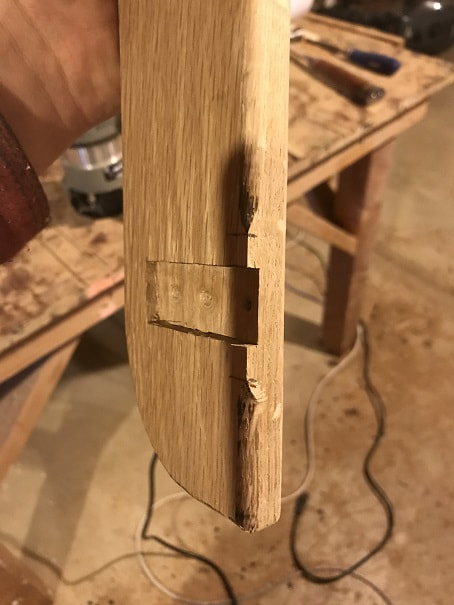
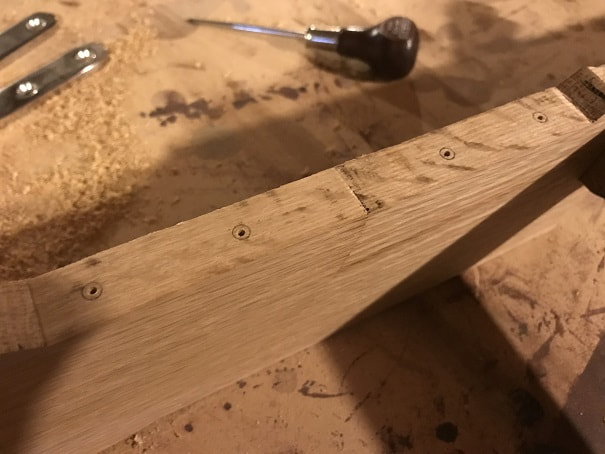
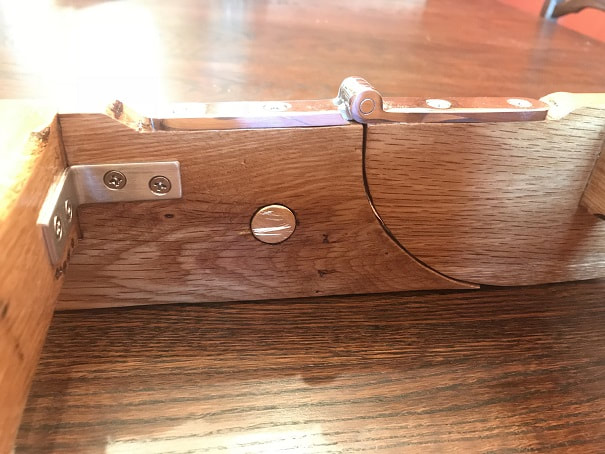
I marked hole locations for all the under-rung-brackets.
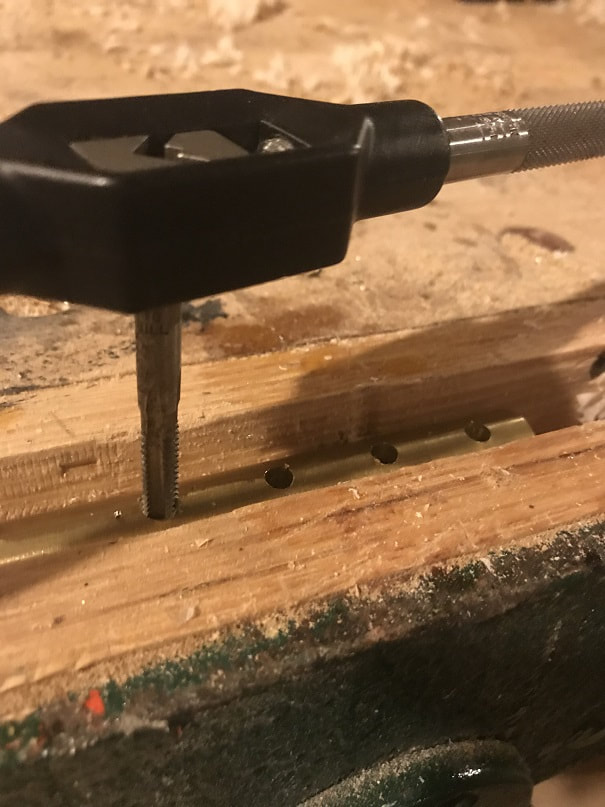
3/4" diameter holes cut for bronze cross-dowels. I then braced the rails and carefully drilled the long mounting screw holes from the edge into the cross-dowel hole.
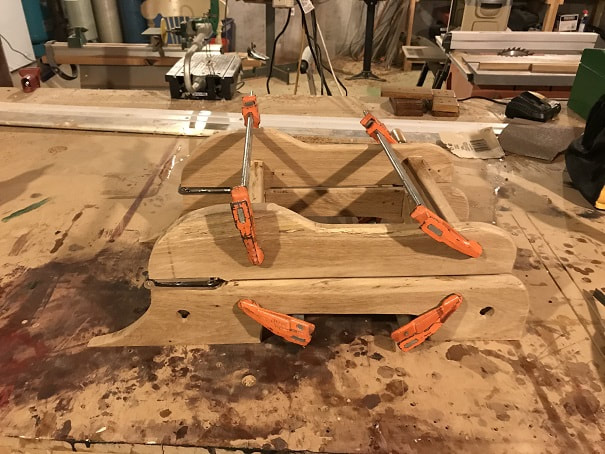
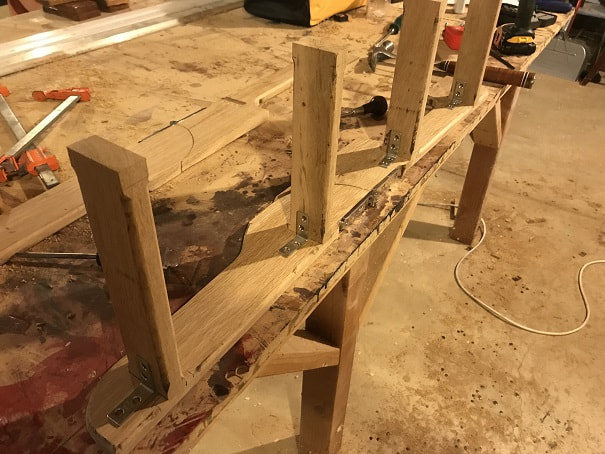
With the parts all disassembled, I predrilled all the holes for the under-rung-brackets, on the drill press. I then reinstalled the hinges for alignment, and glued in the rungs.
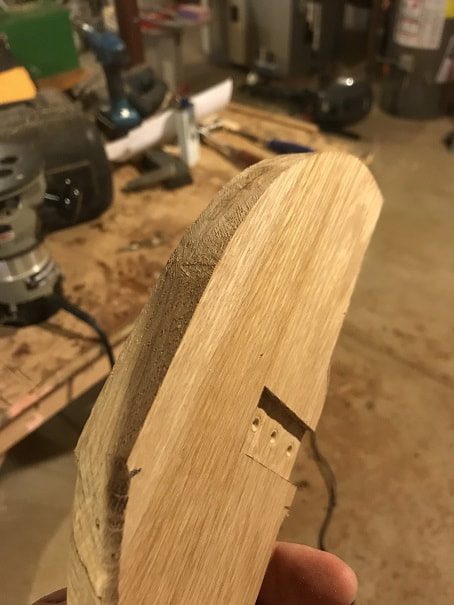
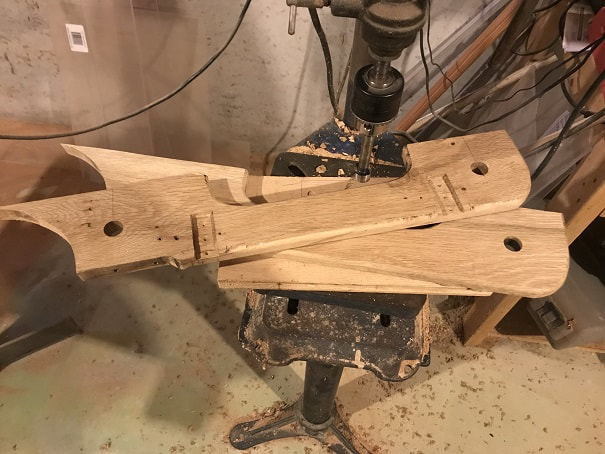
IMPORTANT DESIGN NOTE!!!!!!: I was laying in bed pondering my boarding ladder in the wee hours of the morning, and as I looked through pictures of SCAMPs and boarding ladders, it sank in that the transom of the SCAMP is not perpendicular to the water.....in fact it has a aft leaning angle to it, such that the top of the transom overhangs the water a bit. Climbing up a reverse incline such as this would be a chore.....so I got up and cut an angle into the upper portion of the ladder that mounts to the transom. Luckily, I started with 4" wide rails, so I had enough room to add a nice taper with enough room to still get your fingers around the upper rung.
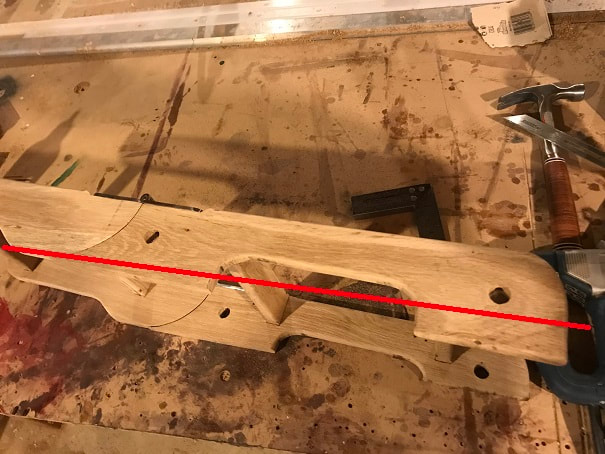
I marked and cut along where the red line below is, so that the ladder rests perpendicular to the water rather than parallel with the transom.
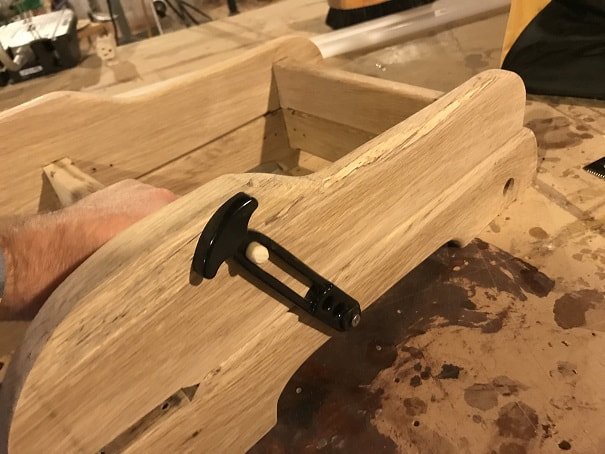
Drilled and dry fit boarding ladder retention strap ( I selected a rubber T-handle -strap Yamaha Part # FIC U5191-00-00). I glued in a 3/8" hardwood dowel at a slight angle (angled away from the fixed end of the strap, to act as a bit of a hook), for the retention pin for the strap.
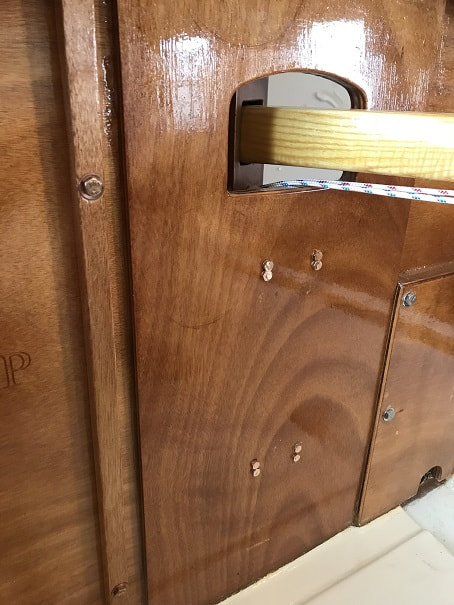
- Made 3/4" x 3/4" backing strips that will reinforce the transom on the inside of the transom; the mounting hardware will go through and be tightened up against these strips on the inside of the transom. They are the full length of the upper section of the boarding ladder, I may need to trim them to fit during installation.
- Removed hinges, sanded everything, and applied 6 coats spar varnish.
Varnishing boarding ladder, I use straightened-out shirt hangers with the ends shaped into hooks, to hang parts such as this from the ceiling when painting/varnishing them. Sanding lightly with 120 grit between coats.
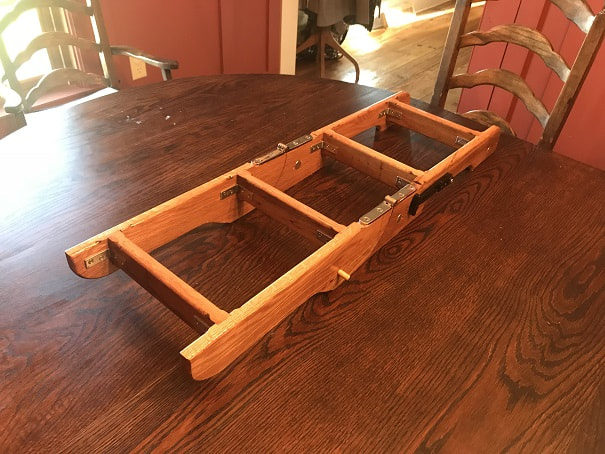
Finished boarding ladder for SCAMP Argo, in open position.
Finished boarding ladder for SCAMP Argo, in folded-up position.
306 Bronze, threaded 3/4" cross-dowel.
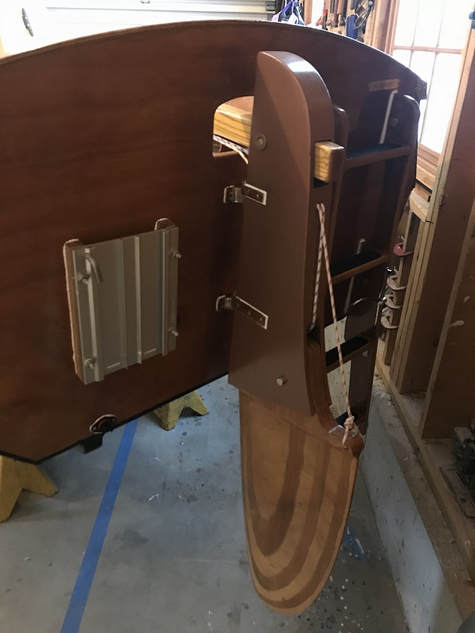
Ladder mounted with silicon bronze 1/4" bolts, custom cut to length, bedded in 3M 4200. Both the ladder and the motor-mount are as close as possible to the center-line as possible without the rudder hitting them, and this is where they are located.
Here the 3/4" x 3/4" backing strip for the rudder can be seen, along with the heads of the silicon bronze mounting bolts.
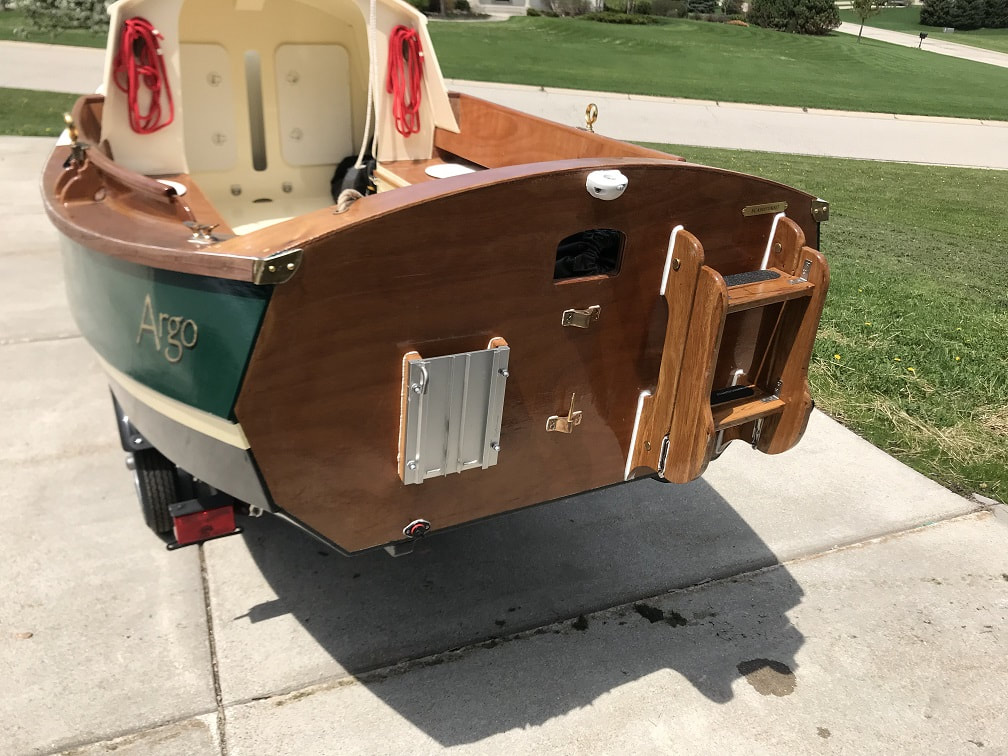
Wooden boarding ladder mounted on SCAMP sailboat stern transom
Boarding ladder thoughts specific to this SCAMP: I find the boarding ladder on my Compac 16 very useful for entering the boat from the water. On small boats, boarding from the side will tip the boat substantially, whilst boarding from the stern, especially as near to the centerline as possible at the stern, provides a stable reentry point. That is based on reasonably calm waters, re-entering a boat that it upright. Re-entering, or righting, a boat that is on its side, or turned turtle, is another situation entirely; For this reason I will be installing both mid-ships re-boarding stirrups along with this boarding ladder.