Summer 2019
....and so he cut the stone, and with his hands, built walls, and an arch of stone flying overhead, which in all its permanent stillness, seemed to be rooted in the earth itself.
The stone wall will create an area for my outdoor blacksmith shop, and the arch will lead to a path that winds through the wild garden part of our back yard. I have always been fascinated by the old stone structures built in the times before modern power tools. I was curious about how to cut stone by hand and how to actually build an arch. Here I will show the steps I took, and the tools I used, to build this stone wall and stone arch. I am not an expert mason, but I am pleased with how the arch and wall turned out, and I got some good exercise doing this work over the summer of 2019.
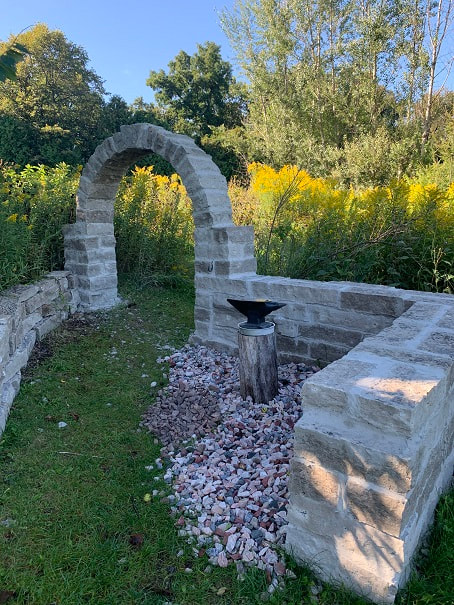
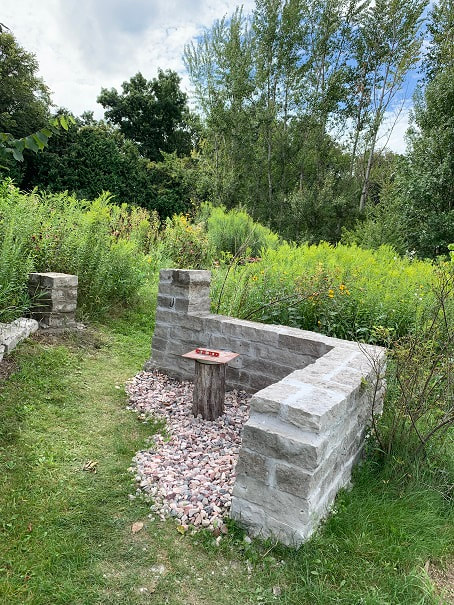
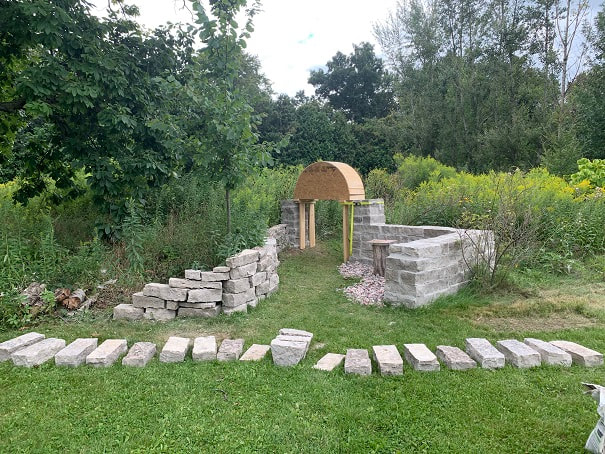
Here is the completed stone arch and stone wall. I intended to only build the wall sections to the right of the arch, but I had left over stones that I dry-stacked (without mortar) into a little wall on the left.
Step 1: Make a drawing of what you want to build and calculate the volume of materials needed.
- Volume of stone. I added 25% to this to allow for trimming of the stones.
- Volume of concrete for the foundation
- Amount of mortar needed (you can guess at this and buy more if needed)
Step 2: The Foundation
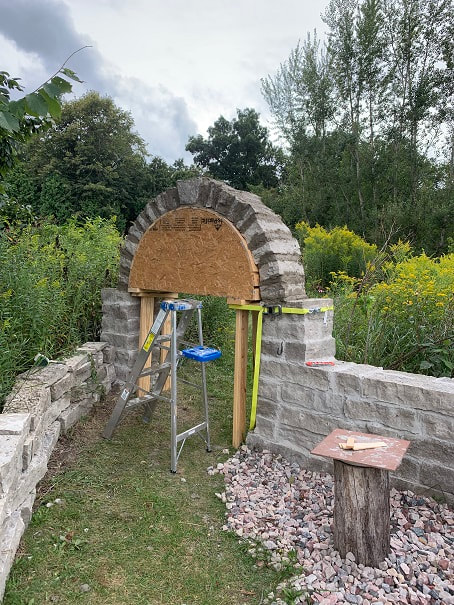
My wall will be built from stone with mortar between the stones. This is called a "wet-wall" and such a wall needs a foundation under it. In Wisconsin where this wall is built, the ground freezes to a depth of 3-4 feet in winter, and when it thaws it heaves, so foundations here need to be 4 feet deep. I dug the foundation 16" wide (the width of the wall) and 12" down. In the corners I dug holes 4 feet down. I then bent 3/8" rebar and ran three rebars down into the holes and across the foundation and down into the other holes. The rebar is in the lower 1/2 of the 12" deep foundation. To be safe, the professional recommendation is to dig a 4ft deep trench the complete length of the wall and to make it a foot wider than the wall so that the foundation sticks out 6" on either side of the wall. My foundation design is the biggest design risk of my wall and I will update this page as the years go by to advise if it holds up. The log stuck in the ground is the base for my anvil for blacksmithing. I am building this wall around my blacksmith area and this area will be covered in gravel when complete.
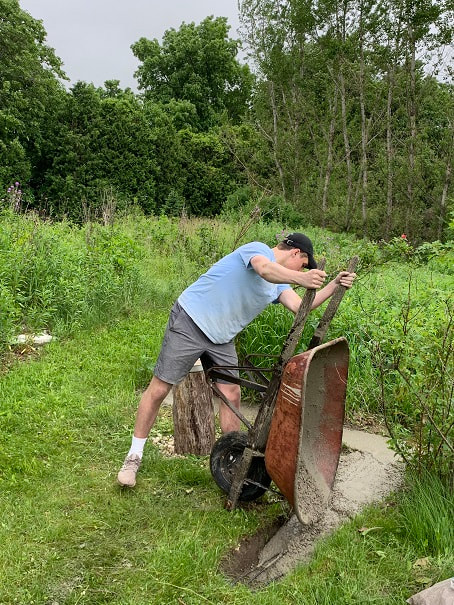
My nephew John provided some needed muscle in helping procure and move the heavy bags of mortar and concrete. Here is John helping to mix and pour concrete for the foundation. We hand-mixed concrete from bags. The bag will indicate the volume of concrete each bag will yield. I made an estimate of concrete needed and wound up with some left over, which I returned to the store.
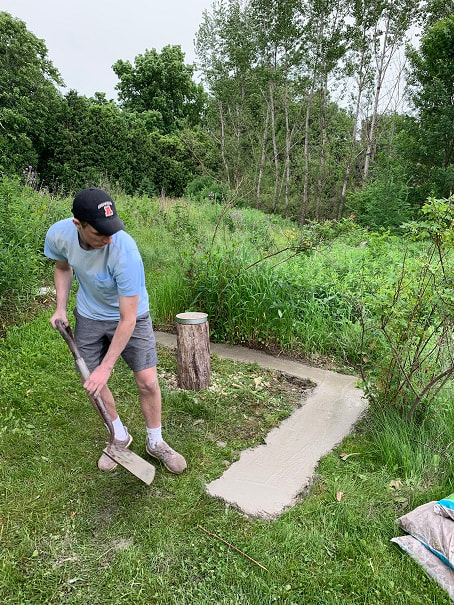
Nice finish work , John! It's tough to see but the far side of the arch (on the left) also has a foundation 4' deep with a square pier on top.
Step 2: Cutting and laying down the stones
I used stone from the closest quarry to my house. The stone is called lannon stone and came in pieces that were 6" thick x 8" wide x 2 to 4 feet long.
Here is John again, laying down mortar. Don't mix too much at once.
I started by laying down a bed of mortar on the concrete foundation. I used high strength structural mortar made for use with natural stone. Then I began laying down stones. Alternate the stones so that no joints line up with other joints. Likewise on the corner, alternate the overlapping of of stones from each side of the wall, like a zipper, as you build each course of the wall.
Cutting stone by hand
I used stone cut from a quarry a couple miles from the house. It is a sedimentary limestone, very laminar, that splits well along its laminations, making easy slabs , and splits to length well across the laminations also , but which does not carve well such as a fine grained granite might. Cutting the stone by hand was my favorite part of the project, and learning how to do it was one of the reasons I did this project. While this work was fun for me to do on weekends as a hobby, I could see how working long days splitting rocks by hand would be hard , hard work.
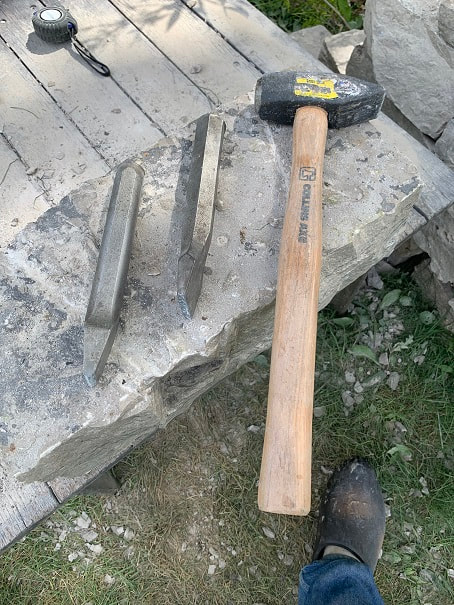
Here are the hand-tools I used for cutting the stones. On the left is a 1.5" carbide tipped Hand-Tracer from Trow and Holden, a 2" x 7" facing chisel from Bon Tool, and a 2 pound hammer.
To cut stone using a hand tracer, mark the line where you would like to cut the stone, then use the hammer to pound the tracer into the stone, moving the tracer along the the entire circumference of the stone, on the line you want to cut. After chiseling into the stone, and making four to ten passes around the stone exactly on the line where you want to cut the stone, the stone should split right on that line. I can confirm that this technique works very well for stones that are 6" x 8" in cross section.
Here is a clip of using a hand tracer to cut a key stone:
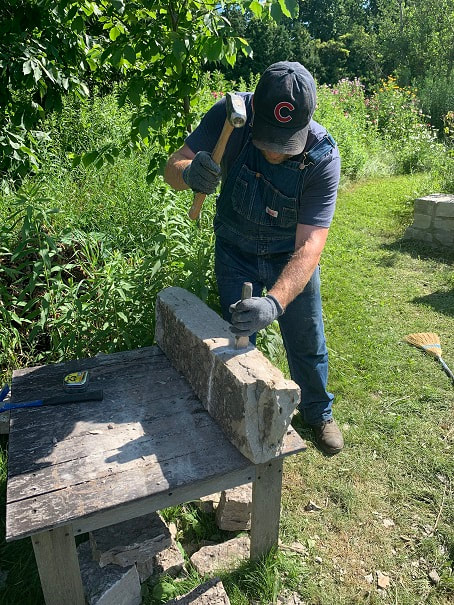
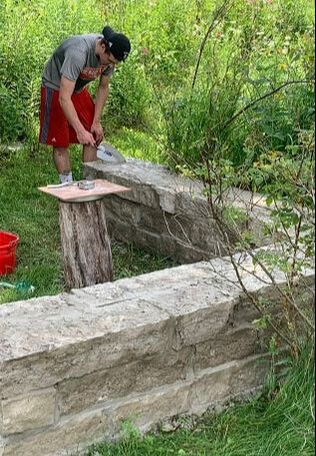
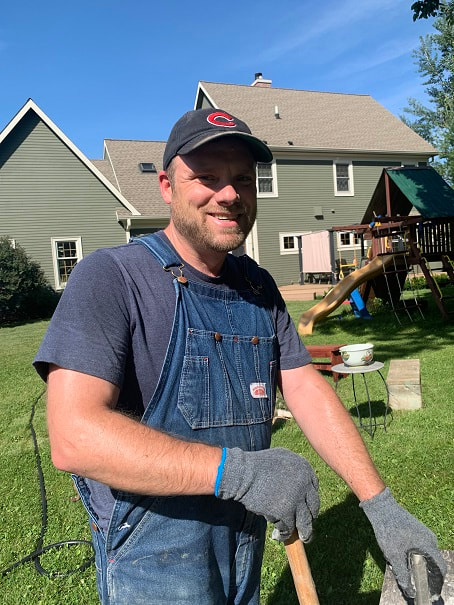
I'm not really a sports fan in general, but I had a great time at a baseball game at Wrigley field and bought this Cubs hat. I am from Wisconsin, so no offence intended to those fine Brewers fans who may see me wearing a Cubs hat. At least rest assured, you won't see me wearing a bears hat. Go Packers....and Brewers. OK, on to splitting stone; here you can see me using a hammer and hand tracer to chisel a line in a circumference around this stone until it splits along that line.

A decent pair of gloves is a great idea for this kind of work. Here I am using the hand tracer to make a key stone for the arch, pounding the tracer around the perimeter of the stone in a line.
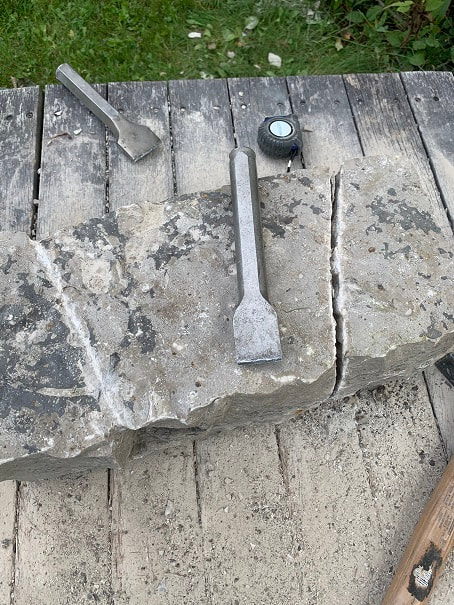
Split stone. I did the work on a nice low height very stout hardwood work table.
Getting some summer exercise splitting stones.
The wall is built, and I am starting to build the columns that will support the arch.
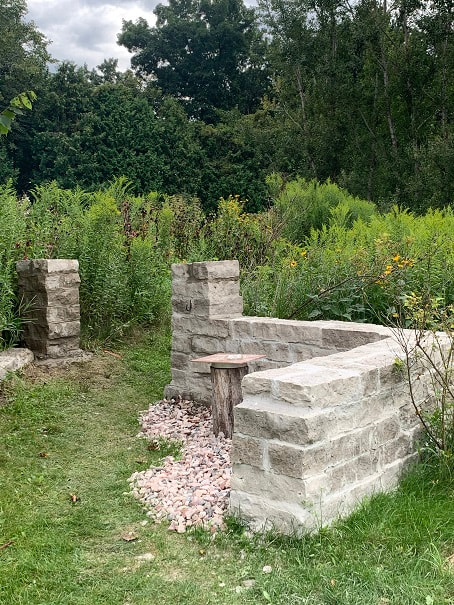
Columns are built up to the point where are arch will begin. I calculated the height under the arch such that my family will all be able to walk under it, but we are not tall people, so look out so you don't hit your head.
Step 3: Build the falsework for the arch
The support frame that your arch stones will rest on while you are building the arch, is called falsework. Upon completion of the arch, the false work is knocked out and the arch will remain standing. The falsework must be strong enough to support the stones during construction.
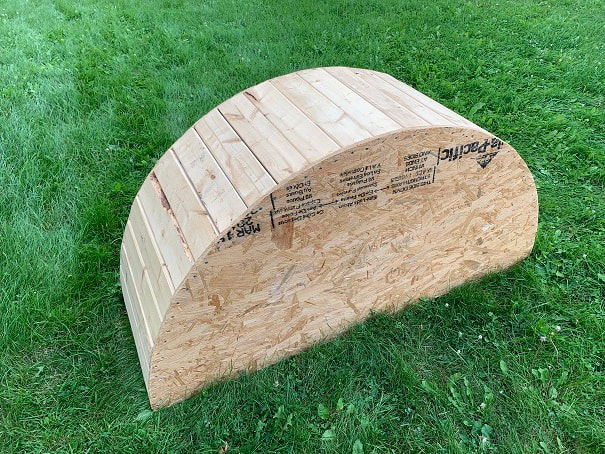
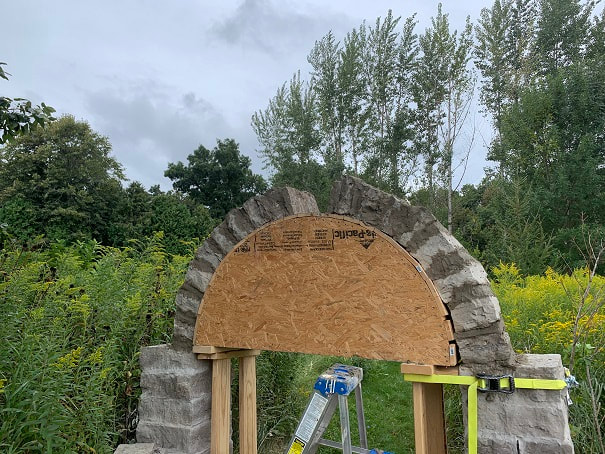
Here is my arch falsework as originally designed and built, using 3/4" particle board and 2x4s. When I measured the horizontal distance between my columns after they were built, I realized that the distance between the columns was 1.5" more than the width of my false work, so I added 3/4" thick cladding over the surface of my falsework, as you will see in the photos below, to make my falsework match the distance between my as-built columns.
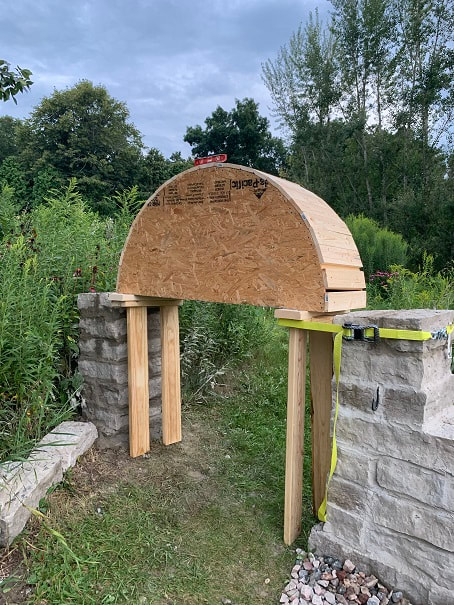
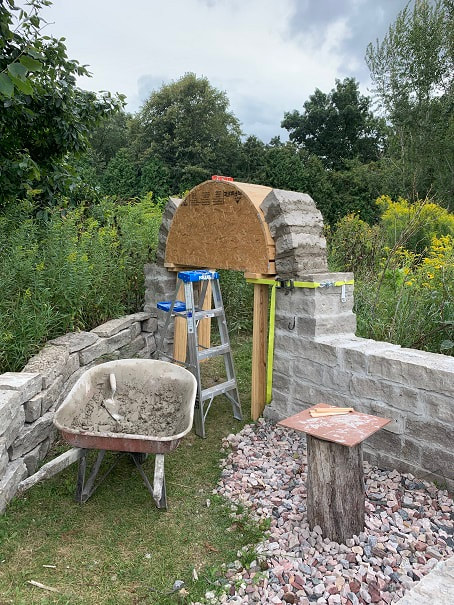
Here is the completed falsework installed and held in place, ready to being placing stones. Note the level on top of the falsework. It is shimmed and leveled in all directions.
Step 4: Dry-fit the stones that make your arch
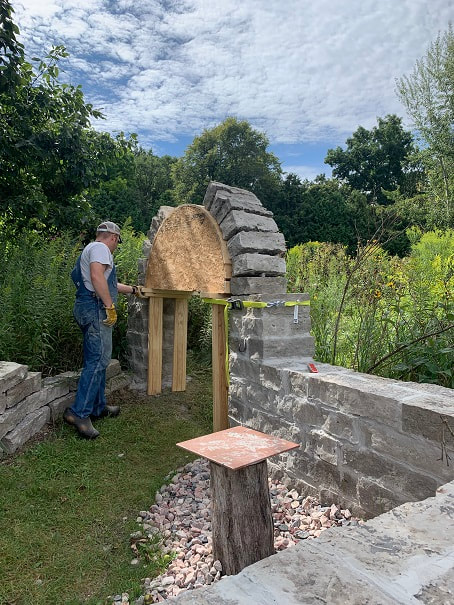
Cutting stones to length and lifting them in place on the falsework; without mortar! To make sure they all fit first. Note the small stones I am putting in place at the outer radius of the arch to hold the arch stones in place. One could also use a facing chisel to taper each arch stone into a wedge shape, but I did not do that. Again, I will update this page over the yars to advise how this baby holds up.

Here is the completed dry-fit of the arch stones, including the wedge shaped keystones.
After the dry-fit of the stones, I removed them all and laid them out in order, so I would know how to put them back in place.
Step 5: Build the arch with stones and mortar on the falsework
Here you can see the wheelbarrow with mixed mortar, and the arch stones being set in place. Note the continual checking for level as the arch went up. This arch will not be level forever, but when it was built it was perfectly level.
Ready for the key stones.
Keystones mortared in-place. The falsework has worked very nicely and the stone arch has been built. Now it remains to let it cure and then knock out the falsework.
Knock out the falsework
I let the mortar cure for a week and then knocked out the falsework with a sledgehammer, hoping that the arch would stand.
Enjoy your work!
Completed stone arch with wall for outdoor blacksmith shop.
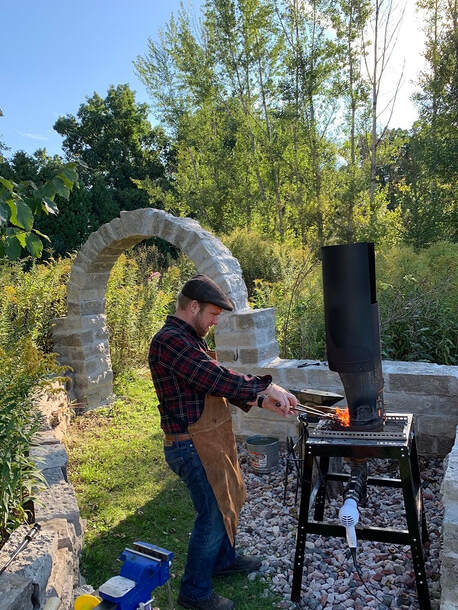
Smithy area in use!
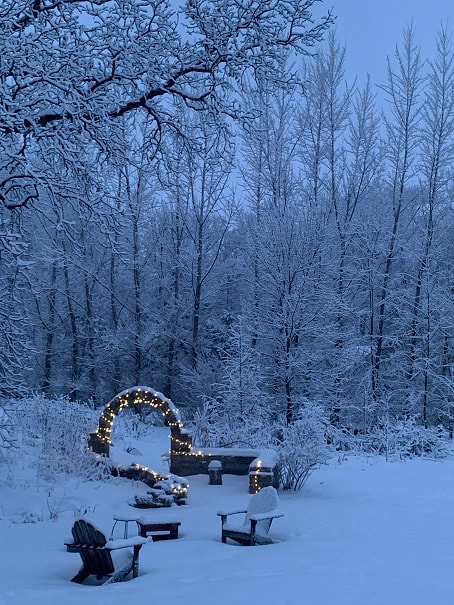
A pretty early morning winter scene. I climbed over the arch with my 200lbs to put these lights on over winter and it held up....