January 2021
Our brooms and dustpans are usually leaning up in a corner, and they are metal and plastic, functional, but not particularly nice to look at. I sought out to make homemade brooms and dustpans that would be enjoyable to use, functional, and that would look artisanal. Here is how I made these dustpans.
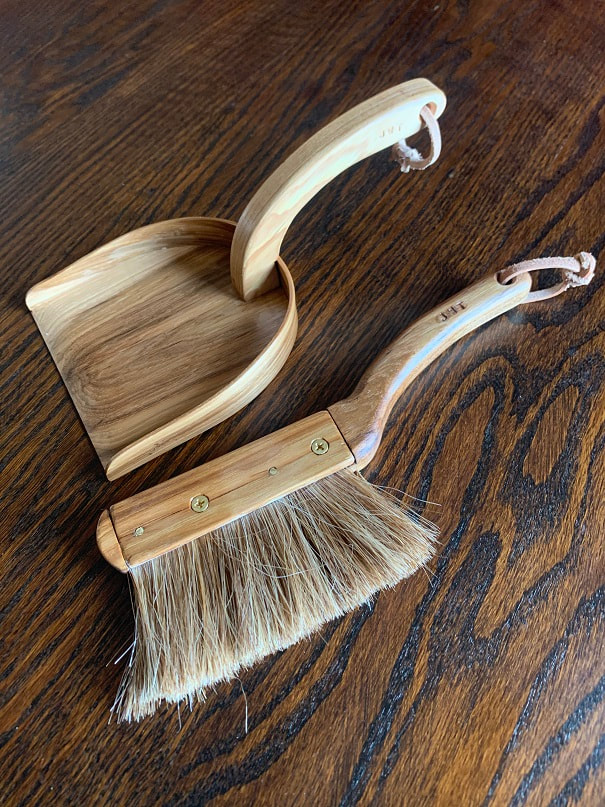
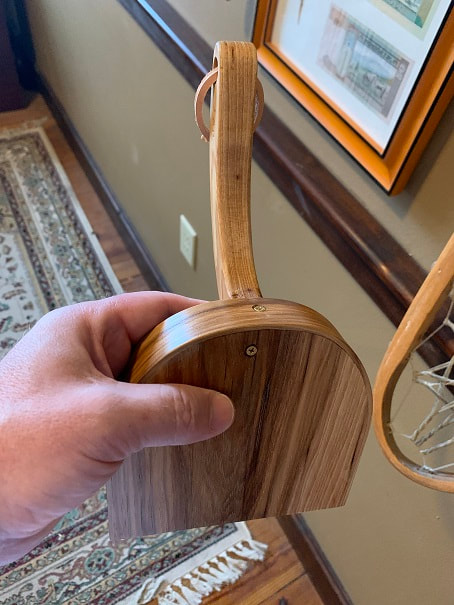
Here is a set; small hickory dustpan, and small hickory handbroom with horsehair bristles. Teak oil finish.

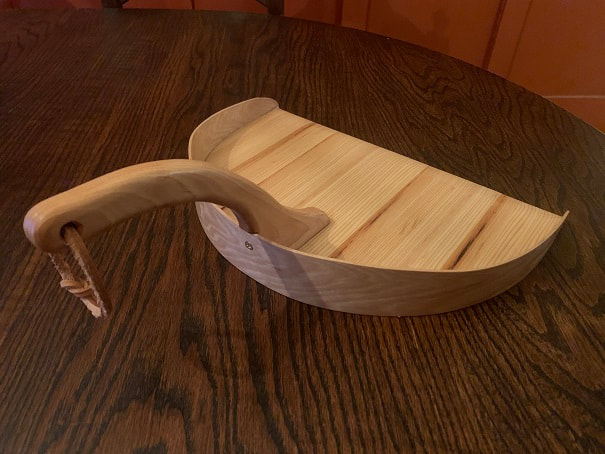
Full size 14" wide solid hickory dustpan, hanging from a hook forged in my blacksmith shop.
How to make a wooden dustpan
I have made 2 sizes of dustpan; the "Kitchen" size dustpan is 14" wide and the handbroom dustpan is 5 3/4" wide. The photo's below will include photos of both sizes.
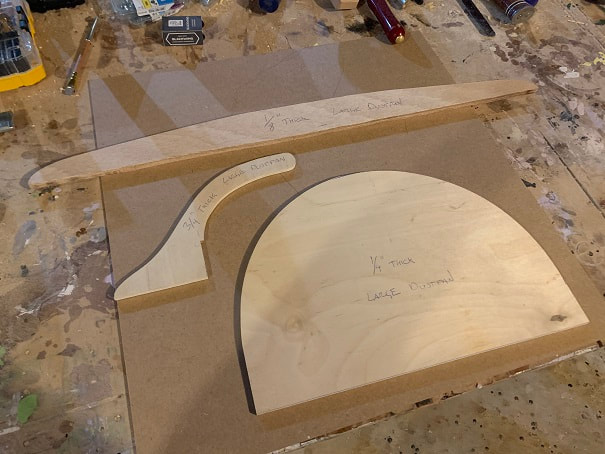
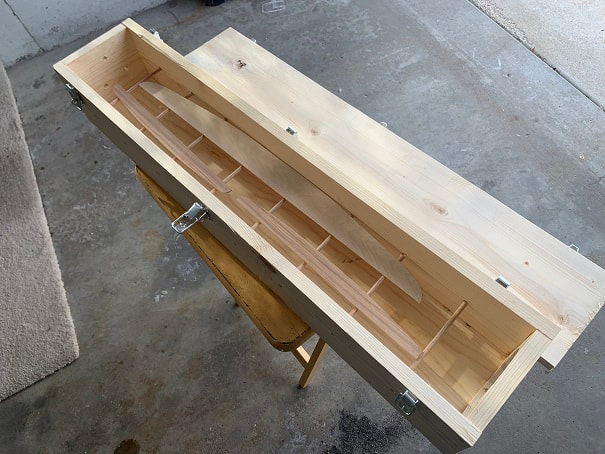
I made templates of the 3 components of the dustpan. When I make a new dustpan I just trace out the shapes using the templates. These are the templates for the larger dustpan.
- First select the wood you want to use. I use Hickory for these, as it is very strong , tough, local, and looks beautiful when oiled.
- Saw or plane the wood to the correct thickness. You can customize the design of course, but I made mine to the following dimensions:
- Kitchen Dustpan: Handle thickness: 3/4", bottom thickness 1/4", side thickness 1/8"
- Small Dustpan: JHandle thickness 3/4", bottom thickness 3/16", side thickness 1/8"
- Once to the correct thickness, trace out the shape of the components (or if you dont have templates just draw how you want the pieces to look), note that the side piece is a single piece that wraps around the whole sides and back of the bottom, so the piece for the sides must be that whole length. I ran a string along the whole curve of my bottom-piece to find out how long the sides-piece needed to be. Also notice the small notch I have in the hand piece; this is to accommodate the side-piece
- Cut out the pieces using a sabre saw or band saw
- Carve or smooth out the handle to your liking
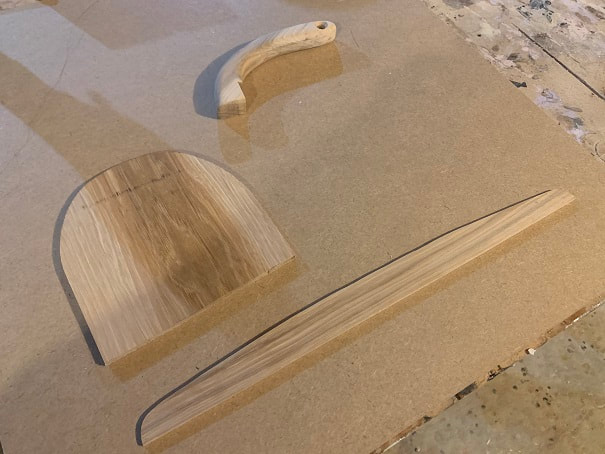
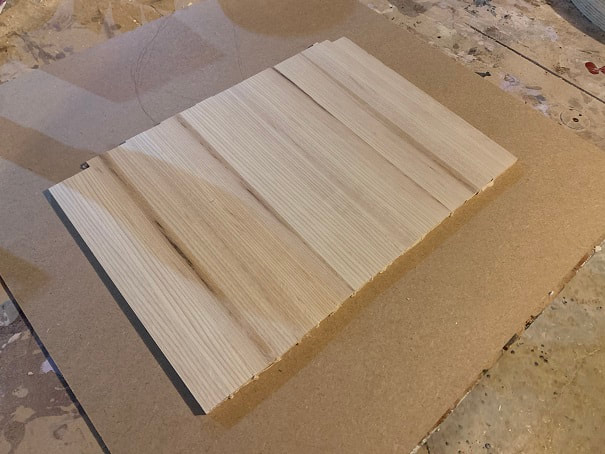
Here are the components for the small dustpan, they are cut to shape and have been sawed and planed to the proper thickness. For the small dustpan I use a solid piece of Hickory for the bottom. I drilled a hole in the handle also thaty I will put a loop of material through that I will use to hang the dustpan from hooks or pegs.
The large dustpan is almost 14" wide, so I laminate the bottom from strips of hickory that are 1/4" thick and 3/4" wide. This is to create a more stable piece of wood and to reduce the odds of warping. To keep the pieces all perfectly flat when gluing them together, I lay the pieces between two sheets of waxpaper and clamp them flat in this fixture, then I use long clamps to apply horizontal pressure to the wooden strips. You could skip this and just use a big single piece of wood, or plywood if you wanted.
Here is the glued up 1/4" bottom piece after being taken out of the clamps and being belt sanded.

The handle, bottom, and sides of the large wooden dustpan.
Next steam the sides so that you can bend them. Here is the steambox I made. It is made out of pine and has hardwood dowels inside on which I can set small pieces of wood to steam. I also have larger steam boxes but this one is perfect for these little pieces. The top clamps down with those toggle clamps. Be careful with steam!! It is both hot and under pressure. Be sure to allow for a way for steam to exit your steam box and boiling kettle; I am not a steam expect so do your own research and be safe, proceed at your own risk. The wood will be hot when you take it out so use gloves. Be careful for the plume of steam when you open the box. All that said, this is a fun step!

These three holes allow steam to exit the far side of my steam box.
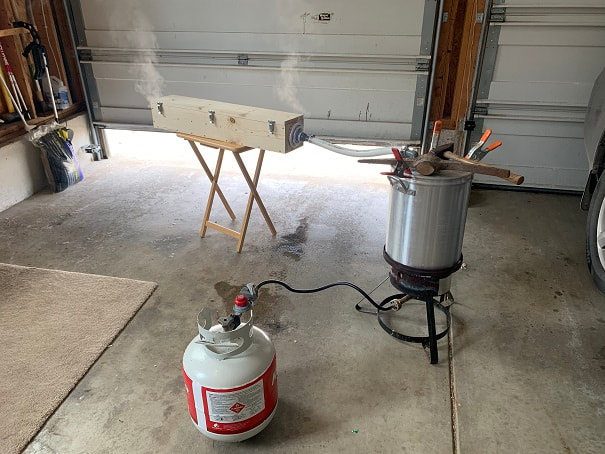
Steaming the wood. It is tough to know how long to steam wood for. I have read that you should steam wood 15 minutes for every 1/8" thickness, but I have found these hickory pieces need at least an hour in my steambox. You will quickly be able to ascertain how flexible they are when you pull them from the steam box.
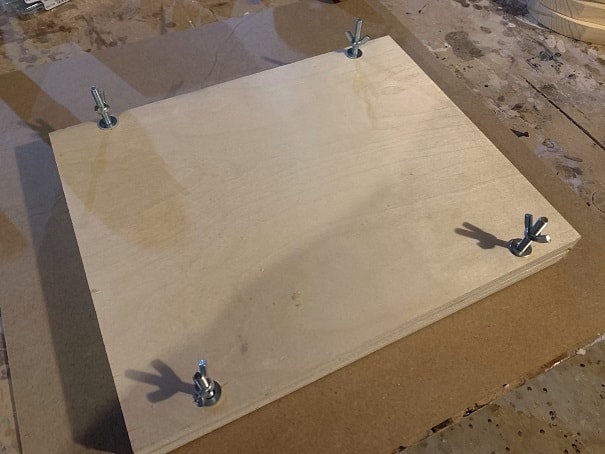
Before you steam your pieces, you need to create a form that you will clamp the steamed wood pieces to. I wanted to bend the sides to exactly match the shape of the bottom of the dustpan, so I used the bottom to trace out the shape onto plywood and cut out the form below. The form is for the big dustpan and the form is 1 1/2" thick. I made the form for the small dustpan from a pine 1x6.
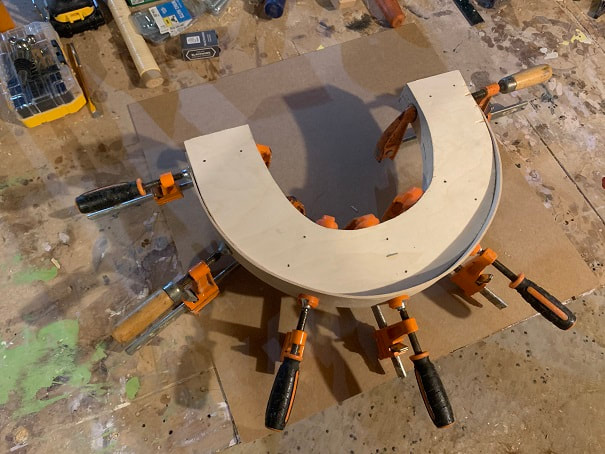
Large wood dustpan sides being bent on the form.
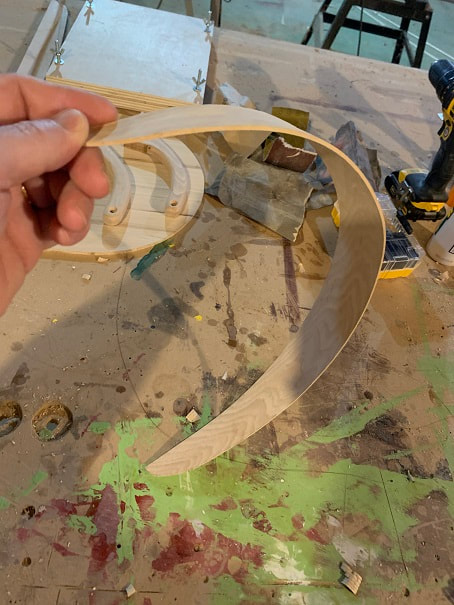
After a day clamped to the form, here is the unclamped , bent, side-piece.
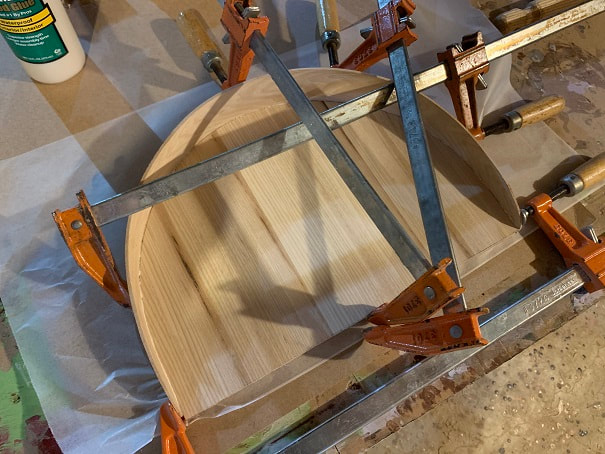
Here are the sides of the wood dustpan being glued and clamped to the bottom.
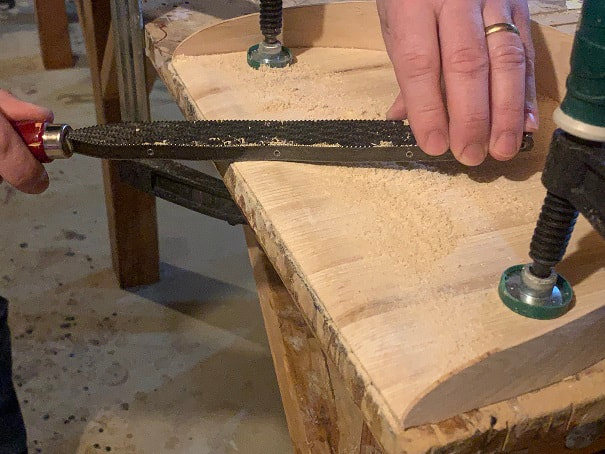
After a day, I removed the clamps and used a rasp to create a nice beveled edge at the front of the dustpan. Make a nice smooth bevel with a leading edge that is sharp but not too sharp. Then sand the whole dustpan wirth 120 and 220 grit.
- Glue and screw (I use solid brass wood screws) the handle on. For the small dustpan I use one screw through the back and one through the bottom. For the larger dustpan I use two screws through the bottom and one through the back. Hickory is very hard so all holes need to be predrilled. I use Titebond III glue.
- Let it dry for a day, then sand and oil it. I use tung oil.
- Cut strip of leather and tie it through the hole in the handle
- Enjoy!!
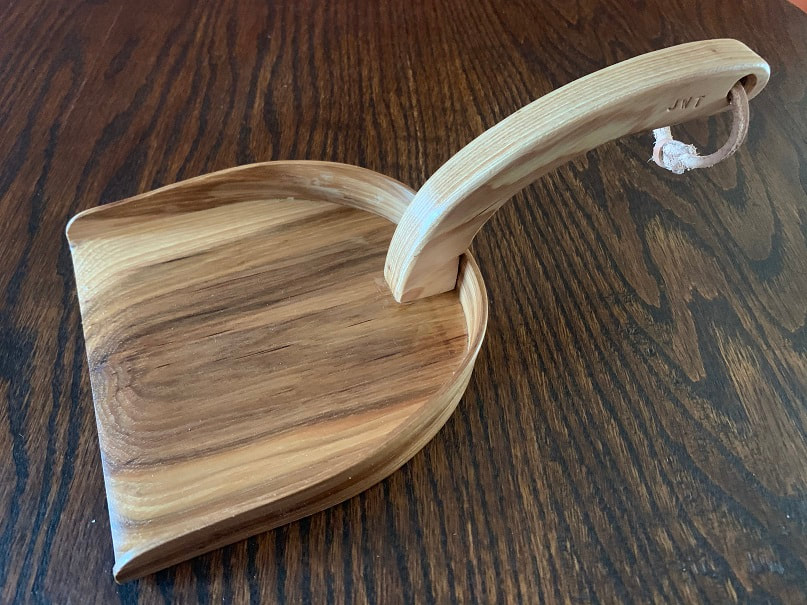
Handmade Wooden Dustpan with Tung Oil Finish.