Humans really began understanding how to harness the power of steam in the early 1700's and by the end of the 1800's steam powered locomotives were driving economic expansion across continents and steam engines were replacing sails on the high seas. Of course steam engines were eventually replaced by internal combustion engines, but in it's heyday, steam powered the world. Here in Wisconsin USA, my family and I took a trip last year on the last big coal fired steamship plying the Great Lakes, The SS Badger, which crosses Lake Michigan every day. Standing on the aft deck one can smell the coal burning and feel the ash falling. From an environmental point of view it's good humans came up with cleaner engines, and we need to come up with new better ones still, but from a historical perspective, I love these technologies.
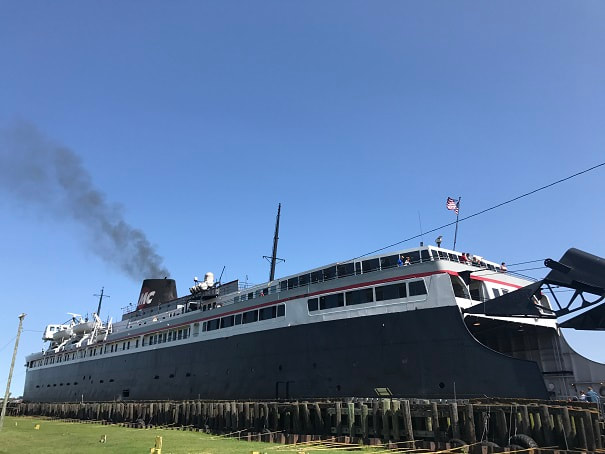
SS Badger at the dock in Manitowoc , Wisconsin. We boarded and took the 4 hour trip across the width of Lake Michigan. She is a 410ft long ship, launched in 1952, and is driven by two four-cylinder compound steam engines; these are not oscillating engines such as the one I built below.
I am building a model steam launch from a kit. She is called the "Alexandra" by Krick models in Germany. Shew will be fitted with a complete functioning steam engine. Here are the photo's of the assembly of the "Clyde" Oscillating Steam engine, made by Miniature Steam Models in Melbourne, Australia, and assembled by myself in Wisconsin USA, and which will be installed in my model of the "Alexandra".
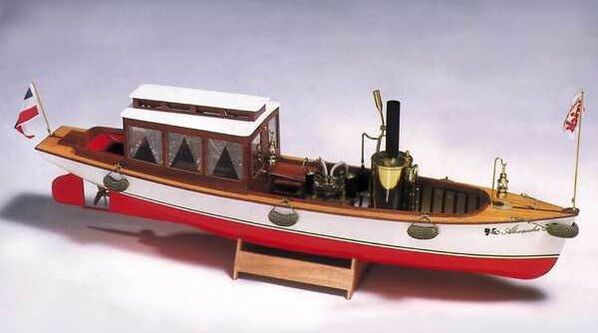
Stock photo of the Krick "Alexandra".
Oscillating steam engines feature engine cylinders that rotate or "oscillate" as the engine turns.
https://en.wikipedia.org/wiki/Oscillating_cylinder_steam_engine
There are many types of steam engines to learn about, and many of those feature cylinders that do not oscillate at all. Have fun with the research!
https://en.wikipedia.org/wiki/Oscillating_cylinder_steam_engine
There are many types of steam engines to learn about, and many of those feature cylinders that do not oscillate at all. Have fun with the research!
Assembling the Clyde Oscillating Steam Engine
The "Clyde" can be purchased assembled or as a kit. MSM's website is www.miniaturesteammodels.com The kit is very easy to assemble and does not require any manufacturing or modification of parts. It's a quick project with nice instructions from MSM. The parts fit great. My goal in buying a kit was to try to better understand how the parts work together and how the engine works.
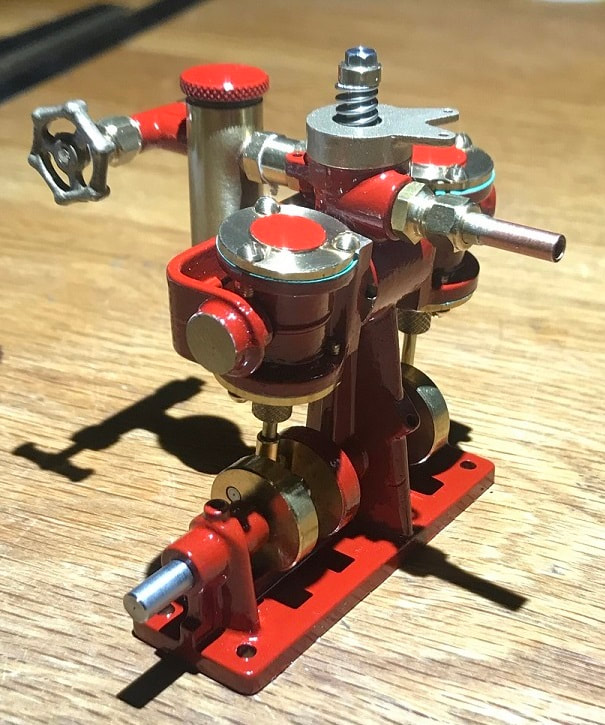
First, skipping to the end....here is a photo of my completed MSM Clyde Steam Engine.
Summary video of the assembly of the Miniature Steam Models
"Clyde" Steam Engine:
The kit from MSM in Melbourne arrives very well packaged.
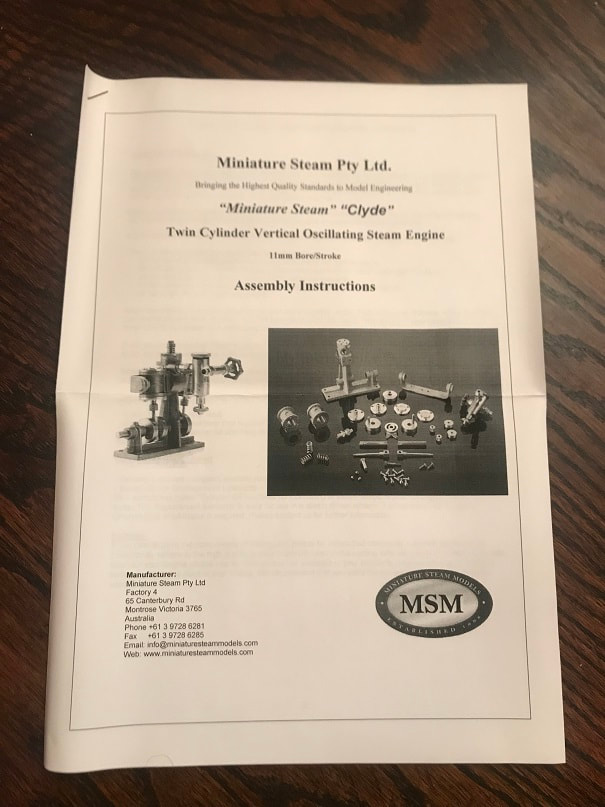
Instructions from the manufacturer, which I used to assemble the engine.
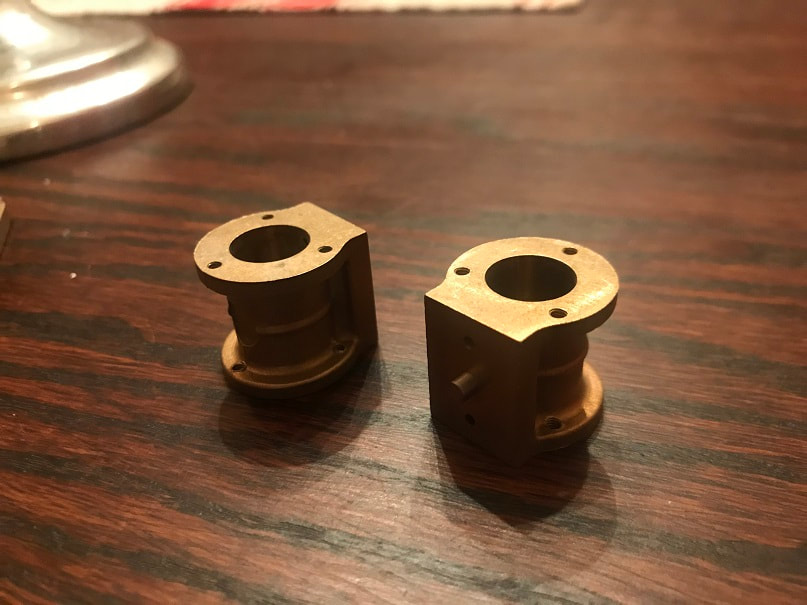
Bronze cylinder castings for MSM Clyde steam engine, as received.
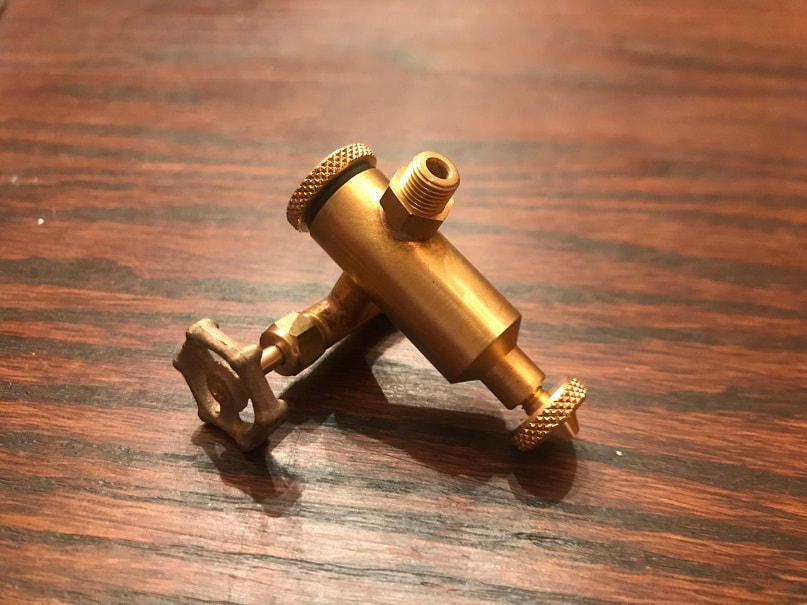
MSM steam engine lubricator, as received. It was pre assembled.
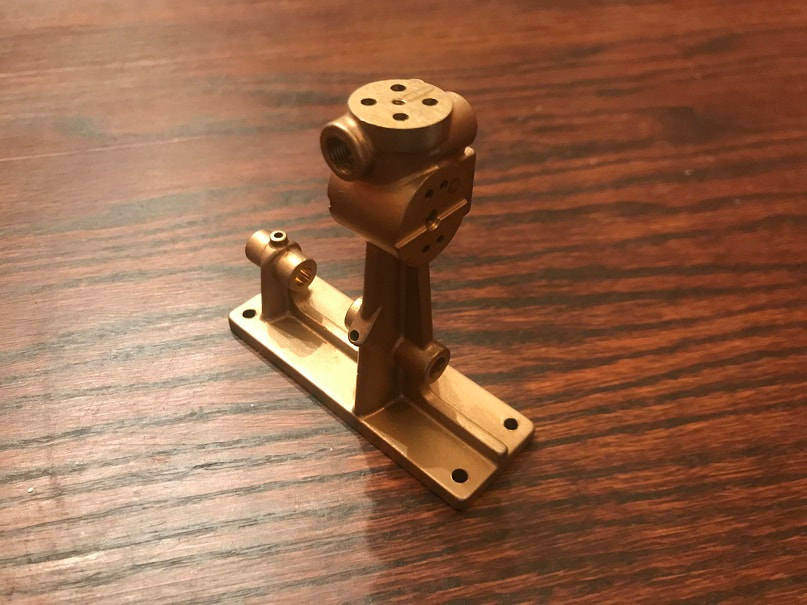
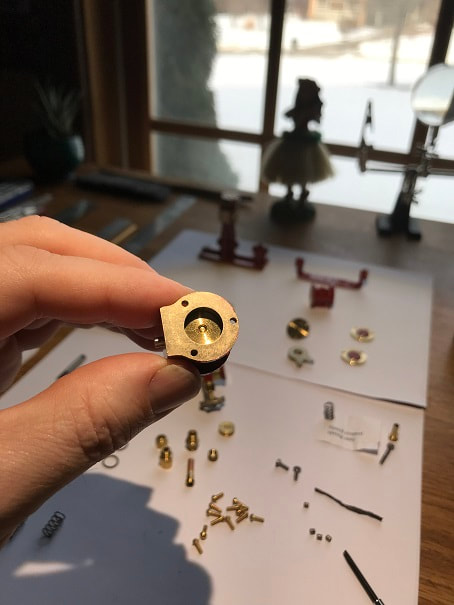
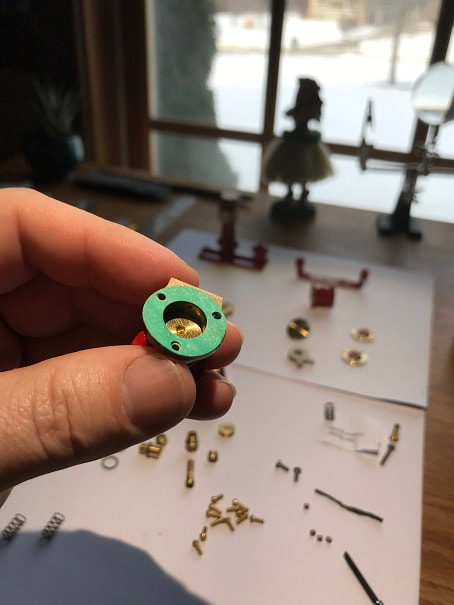
Main trunk, or as I may incorrectly call it : the mainframe of the MSM Clyde steam engine, as received.
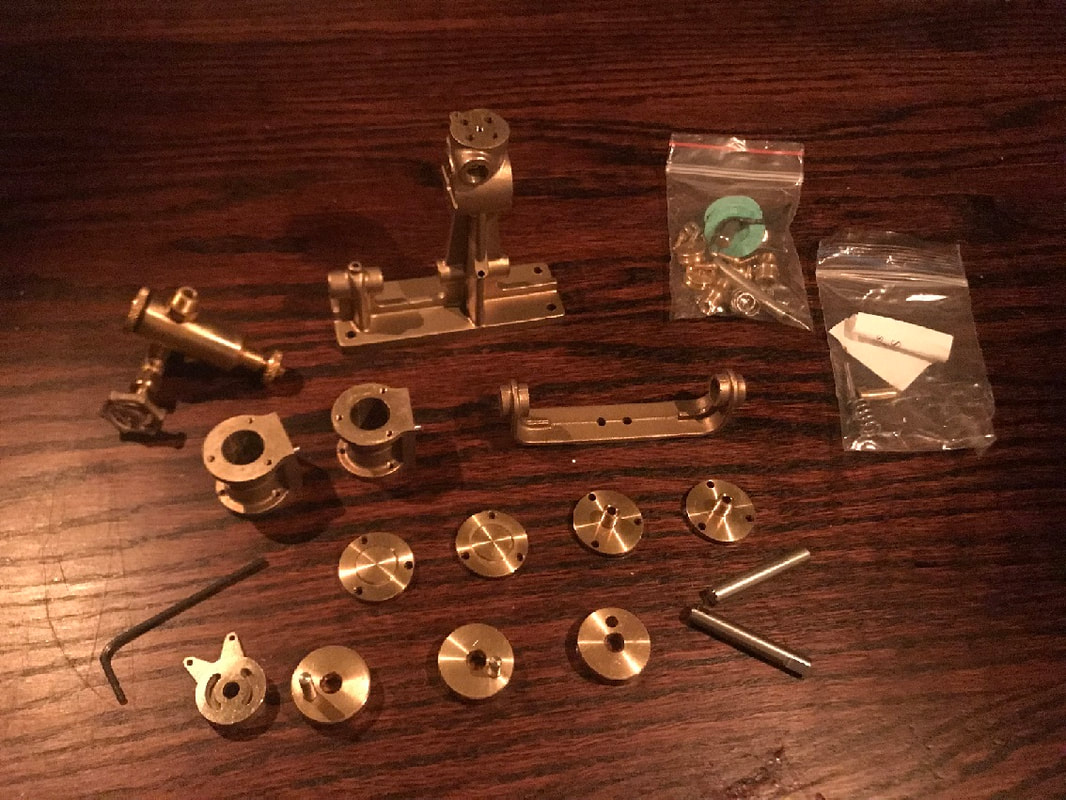
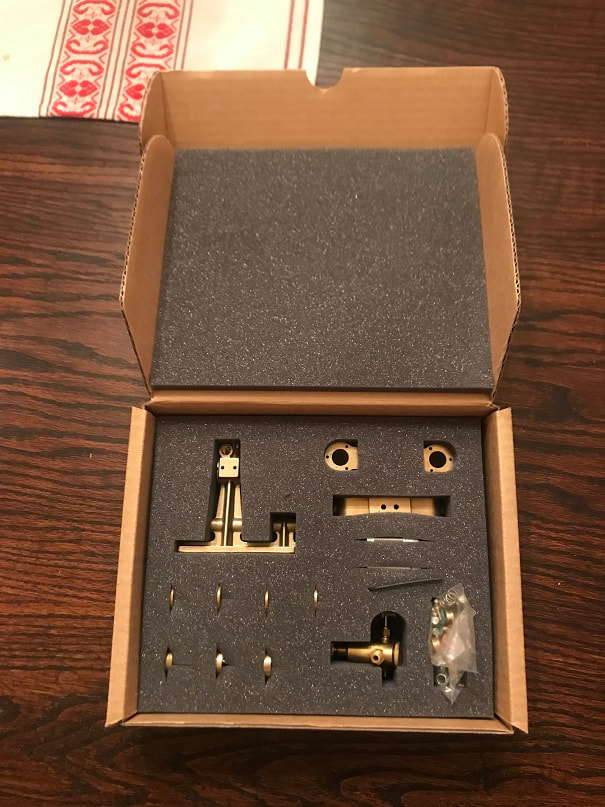
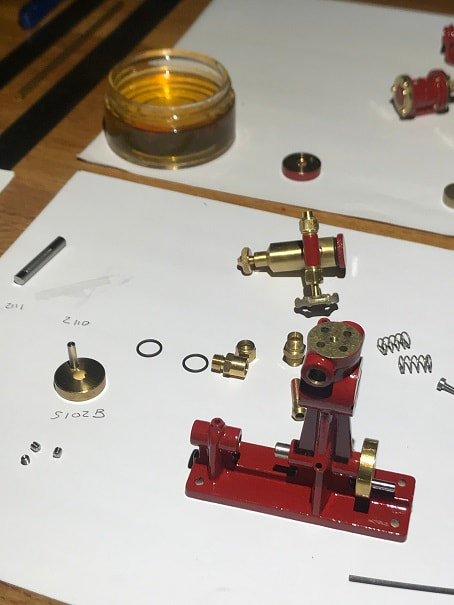
Contents of the MSM Clyde Engine kit, pleas note that the piston rods are not shown in the photo, but they are most certainly needed.
I decided to paint my MSM Clyde engine. I picked a color scheme and picked parts of the engine that I would paint, and some parts that I would leave unpainted. The recommendation in the manual was to use self-etching primer on the bronze, to ensure a good paint bond, so here is the self-etching primer. I did 2 coats by hand with a small brush. Do not paint any bearing surfaces, mating surfaces, valve ports, or internal surfaces or internal parts.
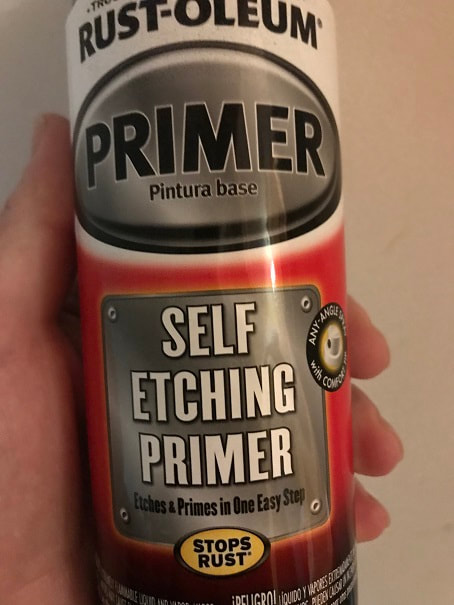
This is the self-etching primer I used. I only found it in a spray can, so I sprayed into a small container and then used a brush to paint it onto the engine parts.
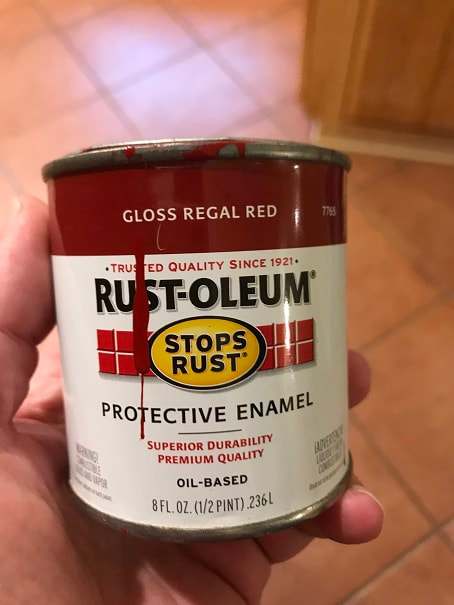
This is the paint I chose to paint the engine with, over the primer. I did 4 thin coats, by hand with a small brush. 1 coat per day.
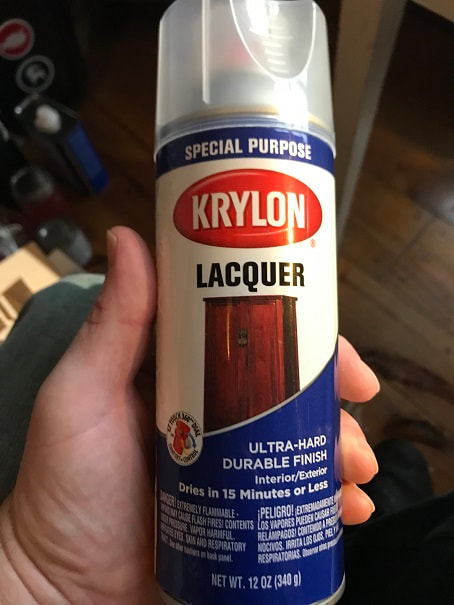
My paint scheme includes many bright metal area which are left unpainted. My experience with brass and bronze is that they will tarnish quickly if left coated, and I didn't know how I would ever polish some of these small shapes and surfaces, so I decided to lacquer the exposed surfaces, EXCEPT those that will be bearing or working surfaces such as piston rods, shafts, and the mating surfaces between any moving parts....those I left unfinished and will lubricate.
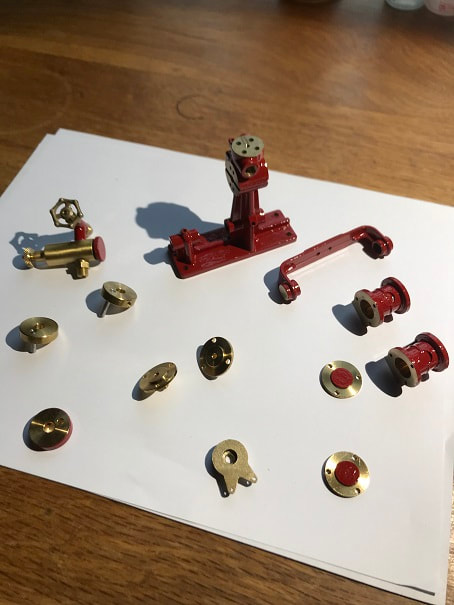
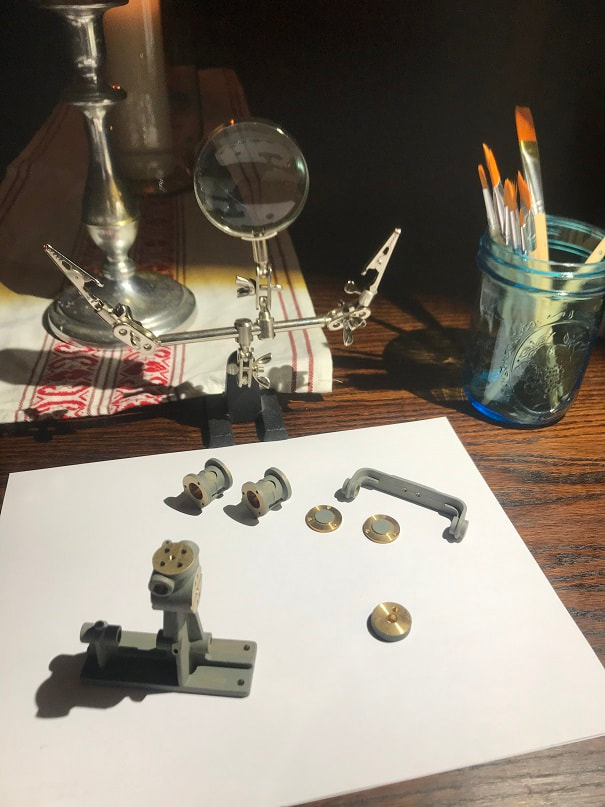
Painted and lacquered components ready for assembly
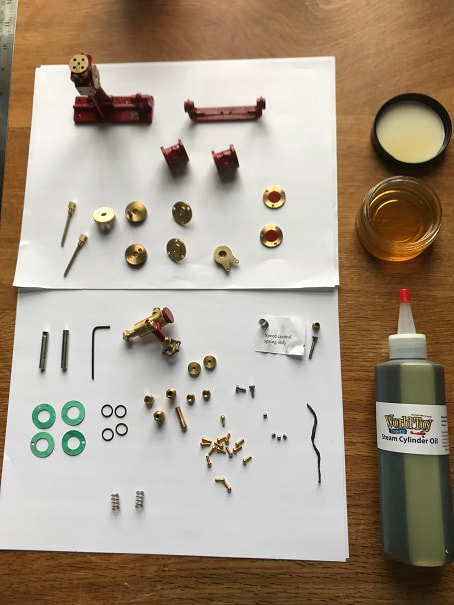
Complete MSM Clyde Steam Engine parts layout. I have painted what I'm going to paint, and am ready for assembly. Piston rods are now included in the photo (on the left). I have 10W30 motor oil ready and special 460 steam cylinder oil. I used the 10W30 on shafts and bearing surfaces, and I used the cylinder oil for the piston rod OD and the piston OD and the cylinder ID.
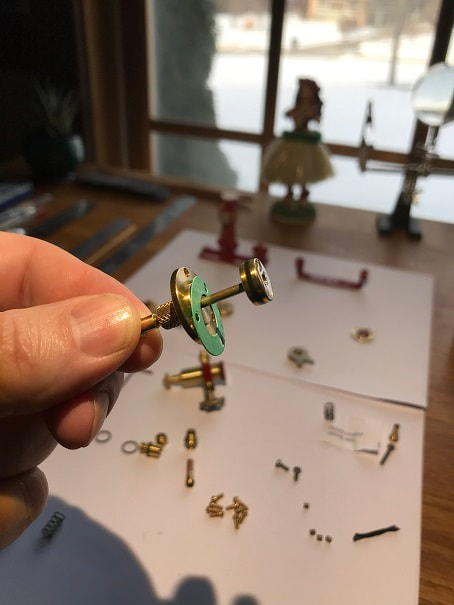
Piston rod has the gland nut with gland packing in it, threaded onto the bottom cap of the cylinder. The gasket that seals the bottom cap to the cylinder is shown. The piston with O-ring has been threaded onto the piston rod. Lubricate the o-ring with some cylinder lube before stretching it onto the piston, you don't want to tear the O ring. Lightly lubricate the piston rod and make sure that the gland packing is sealing the circumference of the piston rod...but also make sure it is not so tight as to create too much friction on the rod.
Insert the piston rod assembly into a cylinder. The two cylinders are identical so doesn't matter which you pick. Lubricate the OD of the piston and O-ring with steam cylinder oil before inserting it into the cylinder.
Tighten up the bottom cylinder cap with three brass screws.
View of the piston in the cylinder prior to screwing on the top cap of the cylinder.
Top cover gasket prepared on MSM Clyde Cylinder.
Completed MSM Clyde Cylinder Assembly
Completed MSM Clyde Stream Engine Cylinder
Repeat the above steps to assemble the 2nd cylinder/piston assembly.
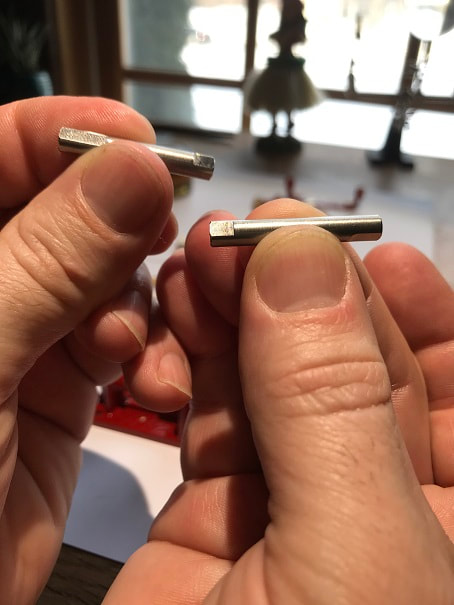
There are two crankshafts. Each has a flat on each end. One shaft has flats that are on the same side (the one on the left) and one shaft has flats that are at 90deg to each other (the one on the right). Inspect and identify which is which.
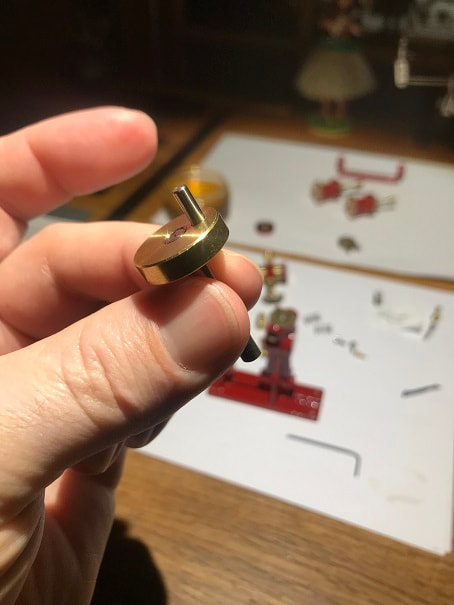
Insert the crankshaft that has flats at 90deg to each other, into the flywheel with the shorter pin, and tighten down the flywheel onto the flat of the shaft using one of the small grub screws (Set screws).
Lightly lubricate the crankshaft (I used 10W30 motor oil) and gently insert it into the main bearing in the trunk as shown.
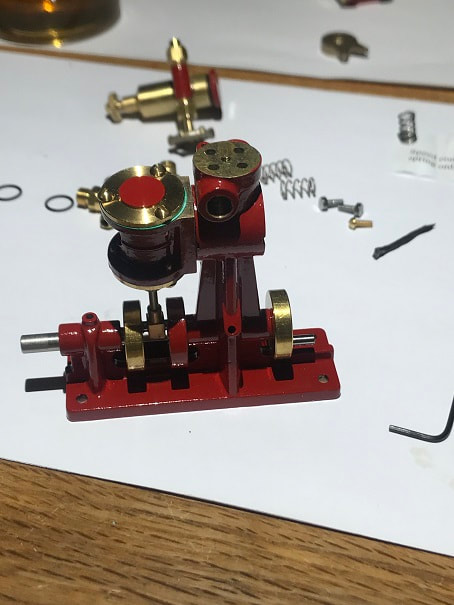
Lightly lubricate the flywheel pins and crankshafts with oil (I used 10W30). Install the big end of the piston rod on one of the cylinder assemblies (doesn't matter which cylinder assembly, they are both the same). Then place the center flywheel, the one with no pin in it, on the long flywheel pin, over the big end of the piston rod. Back out the crankshaft that you have in the mainbearing so that it is not protruding from the mainbearing. Set your assembly of two flywheels and piston end in the space between the two trunk bearings. Line up the center holes and push the crankshaft from the mainbearing into the center hole in the flywheel. Take the remaining crankshaft and insert it through the smaller bearing in the trunk into the other remainining flywheel centerhole. Rotate the flywheels and shafts to align the flats with the set screw holes and tighten down the set screws on the flats. Then lift up the cylinder assembly, lightly lubricate the flat surface and pin where it will fit into the trunk, and then gently put it into position on the trunk, inserting the pin into the hole in the side of the trunk.
Now similarly install the remaining cylinder/piston assembly on the other flywheel pin, and into the other side of the trunk.
Locate the cylinder holding bracket and the two cylinder holding springs.
Set both springs into the cups at the ends of the holding bracket. Set one spring in place in the bracket on the end of one cylinder and compress it as far as you can an to make it possible to also compress the other spring onto the opposite cylinder. I used a small flat screwdriver to help compress in the 2nd spring into place on the opposite cylinder. There are small circular pockets on the outside of the cylinders to accommodate the springs. Secure the bracket to the trunk with the two stainless steel screws as shown.

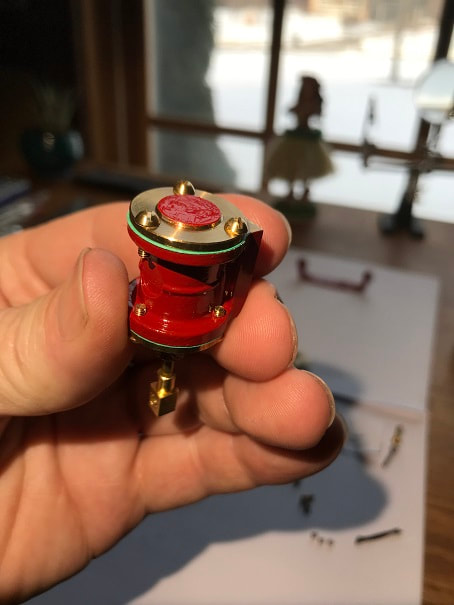
Cylinder holding bracket installed.
Slowly and gently rotate the crankshaft and ensure smooth motion of all the parts. If there is any binding. Disassemble and retrace your steps and find the issue....do not force it, you could break it.
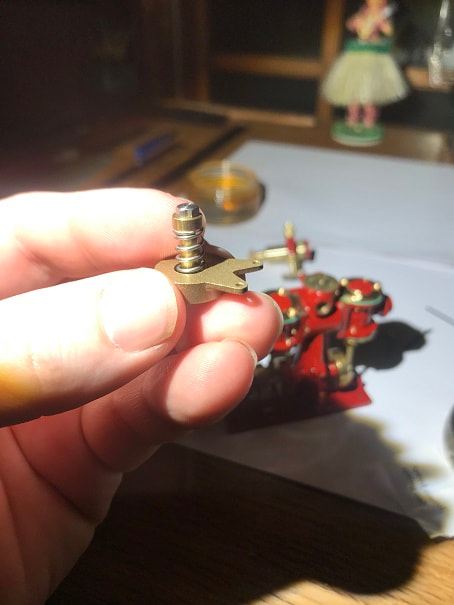
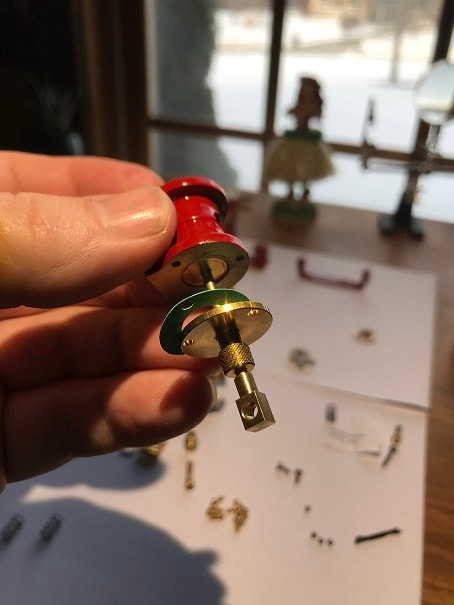
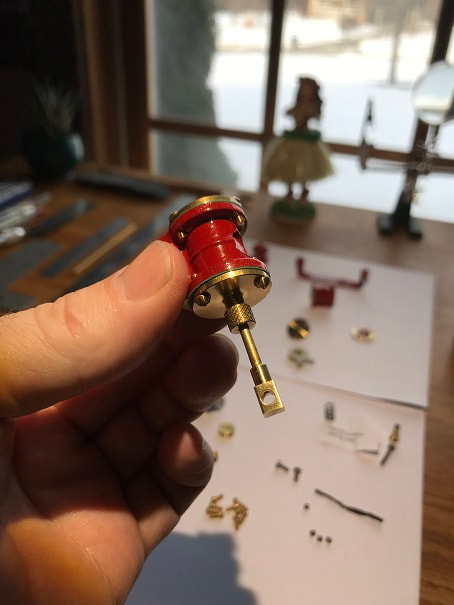
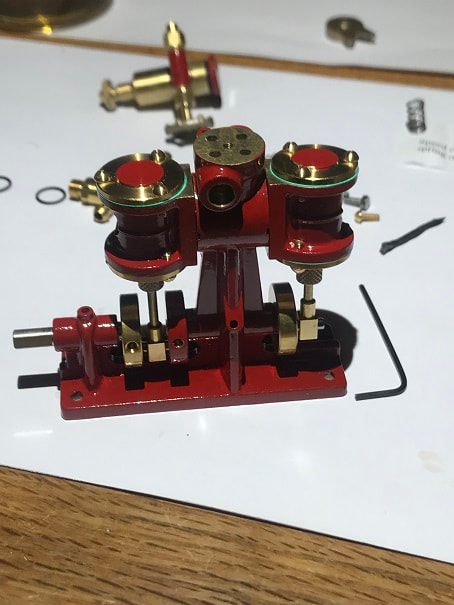
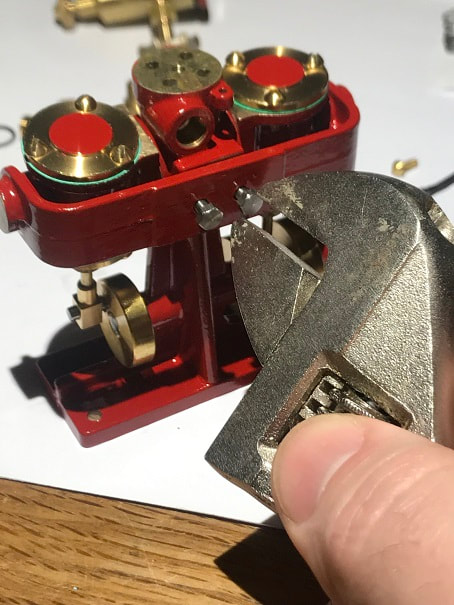
The is how the reversing control assembly stacks up. Locate these parts and put them together like this. Do not lubricate these parts or the faces between the reversing control and the trunk.
Holding the reversing control assembly together, press it down onto the top of the trunk and get the screw threads to engage in the hole on the top of the trunk by hand. Once engaged, use a wrench to tighten the screw until it is secure....but do not fully compress the spring coils.
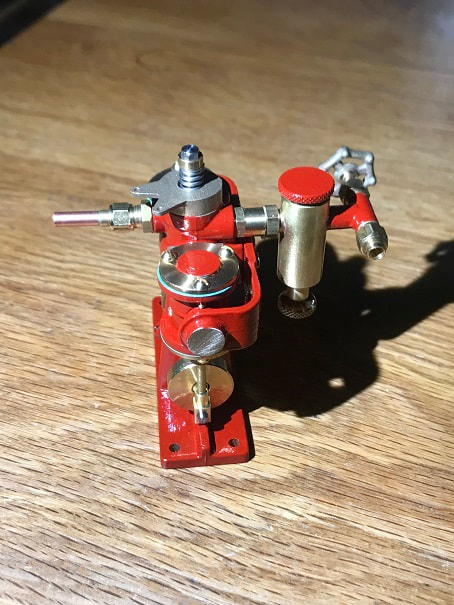
These are the exhaust fittings. Use thread tape and install the fittings into the engine. The exhaust can be fitted to either port in the side of the engine, depending on the layout of your engine installation. Either port can be the steam inlet or steam exhaust, the reversing control will switch the steam direction flow either way.
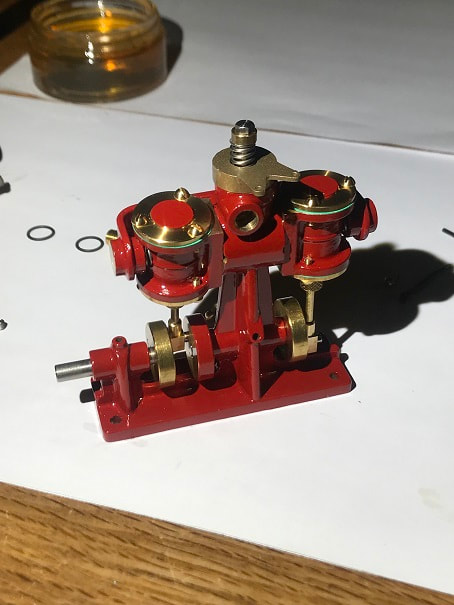
Exhaust port installed.
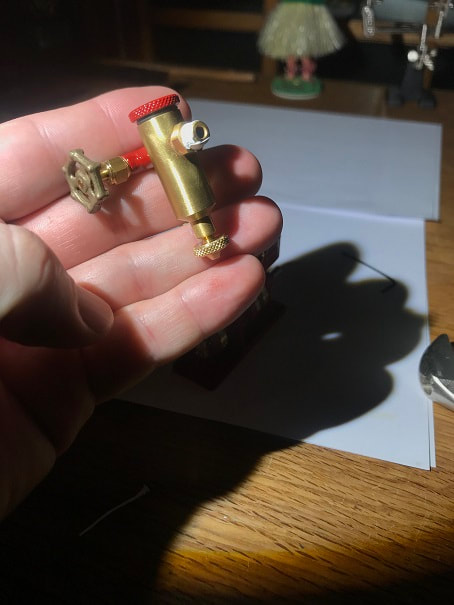
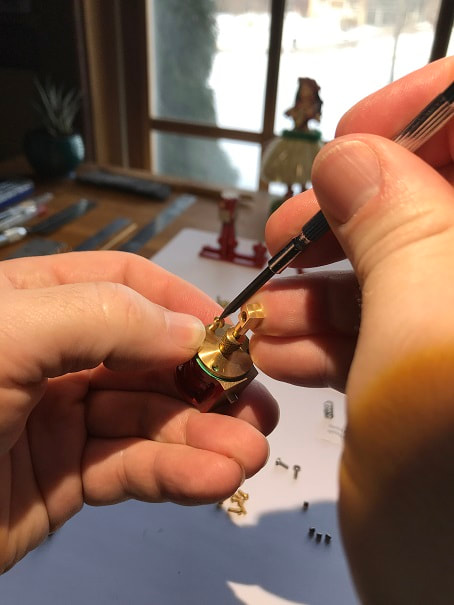
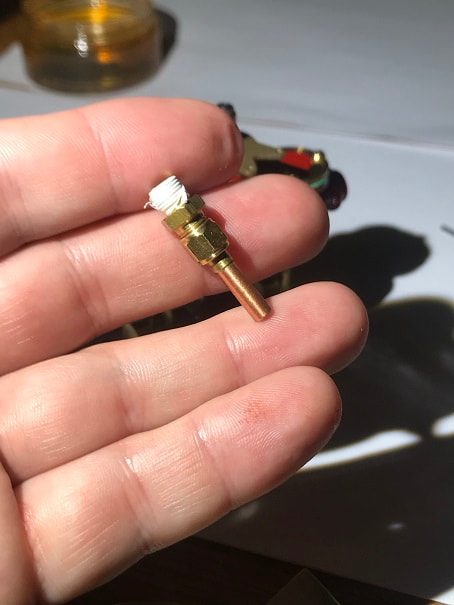
Use thread tape on the threads of the lubricator fittings.
Lubricator installed on the MSM Clyde Steam Engine. Note the brass adapter and extensionfitting between the engine and the lubricator. thread tape was used on these threaded connections.
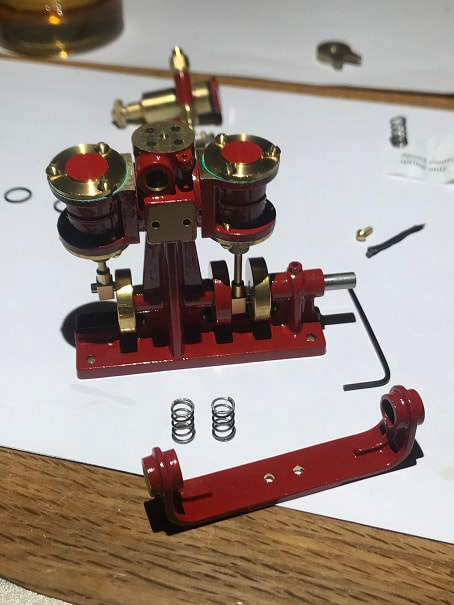
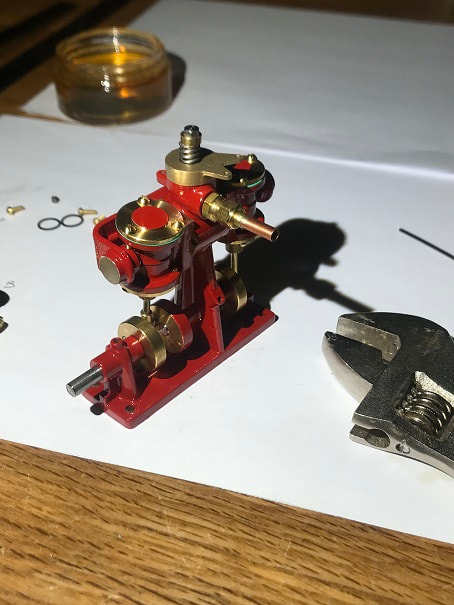
That's all for now folks, here is a photo of the completed MSM Clyde Steam Engine:
Completed MSM Clyde Steam Engine
Next I ordered the fuel-tank, boiler, condenser, burner, and base-plate from MSM.
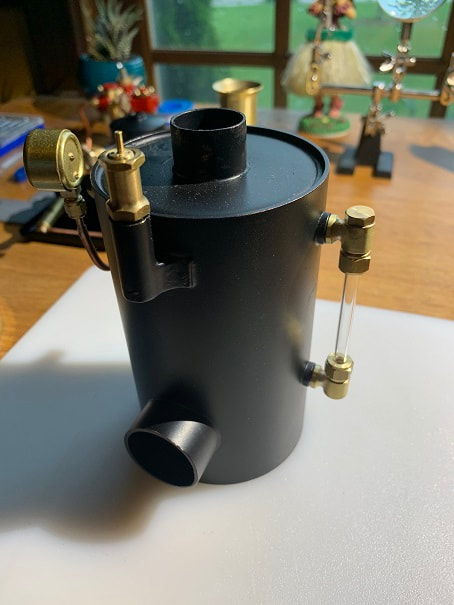
Boiler, as recieved from MSM.
I have cut the hardwood lagging to fit all around the fittings, and superglued it to the boiler.
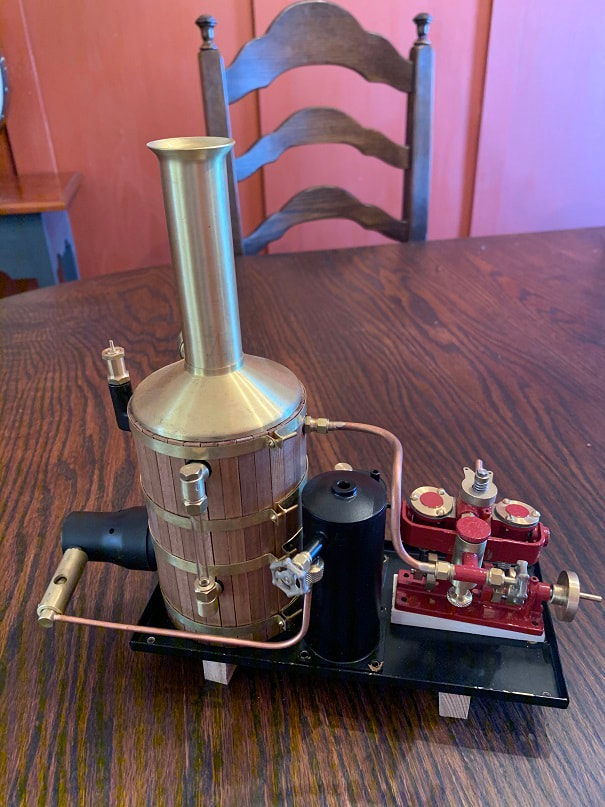
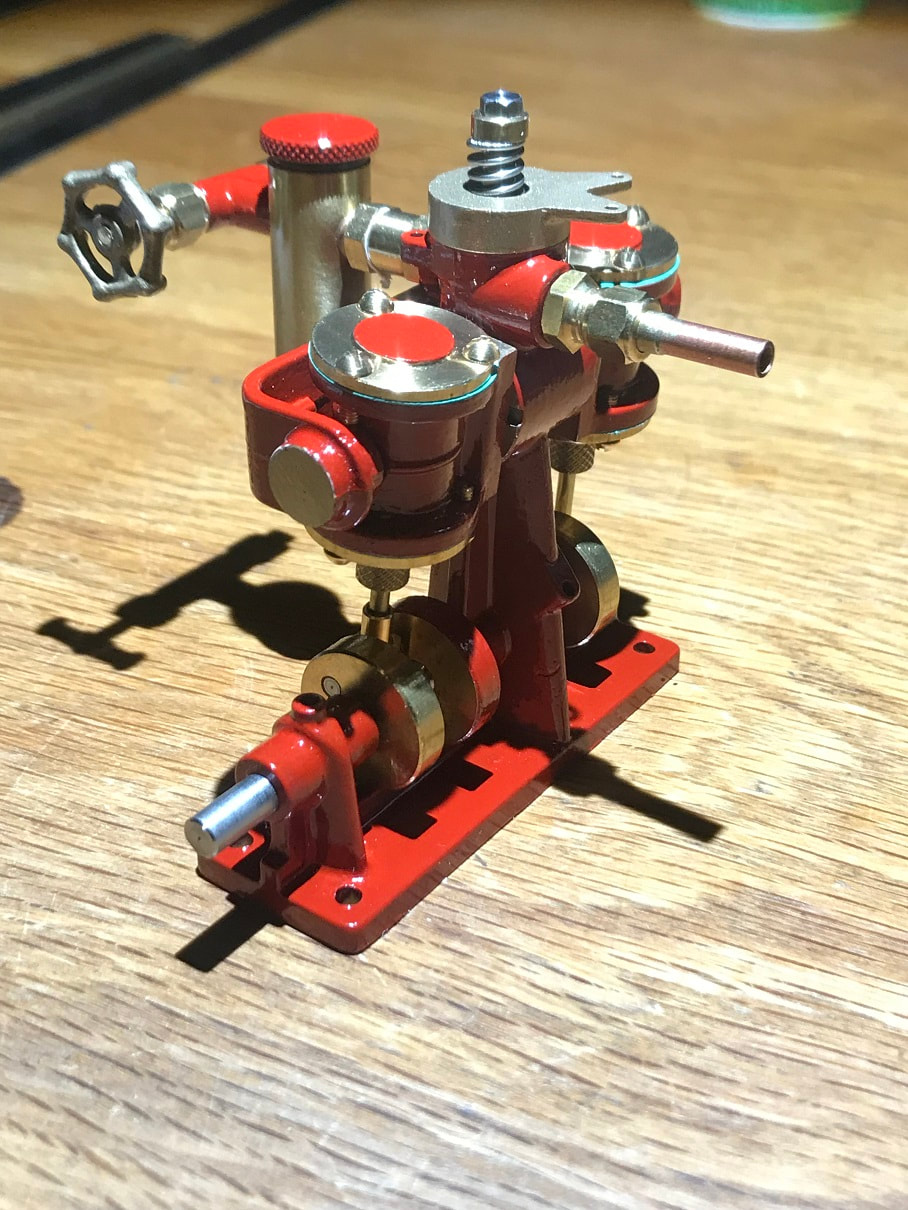
The boiler is lagged and the brass straps have been cut to length, drilled, and installed. The boiler lagging was finished with acryllic clear varnish. Here is the finished MSM Clyde Steam Engine.
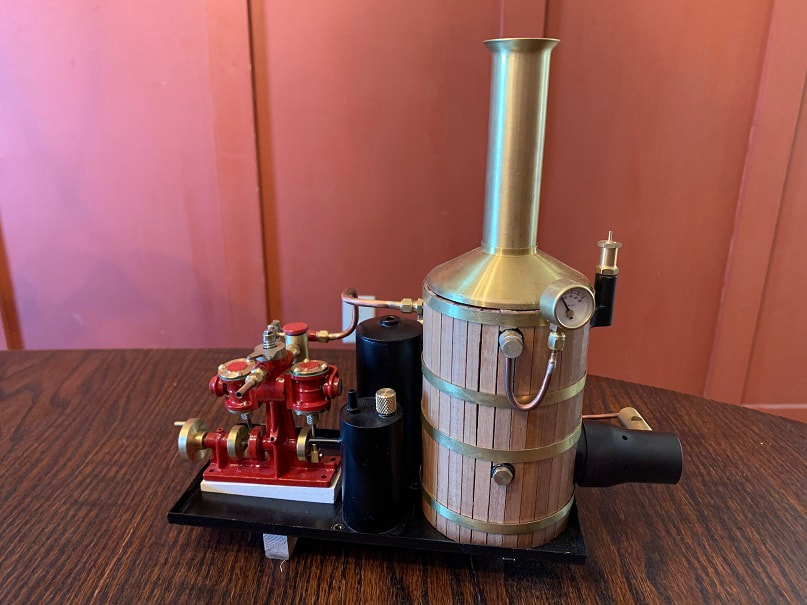
Completed MSM Clyde Steam Engine. I built a wedge base plate for under the engine so that the output shaft is at the correct height and angle to mate with the prop-shaft on the Alexandra.