Sept 2022
Building a Model of the Oseberg Viking Ship!!
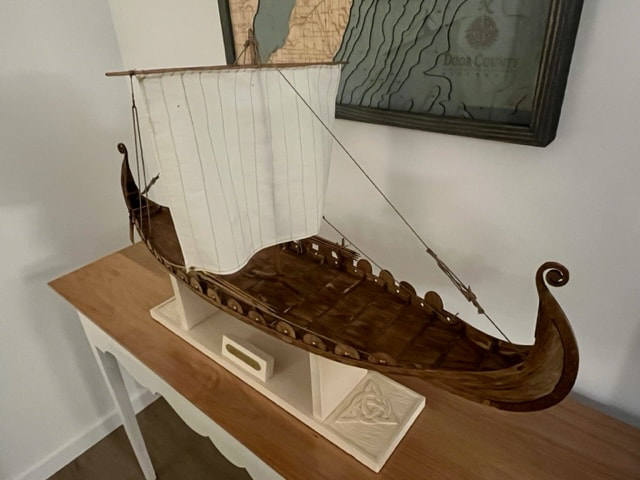
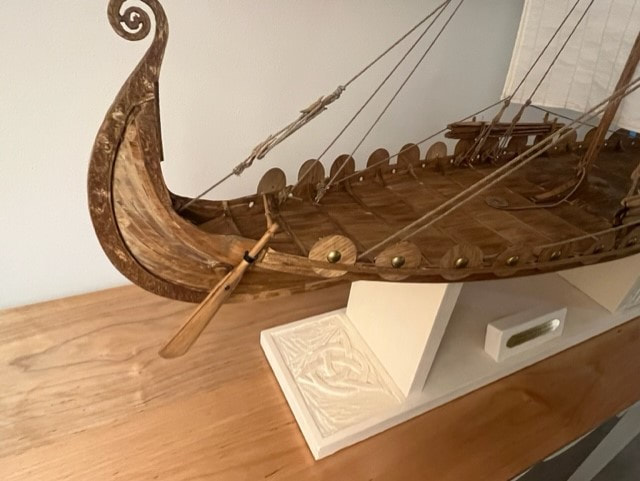
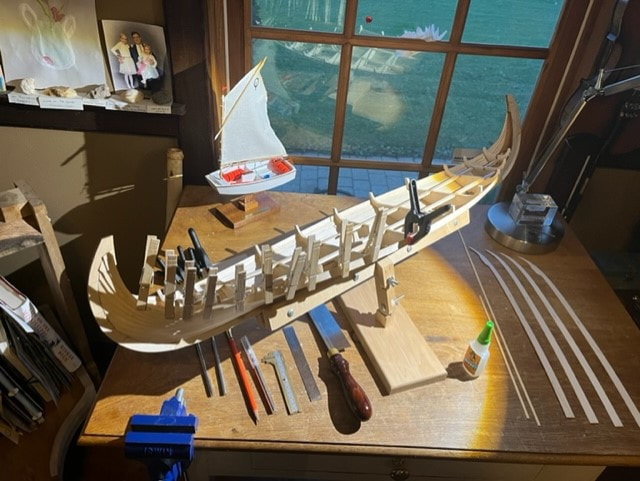
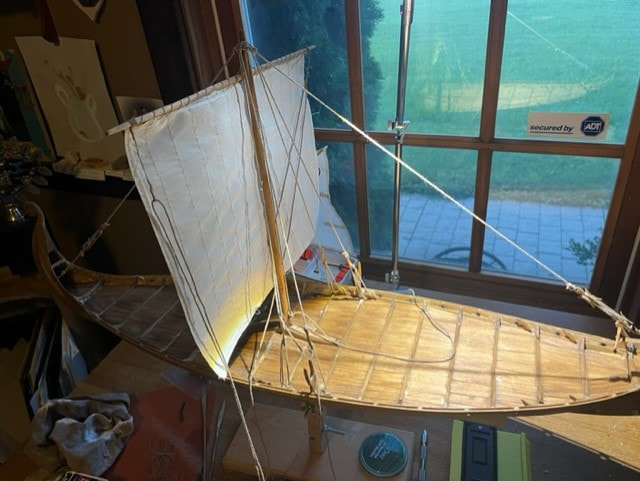
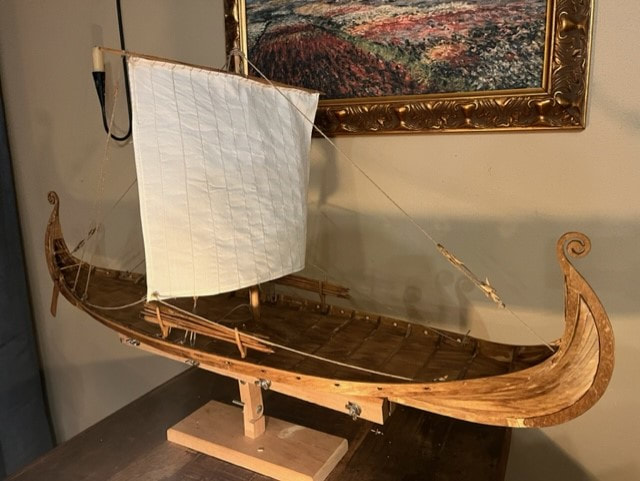
Here is a photo of the completed Billing Boats Oseberg Ship Model!
Hello Fellow Model Ship Builders!
I am excited to be embarking on the construction of a model of the Oseberg Viking Ship! This ship was a ceremonial burial ship built around 800-834 AD and was excavated in Oseberg , Norway in 1904-1905. My great grand parents came from Sweden and my wife has significant Norwegian heritage, so with our bit of connection to Scandinavia, I thought this would be a fun model to build.....I also love the lines on these fast-looking Viking boats. I saw the actual Oseberg as a young teenager in the '80s in the museum in Norway, post cards (and entry ticket) from my scrapbook are posted below. I'm going to take my time, and as always I am not the fastest builder due to work and family commitments, but here goes!
Wikipedia page on the Oseberg: https://en.wikipedia.org/wiki/Oseberg_Ship
I will use the kit Oseberg 720 from Billing Boats in Denmark as the base kit for my model, though I will make many custom modifications.
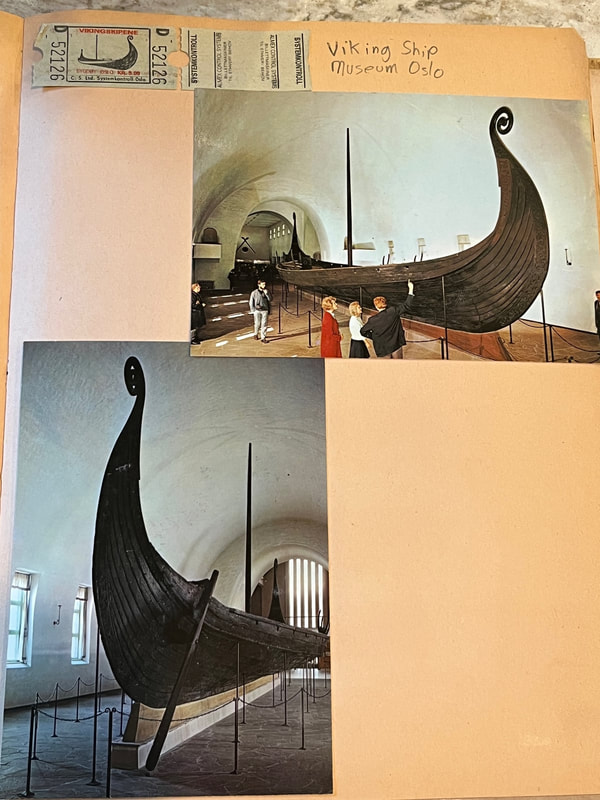
Postcards from the '80s showing the Oseberg in the museum in Norway.
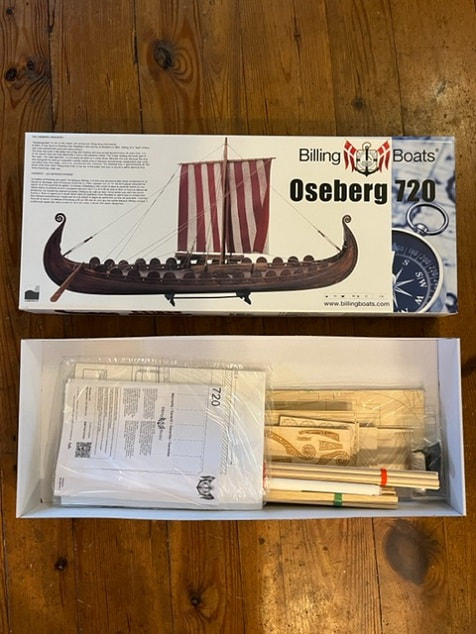
Here's the box opened with the kit contents.

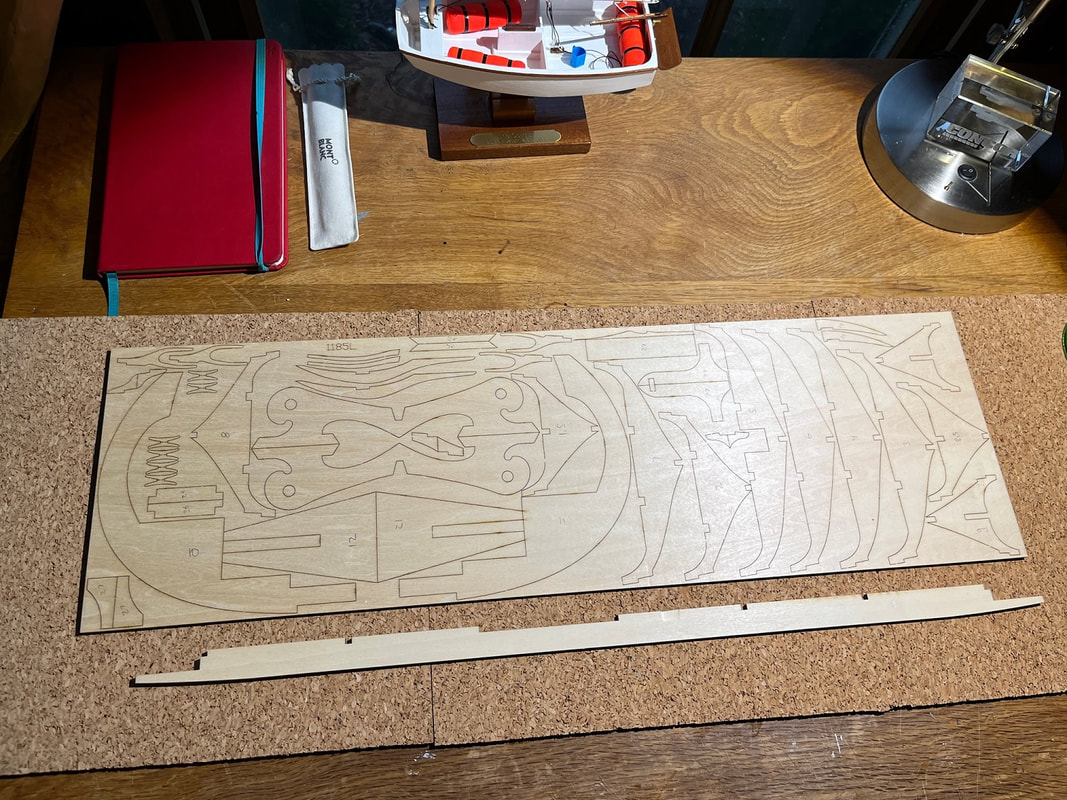
Tonight , I got started building the Oseberg Viking Ship Model. I lightly wrote the part# on many of the pieces first using a pencil. Then, I laid out the keel and glued up what I would call the keel-doublers, which are the reinforcing and thickness-adding pieces added to the both sides of the keel to build it up. I am using CA for gluing wood together.

God kveld alle sammen,
Permit me a small soap-box train of thought. I seek to minimize exposed plywood edges in my model, I also recognize my model will not be a perfect replica of the Oseberg, but I do seek to have reasonably accurately spaced bulkheads. The model from Billing Boats (Denmark) includes various plywood and plastic parts. I believe this is totally acceptable and I think that a modeler could build the stock boat from the kit and wind up with an absolutely beautiful and admirable model. Hats off to any one who builds any boat model , and to anyone who builds the stock Billing Boats Oseberg 720! Kit builders need to balance cost and time-to-build, and expectations of builders, and this would be a tough balance to strike. I am very thankful for the work done by the Billing folks; what a great model. The I will use the pre-cut planks which will be fantastic, and the nice decorative burned scrollwork in the kit, and of course the plans are so nice and essential and hard earned by the designers. Buying the kit provides me with perfect laser cut wooden templates with which to make solid wood parts. Thanks Billing Boats designers!! This said, I will be recreating many plywood and plastic parts with solid wood, and I will be adding the visible parts of bulkheads that are missing from the kit plans. I utilized the plywood keel for stability and I will use the plywood parts in below-decks spots. Visible parts will mostly, but not always, be recreated with solid wood parts, as will be seen in the build log as I progress. I am not a perfectionist so for example I may use the plywood shields from the kit, because I think they look cool, and also I do not yet know if I will place metal nails along all the hull planks as Von Kassa and Jack P did (their end results were truly amazing!). OK, enough writing, I will get to the fun part....pictures.
I contemplated using the plywood bulkheads. They are made from very high quality plywood and are well-cut. I will not be staining my ship as dark as the ship looks in the museum in Norway, I will be shooting for a carmel colored lighter finish. I tested a stain similar to what I will use on the end-grain of the plywood bulkhead to see how visible the plys would be, and unfortunately I thought the plys were to visible so I need another solution:
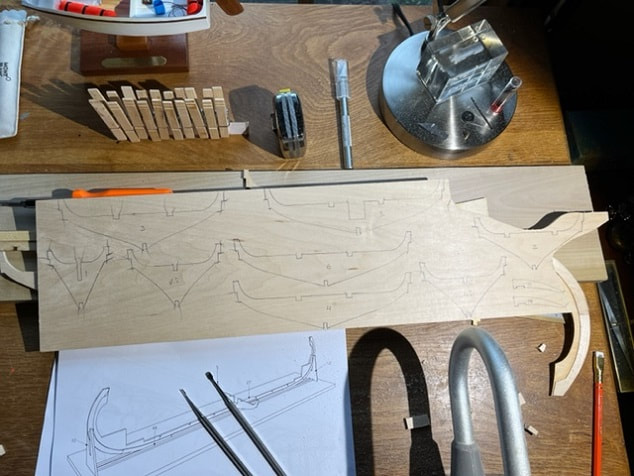
Billing Boats Oseberg Ship model bulkheads, redrawn on 4mm thick solid basswood.
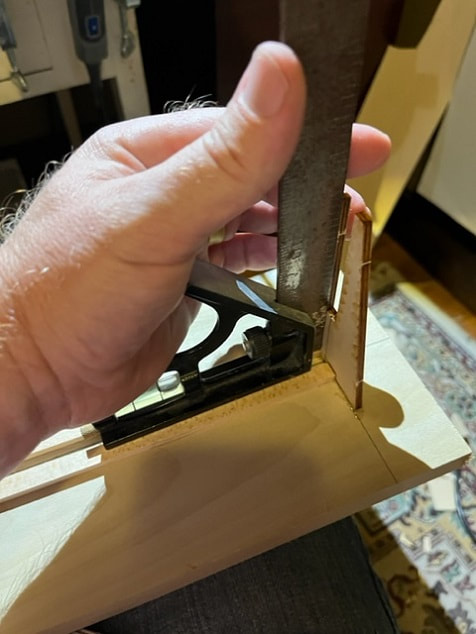
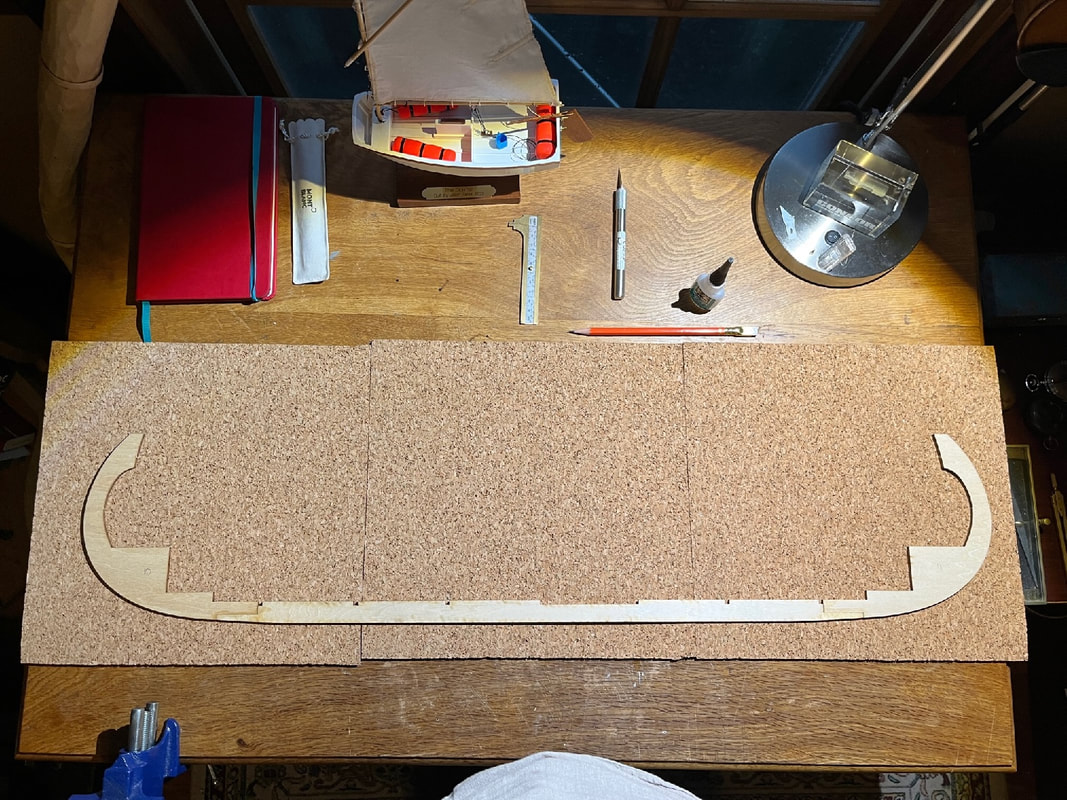
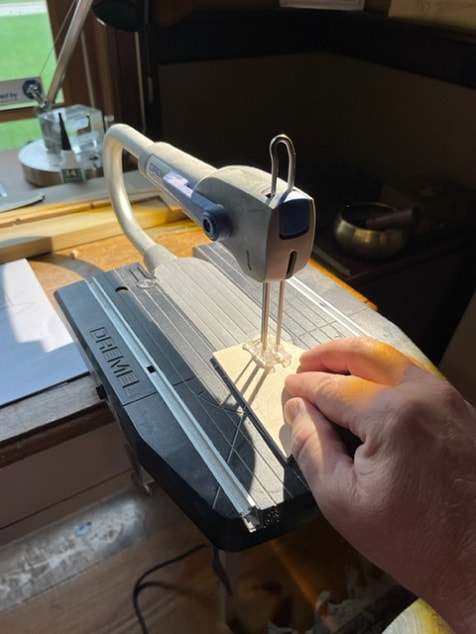
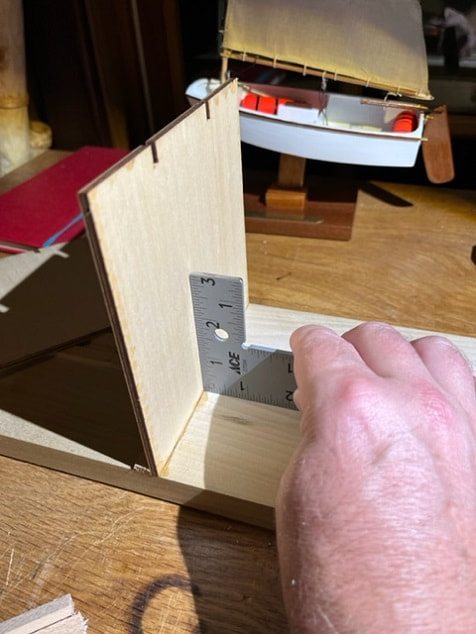
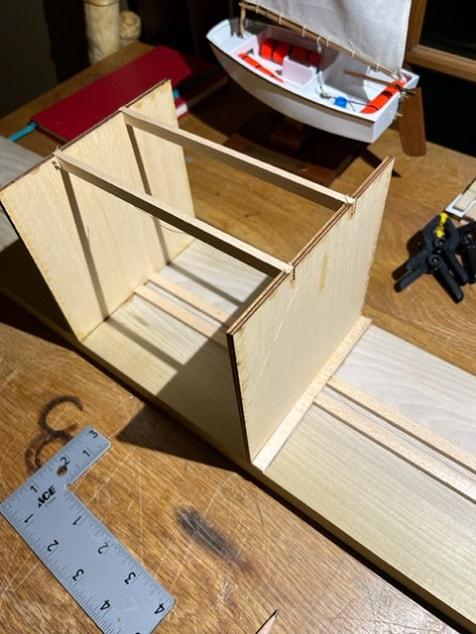
Squaring up the jig.
Base plate fixture for the Oseberg 1:25 scale
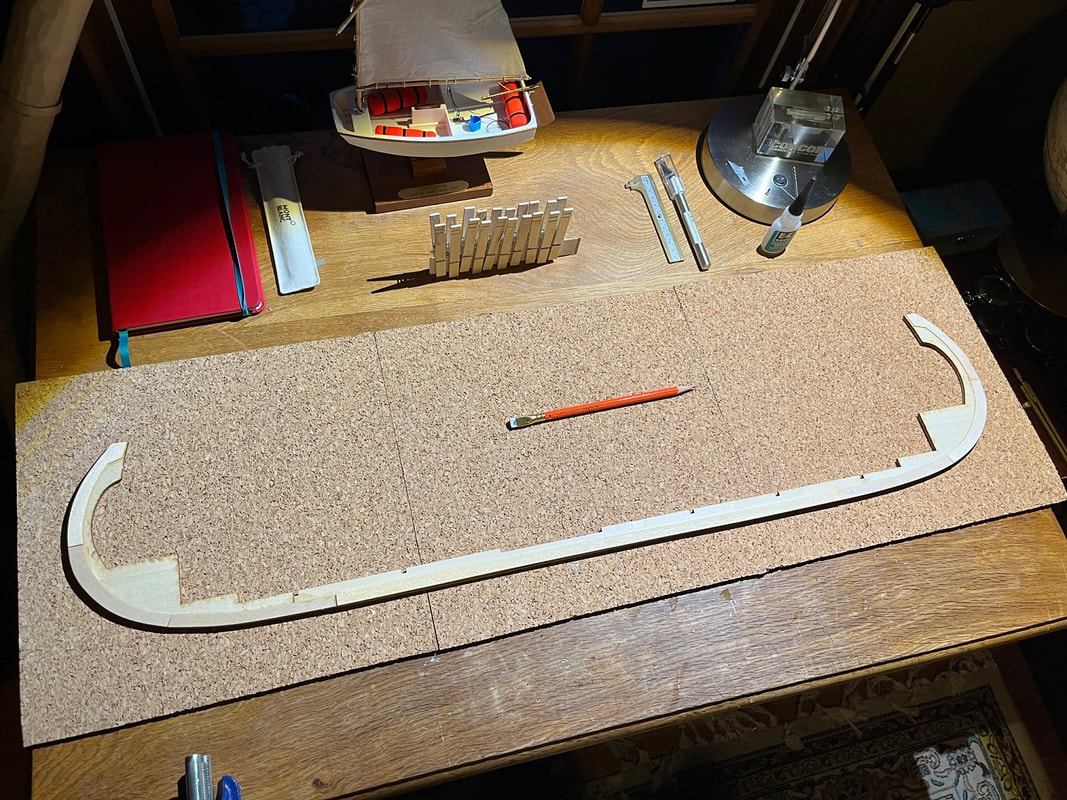
Solid basswood bulheads made using the templates from the Billing Boats Oseberg model.
Oseberg Viking Ship model, these are my solid basswood bulkheads that I made by using the Billing Boat kit bulkheads as templates. In this photo these are just dry-fit in place, not yet glued.
i shimmed the keel in each end of the fixture to center the keel in the fixture.
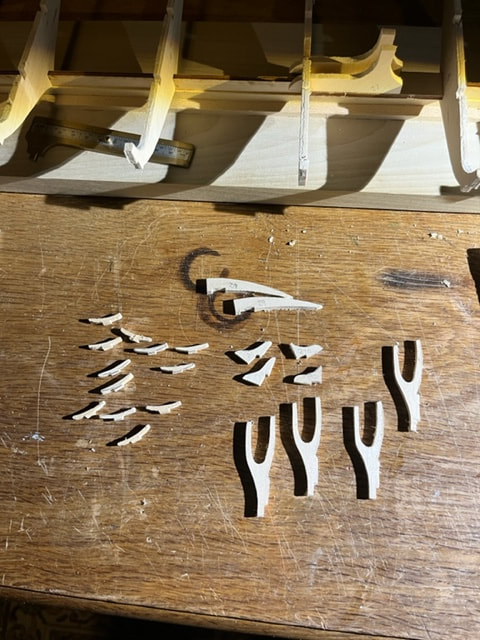
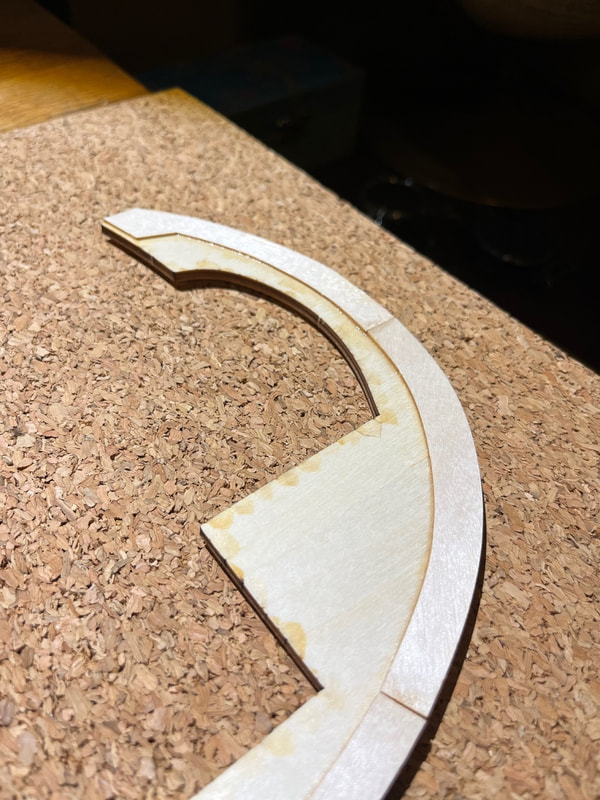
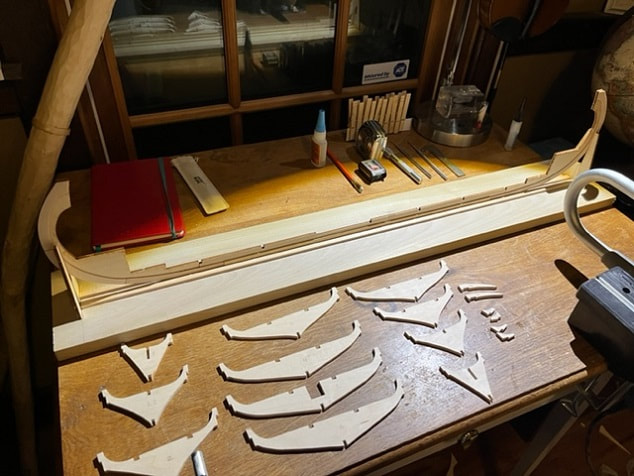
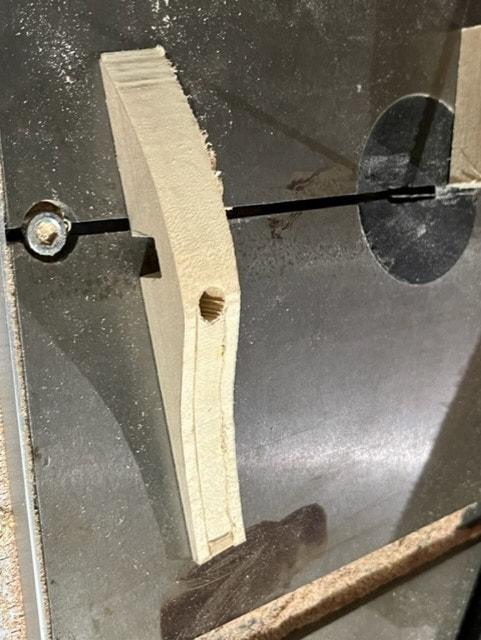
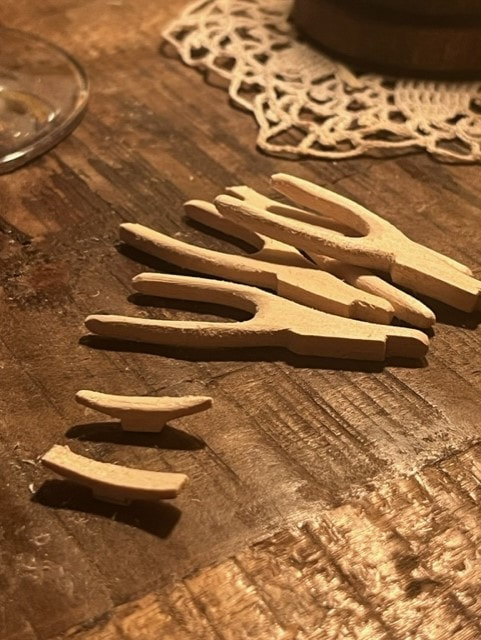
Here are the cleats and oar-cradles , cut out of basswood , using the plywood from the kit as a template.
Completing Bulkheads on the Oseberg Viking Ship Model:
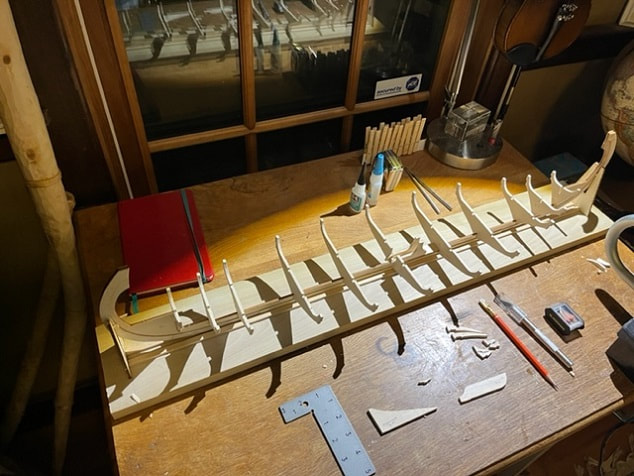
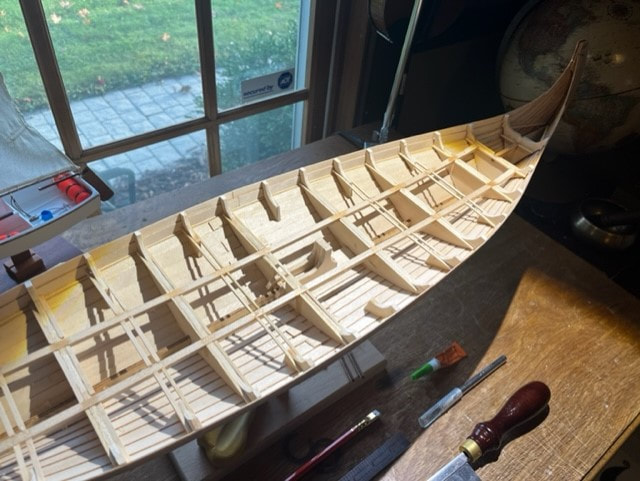
Bulkheads glued in place, with gel super glue. I used a small square to ensure they were true. Note the stringers also installed, which add to the proper alignment and rigidity of the framework.
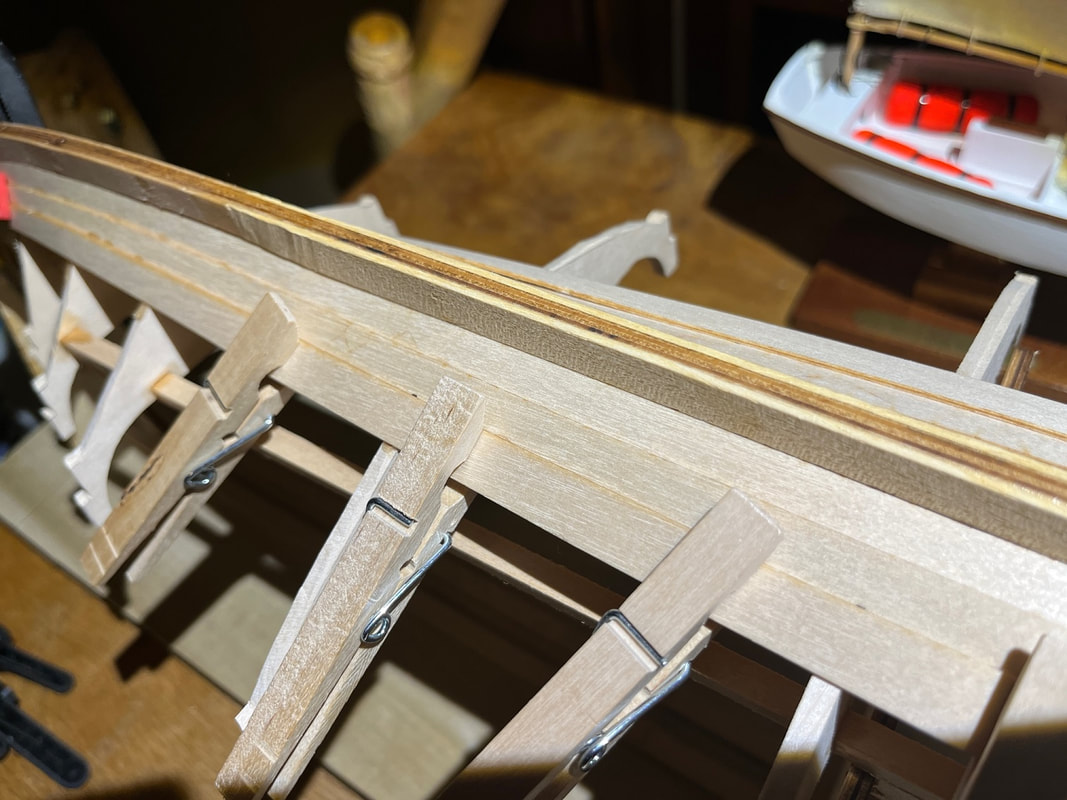
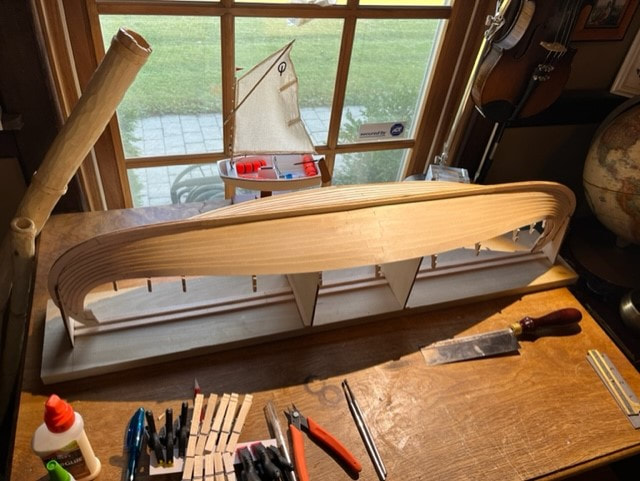
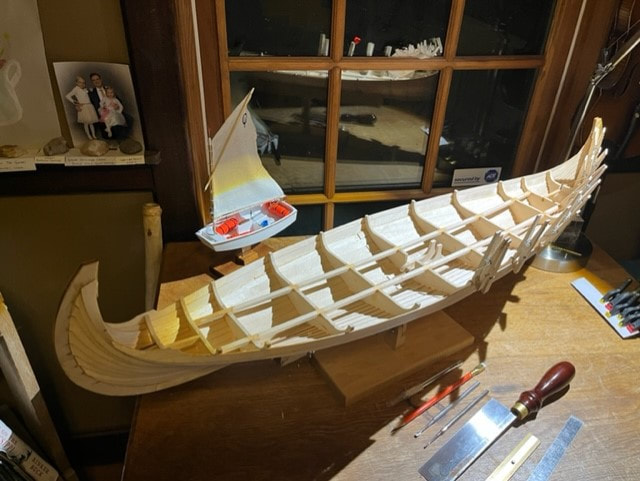
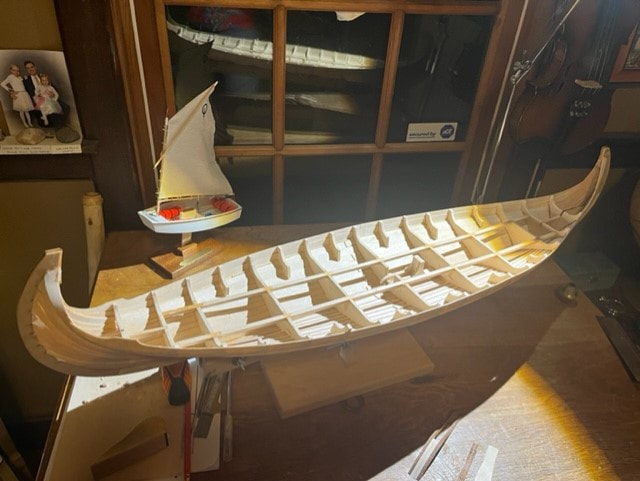
Planking the Viking Ship Model Oseberg:
First, Billing Boats provides a nice structure that supports the hull in an inverted orientation for planking. Here I am building this support frame:

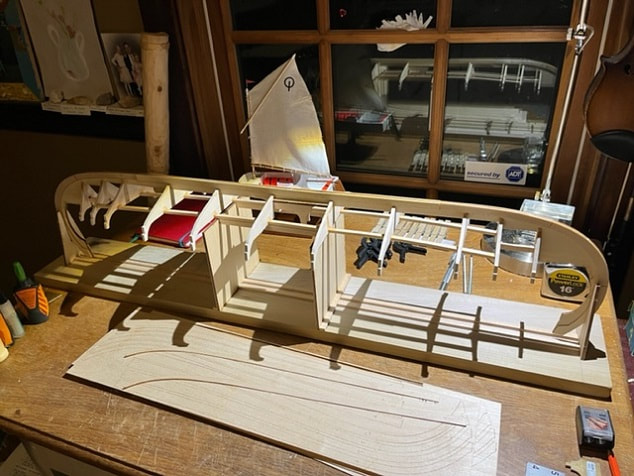
Here is the hull framework resting inverted on the support frame.
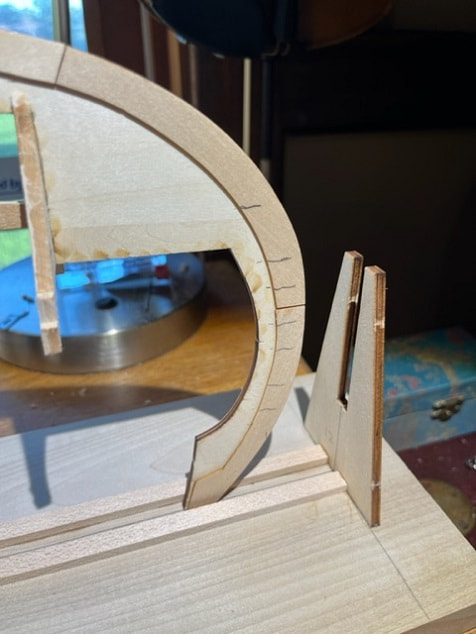
BEFORE PLANKING, I will now use razor knife to chamfer the bulkheads to match the curve that the planks will follow across the bulkheads.
I measured the height from the bottom of the keel of the end of the plank locations on the drawing and then transferred that to the keel in pencil.
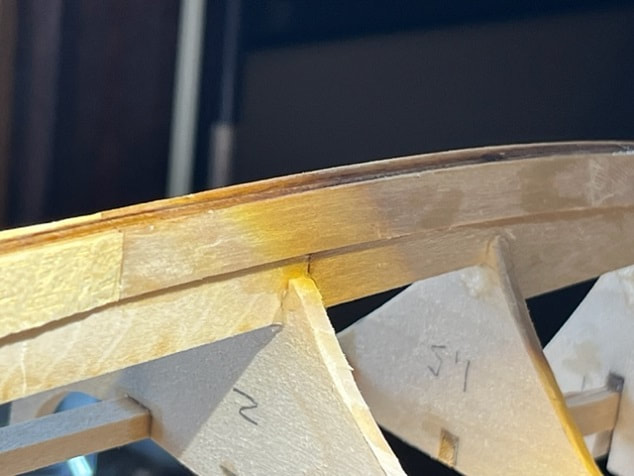
The thickness and width of the plank keel-doublers was thicker and wider than the curved plywood keel doublers, so I used a razor to feather them together in a nice transition before planking.
Here are my basswood bulkheads chamfered (with a razor knife) prior to planking.
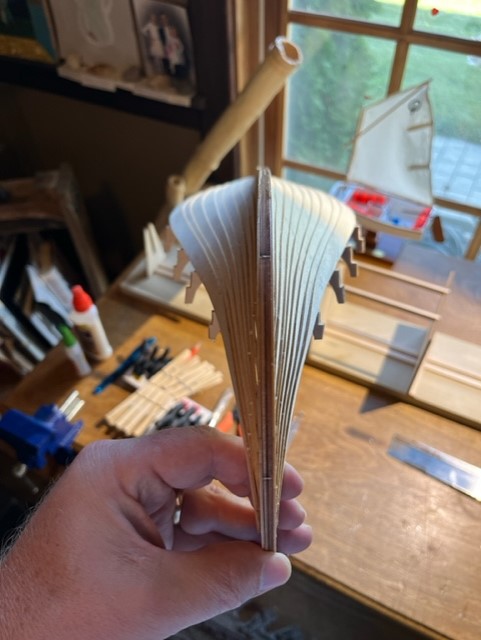
Planking the Oseberg Viking Ship Model:

To avoid warping of the hull during planking, I will symmetrically plank each plank on one side then the other....rather than planking one whole side and then the next whole side. I am carefully using gel CA glue. I don't want any ooze-out, as I will be staining this hull.
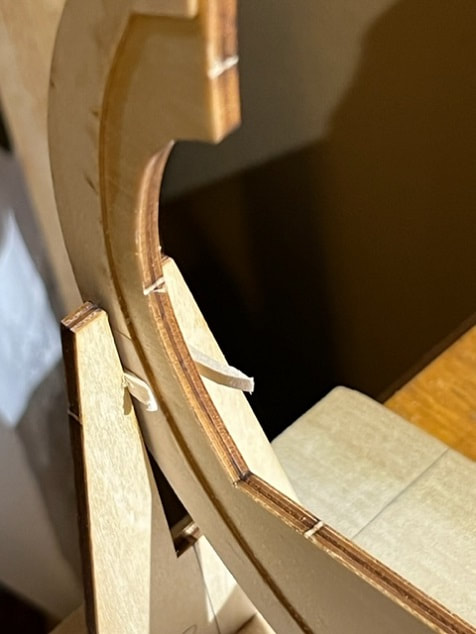
The butt-joint of the planks doesn't land on a bulkhead, so I am adding these little backer-boards behind each plank butt-joint.
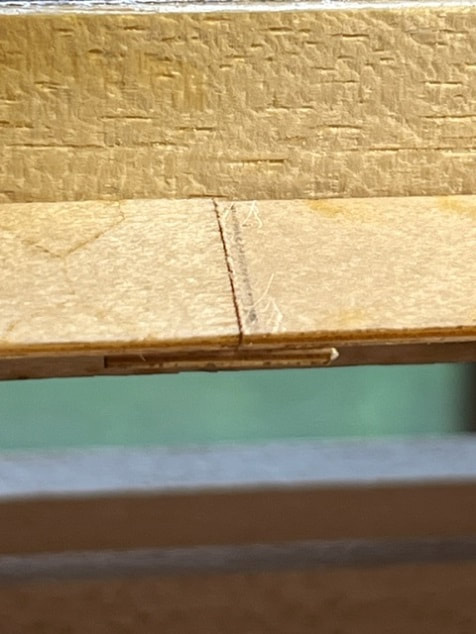
Completed, reinforced, butt-joint.

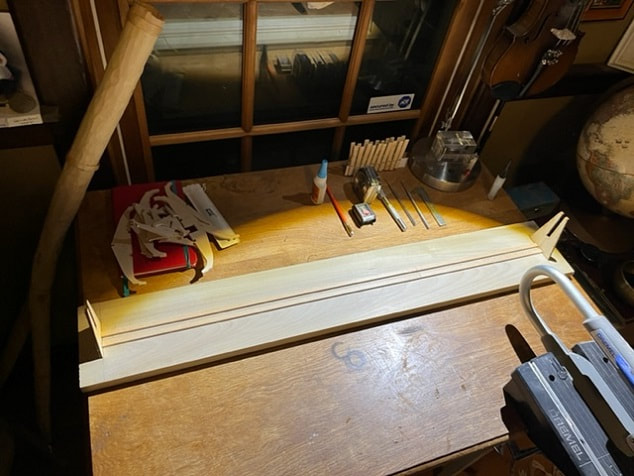
Bottom section planks are now done. Next I will attach the two rows of planks to the sides.
I trimmed and fit a solid wood strip in , per plans, here near the shear line.
Here's a view from the inside of the hull, showing the wooden filler strip installed along the upper edge of the existing planking.
And a view from the outside.
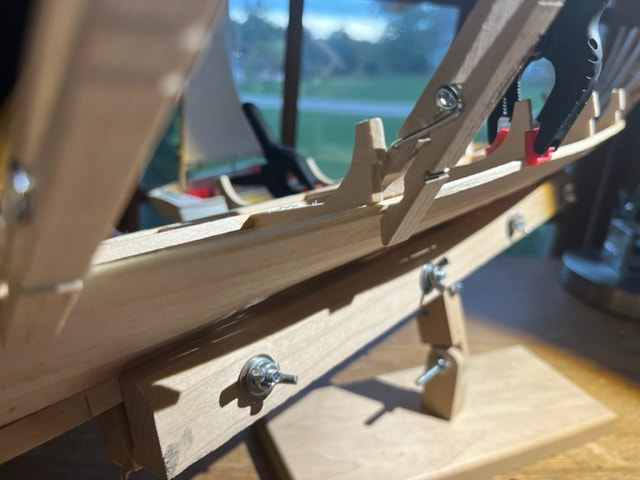
Installing the first plank of the upper two planks.
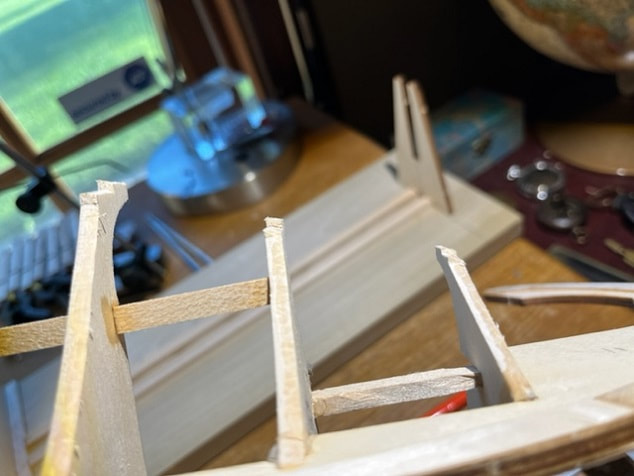
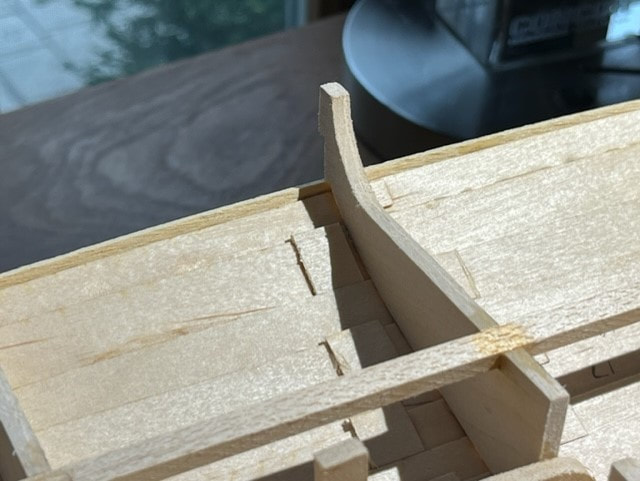
After installing the second to last row of planks, I noticed a gap in the bulkhead cutout as seen here. I cut wood pieces and glued them into these gaps prior to installing the final upper hull plank.
Here are the bulkheads with the little gaps filled with wood pieces, prior to applying final plank.
Final plank row installed!!!! Very exciting. Now I will trim off the tops of the bulkheads that are protruding up from the upper plank.
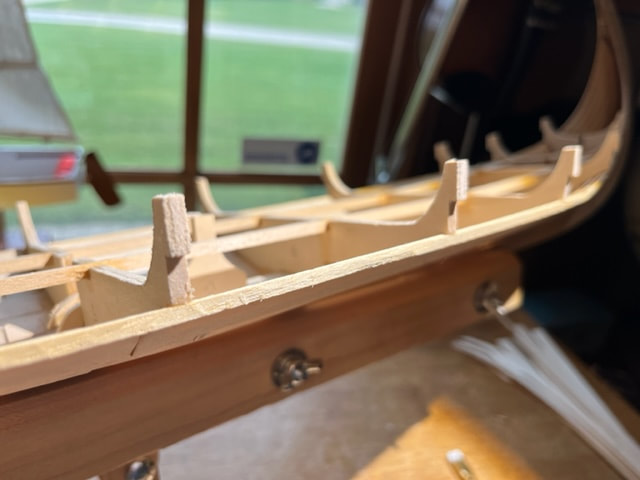
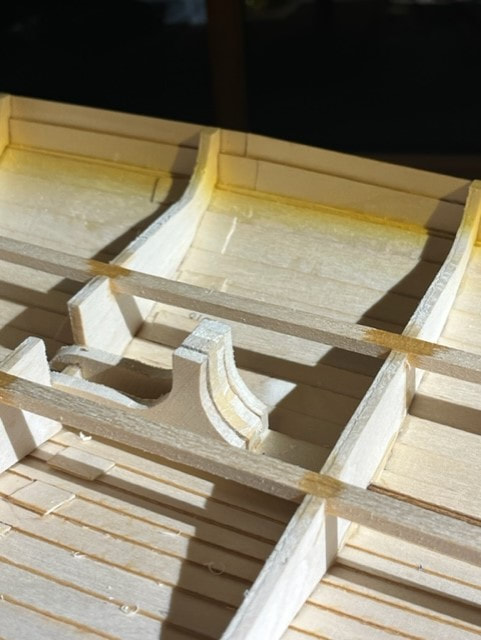
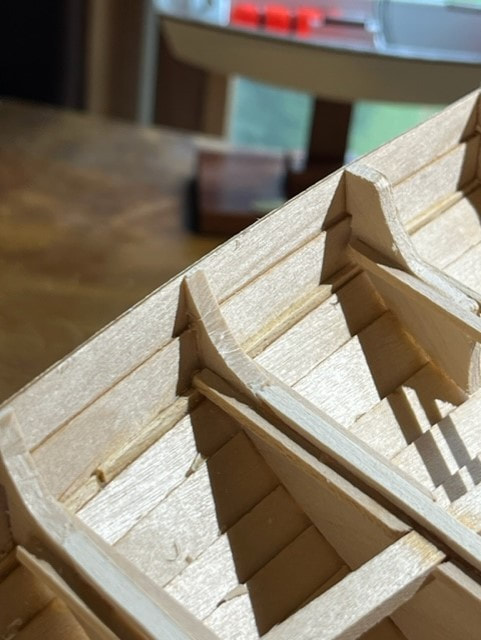
Making and installing the bulkheads that are missing from the kit:
If you look at the plans, or at the photo just above, you will see the first three fore and aft bulk heads spaced closer together, and then you will see large spaces between all the middle bulkheads. In the actual ship, the space between bulkheads was not as large as those big spaces in the kit. I will build small stub bulkhead tops, and glue them in place in the center of the large spaces between bulkheads in the kit, so that the bulkhead spacing in my model looks more accurate.

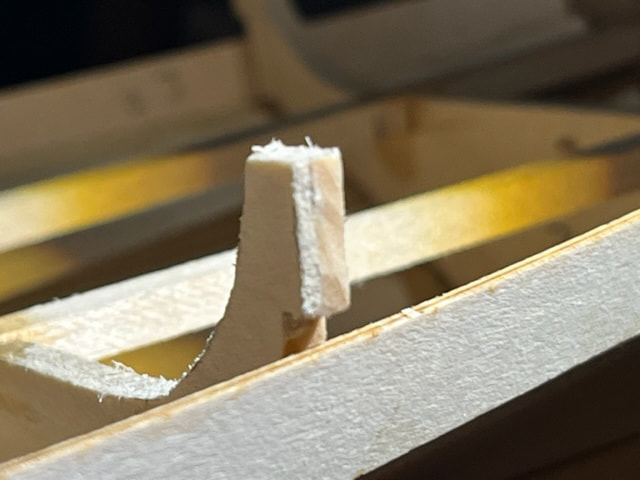
I used the plywood bulkheads (that I never used in the model because I made solid wood bulkheads) to sketch out mini bulkheads. I made different shaped mini stub bulkheads for each section and used a razor to carve them to fit the hull.
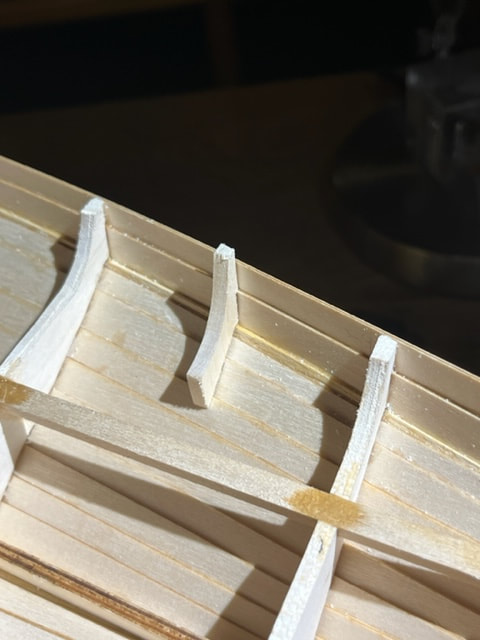
Gluing mini stub bulkheads in place.
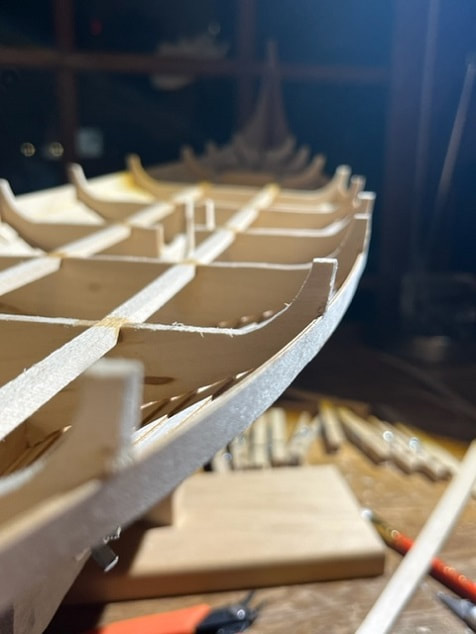
AND here is the hull with all stub bulkheads glued in place in the too-big gaps between the kit bulkheads.
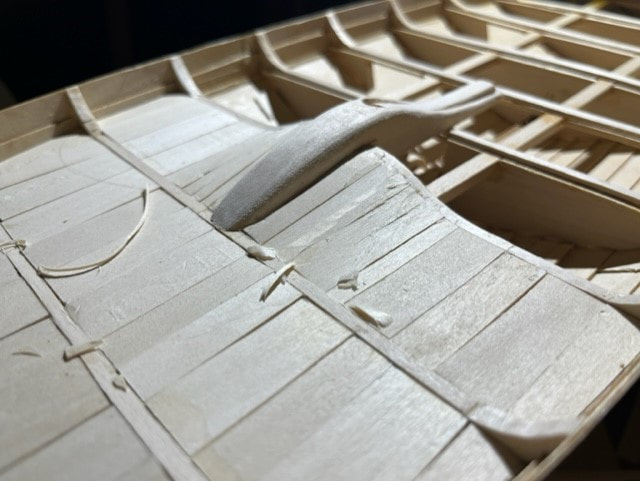
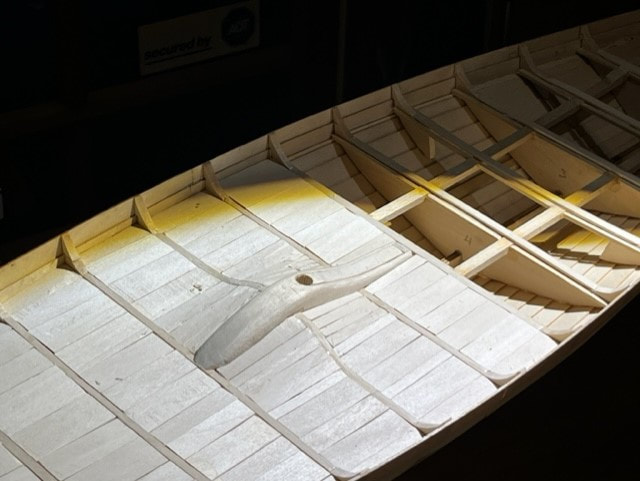
Solid basswood pieces glued into the mast step assembly.
Making the Oseborg Viking Ship Mast Partners:
First, I built the kit version from the plywood pieces:
I used the plywood assembly from the kit as a template to build a solid version from Basswood. Here are the steps I took.
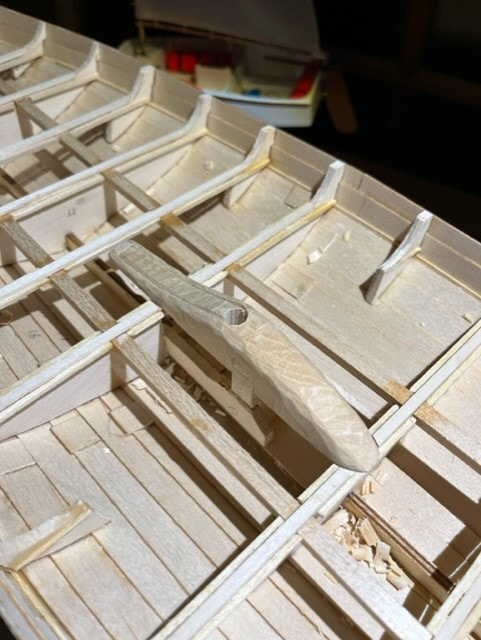
Mast step of the Oseberg. You can also see the thwarts that rise up to the top of the partners at this point.
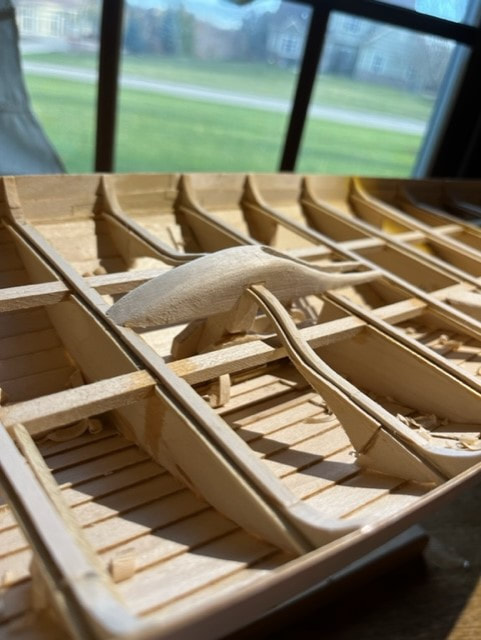
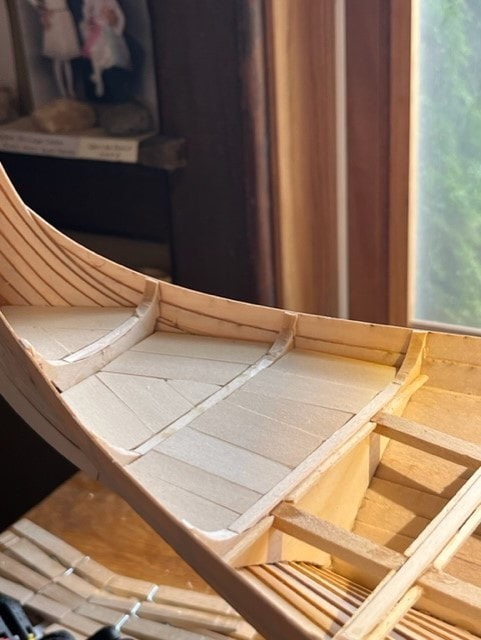
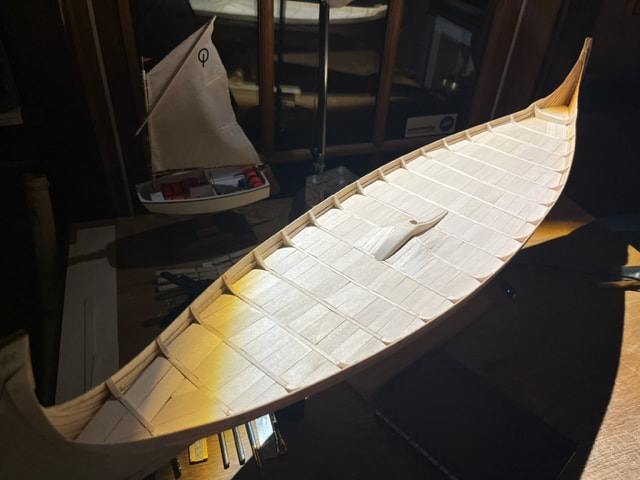
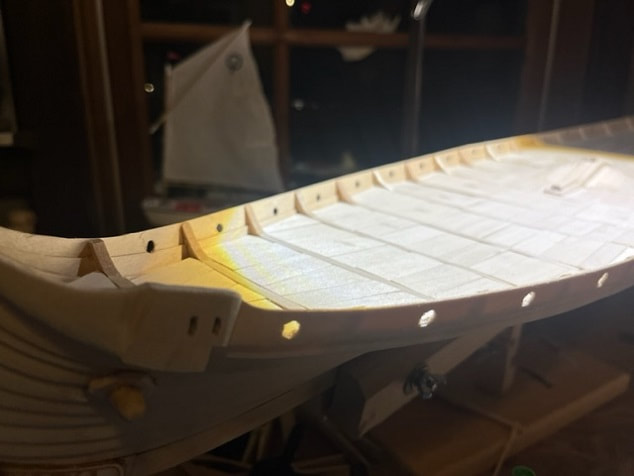
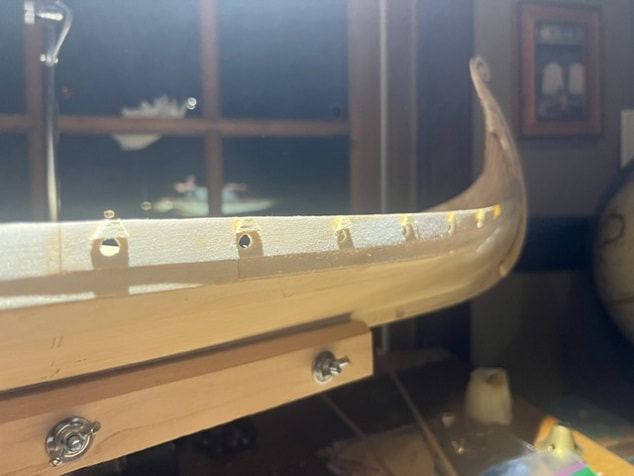
Planking the deck on the Oseberg model, and finishing the tops of the bulkheads:
I have completed installation of the plank support strips on either side of all the bulkheads. I have more bulkheads that the standard kit, so I ran out of the little strip material and used small basswood strips after the kit material ran out. Next, I will build up the tops of the bulkheads with wooden strips so that the tops of the bulkheads are flush with the tops of the planks; see photos below. This is a deviation from the kit, but is more accurate vs the original. The Oseberg ship has small planks that run from bulkhead to bulkhead and which are staggered in lengthwise alignment with the planks between the next bulkhead....ie the mini planks are not all in one big aligned row down the deck of the ship.
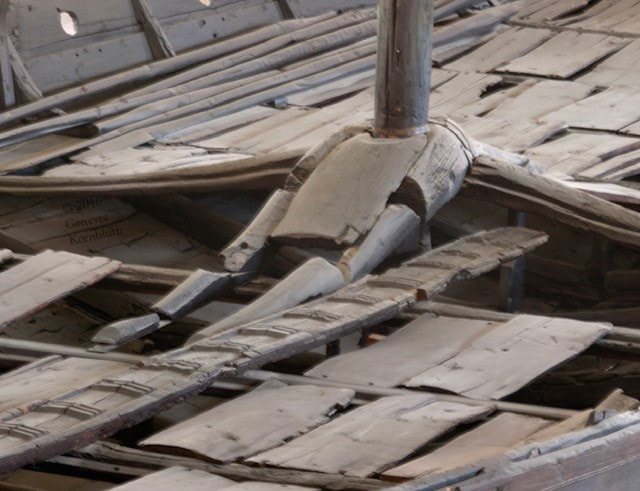
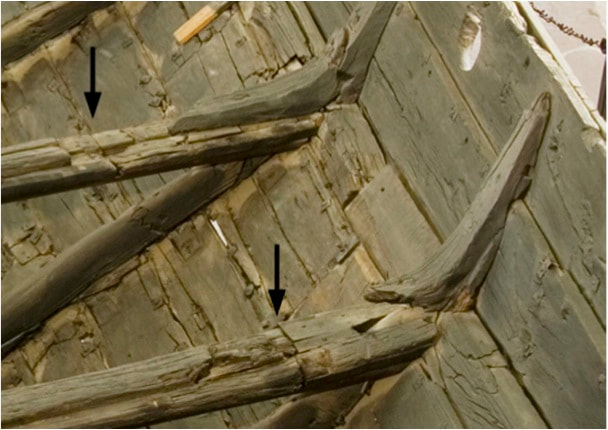
The deck of the actual Oseberg can be seen below. Also, I note the shape of the bulkheads above the deck, I will carve mine to be more similar to this:
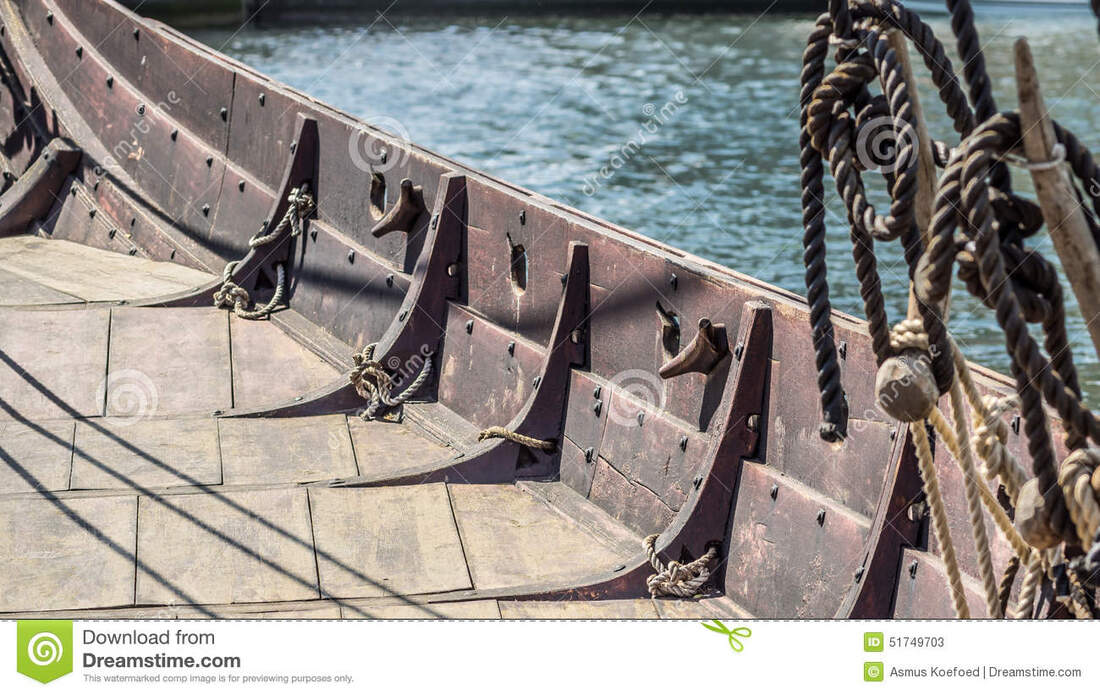
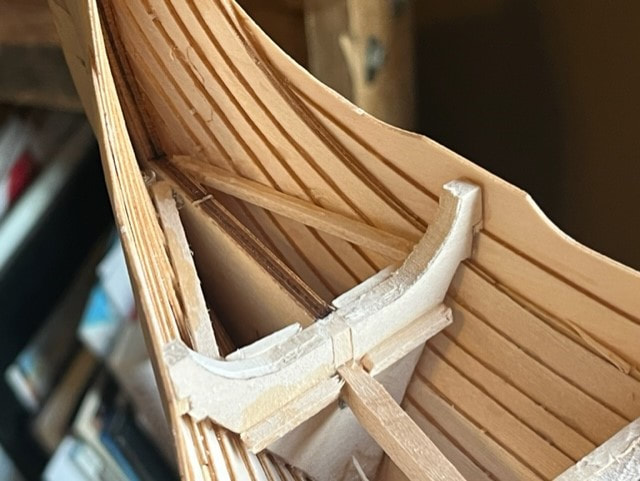
And above, a replica viking ship showing the staggered small planks, the top of which are flush with the tops of the bulkhead.
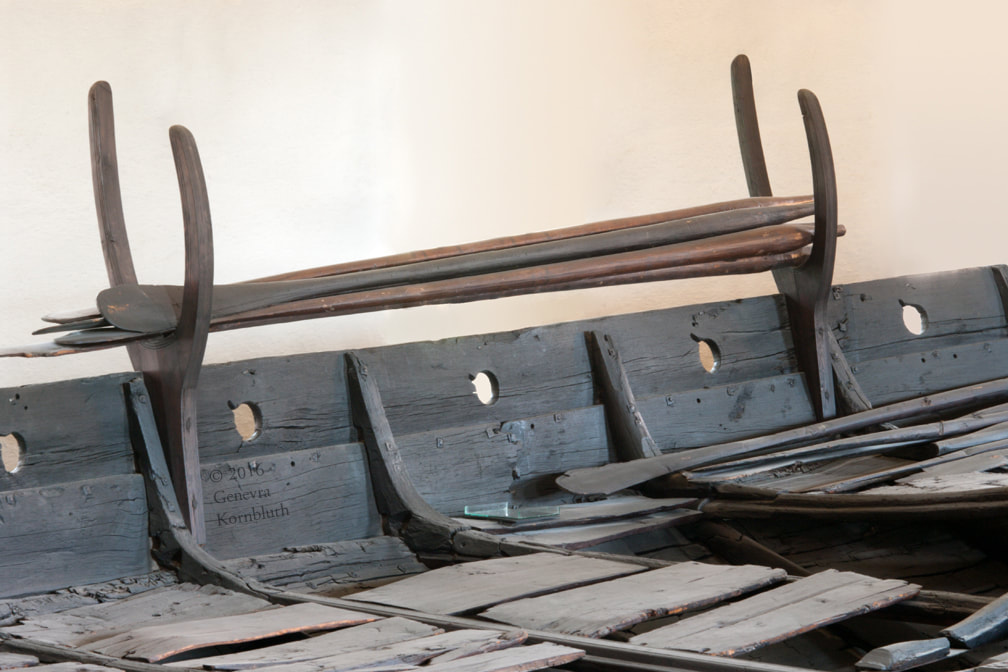
Also, sidenote, from looking at sketches and photo's it seems the Oseberg was not built with solid bulkheads but with thwarts that would run from starboard to port that supported the deck. I think this would have been lighter and allowed for more storage space and storage of longer objects. Various viking ship cross sections can be seen below. I still need to build the arched "bulkhead/thwart" that partners.
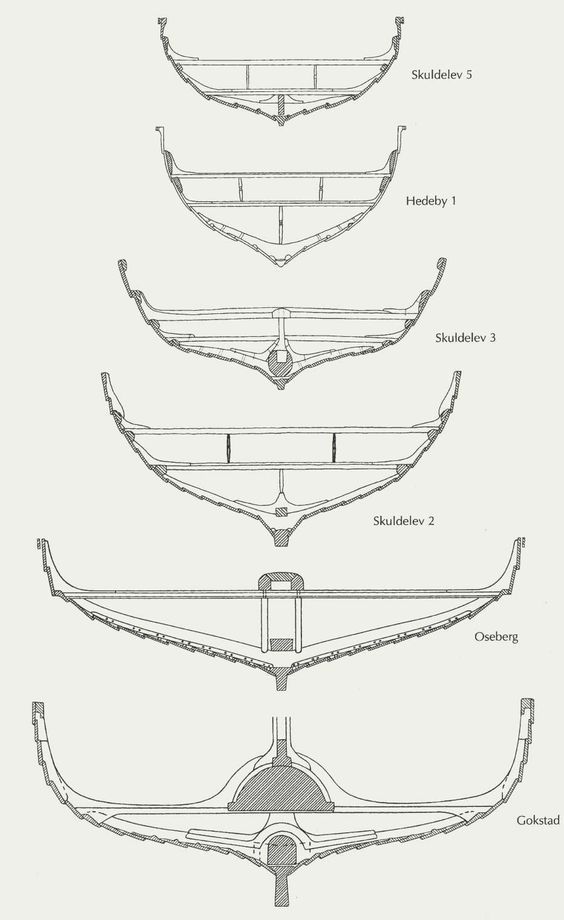
I found this image of viking ship hulls on a post on the internet but I cannot cite the original source, as it was not noted in the post. This is a helpful sketch of viking longboat cross sections.
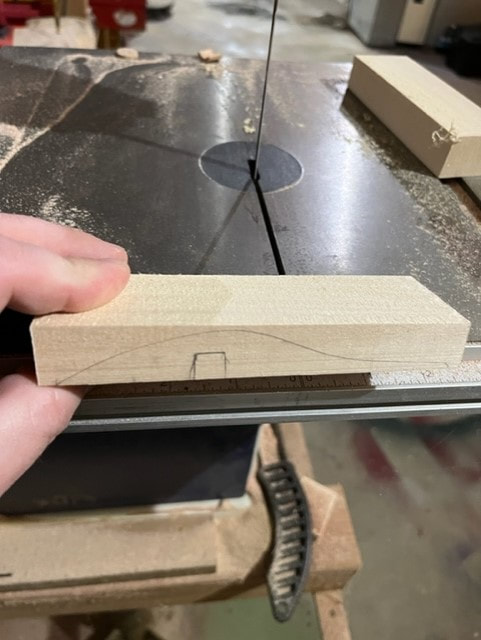
I bought a bunch of 1/16" solid basswood sheets to finish the bulkheads with, and to make the planks from. I am now adding a 1/6" strip to the tops of the bulkheads. As I go I am also carving down the bulkheads so that they taper to a point at their tops. The photo below shows the strips that will be the exposed tops of the bulkheads, and also what the carved tops of the bulkheads look like vs the uncarved ones.

Carvings and making custom basswood curved thwarts for the mast step.
Curved thwarts installed.
Planking the Oseberg Viking Ship Model:
Looking at the photo's of the Osebergs deck, I believe they feature random width planks. One can also see the orientation of the planks. I am planking my planks cut by hand to random widths, with a razor, from 1/16" thick sheets of Basswood.
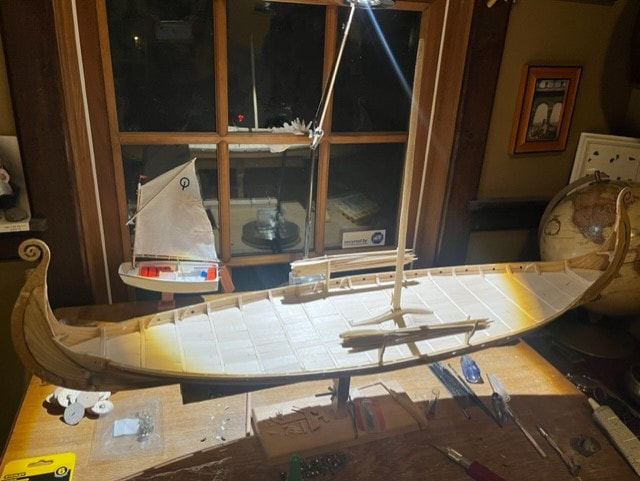
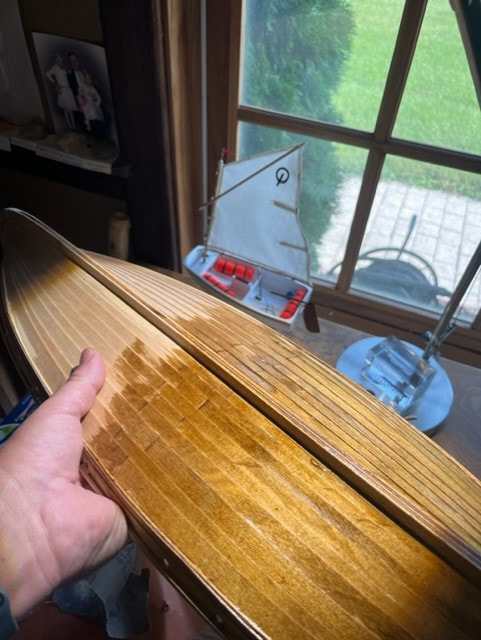
Solid basswood planking complete on my Oseberg Viking Ship model
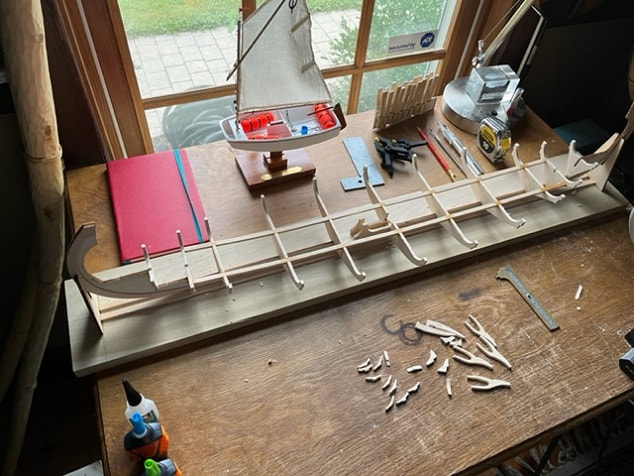
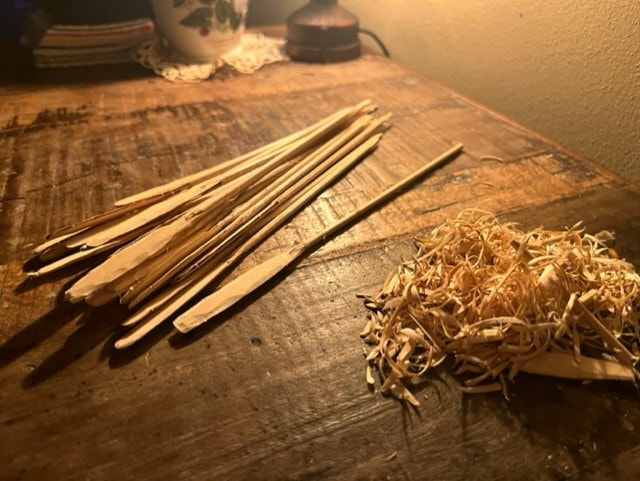
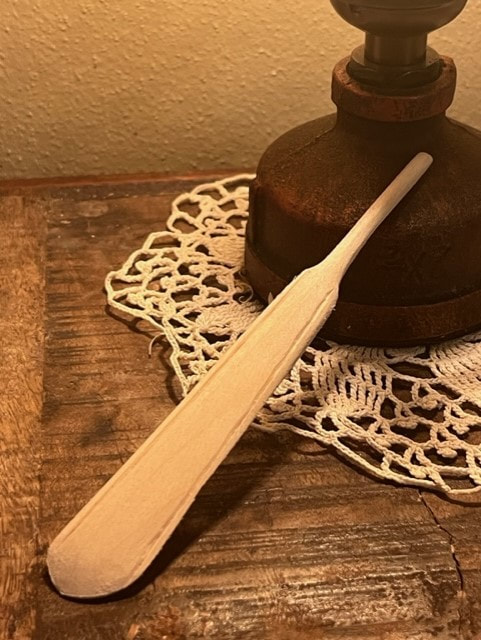
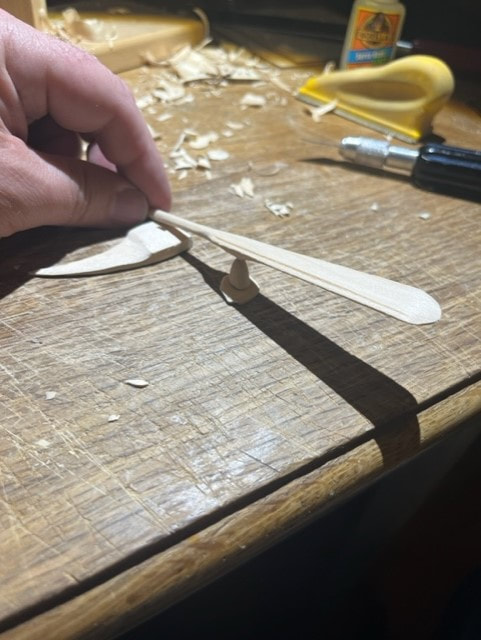
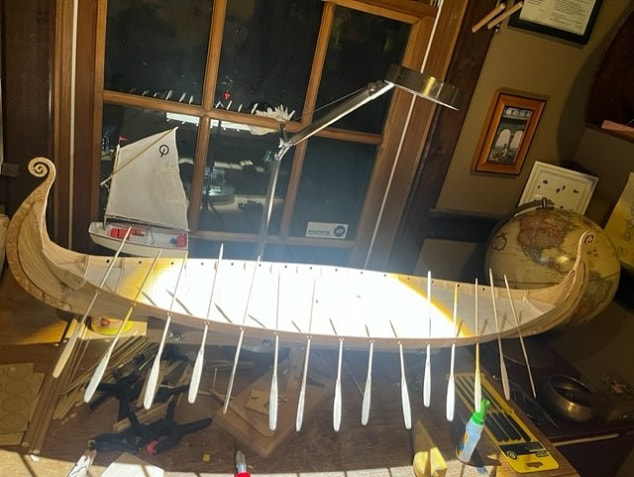
Making the oars:
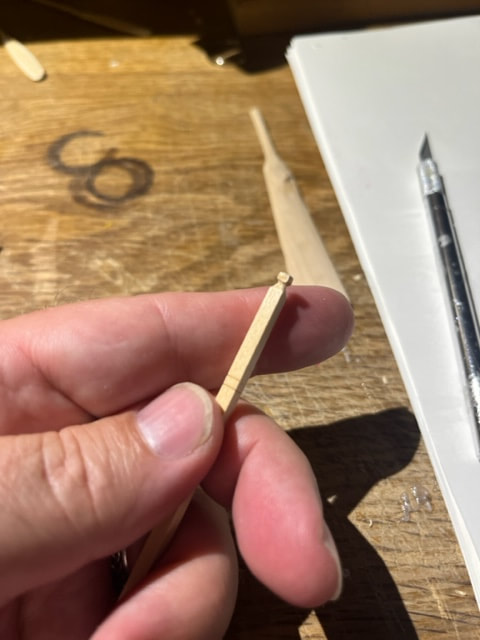
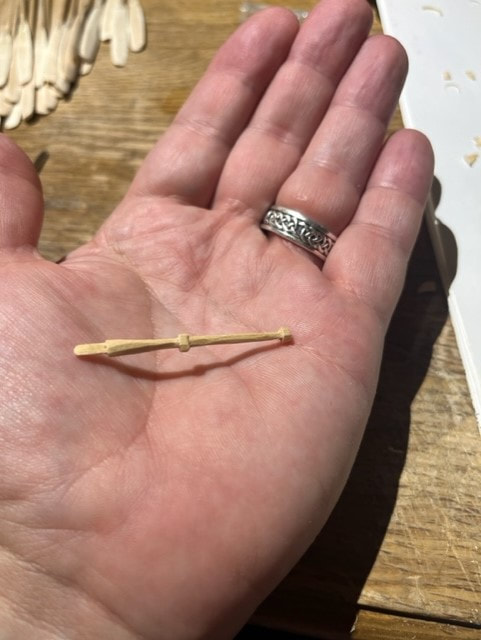
Repetitive task here to make 30 oars. From the photos I could find, the handle-end of the viking oars were just simple tapered ends, so that's how I made mine. I used the components from the kits, tapered the oar blades with a knife, and then sanded them.

I cut the dowel all to length based on the prints, then cut out the oar-blades.
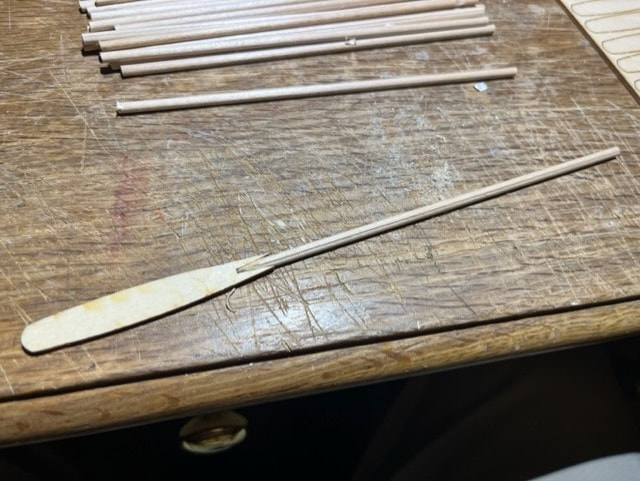
I tapered the ends of oar shafts and glued the blades on.
Tapering the edges of the blades prior to sanding smooth.
Oars sanded and ready for 1st coat of stain.
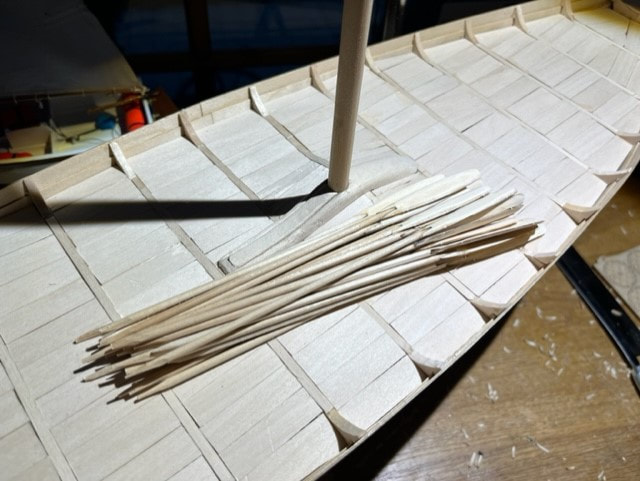
Making the Oseberg Mast and Spars
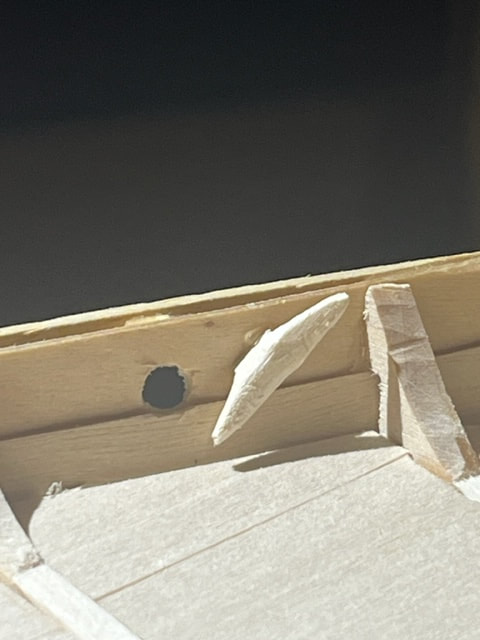
First I opened up the round hole in the partners to precisely fit the mast.
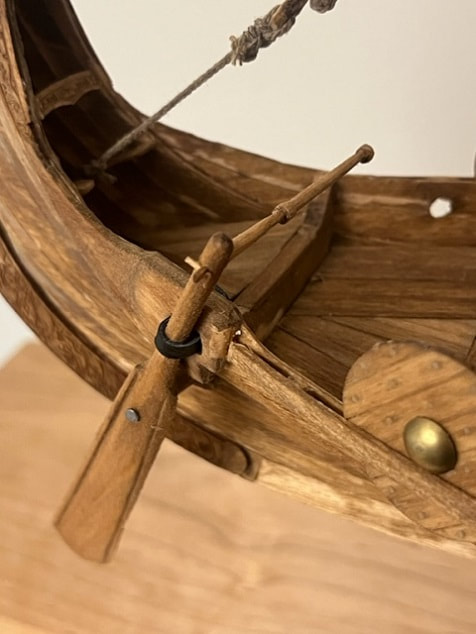
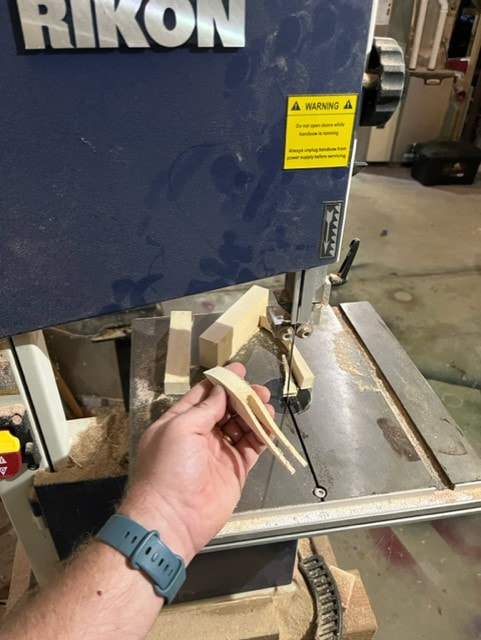
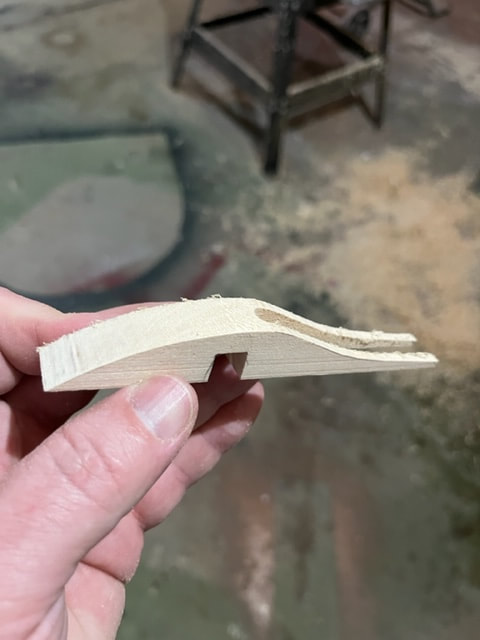
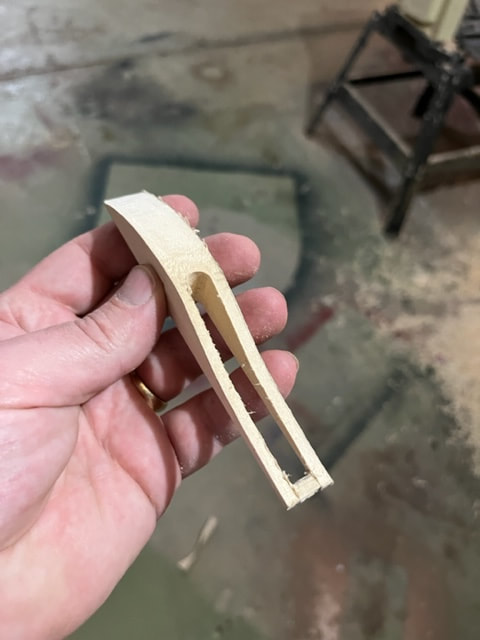
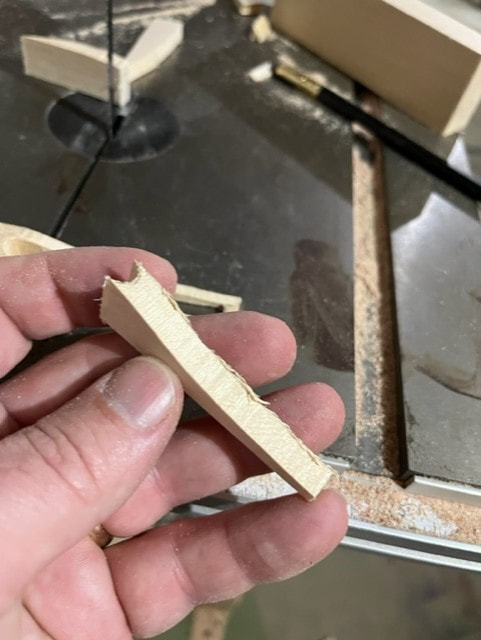
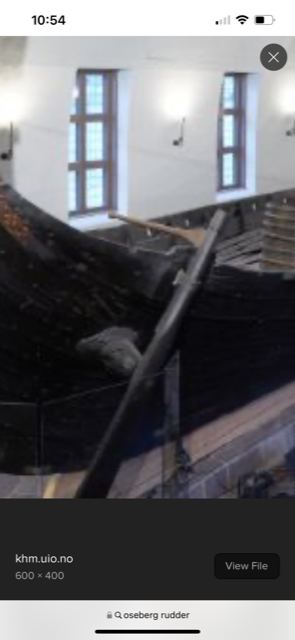
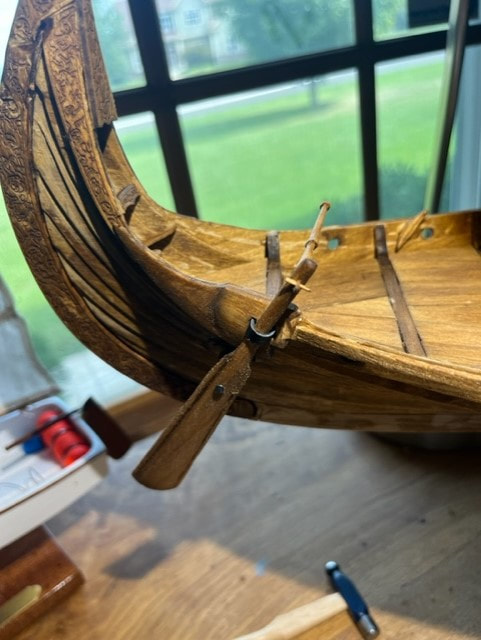
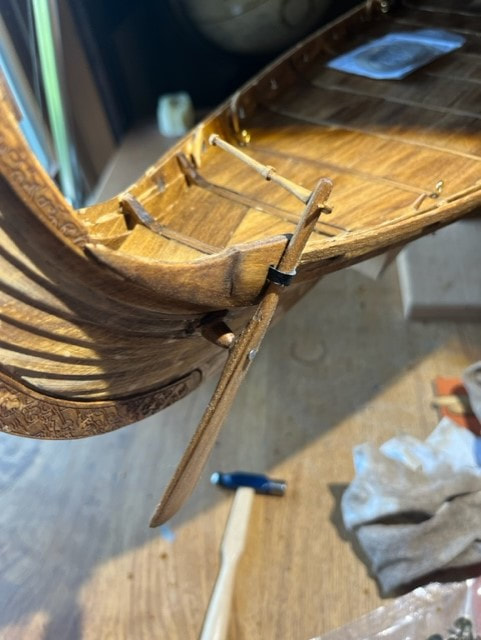
Oseberg Viking Ship Model Rudder and Tiller Assembly
Below are some photos of the Oseberg ship rudder and tiller and how they were attached to each other and the ship. For these components, I carved my model pieces from solid basswood rather than using plywood cutouts from the kit.

Oseberg model rudder carved from basswood.
Oseberg Model Rudder Assembly
Starting to carve the tiller from bassword.
Carved Oseberg tiller
pinned mortise and tenon style joint
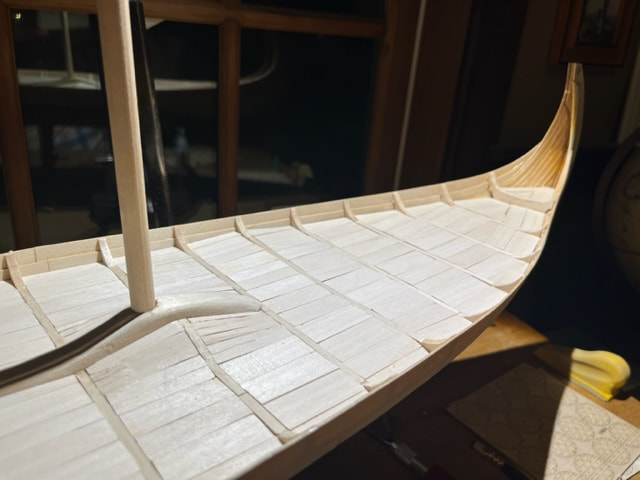
Finishing the Hull:
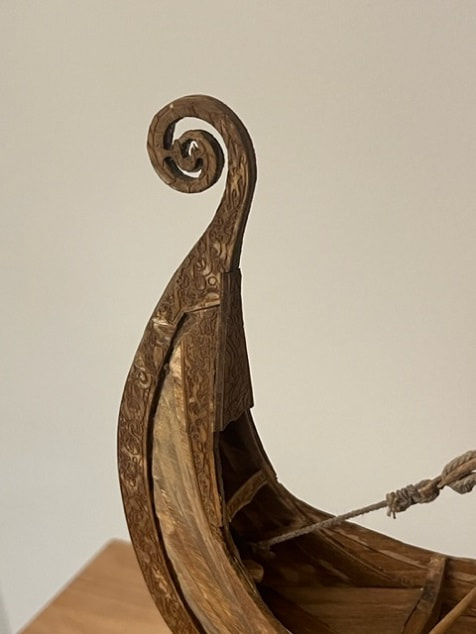
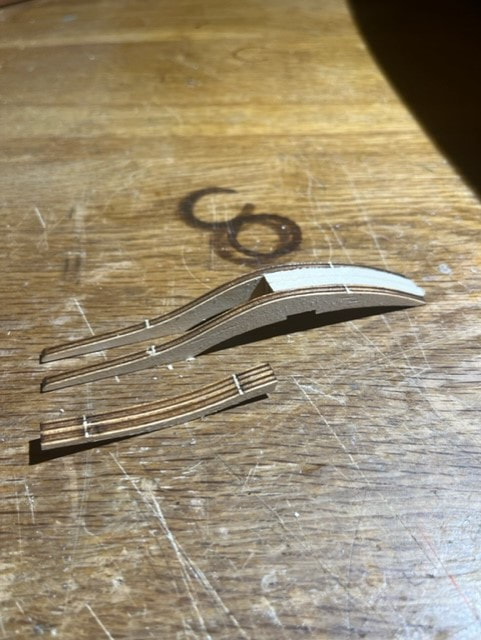
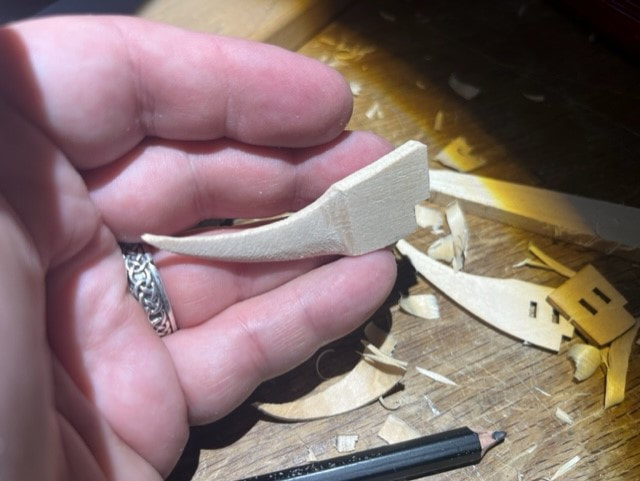
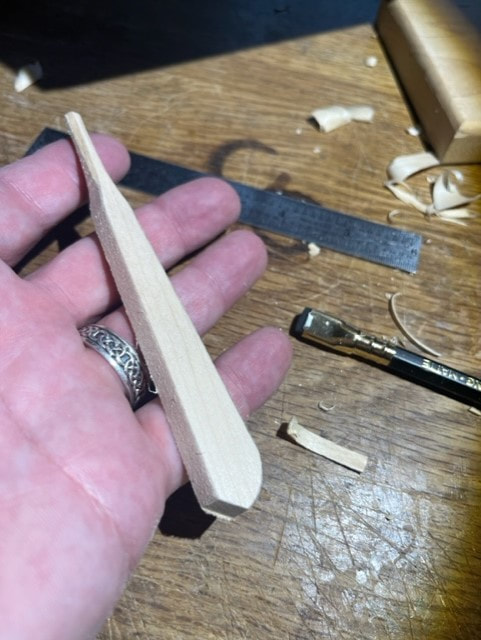
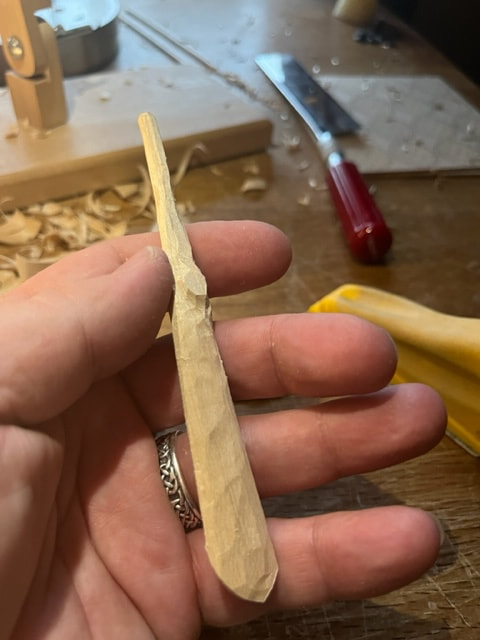
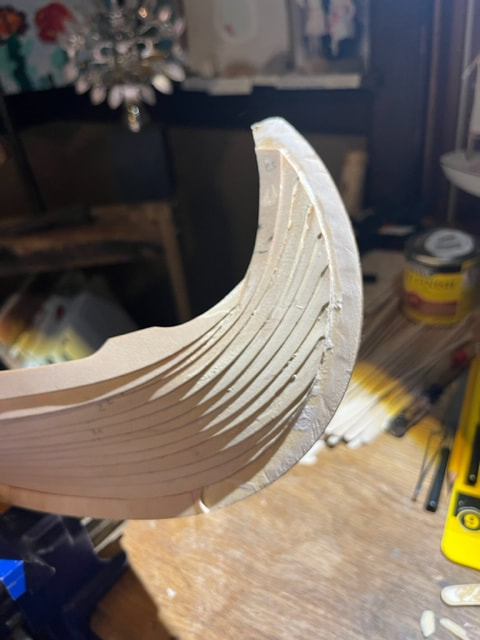
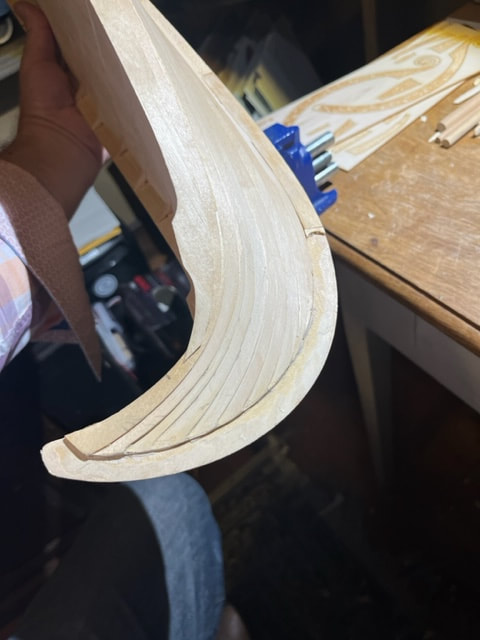
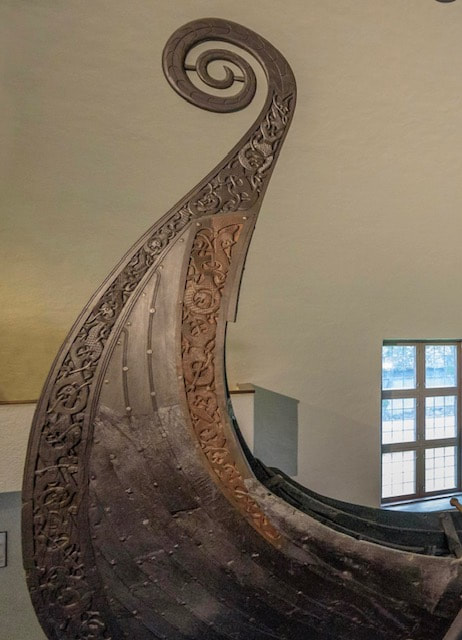
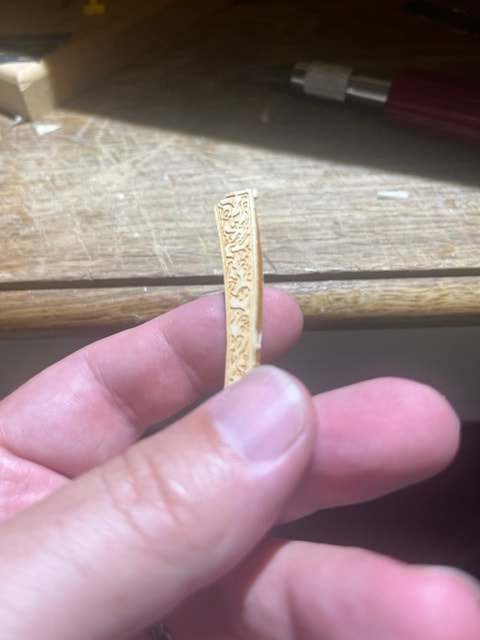
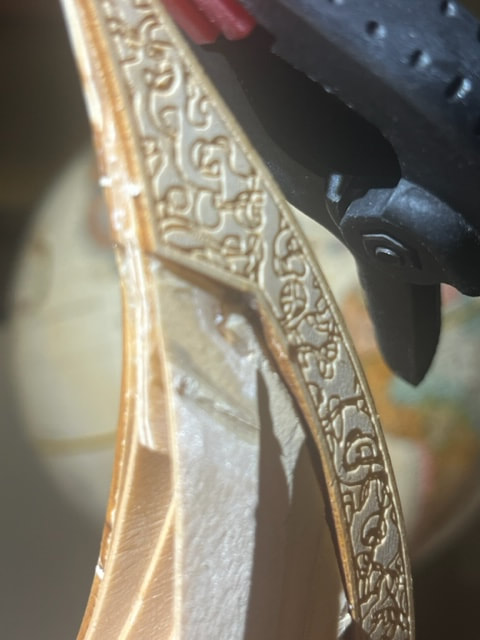
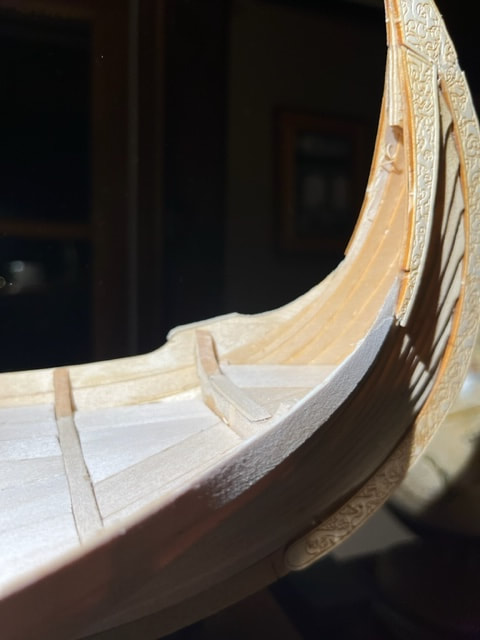
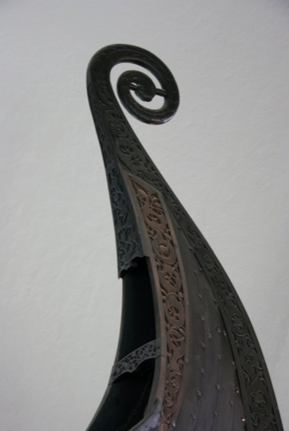
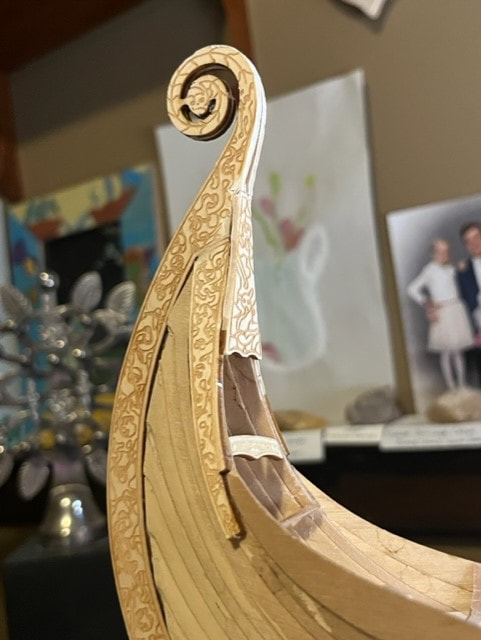
A prominent feature of the Oseberg ship, maybe THE MOST prominent feature, are the tall carved stems at the bow and stern. If one looks at the actual ship, these are quite thinner and more tapered fore and aft than what the billings kit suggest in their design. Building to the design of the kit will build a nice model, but the bow and stern will be very thick and blocky vs the Oseberg itself. I like many others before me, took the time to carve away the frameworks under the bow and stern carved pieces to result in a finer stem and stern.
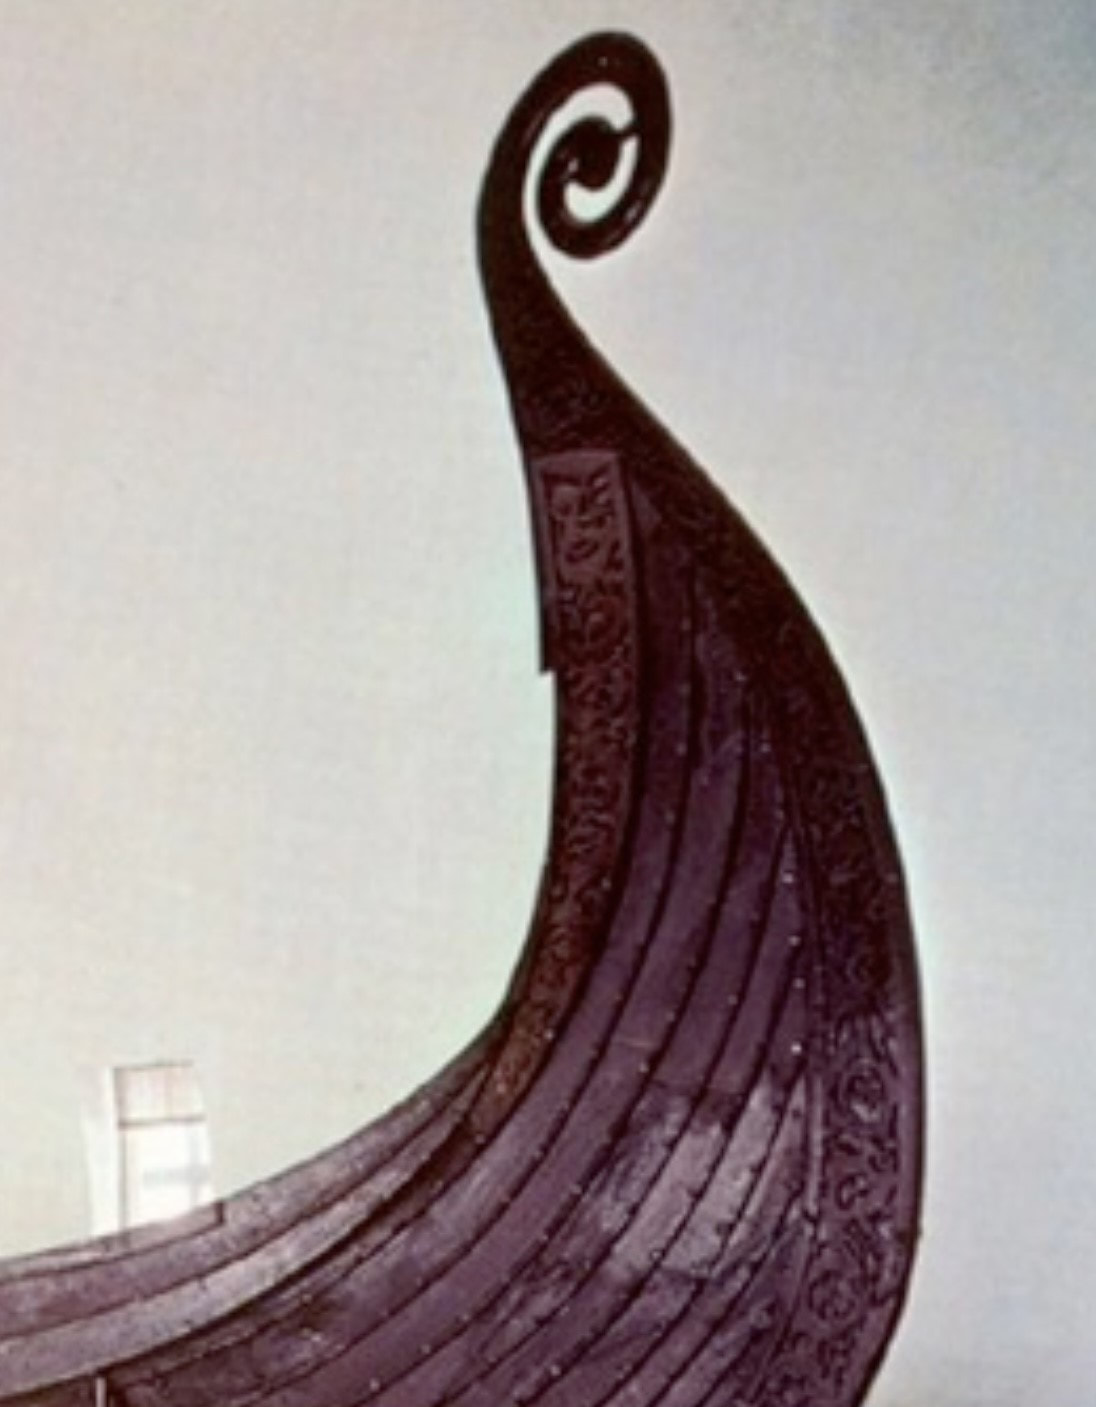
Here is the carving at the peak of the bow on the actual ship
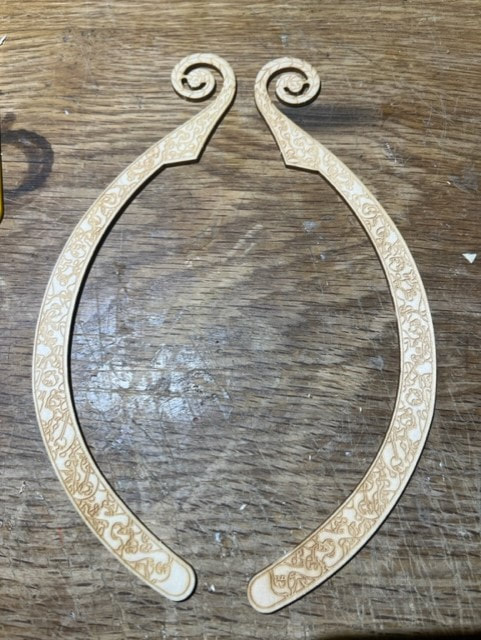
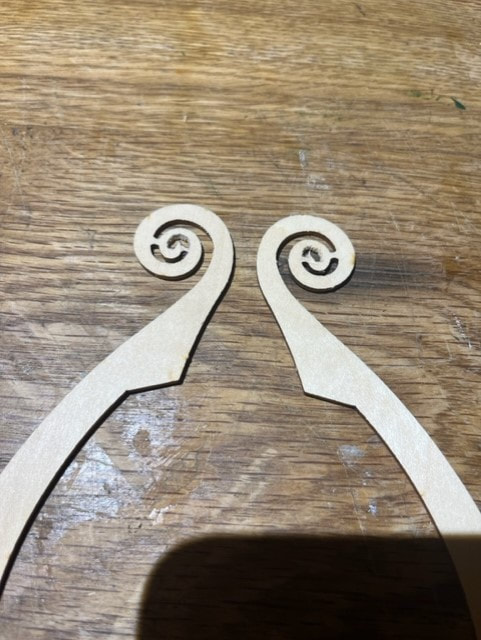
And the bow stem carved pieces from the kit. Very nice.
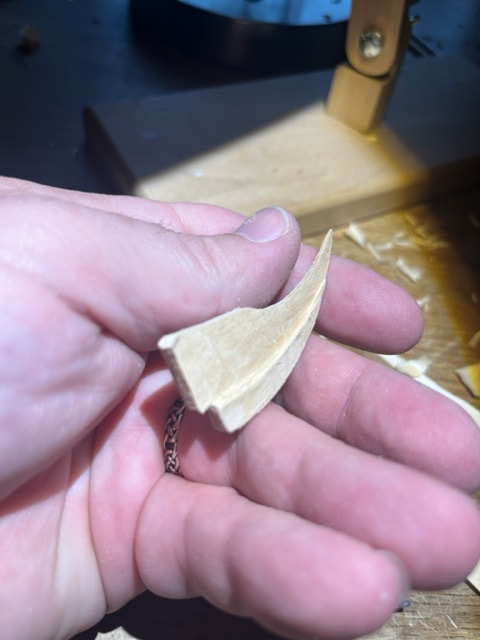
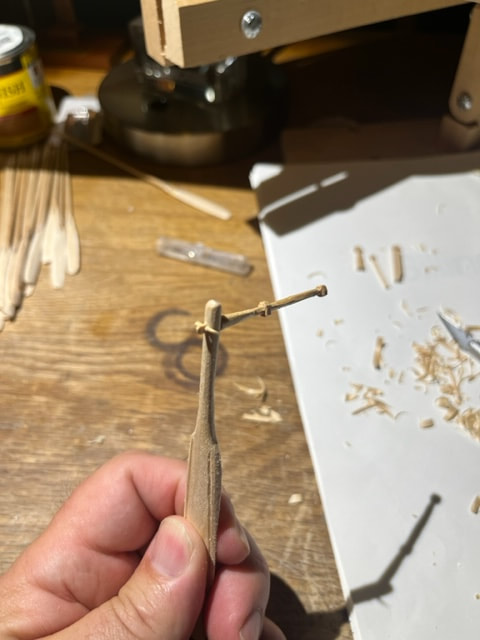
Here is the tail of the dragon, the stern of the ship. This piece will require carving the kit pieces to look like this.
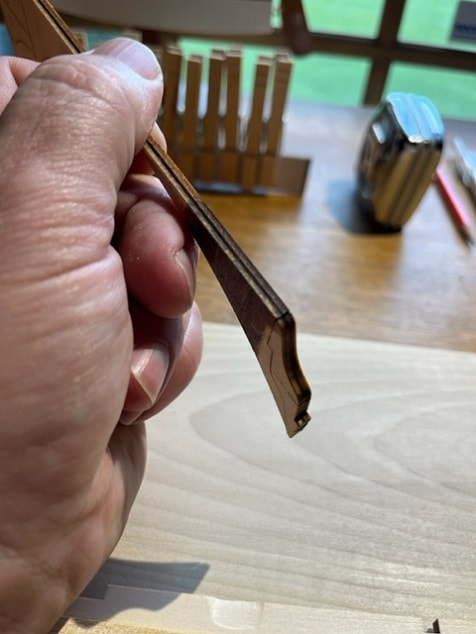
I used a scalpel to carve these stern posts to look similar to the real ship.
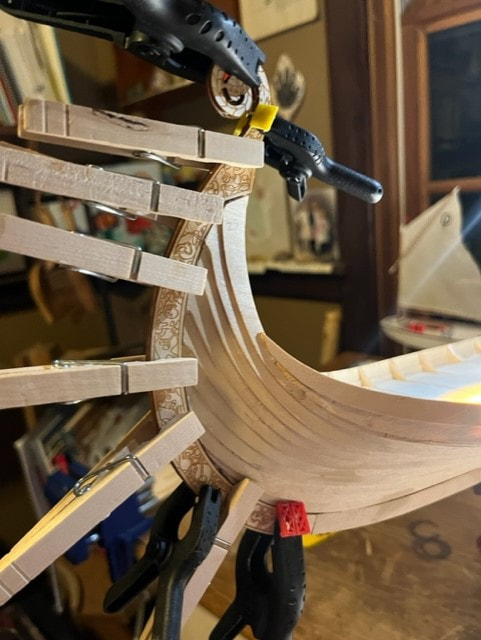
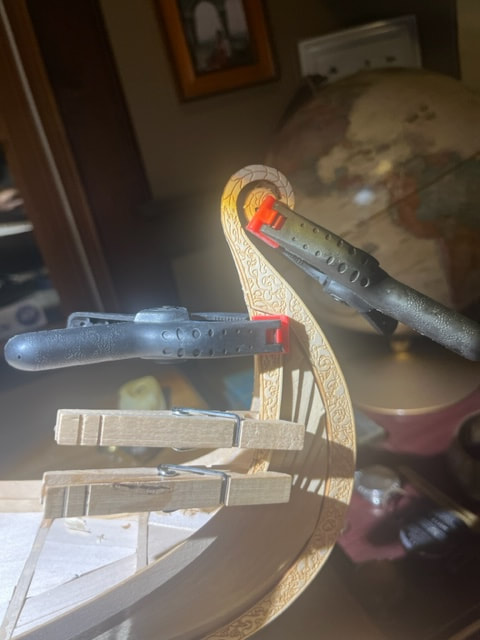
And finally, gluing up the stem and stern leading edges to the ship!!!!
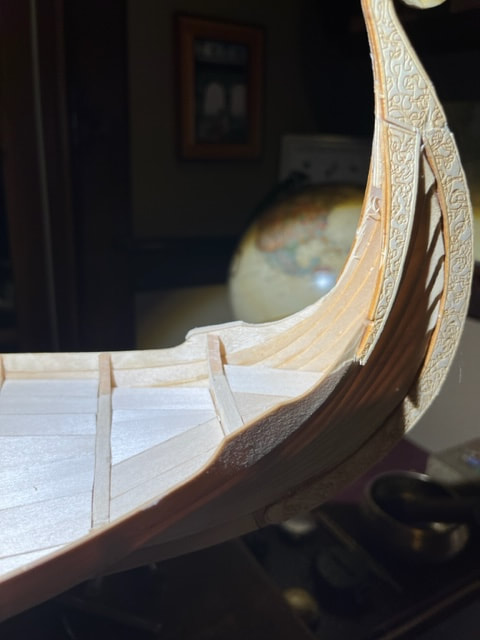
Trim pieces must be tapered down to be flush with the stem and stern pieces.
I also trimmed down the plank as shown so that the carved trim piece will be flush with the bow carved piece.
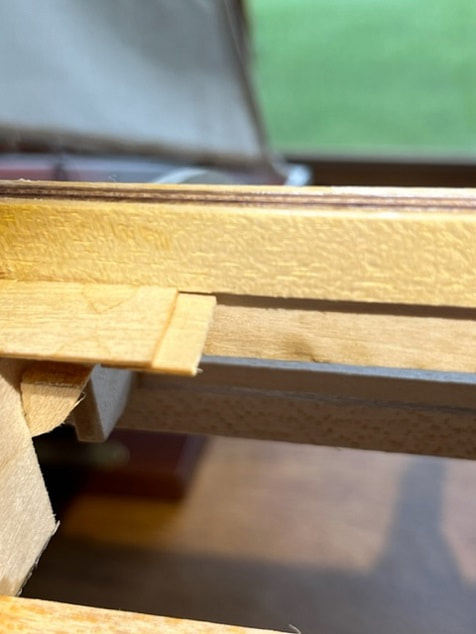
Here you can see the planks on the starboard and port sides both with the raised part designed for the rudder gear. Only the starboard side should hare this raised plank section so I carved it off the port side as seen below.
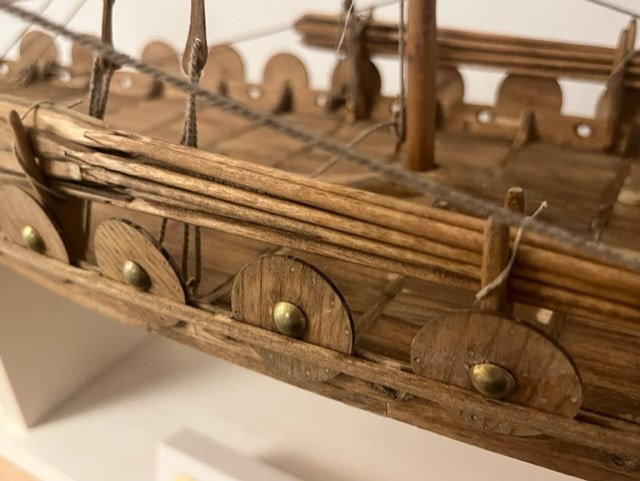
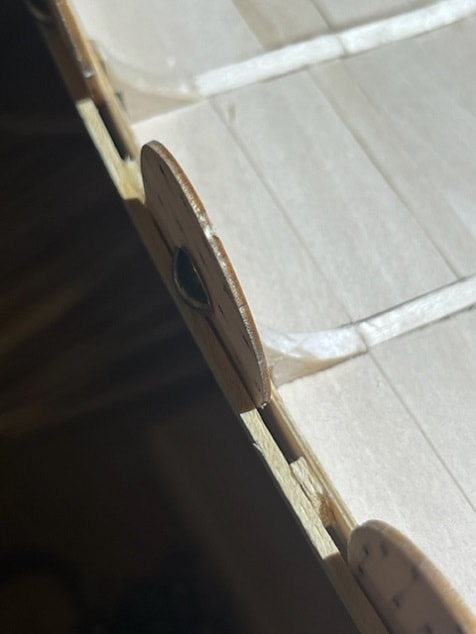
Making the shields and shield rail on my Oseberg Viking Ship model:


Spacer blocks for the shield rail made, tapered, using a hand snips.
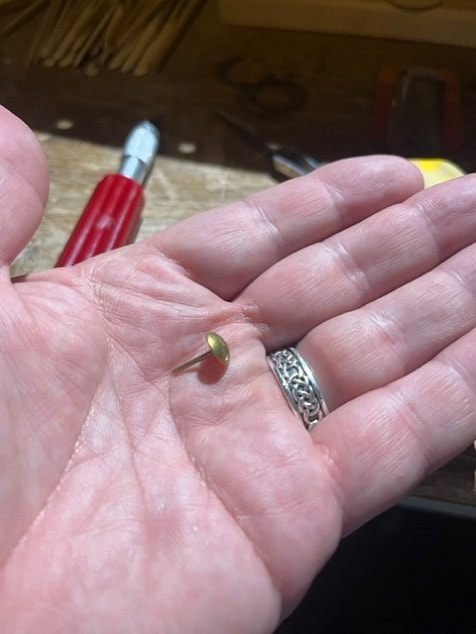
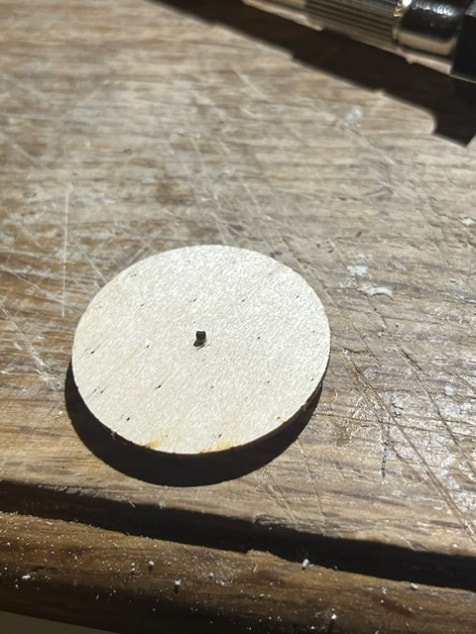
Tonight some work in the armory....shield building. First a note on a interference problem. I used what I thought was the right wood stock from the kit to make the little blocks above that create the spacing for the shield rail. Then I tapered down the ends of the shield rail and glued it in place. I then went to go install my happy little shields only to find that the shields were to thick to fit into the space. Uf-da. I wasn't about to rip off the rail so I sanded the shields down slightly and they not fit. Downside was that in the process of sanding, the little nail hole etches laser-scribed into the shield faces became actual holes. I will fill these with a nice darker color wood filler and will wind up OK. Just be careful to check the thickness of the blocking material vs the shield thickness. 3/8" diameter furniture upholstery tack used for center of shield; I picked a bronze type color, but I think the vikings used iron for these parts; I wanted the bronze color to look better with the stain I will apply so permit me this inaccuracy of metals......the bronze age ended at least 1000years BC and this ship is from 800AD. But then again the Vikings painted their shields so I am going with that the Vikings on this ship painted the shield centers this color. Now I have some cleanup and sanding to do on the shield rail and the shields.


Cleats , Spars and Final Trim Pieces
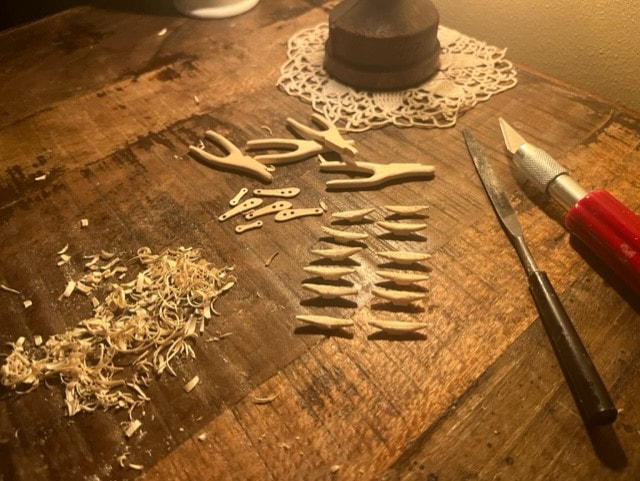
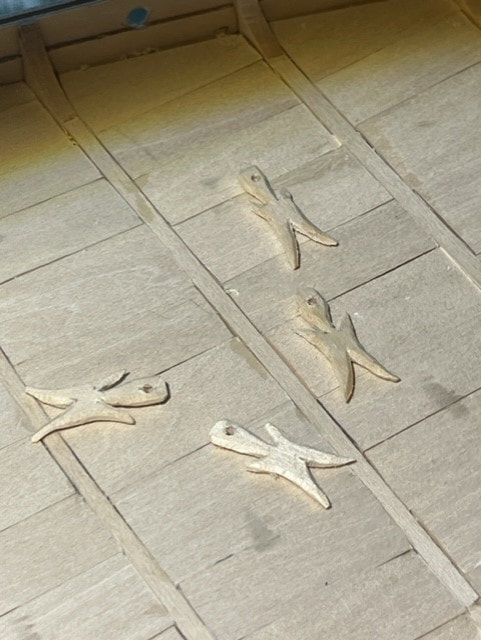
Carving cleats and oar racks for the Oseberg viking ship model!
Rough sanded parts. These were plywood in the kit, but I made these from solid basswood.
Final Trim Pieces At the Prow and Stern
Note which edges of these trim pieces are flush with adjacent woodwork and which sections sit stop adjacent pieces.
Final shaving and sanding needed!
Sewing the sails for the Oseberg ship model:
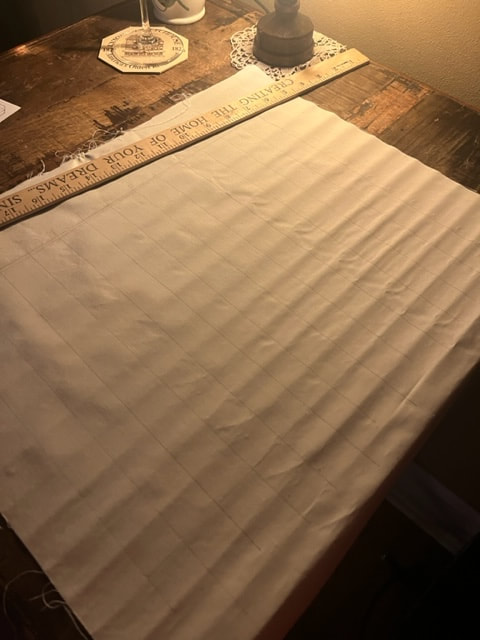
Drawing the sail onto the sailcoth from the kit. The kit sailcloth was rolled up, which is A-ok, but which created the creases you see in the fabric.
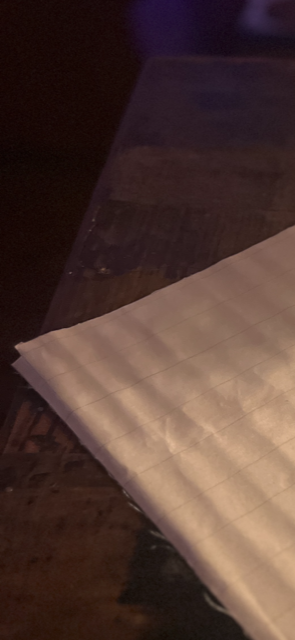
Cut to size with a sharp scissors including cutting out the notches in the corners wear the seams will fold over.
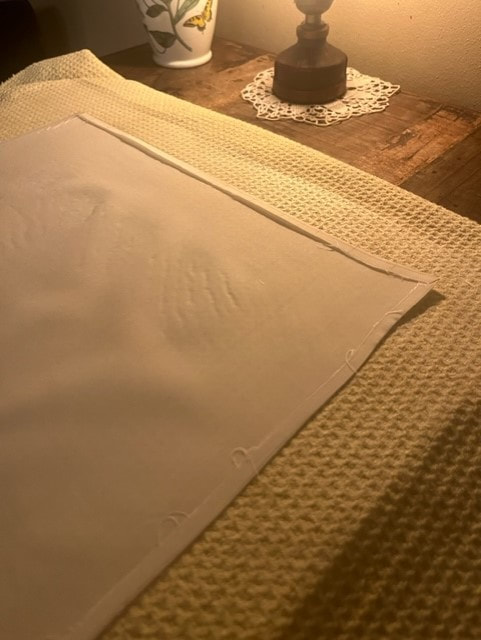
I used an iron to flatten out the fabric and more importantly to iron the seams folded over to make it easier to sew.
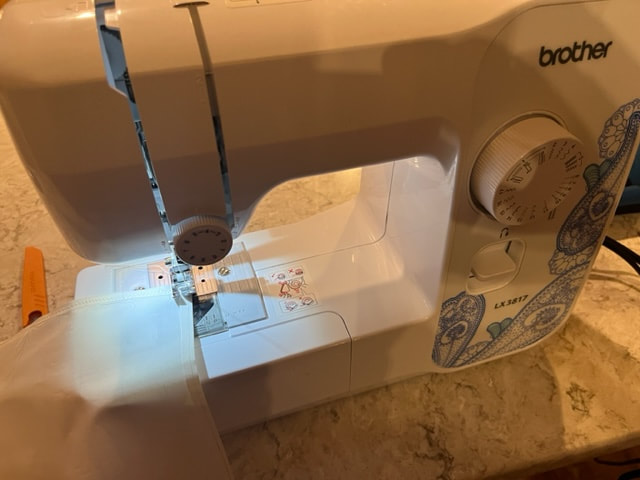
Sewing the sail on our sewing machine.
Stitching of the sail on the sail for my Oseberg model.

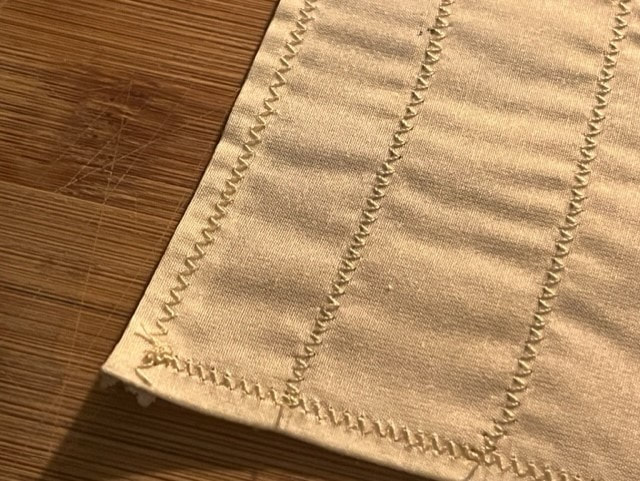
Here is my sail for the Oseberg. I will be leaving it all white with the stitching in tan thread as shown.
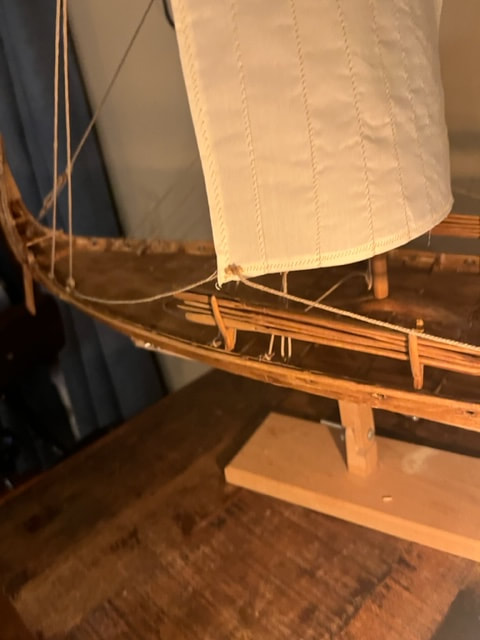
Installing the rudder and staining the ship before rigging:
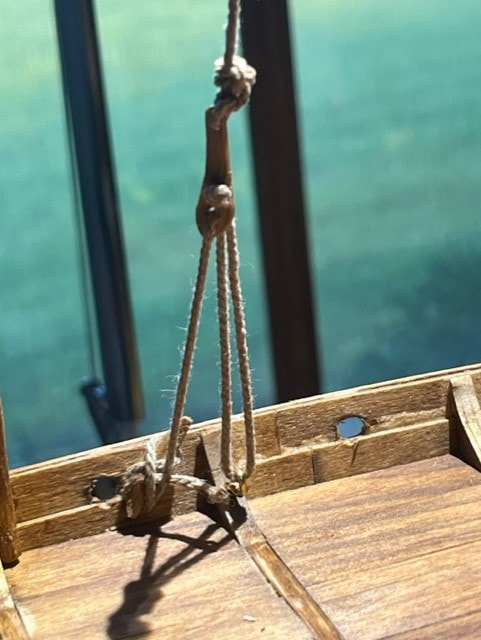
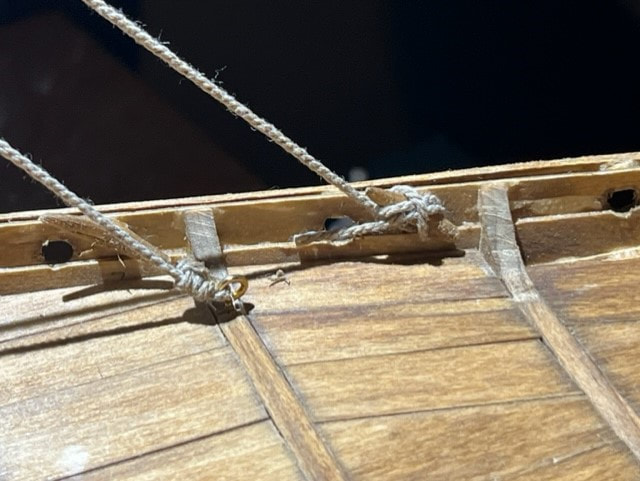
Carved the standing rigging line cleats from basswood.
Ship is stained and I installed the rudder. I went to the hardware store and got a longer steel nail as the one in the kit was not suitable.
Oseberg Viking ship model rudder, installed.
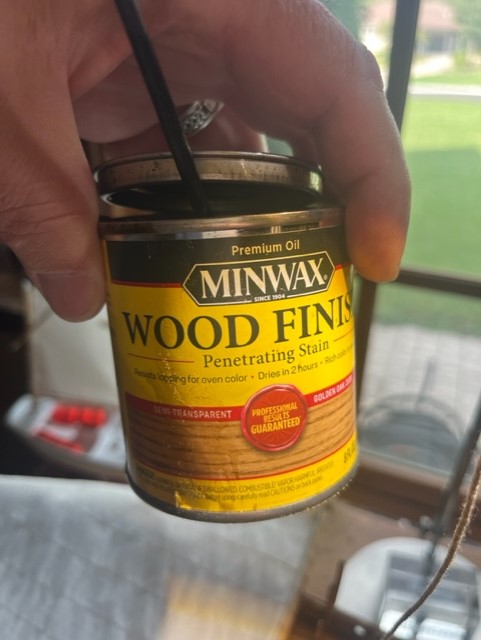
I am using Minwax Golden Oak stain on the ship.
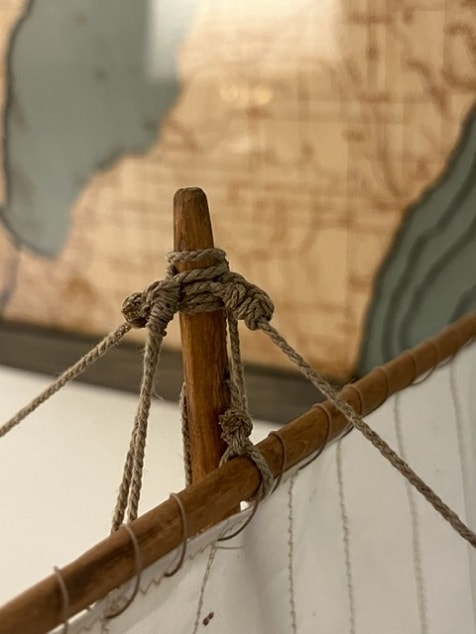
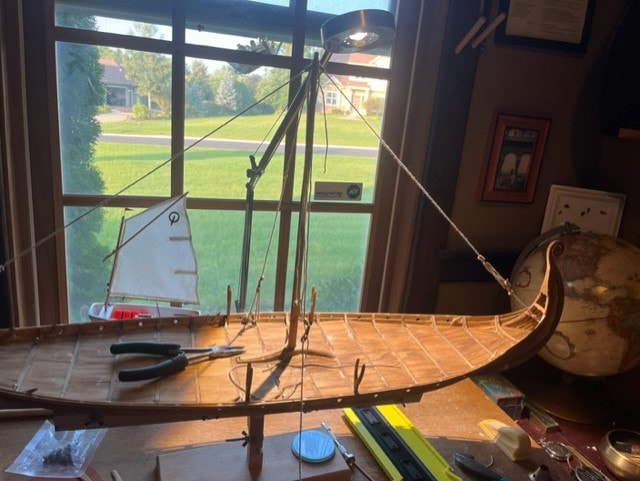
Rigging the Oseberg Viking Ship Model:
I used some smaller scale rope I had in stock for some lines, but mostly used the cotton rope supplied in the kit. I started rigging the ship using the very white rope in the kit but it was too bright white in my opinion so I took the whole spool of rope and dunked it in the can of stain and the pulled the rope out of the bucket through a rag to press the stain out and this resulted in a nice color rope for the ship.

Started rigging the ship and I didn't like the bright white rope.

Rope after staining it a darker color.
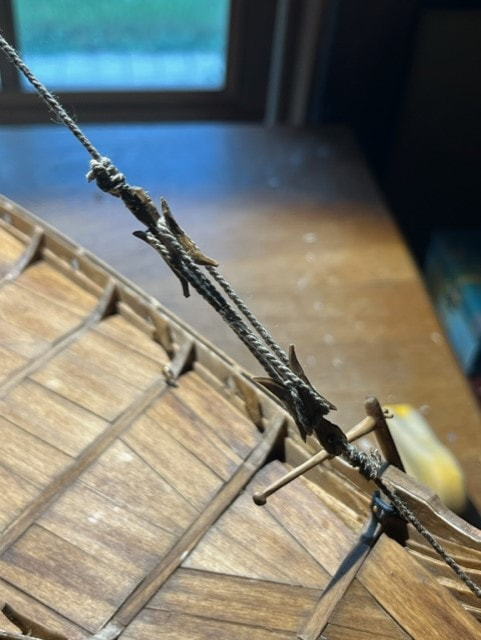
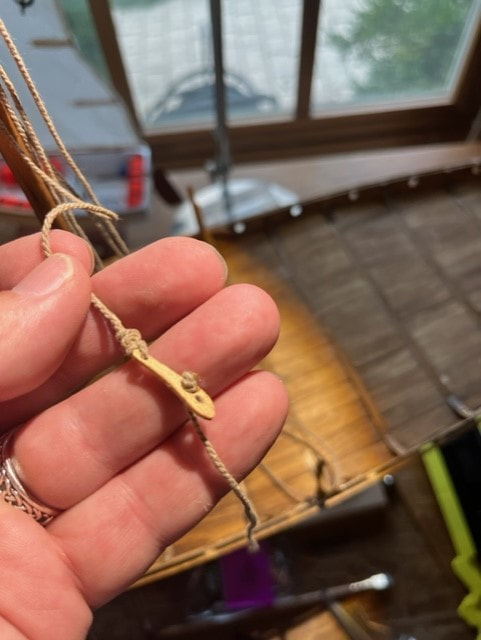
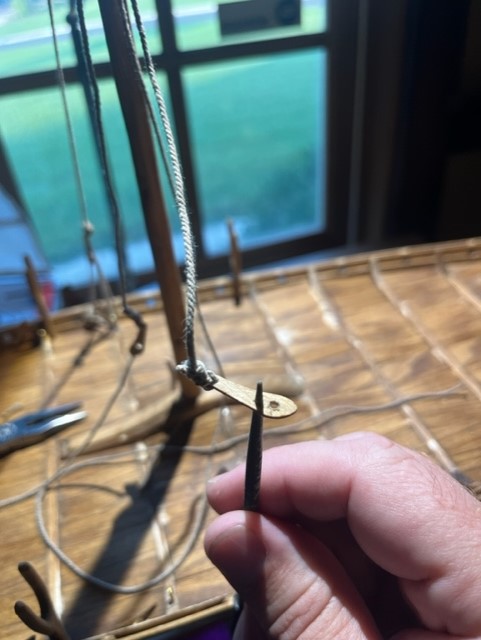
I used a mini round file to open up the holes in the fittings to accept the rope diameter.
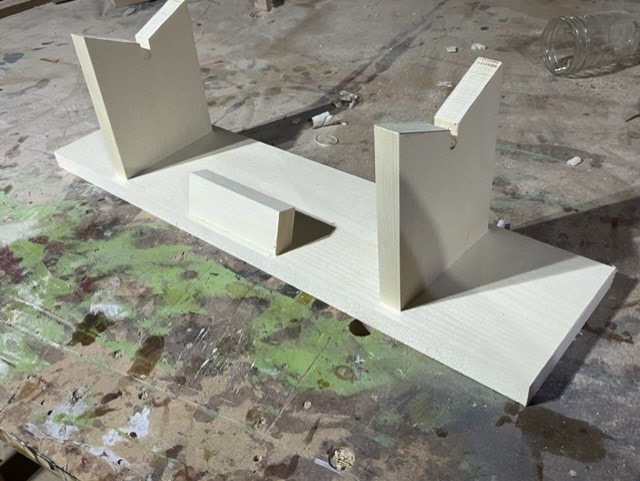
Making the base for the Oseberg Ship Model
I will make the stand for this ship out of Aspen which is a bright white clear grained Nordic softwood. I will add some celtic carvings for fun.
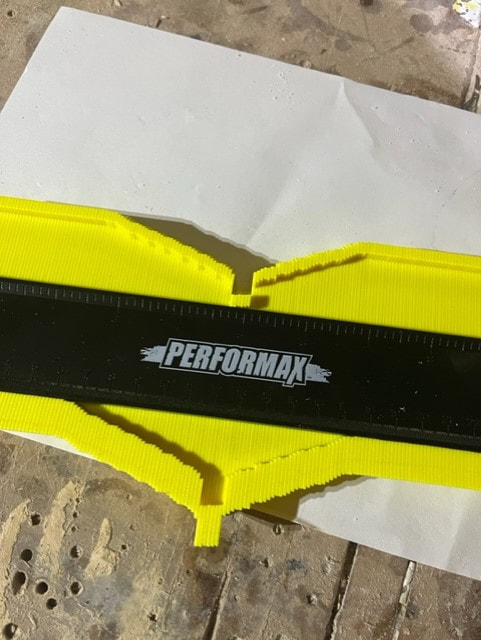
Used a profile gauge on the hull.

Celtic knot sketched out. I will carve one of these on each end of the base stand.
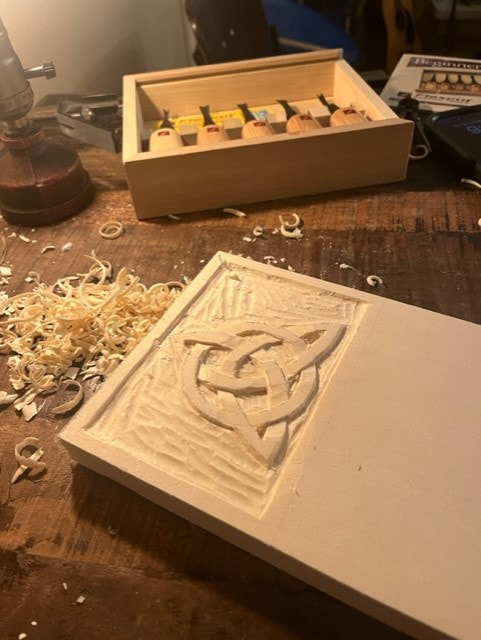
Carving in progress.
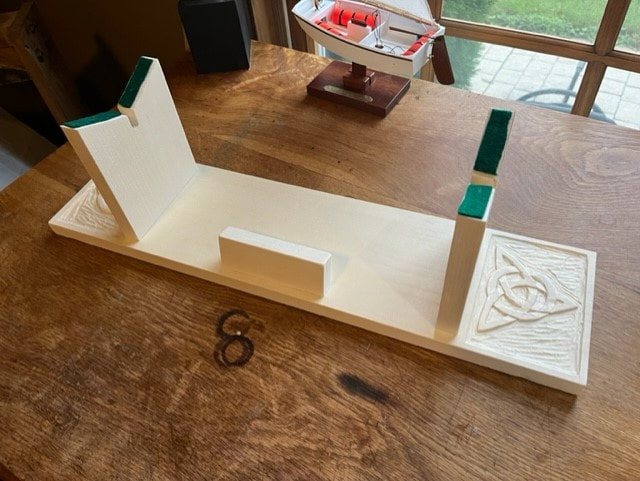
Completed, carved, ship model base , with felt liners on the hull support planes.
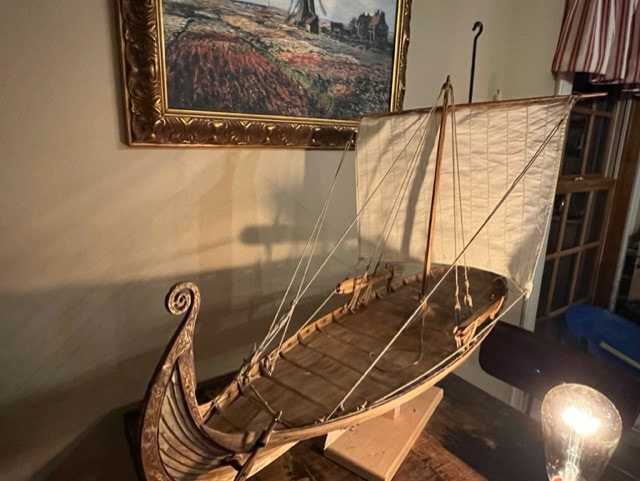
Photos of the completed Oseberg Ship Model: