With the hull painted and flipped back upright, I will now begin the rewarding and exciting process of mounting the hardware to the SCAMP's hull and deck.
Oarlocks
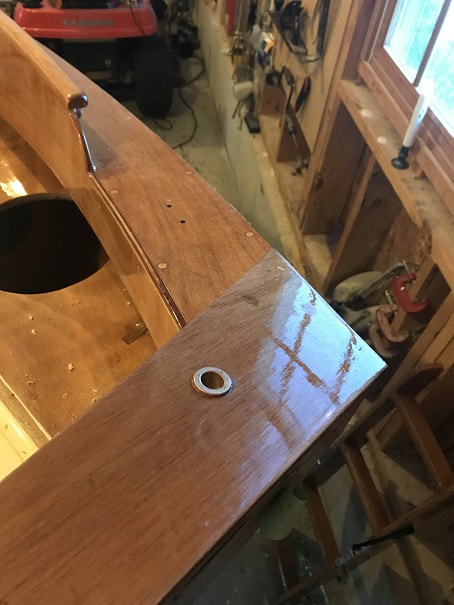
First, I installed the oarlocks. This photo shows the square-edged section of cockpit-coaming-cap where the oarlock is mounted. The coaming reinforcement gussets can also be seen, for more detail on those, you may visit the Deck and Coamings page. The oarlocks are bedded with 3M 4200, and secured with #10 bronze screws.
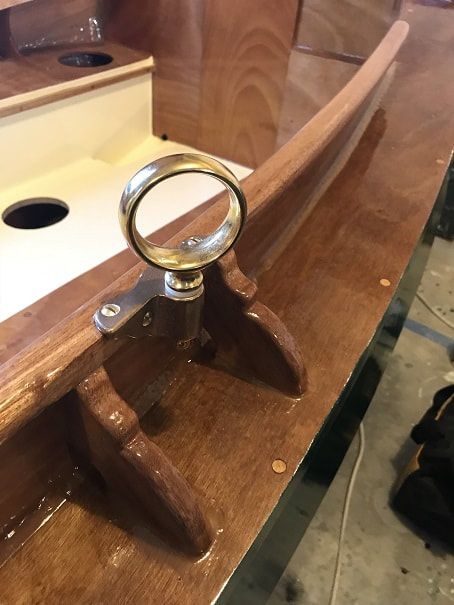
Bow Eye

I opted for a Wichard boweye. I added a 1/16" hard-rubber washer on the backside.
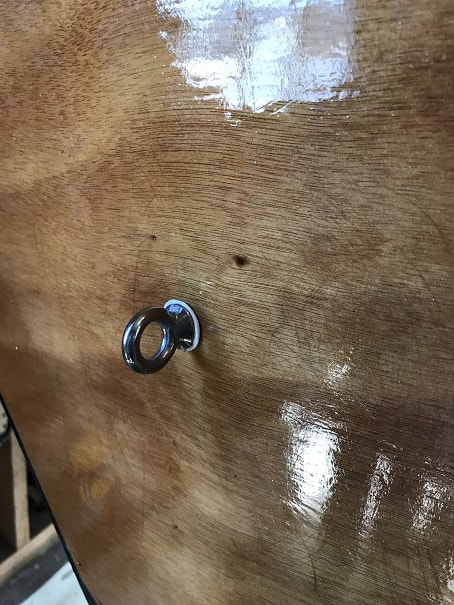
SCAMP Bow Eye. It a Wichard stainless steel bow eye. The hole was drilled oversize and filled with epoxy, then the final correct size hole was drilled through the epoxy. The boweye is bedded in 3M 4200.
Organizing and Preparing for Hardware installation
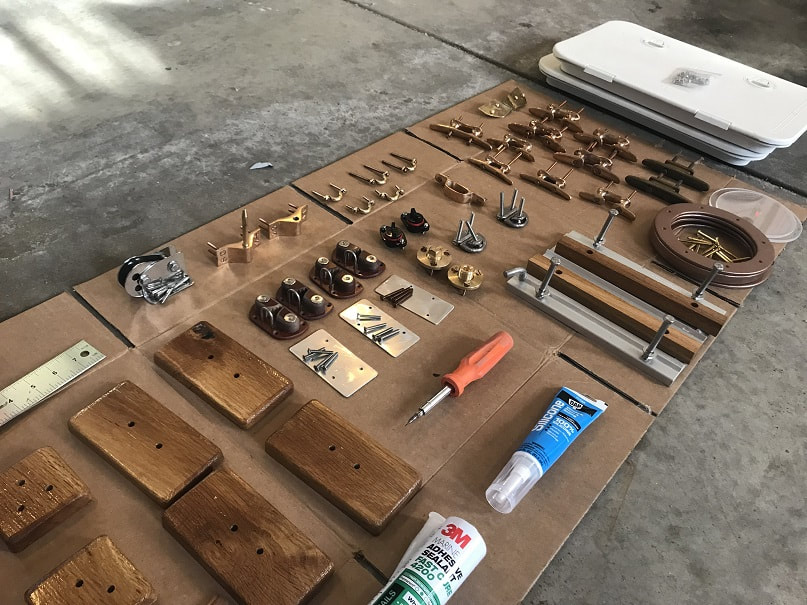
Before starting with bedding hardware, I spread each piece out along with its fasteners.
Installing Deadlights
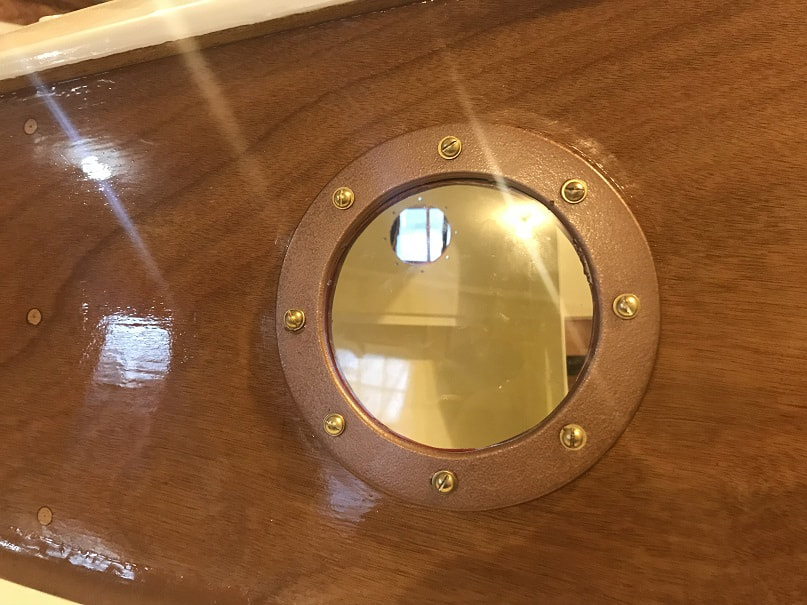
Bedded in 100% clear silicone. Through-bolted.
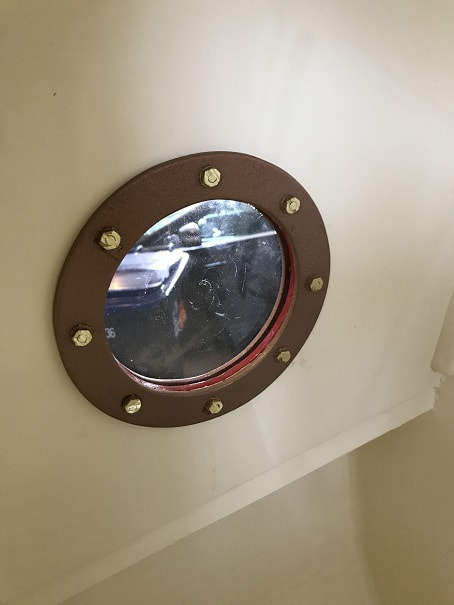
After tightening the nuts, I used a small portable abrasive cut-off-saw to cut and grind the screw-ends flush with the nuts on the inside. During installation I decided to go for some style points and paint the face of the I.D. of the veranda side with red paint, as seen here.
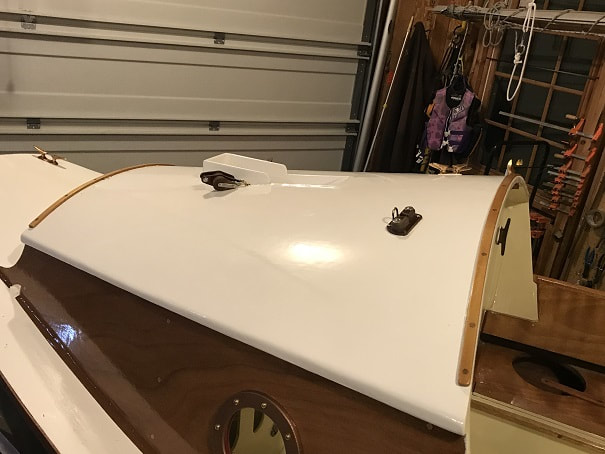
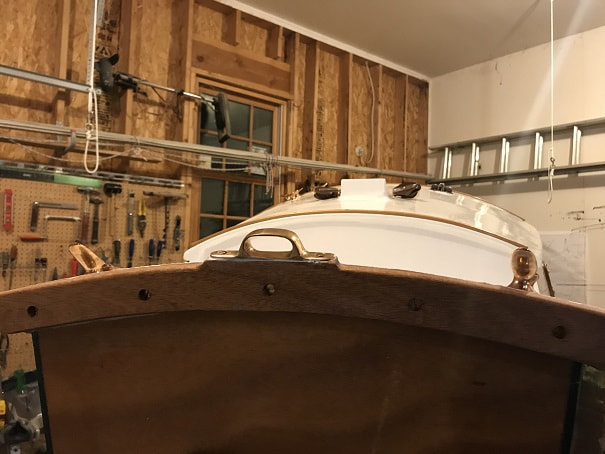
Roof Top Hardware

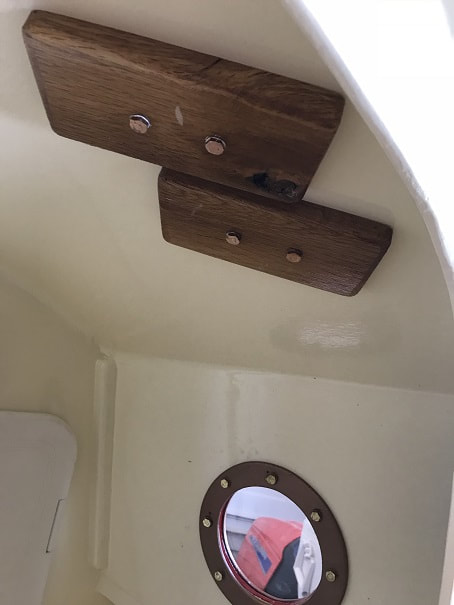
Anchor cleat to starboard, halyard cleat to port. Through-bolted, through 3/4" thick white oak backer plates on the interior. Silicon bronze fasteners. Bedded in 3M 4200.
Tufnol Camcleat (to secure the boom-downhaul) is through-bolted with backer plate on the roof interior, on the port-side of the roof. The chafe-protection strips, made of clear fir, can also be seen bedded onto the fore and aft edges of the rooftop. Bedded in 3M 4200, secured with silicon bronze fasteners.
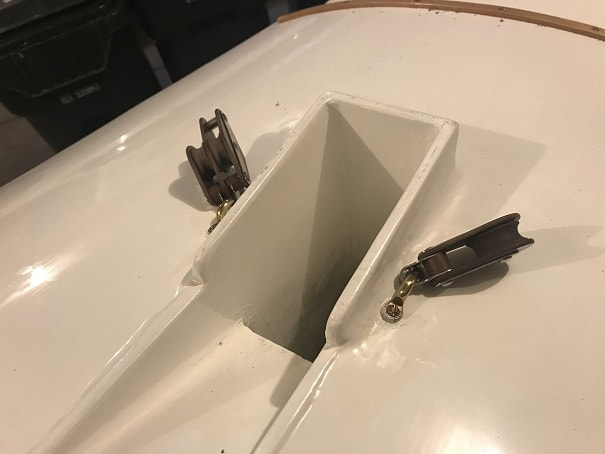
The lower boom-downhaul block is a Tufnol double block with becket, mounted to the roof top with a through-bolted bronze pad eye. To starboard is a Tufnol single block mounted through a small bronze padeye; this block is for the halyard. They are bedded in 3M 4200 and mounted with silicon bronze bolts through the roof and through the roof beams.
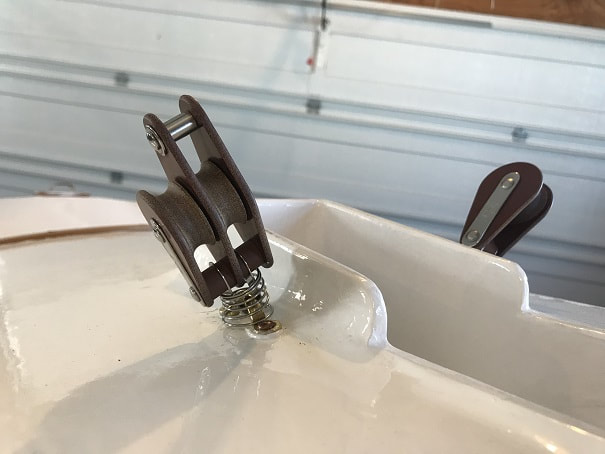
I added support-springs to the boom-down-haul and halyard blocks, so they would be less "floppy"
Protruding tails of screws and bolts have been ground flush with nuts.
Cockpit and Veranda Interior Hardware
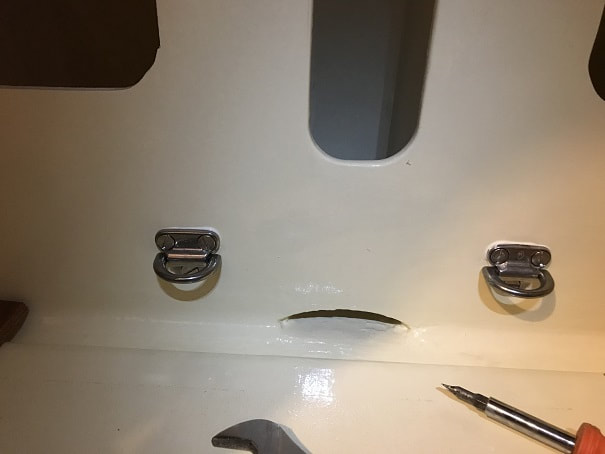
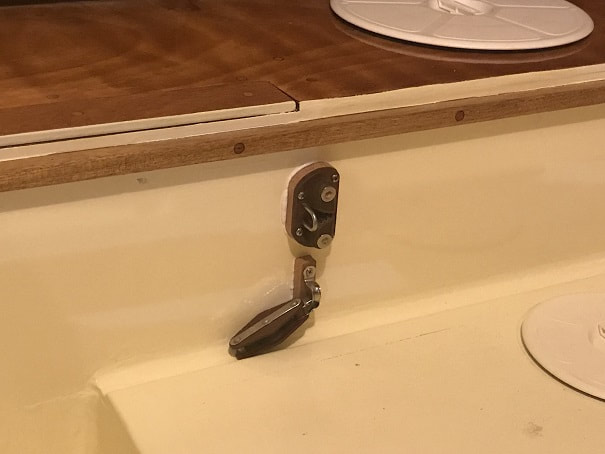
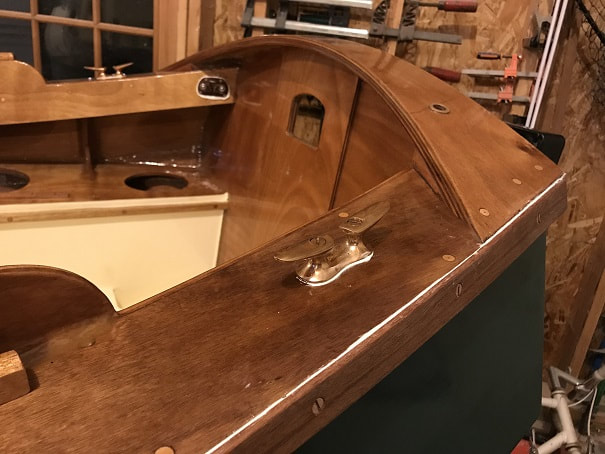
Two Wichard flip-up pad-eyes mounted at a strong spot in the veranda. I have two of these in a similar location in my Compac 16 and I use them for life-line/tether lines, or other tie-down uses. They are very strong and have 3/4" thick white oak backer plates on the other side. Bedded in 3M 4200 and through bolted with stainless steel fasteners.
3/4" white oak backer plate behind pad-eyes.
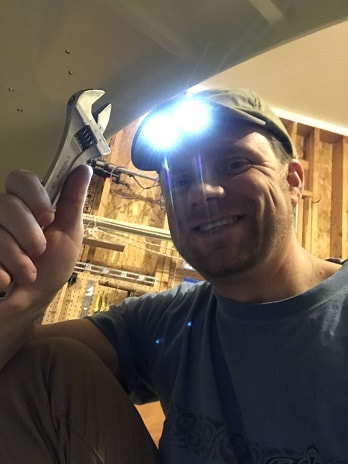
Even though the lights are on in the garage, it's night and the interior spots are still a bit dark when finding hardware and threading on nuts. This light-up hat comes in very handy.
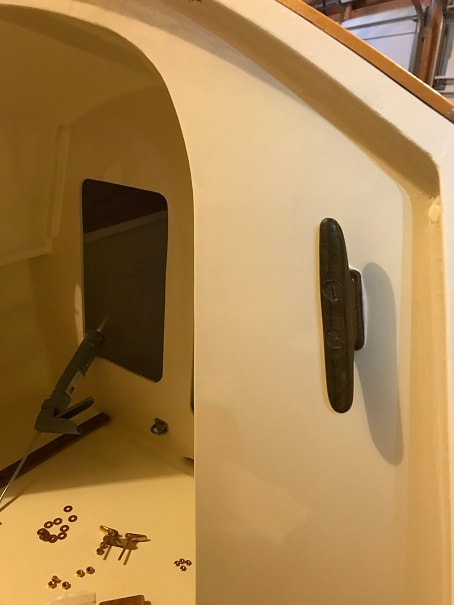
5" Palo Santo bulkhead cleat/mainsheet cleat. Silicon bronze through-bolts. Bedded in 3M 4200, with 3/4" thick white oak backer plate.
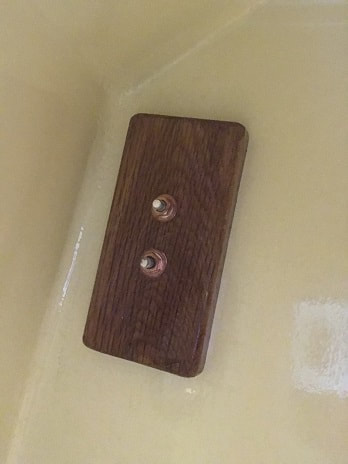
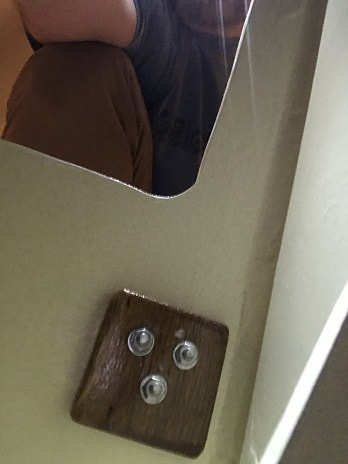
3/4" thick white oak backer plate behind bulkhead cleat. I will trim down all protruding bolt ends in the veranda. The light reflection kind of makes the bolts look like stainless steel, but as can be seen in the two photos above, they are silicon bronze.
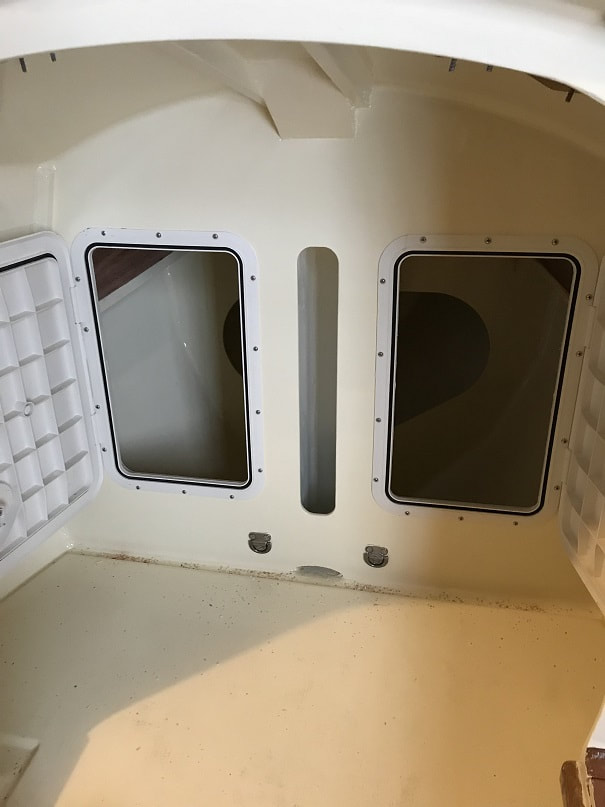
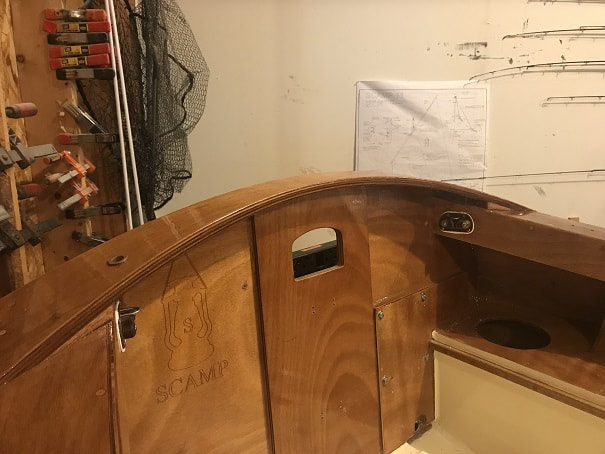
Bomar 1320-WT hatches mounted into the bulkhead in the veranda; bedded in 3M 4200 and mounted with stainless-steel screws.
SCAMP Centerboard Uphaul Tackle and Rigging
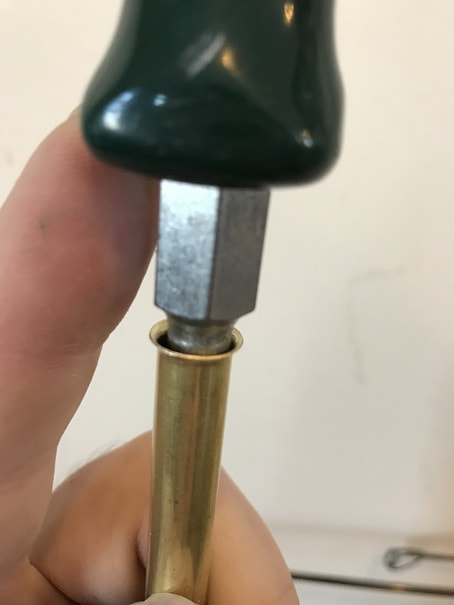
I went with a 3/8" diameter brass tube, I may regret brass vs copper, and I may regret using 3/8" instead of 1/4" diameter. Perhaps the 3/8" diameter that I chose, will leak water into the cockpit? I will let you know after I go sailing. I choose 3/8" diameter so that I would have a free-flowing line, and if I want to upsize the line to 3/8"later, my tube will accommodate. I flared it by pounding this flare shanked screw-driver into it.
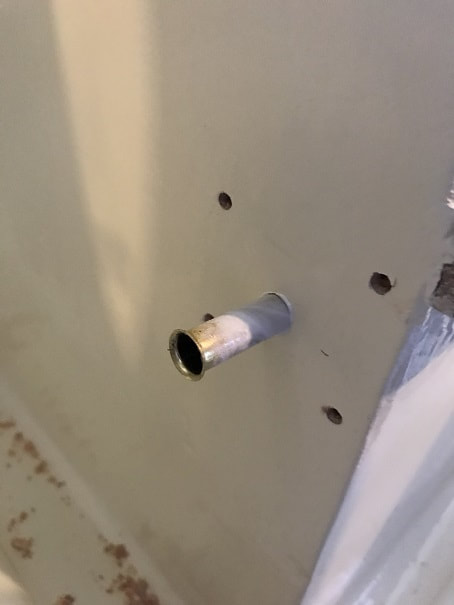
I flared one end, measured and cut the tube to length, coated it in 3M 4200, and pounded it into the hole I had drilled.
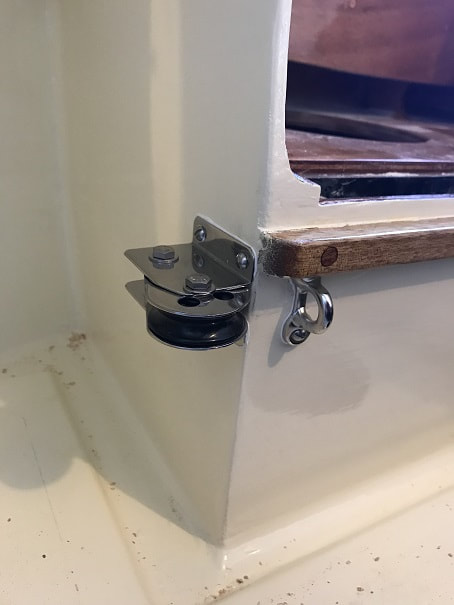
I should have more pictures, but after pounding-in the brass tube I used the same screw driver and various hammers and work, to flare the interior end of the tube, good ooze out of 4200 on both ends., Then I set to work mounting the pulley and fairlead shown here, in 4200 with stainless fasteners.
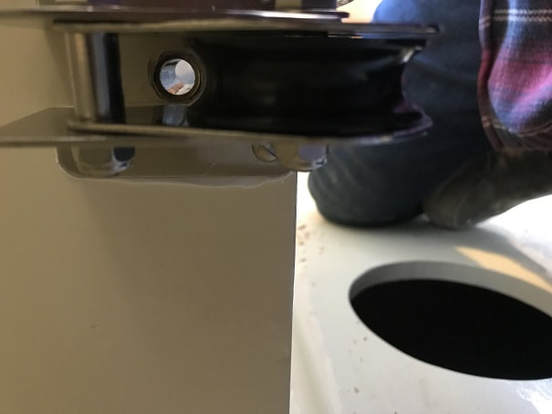
View from block through tube into the centerboard case.
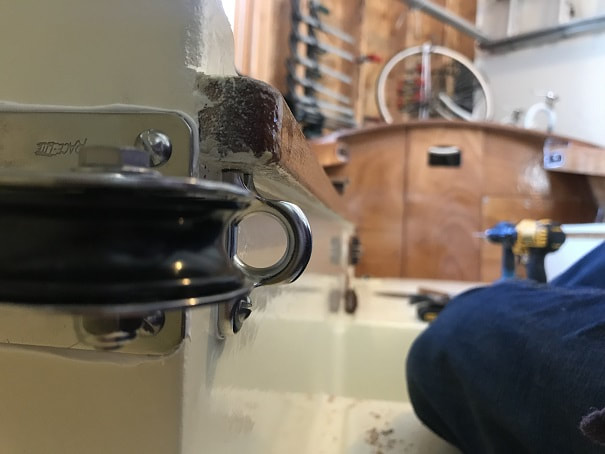
View from block and fairlead back towards the tackle.
For the centerboard uphaul tackle, I have mounted a Tufnol cam-cleat-with-bullseye and Tufnol single block-with-becket. Both are offset with 1/2" (12.5mm) hardwood blocks to keep the lines and fiddle from hitting the side, both bedded in 3M 4200 and secured with long screws into the aft centerboard case column.
Transom Hardware
The SCAMP Argo will have the following pieces mounted to the transom. All of these will be mounted into holes that have been drilled oversize, then filled with epoxy, then re-drilled with the final mounting hole.
- Two drainplugs
- Boarding ladder
- Rudder gudgeons
- Motor mount
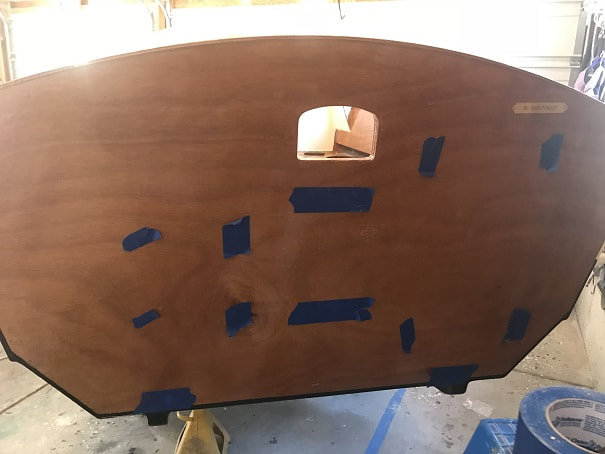
Here the holes in the transom have been drilled oversize. Tape was applied over the holes on the interior, then the holes were filled with thickened epoxy and taped over on the outside. Once cured, I will drill the final correct diameter mounting hole for the hardware to be attached.
SCAMP Argo's Motor Mount
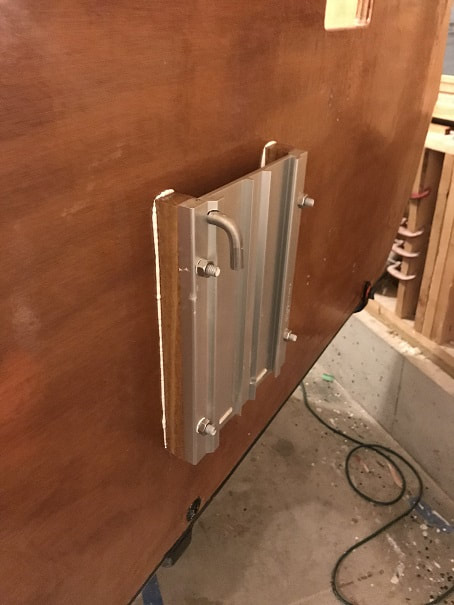
Garelick Motor Mount Adapter Plate #71053, allows the motor mount to be easily slid on or off. It is mounted using stainless-steel fasteners and is mounted through 1"x1" white oak spacers. Bedded in 3M 4200. The spacers hold the motor mount enough astern to allow the lever arm of the motor mount to function properly. I doubled the thickness of the transom in this location, per plans, to provide a strong anchoring location for the motor.
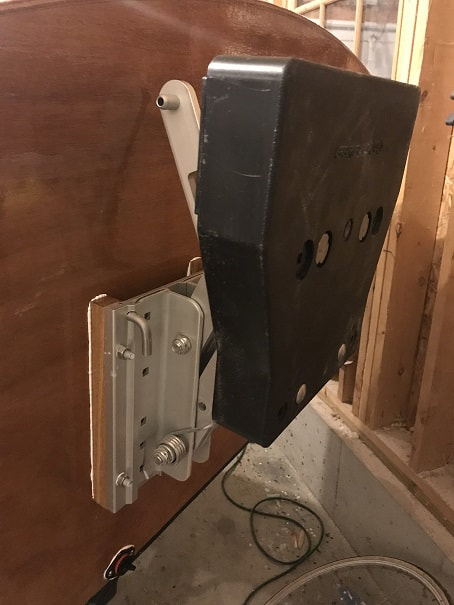
Here the motor mount has been slid into the adapter plate, and is in it highest position. Garelick outboard motor mount #71040
SCAMP Sailboat Pintles and Gudgeons
The pintles and gudgeons are cast bronze, from Davey and Co. The jaws of the pintles were slightly narrower than the thickness of my rudder stock, so I needed to cut in recesses in the stock in order to mount them. Details here. I then bedded them in 3M 4200 and secured with silicon bronze screws.
Matching Davey&Co Gudgeons through-bolted through the doubled transom and bedded in 3M 4200. Silicon bronze hardware and holes were potted with epoxy.
Rudder swings to port and starboard without interfering with ladder or motor...that said, both the ladder and motor-mount are as close as possible to the center-line without interfering with the rudder.
Mainsheet Traveler Hardware
The Argo will feature an adjustable mainsheet traveler. The port and starboard ends of the transom-cap will have holes fitted with bronze shoulder bushings, and beneath these holes, in the cockpit, will be a cam-cleat-with-bullseye, on each side.
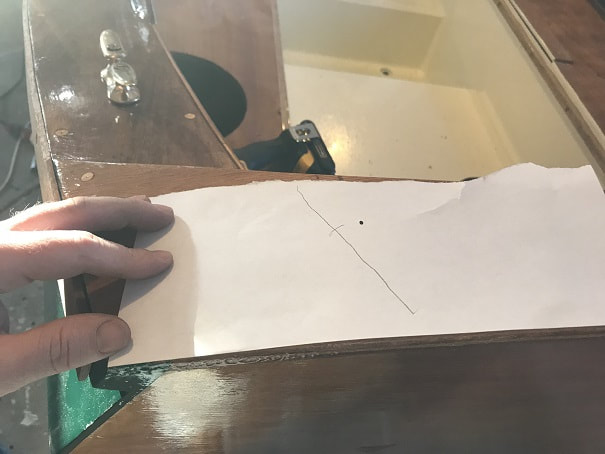
One little trick I have found helpful for symmetrically locating holes and hardware, is to mark holes through a sheet of paper that is held along an edge at a specific reference point. This sheet of paper can be flipped over and held in the same position on the other side of the boat to quickly locate a piece of hardware in the same spot on that other side.
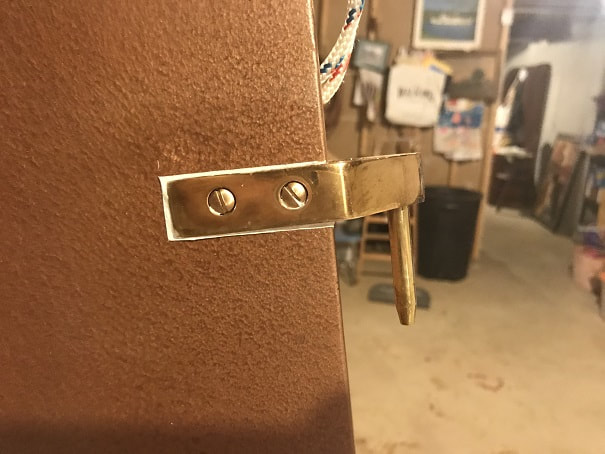
5/8" ID, 3/4"OD, 3/4" long bronze shoulder bushing installed in the transom cap. This hole is located just inboard of the coaming. I will be mounting a cam-cleat-with-bullseye on the coaming and the traveler line will run through this bushing right into the cam cleat. The bushing is there to seal up the hole well and also to provide chafe resistance where the line runs through the transom. I scored the OD of the bushing and then epoxied it in place. I coated the wooden hole ID with unthickened epoxy first, then thickened the epoxy and installed the bushings..

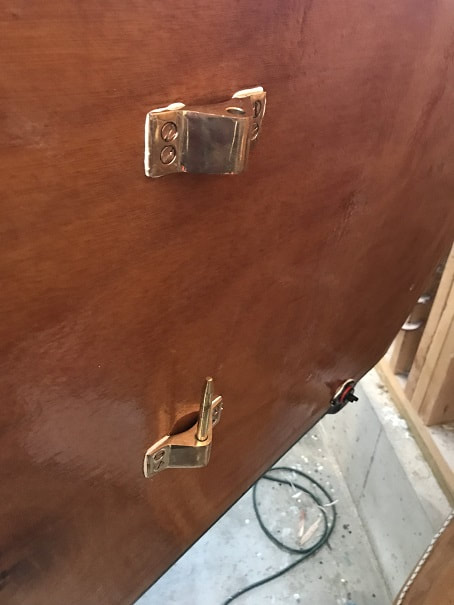
I made these aluminum backer-plates to support the back of the coaming, at the mounting of the cam-cleats.
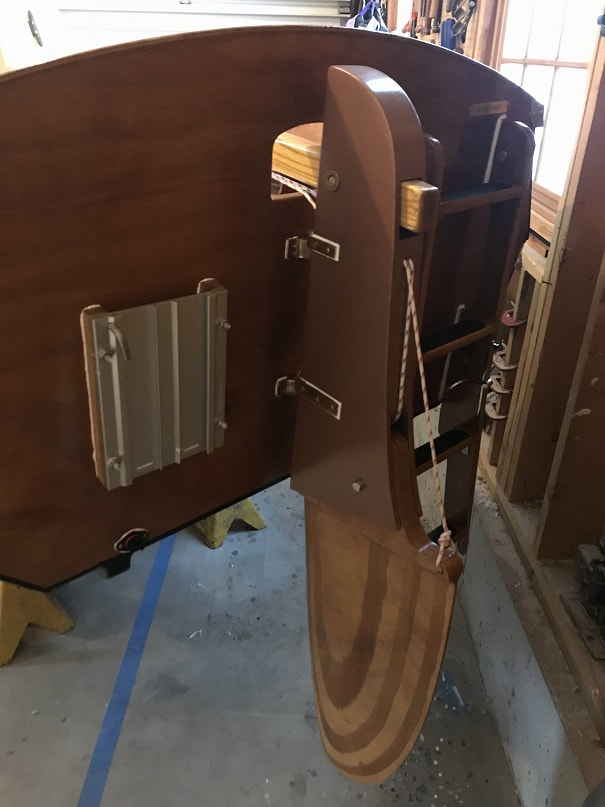
Two Tufnol cam-cleats-with-bullseye, are mounted as part of the mainsheet traveler system; one on the starboard coaming and one on the port coaming. With these, I will be able to quickly and easily adjust the traveler-line length. Through bolted through backer, bedded in 3M 4200. The motor mount doubler can alse be seen on the port side of the transom in this photo.
Here the adjustable mainsheet traveler system can be seen underway.
DECK HARDWARE
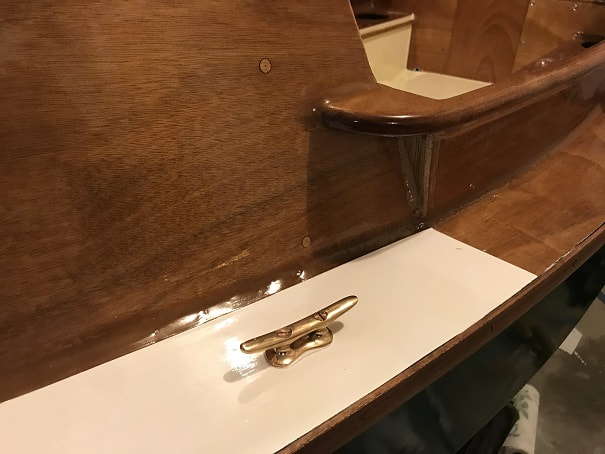
Midships Deck Cleat. 4" Davey&Co bronze. Bedded in 3M 4200 with silicon bronze fasteners, through-bolted through backer that was installed during construction.

Stern Deck Cleat; 5" Davey&Co open cleat, bronze, bedded in 3M 4200, silicon bronze fasteners, through-bolted through backer plate that was installed during construction.
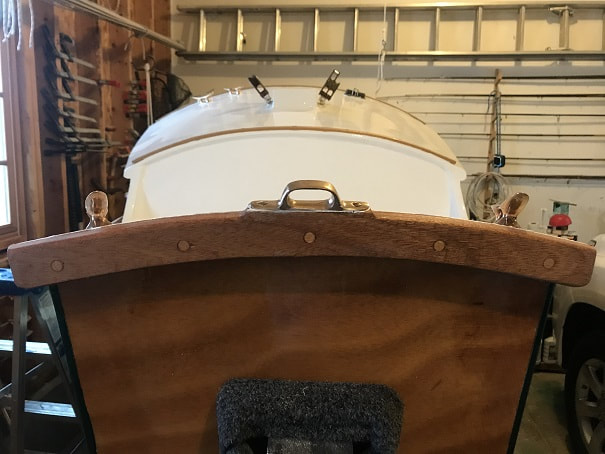
A Davey&Co bronze, closed chock is mounted front and center on the ship. It is bedded in 3M 4200 and mounted to a beveled platform which orients the chock so that it is parallel with the rooftop. The anchor line will pass through this chock and then be made fast up on the roof. (note: Those bow rub rail mounting holes will be plugged)
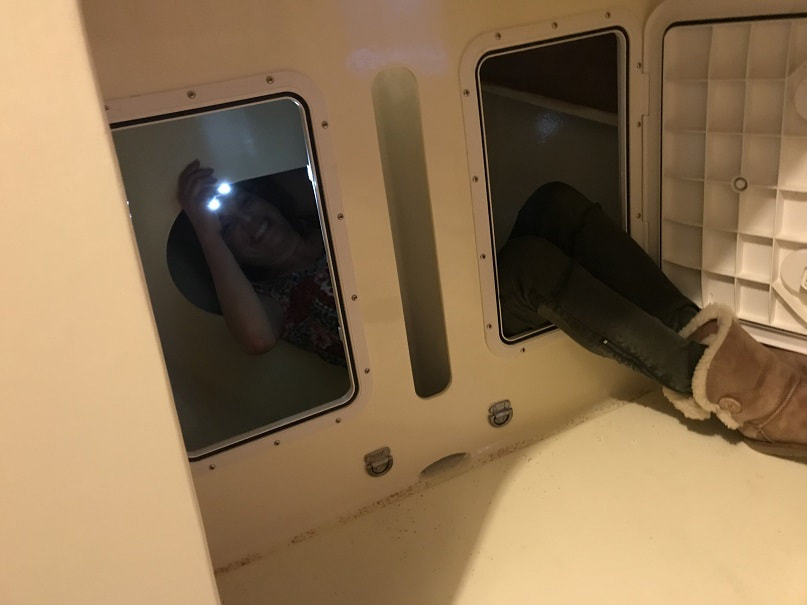
Next the port and starboard 5" bronze Davey&Co open cleats were mounted at the bow. These are mounted through the backer plates that were built into the boat during construction. I tried to climb in through the bulkhead hatches to reach the ends of the silicon bronze machine screws, but my own body diameter was too large and did not allow for enough forward progress to allow me to reach the fasteners. Luckily, in one of the few but critical moments that my wife helped with the boat, she crawled into the bow locker and held the nuts as the cleat screws were tightened down. Thanks Sandie!!!
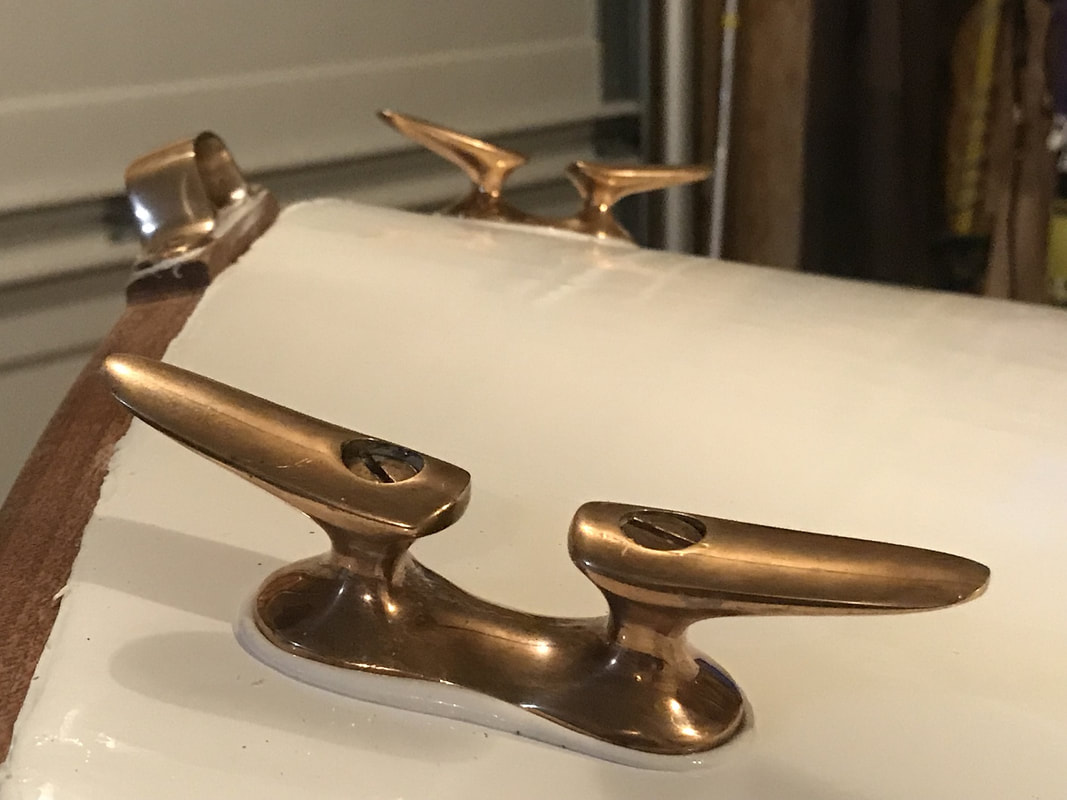
5" Davey&Co. Bronze Open Cleat, mounted at the port and starboard bow, with silicon bronze fasteners, bedded in 3M 4200.
SCAMP Rub Rail
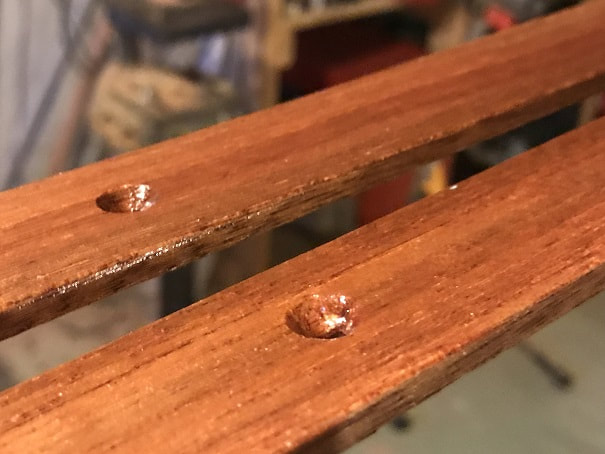
The Argo's rubrail is 3/16" Mahogany. Predrilled and oiled. I dry-fit it in place and let it sit that way for a couple weeks to help the boards take their shape.
Here you can see the rubrail installed, bedded in 3M 4200 and fastened with silicon bronze wood screws.

The rubrail turned out to be an unexpected challenge. It cracked and it was a challenge to keep the very-sticky 4200 from getting everywhere. The portside went great, but starboard put up a fight. This was even more surprising considering I dry-fit everything. Regardless, it cracked as seen here.
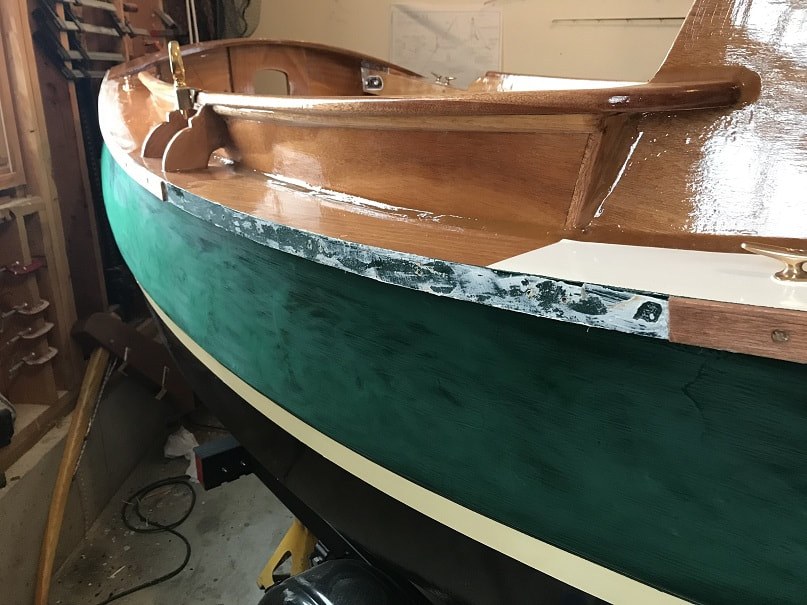
Cracked rub rail, removed, scraped clean, and ready for installation of new piece. During the calamity of the cracked rub-rail, the 3M-4200 got all over the top plank of the hull and required Acetone to remove it....which dulled my beautiful finish. Here I have sanded the plank down with 220 grit and will repaint it.
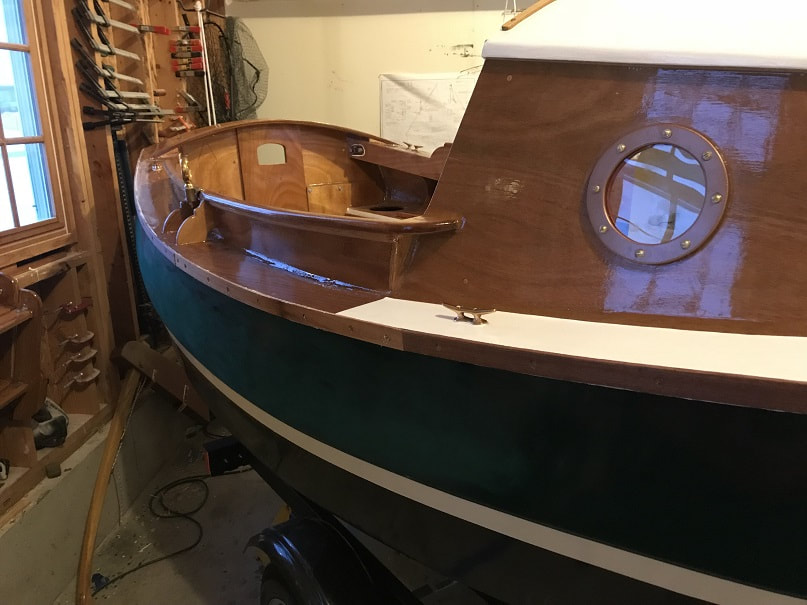
Finished starboard mahogany rubrail, all bedded in 3M 4200 with silicon bronze screws.
SCAMP Bow rub rail, with mounting holes plugged with mahogany plugs
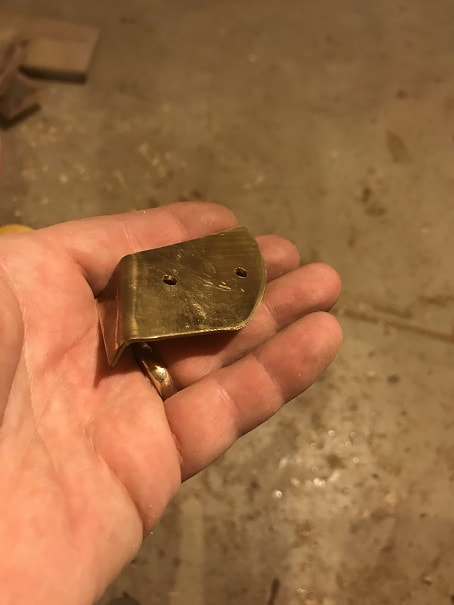
I custom cut and forged (in the fireplace) these rub rail transom corner caps. They will be mounted with two screws and bedded in 3M 4200 at the aft end of the rub rail where it meets the transom.
SCAMP Sailboat Fire Extinguisher
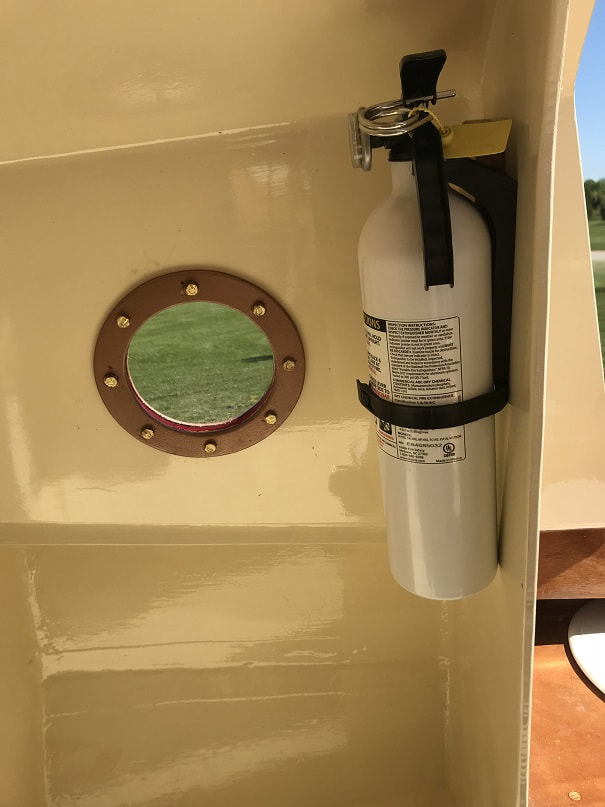
Marine Fire Extinguisher mounted in cabin of SCAMP Sailboat
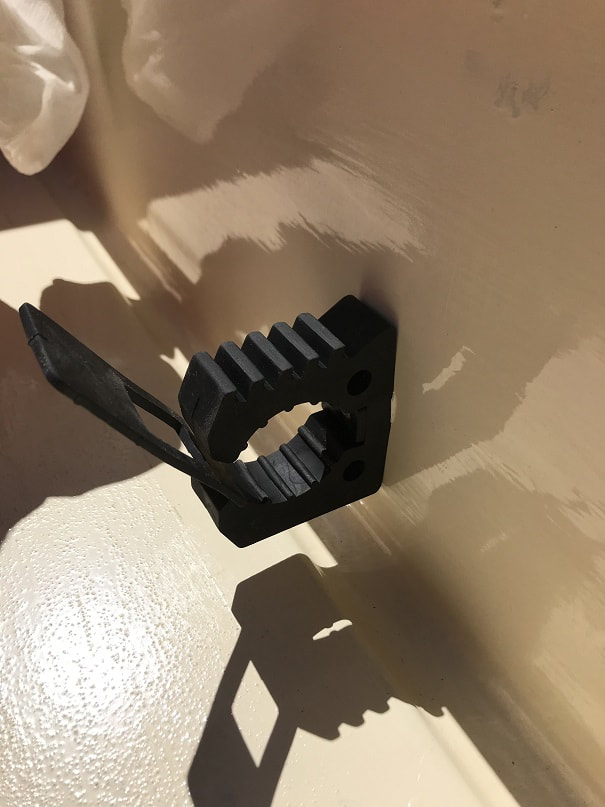
Oar Storage Holder for the SCAMP Argo.
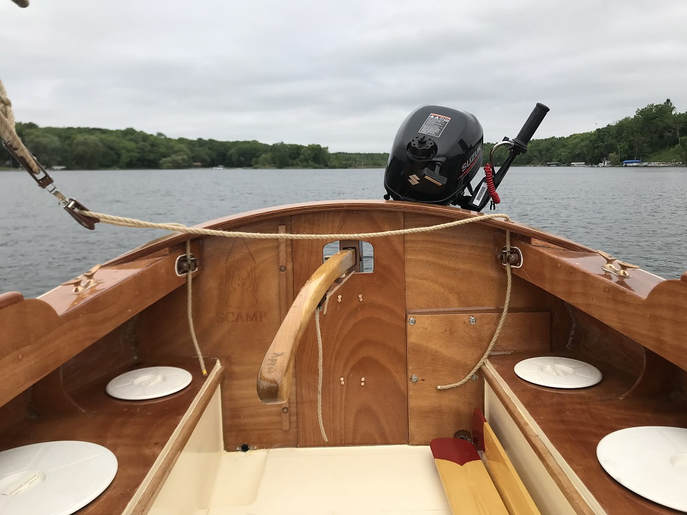
The ARGO is fitted with 8foot oars that can be stowed in one piece in the cockpit. I mounted "Quick Fist" rubber holders to hold the oars tightly in place so that they don't rattle around.
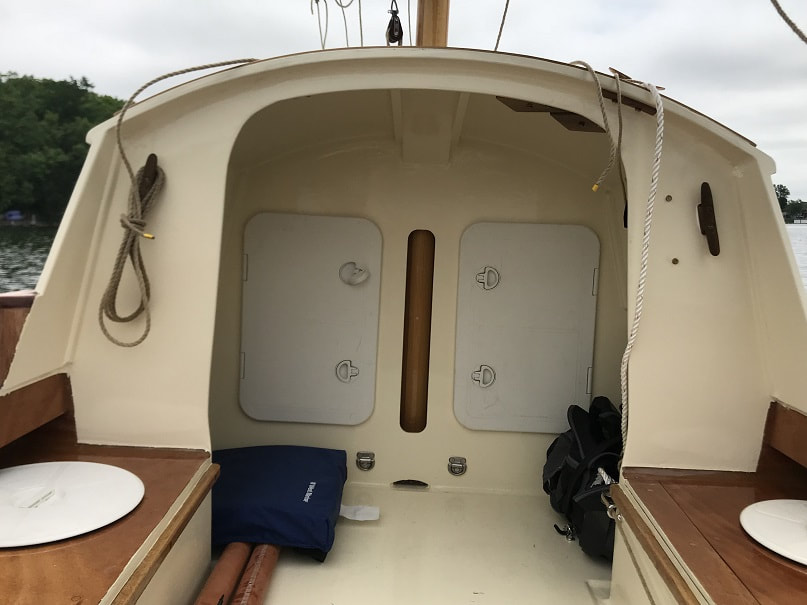
Looking forward, one can see the two oars laying on the sole. One's feet and legs naturally extend further to the centerline than these oars when sitting on the seats, so I have not found them to be a nuisance, and they are ready to go at a moments notice.

Looking aft at the cockpit.