January 2021
Handmade brooms are artisanal pieces of craftsmanship that look and work great! You don't need to worry about putting a beautiful handmade broom away, you will want to leave these handcrafted pieces out to show.
How to make a traditional Broom-Corn Broom:
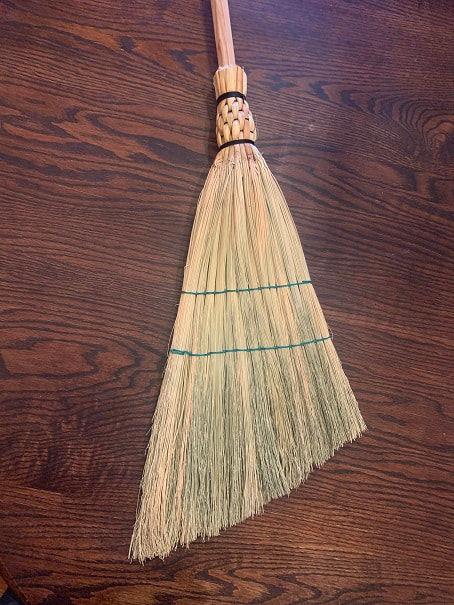
Photos of the finished product, followed by instructions on how to make a traditional broom-corn broom.
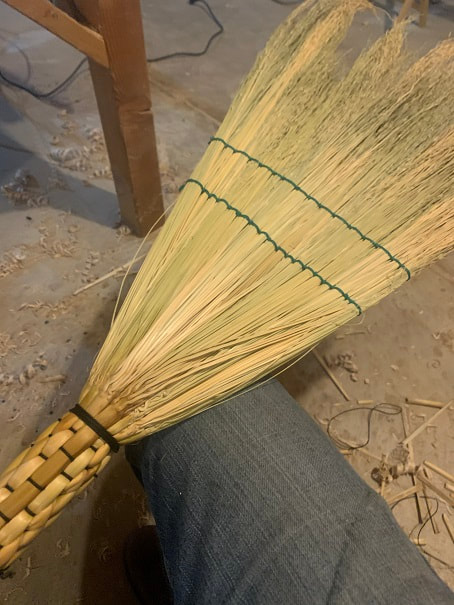
A handmade, plaited, hand stitched broom in the process of being made.
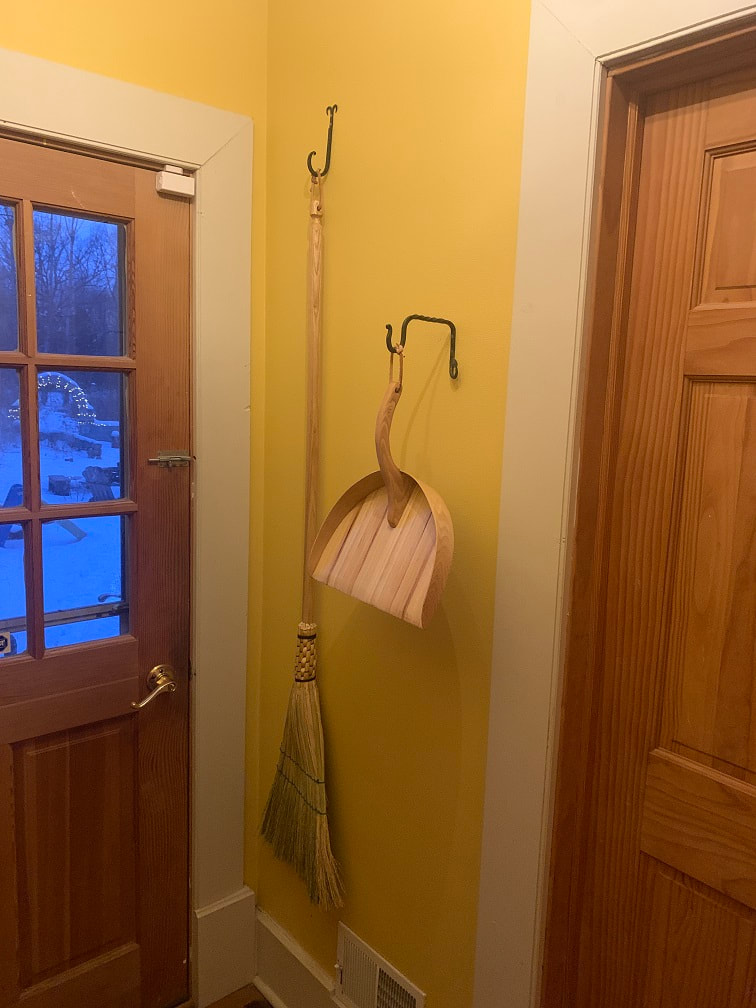
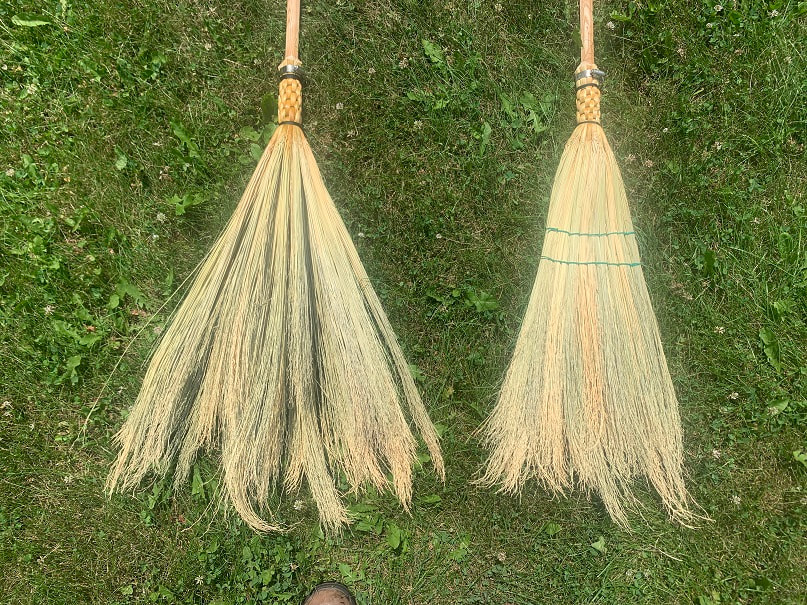
Here is the homemade corn broom and a matching solid hickory dustpan. These are hanging on forged hooks from my blacksmith shop. Fun projects! This broom is trimmed straight across, whereas the next broom pictured below is cut at an angle.
Sweeping up one's abode or workplace has been a task that has been done for thousands of years. This is a noble and time honored chore. Broom corn is a sorghum plant (not actually corn) that originated in Africa and that was brought to America by Benjamin Franklin. The fibers are tough and as the broom is used the fibers continue to split in such a way that they trap and sweep dust excellently. This is not just an antique material for broom making; go look at Lowes or Home Depot and you will find mass-produced corn brooms are still made because of the superior performance of the broomcorn material.
First, here are the tools and materials I used for making a handcrafted corn broom. Note that there are true artists in this craft, of which I do not count myself as one, but I can tell you how to make a really nice broom; see below.
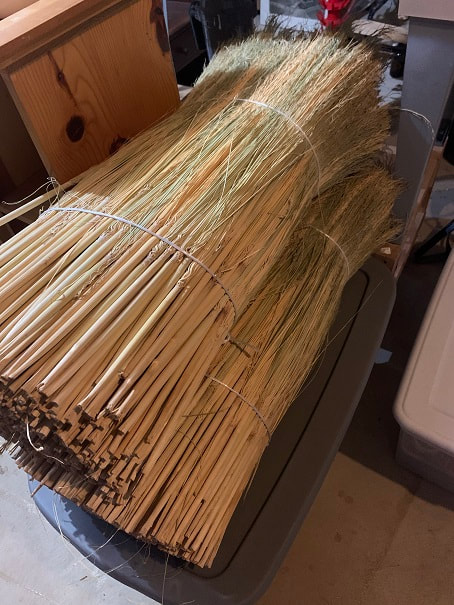
50lbs of broom corn, ready to go! This will make many brooms.
Materials:
- Broom Corn , for this broom, about 40 stalks of full-size broom corn (there is a smaller variant of broom corn that can be used for small brooms)
- Broom stick: this could be many things! Sticks with the bark still on are popular and can be found in the woods. I use rough sawn ash, that I hand-carve into broom sticks.
- Tarred 18 gauge nylon bank twine for wrapping the broomcorn onto the stick and also for plaiting the broomcorn on the handle.
- Waxed hemp for stitching the broom flat
- Leather strips to make a loop at the end of the broomstick, to hang it by.
Tools for Broom Making
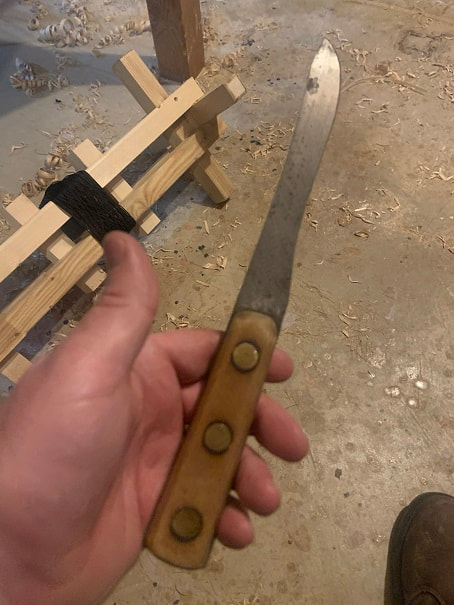
A good strong knife for cutting broomcorn. This one is extremely sharp. I also have a small knife from Helle for whittling.

Foot winder; you can use a simple stick and wrap twine around that. Foot winders such as the one pictured here are common also, and work great. I made this from scrap pine, it is 2 feet long and it is glued and screwed together. You wrap your twine around this, and than hold this winder in place with your feet and pull on the broom as you rotate it. This allows you to put good tension on the twine and get a nice tight wrap. You rotate the winder with your feet every once and a while to release more twine.
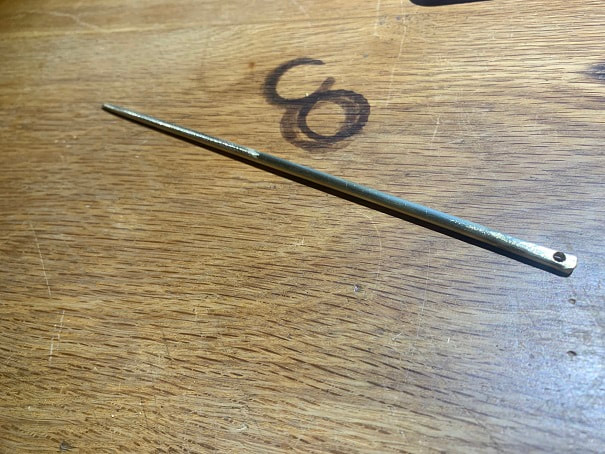
Big needle (or if you want to sound cool, call it a bodkin), for stitching the flat part of the broom. I made this one. It is 8" long and made from 3/16" diameter brass rod. I pounded the end with the eye flat, then drilled out the eye, then ground and sanded down the pointy end. The end shouldn't be razor sharp. I think this is one of the cooler tools you get to use when making a broom by hand.
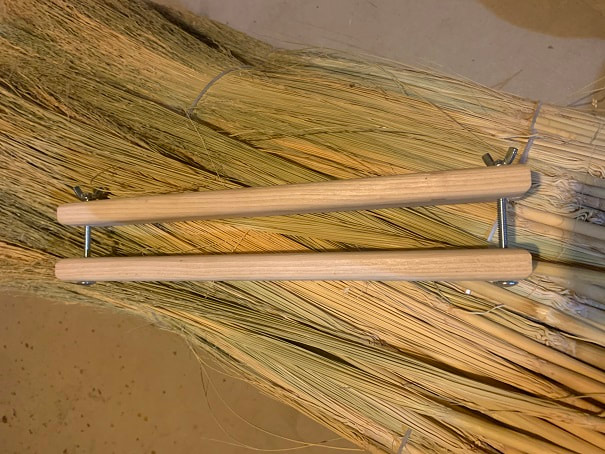
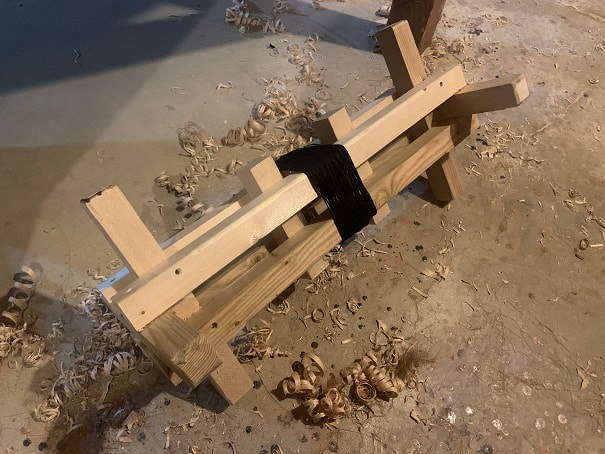
Broom clamp. This is for holding the broom corn flat when you sew the flat part of the broom. I made this from two 14" x 3/4" x 2" pieces of hickory. I rounded the edges over and fitted two 1/4" x 3" carriage bolts with wing-nuts.
- Sharp, stout, large scissors, or sharp shears, for trimming the end of the broom
- Large bucket for soaking the stalk-ends in water
- Depending on what kind of broomstick you want, you may need some tools. Some people use sticks they find in the woods, or you could buy a broom stick, or you could carve/shape one from lumber. If you make one from a piece of lumber, you will need saws and tools such as planes to do that.
Now, Here's how to make a Broom-Corn Broom by Hand!
First, find or make a broomstick:
One can choose many different types of materials to make a broom stick. It is popular to forage a stick with the bark on and use that, if you do that be sure to let it dry out for about 6 months. At the end of the day, you want a strong stick that is 3/4" to 1" in diameter and 36" to 56" long depending on your preference. The broomstick I made here is 46" long and 1" in diameter. I made it from Ash, which is a classic strong wood for broomsticks.
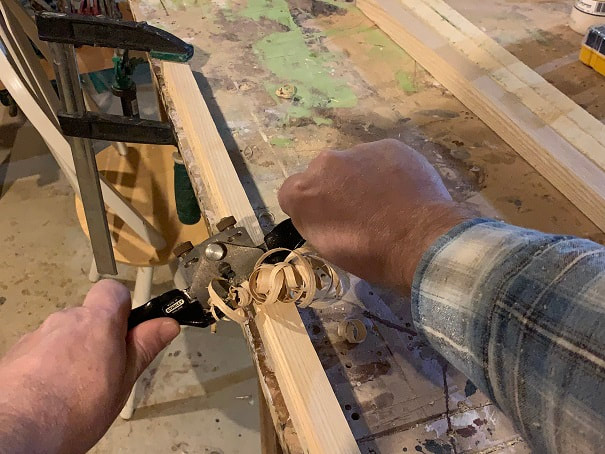
Using a spokeshave to carve a broomstick from a piece of ash.
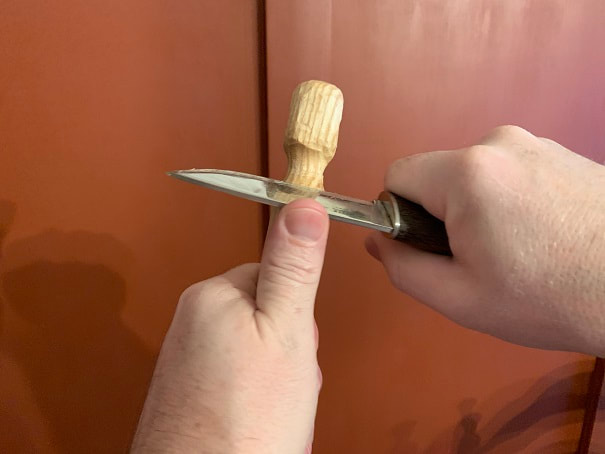
Carving the top end of the broomstick.
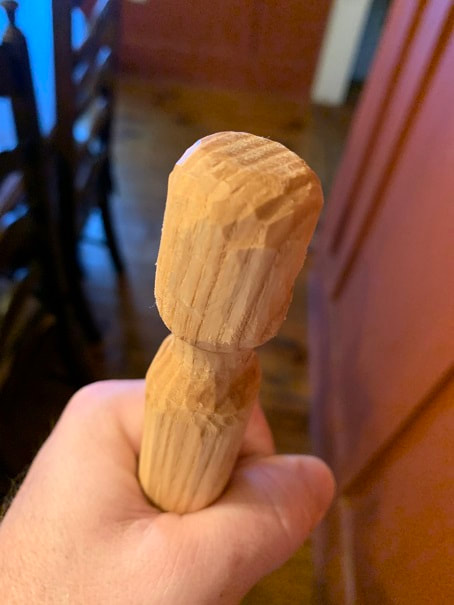
For this broomstick I left the wood carved as seen in this photo. One could sand this all smooth, but for this broom I left the broomstick with all the carve marks. The hand carved ash broom pole will be oiled with tung oil.

3/16" hole drilled 3" from the tip of the bottom of the broom stick. Also note the taper carved into the bottom of the broom stick.
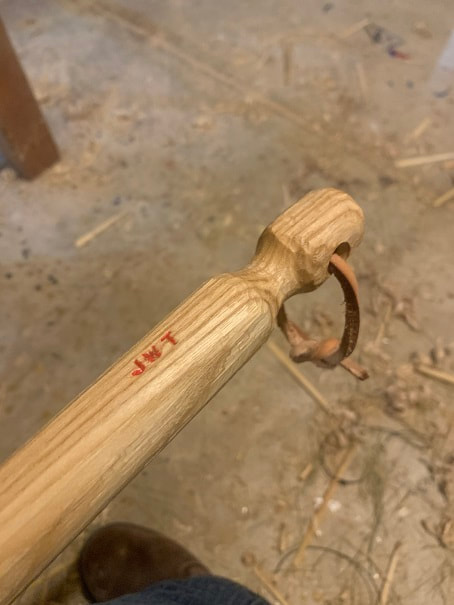
I drilled a 5/16" hole at the top end of the handle and tied a leather loop on. I have a set of steel punches with letters and numbers, and I used those to stamp my initials into the broom handle, as tiny paintbrush and some red paint finished that job.
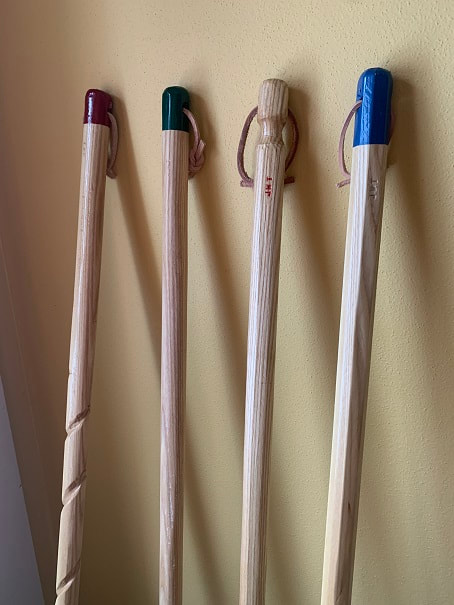
Four different Ash broom sticks; spiral carved, round with a knob-top, round, and octagonal. I sand the corners of the octagonal sticks so that they are smooth and comfortable to hold. If I want to color the tops, I dip them in rustoleum enamel and hang them to dry, the paint should be put on before oiling the rest of the broomstick.
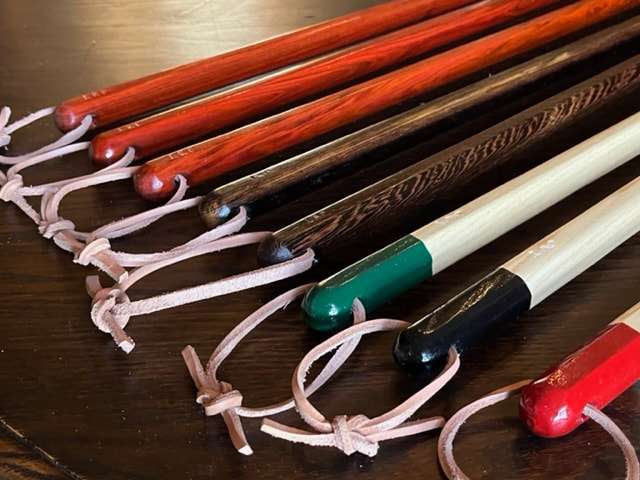
Redheart, Wenge, and Ash broom sticks. These are all made in my preferred style of a rounded octagonal broom stick, hand rubbed tung-oil finish, and I dip the broomstick ends of the ash in enamel. Fitted with a leather strap and I use punches to mark my initials on the sticks.
Natural Tree Branch Broomstick

Branch from an Ash tree from behind the house. I used a hatchet to knock off the little knobs and branches that were growing from this branch, and I carved a point on one end and a round end on the top.
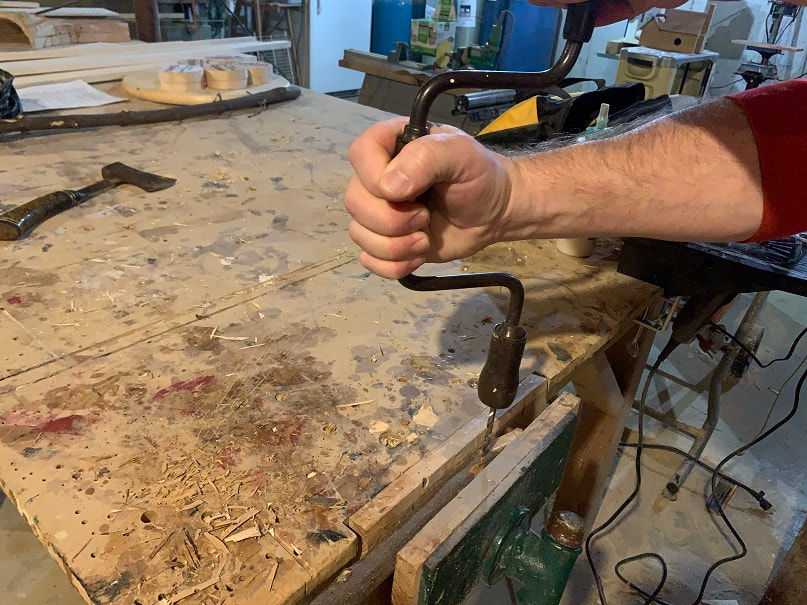
Drilling a hole with a brace: one hole at the top for the leather loop at the top of the broom stick, and one at the bottom for tying on the broomcorn.

I varnish the natural tree branch broom sticks, rather than oil them.
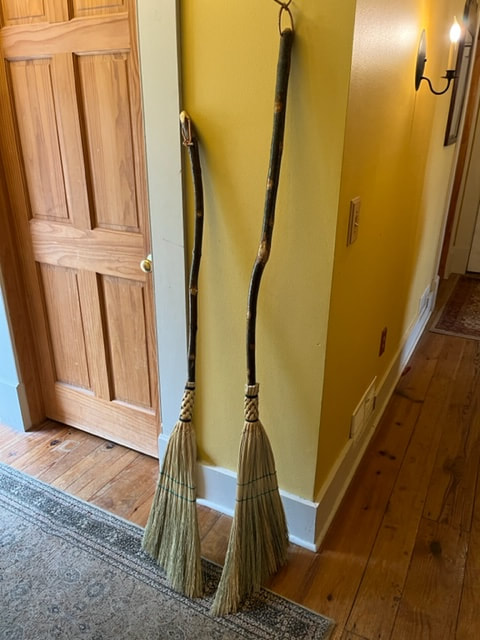
2 handmade broomcorn brooms with natural ash branch handles.
With the broomstick ready, it's time to tie on the broomcorn!
I'd recommend setting up a nice uncluttered space and have all your materials and tools within arms-reach of where you sit to tie your broom. This will be a kitchen broom with
- A 1" diameter x 46" long Ash handle
- An inner broom corn layer consisting of 12 heads of broom, whose stalk-ends have been sliced in half (details below)
- "Shoulders" that make the broom a bit wider. These are tied on opposing sides of the broom to add width, so add them to the sides of the broom that you want to be the sides not the front and back. Each shoulder consists of 3 cornbroom heads, so 6 in total needed. The stalk-ends of these pieces are also sliced in half and trimmed.
- A final outer layer of broomcorn , about 16 heads, whose stalk ends are not sliced in half.
I wound about 100 feet of the tarred nylon twine onto the foot winder. Those wood shavings are left over from carving a broom stick....when I'm done making this broom I can use it to sweep those up!
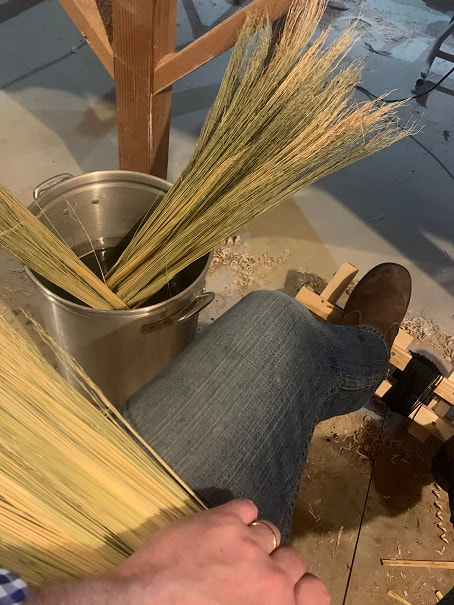
First, fill a tall bucket with 12" of hot water from the tap. Place the broom corn stalks into the water to soak. Put the stalk-end in the water and leave the frayed bristle ends sticking up out of the water. Keep the broomcorn within arms reach so you can grab it. For this broom, which was made on a 1" diameter stick, I started with 40 heads of broomcorn. You'll want them to soak for 20 minutes or so before you start so set them in the water first and then get everything else ready.
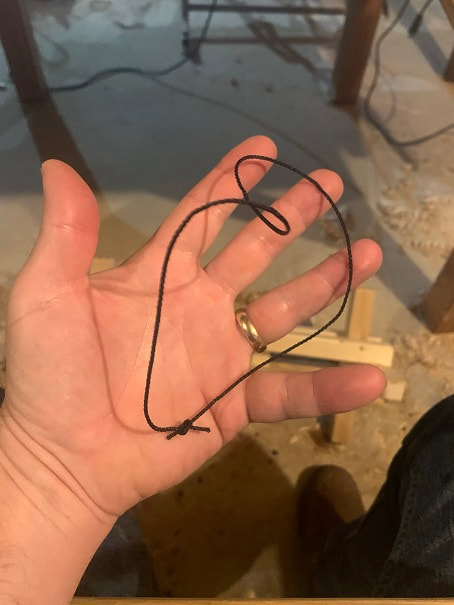
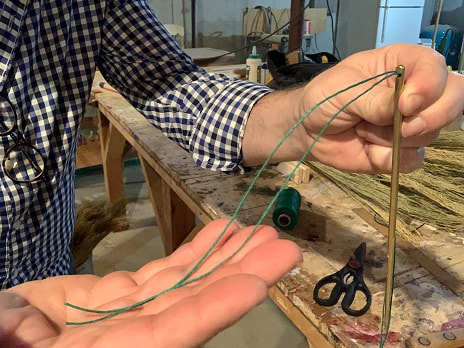
Take a 12" length of the tarred nylon twine and tie it into a circle; I used a sheet bend knot. Keep this loop handy as you will use it as a "rip-cord" to tie off the final end of the twine at the end of the process.
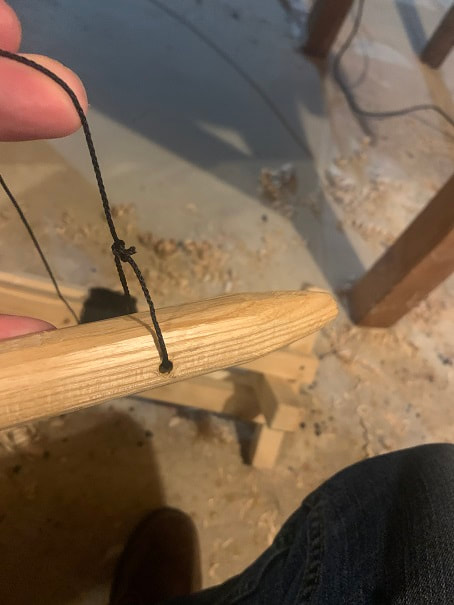
Start by tying the twine to the hole in the bottom end of the broomstick. I tied a bowline knot.
Find out how many heads of broomcorn will be needed for the first layer by placing broomcorn around the circumference of the broomstick and holding it on with your hand. It takes some jostling around but make sure sure each piece of broomcorn is tight up next to the adjacent pieces. Count how many it takes. In my case it was 12 pieces.

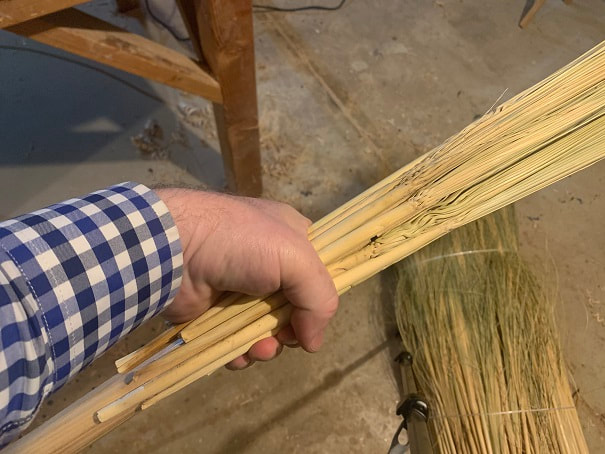
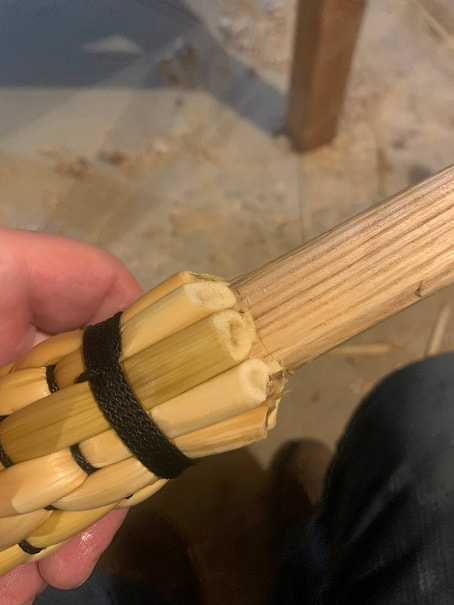
Slice the stalk of the broomcorn in half lengthwise as shown in this photo for the inner layer and the "shoulders" For my broom that means trimming up 12 heads of broomcorn like this for the inner layer, and 6 more for the shoulders.
Once the broomcorn stalk-ends have been sliced in half, trim them to length. The stalks ends for the inner layer and the shoulders should be cut to a length that is 3" past the "knuckle" where the fibrous brushes start. A couple pictures down from here you can see a picture of these trimmed stalks.
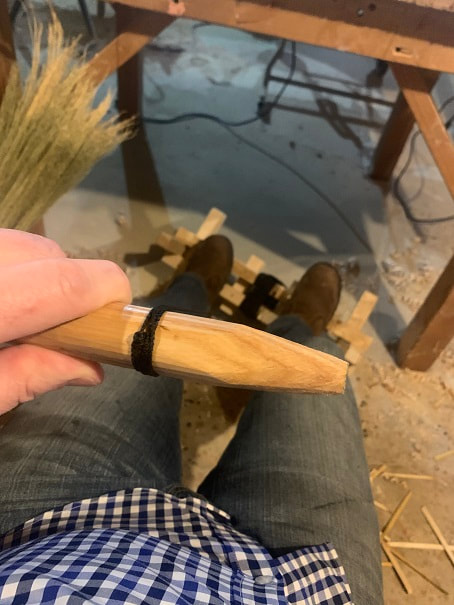
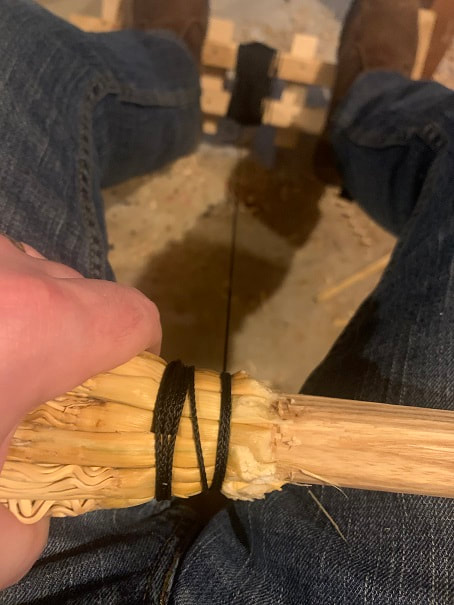
Make 3 or 4 nice tight wraps around the broomstick. This is the anchor point which will keep your broom from "flying off the handle"!
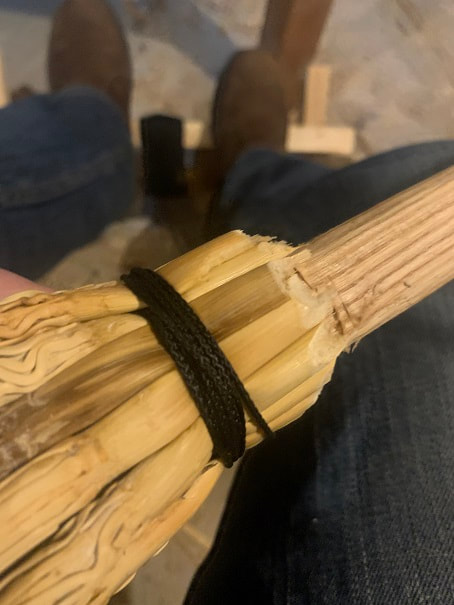
Place the broom corn on the stick. Pull tension on the twine and slowly wrap the twine over the broomcorn stalks about 1/2" up from where the bristles start. Here's what the first layer looks like with half of the cornbroom heads placed around the broomstick. Note the 3" long stalk ends, and also note that the flat face of the stalk is placed against the stick with the round half facing out.

Carefully arrange the inner layer pieces as shown and tightly wrap three or four wraps of the twine around the first layer as shown. The wraps should be tight and should compress the broomcorn.
Next stack up a pyramid of three heads of broomcorn on one side of the broom, wrap around once to hold them in place and then build up the other shoulder on the opposite side using another three heads of broom corn. Then tightly wrap the whole thing 5 times tightly, compressing the stalks.
Keeping tension on your twine, grab your nice sharp knife and cut the stalks off about an inch and a half above the twine, tapering the cuts to the broomstick.
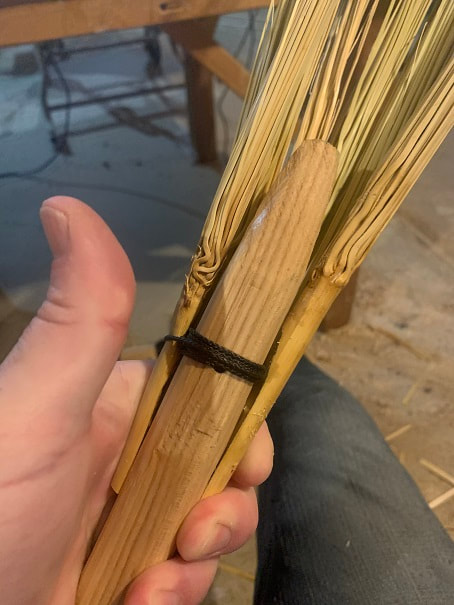
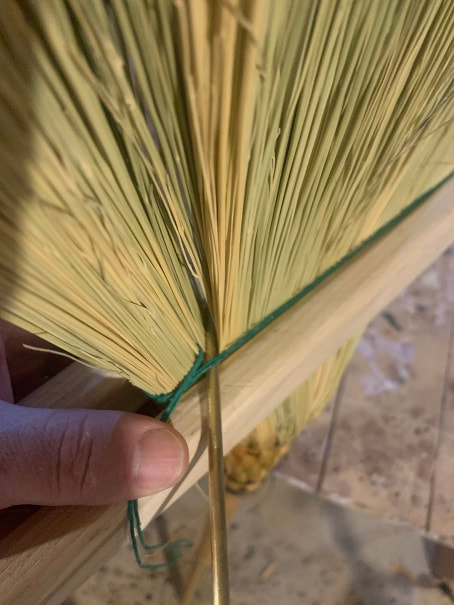
Keeping tension on the line spiral up as shown and make three tight wraps up about a half inch from the top of the stalk ends.

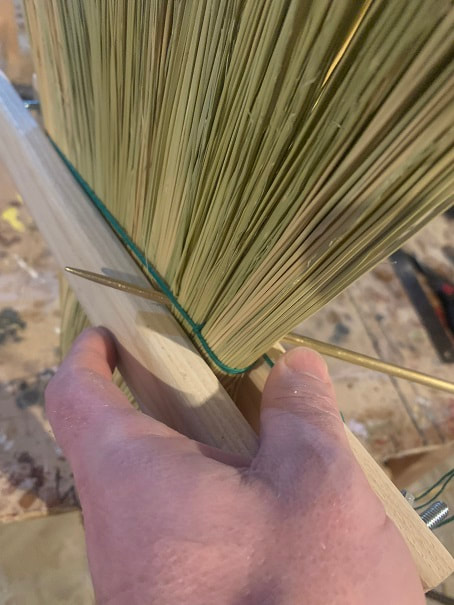
Now you will tie on the outer and final layer of broomcorn. Take the remaining untrimmed whole heads of broomcorn and wrap them on the broom as shown.
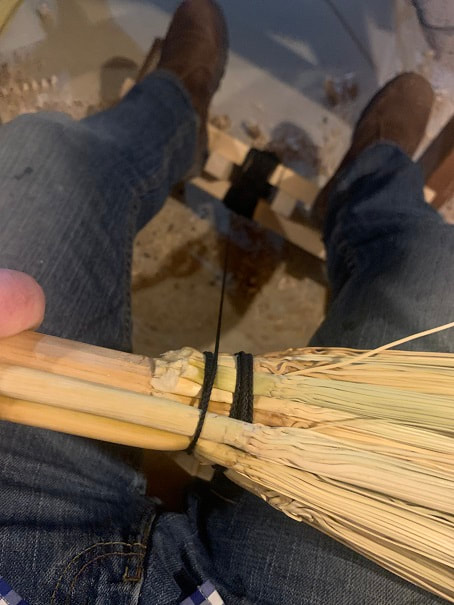
Work your way around the broom adding the outer layer and keeping good tension on the twine.
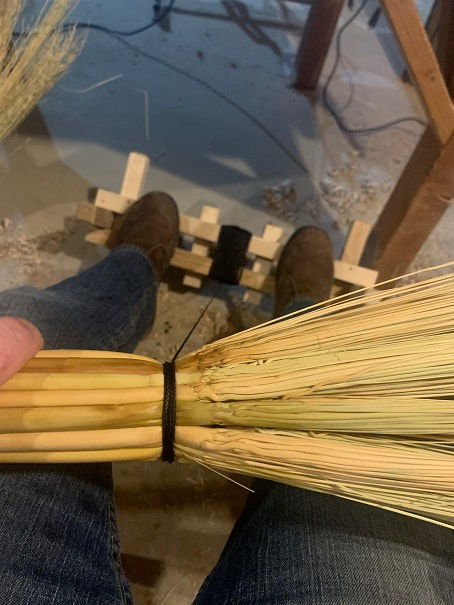
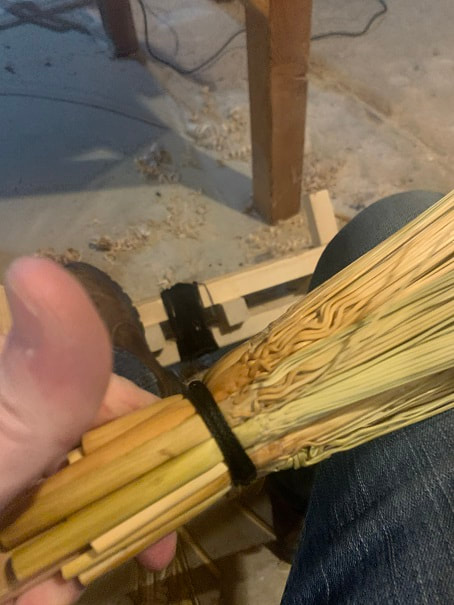
When you get all the outer layer heads of broomcorn on, wrap it five times around tight, compressing the stalks. Always keeping tension on the line, hold the wraps in your hand to keep the line tight and then cut the line so that you have about 6 feet of twine left to work with.
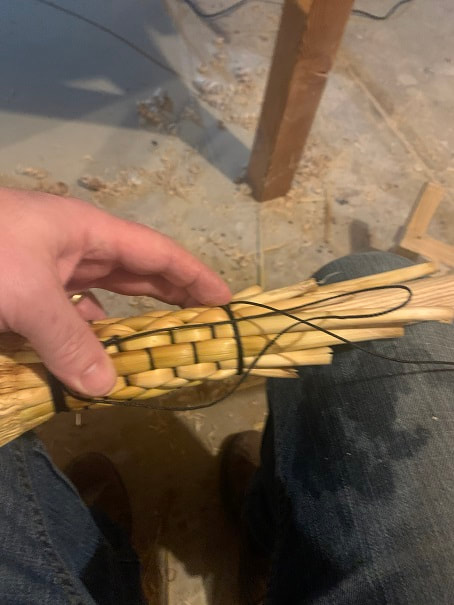
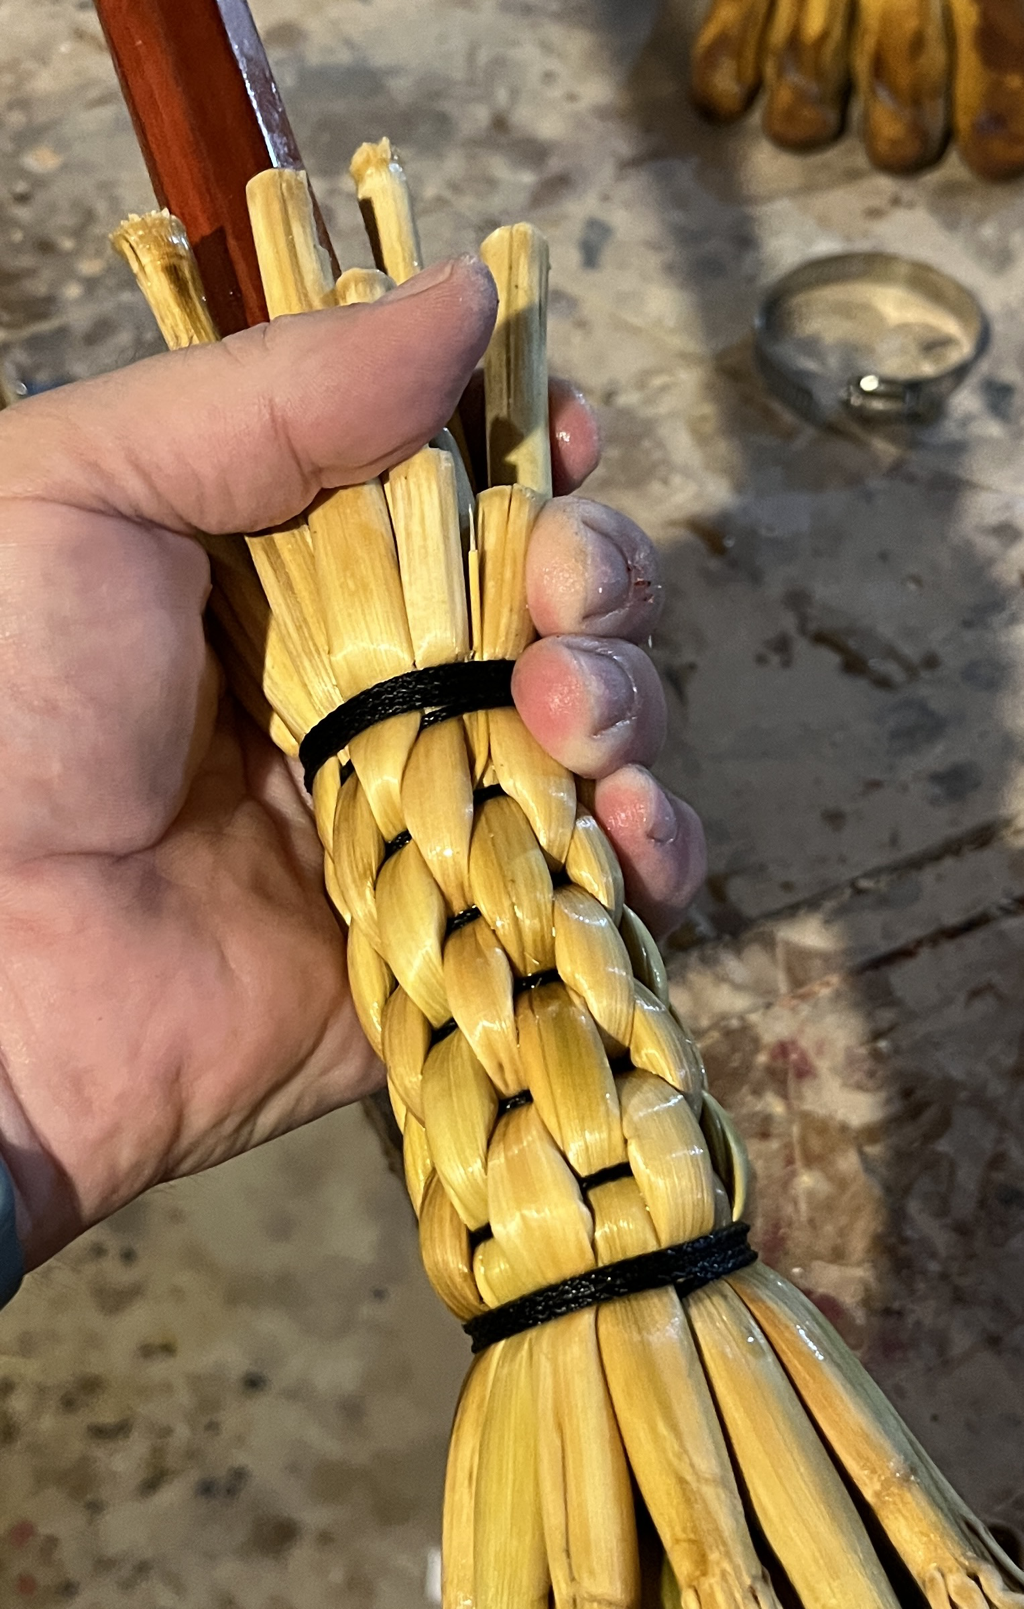
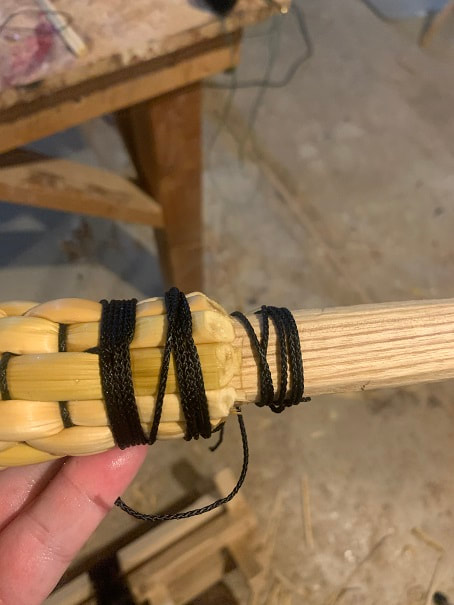
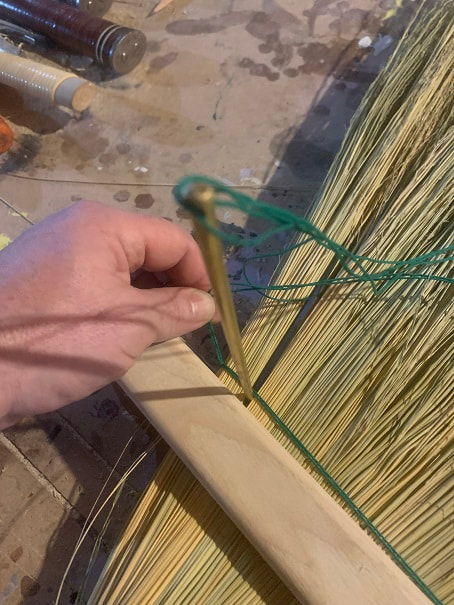
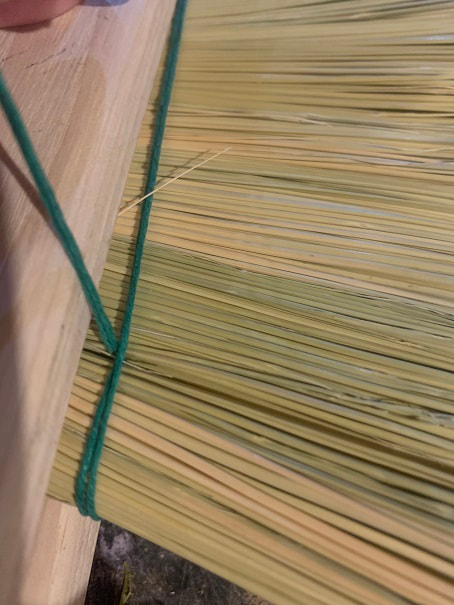
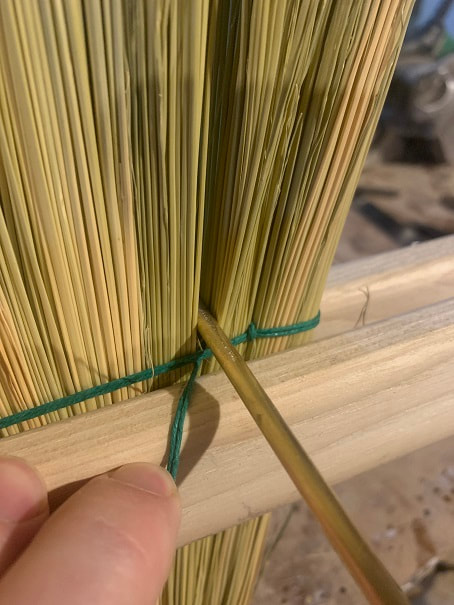
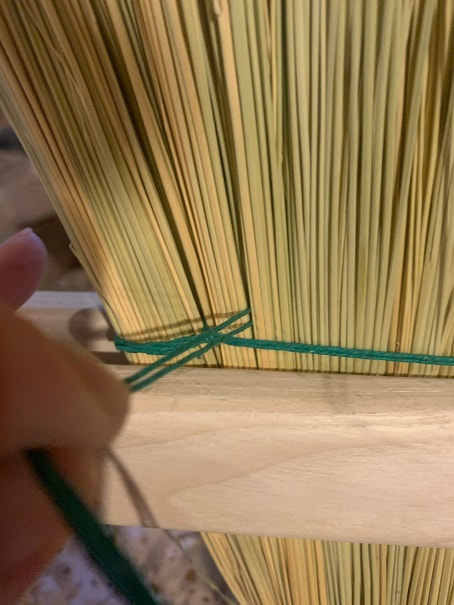
Always keeping tension on the twine, next, "plait" the remaining ends of the broomcorn. You are essentially using the twine to weave the stalks tight to the broompole. Take your twine and loop it over and under, over and under, over and under the stalks, pulling the twine tight as you go. Spiral the twine up in rows as you go and a pattern will emerge that looks like the photo. You want an odd number of stalks so that you get an alternating plaiting pattern. If you have an even number of stalks, just split one with a knife down the middle. Keep plaiting up the stalks, I made rows about with about 1/2" spacing. NOW FOR THE FINALE. Make two tight wraps around the broom corn when you get up to about 1.5" from the end of the shortest stalk. Then take the 12" ripcord loop that you made at the start and lay it over the most recent wraps of twine. As you work, always keep tension on the twine.
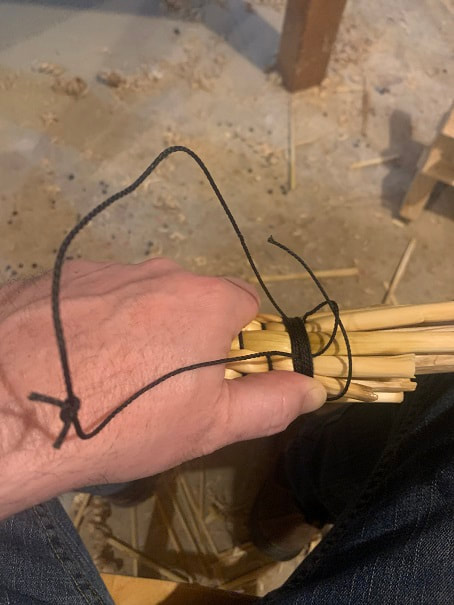
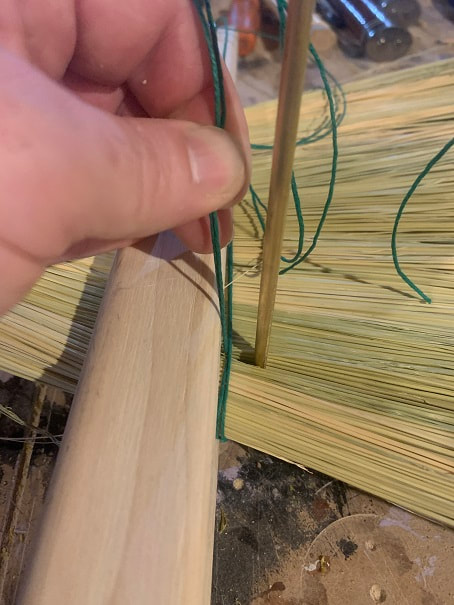
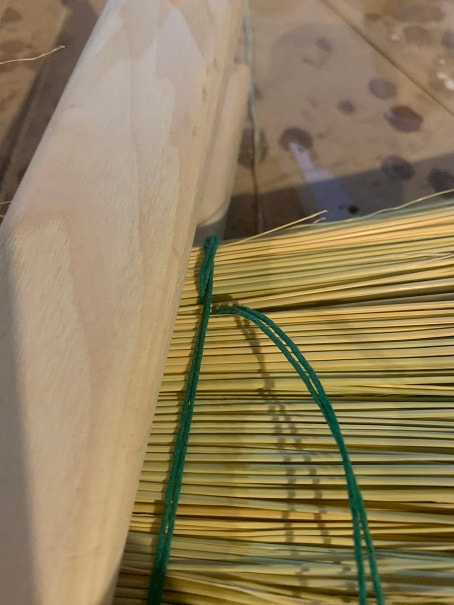
Next make four tight wraps OVER the 12"loop as shown. Cut the twine to leave a tail of about 5 inches and put this tail through the loop in the ripcord as shown.
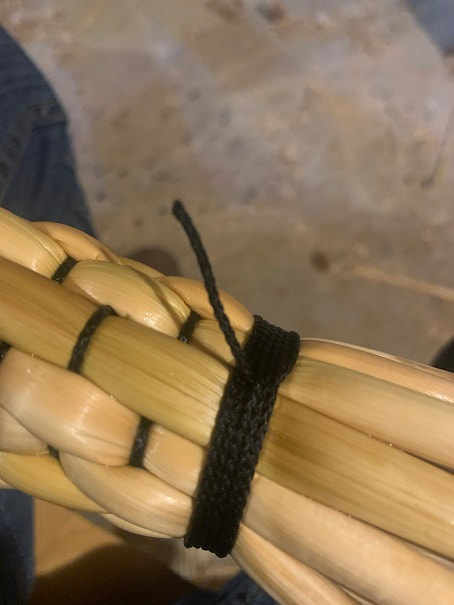
Now the grand finale, firmly and swiftly pull the ripcord down , parallel to the broomstick, and the loop will pull the final end of the twine tightly through the wraps. Trim the tail to about an inch.
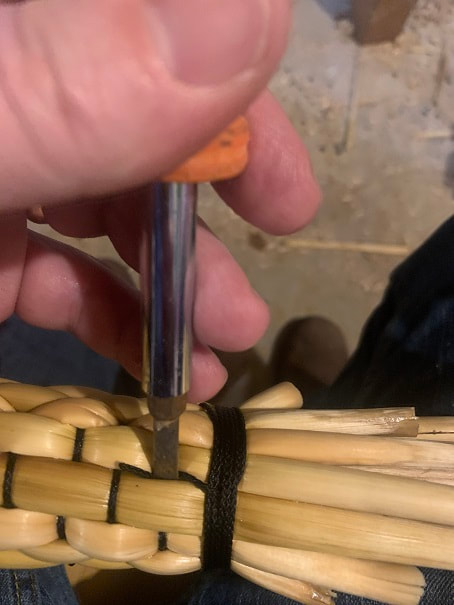
carefully but tightly push the loose tail into the broomcorn bundle with a flat head screw driver.
With your knife, trim the ends of the broom corn at an angle up to the stick.
The wet ends of the stalks can warp as they dry, so to keep them holding a nice shape, wrap some temporary twine around the tips while they dry.
Take some twine and lightly wrap around the tips of the trimmed ends of the broom-corn. Tie of the twine to the broomstick. After the stalks have completely dried out in a couple days, you can take this twine off.
On the left is a broom built exactly as described above, prior to stitching it flat. On the right is a similar broom, after being stitched flat, but before trimming the bottom of the broom corn. I made these today at the same time, and one can see that the top of the broom corn is still wet. I have been using pipe clamps to hold the tops of the broom corn tight as it dries, as can be seen in the photos.
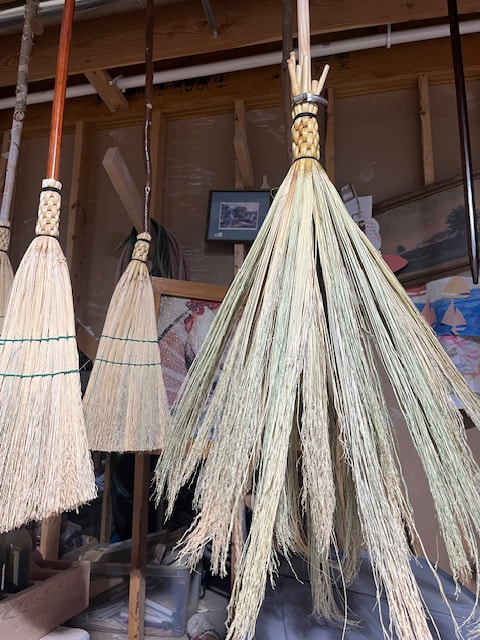
At this point, hang your broom dry out before stitching it flat, to allow air-circulation around the broomcorn so that it doesn't mold. Let it dry out for at least a couple days.
Stitching the broom flat
At this point you have a broom that is generally round in cross section. We can all thank the Shakers for coming up with the innovation of stitching the corn broom flat to make a broom that sweeps a wider swath. Thanks Shakers!
It is tough to describe how to stitch a broom using words alone. I think the pictures below might be more useful. Hopefully with the words and pictures together, this is a useful set of instructions.
It is tough to describe how to stitch a broom using words alone. I think the pictures below might be more useful. Hopefully with the words and pictures together, this is a useful set of instructions.
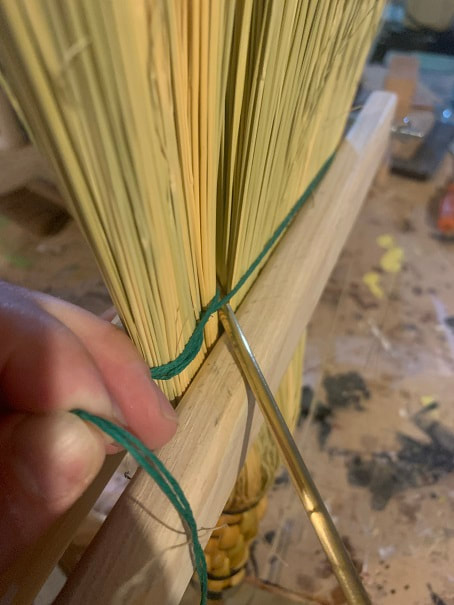
Cut an 11ft length of hemp twine and fold it in half. Take the two loose ends and thread them through the eye of the bodkin (big needle) as shown. I tie them off to the eye so that they don't come out. I use a bowline knot for this but you can use most any ole knot. With this done, you have a 5 1/2 foot long length of double strand twine, with a loop on the other end.
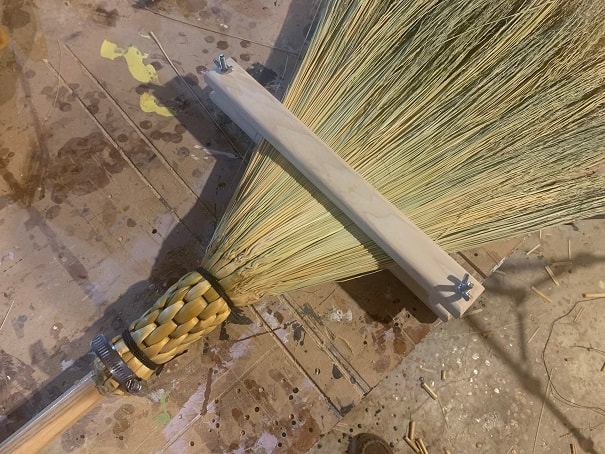
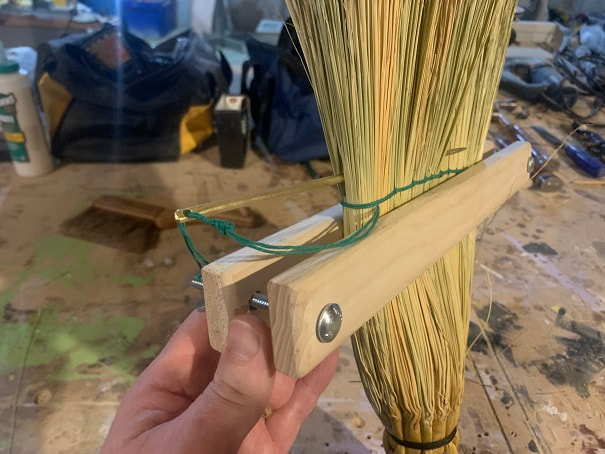
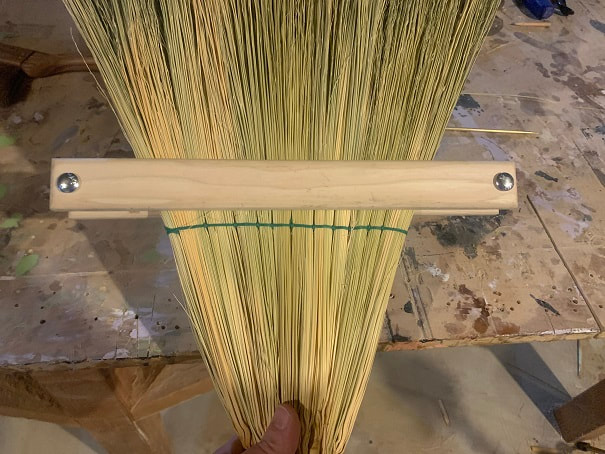
Now take your broom clamp and clamp it perpendicularly acros the broomcorn as shown. Tighten the screws firmly but not crushing the broom corn.
Take your double stranded twine and wrap the end around the back of the broom, then thread your bodkin through the loop. As you cinch it up it will look as below.
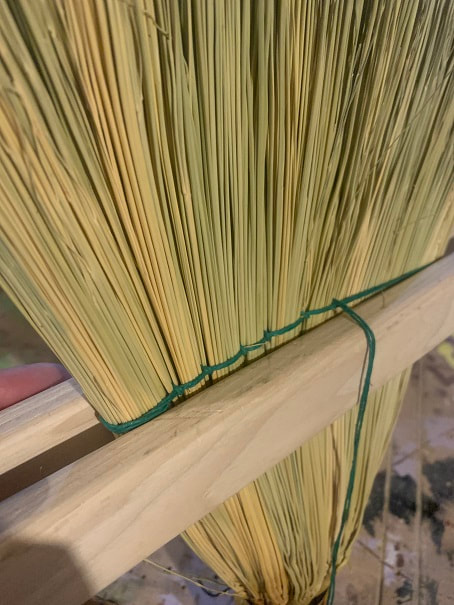
IMPORTANT NOTE: This initial loop of doubled up twine that goes around the broom, I will call the "cross-broom-twine". It is easiest to stitch a broom with the handle on the ground and the broomcorn pointing up. So with this in mind, please note when I write "BELOW" I mean on the side of the cross broom twine that is towards the handle, and when I say "ABOVE" the cross broom twine I mean on the side of the cross-broom-twine that is up towards the end of the bristles of the broom.
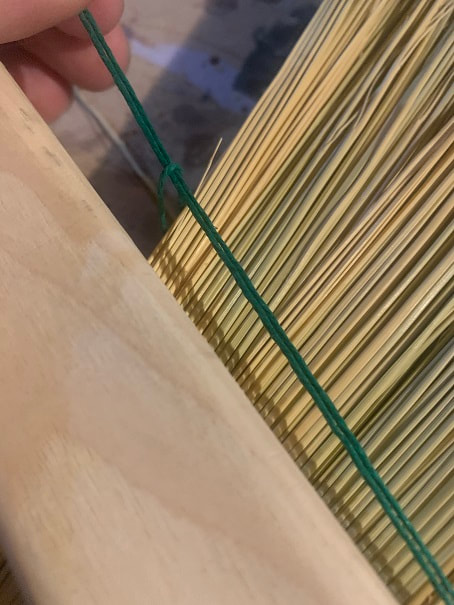
As you cinch up the twine you will have a nice double twine encircling the broom. Cinch up the twine so that the broom corn is compressed a bit, and leave the loop where the twine meets, right at the edge.
This first stitch is a little different than the rest, after the first stitch, the stitches will be the same till you reach the other side.
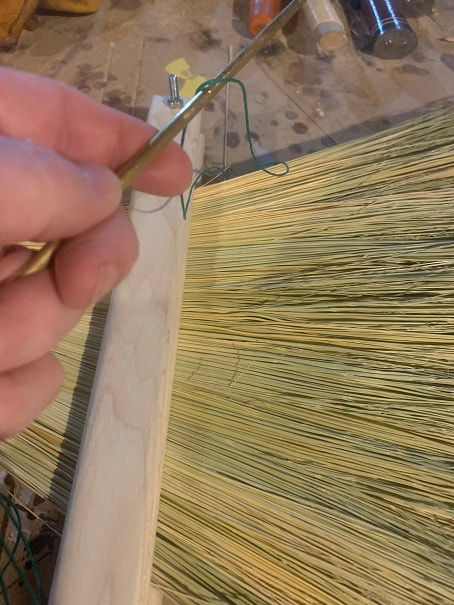
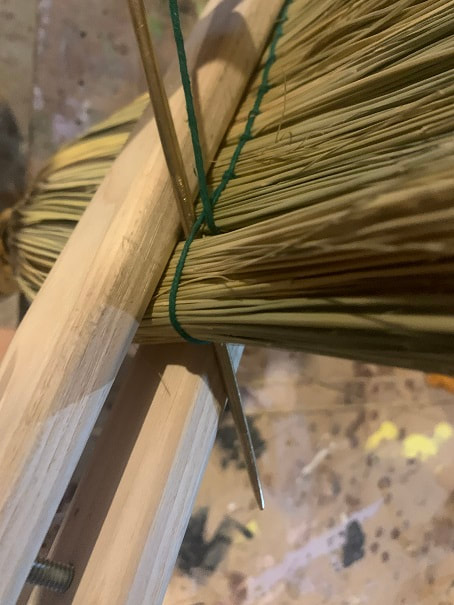
With the initial loop around the broom corn nice and taut, hold the line tight, take the bodkin and push it through the broomcorn BELOW the cross-broom-twine. Push it straight through and ensure the bodkin emerges on the opposite side also BELOW the cross-broom-twine on the other side.
Here is the twine emerging on the other side, BELOW the cross broom twine.
Now take the bodkin and push it back through the broomcorn at the exact same spot as it came out but ABOVE the cross broom twine.
Here is the end of the first stitch, the twine emerging below the cross-broom-twine.
Horizontal stitching progress is made by shoving the bodkin through the broomcorn AT AN ANGLE. With the first stitch done, we will now begin alternating with straight-through and diagonal stitching. Take the bodkin and shove it through the broomcorn BELOW the cross-broom-twine so that it emerges on the other side about 3/4" from the first stitch.
In this photo you can see the bodkin pushed through at an angle BELOW the cross-broom-twine and emerging on the other side. As you stitch, always make sure the bodkin comes out on the same side of the cross-broom-twine as the side it went in on the other side.
OK, I just came out of the broomcorn at an angle below the cross-broom-twine, so now I am going to shove the bodking through the broomcorn STRAIGHT and ABOVE the cross-broom-twine.
Here is the twine coming out having come STRAIGHT through the broomcorn.
Now I will cross over the cross-broom-twine and push the bodkin through the broomcorn at and ANGLE BELOW the cross-broom-twine. Pull the twine through taught, and on the other side, just as before, cross over the cross-broom-twine and then shove the bodkin through STRAIGHT and ABOVE the cross broom twine. Then repeat, repeat, repeat, till you get to the other edge of the broom.
Here is a picture of progress as I stitch across the broom.
OK, reaching the end now! Here I am taking one last angled stitch.
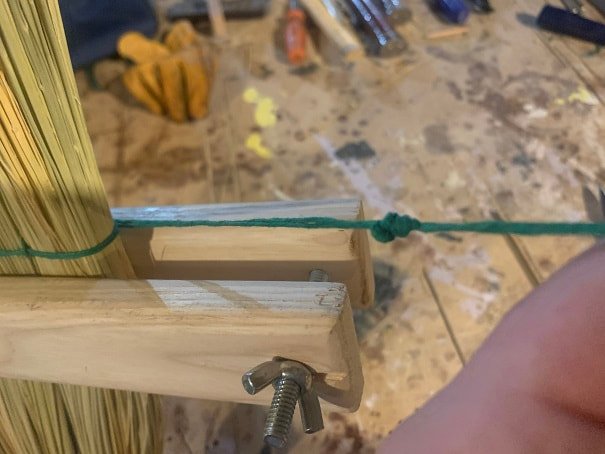
Now tie a big knot in the line about 4 inches from where twine leaves the broom corn.
Shove the bodkin into the edge of the broom at a shallow angle so that it emerges halfway or more down the broom. Pull it through all the way so that the know you tied in the line is buried and trapped in the broom.
Now loosen your broom clamp and move it down the broom, and then retighten it in preparation of stitching the second row.
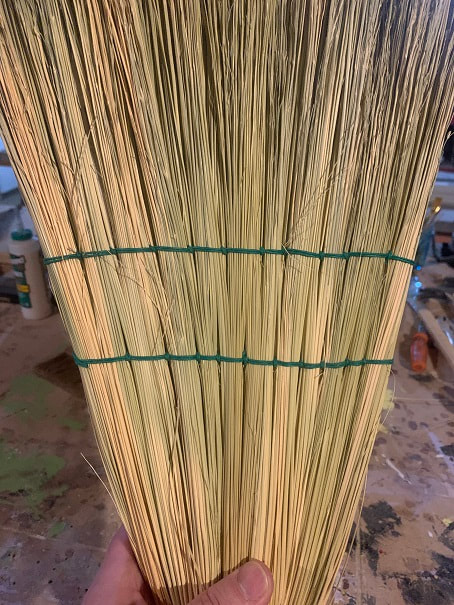
Here is the broom after two rows of stitching. You can do more rows if you'd like.
Finally, clamp the broom once again at the place where you want to trim the bottom. After clamping the broom corn, use a sharp stout shear or scissors to trim the bottom of the broom-corn. After 2 days remove the temporary windings holding the broom corn ends in place. Then happy sweeping!

Here is a broom cut with a rounded bottom.
Here is a handmade broom-corn broom with an angle-cut bottom. I like these for sweeping up along the wall and in corners.