SCAMP Cockpit, Footwell and Ballast Construction
The SCAMP Argo will feature water ballast and a custom footwell. Details on building the cockpit, hatches, footwell, seats, sole-plates, ballast compartment are below.
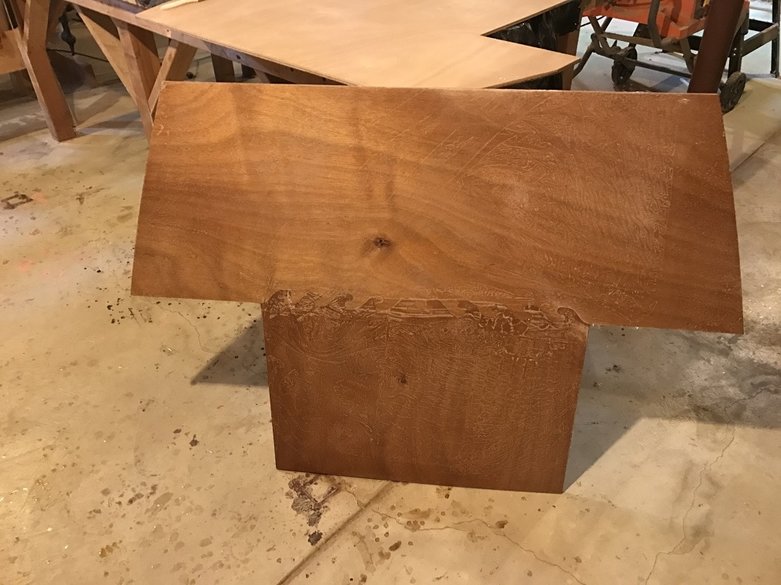
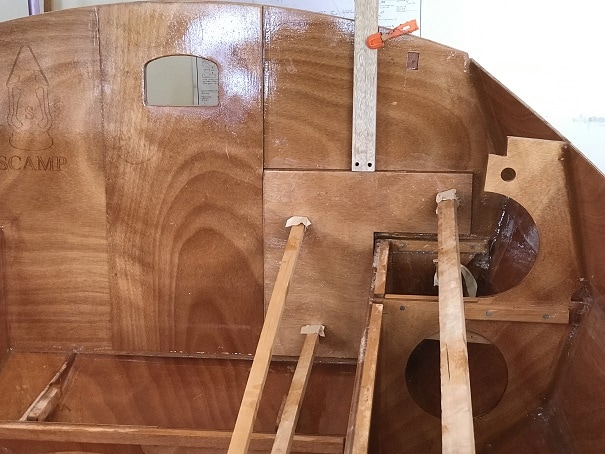
- The aft edge of the foredeck is supported by a piece of plywood that is epoxied onto B2, the piece is in the kit and is pictured below. I will modify this piece to fit on either side of my extra reinforced deck-beam-gussets.
- Time to install cockpit-sole cleats and seat top cleats! I ripped the cleats from clear vertical grained fir, which has been straight and nice to work with.
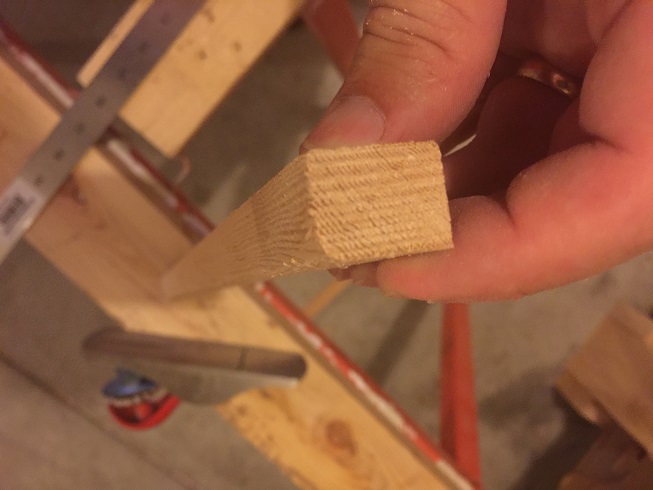
Fir cleat. I am hand-planing a radius on the underside outer edge of any cleat that may be in an accessible compartment.
|
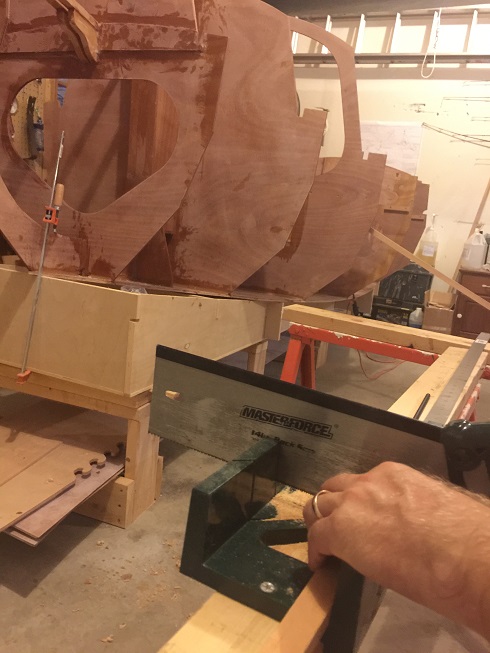
Manual miter box and hand planes make quick work of the cleats, and they are nice and relaxing and quiet to use. I use two drills, one with the pilot hole drill and one with the screw driver bit; this saves alot of time in changing out bits.
|
Cleats!
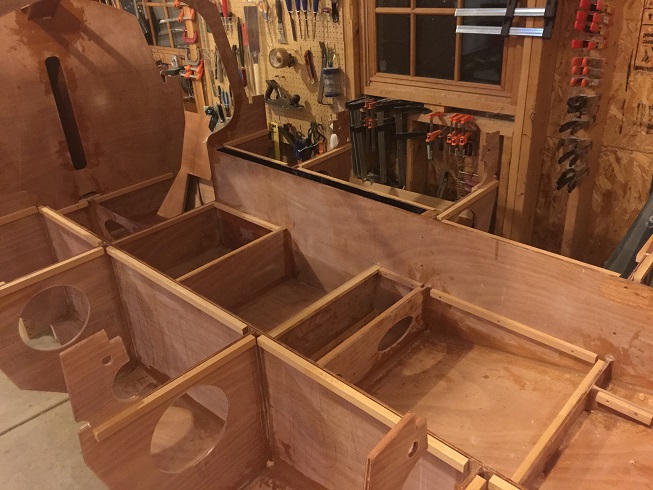
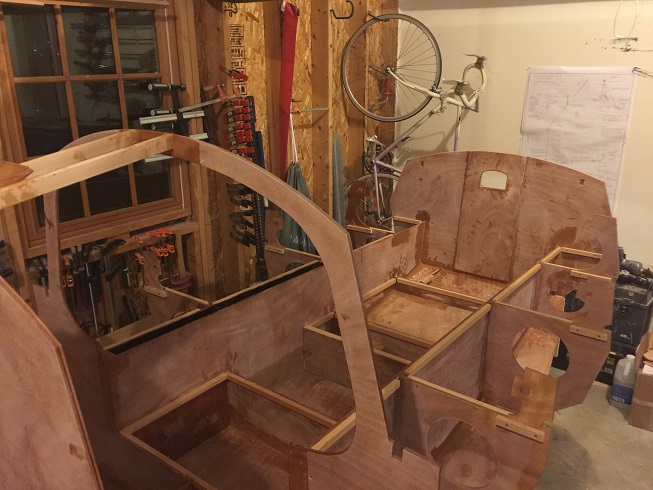
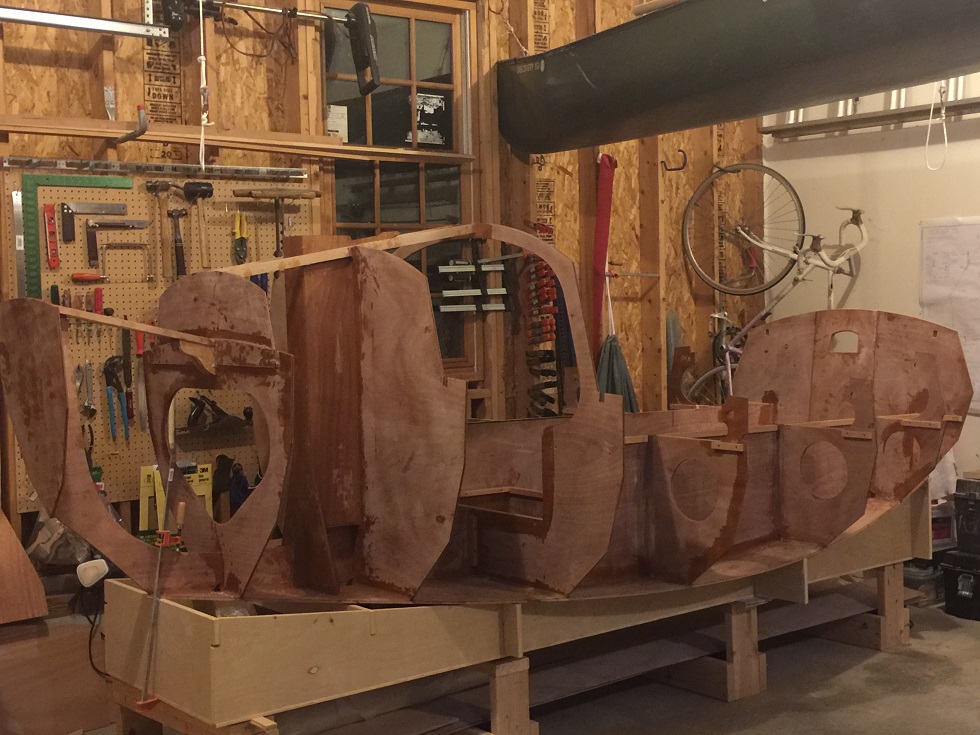
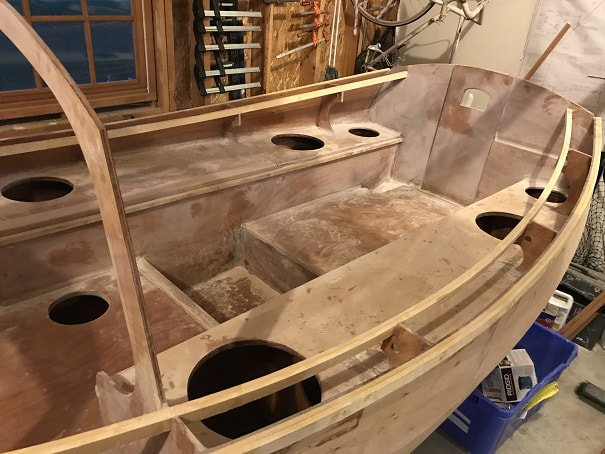
More Cleats! This is also a good view of the footwell that I am building. I built an additional small bulkhead, and the section with no internal cleats will be the footwell. More on that later.
Calling it a night
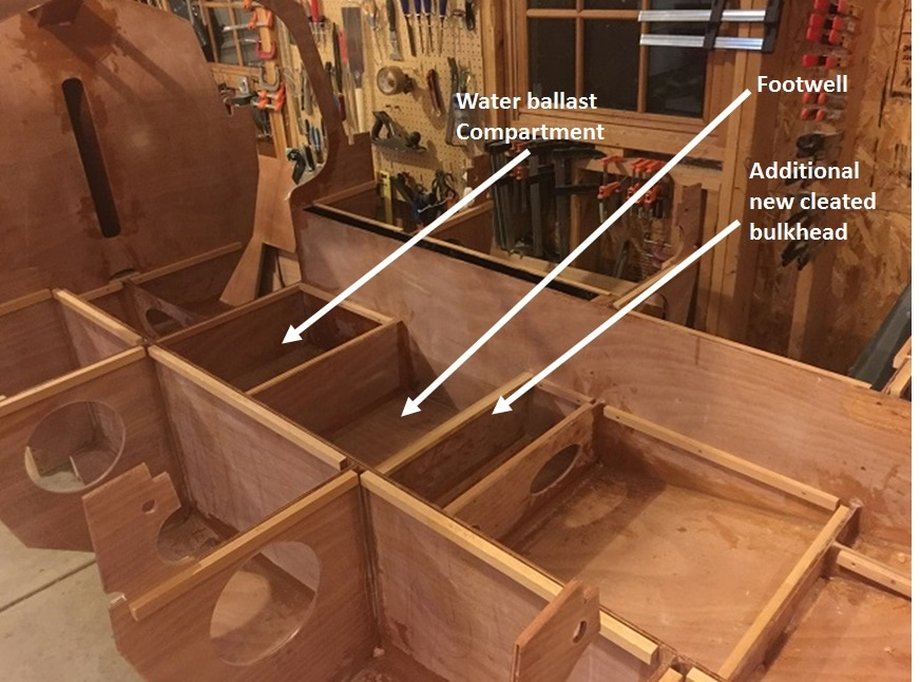
- A footwell is not part of the stock SCAMP design. That said, I think the footwell has many advantages, notably: place to extend your legs for comfort, place to stand and sail (which could help with agility when sailing in certain conditions)
- The biggest downside is that there is no drainage from the footwell, so bilge pumps or auto bailers or both must be added to it.
- It could be argued that if the boat takes on a big wave that it could fill the footwell creating instability. I think the extra water weight in that scenario would be down low in the boat and could even help improve stability, so I am not worried about this.
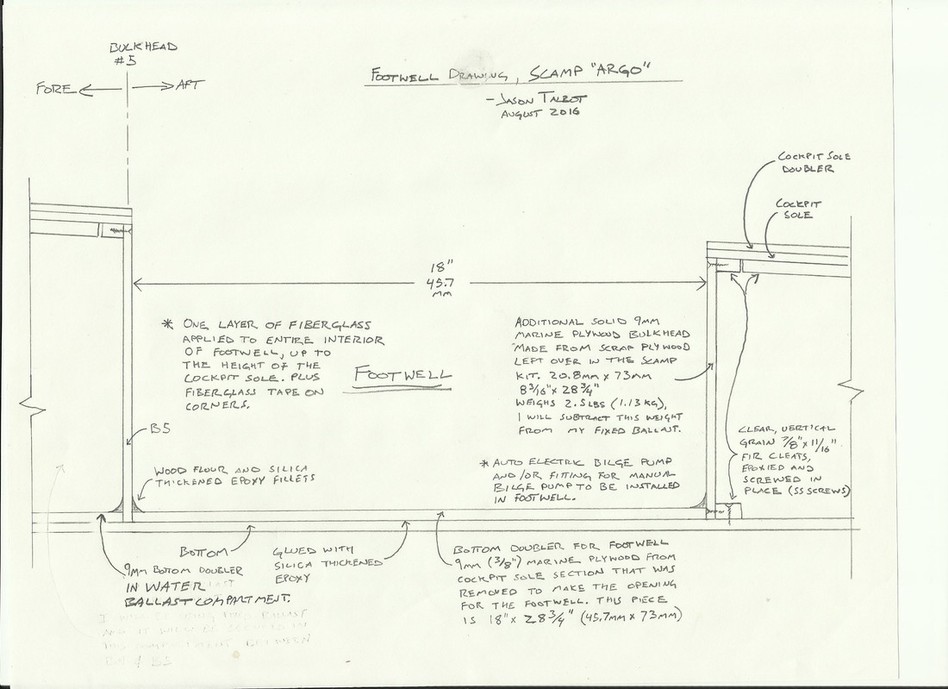
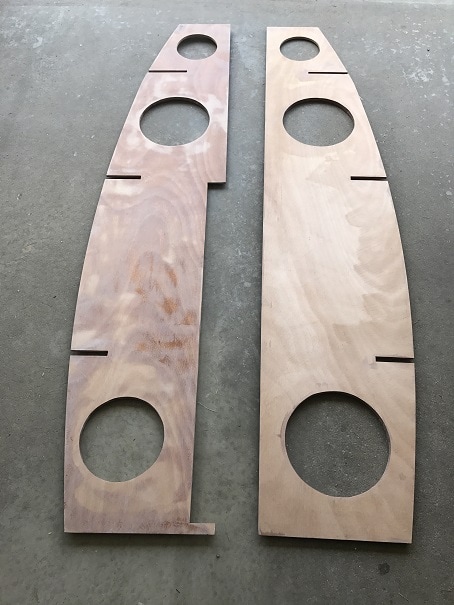
- I made the footwell 18" long, rather than making it the full length between B5 and B6. I wanted it a bit smaller, so limit the amount of water it could fill with, and also on a practical note, at 18" I had enough plywood left over in the kits to make the bottom doublers for the ballast area and footwell and also the little extra footwell bulkhead. See drawing below.
- SCAMP is designed for water ballast to be used in a compartment between B4 and B5. I was initially attracted to the concept of using a bolted-down fixed lead ballast, but have settled on staying with the stock water-ballast design. The "Argo" will be a trailer sailor, and the ability to easily remove the ballast, or reduce weight for light winds, rowing, or floating off an obstacle, all became more appealing to me than the fixed ballast.
- I will use a doubled floor water ballast area, which will allow me to recess the drain plug, which will allow the compartment to drain completely.
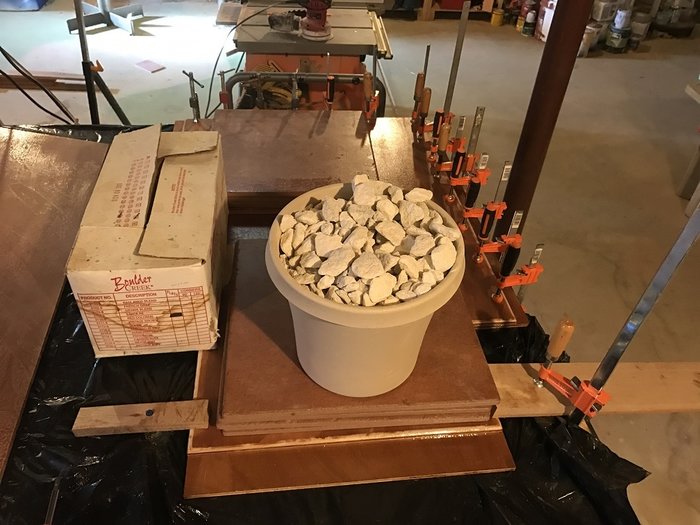
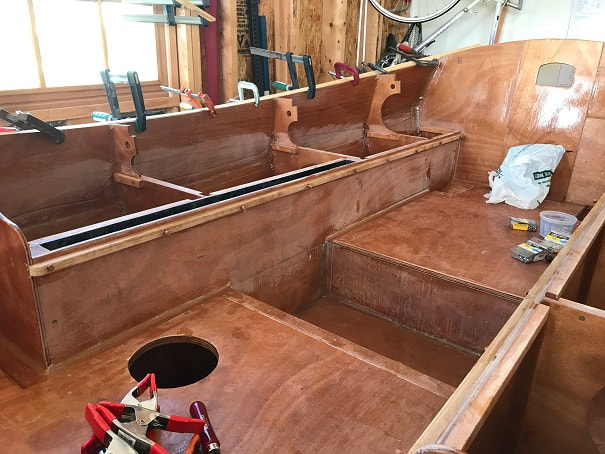
The doublers were glued down with thickened epoxy and pressure applied with heavy weights. After curing , I flooded perimeter of the footwell doubler and ballast compartment doubler with epoxy to ensure no voids and to build a nice solid sealed floor, then filleted everything. I had some filler material left, so I added a fillet along the base cleat of the mini bulkhead also.
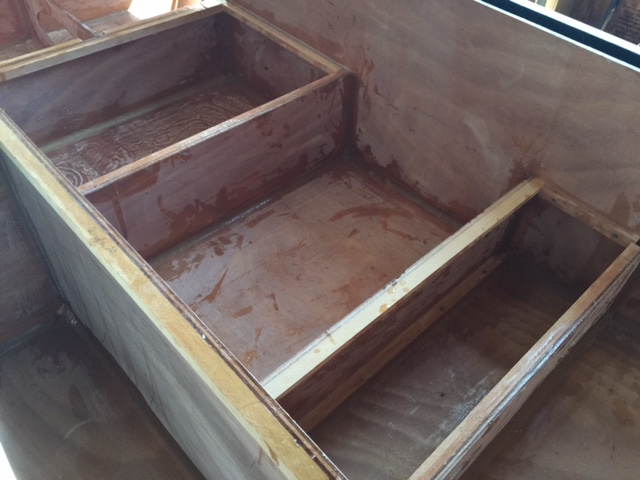
Floor doublers installed and fillets complete for SCAMP Argo's footwell and water ballast compartment.
- Note: I decided to fiberglass the entire interior of the footwell. I have updated my drawing above to reflect this.
- One large piece of fiberglass for the floor and sides, and then fiberglass tape in the vertical corners where the edges of the fiberglass cuts meet.
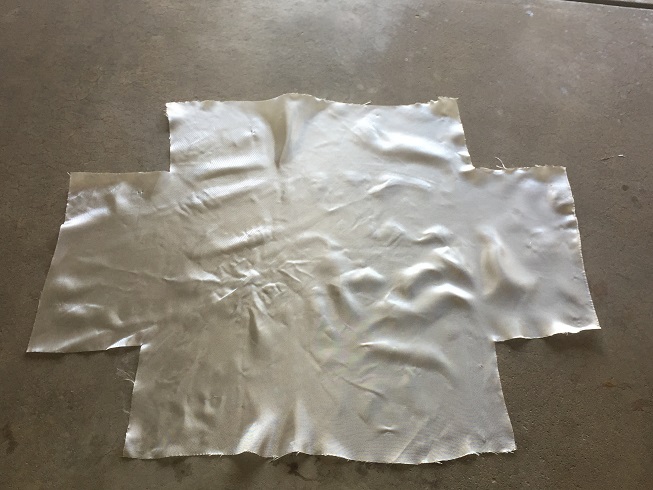
Fiberglass cut to fit the floor and walls of the footwell.
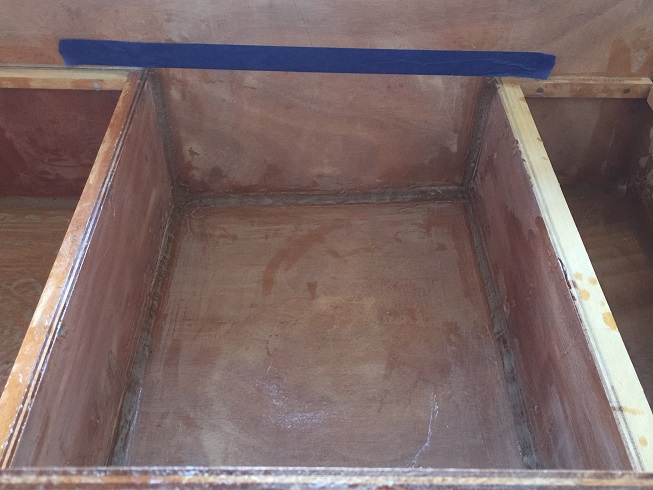
I taped off the top edge of the sidewall of the footwell, when the fiberglass is semi hardened I will trim it off along the bottom edge of the tape to get a nice clean top edge of the fiberglass.
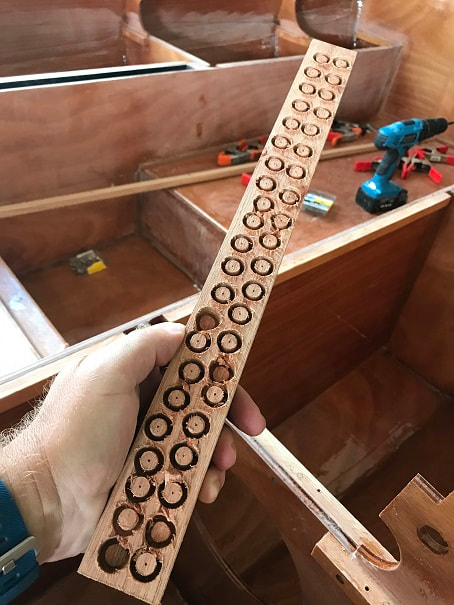
- It is mid January 2017, and over the winter the SCAMP has sat in the garage waiting for warmer spring weather for work to start again. Haven't worked on it since October. Today, as a winter project, I made the hatch and deck plate reinforcing backing plates. These will be epoxied behind the hatch cutout holes. I will be using bomar rectangular hatches for the bulkhead and armstrong round compression hatches in the cockpit and seat tops. I cut these from extra 3/8" (9mm) joubert marine grade okuome plywood (exact same plywood as kit material received from Small Craft Advisor)
Tool made in 4-5 minutes to scribe the circular deckplate reinforcing doublers, which will have an OD that is 4" (100mm) larger than the ID.

Hatch reinforcing doublers, cut out with a sabre saw, sanded, and 2 coats epoxy.
|
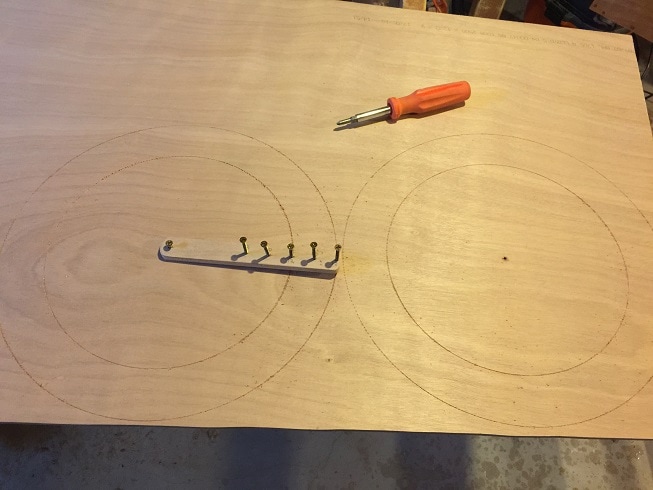
Scribing the circular doublers. There are 3 sizes of round deck plates, hence the multiple screw tip scribe options.
|
Armstrong hatches arrive with the compression bar oriented as shown above, with the "horns" pointing towards the hatch. This orientation would allow the hatch to be installed in only a very thin deck of about 1/2" or less. A smart and informed person on the Small Craft Advisor SCAMP forum pointed out that the bar can be easily removed and flipped over so that the horns point away from the hatch, thereby allowing it's use in 3/4" decks which will be how thick mine will be (doubled plywood surface).
With the compression bar flipped over, I can now use them in my SCAMP. Note that the photo only shows one thickness of plywood, but I will be doubling this up, so the actual deck will be twice as thick as what you see above.

It is abnormally warm in February here, so I went out and did some work on the boat today; cur the hatch openings in B4. Felt good to be making some progress on the Argo again!
Chilly again, so I will get a last few tasks done that I can do in the basement. I will epoxy together the cockpit sole. My cockpit sole is in two pieces, one forward of the footwell and one aft.
First, I epoxied together the scarf joint in the lower forward sole piece.
I used a small round-over bit in my router and routed what will be the exposed edges of the upper sole piece. I think it will be easiest to do this now, vs after the sole pieces are glued together.
I applied a thick layer of silica-thickened epoxy and then troweled it will a v grooved trowel, then clamped and weighted the pieces together. This is the aft sole piece.
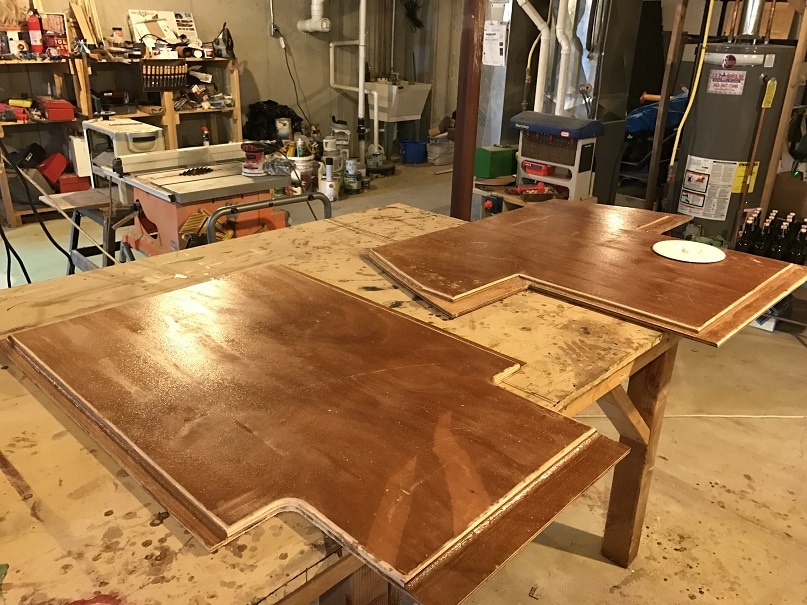
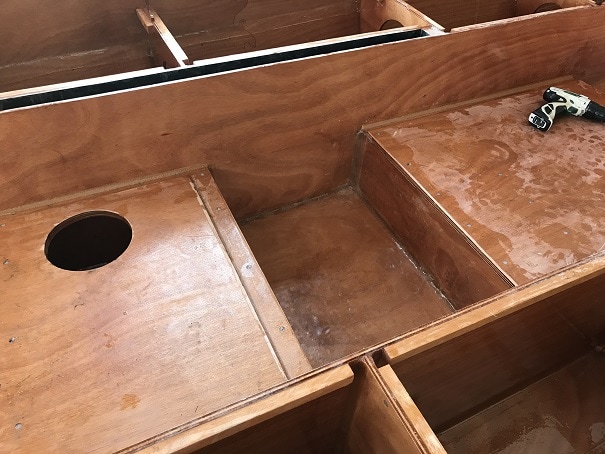
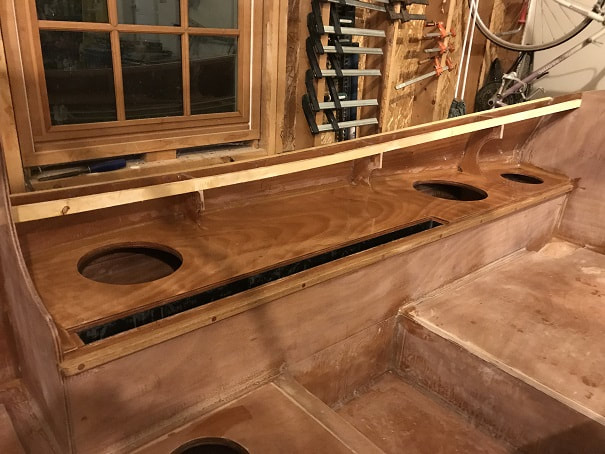
Here you can see the cockpit sole pieces that will be installed fore and adt of the footwell. At this point I have decided to only cut in one hatch, and that for the water ballast compartment which will provide access to the water ballast plug and the centerboard pin. It is an Armstrong hatch. I prefer to wait until I understand the boat and my preferences before cutting in more hatches. The sole is already "doubled" so if I want to add a hatch later, I plan to cut the hole and install an Armstrong hatch.
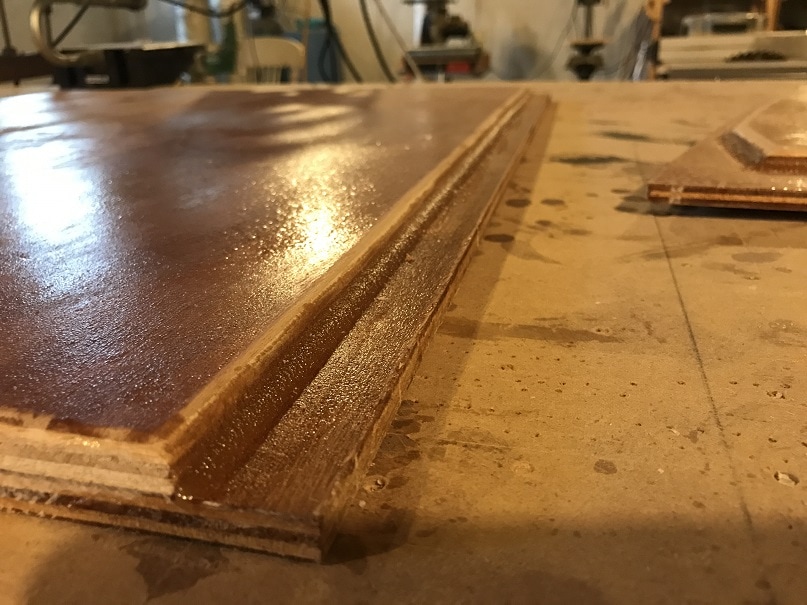
I routed a radius onto exposed edges of the upper cockpit sole doubler prior to assembly. After epoxying the sole pieces together, I applied an epoxy filllet between the two, in the gutter areas, to provide for a nice smooth gutter.
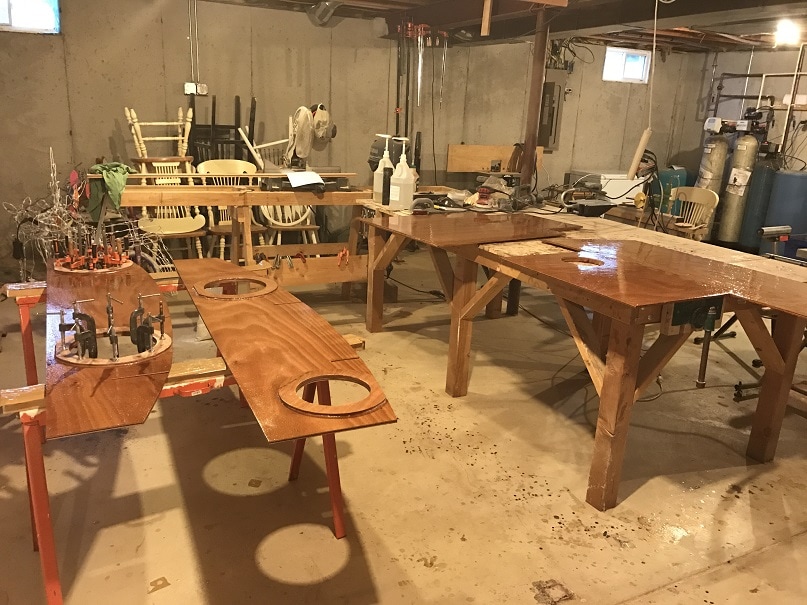
All bottom surfaces of seat-tops and sole pieces, are getting 3 coats of epoxy. Also you can see the hatch doublers being epoxy-glued onto the seat-tops.
I used the plunge cutting capability of my japanese pull saw to cut out the centerboard access panel into the seat top. I want some clearance between the front edge of the panel and the bulkhead, so I left a 1inch "ear" in the seat top at the front of the access panel. This will be a fragile little piece until it gets epoxied down. I wanted to use the japanese saw rather than the table saw also in order to minimize the kerf.
- Finally warm outside and I will start work in the garage again. I am sanding, sanding, sanding. Wear a mask, very fine dust! I am sanding the exterior of P1 and P2, and the whole interior of the boat. The dried epoxy and fillets can leave very small little sharp edges so I recommend wearing gloves. I am sanding down all surfaces to be glued together including seat top bottom, sole bottom, and edges. Now is the time to get everything smoothed and sanding prior to attaching seat tops and sole.
- I got it as good as I had patience for....The interiors of the storage compartments are smooth with any sharp edges removed, but they are not smooth/perfectly flat, there are some epoxy lumps and drips in the storage compartments that will be left there.....I am done sanding in there!! I put a complete coat of epoxy on the entire interior of the boat from stem to stern.
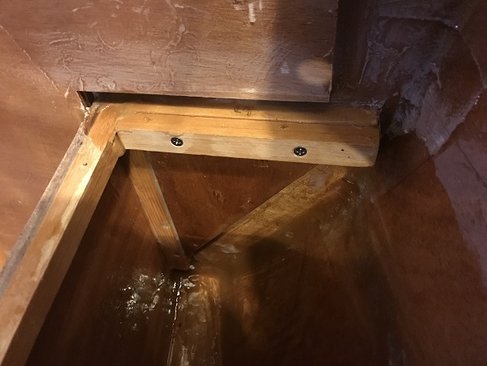
- Next I installed the motor mount reinforcing doublers.
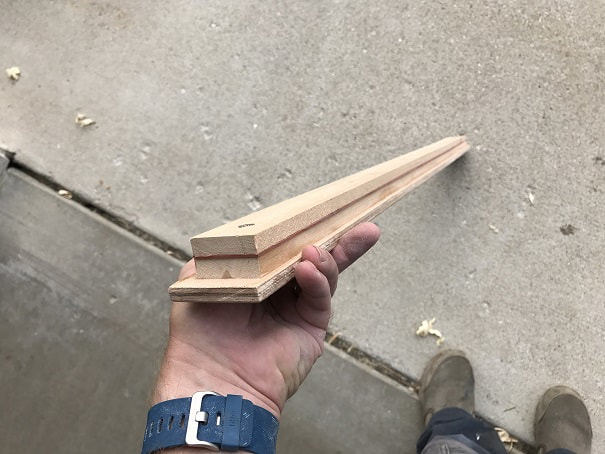
I made 3/4" thick reinforcement doublers and epoxied them to the transom where the motor mount will attach. They are made from 2 thicknesses of plywood epoxied together. There are two of these pieces one is the big one you can see between the transom doubler and the portside hull; the other is a small triangle that is epoxied in place on the transom inside the seat framing. I used sticks cut exactly to length to compress/clamp these pieces in place during epoxying. The reinforcing piece wanted to slide upwards under the compression force, so I clamped a block in place there to keep it down where it should be.
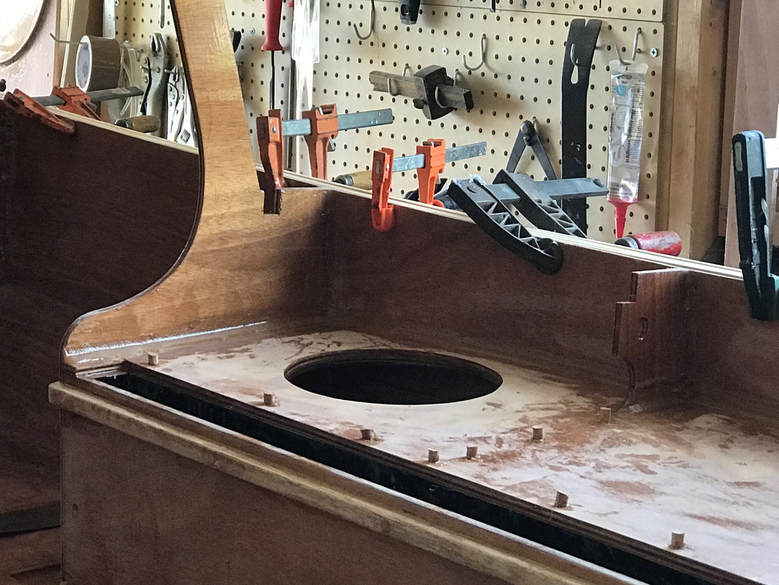
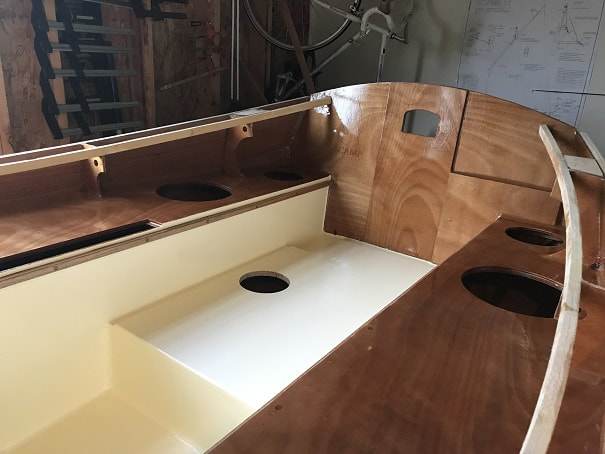
The bottom of the water ballast section has a doubler, allowing for the drain plug to be countersunk such that the top of the plug is flush with the surface; this will allow for complete drainage of the compartment.
Sole, epoxied and screwed down.
Fore and aft sole sections are now installed and filleted.
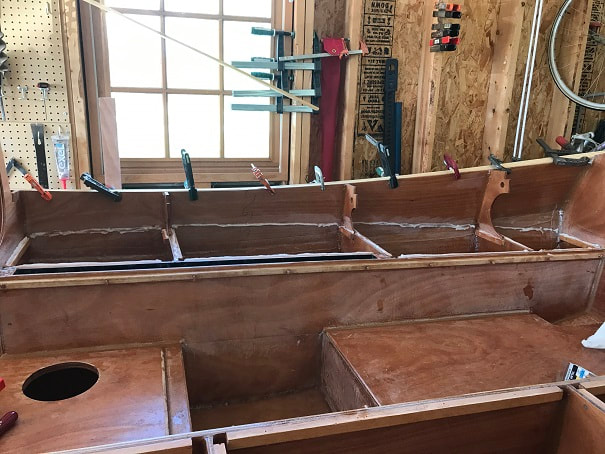
- One detail that I had missed earlier, is that the designer now recommends sealing off the compartment on the port and starboard sides that is between bulkhead 7 and the transom, so that these sealed compartments will act as flotation cells. I cut two 6 3/8" discs out of joubert marine okume, the same thickness as the bulkhead, and epoxied them in place. Also remember to seal off the limber holes at the bottom of the bulkhead....I will do this with a large fillet of thickened epoxy. Important to do all this before installing the seat tops. I will cut small watertight hatches into the seat tops above these watertight compartments so that they can be ventilated as needed.
The new storage/ventilation holes for the watertight flotation compartments between bulkhead 7 and the transom, can be seen above; a 8" Armstrong hatches will fit those holes.
- Dry fit seat tops, pre-drilled and countersunk holes.
- With the addition of the motor-mount doubler, I needed to trim the aft end of the port seat top. I also doubled-up the seat top cleat on the transom on the port side so that the seat is supported there.
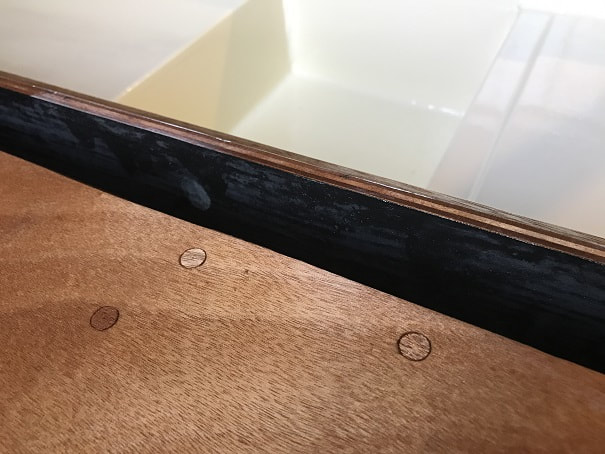
Installing the long rails on the interior of the cockpit. These can support the filler boards. I went with 3/4" x 3/4" mahogany. I rounded the exposed edges with an 1/8" quarter-round router bit. These are epoxied and screwed in place. I elected to screw these in from the rail into the seat longitudinal, and I will plug the holes with mahogany plugs which I think will look nice.
I used a plug-cutter to cut 3/8" plugs which I will use on the cockpit rails and the seat tops, which will be varnished. The plug cutter produces a plug that presents a the face grain to the exterior, rather than an end-grain as would be the case with a cut dowel.
Thickened epoxy applied prior to installation of the starboard seat top.
Filleted the seat top and plugged the holes with mahogany plugs.
Next, I cut the plugs flush with the japanese saw and then proceeded to sand, sand, sand, sand for a looooong time. Just finished sanding the cockpit and the the interior of the whole bow section. Wear a good mask!
Sanding isn't my favorite thing to do, and this was alot o sanding. After many hours of sanding I am pleased with the result and will start applying finishes.
The seat tops will get 2 coats of epoxy, followed by 4 coats of Epifanes varnish. With the sanding done, I have applied the 1st epoxy coat in the photo above.
SCAMP Centerboard Case Cover
- Folks that have sailed SCAMPS advise that the centerboard needs to be accessed every couple time out, in order to clear debris that sucks up into the case between the centerboard and the case. Beaching the boat and grounding would obviously increase the frequency of rocks entering the centerboard case. Also, even in clear water, water pressure seems to cause water to push up to the seat top, which makes a good seal of the centerboard case important.
- My solution is shown below.
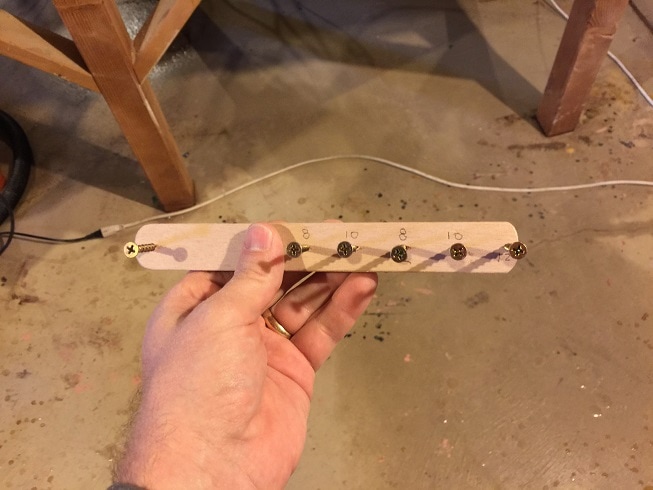
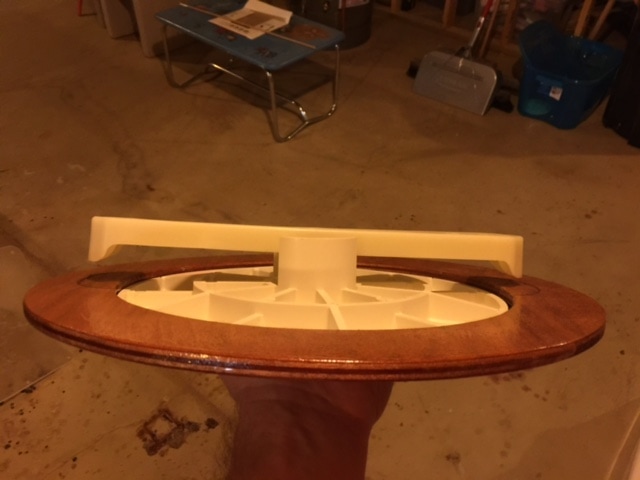
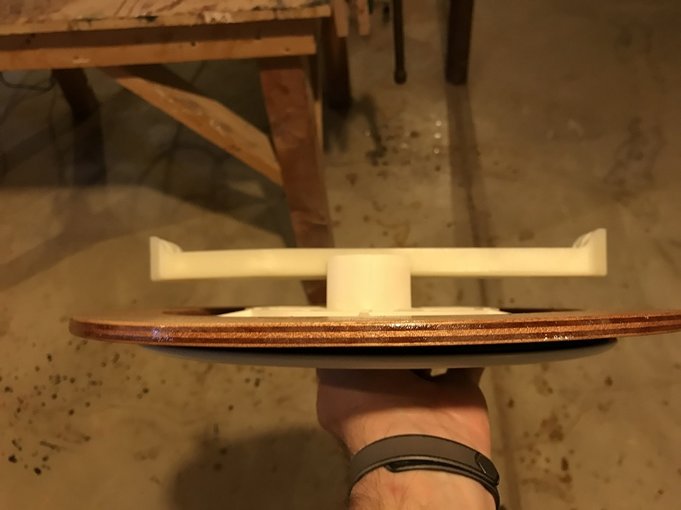
I built a centerboard case cap, made from a piece of Okuome plywood epoxied to a 5/8" piece of mahogany, followed by a 1/16" (2mm) natural rubber gasket, backed by a 3/8" mahogany strip. Six (6) stout stainless screws compress the mahogany and gasket together. This is a photo of the dry-fit. I will epoxy-coat and finish the pieces.
- NOTE!: The solid mahogany pieces above that fit into the centerboard case already are tight fits.....I didn't want a loose fit with a large gasket, thus the solid pieces are already tight and the gasket protrudes a very small amount, under 1/16" (1mm). When inserted it is very tight. I will report back on performance after the baby gets into the water.
Finishing the Cockpit
- Seat tops and stern will be varnished with Epifanes High Gloss Spar Varnish, but first I will do the painted parts
- Sanded with 120grit paper, vacuumed and tack cloth. Applied a coat of Pettit EZ Prime, let dry for a day
- Sanded with 120 grit paper, vacuumed and tack clothed, applied second coat of EZ Prime, let dry
- Sanded with 120 grit paper, vacuumed and did a solvent wash on a tack cloth using Pettit 120 Brush Thinner. Poured out a pint of Pettit EZ Poxy, Hatteras Cream and mixed in 3 cap fulls of Pettit EZ Poxy Performance Enhancer 3021. Applied 1st coat of paint to cockpit and bow interior.

OK, this is about to get serious.
|
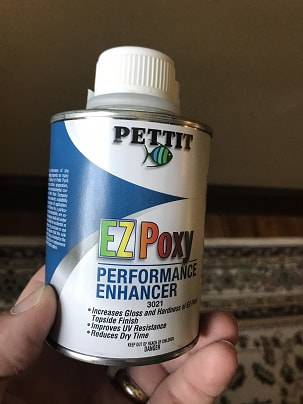
...thought I'd try this stuff
|
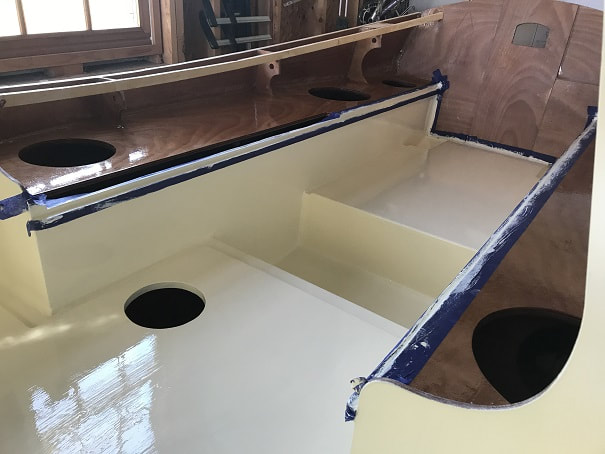
- Sanded with 220 grit, vacuumed, tack-cloth solvent wash with Pettit 120 Brush Thinner, applied 2nd coat of EZ Poxy with 3021 Performance Enhancer, waited a day
- Sanded with 220 grit, vacuumed, tack-cloth solvent wash with Pettit 120 Brush Thinner, applied 3rd coat of EZ Poxy with 3021 Performance Enhancer
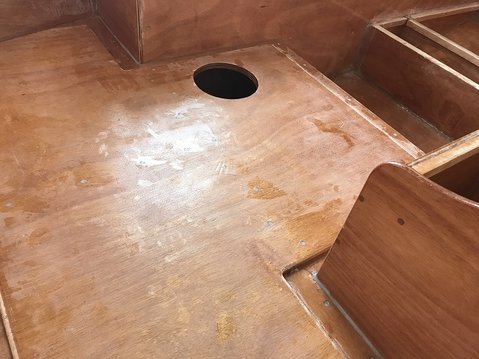
NOTE: I became concerned about the completed sealed off sections beneath the aft sole section, between the footwell and stern, would gather condensation and create moisture problems. I posted the question to the SCA forum and Howard Rice suggested adding a hatch or deck plate, for inspection and ventilation. I cut in a 6.75" diameter opening into the aft sole section for a small Armstrong hatch. This new opening can be seen in the photo in the non-skid section below.
Applying Non-Skid to Sole
The SCAMP Argo will have non-skid coating applied to the floor of the footwell and to the sole tops. As I will be using Armstrong hatches, which seal to the surface of the deck, I made sure to mask off the sealing surface so that those areas will remain smooth for a good seal.
- Masked off the area that I wanted to have non-skid applied to. I traced the corners with a little can so that the corners will have a nice radius. I trimmed the radius' with a razor.
- Sanded the area to be painted with 220 grit, vacuumed, solvent washed with Pettit 120 Brush Thinner
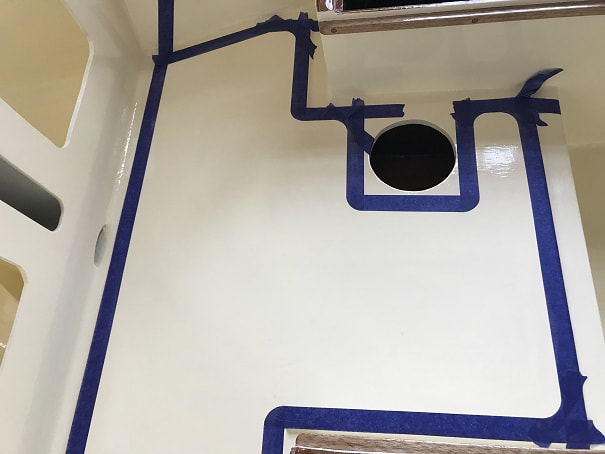
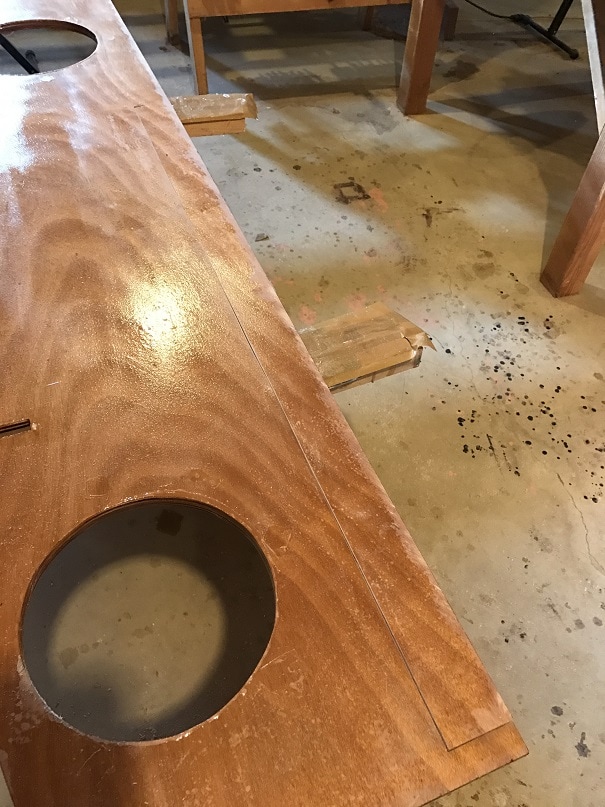
Forward sole section, taped off for application of Non-Skid

Aft sole section, taped off for application of nonskid. Note the recently cut-in hatch opening.
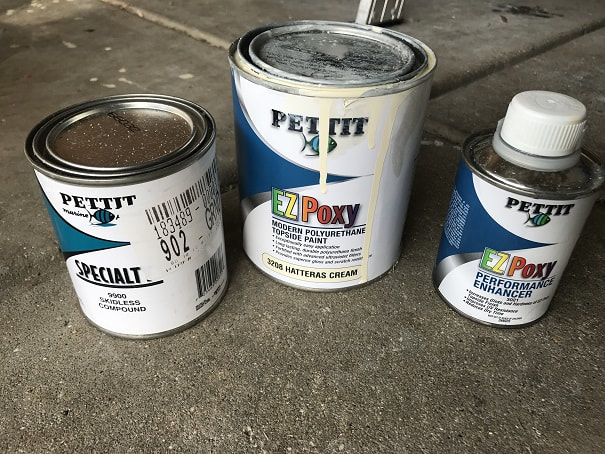
These are the Pettit components of the non-skid coating that I used on the SCAMP Argo.
- Mixed the non-skid paint. With such a small area to be painted I mixed 10oz EZPoxy, 1.8 capfuls of EZPoxy Performance Enhancer, and 2oz of 9900 Skidless Compound. The skidless compound was a dry grit. Mixed it all up and brushed it on (being careful not to over-work the coat) in order to get a nice even grit distribution.
Cockpit Brightwork
- Cockpit interior had 3 coats epoxy. Sanded epoxy with 120 grit, vacuumed, solvent wash/tackcloth with Pettit 120 thinner, applied first coat of Epifanes High Gloss Spar Varnish.
Cockpit color scheme for the SCAMP "Argo"....note I chose to varnish the longitudinal rails that support the cockpit filler boards...., to excentuate the nice mahogany rails and plugs.
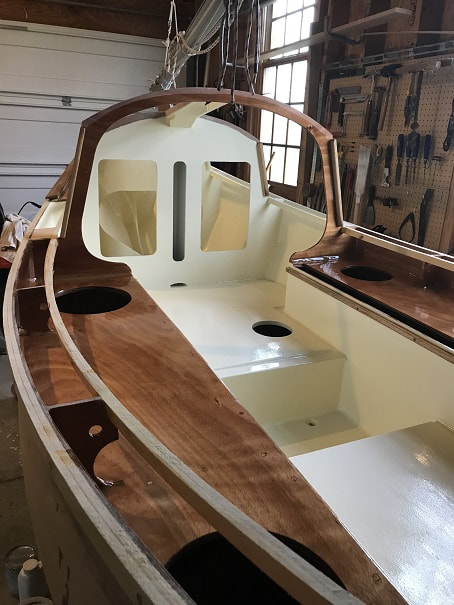
Pettit EZPoxy with performance enhancer on the decks and Epifanes high gloss spar varnish.
I am pleased with the flush-cut mahogany plugs under the varnish.
- Sanded varnish with 220 grit, vacuumed, solvent wash/tackcloth with Pettit 120 thinner, applied second coat of Epifanes High Gloss Spar Varnish.
- Sanded varnish with 220 grit, vacuumed, solvent wash/tackcloth with Pettit 120 thinner, applied third coat of Epifanes High Gloss Spar Varnish.
WITH all of this done, I am now working on the deck and cabin (veranda). The COCKPIT COAMING pieces are arguably part of the cockpit, but please check the DECK AND CABIN PAGE for the steps I took to install the coaming pieces, thanks.
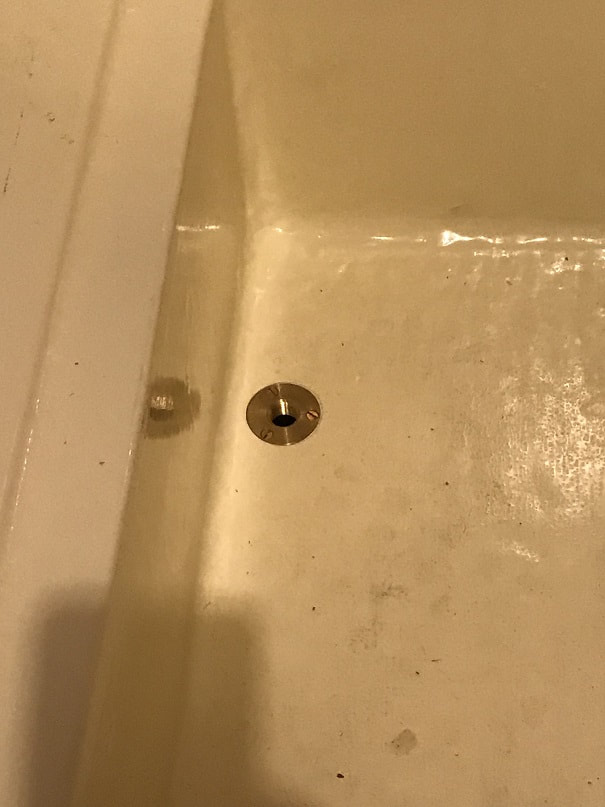
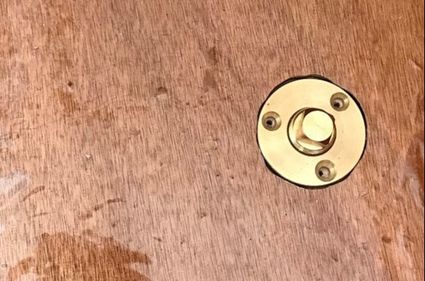
Bronze drain plug mounted in the footwell. This will be used to drain out the boat and footwell when I retrieve the boat onto the trailer. Bedded in 3M 4200.
I drilled a hole in the top of the BALLAST drain plug and inserted a brass rod, then bent it upwards for easier hand-access, and to retain it in the plug. The footwell drain-plug will be a recessed allen-key plug to go easier on the toes in the foot well.
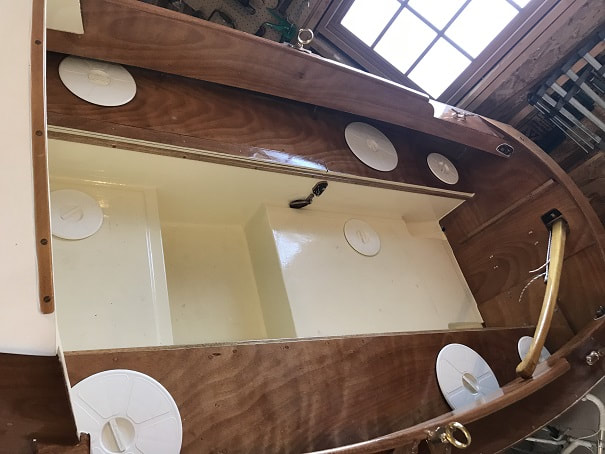
Armstrong hatches in the cockpit. To port and starboard of the foot well, there are not hatches, to allow for comfy seating.
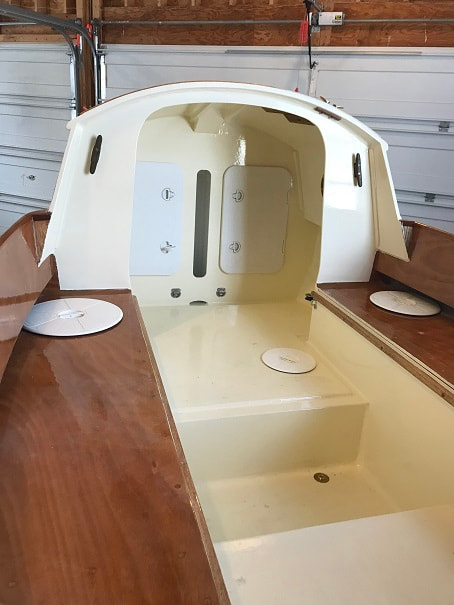
Cockpit looking forward, including hatches now in-place.
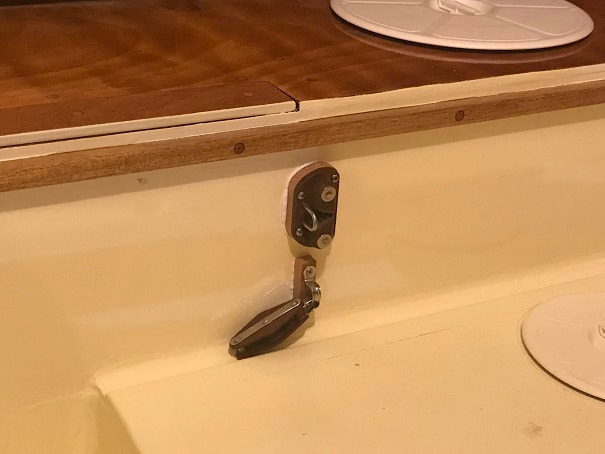
I detailed installation of hardware on the "Mounting Hardware page of this website" so go there for tackle and rigging detail, but here are some additional photos of the centerboard uphaul tackle which is mounted in the cockpit and veranda area.
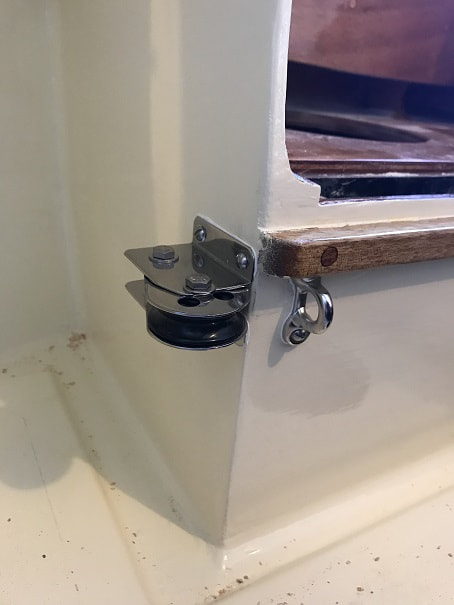
Again, for complete detail visit the "mounting hardware page" but here is a view of the centerboard uphaul hardware mounted at the aft end of the centerboard case. Tufnol camcleat with bullseye, and a stainless strap-eye retaining a single 10mm tufnol bock with becket. These two pieces are spaced-out from the cockpit side, with 1/2" hardwood spacers. This is to keep the centerboard tackle from banging against the sides. All bedded with 3M 4200 and secured with 2" #10 stainless machine screws.