Warp: the yarn or other type of string or cord that is stretched over a loom, typically the vertical strings on a loom. Weft: the yarn or other type of string or cord that is woven back and forth, typically horizontally across the warp.
Weaving by hand on a small loom that can be held in one's hand is such a peaceful, therapeutic, creative endeavor. I encourage you to try it. Small hand looms can be made cheaply , or bought.
On this page I will show photos and steps I followed to make:
- Hudson Bay Point Blanket Themed Coasters
- Various Plaid Coasters
- My first tapestry piece made on the mini loom
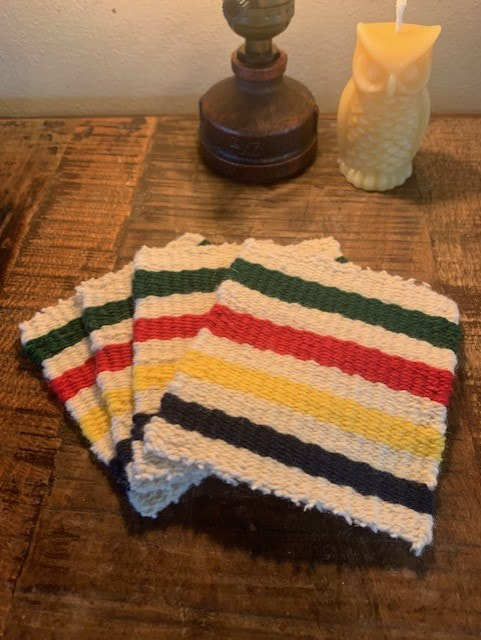
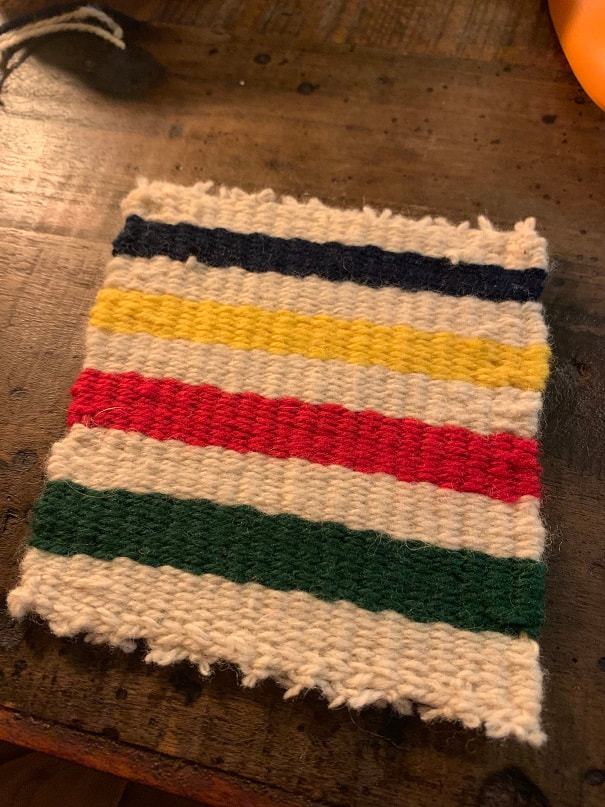
Hand woven wool coasters from my mini loom.
Small Looms used to make these projects:
Before I get to the weaving, here are photos of the two small looms that I made. Details on how to make these looms is on my making mini looms page.
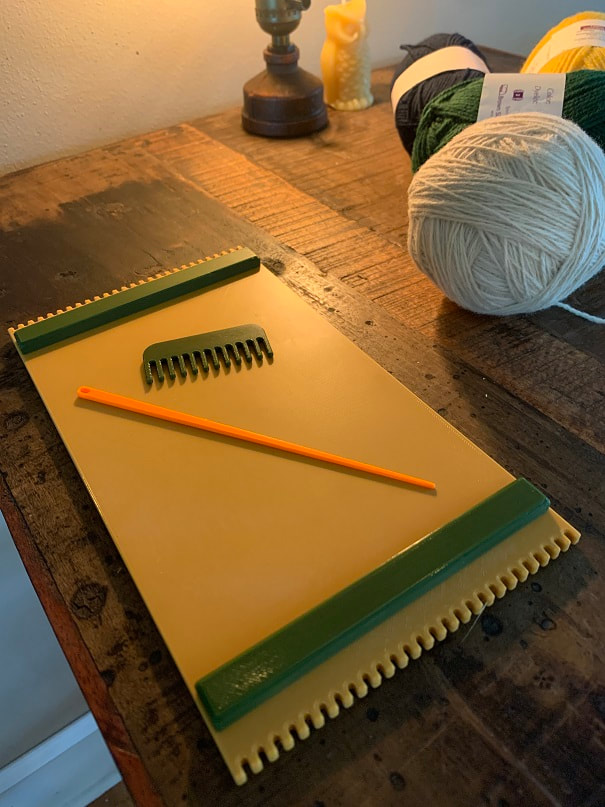
3D printed loom, 5 1/4" x 9 1/2" (133mm x 240mm), along with needle and beater.
You could buy a little loom such as this, or make one out of wood or cardboard.
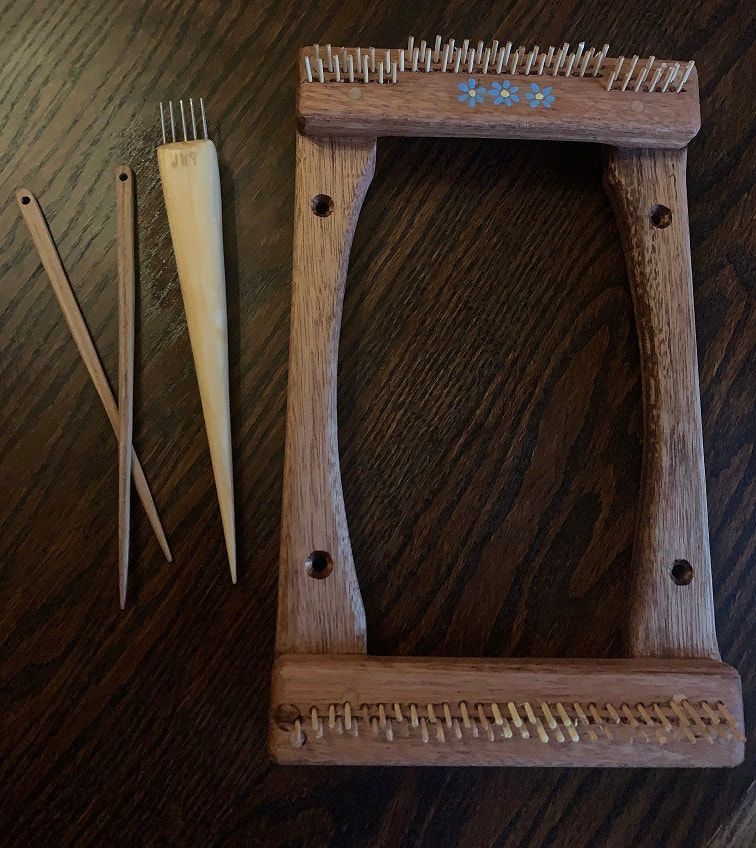
Home made wooden hand loom with homemade beater and needles.
Weaving a Hudson Bay Inspired Wool Coaster on the Mini Loom:
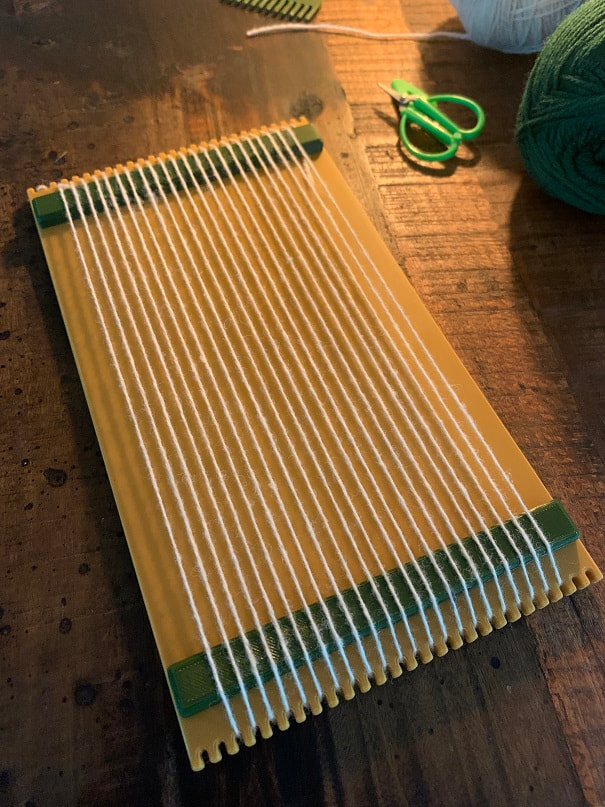
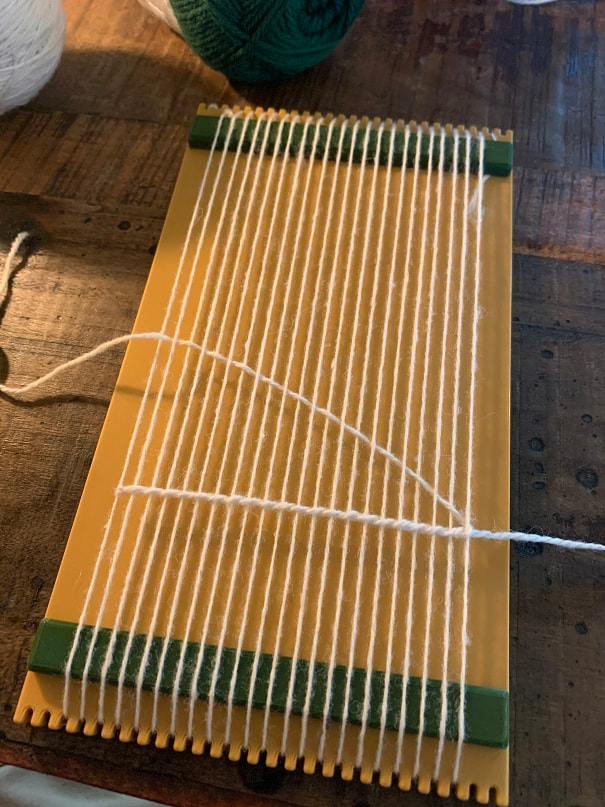
Wool yarn warp tied to the loom.
You can warp the loom like this, or if you want longer tassles on your work, you could wrap the warp all the way around the back of the loom and then back over the front.
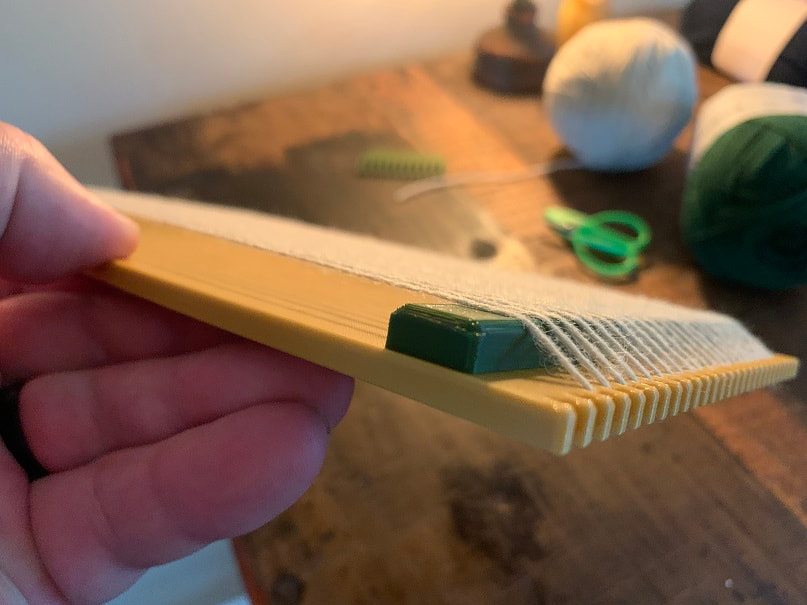
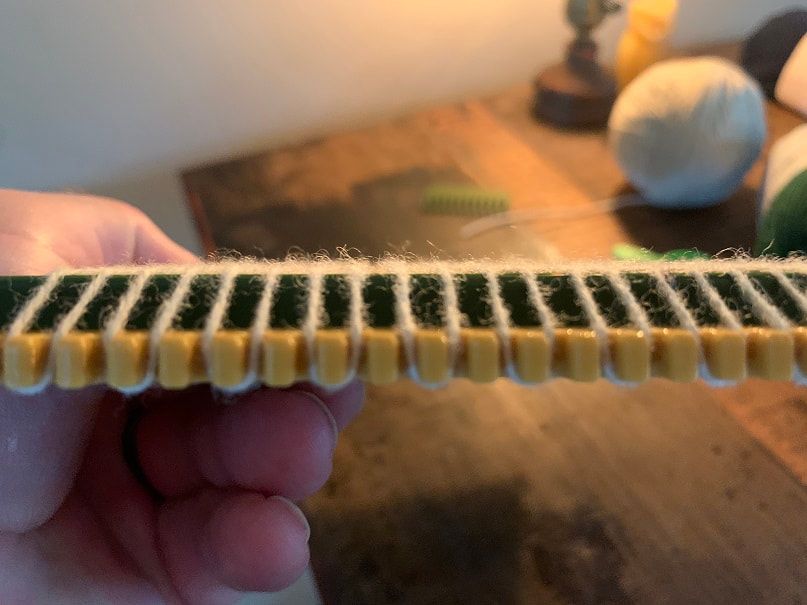
Here you can see how the riser bar lifts up the warp over the frame.
Starting my coaster with two rows of "twining stitches" which provide solid base for the weaving and which also help provide secure spacing of the warp strings.

Second row of twining stitching is in place. When I start and finish each bar of color, I am leaving 2 to 3" tails of yarn loose outside the weaving. These will be tucked in later.
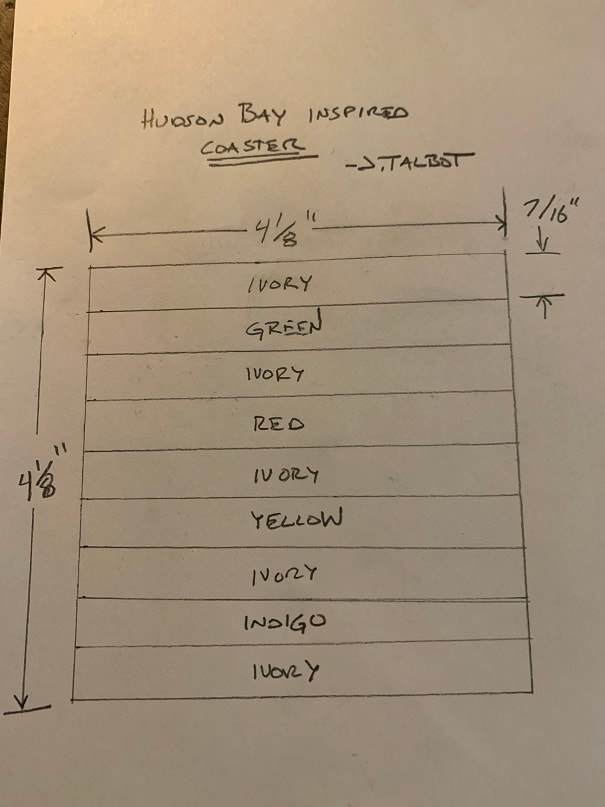
I am going to weave coasters inspired by the Hudson Bay Point Blanket design. These large warm blankets were used to trade in exchange for beaver pelts in the 1700s and 1800s. They were woven in England and still are to this day. https://en.m.wikipedia.org/wiki/Hudson's_Bay_point_blanket
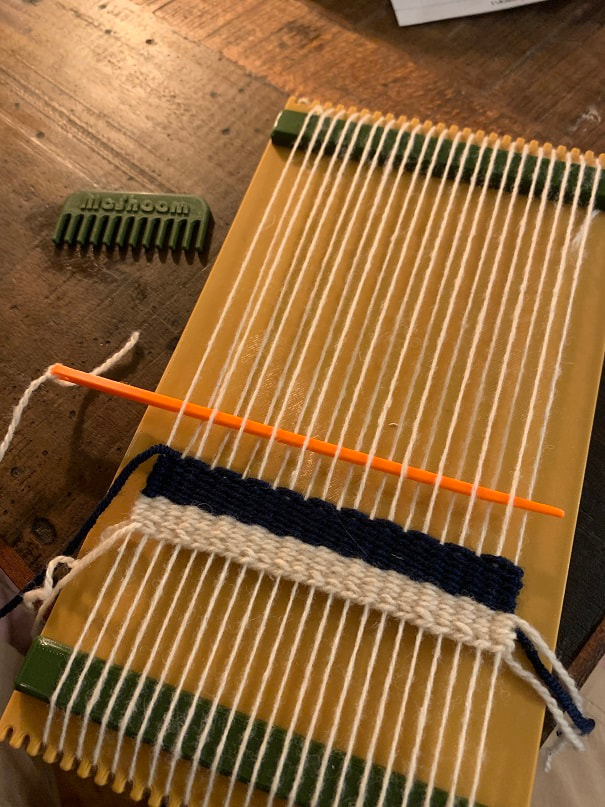
Weaving is underway! I tie the yarn to the needle and then just weave back and forth, alternating under and over the warp strings. Gently weave the weft in place and then press it down into the previous row using the beater (little comb)

I used my little drawing as I go, to make sure the colored bars are the correct width.
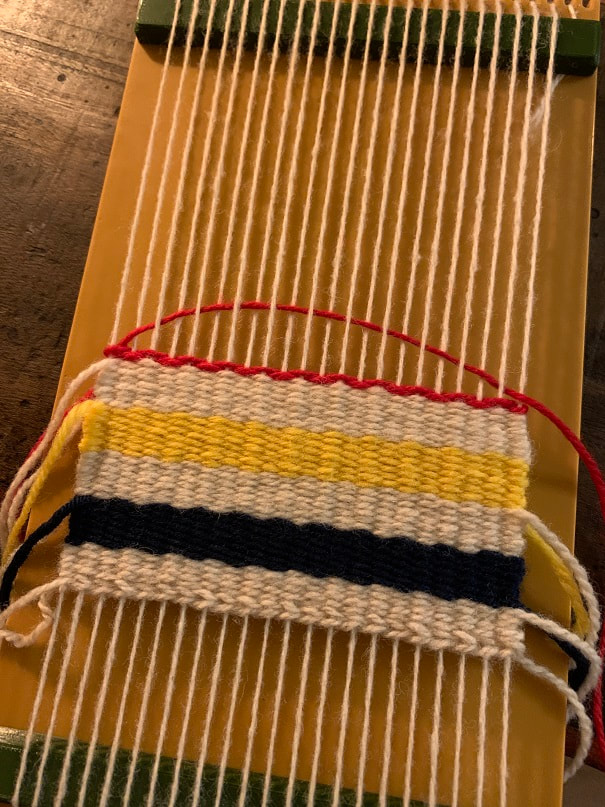
A common mistake that I made on earlier projects, was to weave to tightly around the outer edges (selvedge) which results in the woven cloth necking in and getting narrower and narrower as you weave. Be careful not to over tighten the weft when you loop around the outer edges of your weaving, and also leave a "hill" like this in the weft before you beat it down.
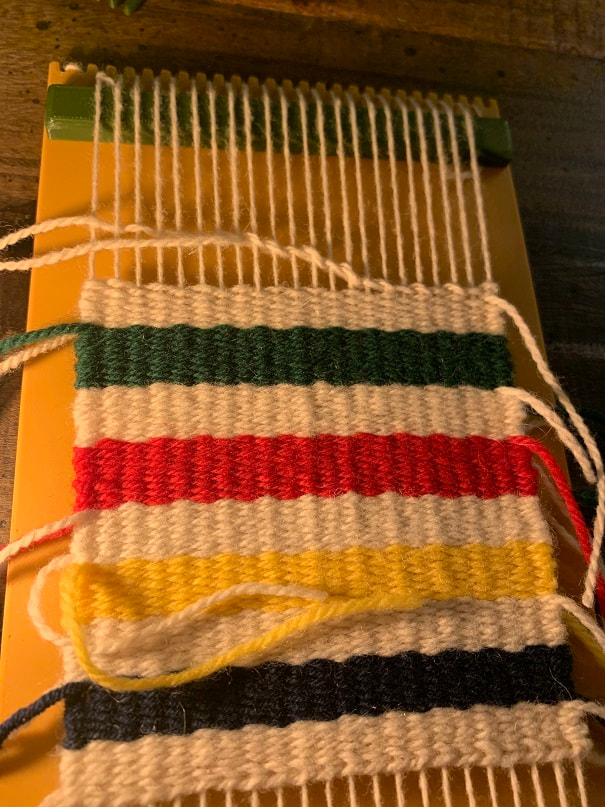
Two rows of twining stitches at the top.
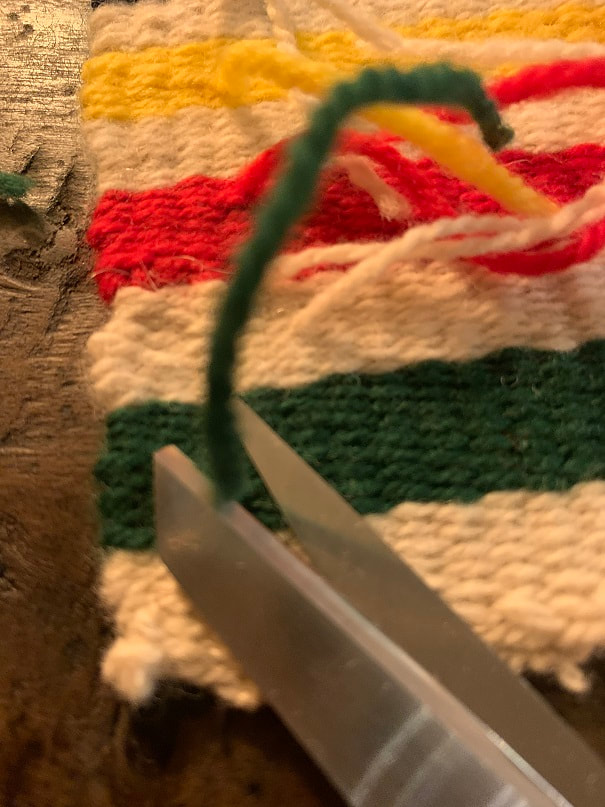
When the weaving is done , you can cut your work off the loom!
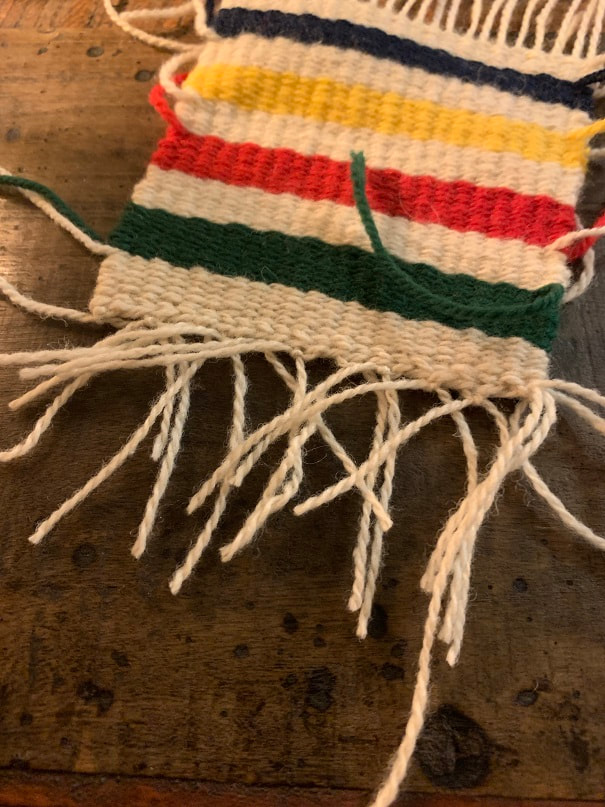
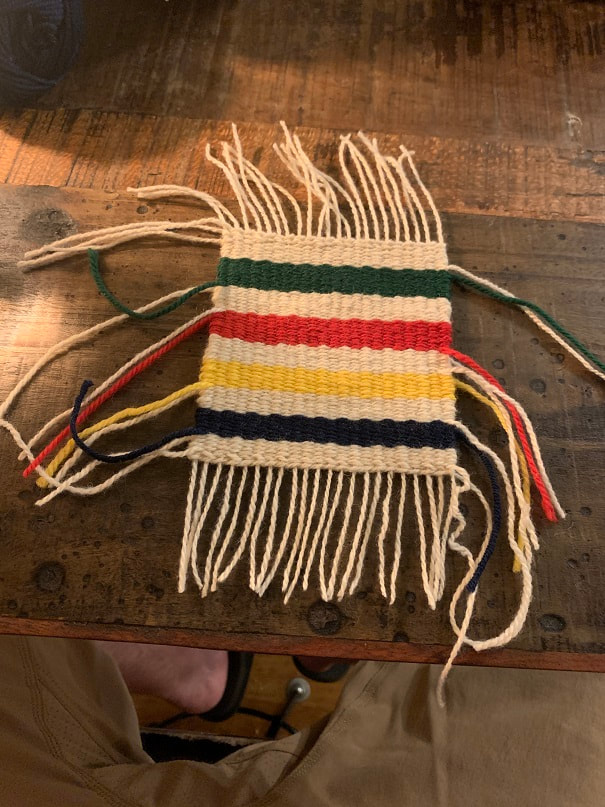
There are many ways to finish off the warp strings that extend from the top and bottom. You could braid three together and leave them long, you could tie them all and leave long tassles, you could stitch the ends into the weaving. I tied square knots and trimmed the ends short. Here is a photo of square knots tied using two warps per knot.
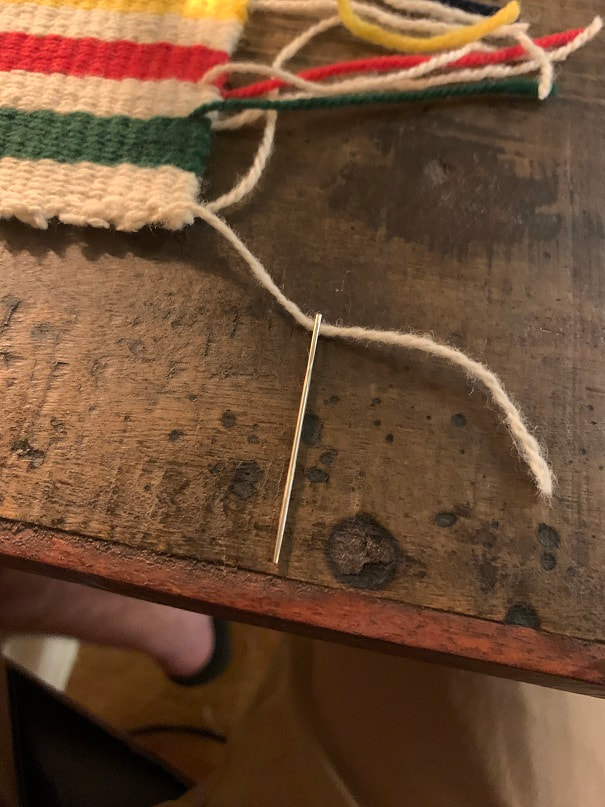
I then cut the tails very short outside the knots. Now I will use a needle to thread the tails hanging out of the sides of the weaving, into the weaving itself.
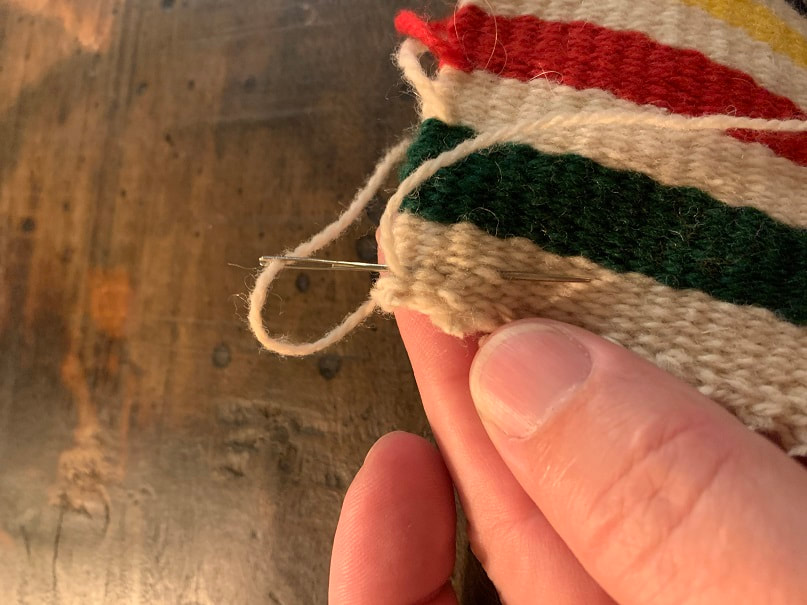
Here I am starting to stitch a loose end back into the weaving. Keep the loose end within the bar of same color. Also do your best to keep the loose end on the bottom face of the weaving so that it can't be seen from the other side (top of the weaving), make sure all the tails come out on the back side of the weaving.
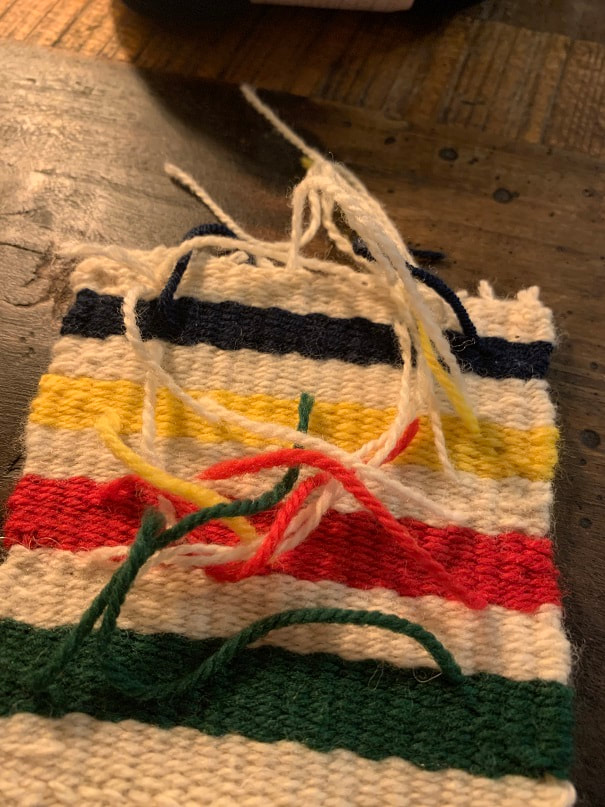
Here are all the loose ends stitched back into the weaving.
Carefully cut the loose ends flush with the surface of the weaving.
Here is the "back" of the weaving after the loose ends have been trimmed off. I applied a drop of clear "Fray Check" to each knot and each loose end at this point. Fray Check will help the knots hold and help the loose ends from slipping out.
Native American Themed Wool Coaster
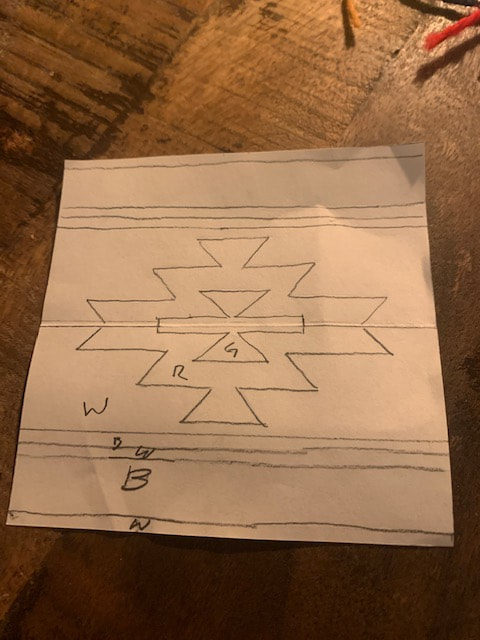
I find a life-size scale drawing of the project to be helpful. I use these to make sure my weaving is following the design.
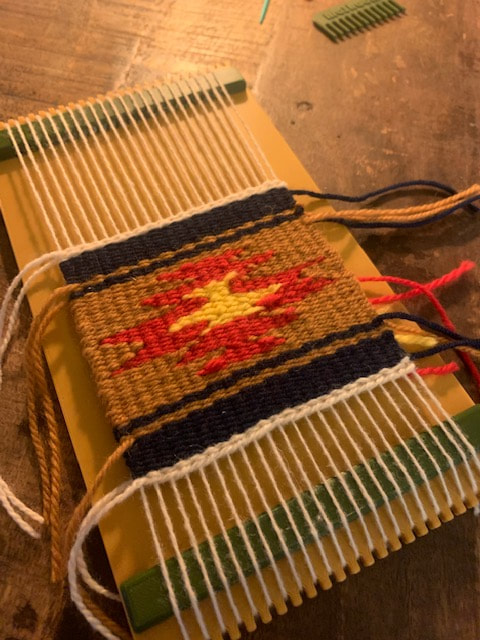
This coaster was my first attempt at tapestry style weaving where you weave multiple colors in a row in order to make a design. For this coaster I want longer tassles left over at the, as seen in the photo below, so I wrapped the warp all the way around the back of the loom each time as I strung the warp into the notches at the top and bottom of the loom.
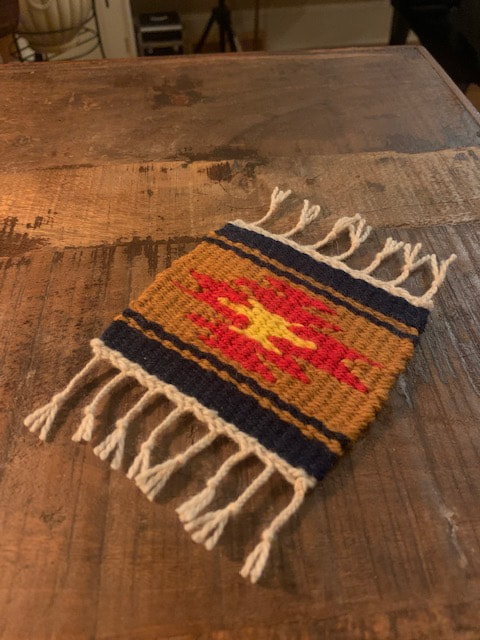
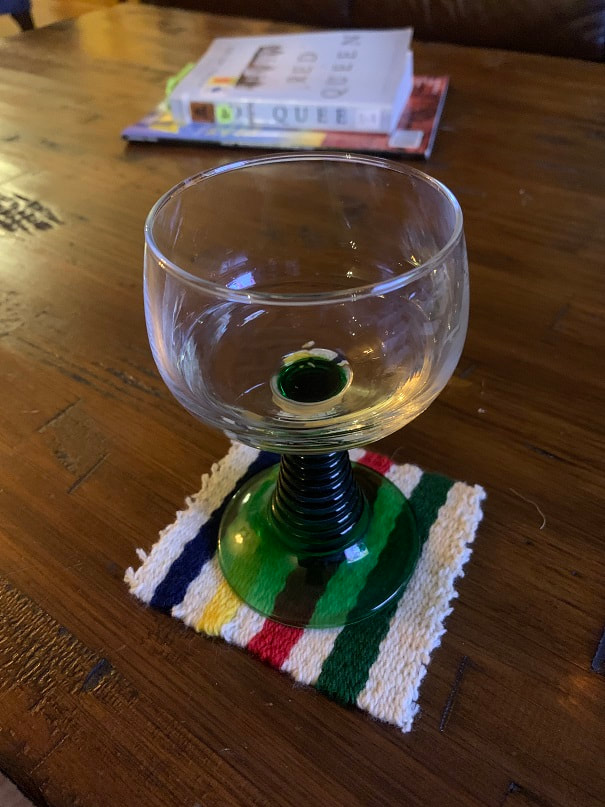
Native American inspired design, wool coaster, made on my mini-loom. I braided and tied the warp to finish off the edges of the coaster.
Plaid Style Weaving: Version 1: One Warp yarn and doubled up Weft
Here is a coaster idea with three different colors of warp strings. I will use single warp strings for this project and each time I weave the weft across I will use a doubled up yarn strand. This will result in a "warp facing weave" in which the warp strings will be visible.
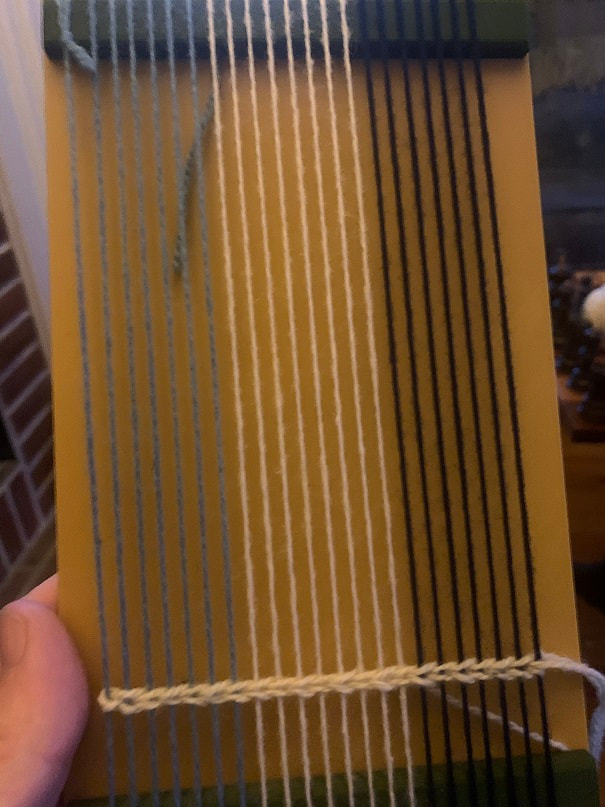
Here I am weaving a coaster such that the warp will show. This is called a warp-facing-weave. I set up the warp in three colors to make a plaid type weave.
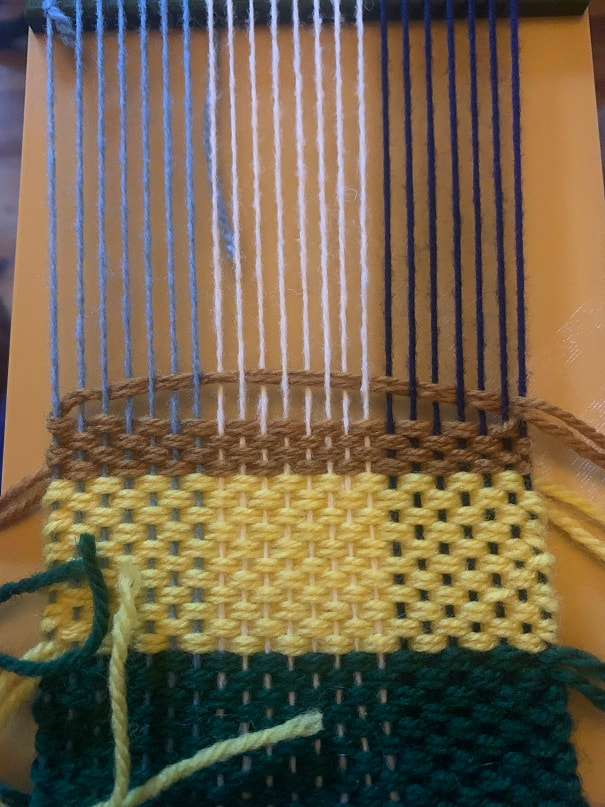
Here is the weaving in progress, I am weaving 2 yarns of weft at a time which results in the warp being exposed.
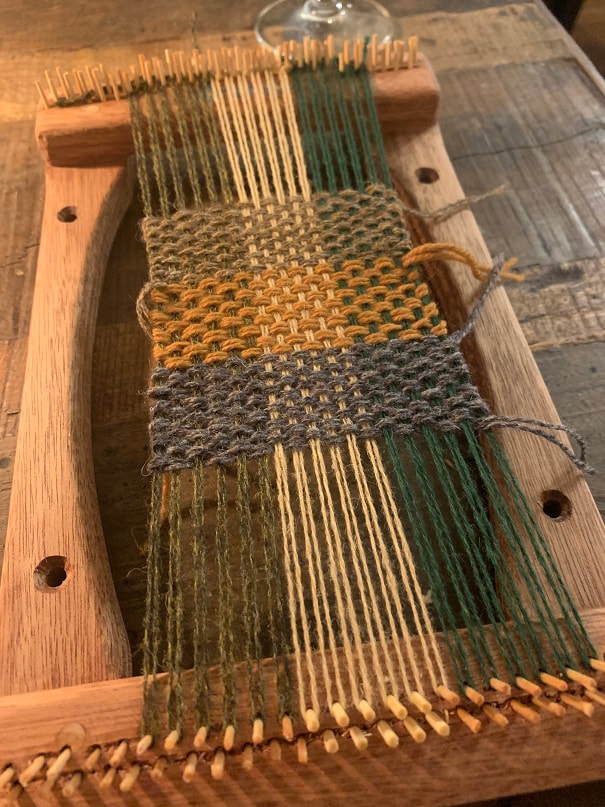
Weaving Example, 3 colors of warp, 1 warp strand and doubled up weft yarn strands
Plaid Style Weaving Version 2: Doubled up Warp and Doubled up Weft
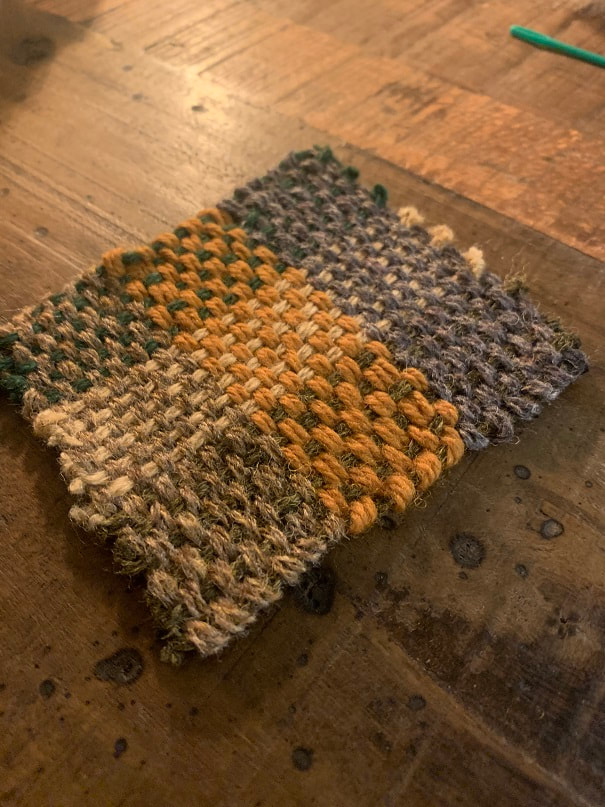
Here I wove two warp yarns between 2 weft yarns to have both warp and weft well exposed.

My First Effort at Tapestry!:
Thicker sevedge (selvedge is the out warp strands that make up the right and left edge of the piece) and twice the warp strands, make this piece 10 EPI (ends per inch, or 10 warp strings per inch, vs the spacing of the notches in the loom which are at 5EPI).
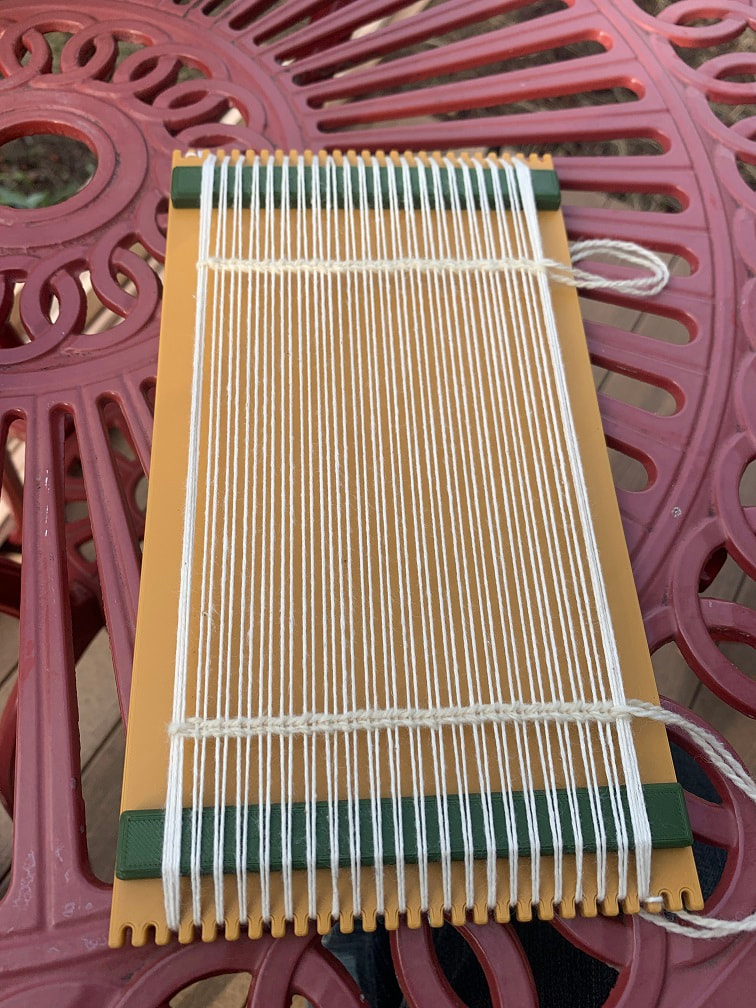
I warped the loom this time with unmercerized cotton at 10EPI, also note the thicker selvedges; I ran 5 strings in the notch for the selvedge. Twining stitches at top and bottom to space out the warp.
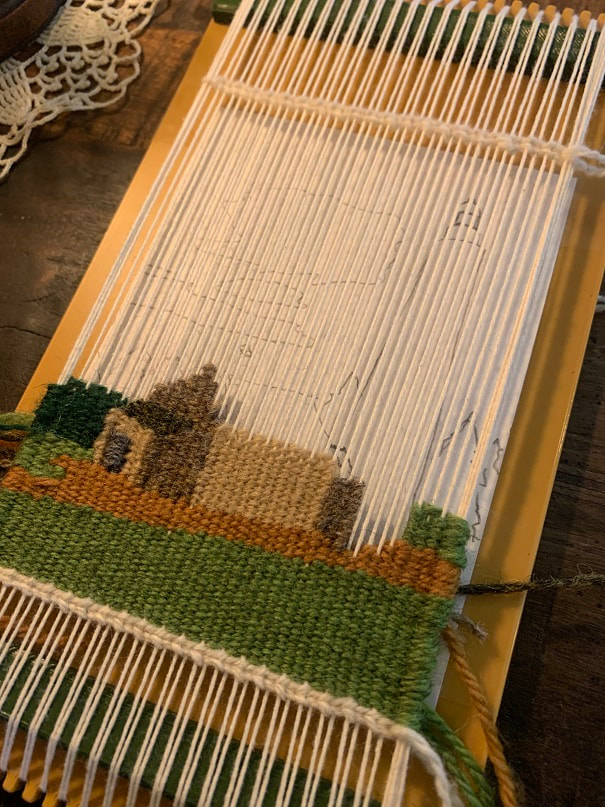
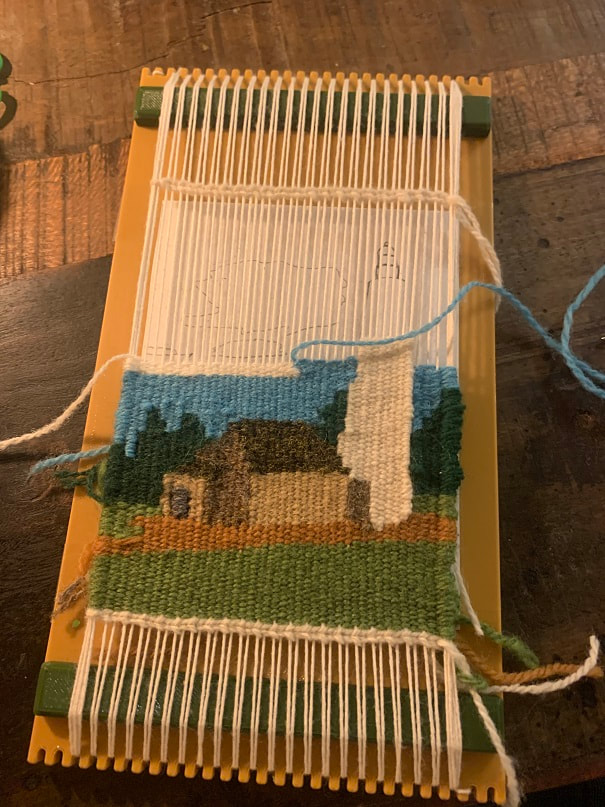
I drew a picture of the Cana Island Lighthouse in Door County Wisconsin, onto a piece of paper that was the size of my desired tapestry, and I taped my sketch onto the loom. I then started weaving with long needles, with multiple colors, and did my best to follow the design on the paper below.
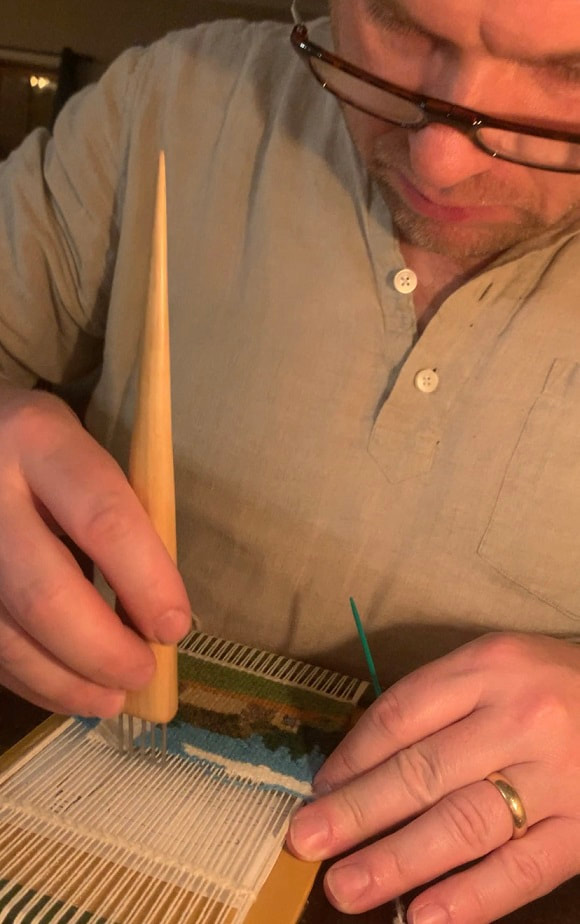
Pressing down the weft firmly but gently with a beater.
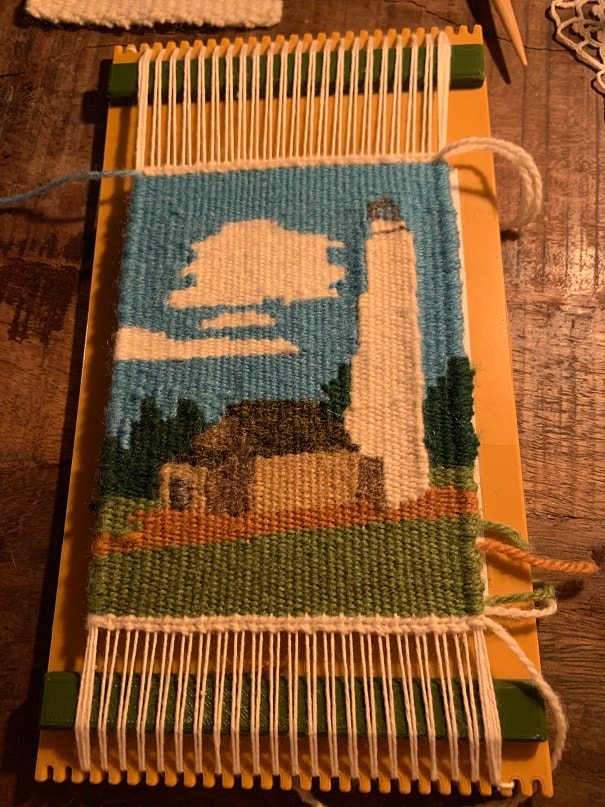
Weaving complete!

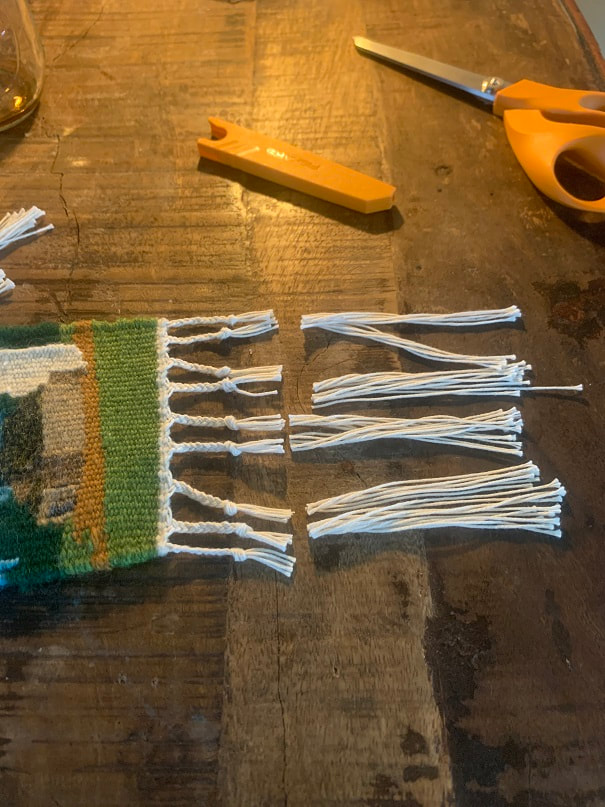
When the weaving was done, I cut the weft and removed the tapestry. I clamped the warp that was extending from the top of the weaving, so that I could braid and tie off the warp on the bottom of the tapestry. ALSO, do you see that long vertical edge between white and blue on the right side of the lighthouse? This was essentially a long "slot" in the weaving, so I went in and on the back of the tapestry, used fine thread to stitched that slot tight together.
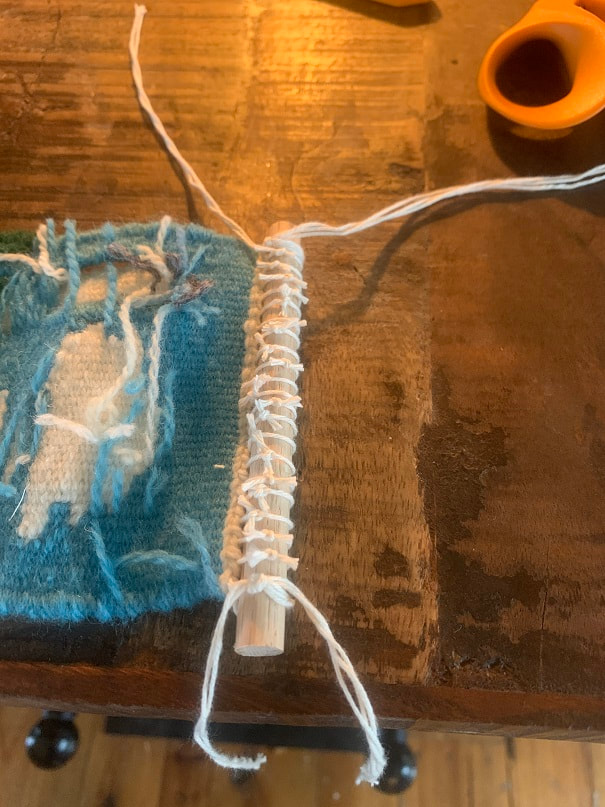
I tied a dowel along the top edge of the tapestry. At this point I trimmed all the loose weft yarns that were sticking out the back of the tapestry.
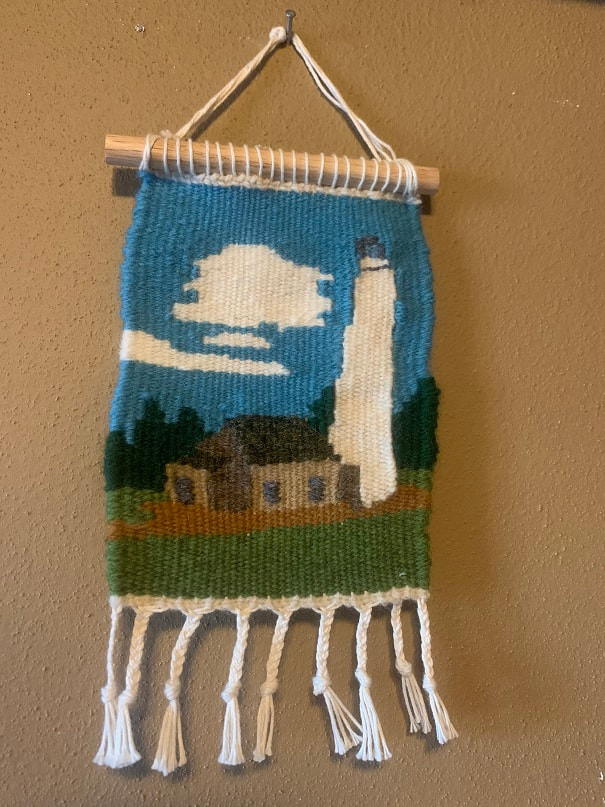
It's not an award-winner, but it's my first completed tapestry and it was fun to make!