April 2024
Making and Carving a "Paddle to the Sea" model
"Paddle to the Sea" is a childrens' book, written and illustrated by Holling Clancy Holling, and published in 1941. It tells the tale of the voyage of a small carved wooden canoe and it's paddler as they follow the currents of the Great Lakes, from Nipigon country out to the Atlantic Ocean. A Native American boy carves the canoe and it's stoic captain, paints it, and places it in the snow, high in the hills over Lake Nipigon. When the snow melts, it takes "Paddle to the Sea" with it, and the book tells the story of all the people, machines, technology, animals and natural wonders that the little canoe model sees on it's epic journey through the Great Lakes to the Atlantic. I loved the book as a boy, and I still have the book. I live in Wisconsin, not far from Lake Michigan, and the book has always been special to me. As a boy I thought how cool it would be to make this canoe and paddler model......now I have decided to do it! Below is documented my best attempt at building as close to accurate a model as possible of the actual "Paddle to the Sea" canoe and paddler from the book.
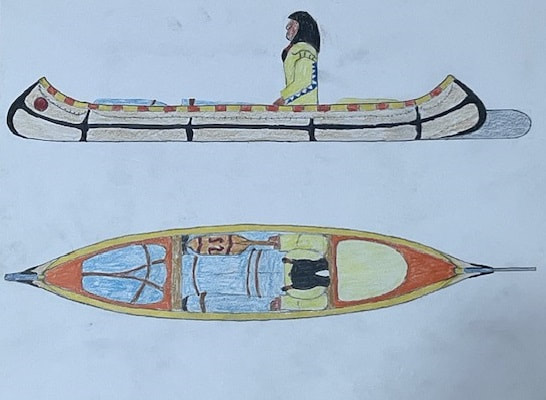
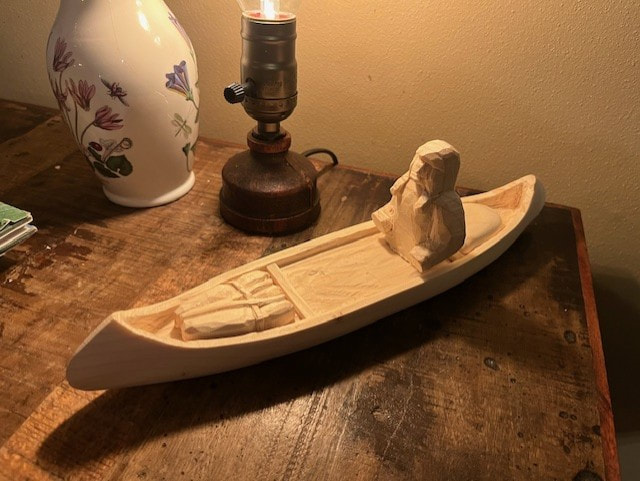
First here are some photos of the completed model of "Paddle to the Sea"
Then further below are drawings and build-log of how I built it.

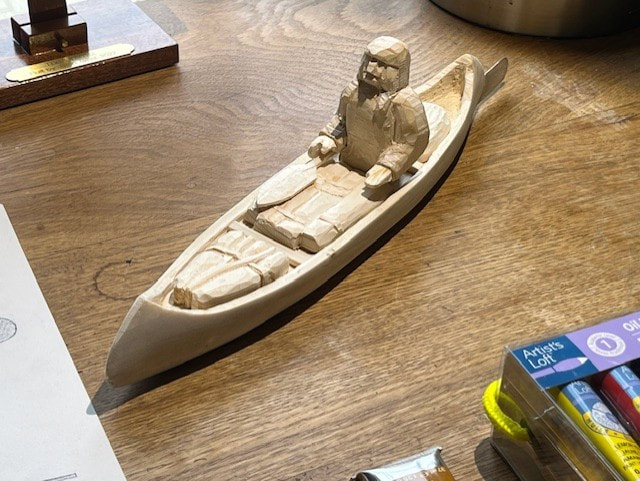
Paddle to the Sea model


Making working drawings of "Paddle to the Sea"
There are illustrations throughout the book of Paddle to the Sea, and there are also good clues as to materials, dimensions, and finish. The book tells of the young Native American boy in Nipigon Country (North shore of Lake Superior, around Lake Nipigon), who take "many days" whittling a "piece of pine" into a "canoe one foot long". It also advises of a rudder made of tin and lead ballast. The book also advises "oil paints" were used to paint it, along the with words carved into the bottom of the hull , "Please put me back in water, I am Paddle to the Sea"
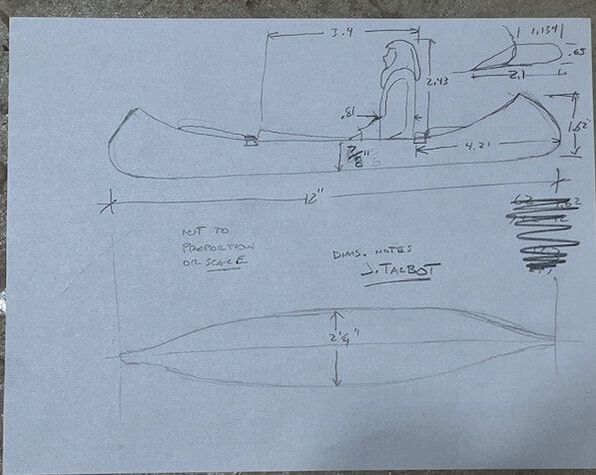
Paddle to the Sea dimensions
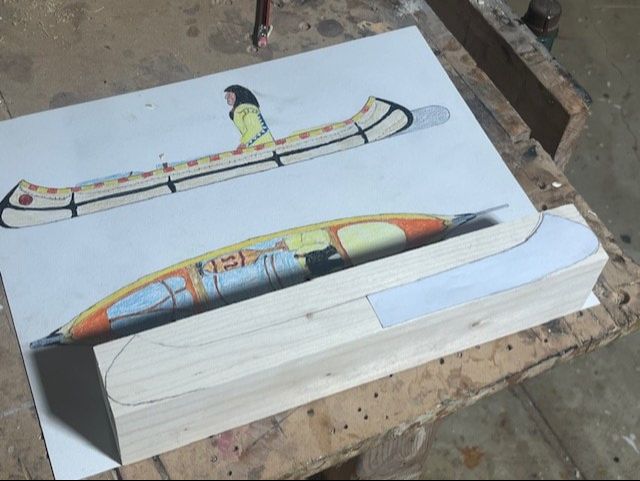
Scale drawing of Paddle to the Sea. I made this actual life size and will use it to take measurements from as I make the model.
Starting with the known total length of 12", I scaled the other dimensions from the many pictures in the book. I landed on the dimensions above, the sketch is not to scale.
Making a model of "Paddle to the Sea"
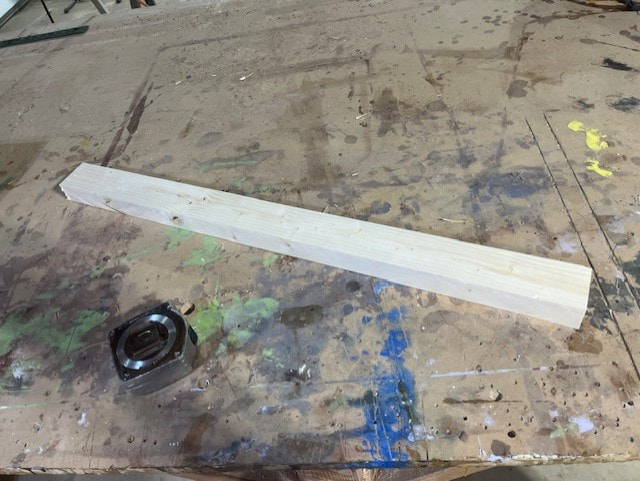
The book said the carving was made from a piece of pine....so I used this 2x4 that was in the basement.
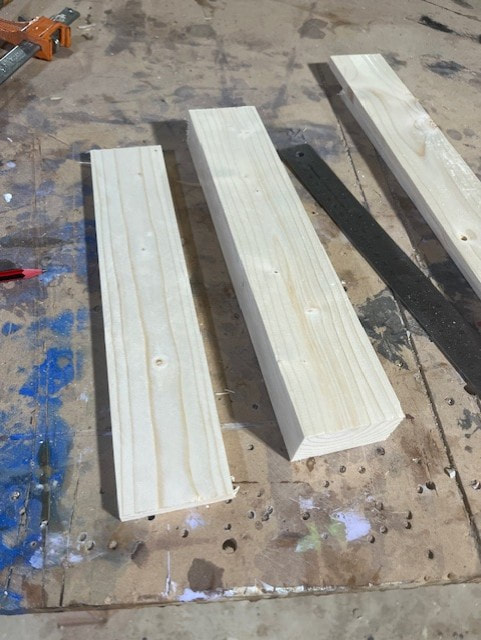
The hull is a bit thicker than a 2x4 so I cut and planed these two pieces which I will now glue together to make the blank for the hull. I was able to find 12" long sections of the 2x4 that has no knots.
Here is the finished hull blank cut and planed to length , width, and height. I made a paper template of the hull shape and and here tracing it onto the blank.
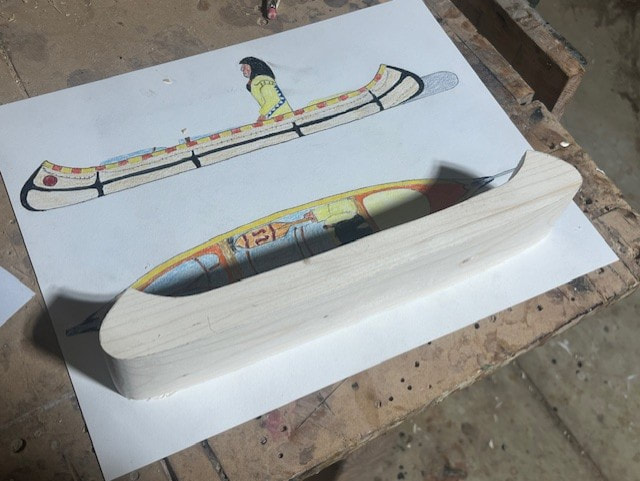
Here's the hull with profile cut out on bandsaw.
Tracing out the plan view shape of the hull.
Now the hull has been cut out in two dimensions on the bandsaw, and it will be all carving from here.
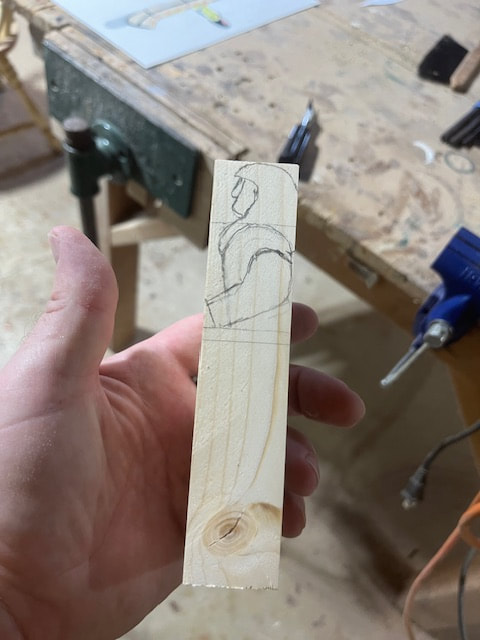
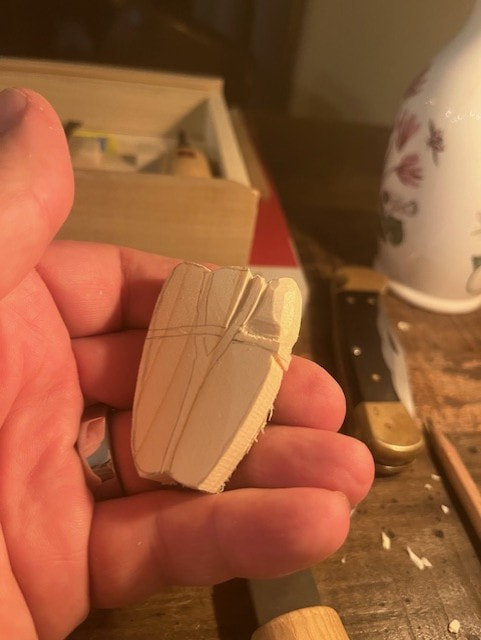
I made pine blank the size of the paddler and sketched out the side profile.
Paddler blank cut out on bandsaw....all carving from here on out.

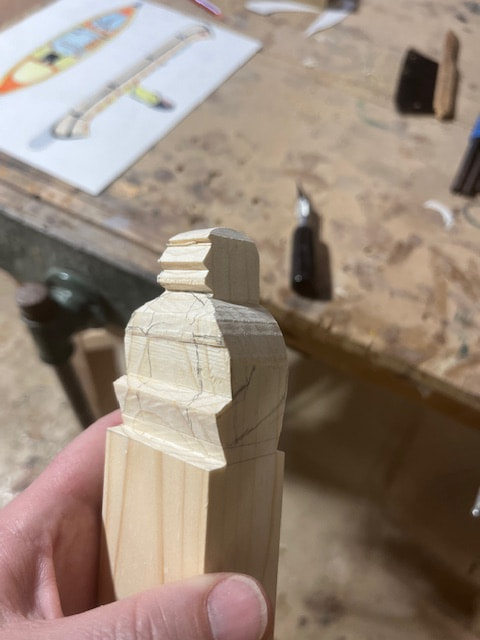
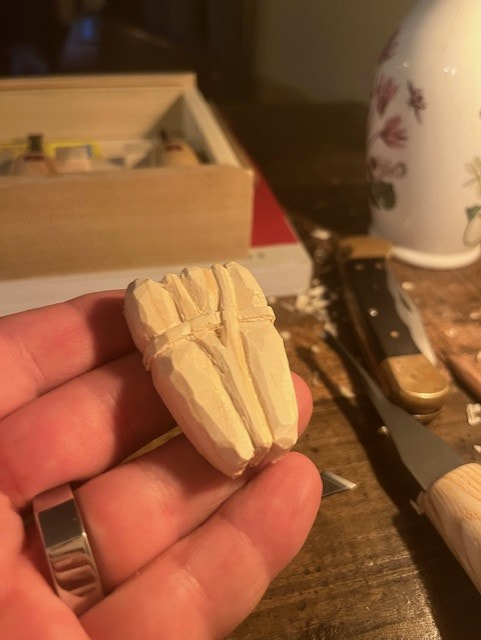
Carving the little hero....he is starting to take shape!
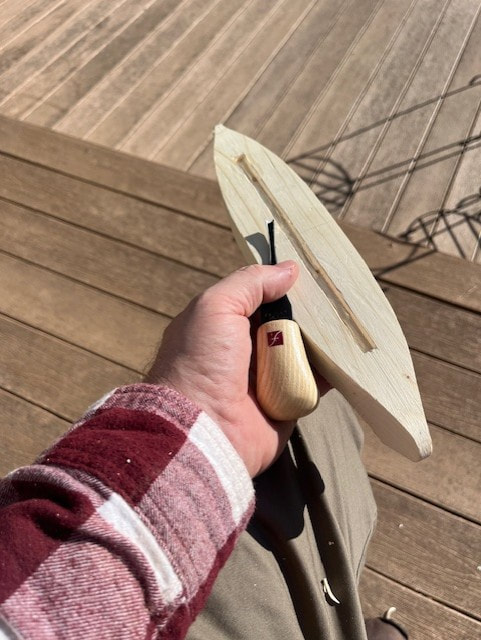
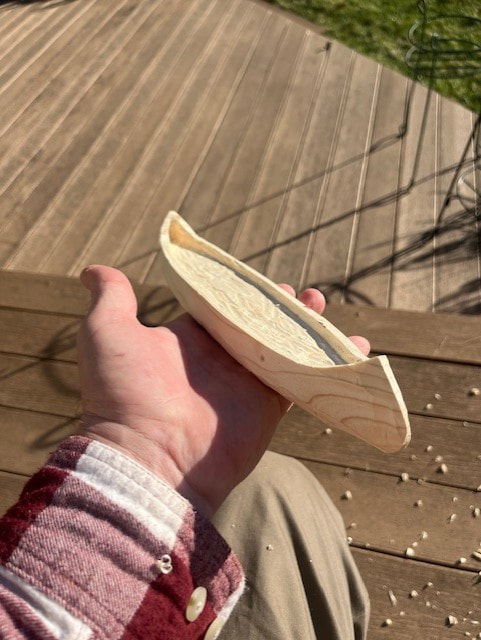
There is a shallow recess for the interior of the canoe in the pictures in the book, here I am carving the shallow recess.
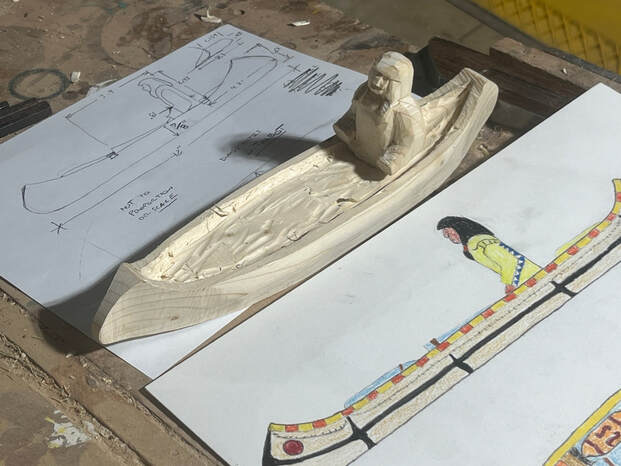
Rough carving in progress (the paddler is not glued in place, he's just resting there for effect).
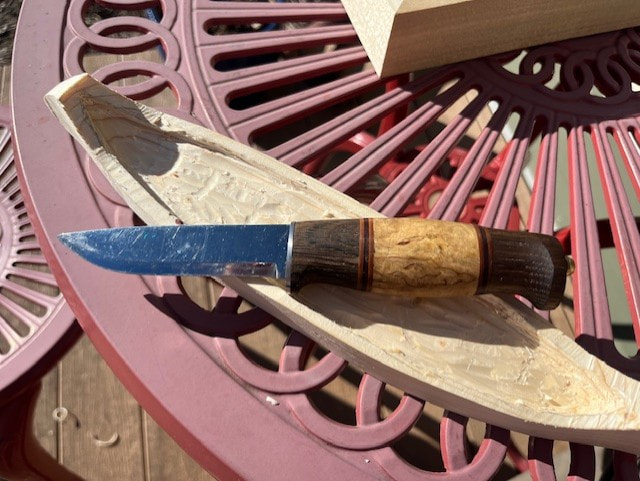
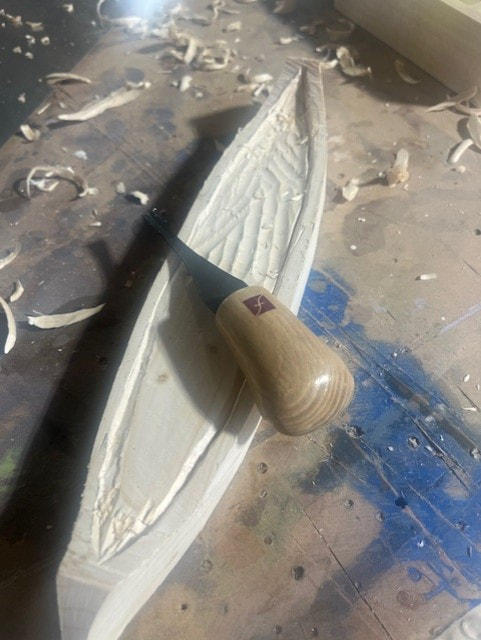
The exterior of the hull, I carved with my Helles knife.
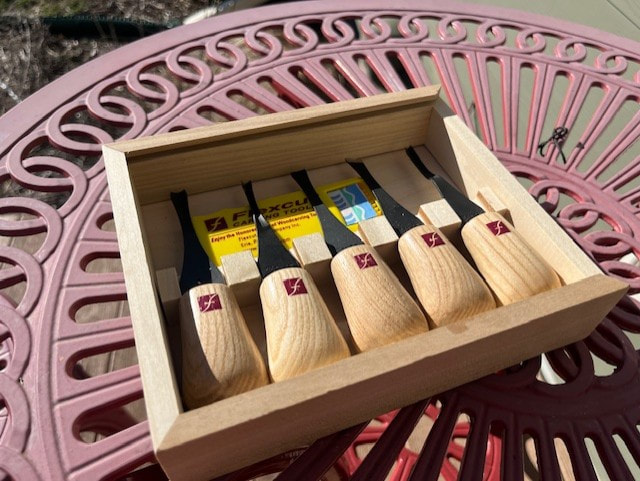
For general carving on this model I am using these palm-held carving tools from Flexcut, they are such wonderful tools to use!!
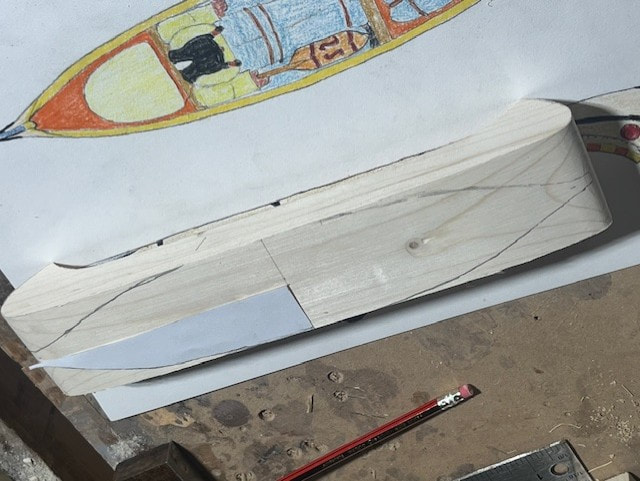
Ballast recess has been carved into the bottom of the hull.
Carving continues...
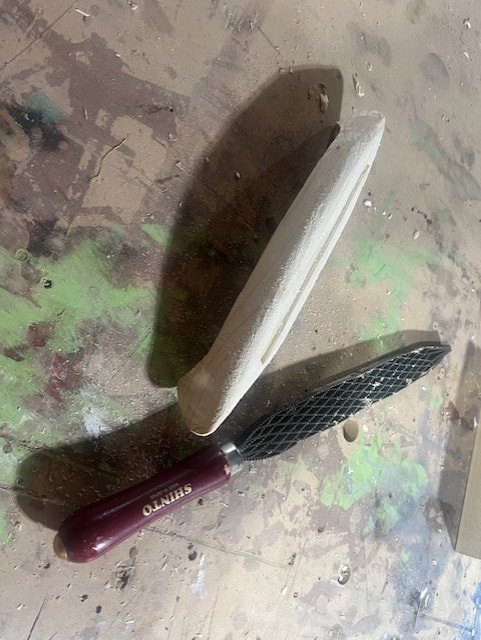
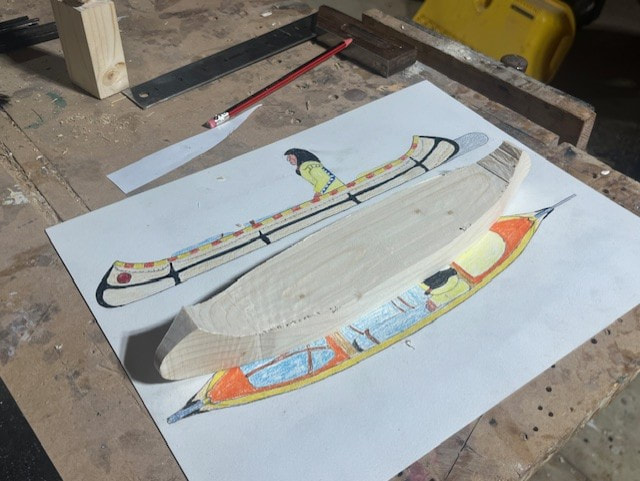
Using a Shinto Rasp to finish roughing out the hull exterior.
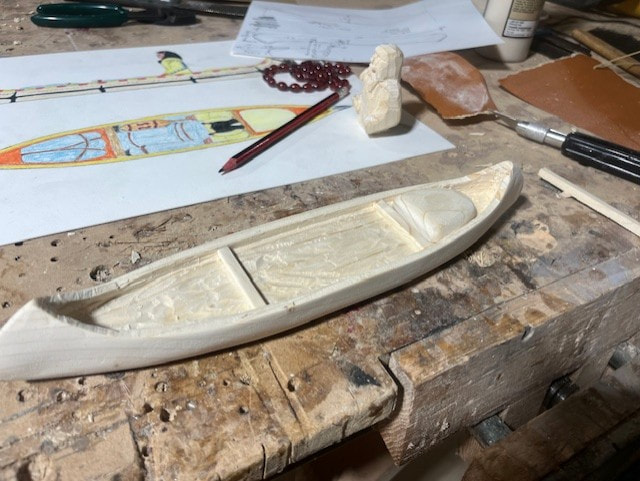
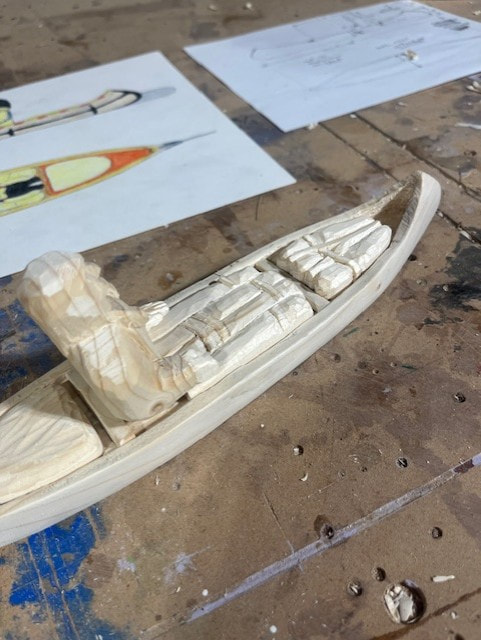
Thwarts made and glued in place. You can also see the aft pack has been carved/sanded/glued in place. I later recarved the aft pack, as I liked the carved look better than the sanded-smooth look.
Carving the bow pack.
And here's the status as of tonight. Calling it a day!
Tonight was a special night because I got to light a burner, melt metal, and do my best to pour it into my model! At the point I was at in carving the hull and installing the rest of the pieces permanently, I figured I better pour the metal into the ballast slot in the bottom of the hull in case it went haywire and wrecked it.
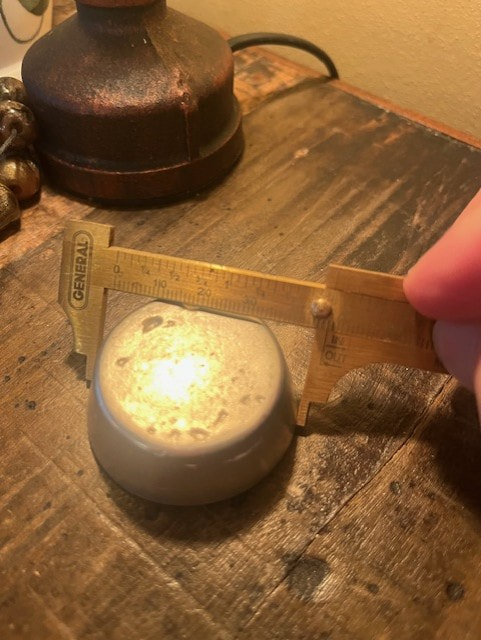
Micromark Type 280 model casting metal. tin/bismuth alloy with no lead or cadmium (I know a deviation from the lead used by the boy in the book). Melting temp 280degF. I bought two 1 7/8" pucks to melt down but only needed one.
Micromark Type 280 model casting metal. tin/bismuth alloy with no lead or cadmium (I know a deviation from the lead used by the boy in the book). Melting temp 280degF. I bought two 1 7/8" pucks to melt down but only needed one.
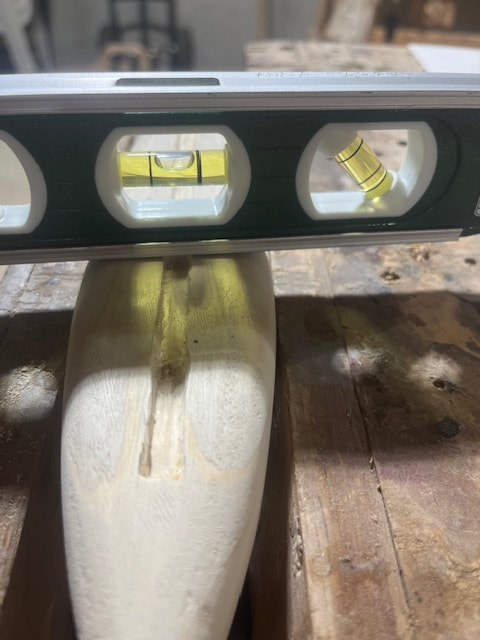
I levelled the hull in both directions prior to pouring metal into the ballast slot.
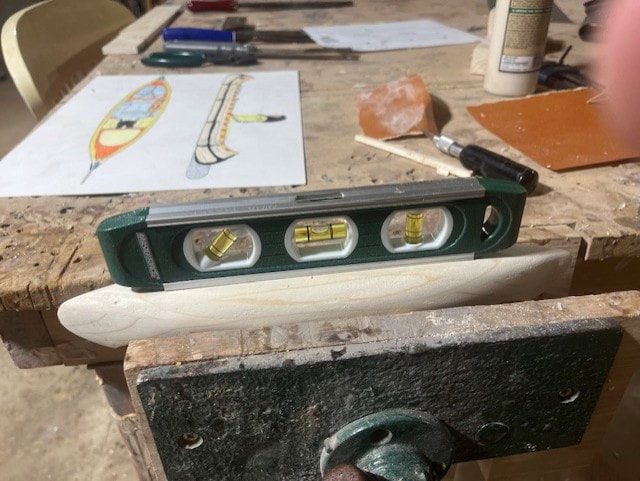
Hull levelled in both directions prior to pouring ballast metal.
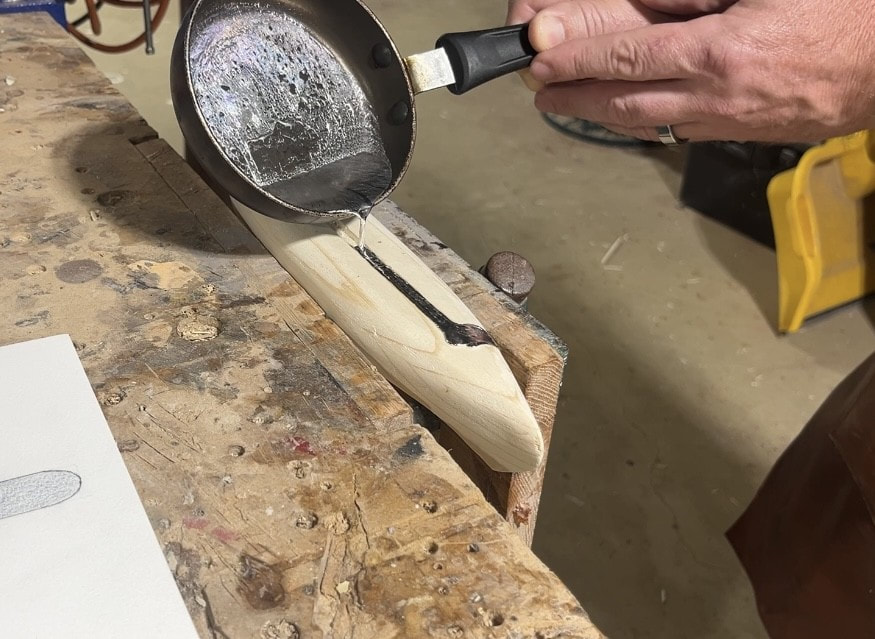
Pouring ballast metal.....it was so low temp that even in the 20ft walk from the stove to the hull it formed a skim surface which had to be overcome in initial pouring and which caused an oveflow which poured over the sides of the cavity as seen in the photo. A deeper melting pot with a spout would prevent this.
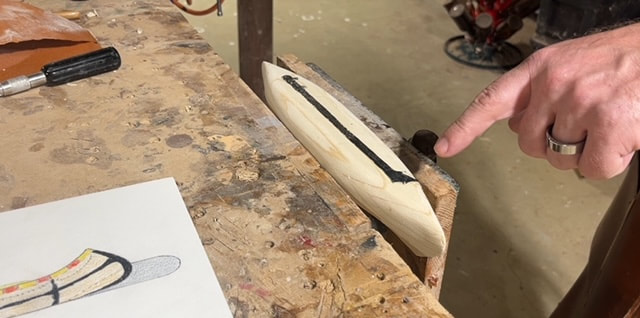
Balance of pour went perfectly.
Notes on deviation from original design:
I set out to build an accurate reconstruction of the model from the book, I think I will succeed and fail in various ways.
1. Dimensions and accuracy of shape, form and color: I believe I will be very accurate in these areas. I watched the movie clip above of the ship provided by Navyshooter, and I see three thwarts in the model used in the movie, and I fully respect that model, but I do not see three thwarts anywhere in the book, so I will stick with two. Each interpreter of a model must make their own decisions, and whoever made that model for the movie did an outstanding job in my view.
2. Materials:
a. All wooden parts in the book : pine. All wooden parts in my model: Pine.
b. Lead ballast in the book: Tin/Bismuth in my model....a deviation for safety purposes
c. "tin" rudder in the book, I will use a piece of aluminum, a deviation for long term corrosion purposes.
d. "Enamel" paints in the book, I will use same.
3. Tools: from Chapter 1 in the book , I see a hatchet and two different knives for carving the model. I used a table saw and planer to form the pine blank, and I used a bandsaw to cut out blanks for the various pieces as shown in my photos.....maybe I should have used a hand jigsaw which would have been doable. I did only use knives and chisels for carving, no dremels.
4. Construction: It is not clear from the book how the model was exactly constructed, but the impression I get from the early pages is that the boy carved it out of a single piece of pine. I made my hull from a piece of pine and am making the thwarts, packs, and man, from separate pieces which I am gluing to the model. This may be inaccurate, but! I submit the illustration from the 2nd page of chapter 26 to support my decision to make the man from a separate piece of wood with the grain vertical along the upright plane of the man. For copyright purposes I will not post the illustrations here. The illustration supports that the boy built the model with the man made from a separate piece of wood with vertical grain perpendicular to the grain of the hull. I will use wooden pegs to attach the perpendicular-grained pieces of the man and the canoe.
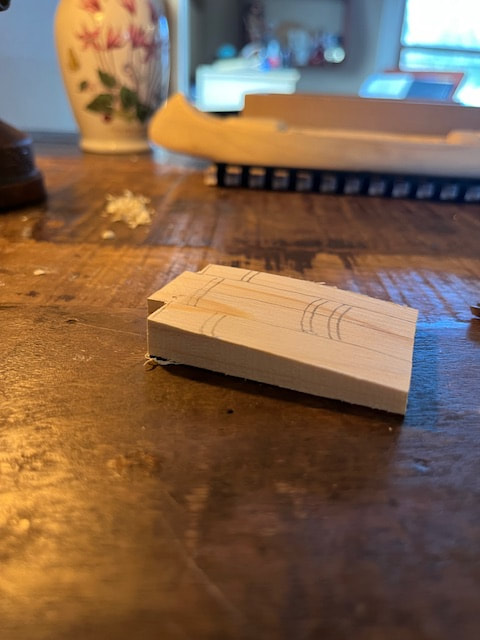
Here is the blank I made for carving the mid-ships packs. They are angled like this in all the illustrations in the book.
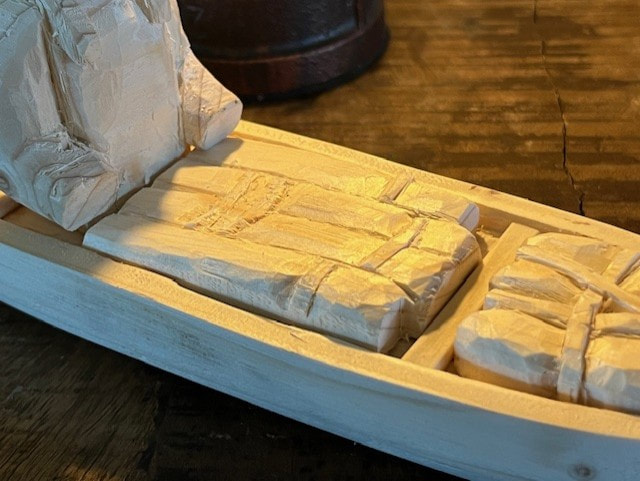
Finished carving the packs.
Carved and glued on his hands; he feels better now!
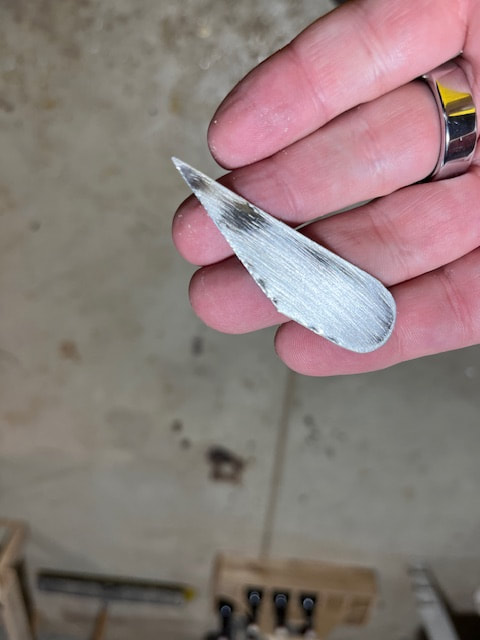
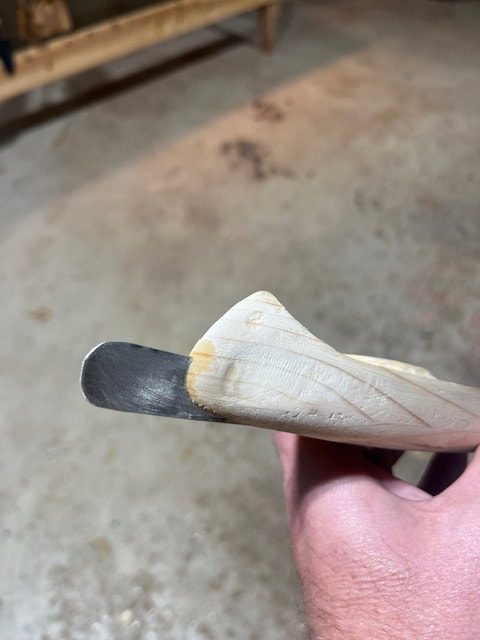
Rudder cut from an aluminum sheet with a tin-snips and I sanded the sharp edges to dull them.
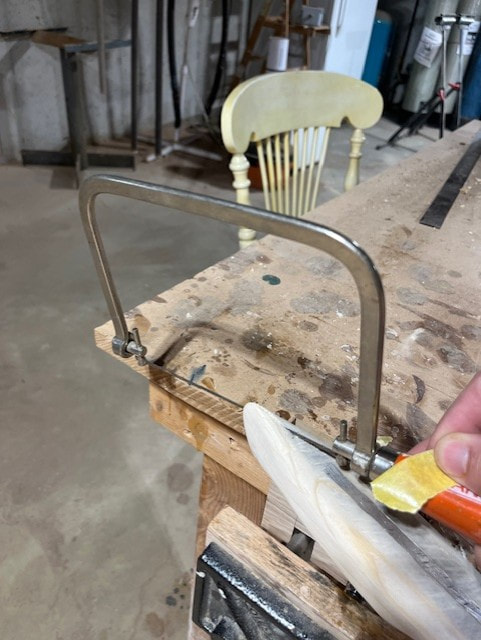
I used a saw with a thin blade width to cut a slot for the rudder.
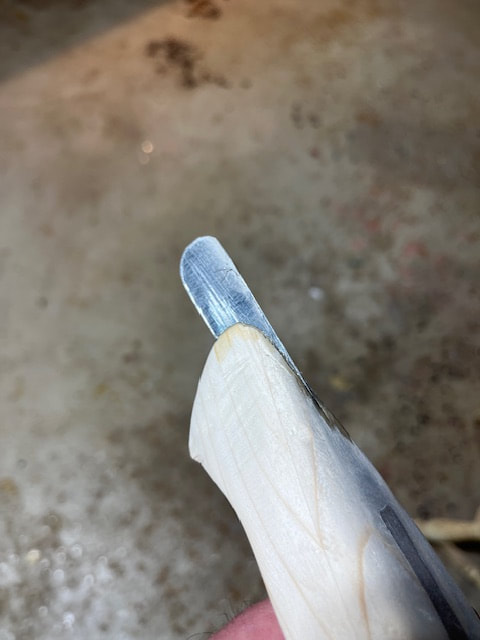
Rudder superglued into the slot.
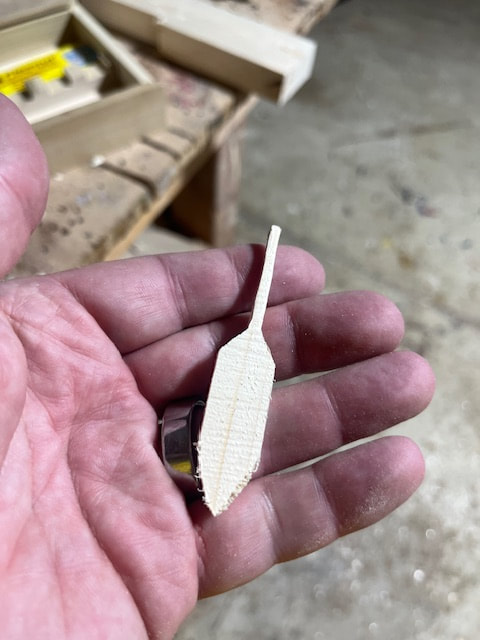
Making the last piece....the paddle!
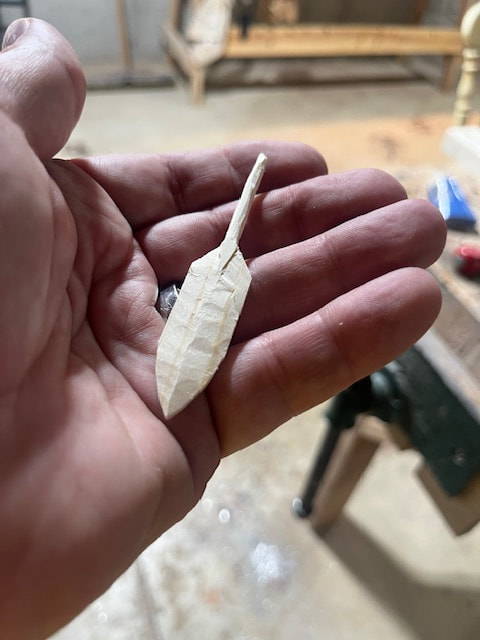
Finished paddle for Paddle to the Sea!
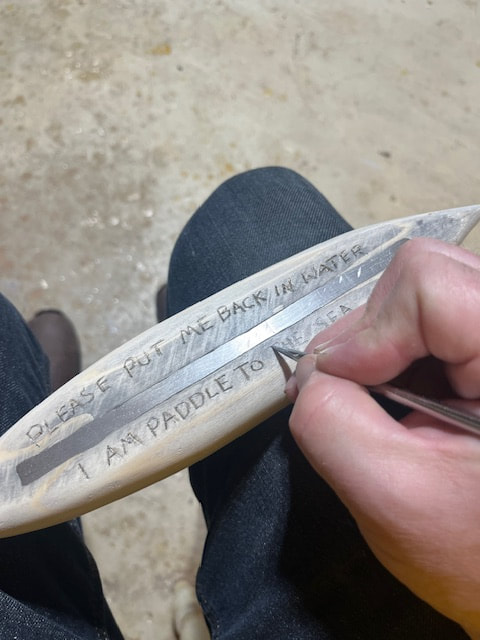
I wrote out the words as seen on the model in the book, first in pencil on the bottom of the canoe, and then etched the words in with an awl.

Time to paint!!!

Painting in process....note that I have not glued the individual carved pieces together yet, it is easier to paint them individually and then glue them together.

Painting continues.....
completed model!!

Here is the model on display at our place in Door County, Wisconsin. I made a display stand out of a Birch tree that died in our yard.