"She Blinded Me With Science" , a great song by Thomas Dolby from 1982.
Getting Started in 3D Printing:
3D design and printing has been a great project for the kids and me. This page will provide advice from a novice, on how to get started in 3D printing, based on my own experience.
I have been building wooden boats, blacksmithing, and just completed the construction of a 12.5 foot long wooden alphorn, but now I embark on a much different, much more modern manufacturing endeavor. I am hoping this 3D printing project will be fun for me and also a good STEM initiative for my kids. I researched 3D printers and 3D CAD, and selected the following hardware and software:
- The printer: I selected the PRUSA i3 MK3S printer kit from Prusa Research in Prague. The kit comes entirely in pieces and by building the printer , I think I will learn about how it works. It is less expensive and more instructive, to build the printer, as compared to buying a completed printer. https://www.prusa3d.com/ On the Prusa site, one may purchase the printers directly, along with filament and other things for 3D printing. There is also an engaged forum where one can share challenges, successes and ideas.
- I selected Fusion 360 as CAD software for myself and my 12 year old daughter and this has worked great. The non-commercial software was free, but as of 2021 I have had to purchase it. You can still get a free education version if you qualify. I graduated with an engineering degree in the '90s but CAD was an insignificant part of the degree. At work in the '90s and early 2000s I did use 2D CAD but never 3D, so this experience with Fusion 360 has been eye opening and impressive. https://www.autodesk.com/products/fusion-360/overview
- I also got a Tinkercad account for my 8 year old which can also generate printable files, and which features an easier to use CAD program. This is a web-based software that is free, and easy to use. https://www.tinkercad.com/
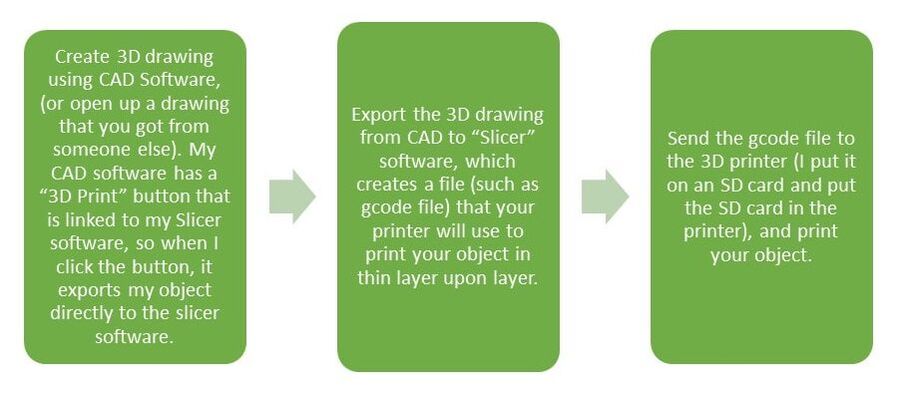
- The 3D CAD file is exported to a "slicer" software that creates a print file that the printer uses to print each layer. From the "slicer" software you save the file on an SD card, which you insert into the printer in order to print the part. I am using PrusaSlicer for my slicer software and it was very easy to get stared with. It is a free download from the prusa3D site. https://www.prusa3d.com/prusaslicer/
Basic Key Steps to 3D Printing, Option 1:
Basic Steps to 3D Printing, Option 2:
Assembling the PRUSA i3 MK3S 3D Printer:
For my 3D printer, I selected a PRUSA i3 MK3S. I bought the kit from Prusa in Prague, and it arrived in Wisconsin after about 4 weeks. The quality of the product, packaging, and instructions, was truly impressive to me. The pride that this company has in their work and what they send to customers, clearly shows and I was impressed.
I built the PRUSA i3 MK3S over the course of a week, at night after my day job. It started up great. The intructions are so good that I don't think a photo log of the build would add to what's already in the manual. Based on this, below are some photo's the construction of my PRUSA i3 MK3S, but this is not a proper build log. Building this printer was a very positive and informative experience for me. I loved that they included Haribo gummy bears in the kit; that might have been the best part.
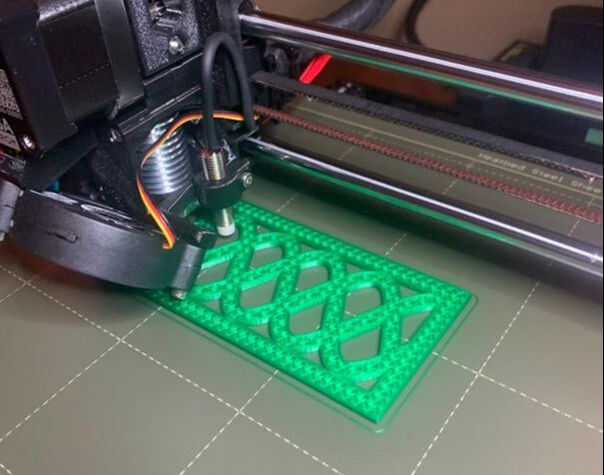
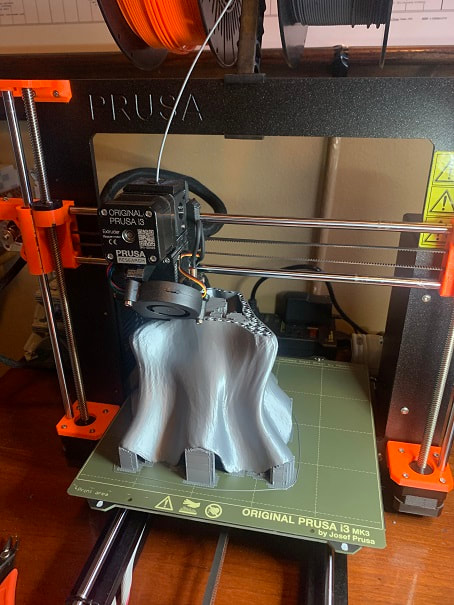
Here's what the Prusa i3 MK3S looks like in action:
Smoke Detector Automatic Shut Off for 3D Printer:
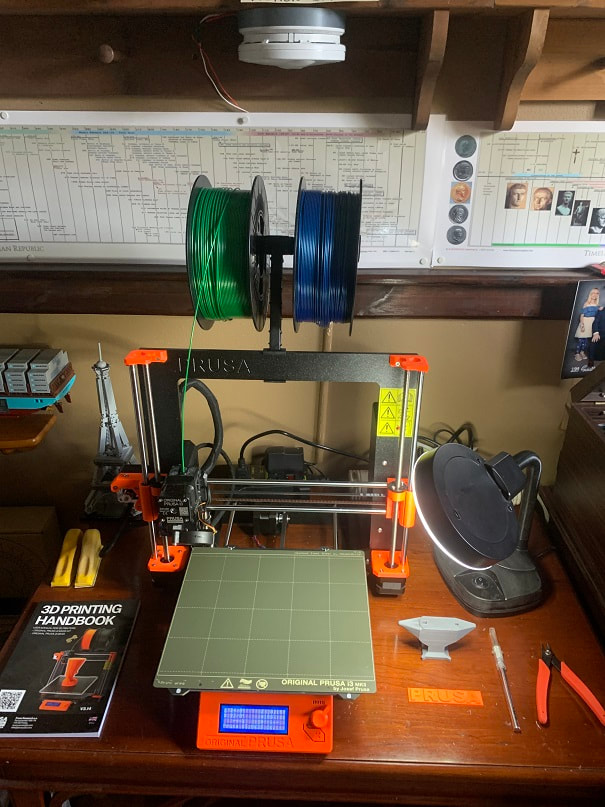
Safety note here: use any of my advice at your own risk. There is a heated bed and a hot nozzle on this device, and from a fire safety point of view, I think it’s best to be at home while it is running. I have a fire extinguisher nearby and I would recommend installing a smoke alarm nearby. I wired up a device that shuts power to my printer OFF if smoke is detected. The smoke alarm can be seen mounted above the printer in the photo above. I followed the design on this link: https://www.thingiverse.com/thing:2148191
Every electric device presents a fire risk not just printers. Using a printer with high quality components will reduce risk. Keep flammable objects away from the printer.
Every electric device presents a fire risk not just printers. Using a printer with high quality components will reduce risk. Keep flammable objects away from the printer.
This high tech business can be so fun that time can run away! If you find yourself spending too much time with technology, check out the other pages on this site!
Some basics of 3D Design and 3D Printing:
These bits of advice were written by me, an absolute novice to 3D printing, in the hope that they are useful to other people getting started in 3D printing and design. I do not claim to be an expert and there are certainly very detailed articles and books on this topic by experts.
Overhangs in the design:
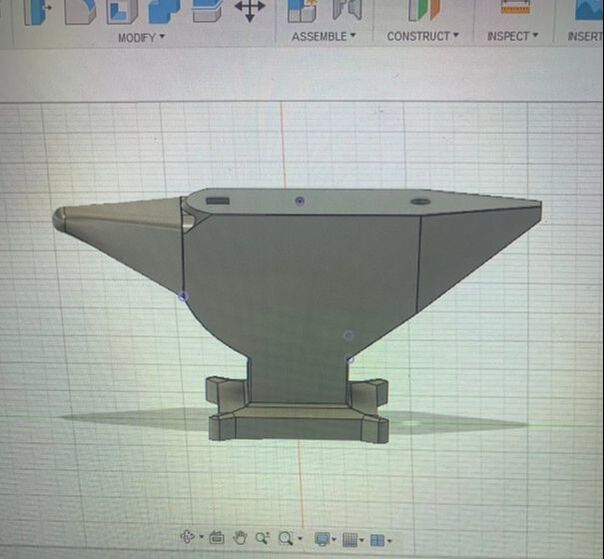
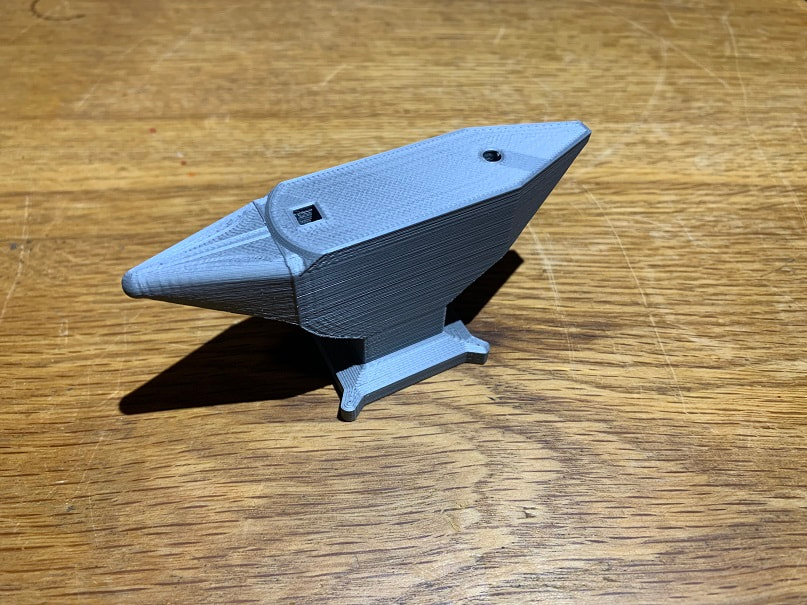
A 3D printer can generally not print material into the open air; as the layers print one on top of the other, there must be something beneath each layer that is being printed. For this reason features such as horizontal beams stretching through the air in the middle of your design will not work with out “supports”. A 3D printer CAN generally print overhanging layers as long as the overhangs extends sideways gradually at up to 45degrees. When possible orient your design for printing such that the larger parts are on the bottom and smaller layers at the top, the orientation for printing does not need to be same as the orientation of the finished product. For example the horns of this anvil would likely sag or struggle to print properly without some supports printed under them.
A 3D printer can generally not print material into the open air; as the layers print one on top of the other, there must be something beneath each layer that is being printed. For this reason features such as horizontal beams stretching through the air in the middle of your design will not work with out “supports”. A 3D printer CAN generally print overhanging layers as long as the overhangs extends sideways gradually at up to 45degrees. When possible orient your design for printing such that the larger parts are on the bottom and smaller layers at the top, the orientation for printing does not need to be same as the orientation of the finished product. For example the horns of this anvil would likely sag or struggle to print properly without some supports printed under them.
Supports:
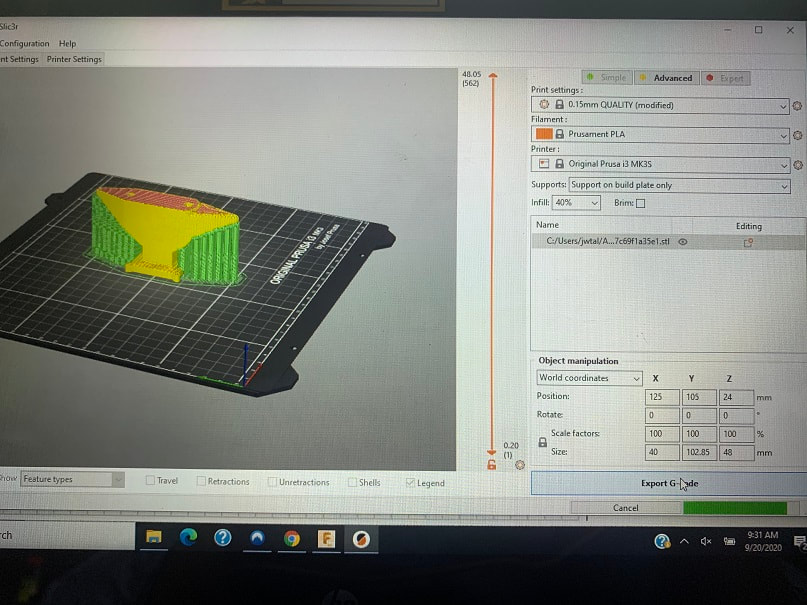
Can you include overhangs and even horizontal features floating over air in your design? YES, but you will need to include supports, which will print up from below and support these more horizontal features as they print. When complete, you remove the supports. I was happy to learn that one does not need to design all the supports oneself. All you have to do is click a simple button in the Prusaslicer and it will add very fine lightweight supports to support any overhangs during printing. How convenient! Here is the anvil above, in Prusaslicer; I have choosen to utilize supports, and the program automatically calculates and inserts the supports. The supports are in green in the photo. I could also print the anvil upside down, and then it would only need supports under the base/foot of the anvil which extends horizontally from the base of the anvil.
Can you include overhangs and even horizontal features floating over air in your design? YES, but you will need to include supports, which will print up from below and support these more horizontal features as they print. When complete, you remove the supports. I was happy to learn that one does not need to design all the supports oneself. All you have to do is click a simple button in the Prusaslicer and it will add very fine lightweight supports to support any overhangs during printing. How convenient! Here is the anvil above, in Prusaslicer; I have choosen to utilize supports, and the program automatically calculates and inserts the supports. The supports are in green in the photo. I could also print the anvil upside down, and then it would only need supports under the base/foot of the anvil which extends horizontally from the base of the anvil.
Orientation of the printed object on the printer:
You can rotate the object around to have it print on it's side, upside down, right side up, at an angle ans so on. Oftentimes you can minimize the need for supports, or provide a more stable object during printing, if you choose the orientation properly.
You can rotate the object around to have it print on it's side, upside down, right side up, at an angle ans so on. Oftentimes you can minimize the need for supports, or provide a more stable object during printing, if you choose the orientation properly.
Detail:
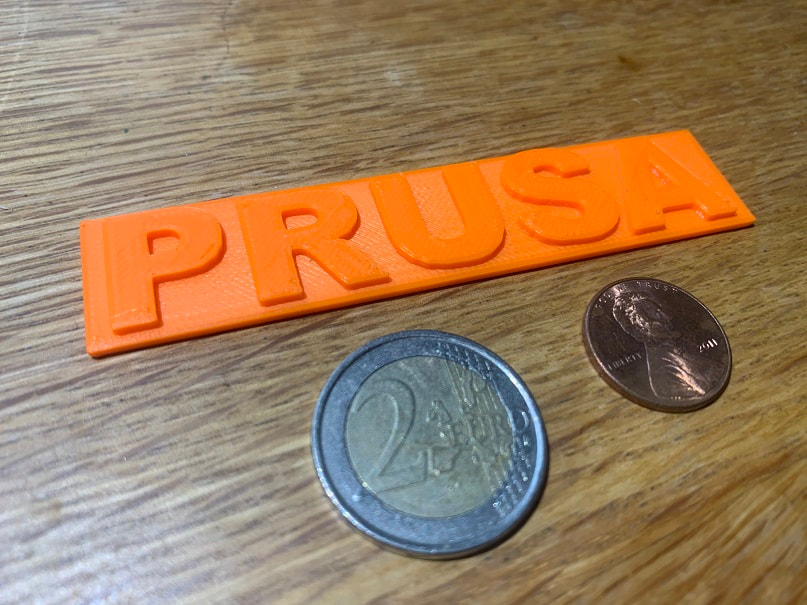
You can design objects and features on CAD that are much smaller than your printer can print. I would suggest test printing text and features of small sizes to see how fine of a resolution your printer can print to, then you will know how fine of features you can incorporate into your design. I printed the anvil with a medium resolution, and the layers can be clearly seen.
You can design objects and features on CAD that are much smaller than your printer can print. I would suggest test printing text and features of small sizes to see how fine of a resolution your printer can print to, then you will know how fine of features you can incorporate into your design. I printed the anvil with a medium resolution, and the layers can be clearly seen.
Another lesson learned: They really mean it when they say to clean and prepare the bed properly each time.
Infill:
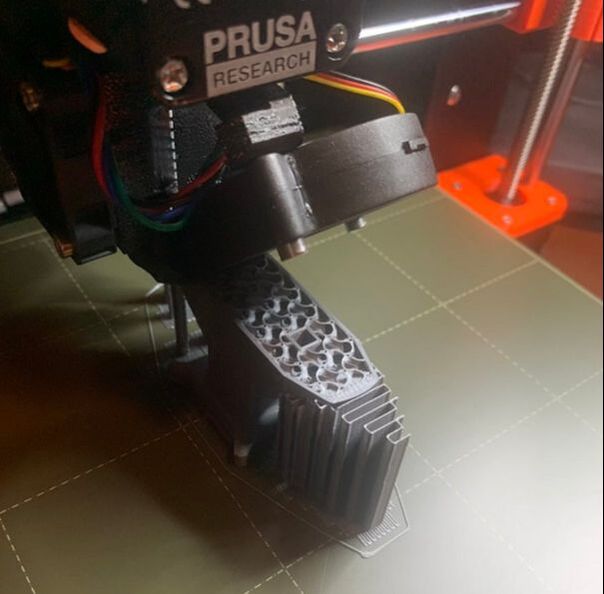
I had to learn what this meant. In the slicer software (I use Prusaslicer) as your define your print file, there is a drop down menu where you select “infill” this is an automatically calculated interior geometric matrix of material that will include voids on the interior of your print. All exterior faces will be printed solid, but the software will automatically add as much voids to the interior as you want. I have done tests from 15% infill to 100%. Thin parts that need to be strong, I print at 100%. Lower infill will print parts that are lighter weaker and that will use less filament and print much faster. Below you can see the interior of the anvil being printed which illustrates the voids and structure being printed based on the infill % that I selected. 100% infill would be a completely solid print. You can also see the supports printing to hold up the horns of the anvil as it prints.
I had to learn what this meant. In the slicer software (I use Prusaslicer) as your define your print file, there is a drop down menu where you select “infill” this is an automatically calculated interior geometric matrix of material that will include voids on the interior of your print. All exterior faces will be printed solid, but the software will automatically add as much voids to the interior as you want. I have done tests from 15% infill to 100%. Thin parts that need to be strong, I print at 100%. Lower infill will print parts that are lighter weaker and that will use less filament and print much faster. Below you can see the interior of the anvil being printed which illustrates the voids and structure being printed based on the infill % that I selected. 100% infill would be a completely solid print. You can also see the supports printing to hold up the horns of the anvil as it prints.
Layer Thickness:
In the slicer software you can select the resolution or layer thickness that the object will print at. Mine has the option for .3mm draft quality all the way down to .07mm ultrafine detail. Thinner layers will print a finer resolution but take longer, while thicker layers will have a tougher surface but will print much faster. I printed the anvil with a medium resolution, and the layers can be clearly seen.
In the slicer software you can select the resolution or layer thickness that the object will print at. Mine has the option for .3mm draft quality all the way down to .07mm ultrafine detail. Thinner layers will print a finer resolution but take longer, while thicker layers will have a tougher surface but will print much faster. I printed the anvil with a medium resolution, and the layers can be clearly seen.
Very helpful design manipulation in the slicer software:
Again, my experience is with PrusaSlicer but I imagine other slicers have similar features , though some must have more and some must have less features.
I was very pleased to learn that one can manipulate the design in the slicer software, including:
-Flipping it around to choose which face points down onto the print surface
-Selecting layer thickness, infill%, and what supports you want
-Rotating the design and choosing where on the print surface you want it to print
-Scaling the design larger or smaller (designs larger than the max print volume are automatically scaled to fit the max print volume).
-Selection of what filament you will be printing with.
-It will show you an estimate of time to print based on your selection (only after you click preview or slice now).
There are many more features, but at this early stage, those are the features of the slicer software that I have found most useful.
IMPROVE the design: One thing I have learned in work and in this 3D printing exercise is that it takes multiple iterations of a design to get it right. With time and multiple attempts, comes experience, after which, less iterations will be necessary. If at first your design does not work, try again, till it works.
Get a good 3D printing handbook, the one that came with my Prusa printer is very helpful.
Trial and Error; some prints are quite trick, and some materials are tricky to print. Tiny modifications to the bed temp, nozzle temp, layer thickness, nozzle speed, first layer thickness vs other layers, and the list goes on, these all make a difference. Start with easy objects in an easy material such as PLA. I needed to try many different things to get certain objects such as flex-objects, to print right. Learn as you go and have fun! As I write this line, I built the printer and wrote the page above a year and a half ago, and I am still a beginner.
