above: Paddle boarding on a Kaholo SUP, Eagle Harbor Door County Wisconsin, July 2021.
I hope you enjoy this photo build log of the Chesapeake Light Craft Kaholo Stand Up Paddleboard.
Summer 2020:
We have enjoyed renting stand up paddleboards (SUP) in Door County over the years, and decided that we wanted a couple for our use near home. A bit of research led me to the Kaholo SUPs from Chesapeake Light Craft. It is a high performance, lovely looking, hollow frame wooden paddleboard that can be bought as a kit and assembled at home with simple tools. This will be for my wife so I am building the 12'-6" version, for myself, I would need the 14' model. I visited the Chesapeake Light Craft (CLC) shop a couple years ago. It is in Annapolis, a short drive from BWI, and it was fun to see the boards in-person, and also to see the high accuracy machines they have for cutting out kit components.
CLC Kaholo 12-6 Stand-up Paddleboard Specs:
Length: 12'-6"
Thickness: 4 1/2"
Width across the top of the board: 29 3/4"
Weight: 29 pounds
Construction: Hollow frame, Okuome marine plywood, stitch&glue construction with fiberglass and epoxy
Length: 12'-6"
Thickness: 4 1/2"
Width across the top of the board: 29 3/4"
Weight: 29 pounds
Construction: Hollow frame, Okuome marine plywood, stitch&glue construction with fiberglass and epoxy
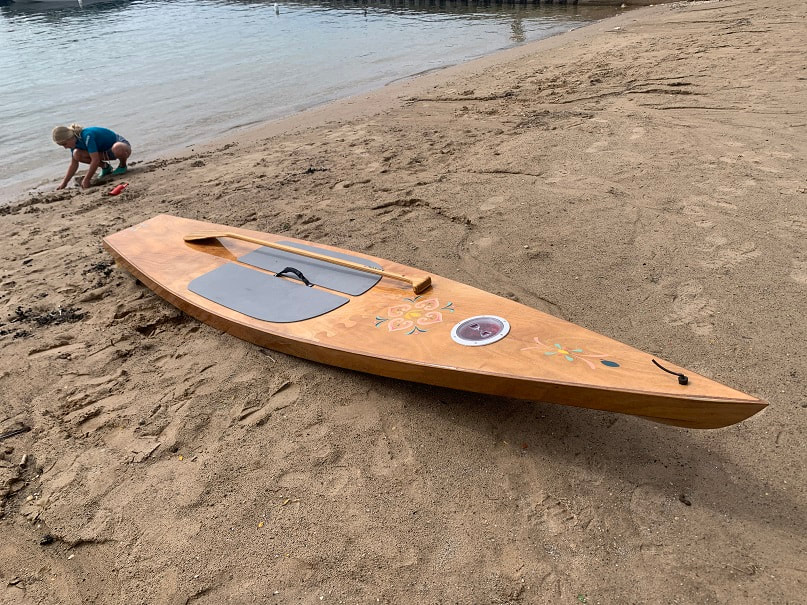
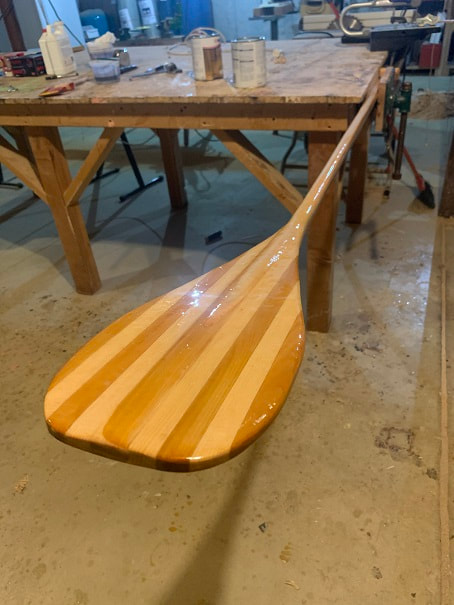
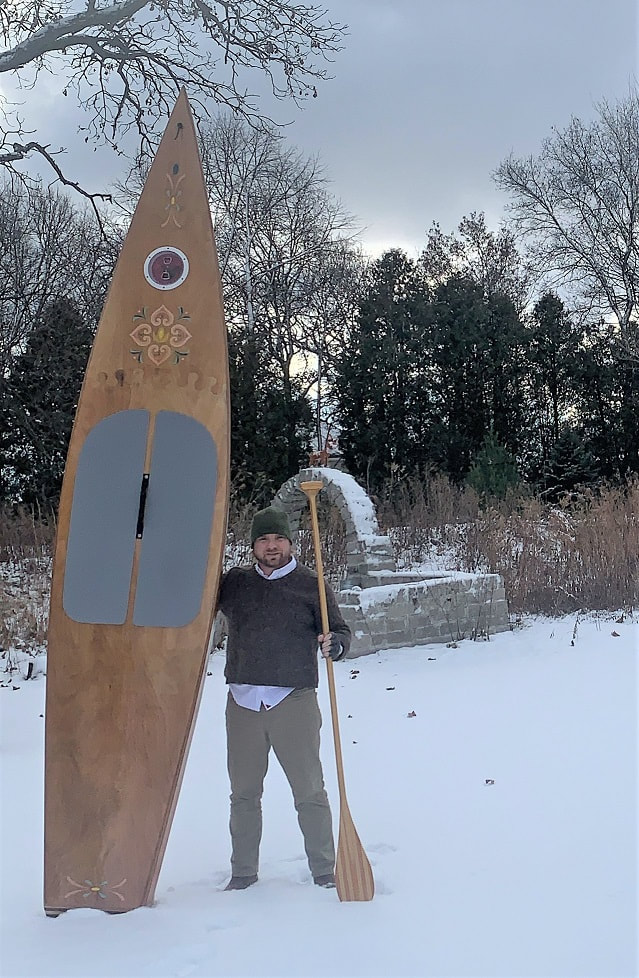
Here is the completed Kaholo SUP and custom wooden SUP paddle. The construction of this SUP is documented in photos below.
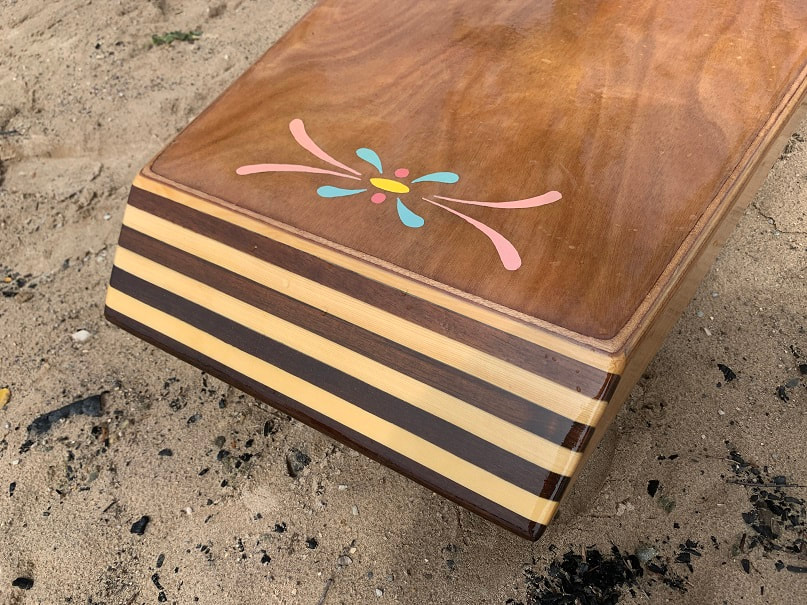
Close-up of the stern of my Kaholo SUP.
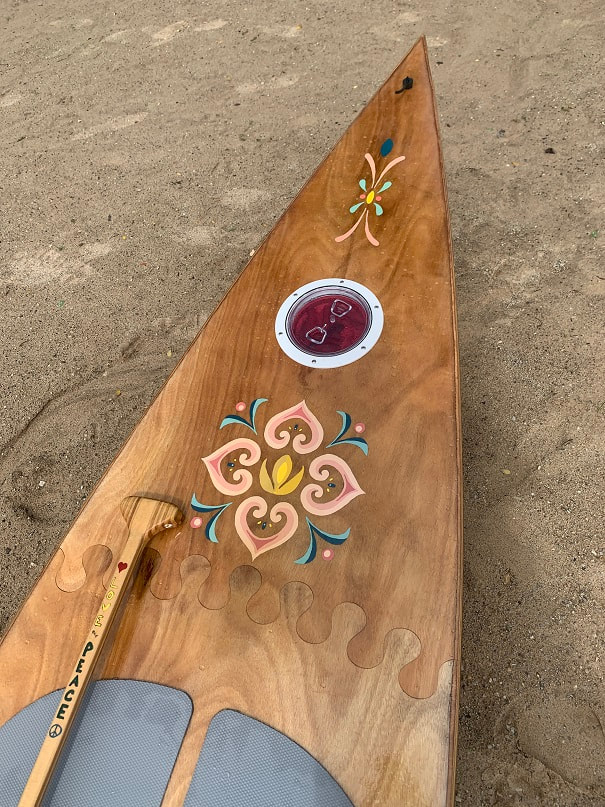
Close-up of the bow of my Kaholo SUP.
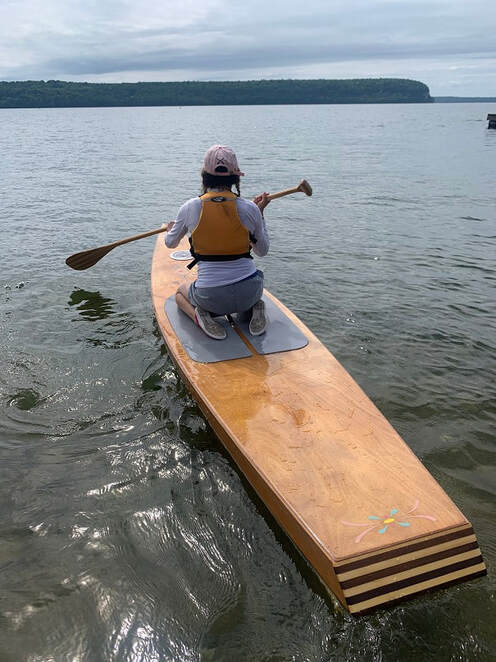
Here is my wife a couple feet from shore, heading out on the maiden voyage of this SUP. I was glad that it floated, didn't take on water or sink; in fact she said it was fast and stable and handled great!
The SUP Build Log is below, but first: I Made This Wooden SUP Paddle
The page you are on concerns the construction of a Kaholo wooden SUP. I built a wooden SUP paddle also. If you would like to see how I did that , please follow this link button:
Building a Kaholo SUP!
The Kit Arrives:
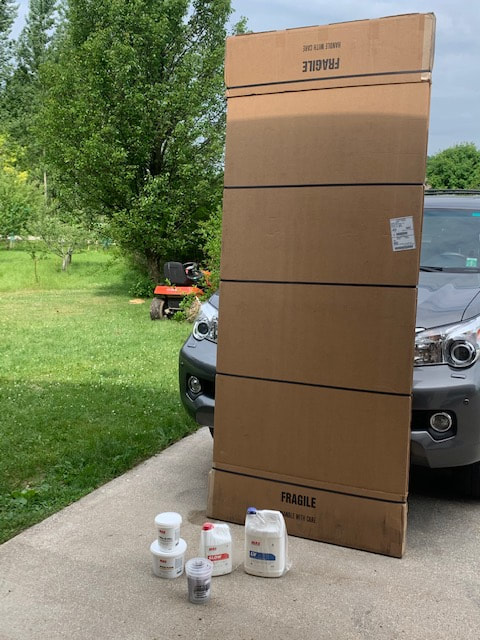
The kit ships in two boxes; one large one with the all the pieces to the kit, and a smaller box with the epoxy ingredients.
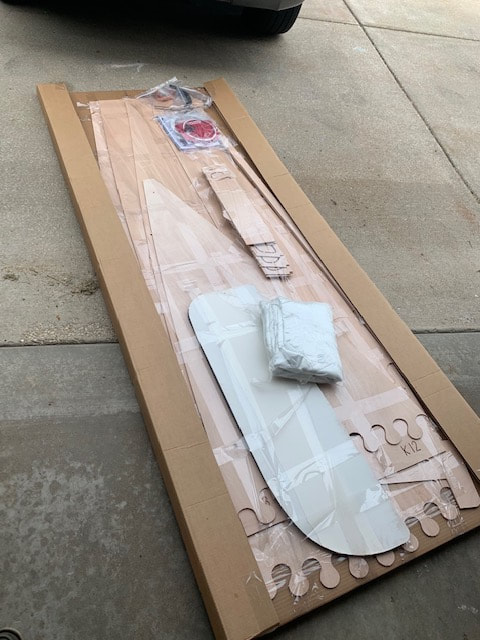
The components were well protected and well packaged.
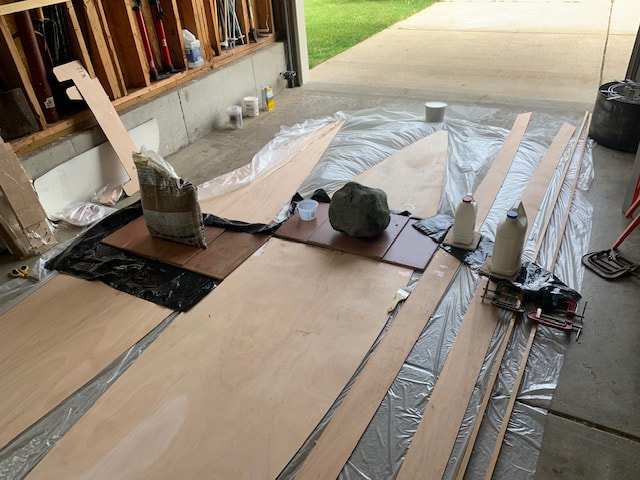
Gluing together the plywood panel pieces and the long wooden cleats
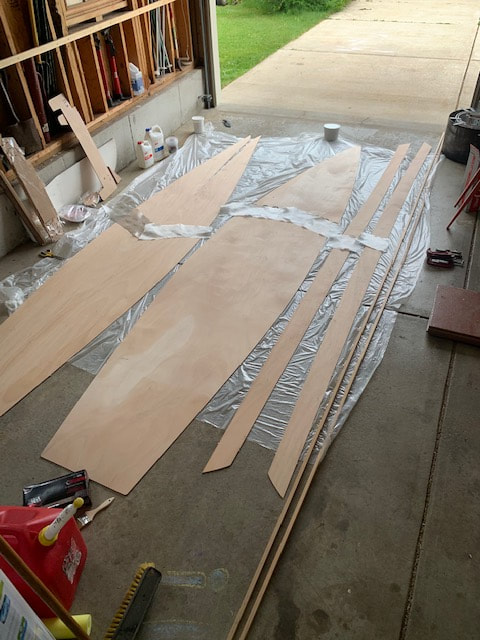
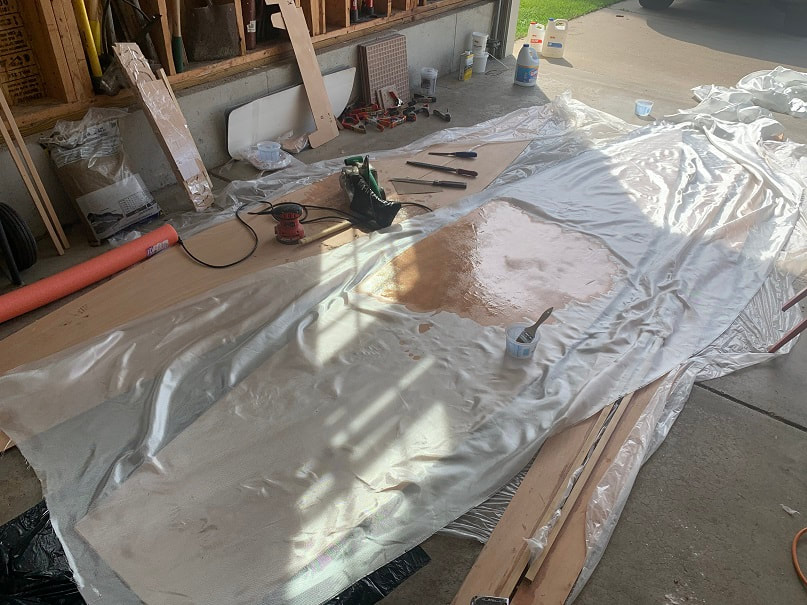
The kit comes with great photo instructions, which I will follow. Here I have laid out the plywood panels in the correct orientation, on a sheet of plastic in the garage. I have also cut out strips of fiberglass which will lay over the puzzle joints that join the big pieces of plywood together. Pick the side of the plywood that you want to show on the outside of your board, and face that side down. The side that is up at this stage, the side that get the fiberglass reinforcing strip, will be the inside of the board.
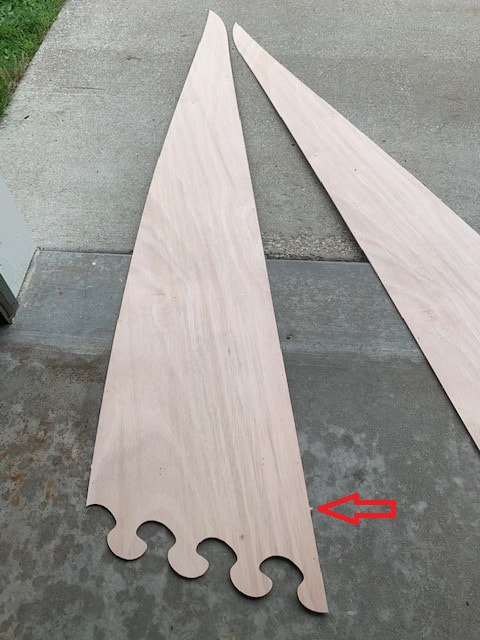
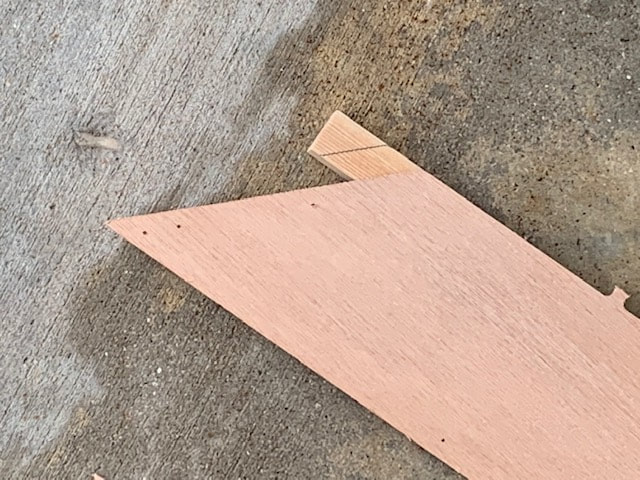
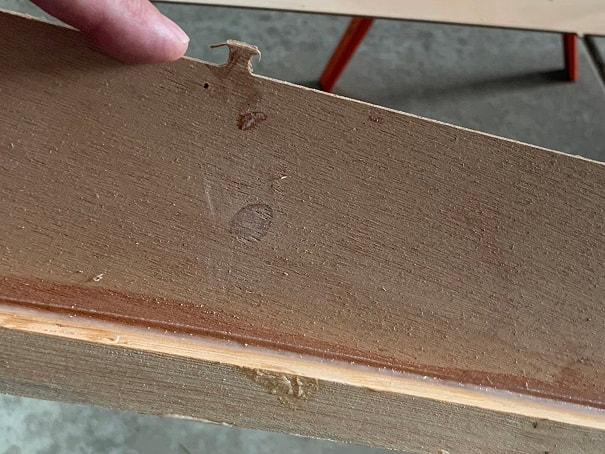
There are some small tabs of wood protruding from the precision cut edges of the plywood pieces. The tab that the arrow is pointing at needs to be trimmed off with a sharp knife prior to gluing the panels together.

I gave the edges of the puzzle joints a very light sanding to remove any rough spots, do not actually round over the corners of the puzzle joints. Then I mixed the epoxy, thickened it with the silica (fine white powdered "collodial silica") and glued the puzzle joints together.
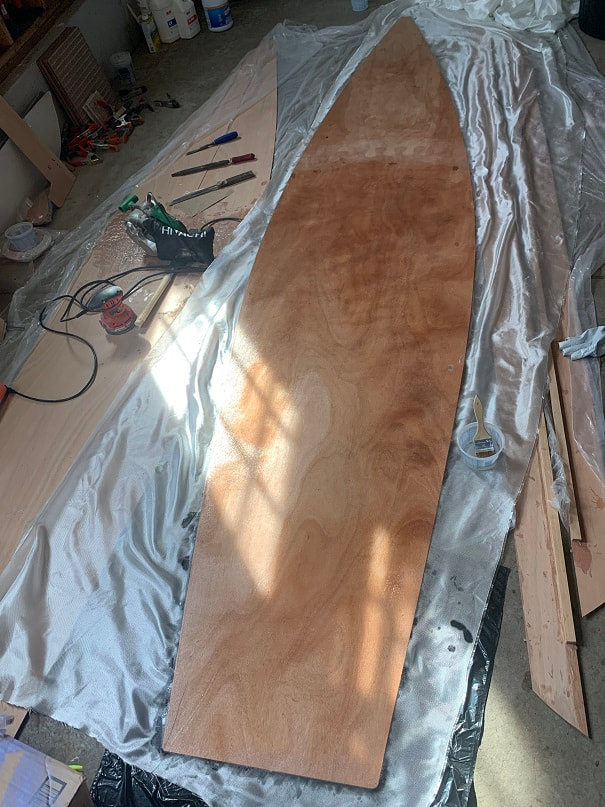
The start of building a Kaholo SUP has gone well! The pieces from CLC fit together nicely and the instructions are complete.
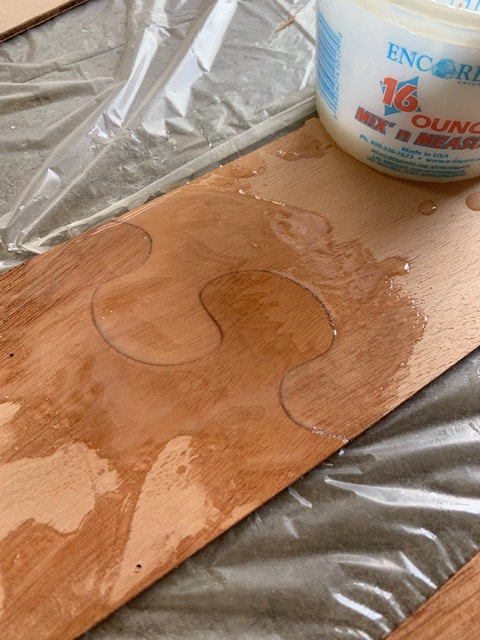
Puzzle joint on the paddle board side panel, prior to laying down fiberglass.
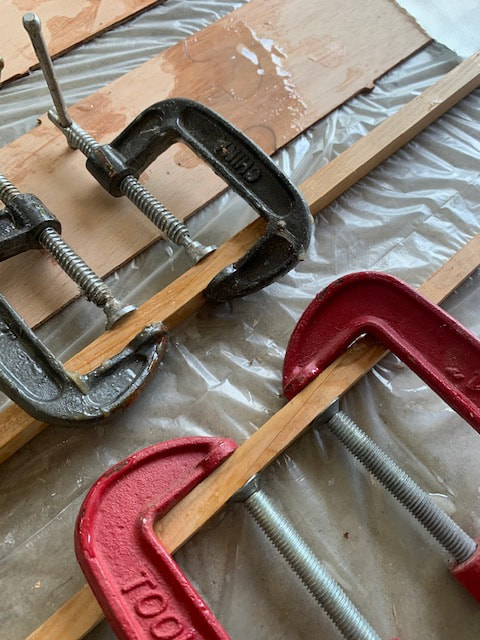
The Kaholo has two long solid wood strips that run down the length of the board on the inside top corner of the board. I will call these "cleats". There are two cleats, and they show up in the kit in two pieces each. To create a full length cleat, take two of the cleats and glue them together with the pre-cut "scarf" joint. The scarf joint is simply a long taper that increases the surface area of the glue joint. Line up the tapers and epoxy them together with silica-thickened epoxy. Do not over-tighten the clamps to the point that you squish all the epoxy out.
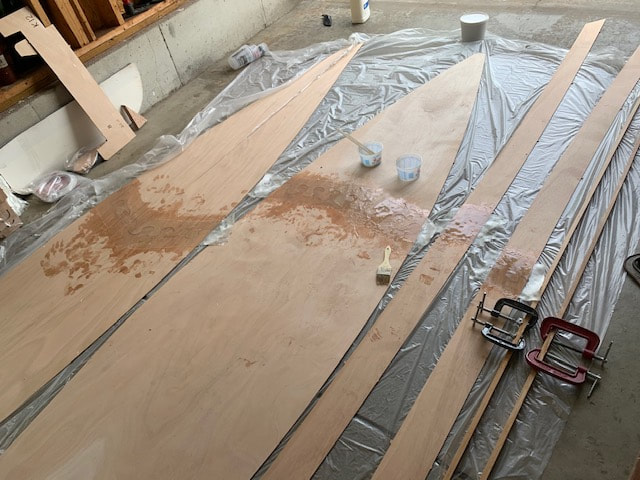
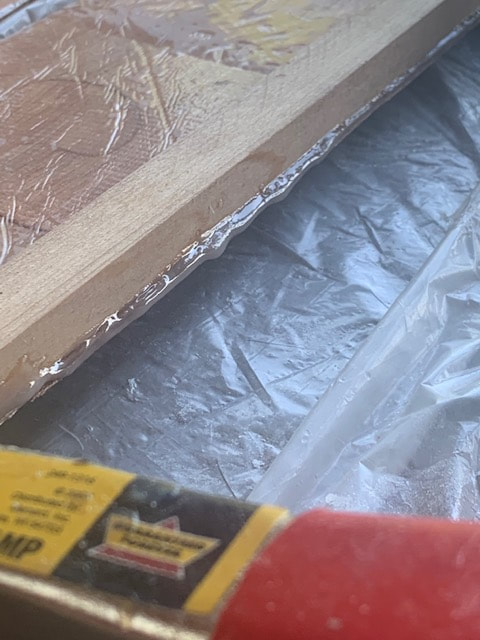
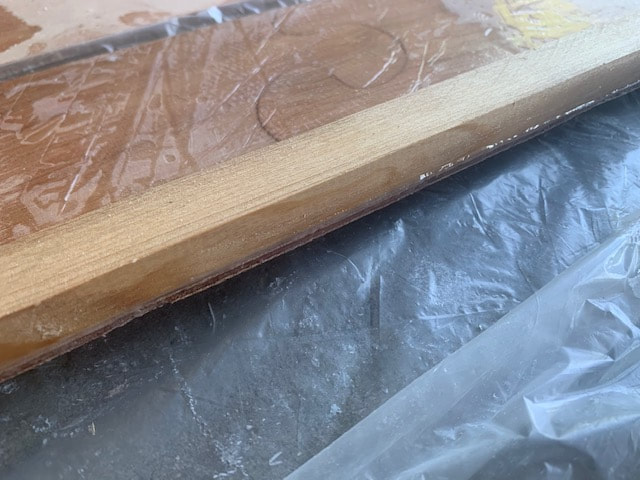
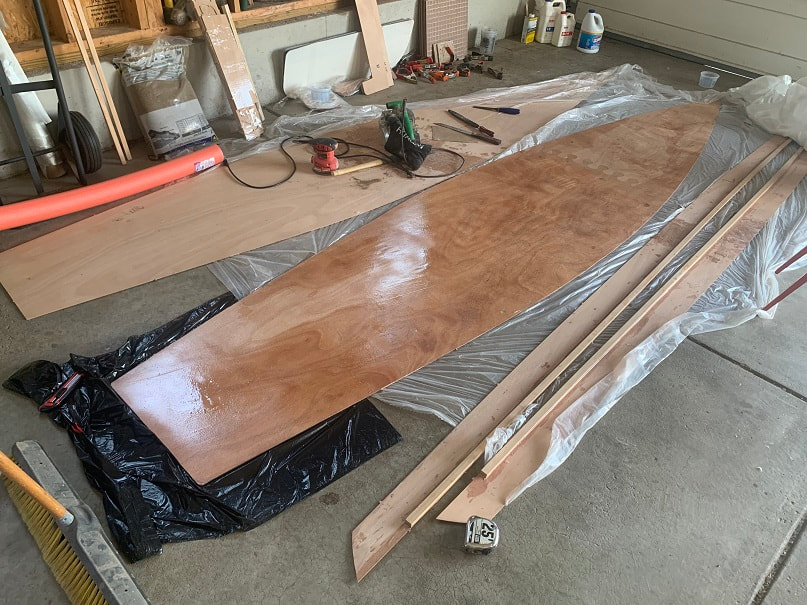
Mixed unthickened epoxy, and laid down the fiberglass reinforcing strips over the puzzle joints, filling the glass with epoxy using a chip brush.
Weighted down the joints to keep them flush, with tiles and heavy objects. Note the plastic under the epoxy and the plastic garbage bags between the weights and the epoxied joints. The epoxy wont stick to the plastic. If you do not protect the adjacent surfaces using plastic in this manner, you will likely glue the plywood to the floor and to the weights.

It's best to trim the fiberglass off when the epoxy is "green" or partially cured, solid but still a bit maleable. In my case I waited a couple days and it was very hard. It will still trim off, it'll just be a bit harder.
So far the CLC Kaholo SUP kit has been a breeze to work with and the components have fit together perfectly.
Cutting the long solid wood cleats to length
The Kaholo 12-6 has solid straight grained clear wood cleats that run from end to end in the corner between the deck and the sides. I epoxied the scarf joints together to create full-length pieces, and now I will trim the end to the correct angles and length as described in the manual.
Marking the angle to cut the cleat , to match the angle at the aft end of the board.
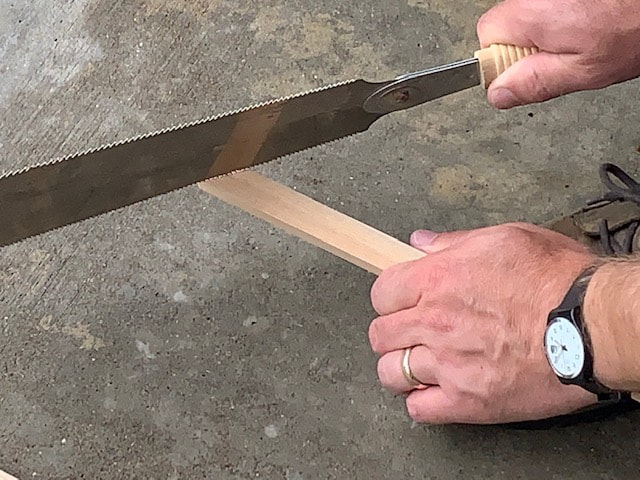
I used a Japanese pull saw to but the cleats.
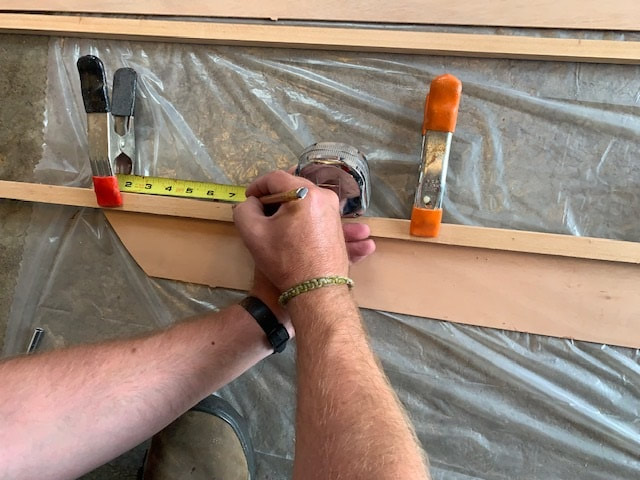
The Kaholo 12-6 cleat is to be installed starting 1/4" from the stern end of the top edge of the side, and is to run forward to a point 7" aft from the bow. I dry-clamped the cleat in the proper position and measured 7" back from the front end.
Epoxying the cleats to the side panels
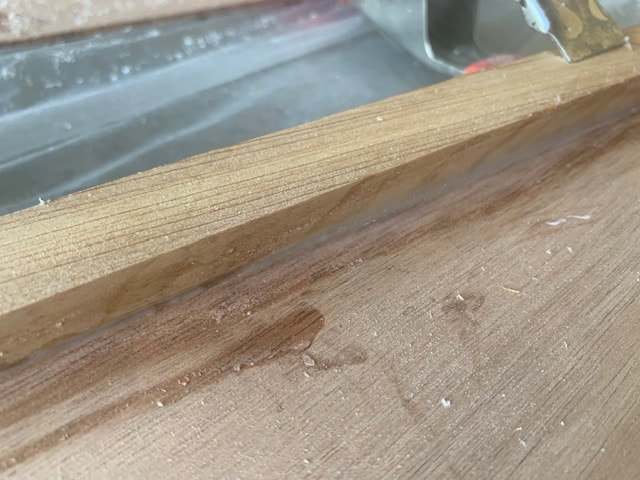
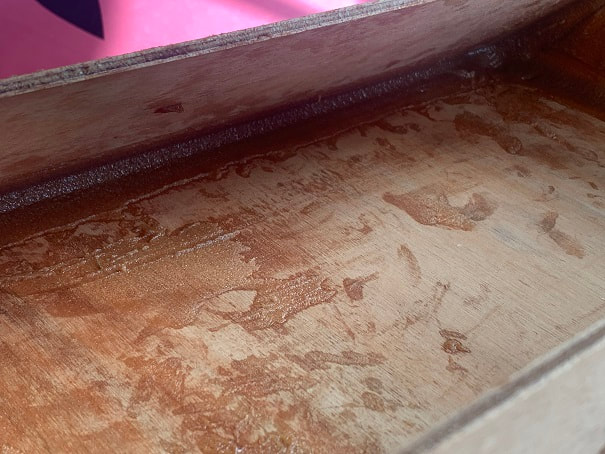
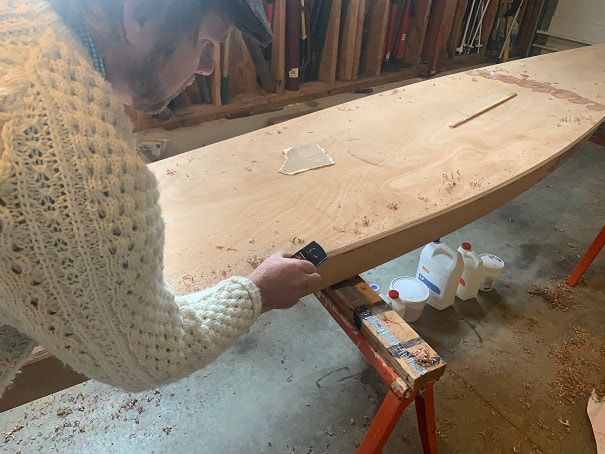
I rasped and sanded down the high spots of epoxy that existed where I had laid down the fiberglass reinforcing strip on the sides. I also rasped and sanded the scarf joint area on the cleats so that the joint sides were flat and sanded. This will ensure nice flush surfaces for glue adhesion, and sanding the epoxy also creates a rough surface, called a "key", for the epoxy to sink its teeth into for a better bond. The kit came with slow-cure epoxy, which is good for long pieces like this. Fast set epoxy might start curing before one was ready to clamp the pieces together, especially in summer like what I am in now.
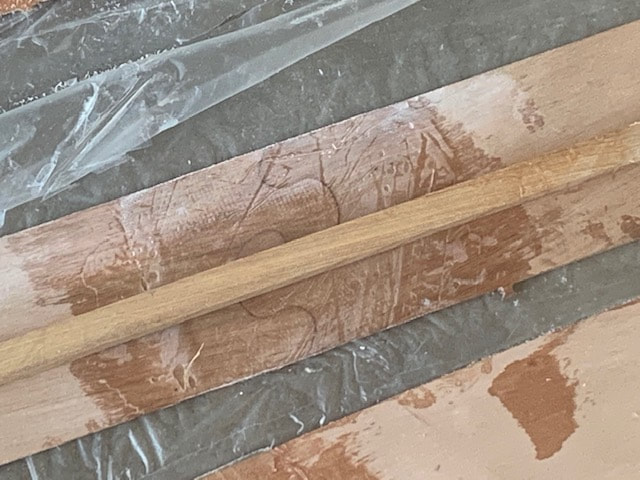
Rasped and sanded scarf joint and side panel
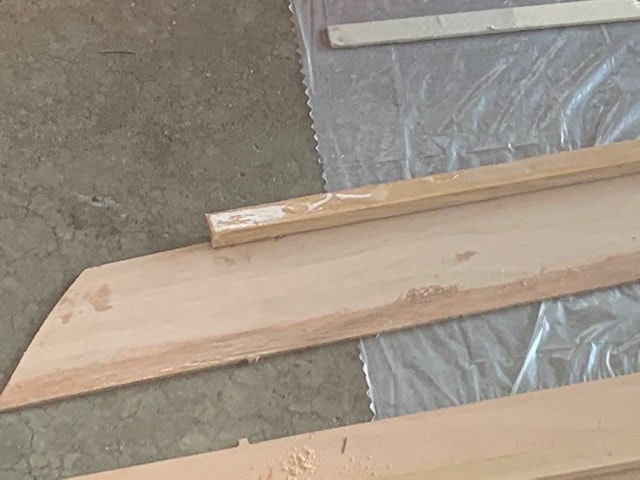
Silica thickened epoxy has been applied to the cleat and a thin coat also brushed onto the side panel of the Kaholo 12-6 kit.

Clamping the cleat the the side panel using spring clamps.
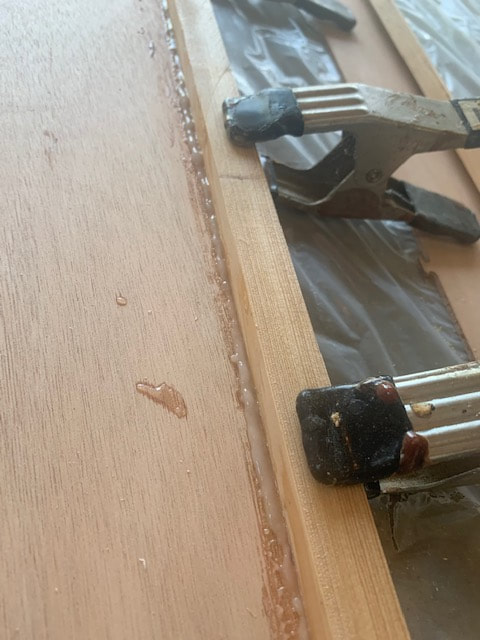
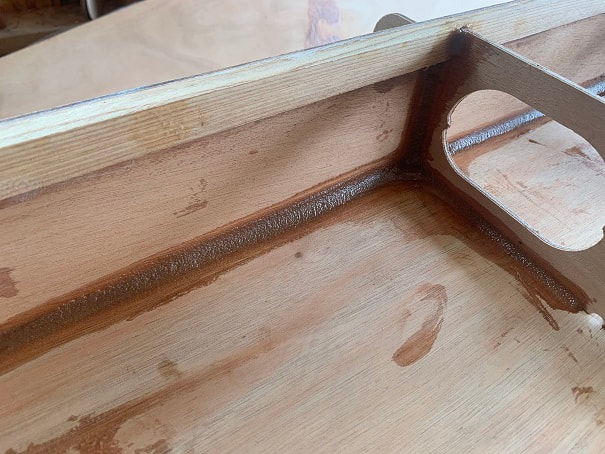
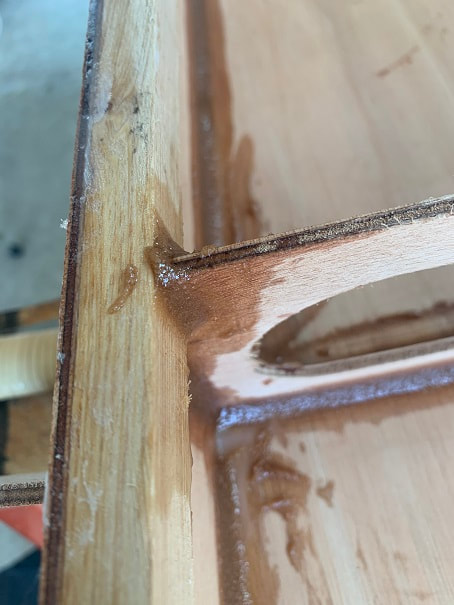
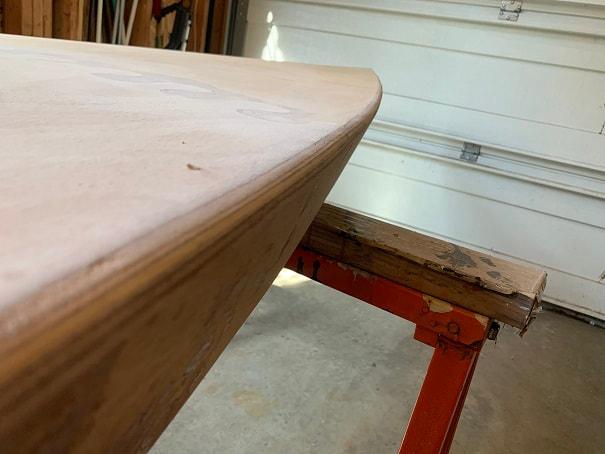
When I built my SCAMP sailboat, I quickly learned that cleaning up epoxy BEFORE it cures is SO much easier and saves SO much chiseling, sanding and rasping vs if it is left to cure in a messy fashion. In this photo one may see the epoxy ooze-out from clamping the cleat to the sides. Now is a great time to take 45 seconds and run your gloved finger down this glarpy epoxy and make a nice tiny smooth fillet out of it.
This is the ooze-out of epoxy on the top of that same joint. A quick run-over with your finger will remove this excess epoxy now, vs alot of elbow grease to sand or rasp it off later.
Here is the inside corner after a quick smooth-down with a gloved finger.
Here is the same top side of the joint after a quick smooth-down with a gloved finger.
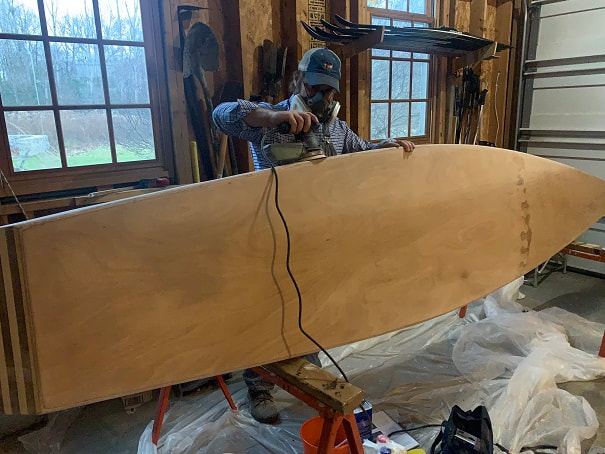
Fiberglassing the Underside of the Kaholo SUP Deck
Sand down any high epoxy spots where the fiberglass reinforcing strip is. I would recommend using a random orbit sander with 120grit paper, which I was out of, so I used my belt sander which one must be very careful with as not to sand right through the fiberglass.

Orient the fiberglass sheet on the deck. You will be fiberglassing the underside of the deck, over the fiberglass reinforcing strip that is already applied. Smooth out the fiberglass sheet prior to applying epoxy.
There appears to be enough fiberglass in the kit to complete the build of this Kaholo SUP. Not sure if they included enough epoxy though.
I mixed slow set epoxy in 12 ounce batches and applied it from the center out. Spread the fiberglass out nice and flat from the center out, eliminating any air bubbles. I used a chip brush, but a epoxy spreader works great also. The fiberglass will absorb the epoxy and turn clear, this is called "wetting out" the "glass". Apply enough to "fill" the fiberglass, but not too much where you have excess epoxy floating over the fiberglass sheet.
Here is the underside of the Kaholo 12-6 with fiberglass wetted out. That's all for today.
I let the epoxy cure for a day and then trimmed the fiberglass off the deck. Here is the underside of the deck, fiberglassed.
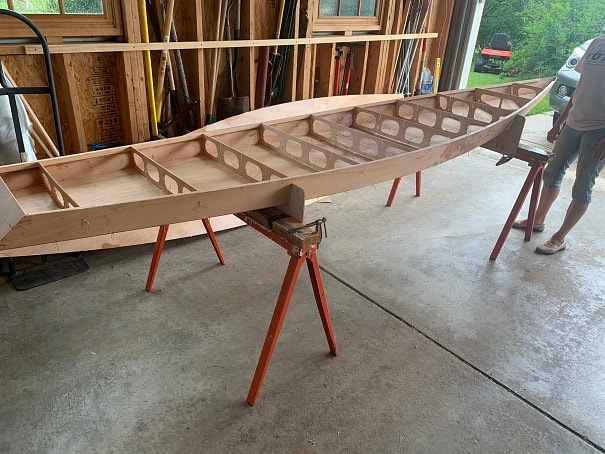
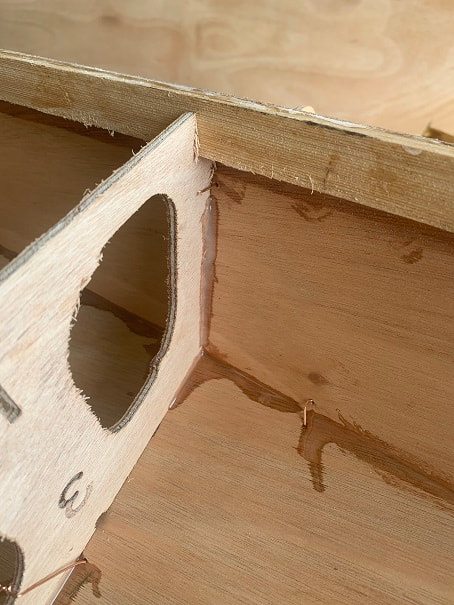
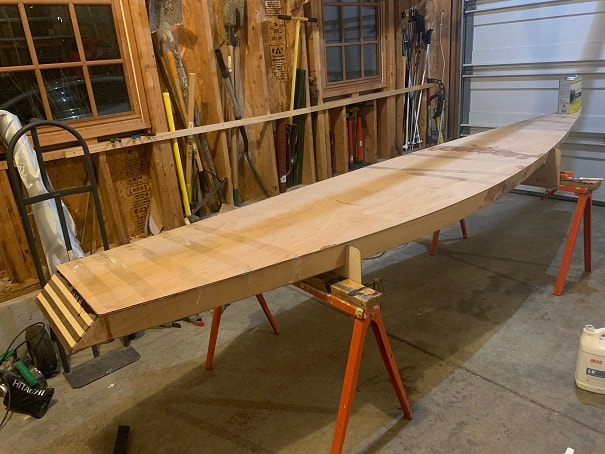
Stitching together the bulkheads and sides of the Kaholo SUP
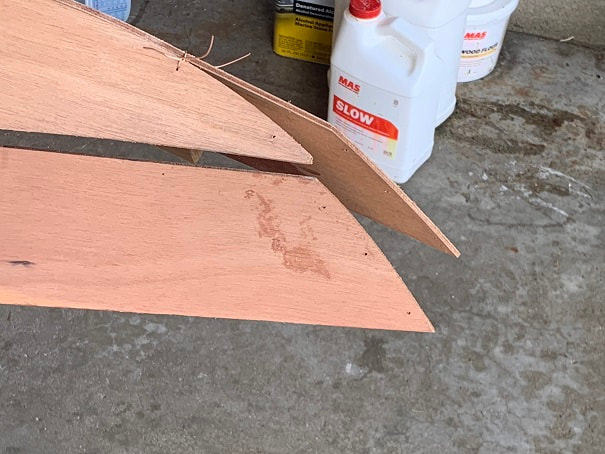
First, I removed the little tabs that were on the sides, bulkheads, bottom, and deck. I trimmed these off with a clipper and then smoothed the edge straight with the rasp. went very fast.
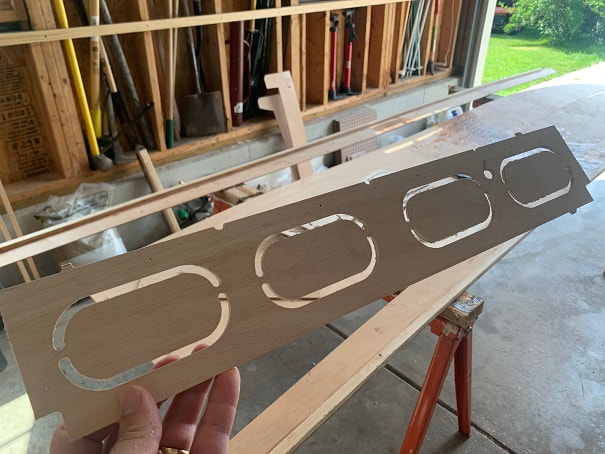
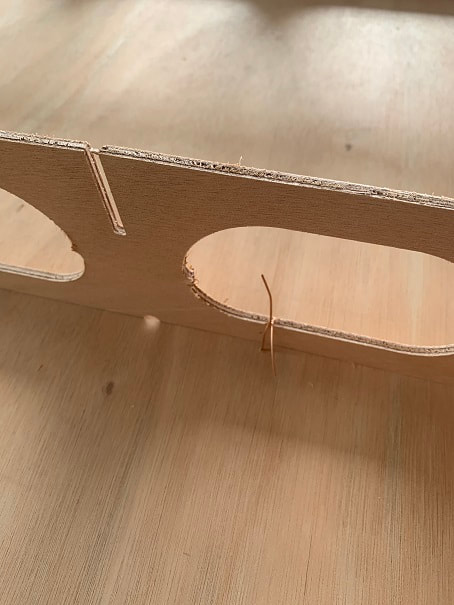
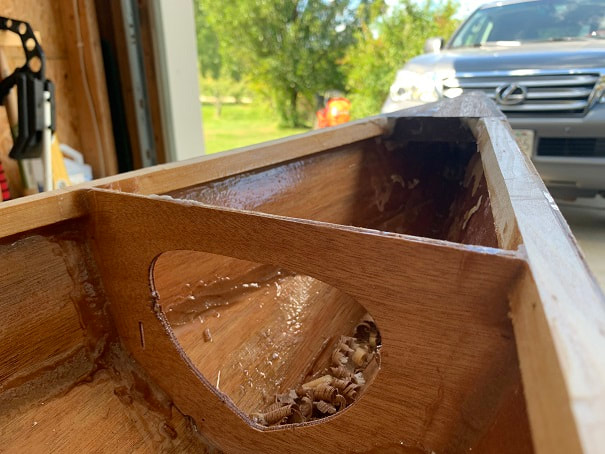
In preparation for assembly I cut out the oblong scrap pieces from the inside of the bulkheads. This photo shows a bulkhead prior to removing the oblong scrap pieces.
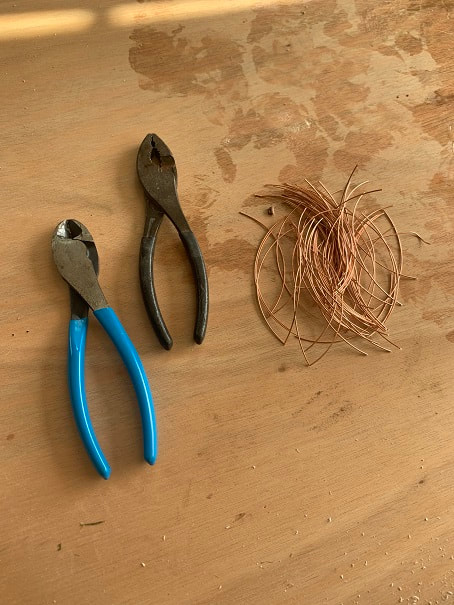
With all the pieces prepped, it was time to stitch the bulkheads in place. It was a fun part of the project, as the board starts to really take shape. These are the tools I used to stitch the pieces together.
I installed the #1 bulkhead at the bow first, then the stern transom piece, then the rest of the bulkhead from the bow to stern.
This was an exciting part of the Kaholo Stand Up Paddleboard construction, as it really starts to take 3D shape!
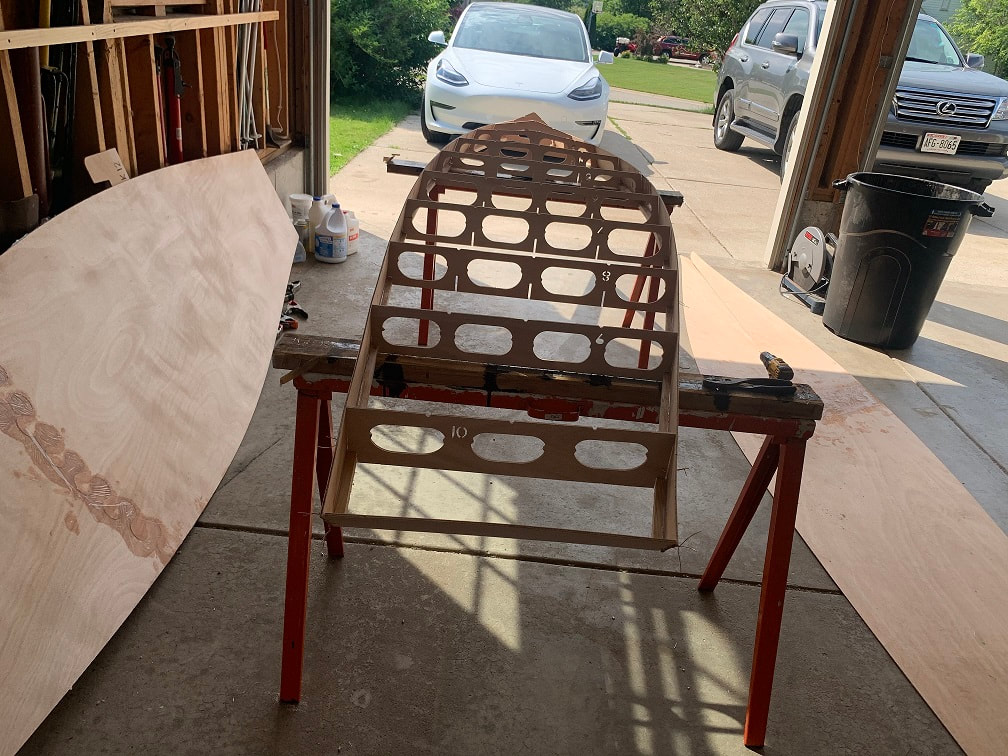
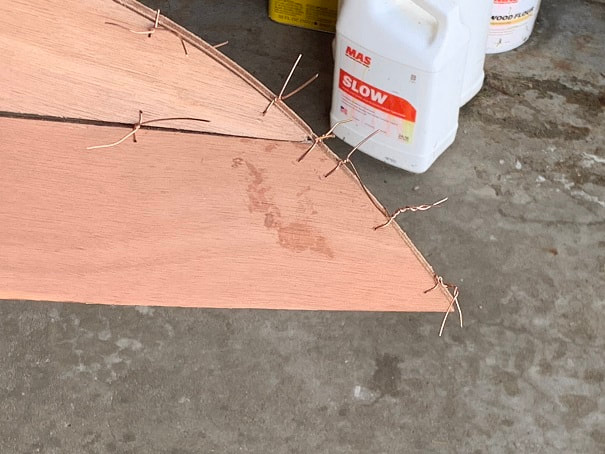
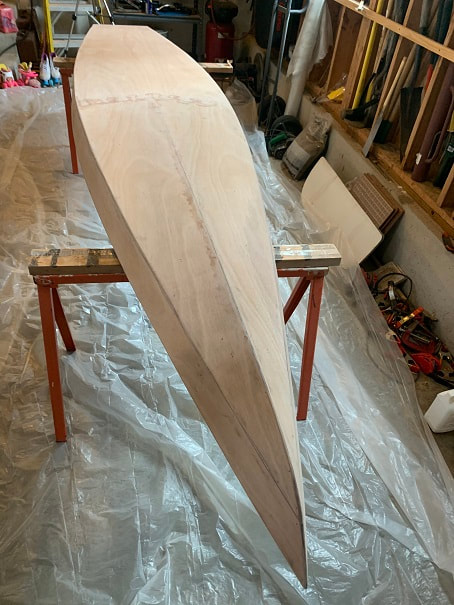
All bulkheads stitched in.
This is one of the stitches as seen from the outside of the board.
Here you can see the stitch travelling through the bulkhead and side.
Stitching the bottom panel onto the Kaholo 12-6
First, I put the bottom panel in place over the bulkheads. The bottom of the board is still facing upwards. The fiberglass reinforcing strip on the bottom panel puzzle-joint will face the inside of the board. My wife and I did this whole step together. Before we began stitching the bottom panel to the board, we stitched the split forward section of the bottom panel together.
There were no pre-drilled holes along the front edge of the bow. Here one can see the four rows of holes that I drilled to use when stitching the bow together.
Here, the bow is stitched together. The kit pieces from CLC fit together very nicely. Next we stitched the bottom panel to the sides using the predrilled holes. We worked from bow to stern progressing evenly down both sides.
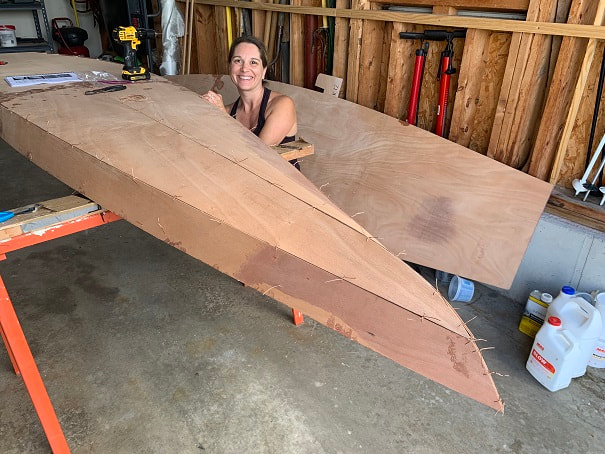
This board will be for my wife (I am hoping to build the 14' version for myself). In building the board she will know the board well even before using it!
With the bottom panel stitched to the sides, with the board still upside down, we inserted all the stitches from the bottom panel to the bulkheads; next we will flip it and then tighten all those loose stitches. I think this will be easier than tightening all those upside down under the board.
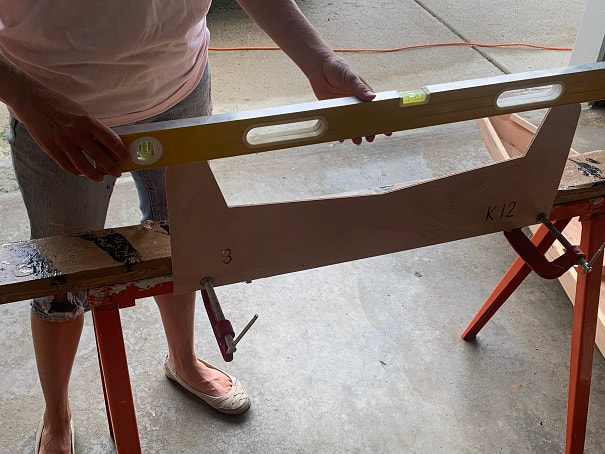
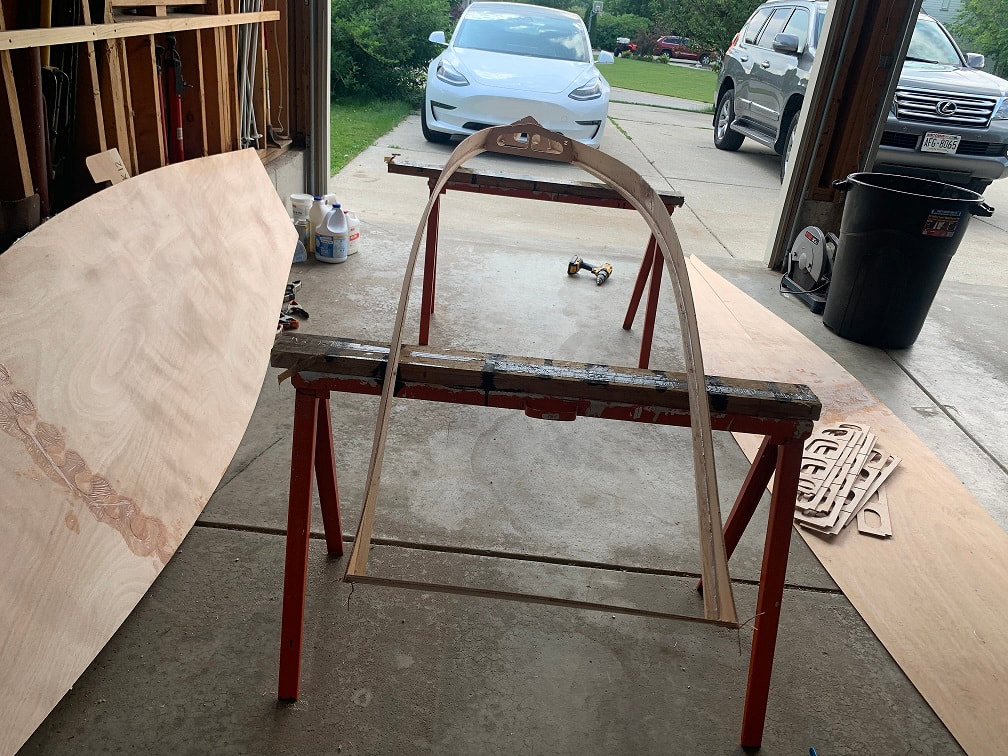
At that point, we removed the board from the sawhorses, and then clamped the precut cradles from the kit onto the sawhorses (making sure they were level). Space the sawhorses apart at the correct distance so that the cradles align with bulkheads 3 and 8.
Chesapeake Light Craft has done a nice job in my opinion of designing and cutting out the pieces for the Kaholo SUP. The pieces continue to fit together well.
Here is the board sitting level in the cradles.
With the board right side up, we twisted the wires that we had pushed through the bottom earlier. These hold the bottom tight to the bottom of the bulkheads. The wires we long enough, and we found it much easier to just run these through the big holes in the bulkheads, not the little pre-drilled stitch holes.
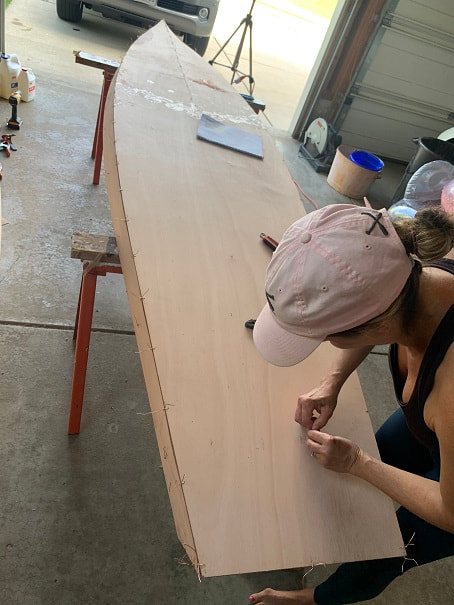
Truing up the board, epoxying the joints, and removing stitches.
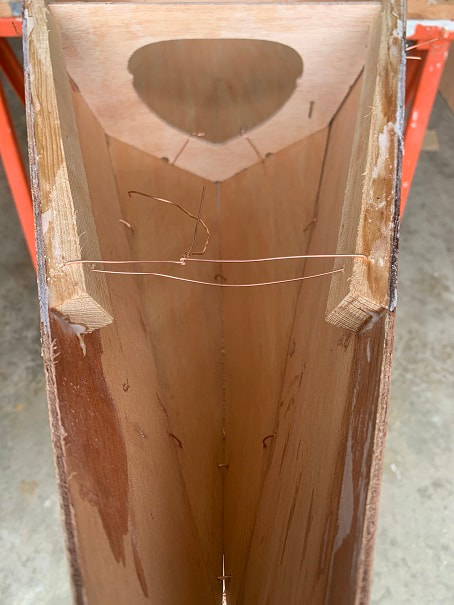
I drilled holes and rang a tension wire to pull in the bow a bit.
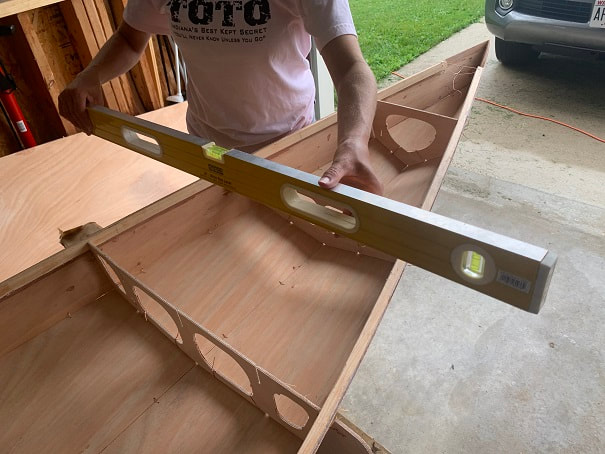
With all the stitching done, we used a level and also our eyes to sight down all the lines on of the board until we were happy that it was true and straight. We twisted and jostled the board until we were pleased with the straightness. Then we were careful not to bump it!
Next I mixed thickened epoxy to a still-fairly-thin consistency , so that it could be drawn up into a syringe. We then used syringes to apply epoxy glue to all the joints, doing our best to skip over the copper stitches. After a day of curing, we will remove the wires, and then we will have more epoxying and filleting to do.
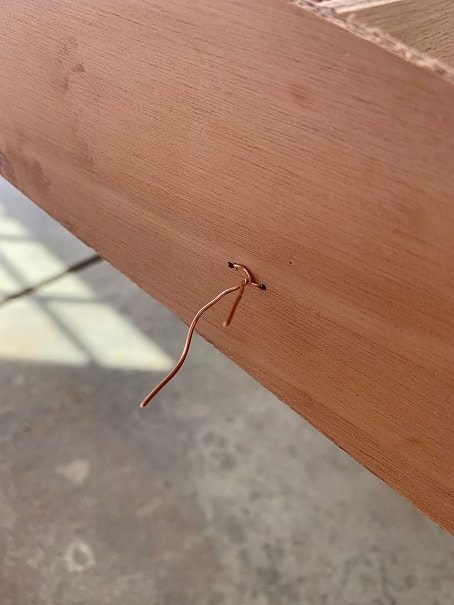
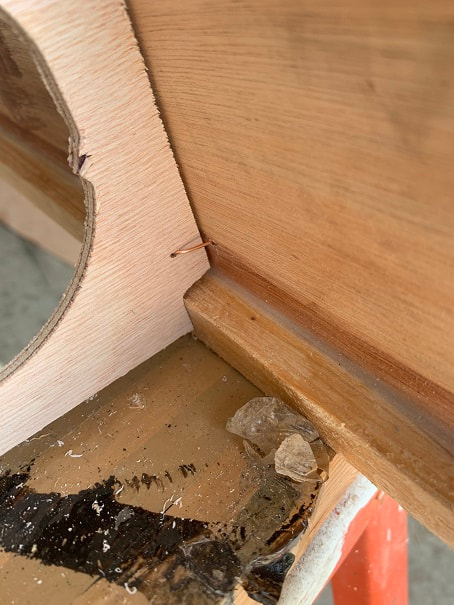
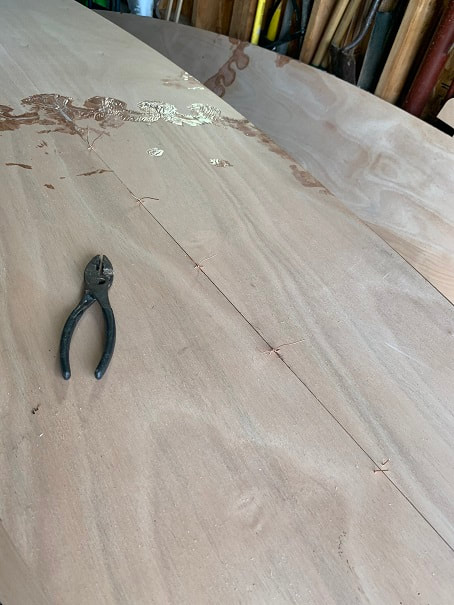
We went around with the wire cutter and pliers and cut and removed all the wire stitches, one day after epoxying the joints.
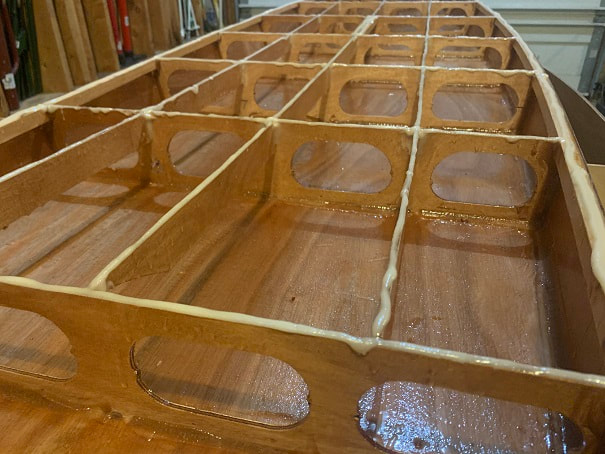
Filleting the joints
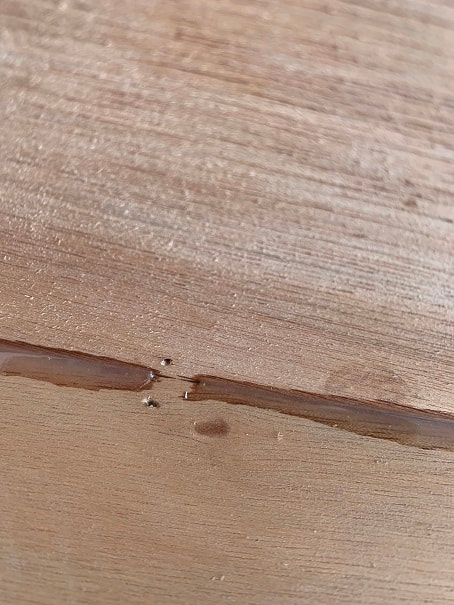
The joints which were stitched and glued together are now further reinforced with a "fillet" of epoxy which has been thickened with wood flour. These fillets are not unlike a fillet weld in metal welding, as they form a roughly triangular-in-cross-section reinforcing support and bonded joint between two pieces of material. If you can plan it, just do the filleting the next day and you can skip the sanding, in my opinion.
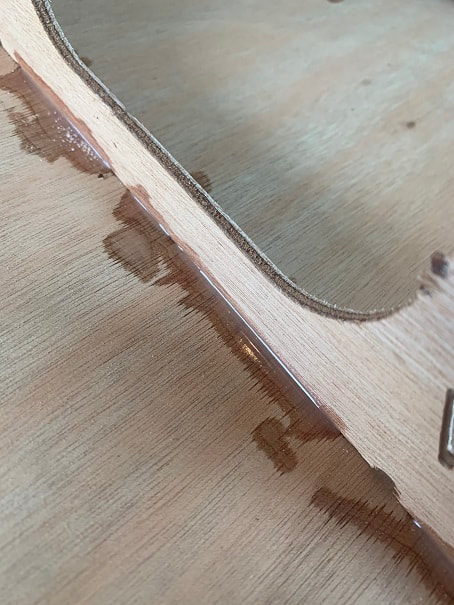
Important: Here you can see the epoxy glue which was applied earlier to the joint. IF you apply the fillet over this epoxy within about a day and a half, the epoxy fillet material will still chemically bond to this epoxy glue. IF the epoxy glue cures completely hard and shiny, then it will present a slick surface that your epoxy fillet will not bond well to. Anytime you want to epoxy together two epoxied surfaces that have already cured, you need to rough up the surfaces to provide a "key" or roughed up surface for the new epoxy to grab on to. It has been over a week since I worked on this SUP, and you can see the glossy hard, completely cured glue in the corners. I will rough this up with 120 grit sandpaper so that the fillet bonds well. If you can plan it, just do the filleting the next day and you can skip the sanding, in my opinion.
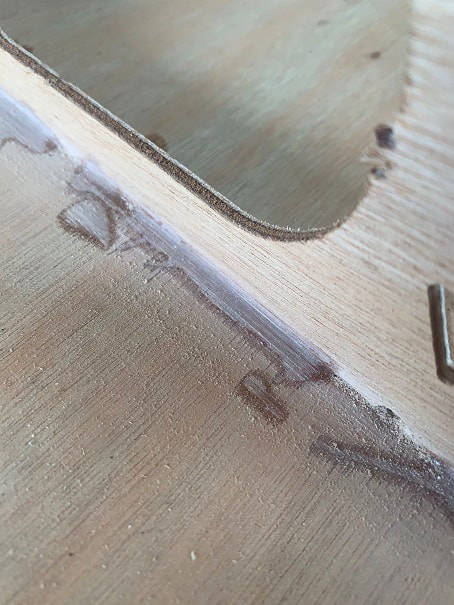
Roughed up epoxy surface will now present a good grippable surface to the new epoxy fillet. Vacuum out the interior of the board and wipe the joints down with a rag before applying the filets.
With gloved gluey hands I didn't get good pictures of this step....but: 1. Mix about 18 oz of epoxy and thicken it with wood flour until it is so thick that it will not drip off of the stir stick. 2. Transfer the mixture to a disposable backery piping bag , or a large ziplock. 3. Cut a 1/4" to 5/16" hole off the bottom corner of the bag. 4. Squeeze the mixture into the corners of all the joints in the SUP. 5. Use a stick that looks like a large tongue depresser, 1" wide, with an end that is cut to a 1/2" radius semi-circle. USe this semi-circle-ended paddle/stick to form a nice concave bead or fillet in the material that you have squeezed into the joint corners. IMPORTANT: We did this today and it's about 73 deg, and the kit comes with SLOW cure epoxy. If you mix a big batch of epoxy like this with fast cure or even medium cure epoxy, especially on a hot day, you will have a hot, smoking, and fast curing pot of epoxy that will cure before you can use it all. Epoxy cures in an exothermic reaction, giving off heat, and I have mixed even medium size batches in very hot weather than started smoking because they got so hot; not good, and you waste the epoxy. All that said, it's not too hot today, and this is slow set epoxy so we used 34 ounces of epoxy to fillet the whole Kaholo 12-6. About 18 ounces per batch.
We glued and filleted the bulkheads right up to the top of the cleats. My wife helped with this whole filleting step and it went quick, maybe an hour.
I had to use my finger to smooth out the fillet where the stern transom meets the bottom.
Well I got slowed down at this point by an unplanned surgery. In September I will restart the project!
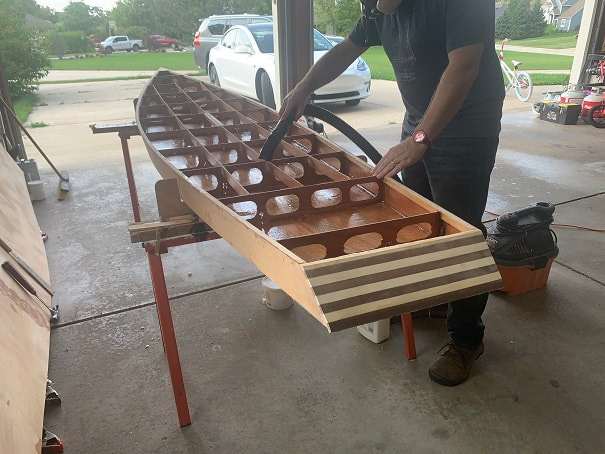
Building the Kaholo SUP: Epoxy Coating The Interior, Installing the Stringers and Handle Reinforcers
Feeling better and getting back to work on the SUP today, Aug 29, 2020"
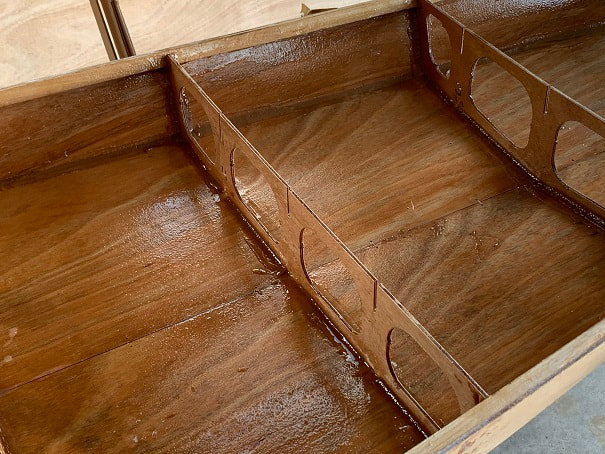
Coated the entire interior with unthickened epoxy, being sure to get epoxy soaked into all end grains and difficult to reach spots. Good but not thick/flooded coat of epoxy....you don't want to add too much weight.
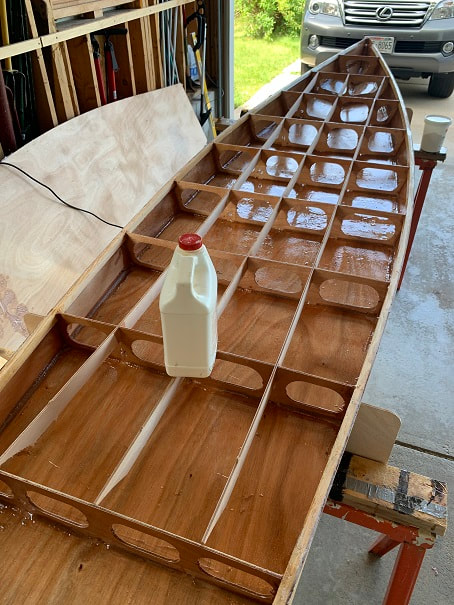
With interior epoxy still wet, we glued in the stringers with silica-thickened epoxy glue.
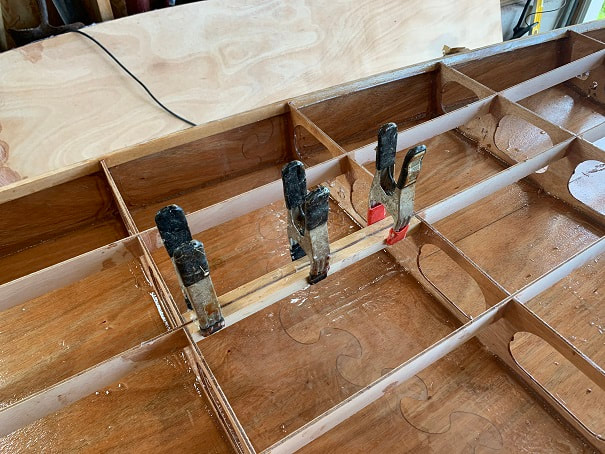
Using remaining glue from the stringers, we glued in the handle reinforcing cleats which we cut from remaining cleat stock, and glued them in place with spring clamps.
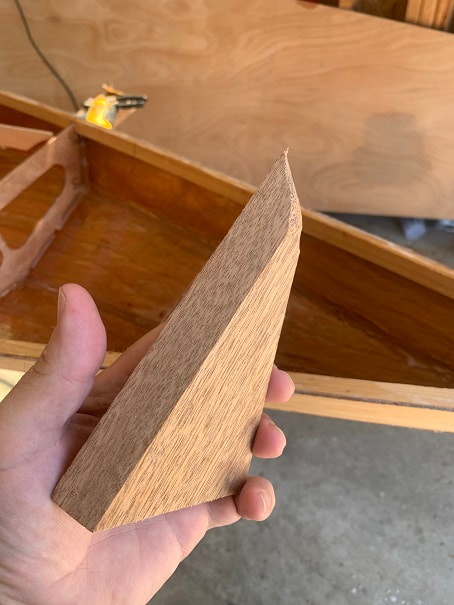
The kit comes with a nice solid clear block of mahogany for the bow reinforcement. I carved it to fit.

Here is the bow reinforcing block glued in place with thickened epoxy. This epoxy glue needed to be very thick to prevent it from oozing out the bottom.
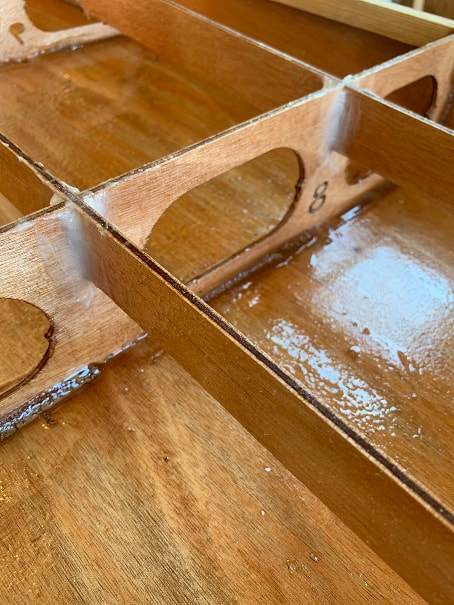
I coated the stringers with unthickened epoxy, including flooding the long "endgrains" of the plywood which soak up more epoxy. Then I used left over thickened epoxy from gluing the bow piece in place, to fillet the stringers with my finger. I would normally make fillet material with wood flour, but I had left over silica-thickened epoxy which worked fine.
At this point, I used a small plane to plane the tops of the longitudinal cleats so that they were level with the tops of the bulkheads.
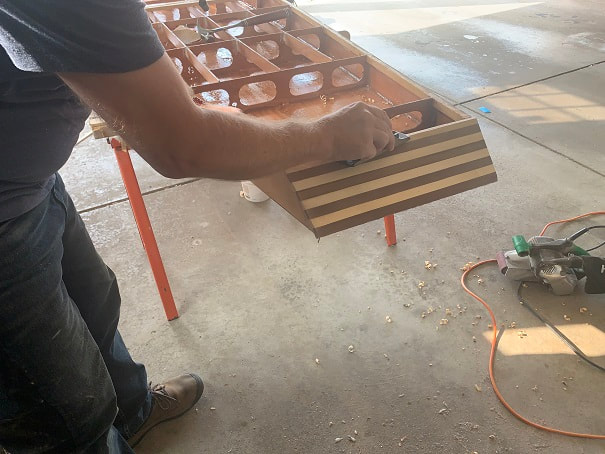
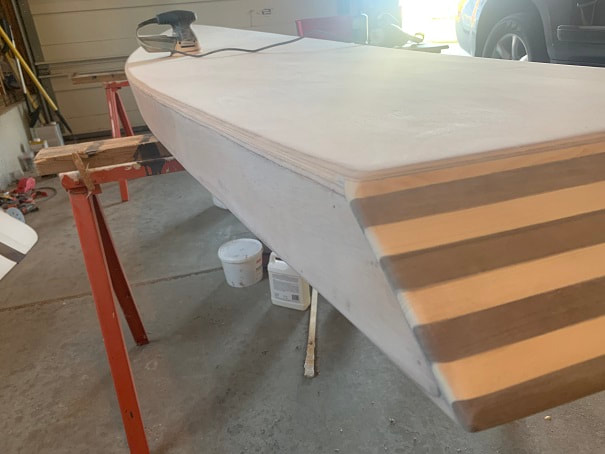
Laminating The Transom
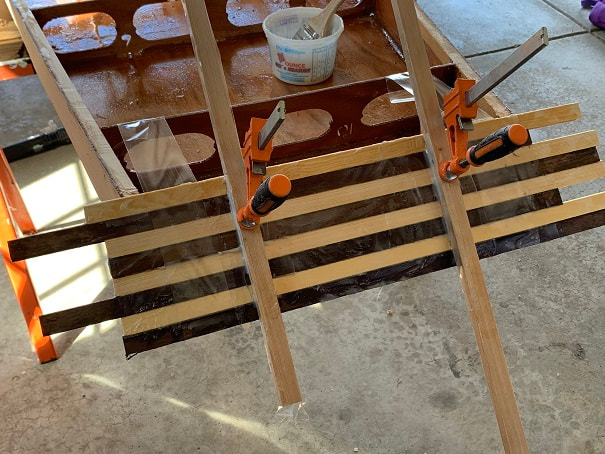
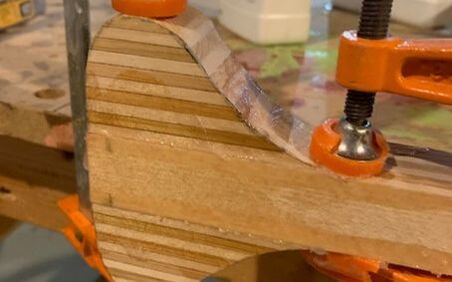
First I sanded the plywood aft facing surface of the rear transom. Then I gave it a coat of unthickened epoxy, then I gave it a coat of silica thickened epoxy and then I applied the walnut and pine strips from the kit in an alternating pattern. I was sure to give all glued faces of the strips a good coat of epoxy glue as I went. I clamped them and taped them in place to cure. The wooden braces I am using with the clamps, are covered in clear plastic packing tape so that they do become adhered to the transom.

I removed the tape and clamps and cut the ends off with the japanese pull saw to within about 1/4" to 1/8" of the sides, I will use the rasp or belt sander to bring the solid-wood boards flush with the sides.
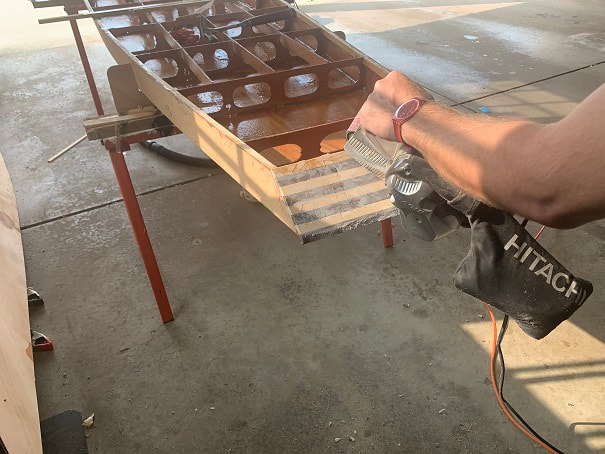
I used a belt sander to sand the transom smooth
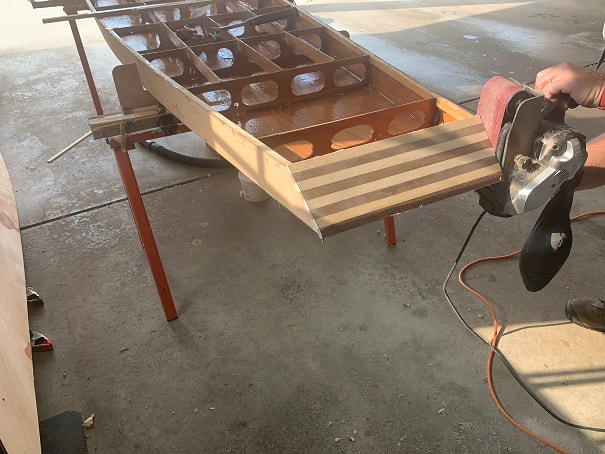
I also used the belt sander to bring the end-grains of the transom laminate boards flush with the sides. Be very careful here. Belt sanders remove material quickly and it one doesn't pay attention , one could quickly sand through the outer laminate of the side-plywood.
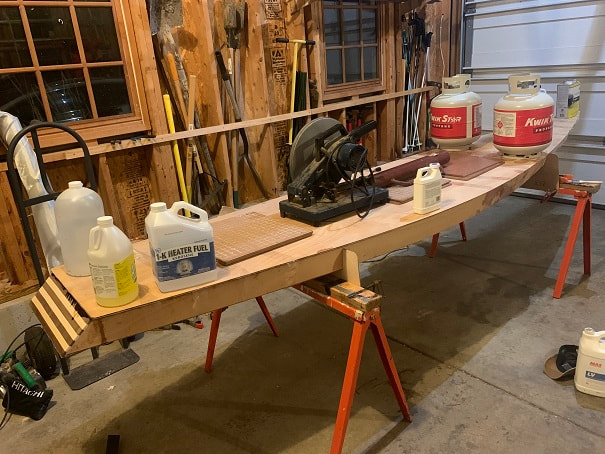
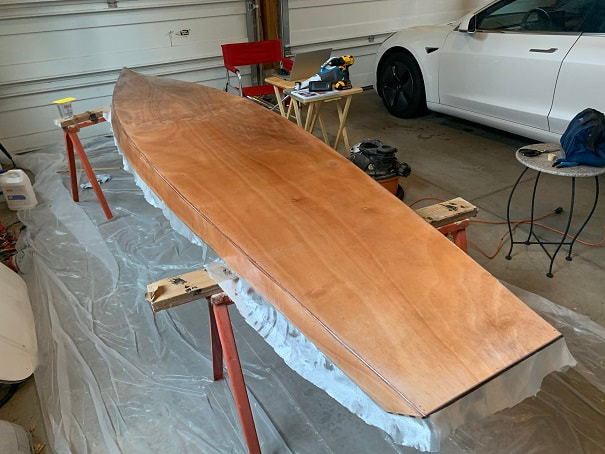
Attaching The Top To A Kaholo Stand Up Paddle Board:
This is a big step!!! Once one attaches the top to the board, one will never see most of the inside of the board, or have easy access to the inside of the board, again. It is also imperative to have ample weights and tape at the ready.
*Note, at this point I ordered a quart and pint of additional MAS resin and hardener (slow) from CLC. It would be disastrous to be gluing down the top or wetting out the fiberglass on the board exterior, and then to run out of epoxy mid-step. I don't think there is enough epoxy or silica left in the kit to make it (there is plenty of wood flour left). I wasn't perfect with my epoxy, though I wasn't overly wasteful either, and I do not think there is enough left so I bought some more.
*Note, at this point I ordered a quart and pint of additional MAS resin and hardener (slow) from CLC. It would be disastrous to be gluing down the top or wetting out the fiberglass on the board exterior, and then to run out of epoxy mid-step. I don't think there is enough epoxy or silica left in the kit to make it (there is plenty of wood flour left). I wasn't perfect with my epoxy, though I wasn't overly wasteful either, and I do not think there is enough left so I bought some more.
I used a small plane to plane the top of the transom flush and level with the top of the framework.
- I missed a key photo here: I sanded the tops of all the upward-facing edges that the top will glue down to, so that they would present a nice , flush, rough surface for the epoxy glue.
Sanding the fiberglass/epoxy surface of the bottom-side of the top. I sanded this with 120grit in order to rough up the surface so that the epoxy glue adheres well when I glue this down to the board frame.
Vacuuming out ALL dust and debris from the interior of the board. I figured this was my last chance to make sure any objects were removed from the board prior to me gluing the top on. You'd hate to have something rattling around in there for all time and to be unable to remove it later. I vacuumed the heck out of it and also vacuumed the top edges where the top needs to adhere.
- Next I mixed unthickened epoxy and brushed it into the bare upward-facing edges of the frame. The unthickened epoxy will soak into the unfinished edges better than thickened epoxy. With that done, I immediately made a large batch of thickened epoxy and applied a thick bead of epoxy to all upward facing edges of the SUP frame. I made this epoxy glue paste thick, otherwise it will drip right off the tops of the edges....it needs to be thick enough to stay put.
Silica thickened epoxy glue applied to all edges of the frame.
Pushed the top onto the epoxy beads and wrapped the board in packing tape.
Weights placed to press the top down onto the frame (those propane tanks are empty otherwise they'd have been too heavy up there)
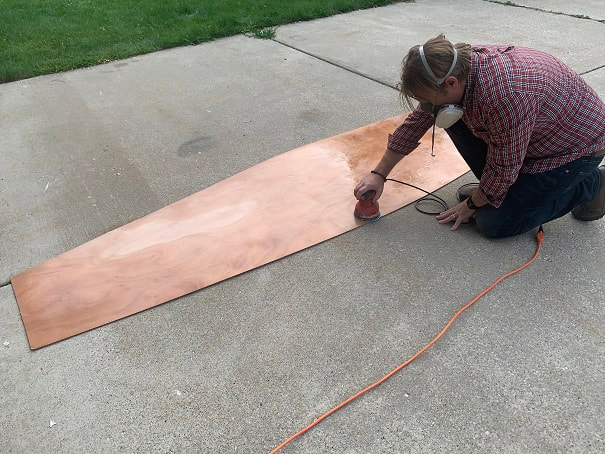
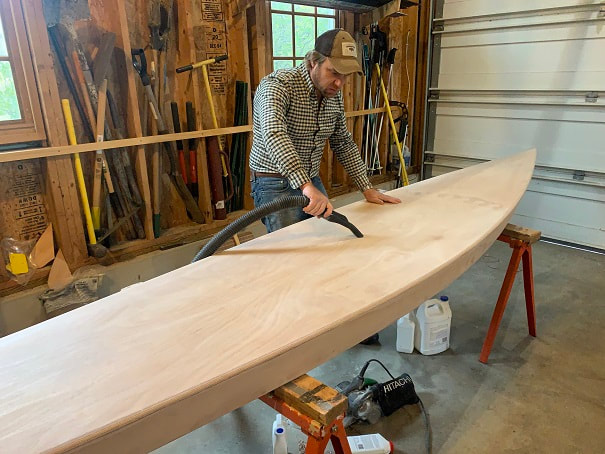
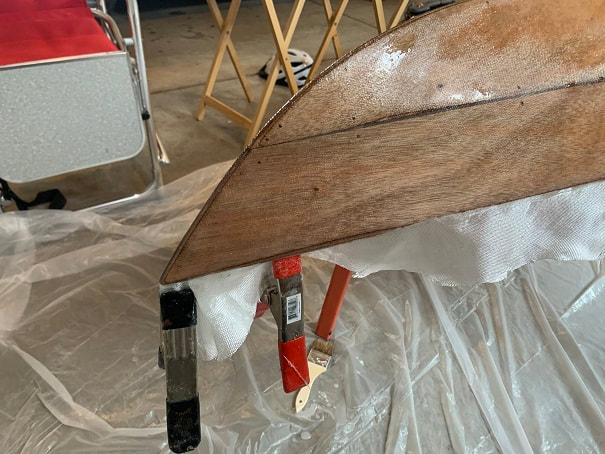
Planing and sanding the board down prior to fiberglassing
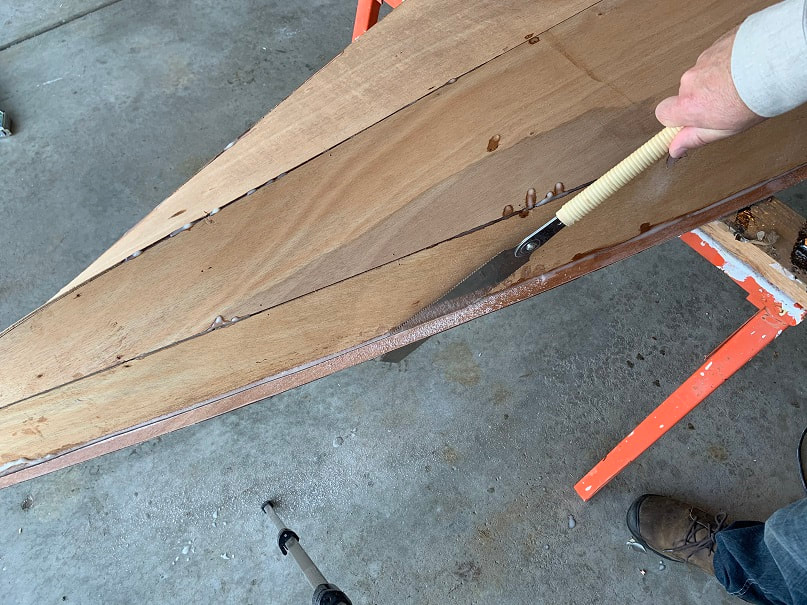
I flipped the board over and used the japanese pull saw to trim off the overhang of the top.
I sharpened the blade of my little block plane using my sharpening stones and then used it to round over the edges of the board. Using a super sharp plane helps so much.
I used a small plane, which I sharpened regularly (the epoxy will dull the blade), to plane a large radius on the top edges of the board. I planed down until about an 1/8" of the solid wood cleat was exposed.
Here is the radius on the top edge of the Kaholo SUP I am building. This is after planing the radius and sanding with 80grit.
Sanding entire board with 80 grit.
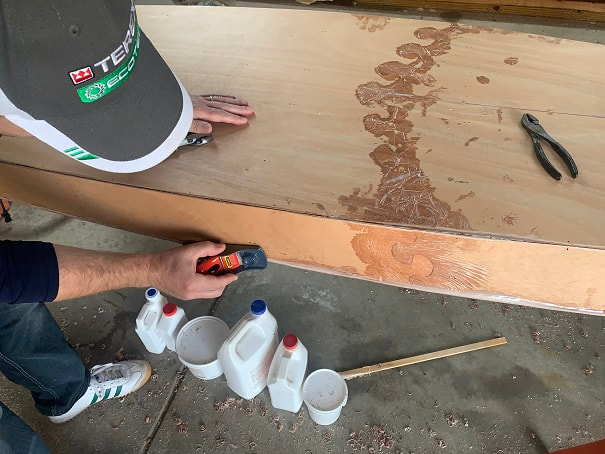
After sanding with 80grit, I vacuumed the entire board to check for voids in the exterior seams. The seam between the top and sides was full of epoxy due to how the top was glued down onto a thick bed of epoxy glue. The exterior joint seams of the sides to the bottom had been epoxied and filleted from the inside, but needed to be filled in spots from the outside. At this point in the build, I filled any of those voids with silica thickened epoxy.
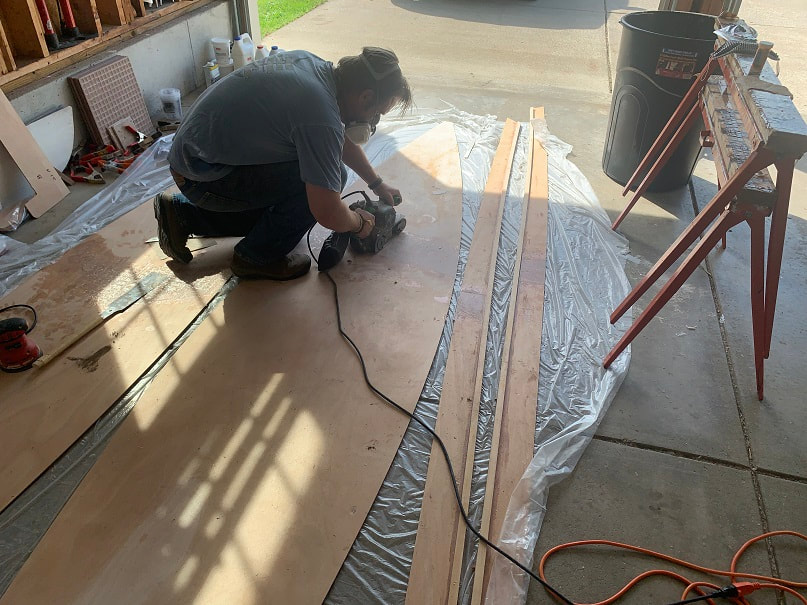
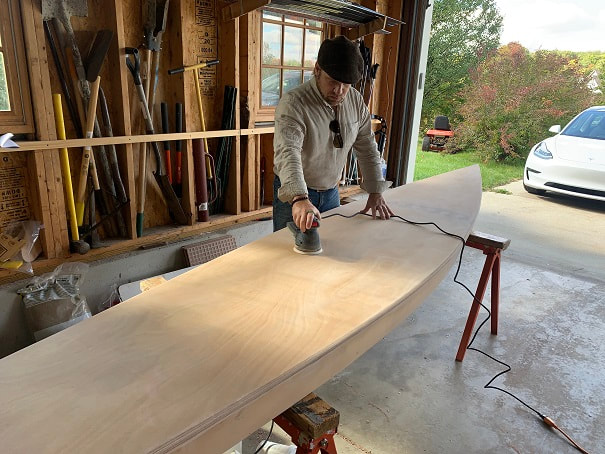
Then sanded the entire exterior of the board with 120, 180, and finally 220 grit, with a random orbit sander.
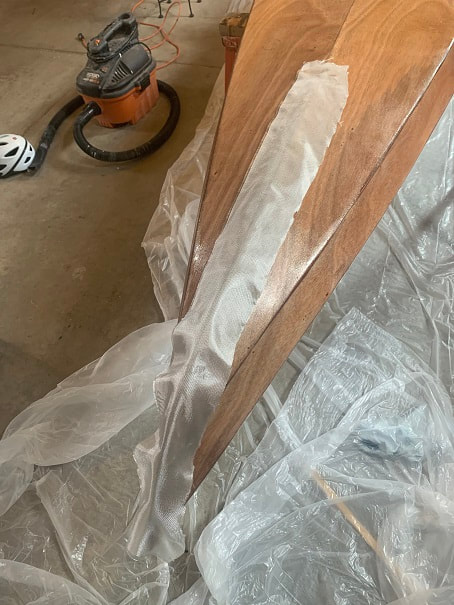
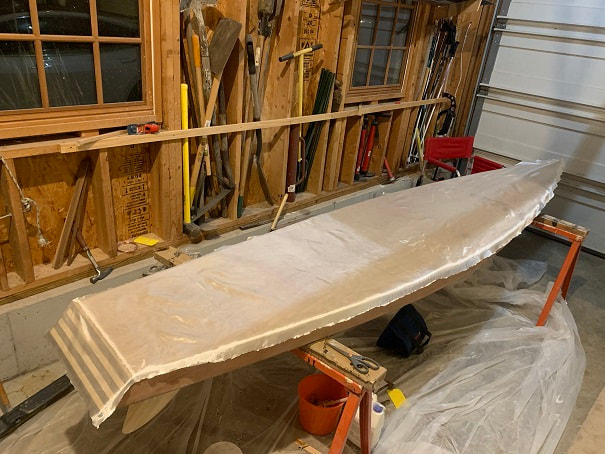
Fiberglassing the Bottom of the Kaholo SUP
Vacuumed the top and bottom of the board just prior to fiberglassing.
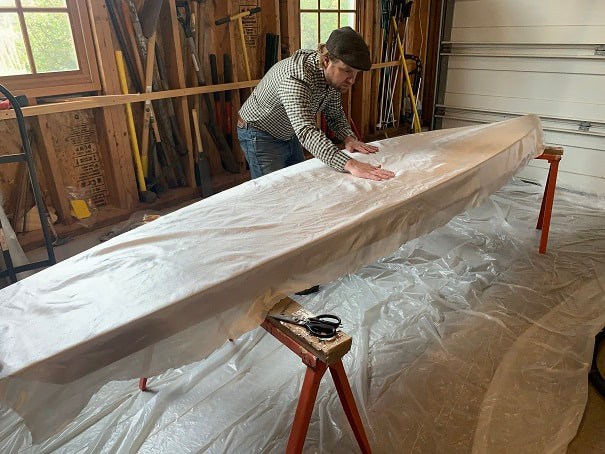
I cut out the fiberglass a bit oversize, and then spread it out smooth over the hull.
The Kaholo comes with a breather to let the interior of the board dry out and also to ensure that a pressure differential doesn't build up between the inside of the board and the outside. With the next step being to fiberglass the bottom of the board, I decided to drill a small 1/8" dia hole in the deck where the breather will eventually go.
Here's my kaholo 12-6 all sanded and vacuumed. Next step is a big one; fiberglassing the hull!
I worked from the center out towards the sides and front and back when I spread out the epoxy over the fiberglass. I used a plastic spreader. This used 18 oz epoxy.
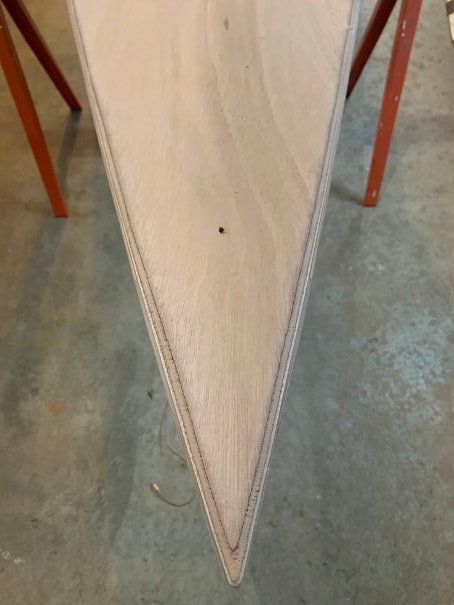
I was able to get a nice smooth flat wrap of the fiberglass on the sharper angled bow section. Using a couple spring clamps as shown, helped.
Trimming off the fiberglass after 24hrs. It is "green" at this stage and easy to cut with a sharp utility knife.
This step was not in the OEM plans. A day after applying the single layer of fiberglass on the bottom of the SUP, I epoxied on a 5" wide second layer of fiberglass on the sharp bow and down the bottom of the hull as shown in the photo. At this time I also applied a complete 2nd coat of epoxy over the previous days fiberglass/epoxy which had not yet fully cured.
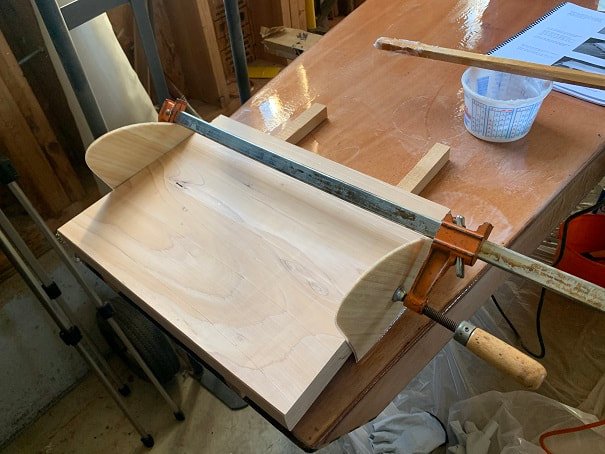
Attaching the fins to the bottom of the Kaholo SUP
First a sanded down the area where the fins will be glued to the bottom, with 120grit sandpaper to rough it up. I elected to use "Bamboo Twin-fins by True Ames" which I purchased from the CLC site https://www.clcboats.com/shop/products/new/gephart-bamboo-fin-set.html These fins look cool and are fiberglassed at the manufacturer.
I made a square and true fixture to hold the fins staight and vertical during glue up. The bottom of the board from the kit has two marks that mark where the leading edge of the fins should start, then it's up to you to make sure they are straight fore-aft and vertical. I glued these to the bottom with epoxy thickened with silica.
Bamboo fins epoxied to the bottom of the SUP.
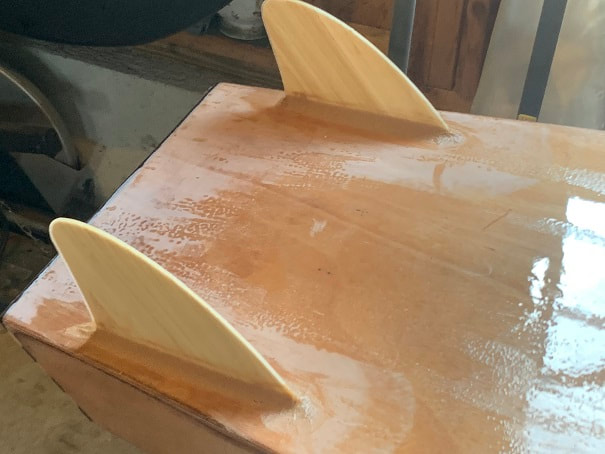
The next day I mixed up silica and wood flour thickened epoxy and applied a thick fillet around each fin.
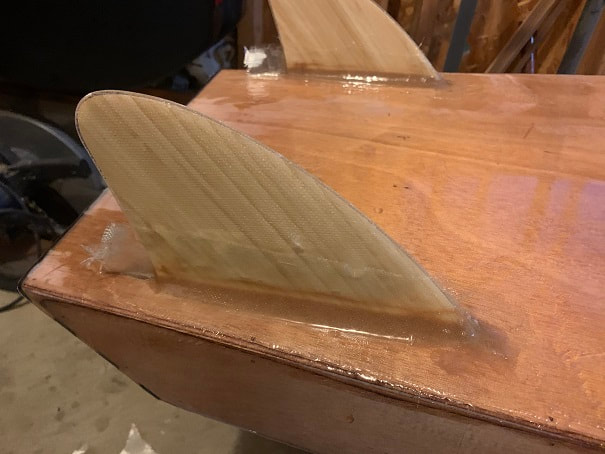
After the fillets had cured for about 4 hours I cut 3" wide strips of fiberglass and pressed them into the fillets and wetted the strips out with epoxy. These fiberglass reinforcing strips are on both sides of each fin.
- At this point, I sanded all the bottoms and sides, and trimmed the fiberglass and sanded the fins. This took a while, I did this with 120grit on a random orbit sander.
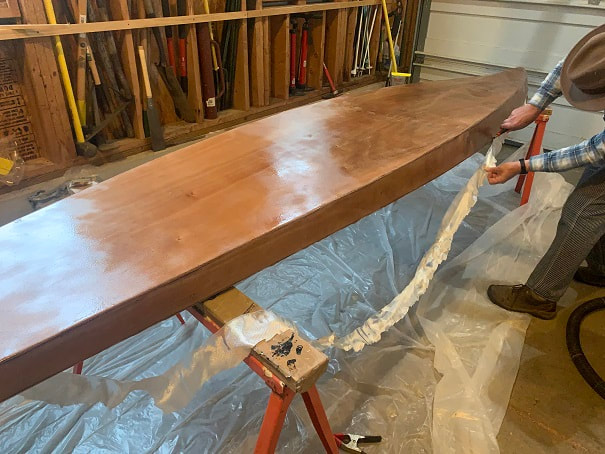
Fiberglassing the top of the Kaholo SUP
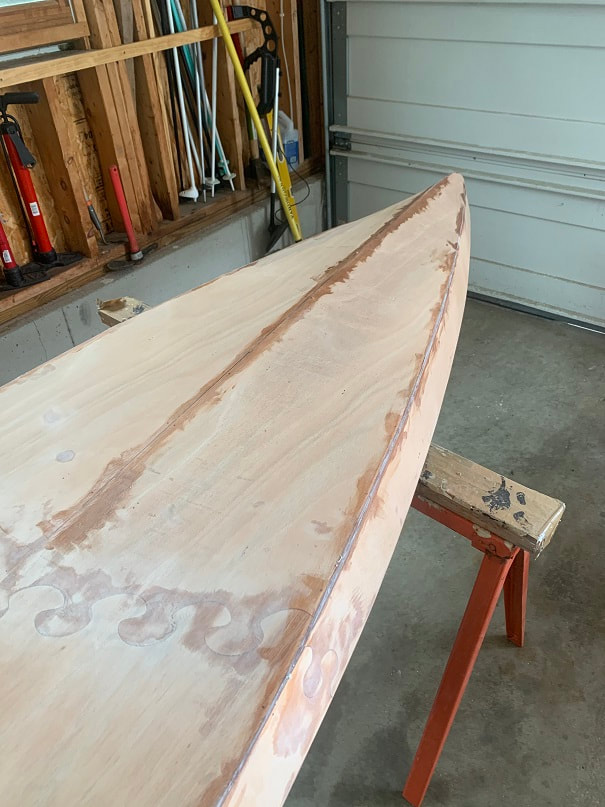
Fiberglassing and epoxying the bottom and sides, resulted in drips on the nice radius around the top of the board. I resanded this to recreate my nice smooth radiused top edge. With that done I was ready to fiberglass the top.
Sanding the fiberglassed sides and bottom, prior to fiberglassing the top.
Here is the fiberglass trimmed to size for the top of the SUP. The fiberglass will extend down the sides about 2 inches.
Wetting out the fiberglass on the top of the Kaholo.
- aaaaaaand now the sides are all covered with epoxy drips again so it's back to rasping and sanding. 120 grit then 220 grit. Top and sides.
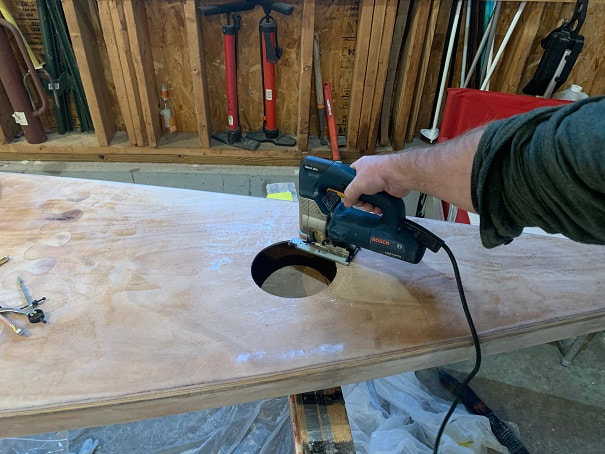
Measured, drew out, and cut out the hole for the deck plate/gear bag.
I have done this project at quite a relaxed pace and now it is autumn and freezing at night and soon is will be freezing all day. From here on out I need to turn the garage heater on to keep it over 55deg in the garage , for epoxy and paint and varnish to dry.

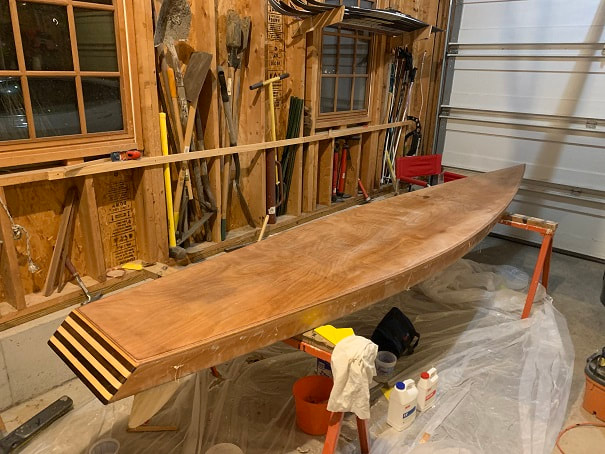
Completely fiberglassed and sanded board!
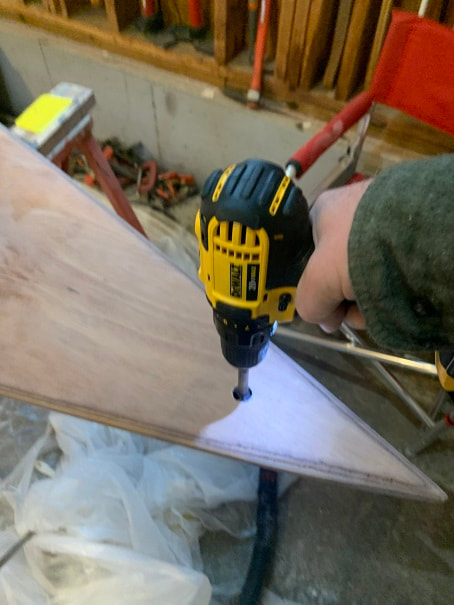
Drilling 3/4" diameter hole up near the bow , for the breather
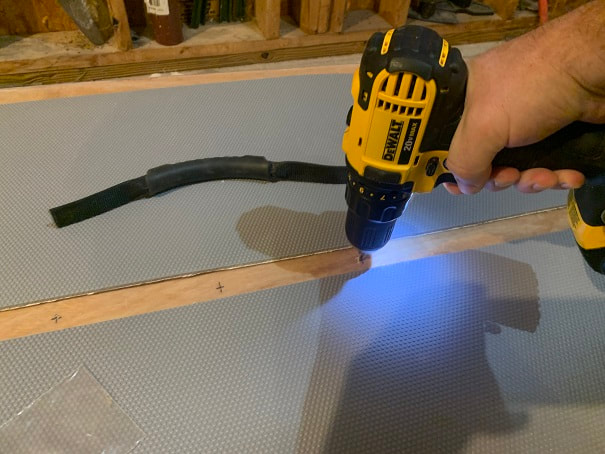
Next I laid out and marked where the foot pads go, and also drilled the holes for the handle.
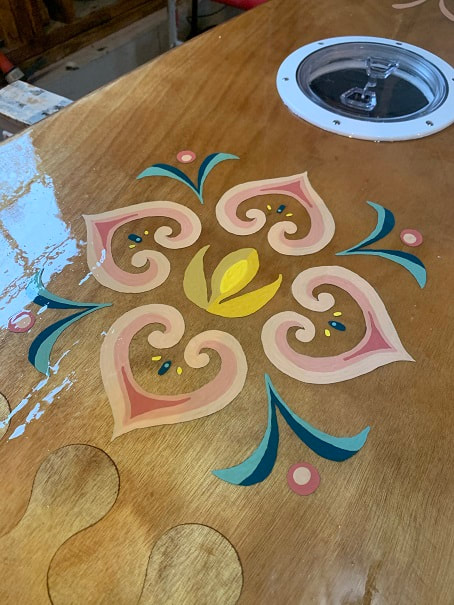
- With the deck hardware laid out (not permanently installed!) I was able to lay out the graphics. This board is for my wife and being of Norwegian decent, she had requested some rosemaling. I had made some stencils for a project a few year ago, based on the rosemaling in Disney's "Frozen", and she liked those, so I reused the stencils for this project. The original artist who drew these designs for Disney, is Brittney Lee, thanks for the wonderful art, Brittney!
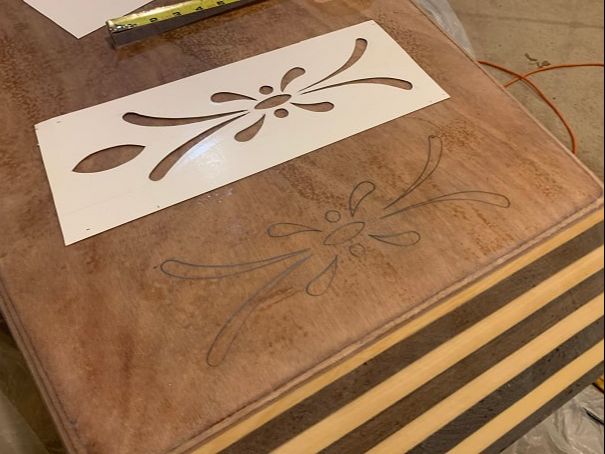

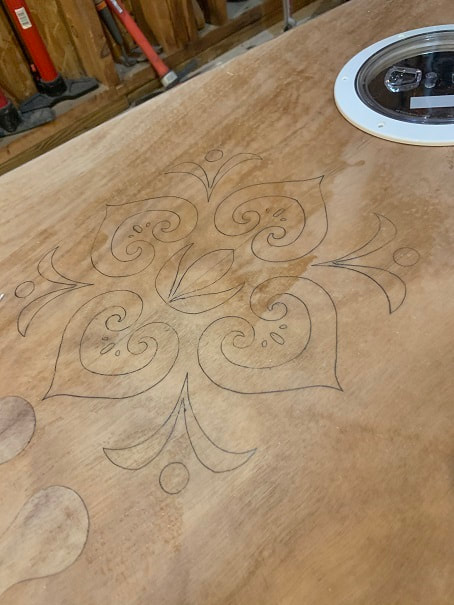
With the designs traced onto the board, I will now use a small brush to apply the paint.
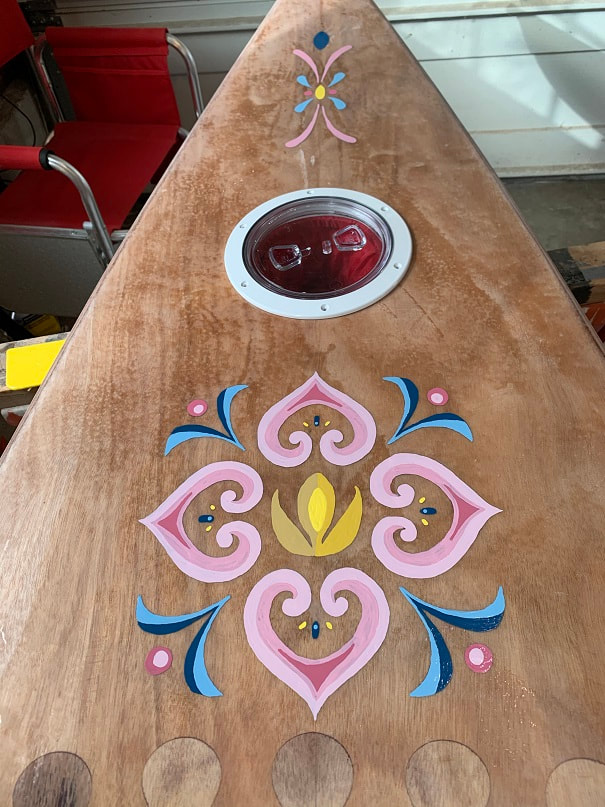
I painted the design on with small art brushes. I used rustoleum enamel paint, hand mixed to achieve various color shades. It took three coats of each color to get a good solid final coat.
3 coats of Schooner Spar Varnish, un-thinned, applied to the tops and sides. I strained the varnish through a paint strainer funnel and used a high quality brush.

Here is the stern after spar varnishing.
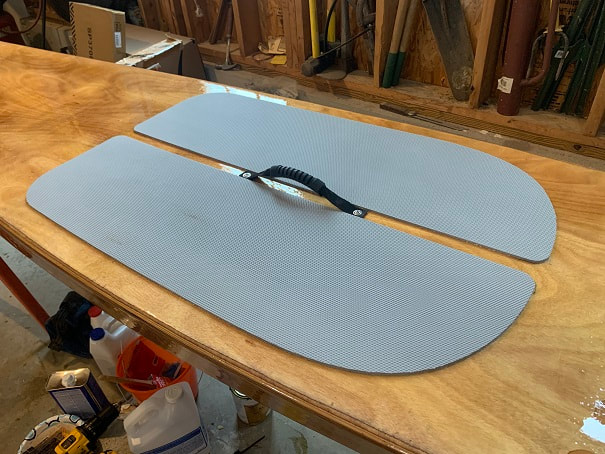
Here is the handle installed. I filled the holes with 100% silicone sealant and then threaded the mounting screws in. I have also now installed the self-adhesive foot pads.
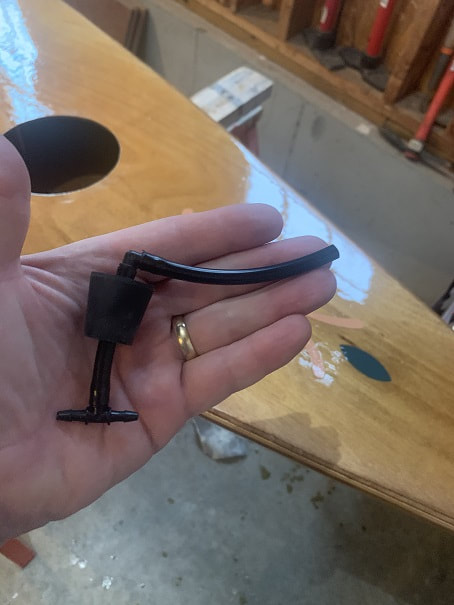
Here is the breather assembly all put together. This breather ensures that the pressure inside and outside the board is the same.
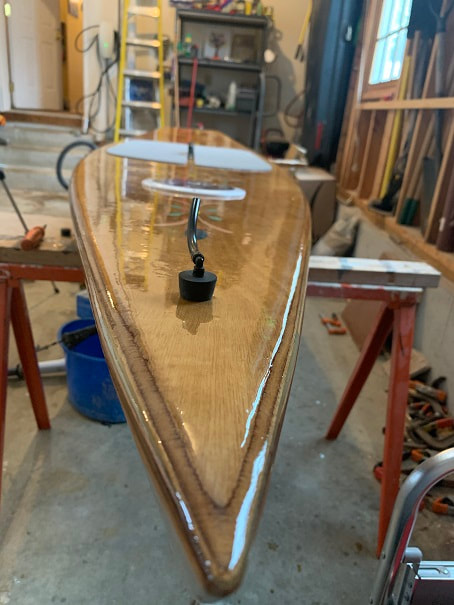
Kaholo SUP breather, installed into a hole drilled through the deck, near the bow.
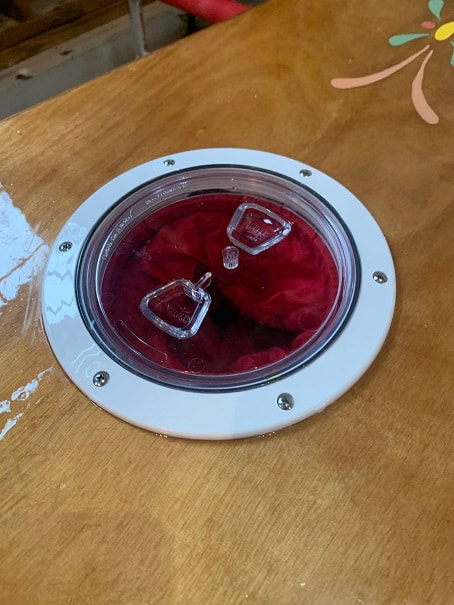
This deck plate is bedded in 100% silicone and secured with stainless steel screws. There is a bag mounted to the bottom of the deckplate to contain any items that one want to put in.

Almost done! Here is the completed top of the SUP, including installed hardware.
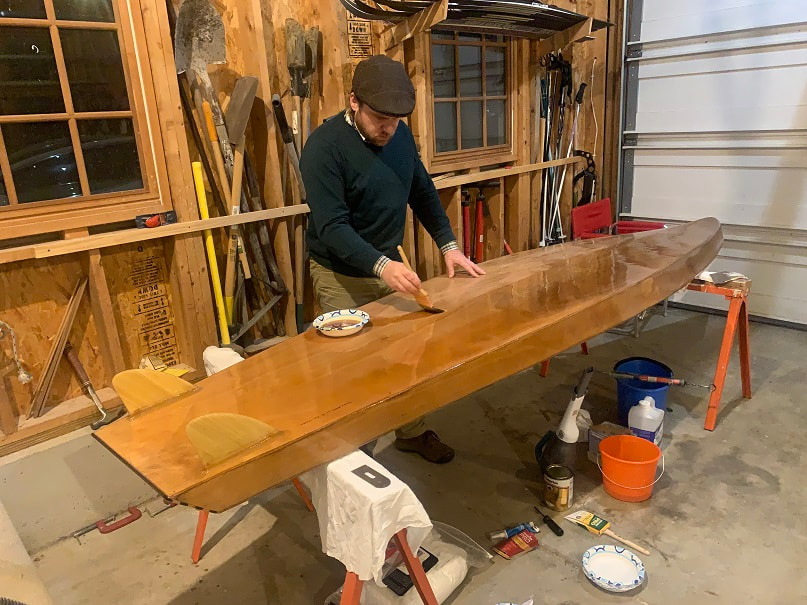
I flipped the SUP over and applied three coats of Schooner Spar Varnish. 220grit light sanding between coats, filtered spar varnish every time, and vacuumed/wiped down prior to varnishing.
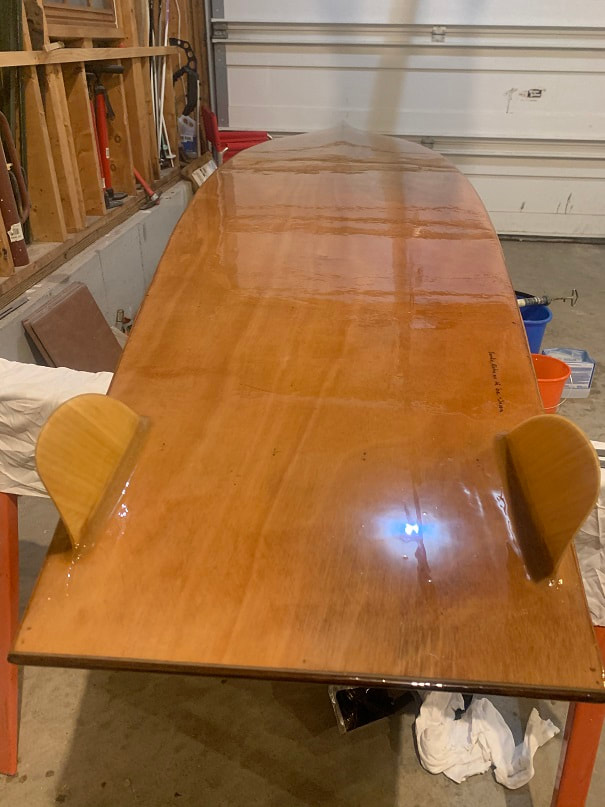
The Kaholo SUP is done!!! Tomorrow after the varnish is dry I will post some final photos.
I started this project in summer, but an unexpected hernia set me back and I finished the project at the end of Autumn. Luckily I was still able to get the paddleboard right out on the water......unfortunately the water was a little cold as can be seen in the photo.