Provisioning for a trip with food that doesn't need to be refrigerated: simple packing and tasty traditional meals
For provisions on a trip, I have taken to preferring to skip coolers of ice and perishable foods, in favor of packing traditional sea-faring foods that require no refrigeration. That said, there are some aspects of my location and the length of my trips that make this possible, including; even in summer, where I sail tends not to get too hot (as it would further south or in the tropics). The water is in the 50's or low 60's in summer and the nights are cool. Also my trips are 4 days long, making the old-timey food practical and fun...but I imagine after 4 months of it, a fresh ham sandwich with cheese and mayo and a cold coke would really hit the spot.....
According to mayflowerhistory.com, the "Pilgrims" who voyaged across the Atlantic to what is now Massachussetts in the USA, took with them: Biscuit (hardtack), beer, salt, (dried) beef, salt pork, oats, peas, wheat, butter, sweet oil, mustard seed, ling or cod fish, "good cheese", vinegar, aqua-vitae, rice, bacon, cider.
According to mayflowerhistory.com, the "Pilgrims" who voyaged across the Atlantic to what is now Massachussetts in the USA, took with them: Biscuit (hardtack), beer, salt, (dried) beef, salt pork, oats, peas, wheat, butter, sweet oil, mustard seed, ling or cod fish, "good cheese", vinegar, aqua-vitae, rice, bacon, cider.
My List of Traditional Sea-Going Provisions and Recipes for Your Consideration:
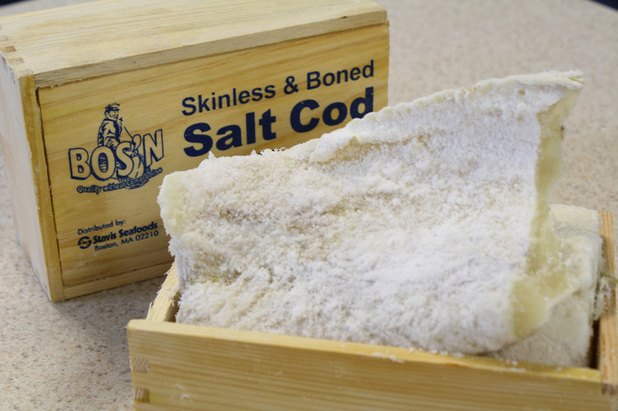
- Salt-Cod: open the box and take a whiff and you will know what you are getting in to. Recipe below.
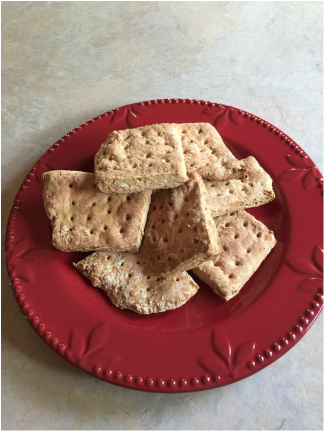
- Hardtack. Standard fare in the age of sail. Keeps pretty much forever as long as it is dry. There's a reason they called hardtack "molar-breakers". Very easy to make, and a great provision to have aboard! Great with soup or coffee. Hardtack recipe below.
- Beef Jerky
- Pickled Herring
- My brother makes a great confit, pickled in mason jars and encased in fats; very yummy. Recipe below
- Potato's, carrots, onions
- That most-traditional of ancient mariner's meals: Spam
- Bacon grease and olive oil, salt and pepper
- Noodles (can make a variety of soups with all these ingredients)
- Try to catch fish
- Limes and oranges to keep the scurvy at bay on long 4 day voyages
- 2 Gallon water jug with a way to sterilize the water, and we take Tang to flavor the water.
- Coffee, and french press for brewing
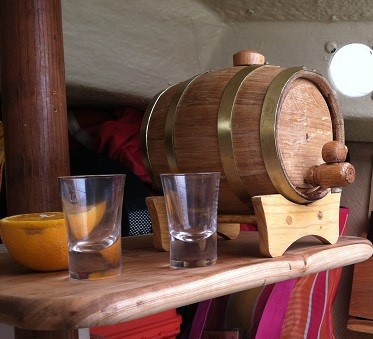
- Rum
HARDTACK RECIPE
Reading about Hard Tack in so many books and novels about the Age of Sail, along with an interest in non-perishable food that is good for stowing aboard, led me to make some Hard Tack to experience for myself what it's all about. I can confirm that it is too hard to be reasonably eaten without being saturated or ground up first. In it's dry state, it has more in common with a ceramic tile than a piece of bread; even makes a clinking noise when you bang two pieces together. If you soak it in coffee you can start to break pieces off and it's not bad. If it is kept dry it will not go bad.
1. Measure out 3 cups of refined white flour and 2 teaspoons of salt into a bowl
2. Slowly mix in a cup of water
3. With a rolling pin, roll the dough into a rectangle that is 1/2" thick.
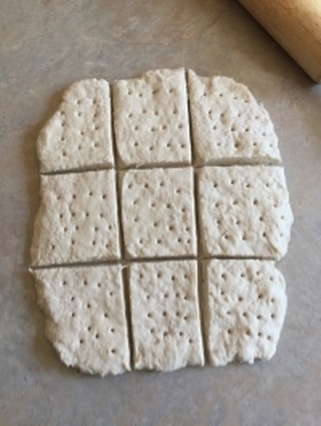
4. Cut the dough rectangle into 9 pieces and poke each piece 16 times with a nail in a 4 x 4 pattern of holes, see photo above of dough before baking, and also of the finished hardtack.
5. Put the pieces on an un-greased pan, and in an oven that has been preheated to 375degF for 30minutes
6. Flip them over and put em back in for another 30 minutes
7. Let cool completely
8. Experience a taste of yesteryear!
SALT-COD RECIPE
Salt cod is dried and extremely salted cod. It usually comes in neat little finger-jointed pine boxes, that are usually wrapped in plastic. Salt cod is a traditional and very old preserved fish preparation and is alot of fun on a sailing trip. I also like the way it tastes.
- The dried salt cod must be "freshened" by soaking it in water. It is near inedible in it's out-of-the-box state due to extreme saltiness. Just rinsing it a couple times for an hour will not freshen it enough, you will still have very salty fish. I recommend two methods: 1. fill a large bowl with fresh water and soak the salt cod overnight, draining/refilling the water frequently before bed bed and when you wake up. Then you can cook it in the morning. or 2. As I sail in fresh water, I throw the salt cod overboard in a mesh bag while sailing for at least half a day.
- The boil and eat the cod, or bake it or cook it however you'd like
- My favorite way is to make the Newfoundland dish called Fish and Brewis, in which you soak Hardtack overnight also (not with the cod!) and then chop up the hard tack in the morning into cubes and boil it. Then boil the cod, then mix them together and put chopped bacon and bacon grease over the top of it. This is a manageable simple meal to make aboard.
- There is also a great portuguese recipe using salt cod, which I wouldn't make aboard ship, but which I have made at home called Salt Cod Brandade, google a recipe and try it, very yummy.
Confit A La Justin
Confit is an old French method of preserving meat. My brother is very good at it, and he has been kind enough to write down the recipe below. I'm not sure what the FDA has to say about refrigeration requirements, but you can research that and make your own decision. What I do know is that is has worked well as a preservation method for us on our short trips and it tastes amazing.
Confit process:
Step 1: Render fat of choice. Beef tallow and pork backfat can often be had very cheap at your local butcher. Duck fat and goose fat are typically rather expensive unless you hunt; in that case, ALWAYS save your duck fat! Another good one bacon fat (we all have a ready supply of that). Render fat over very low heat flipping pieces of fat occasionally until all or nearly all the fat has rendered (liquified). Then strain the fat through a cheesecloth or similar and put in a jar for later use. Rendered fat can be used in place of butter in many recipes and has a lot of uses in the kitchen.
Step 2: Salt cure your protein. To start the confit, trim or dress your protein of choice (pork, beef, duck et cetera) into portions that will fit in a canning jar of your choice. Pints are a good choice for single serving, and quarts are a good size for two adults. Use wide mouth jars. Once you have trimmed your meat, salt it with about 1/4oz of kosher salt per pound of meat. This is also a good time to add any spices you may want. Once, the meat is well coated in the salt/spices, cover with cling wrap and place in the fridge over night and up to 48 hours.
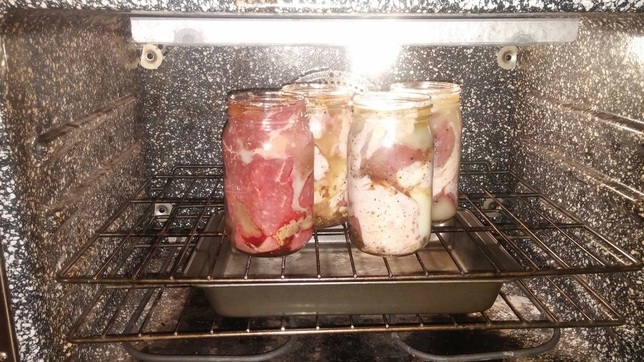
Step 3: Cook confit. Start by rinsing the salt cure off your meat under cool running water. Preheat oven to 190º. Melt your rendered fat (or use freshly rendered fat). Place the meat in canning jars and cover with fat so that all meat is submerged. Fill an additional jar with some extra fat that will be used for topping up if necessary. Put lids and rings on each jar only very loosely (not sealed). Then put jars in a pan and the whole thing goes in the oven to cook for 8 hours.
Step 4: Finish canning. After the confit has cooked fully, remove the pan and jars and check the fat level. If there is more than 1/2-3/4" of air space under the lid, I would consider carefully removing the lid and topping up with some of the additional fat. Once all the fat levels look good, tighten the rings and set the jars out to cool fully.
Step 5: Storage. Your confit can be eaten immediately or stored in a cool spot for up to about a month. Many French references talk about aging confit much, much longer and you are welcome to try that at your own risk.
Step 6: Eat! Confit can be eaten cold or reheated. Simple scrape off most of the fat, and fry, crumble, saute or cook however you want. For onboard cooking, I prefer to sweat some onions and root vegetables in fat from the confit, then add the confit and brown it all a bit.
All sorts of things make good confit. Some favorites are classic duck legs with sage, salt pepper, and garlic cooked in the confit; beef roast cooked with fiery dried chilis; and pork shoulder cooked in bacon fat.
