Tools Used to Build the SCAMP Sailboat "Argo"
Here I will list the tools I used to build the SCAMP Sailboat "Argo". To save drafting and lofting time, I bought the SCAMP kit. Hats off to ye that took the time and put in the skillful effort to draw and cut out all the pieces! The reward is in the accomplishment. Below are the tools that I used to build my SCAMP from the kit. A person wouldn't need all these tools to build it, but my tool collection has grown over the years so this is what I have now.
Building a wooden boat is a bit of a spiritual journey, and as such, I find it most rewarding to use hand tools as much as possible; they are quieter and provide a direct real connection to building something "by hand". Building the SCAMP from a kit can be done almost completely with hand tools, which is great. That said, I am not one to take on huge jobs with manual labor that takes too long. I use electric drills for drilling holes, electric planers for thickness planning, table saws for ripping staves, and electric sanders for big sanding tasks....so I am no hand-tool-hero....but I do love using the hand tools with some nice music on in the shop.
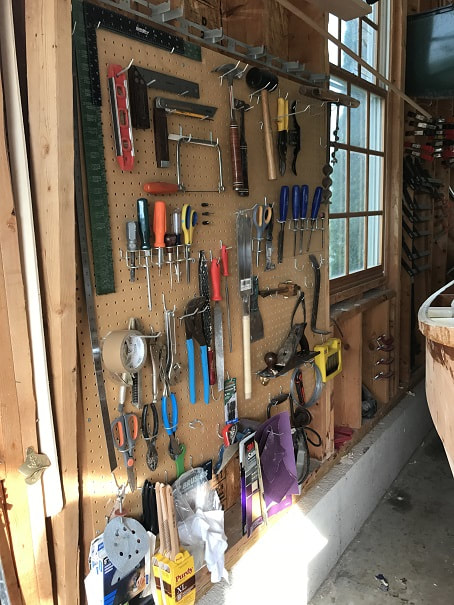
First thing I did when I started the build was to move key tools from the basement-shop up to the garage where the boat is being built. This has really increased my exercise, because if I work in the basement the tools I need are inevitably upstairs, and if I am in the garage I still need to go to the basement for the big tools.... ha ha. I have really enjoyed my hand-tools pegboard in the garage.
Safety
|
|
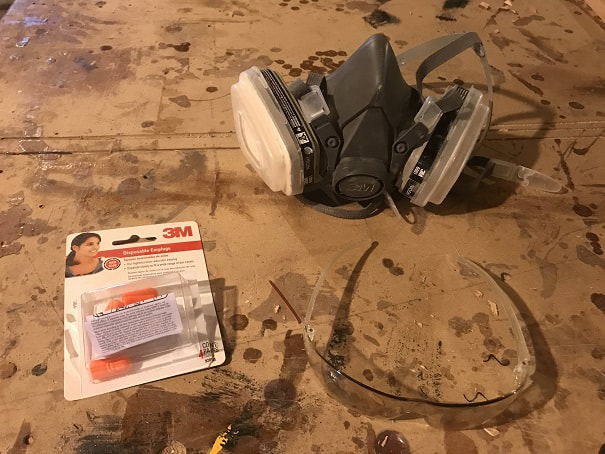
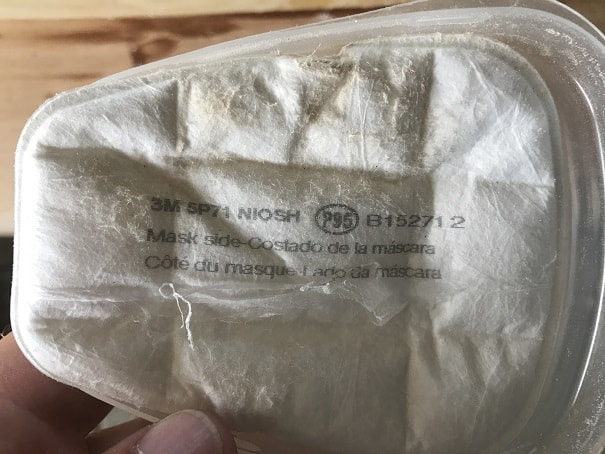
I like putting on a dusk mask on a hot summer day about as much as the next guy, but when you see how fine and airborne the colloidal silica is, or the sanded epoxy....you can imagine your lungs after even a couple minutes of breathing that stuff in. I wear a 3M6001 dust mask with 3M 5P71 filters. I find this to be better and more comfortable than the disposable dust masks. Safety glasses, ear plugs, and leather gloves round out the safety gear. Be safe friends!
Measuring and Marking Tools
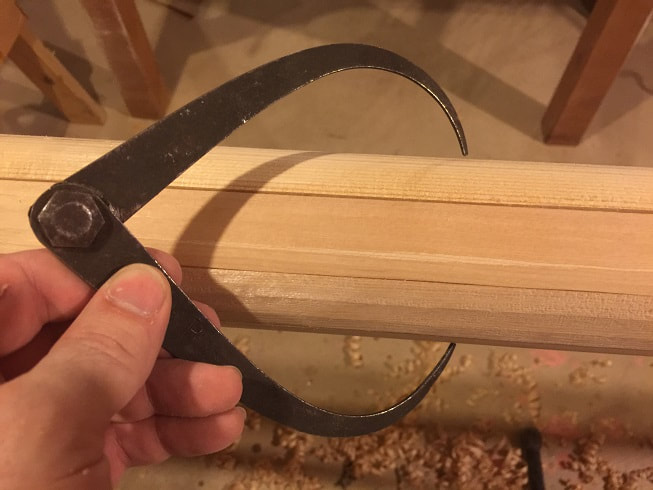
Ye Olde Caliper: very handy in checking consistency of diameter when shaping spars.
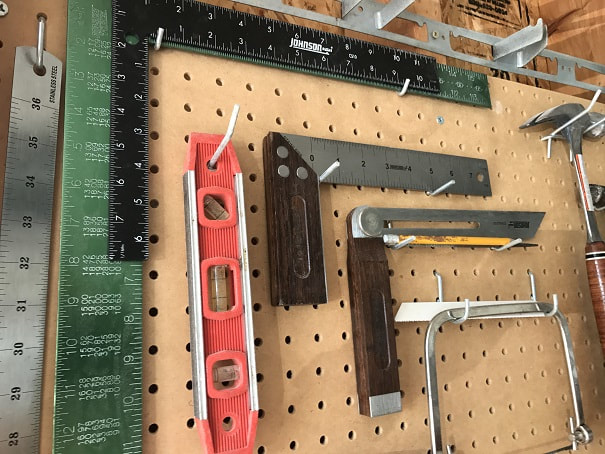
Metal squares of various sizes, short level and a 3' level, 3' steel straight edge, Johnson ruled try-square, Johnson sliding bevel.
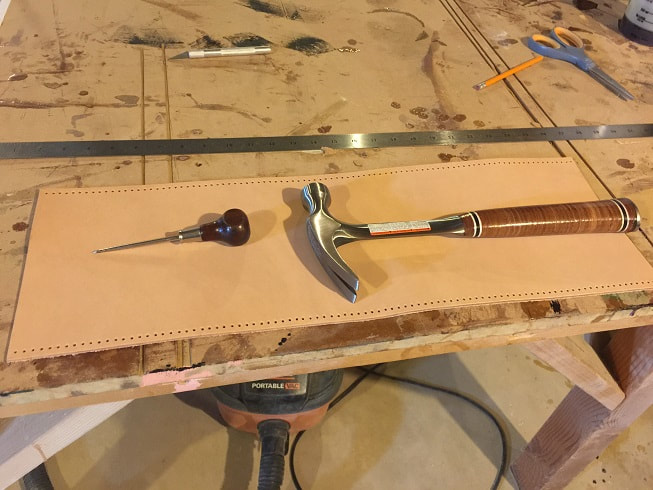
An awl comes in handy for scribing lines and marking hole locations, also used for leather work.
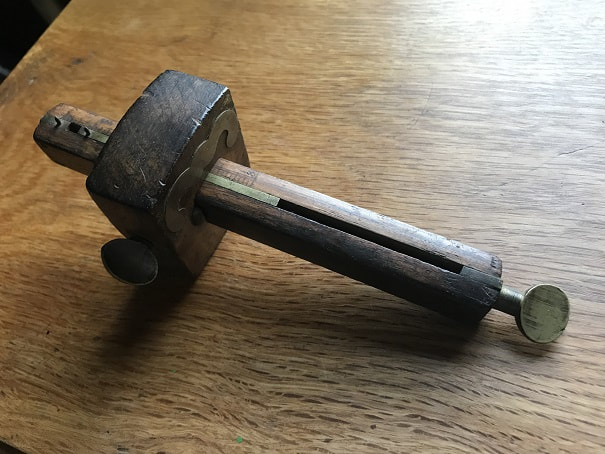
Mortise Gauge; A beautiful and useful tool.
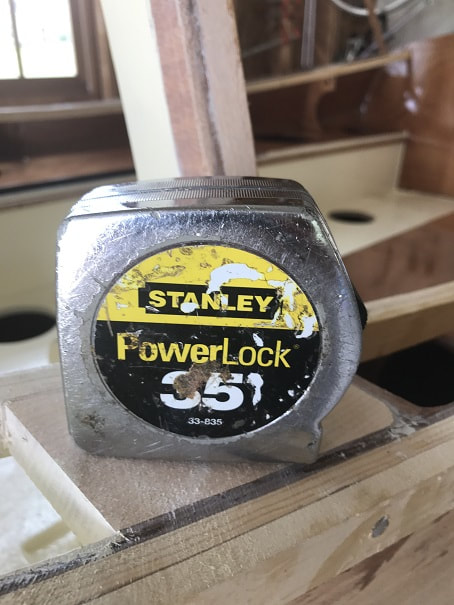
And finally.....the trusty tape measure. Mine never seems to be where I thought I left it! Measure twice cut once.
Sawing Tools
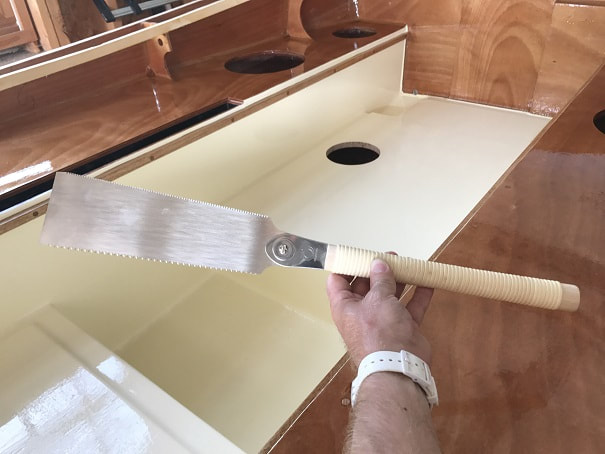
Japanese Pull Saw. It has coarse teeth on one edge and fine on the other, and it cuts on the pull stroke. It is extremely sharp and cuts easily with a very thin kerf. The flexible blade makes it a good saw for flush cutting. Get a high quality Japanese one, and enjoy the performance and quality. Along with the Shinto Rasp, this saw is one of the indispensable Japanese tools of small boat building today. Besides the practical benefits, consider also the fact that you will feel like a Samurai every time you use this saw.
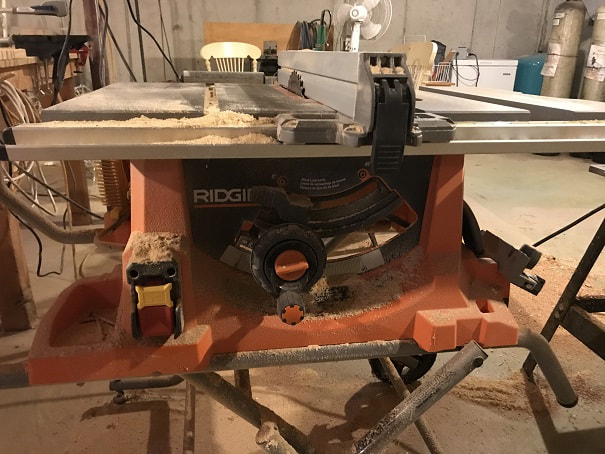
Table saw. 10" Blade, 15Amp motor, cast aluminum table, decent fence, decent everything. Does a great job. It is not a heavy duty high-end saw or fence, but it has done the job well for me. No complaints!, did a great job making my birdsmouth mast.
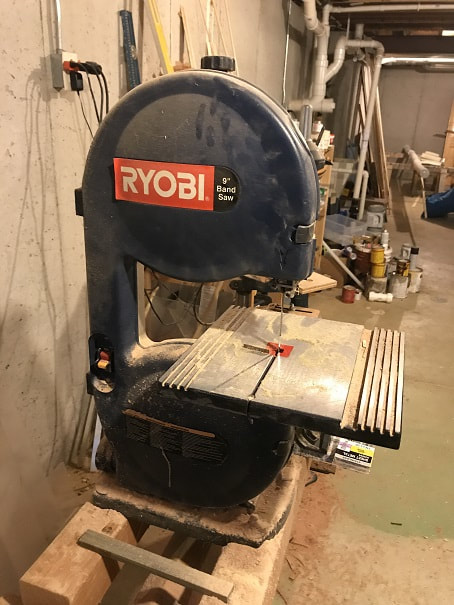
Small, low price, benchtop bandsaw, again...not fancy but gets the job done. Came in handy in many situations. Useful for making horn cleats.
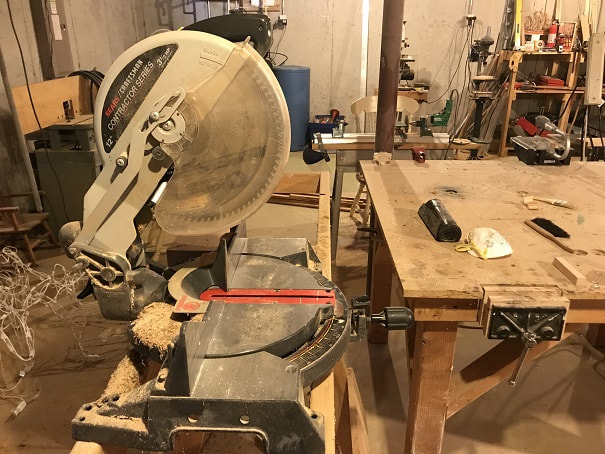
Sears 12" Compound Miter Saw.....bought this in 1993 and it has been a battle axe. This tool didn't get that much use in the SCAMP build, as I preferred to use hand saws for most cross-cuts.
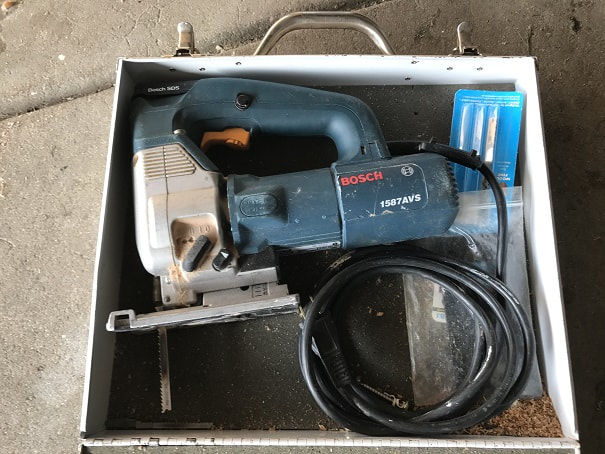
Bosch Sabre Saw, another +20year old tool still running great. This is a high quality tool. Worked well to cut the hatch openings and mast stave taper rough cuts.
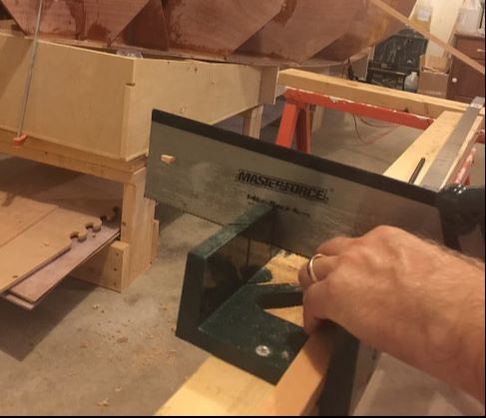
Miter Box, used for cutting cleat stock to length, and for all little cross cuts during the build. More rewarding to use, and quieter, than an electric chop saw.
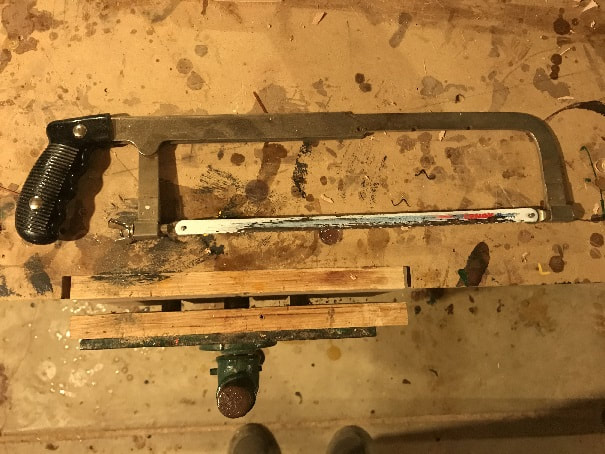
Hack saw, useful for cutting bolts flush with nuts, and for cutting the copper tubing.
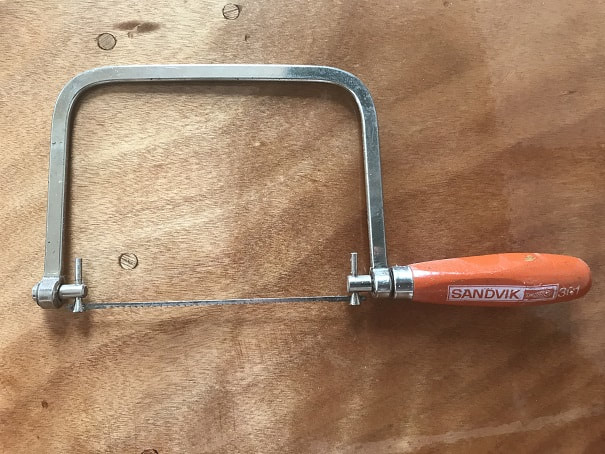
Coping saw; an infrequent visitor to the SCAMP build, but was useful four or five times.
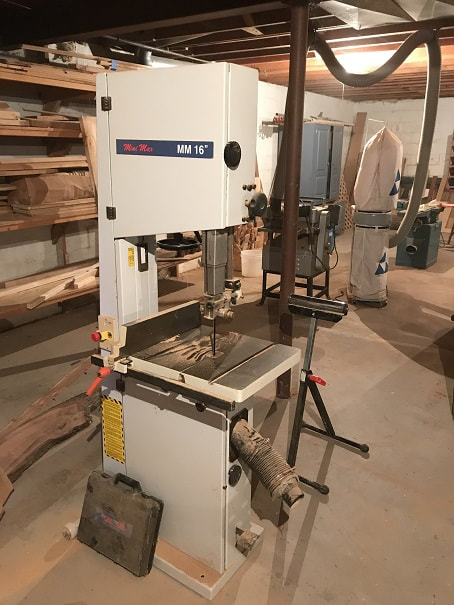
This is a substantial bandsaw, 240V, and was used the cut the 2" white oak lumber for the SCAMP Skegs. This is not in my shop; it's in my Dad's shop. I have seen very impressive large band saws, even bigger than this, in boat building shops, but these are not typical tools to have available. They are very useful and make otherwise difficult jobs possible. I would try to go find one and ask the owner to let you use it if possible.
Chisels, Rasps, Files, and Sanders
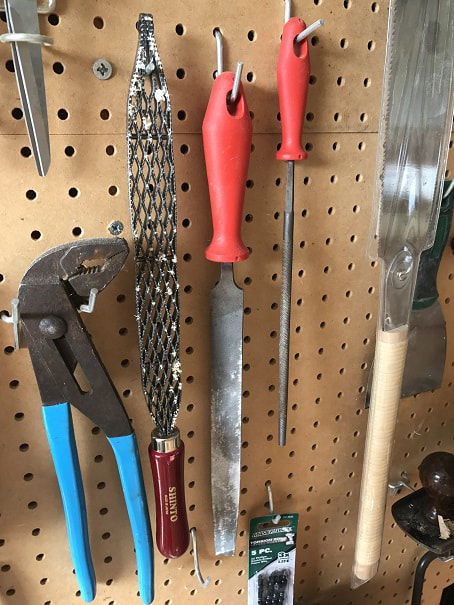
The mighty SHINTO RASP!!!! Shown here with the dark red handle. I bought it for use on the SCAMP build and I don't know how I lived before owning this tool....it's that good. It is coarse on one side, and very coarse on the other. The rasp surfaces are similar to a sawzall blade; this tool is very effective. Mine is the long model, I have seen short Shinto rasps, but I think they would be too small for my liking on this build. I also used regular a fine flat file for smoothing hardware edges, and round file on the build.
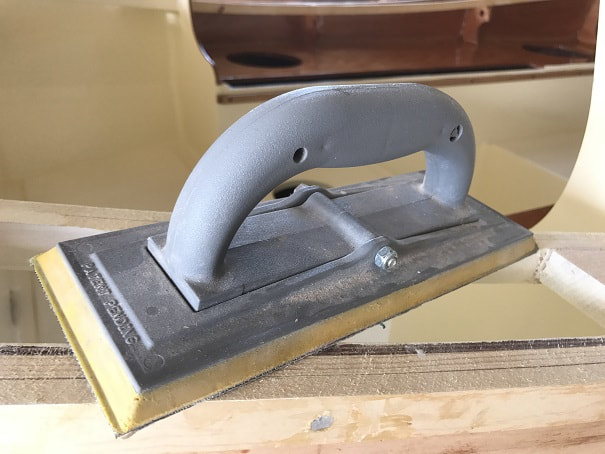
Hand Sander, hook and loop.
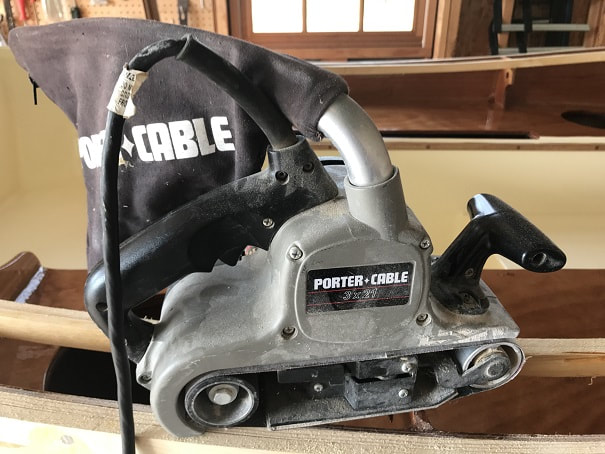
Porter Cable Belt Sander. 23 years old and still going. This tool has taken a beating and still runs great. It's greatest act was the time it was sitting on my workbench over a concrete floor, unplugged, and I had forgotten that I had the trigger lock engaged...so when I plugged it in it went racing the length the table and flew off, crashing to the floor......still works great!
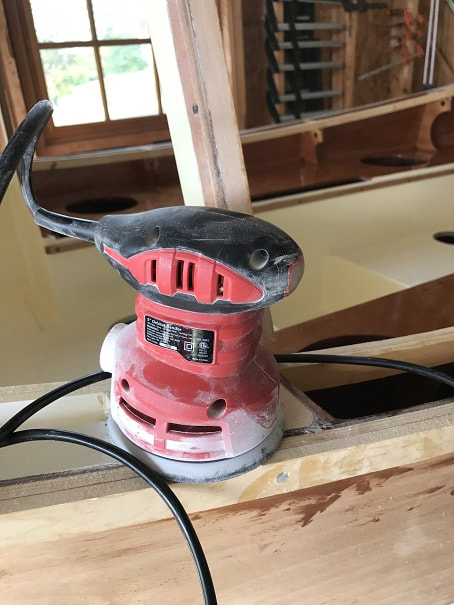
$25 Al-Cheepo random orbit sander. Dust bag never worked and broke immediately, so this little baby just blasts dust everywhere (I wear a very good dust mask). Maybe a better random orbit sander is in my future, but I'll run this little guy till it dies.
Planes and Chisels
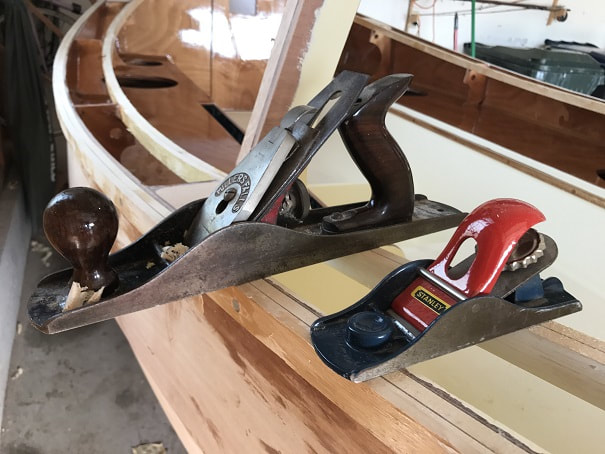
My Millers Falls No14 Jack Plane is a beauty, and works great. Sharp as all get-out and runs true! It was used throughout the build, from spars to the boat itself. The little Stanley hand plane was very useful for small or tight space jobs. I used it for many little tasks, as well as for rounding over cleat stock and for removing unwanted epoxy bumps.
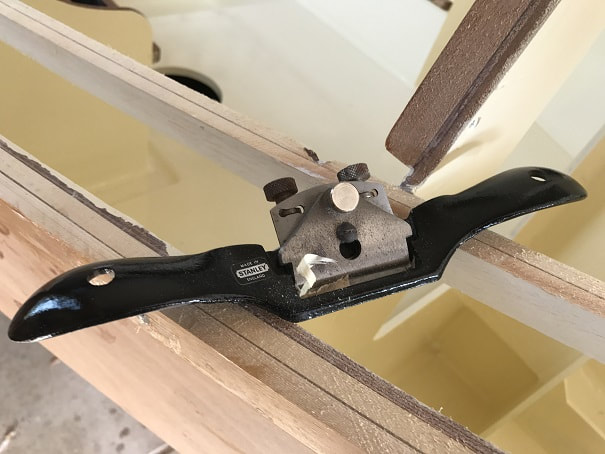
Stanley #151 Spokeshave, very handy in shaping the tiller, gunwhales and carlins.
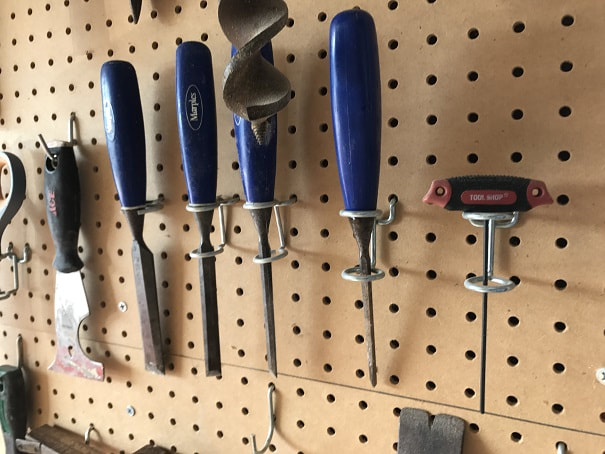
Marples Chisels, from 1/4" to 1" in width. The scraper shown to the left is also very handy.
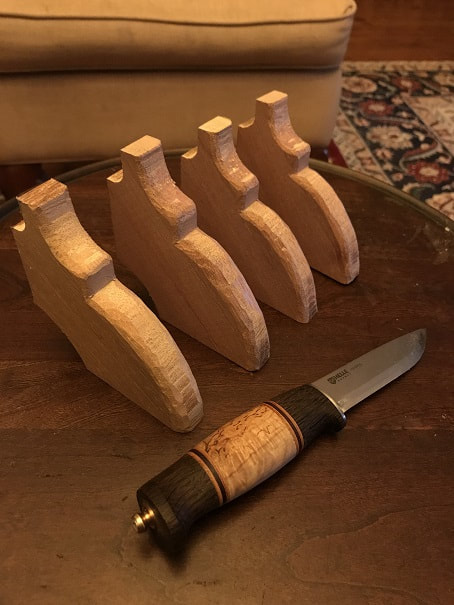
Hand knife, well sharpened, good for whittling. This one is made by Helle in Norway.
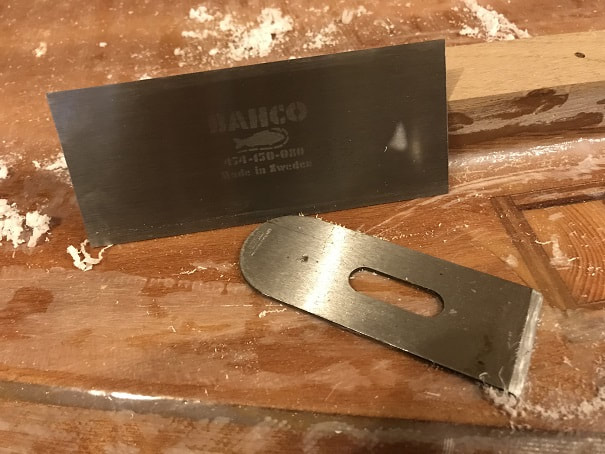
Scrapers come in very handy. They scrape a smooth surface and kick up less dust then sanders. Scrapers, in this case, straight-edged ones, are good at leveling out inconsistencies from surfaces. I have a Bahco from Sweden and I also use a small Stanley plane blade as a scraper which works great, including the curved part.
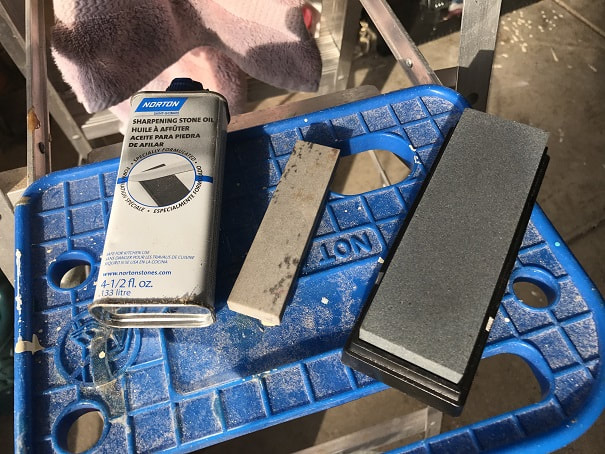
Sharp tools are soooo enjoyable to work with. Frequent sharpening results in perpetually sharp tools and short time required to sharpen. Letting them get dull will result in a bigger project in getting them back into shape. I use the stones shown and sharpening stone oil shown here, and I rinse off the stones after sharpening.
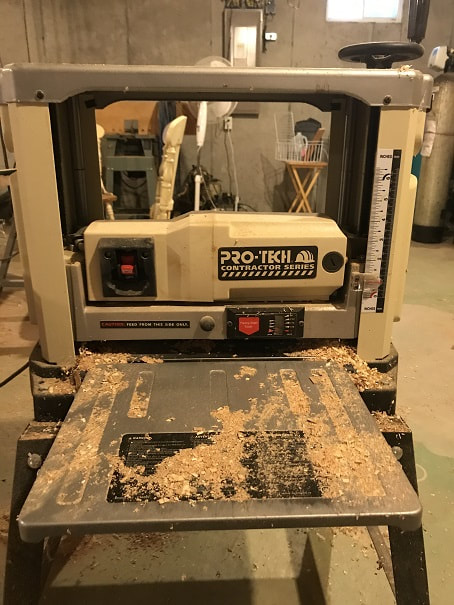
Pro-Tech Electric Surface Planer. Mine is a light/contractor series machine. The tools in my Dad's shop are huge cast beasts that are amazing, including a big ole cast planer, but I went for this cheaper and easier-to-get-into-the-basement version. It has worked well for over 10 years at the hobbiest-rate-of-use that I use it for. It has worked very well. I used it to thickness-plane the mast staves and other spars prior to planning them to shape. I will also use it to plane down the skegs to proper thickness.
Drills, Router and Bits
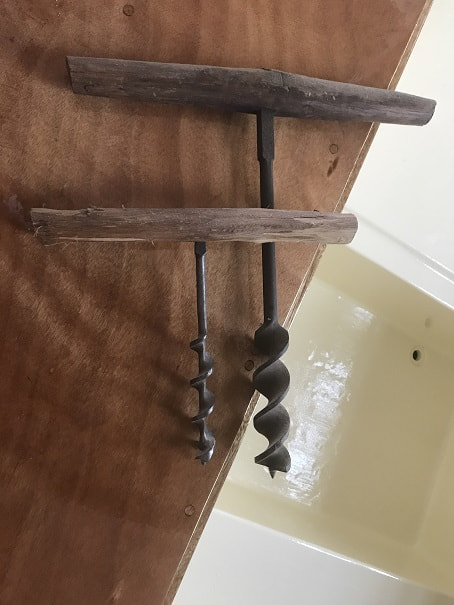
These spiral bit augers are time-proven classics. During the SCAMP build I used them for............absolutely nothing! But they sure do look fantastic on the tool board when people come to look at the boat being built...I would recommend having one or two around for that purpose.
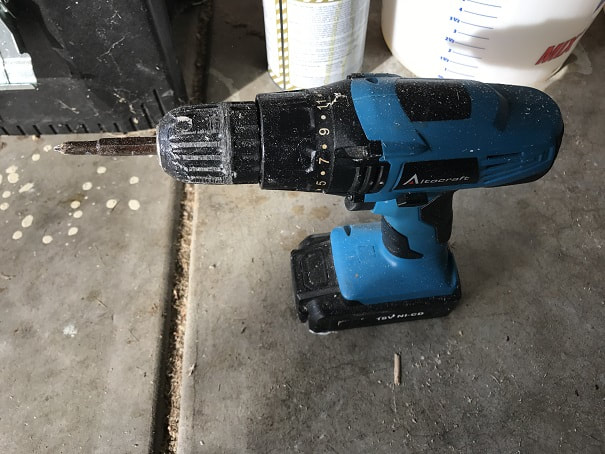
Cordless electric drill. This is a real workhorse of the SCAMP build. It cost me about $25 bucks, I have two of them, one usually with a drill bit in it, and one with a driver bit. They are working very well, but despite my best efforts, they are still getting a decent coat of epoxy. I don't think I would use a high-end cordless drill for this work. I put a plastic bag over them when I am screwing down epoxy pieces to keep the epoxy off of them.
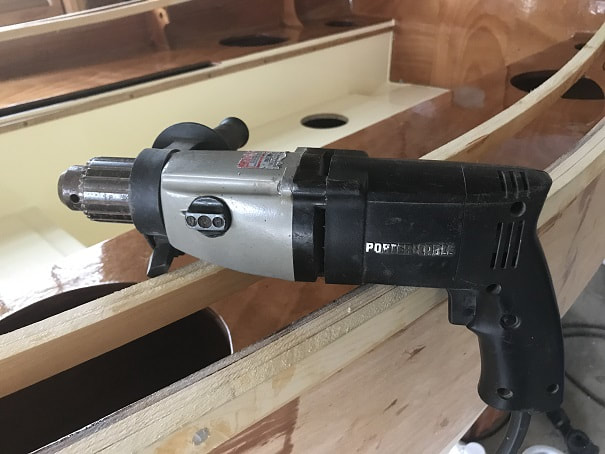
Porter Cable 1/2hp drill/hammer drill. Another mid-90's era purchase this has proven to be a very durable tool. Didn't get much use on the SCAMP, but I drilled some of the larger holes with it.
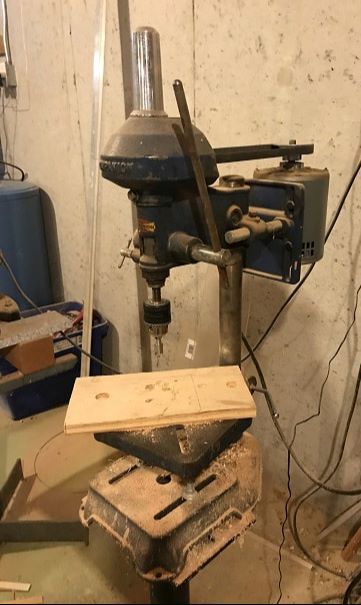
Companion Drill Press. From their "Power" series. I got it without a motor and in need of some TLC....spruced it up and she has run like a champ for years.
#8 and #10 countersink/predill bits. I like the Vermont American ones.
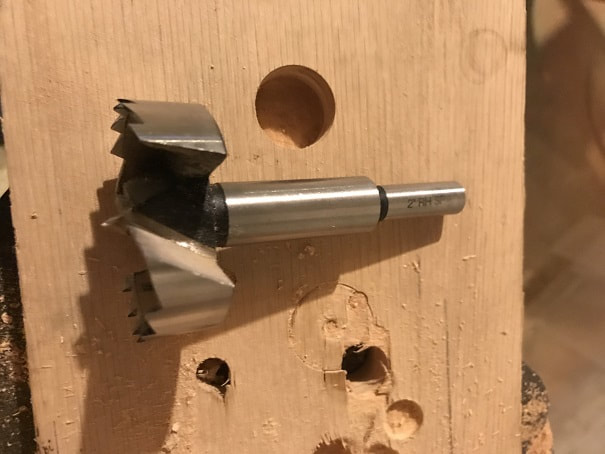
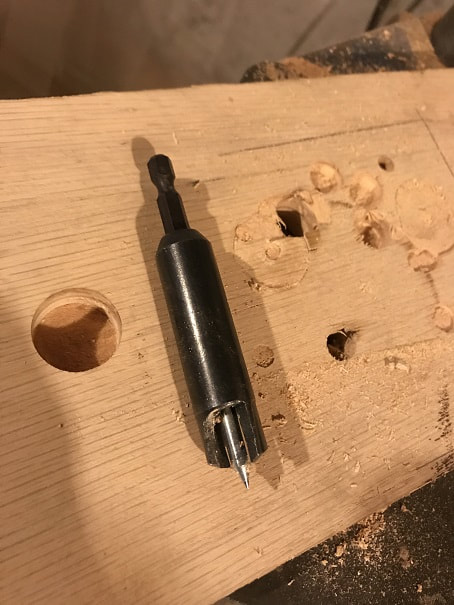
1/4" to 2" Forstner bits. Very handy for making flat bottomed countersinks such as those needed for plugs, and I used a big forstner for countersinking the garboard plugs.
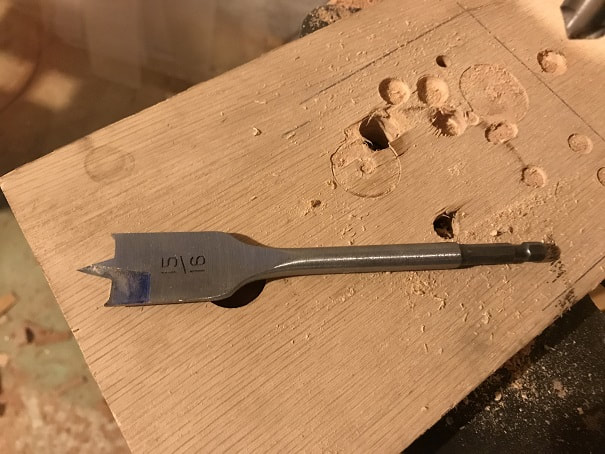
Spade bits, good for making big holes in soft materials fast. They make a pretty rough cut, but I did use this new/sharp 15/16" spade bit for the scupper drains, as I did not want to buy an expensive 15/16" forstner or spiral bit. I was careful and it worked well.
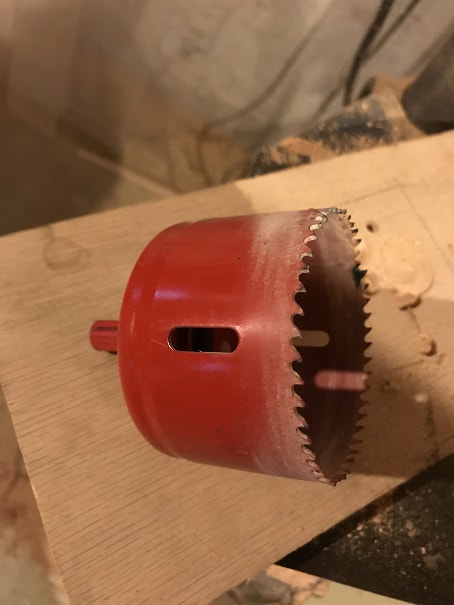
Milwaukee Hole Saw, used to drill the big hole in the mast blocks.
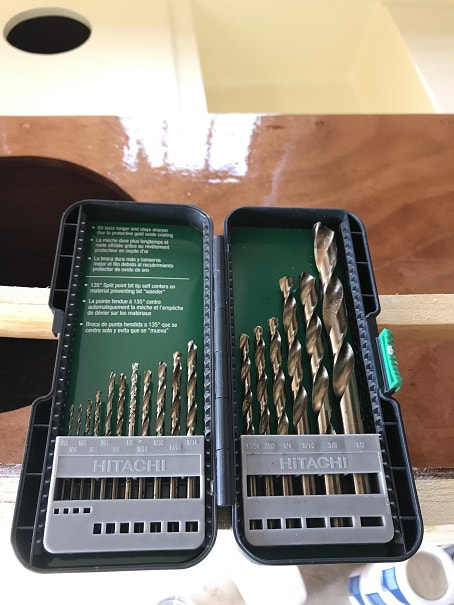
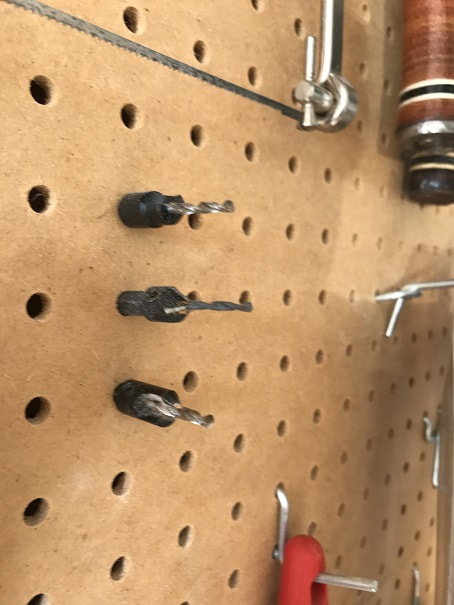
Nice set of high quality drill bits 1/64" to 1/2".
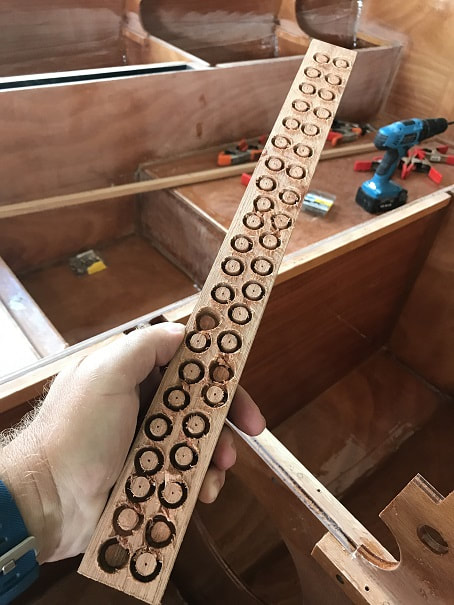
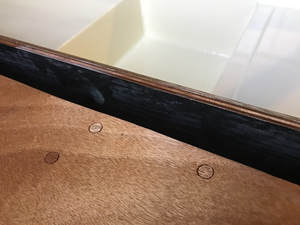
Plugs cut into a scrap piece of mahogany, use a flat screwdriver to pop them out.
|
|
3/8" Vermont American Plug cutter bit. Used to make the 3/8" mahogany plugs for the SCAMP....using dowels for plugs exposes an end grain, whereas this cutter makes face grain plugs.
|
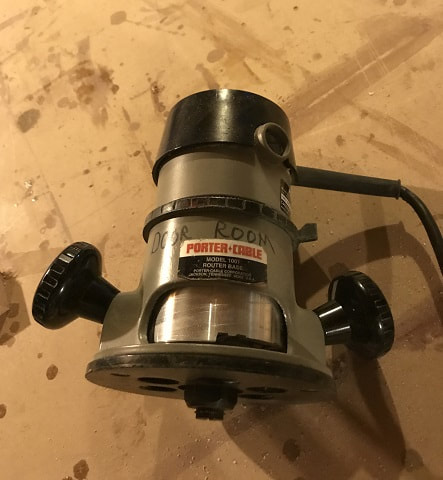
Porter Cable Router, time proven, high quality tool has lasted me decades. Used to create the lead cavities in the centerboard, and to round over the edges of the sole doubler, and in cutting grip-grooves into the skegs.
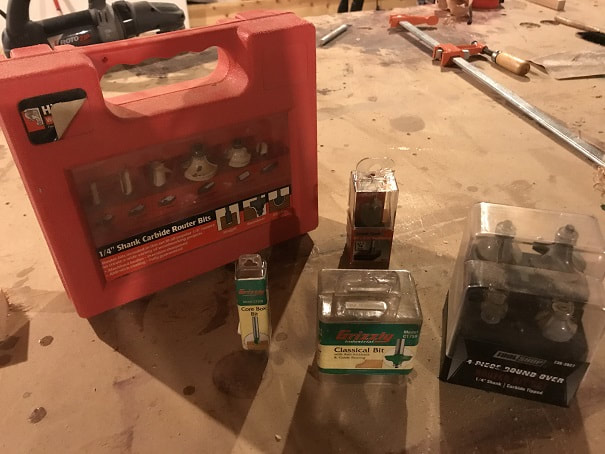
Router bits....I used a round-over bit on the sole and tiller, and a flat bottom square bit for the lead cavities.
Hammers and Mallet
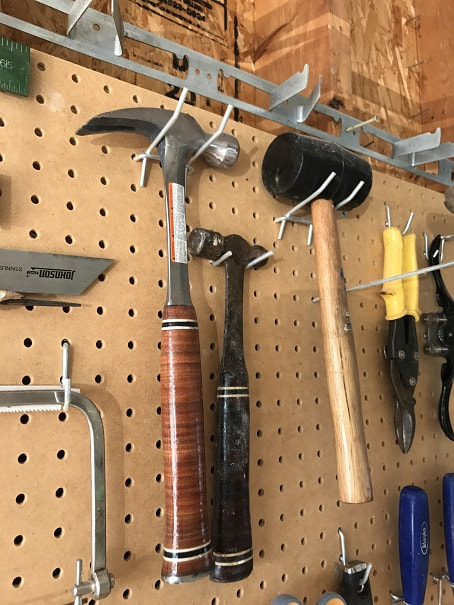
Estwing Claw hammer & ball-peen hammer, rubber mallet. I like the leather handles, and my old hammer handle started falling apart (after a couple decades use) so I have a nice shiny new claw hammer these days.
Scissors, Cutters & Pliers
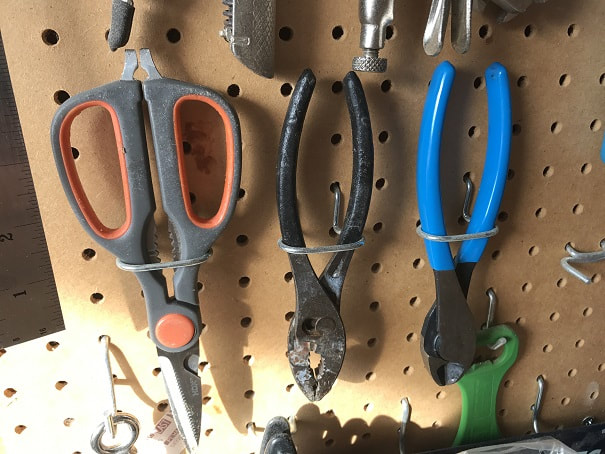
A nice pair of wire cutters will be useful for trimming the wire stitches used for the planks. Likewise a nice plier is used in that process also. A sharp long pair of scissors (not shown) and a sharp razor blade (not shown) are also useful for cutting fiberglass, trimming masking tape, and for leatherwork. I have a tin-snips, but didn't find a use yet on this project for them.
Epoxy Work, Painting and Varnishing
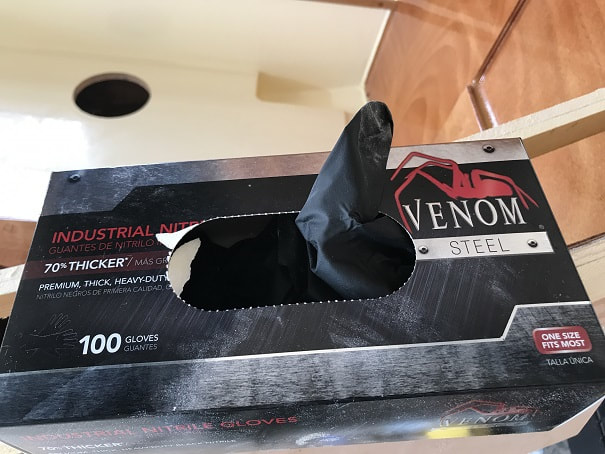
I started with inexpensive gloves, which tore easily and generally were a pain, so I went and bought the heavier "Venom Steel" (quite the name...) gloves shown here. They have really improved the experience for me. You must wear gloves/glasses when working with epoxy, do not get it on yourself.
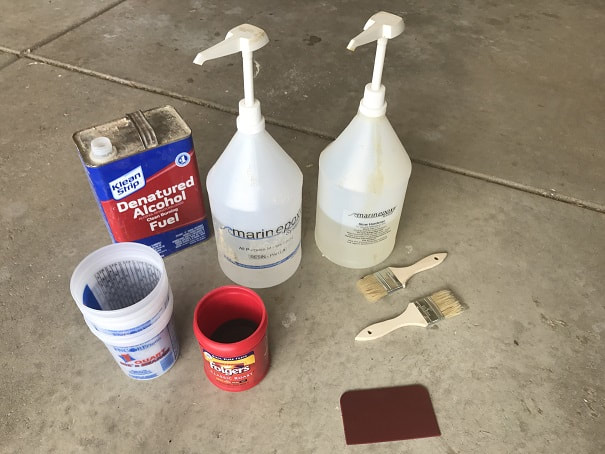
I measure out my epoxy proportions using the pumps that thread onto the jugs. Denatured alcohol for cleaning epoxy of yourself or other things, epoxy spreaders, and the disposable chip brush....of which you will go through many. Saving clean plastic containers will save you money, as you can use them for epoxy mixing cans. I also always keep a bunch of small plastic pails available in case I run out of old plastic containers.
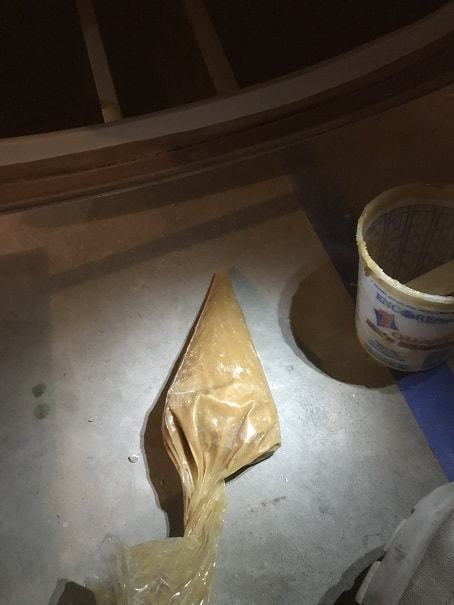
Pastry bag full of fillet material. Wow, I wish I had used these pastry bags all along, they make the job much easier and quicker and cleaner than cut off ziplocks!!!! I encourage you to use these for laying down beads of fillet material prior to forming the fillet.
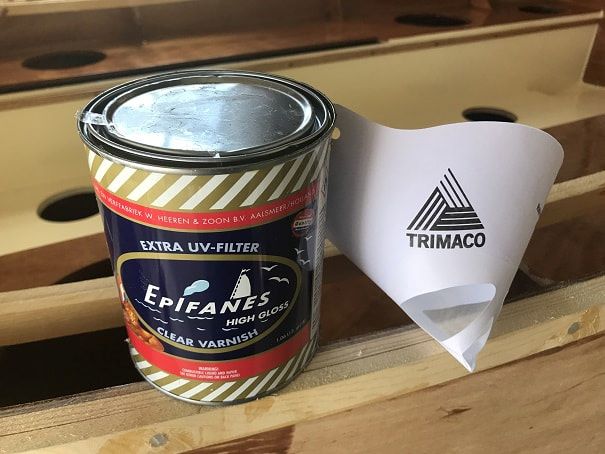
I recommend filtering spar varnish each time, with a filter such as this.
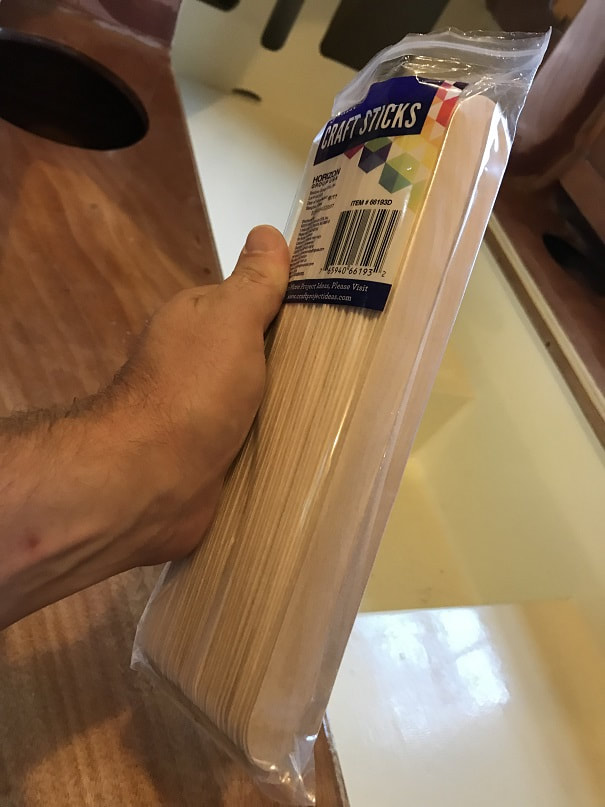
I got a package of these big "craft sticks" at Walmart, and they are great for having a clean nice stir stick for paints and epoxies. Also work for fillets. These work better then trying to find scrap pieces of wood for stir sticks.
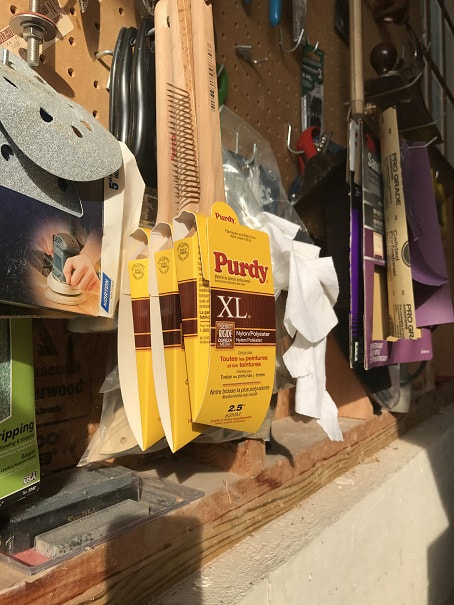
Purdy XL Medium Stiffness 2.5" tapered edge brushes are working well with the paint and varnish I have choosen. You can also see the paint-brush "comb" that I use to straighten out the bristles after cleaning the brushes. After cleaning I store them in the cardboard cases as shown so that they keep their shape.
Paint brush spinner: These things work great! Chip brushes are a one-use tool, but if you have nice brushes that you want to keep nice over time, then these brush spinners are an excellent tool.
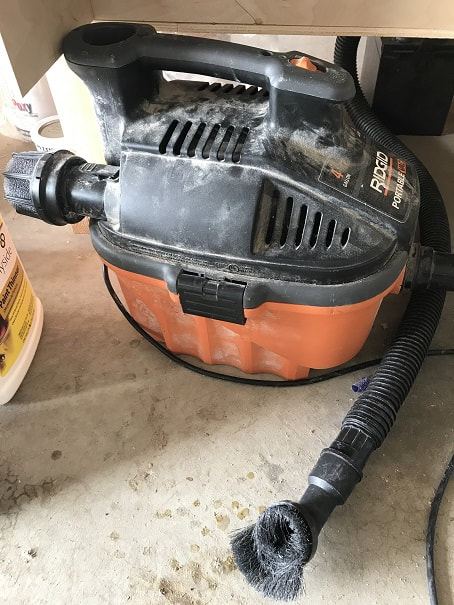
Wet/Dry Shop Vac: For cleaning up, and for vacuuming dust prior to painting.
Clamps
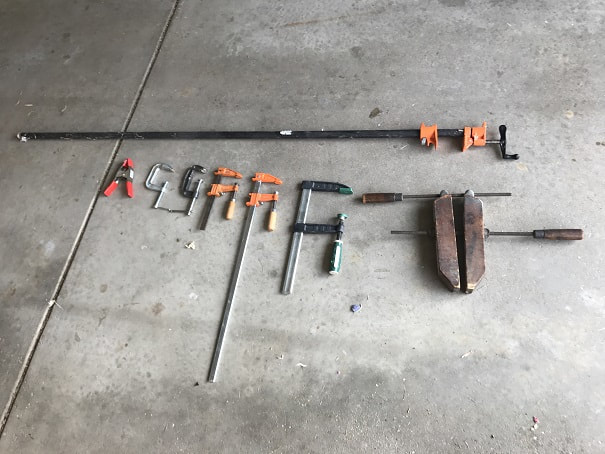
I have 75 clamps, and I think there were times that I had them all in use at once. It will be helpful to have a wide variety and large quantity of clamps. In looking through the photo's of the construction of the SCAMP on this site and others, you can get an idea of the clamping that needs to take place, and you can pick a strategy, there are many different types of clamps to choose from.
Benches, Saw-Horses and Ladders
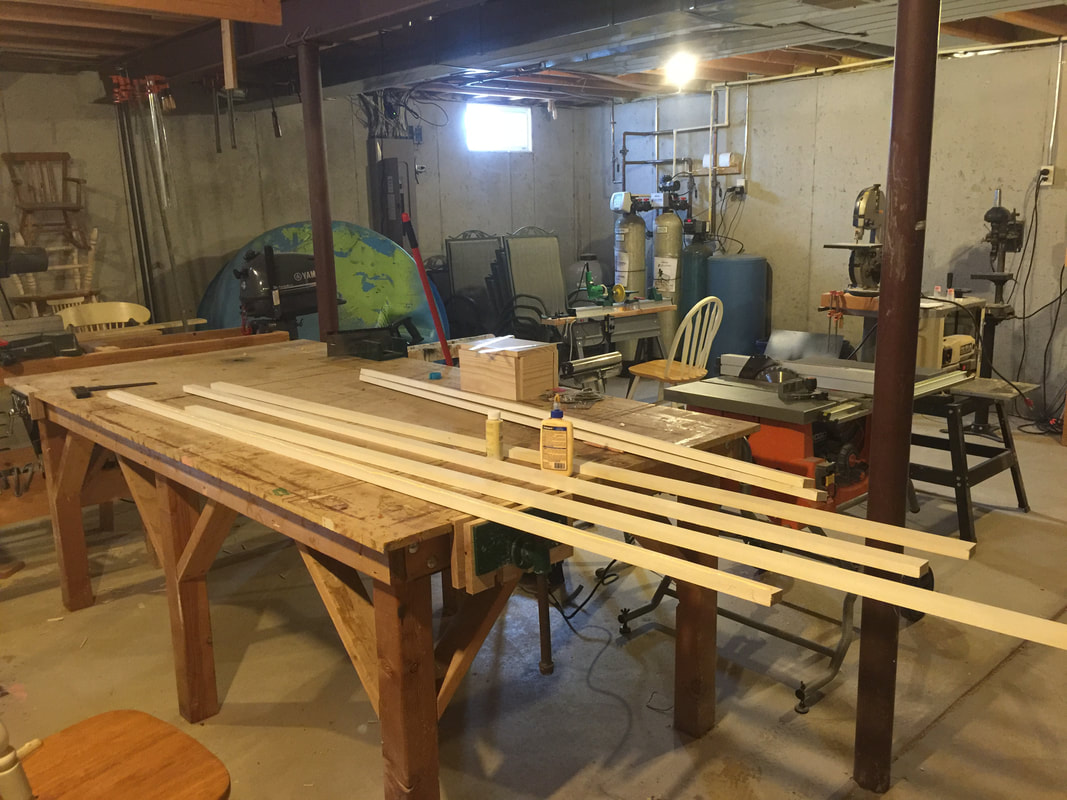
A broad, stout, workbench is a pleasure to work on. Mine has lasted many years and I have attached two bench vices to it over time. The 3/4" x 4' x 8' MDF top can be replaced.
I have four sawhorses that are frequently used on this project.
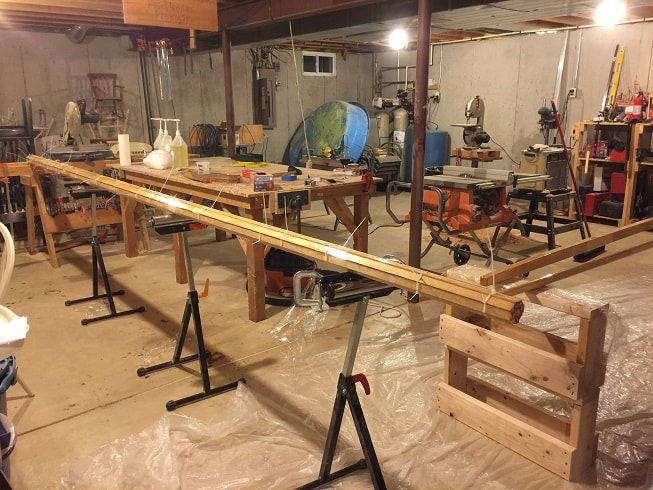
Adjustable height roller supports; these come in very handy, especially during the spar construction and steaming of the carlins. I have 4.
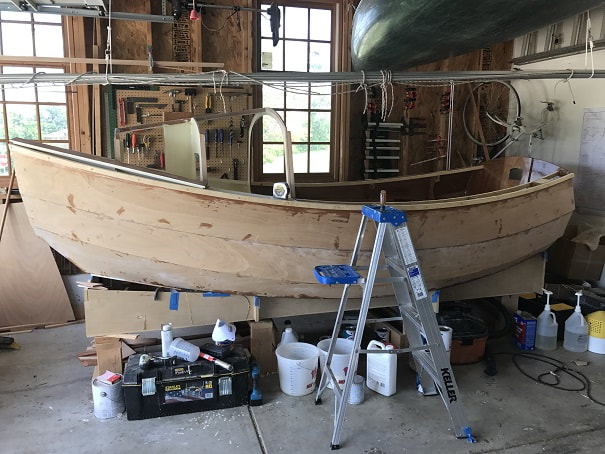
A 4' aluminum ladder has been the tool of choice for getting in and out of the boat. My work space isn't the tidiest at the moment, We use the parking space where the ladder is standing, and everything must get pushed under the boat when I am done working.... Also the mast for my Compac 16 is suspended above the SCAMP....and our canoe is on a pulley system above that!
Melting and Steaming
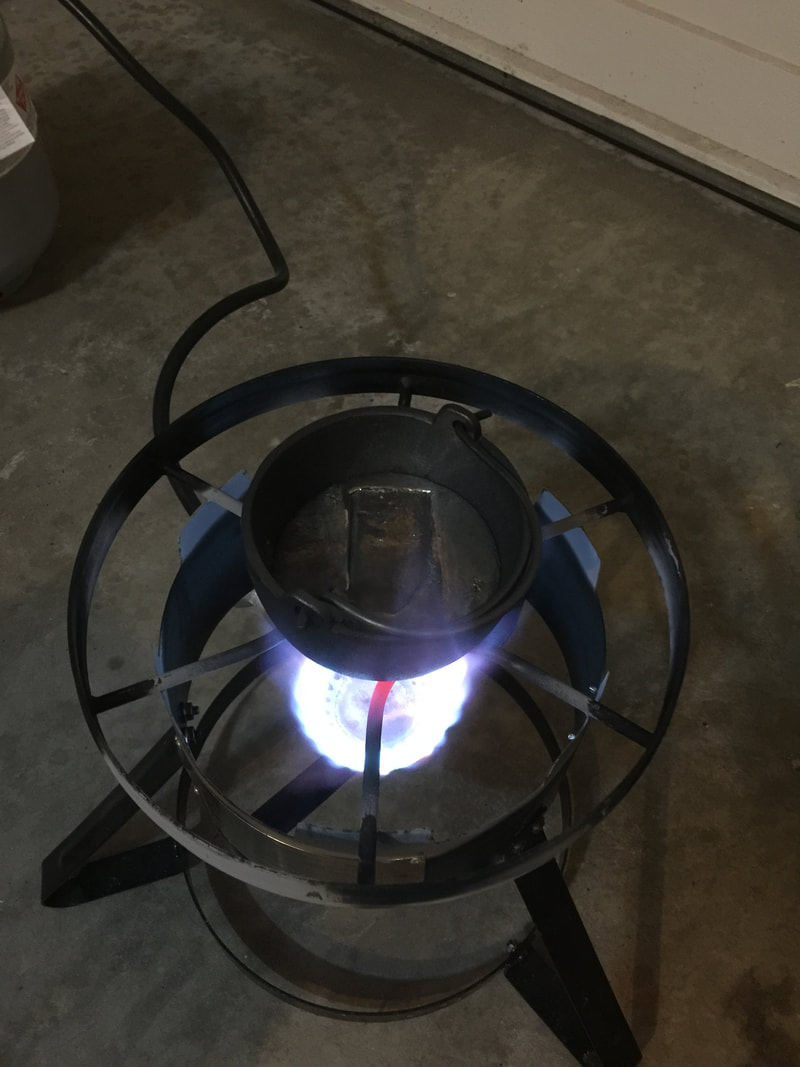
Propane burner and a 20lb cast cauldron , in the process of melting lead. I also have a heavy cast ladle. Be careful with lead it is poisonous, wear a suitable respirator, wear gloves do not touch the lead, work in a well ventilated space, have a fire extinguisher handy, keep flammable objects a long way away. Store and/or dispose properly, any large pieces or small pieces or filings of lead. You work with lead at your own risk, I do not advise that my methods are somehow safe or approved, please be careful.
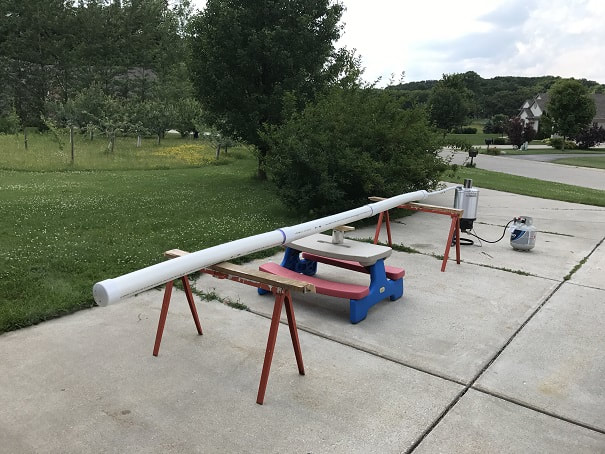
Homemade PVC steambox, propane burner used for heat.
Steambox details and safety precautions on this linked page
The most important tools of all: Human ingenuity, persistence, hard-work, and.....a Sense of Humor!!