Here I will document the construction of the pilothouse itself. The sketch below shows the basic design concept. The pilothouse superstructure will be made of 3/8" (9mm) Joubert marine grade Okuome plywood, with plexiglass windows and clear fir cleating. The roof and companionway hatch of the Compac 16 will be sawed out, and the pilot house will be bedded and attached in spring. Then I will mount the outriggers and install the rope steering system.

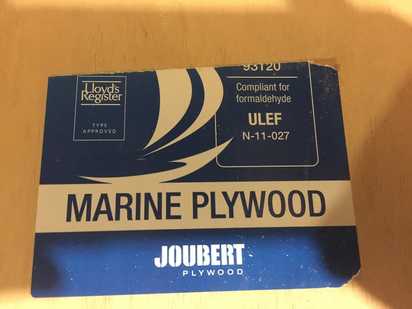
As long as you are taking the time to do the project, I would suggest using high quality materials that will hold up well. I am using Marinepoxy epoxy and Joubert marine grade 3/8" Okuome plywood.
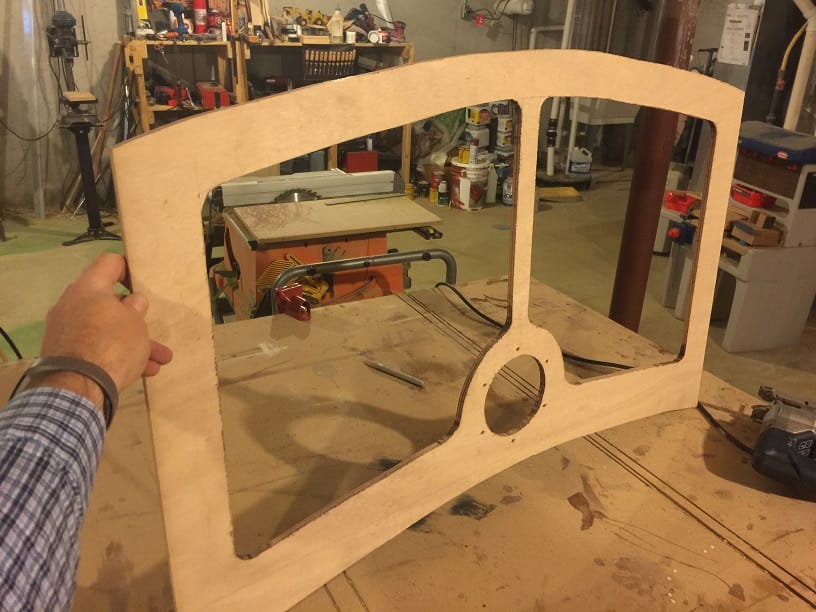
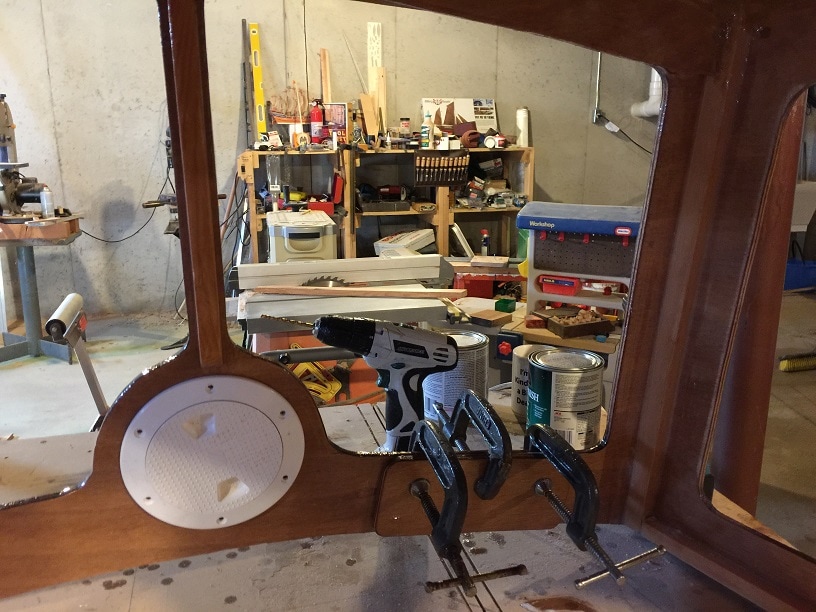
Cutting out the Pilot House front piece. Two fixed windows and one openable porthole for ventilation or to reach through if needed.
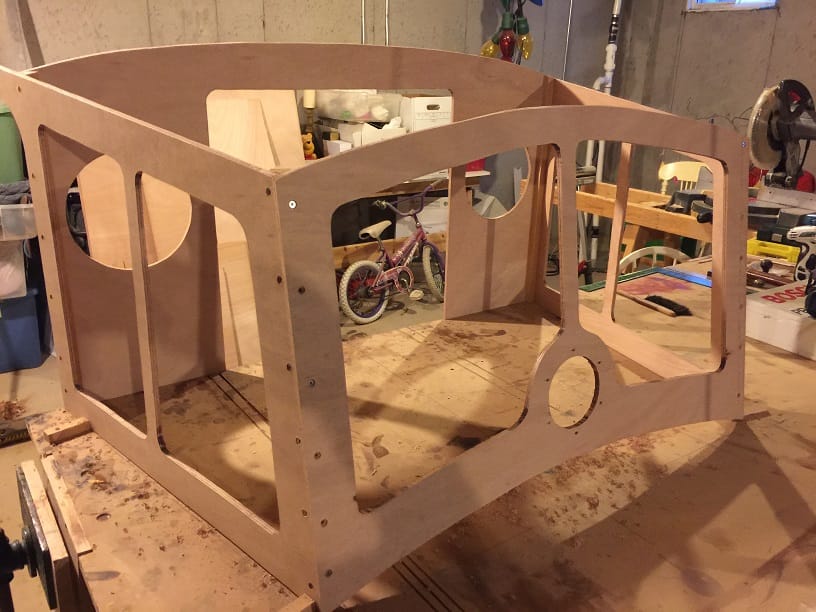
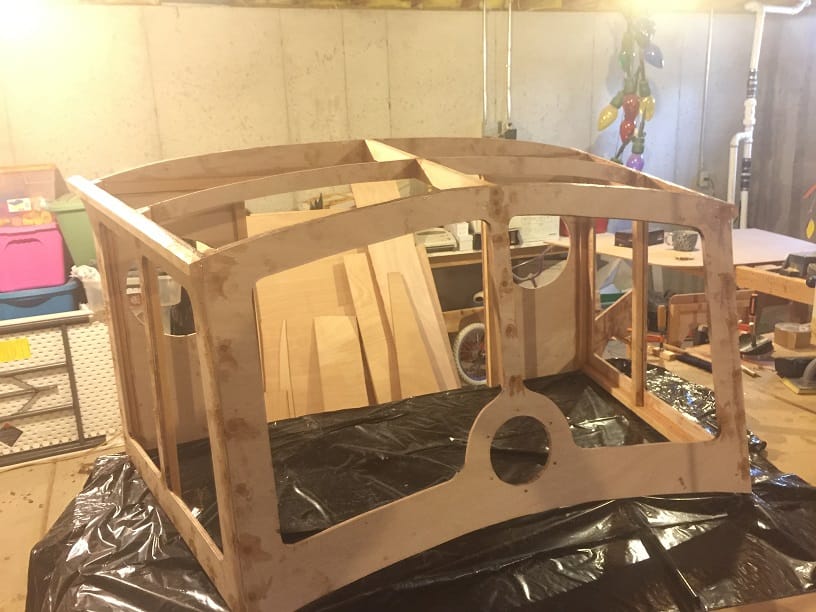
Dry fit assembly of pilothouse parts. The whole pilothouse will be dry-fit, predrilled and screwed, then disassembled and then finally reassembled with thickened epoxy glue and screws. I drew out the outline on the workbench and installed cleats to hold the pieces in place as I work.
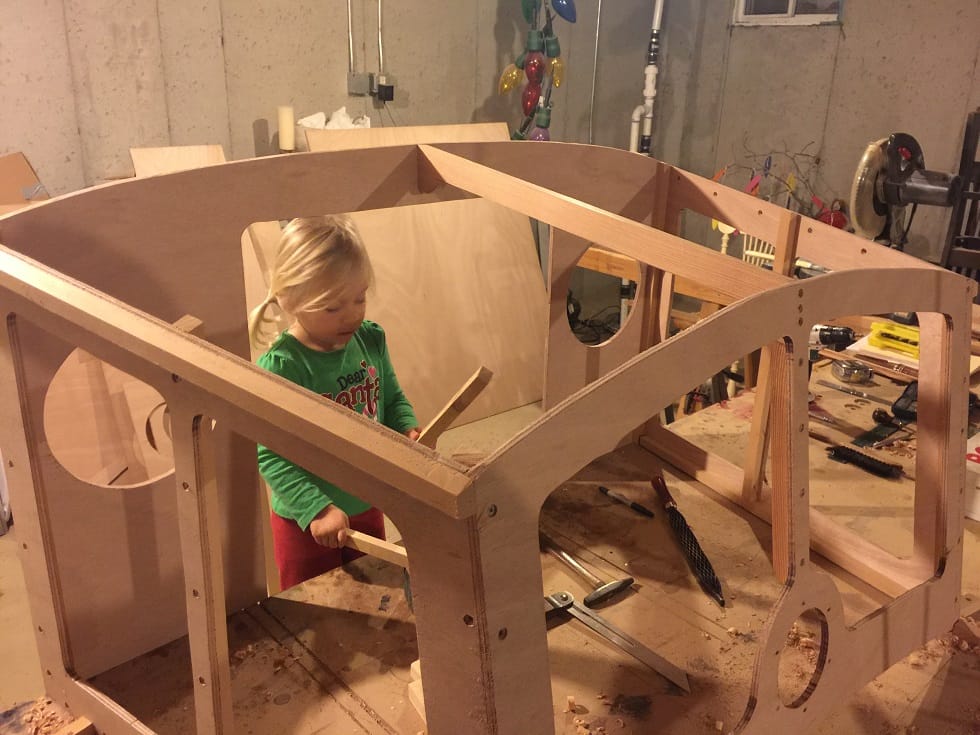
Continued dry-fit of pilothouse, including reinforcing clear fir cleats all tapered to fit the joins.
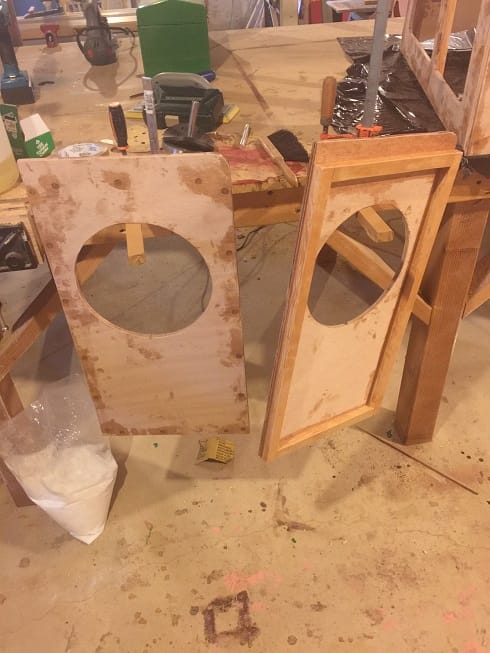
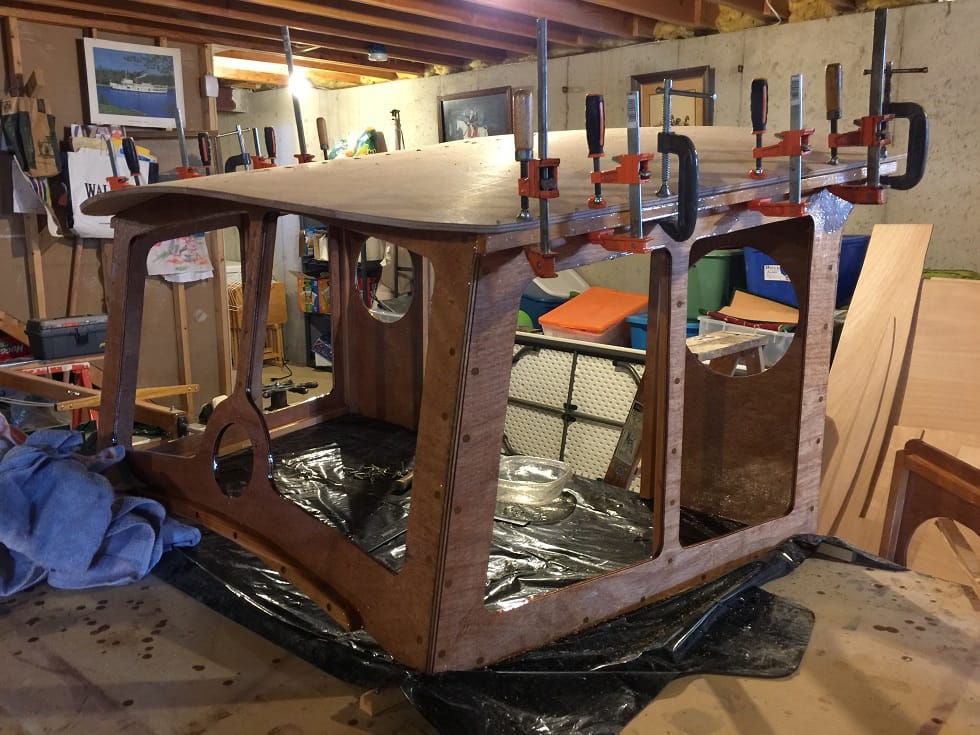
With the dry fit done, I am now gluing and screwing together the pilothouse. I am using #8x3/4" stainless steel screws, and collodial silica thickened marine epoxy as glue. Photo here is of the doors. The one on the left shows how the door looks from the outside, and the door on the right shows the fir reinforcing cleats on the interior of the door.
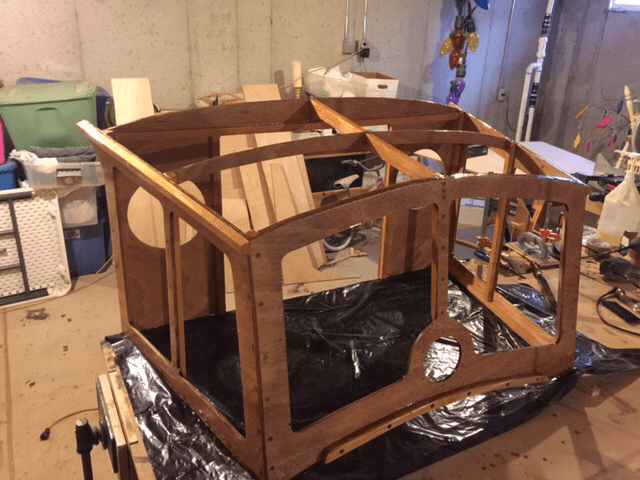
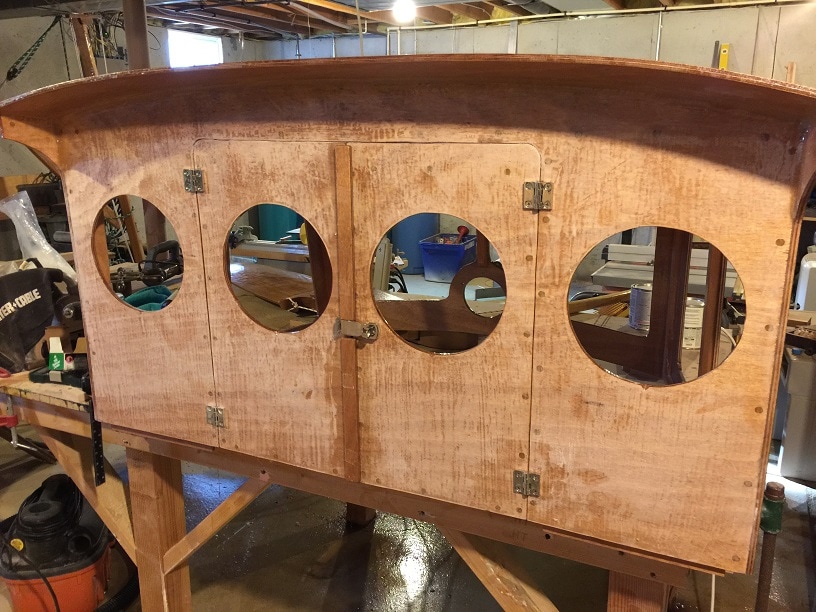
View of the back of the pilothouse, epoxied and screwed together, the screw holes are filled with wood-flour-thickened epoxy.
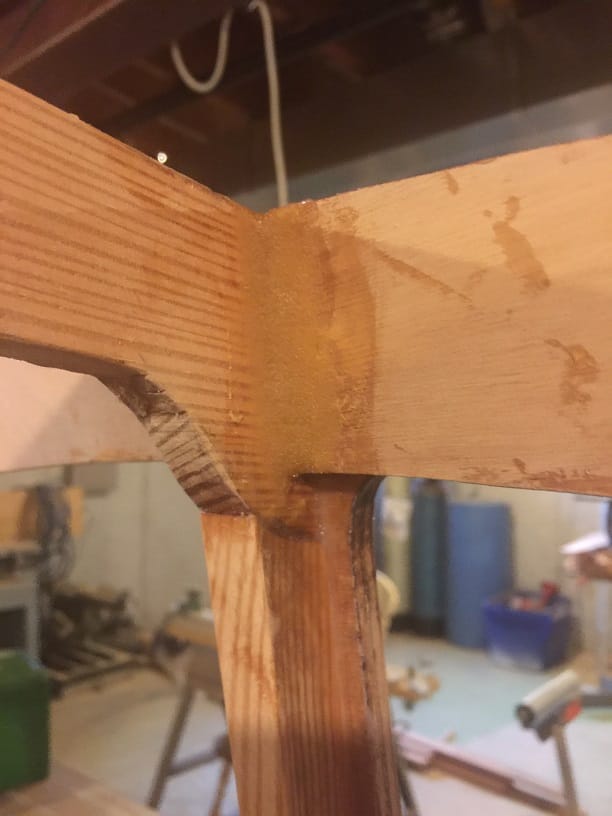
Most joints are reinforced by cleats in this build. Some, such as where the central ridge beam meets the header over the front windows, I used an epoxy fillet.
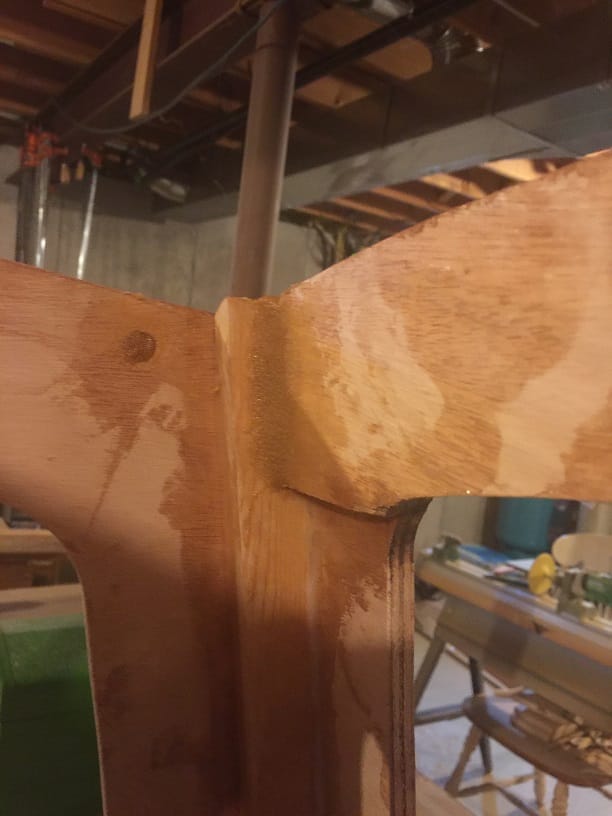
The header over the front windows has a doubled up plywood section. The doubled up pieces are epoxied together and filleted to the sidewalls at the top.
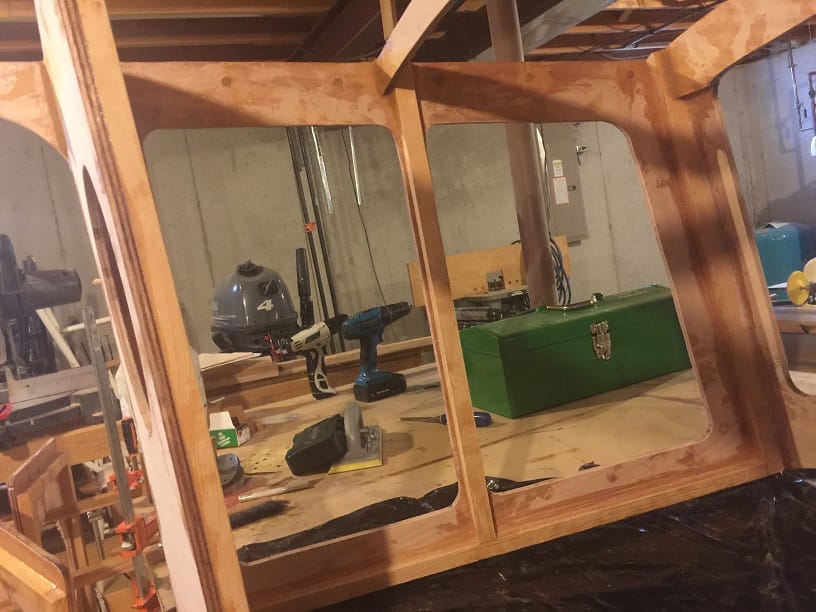
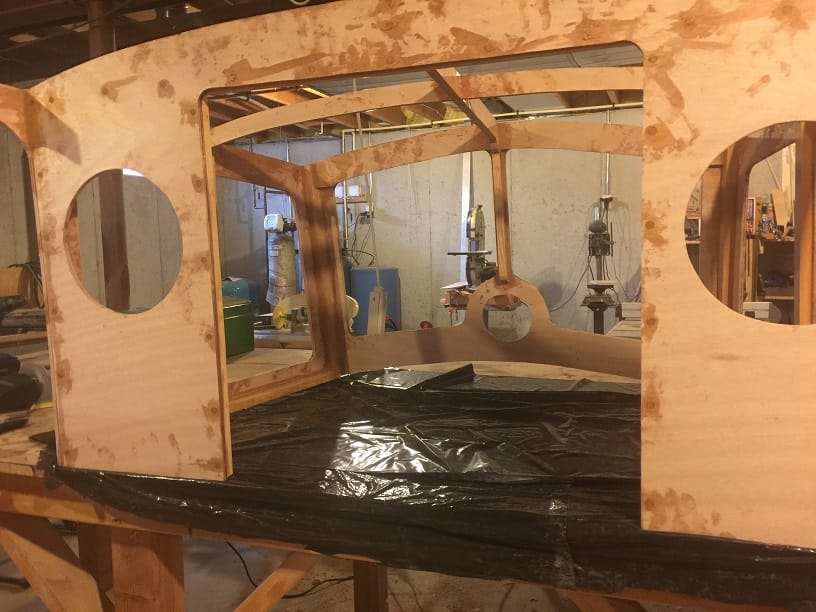
Showing cleating on sidewalls
Epoxied and screwed pilothouse from the front. The curved cross beam is notched to fit the central ridge beam.

Showing reinforcing cleats on the back wall.
Screw hole fillers all sanded flush. Note the curved flange/clear at the bottom of the front panel. Completed sanding of pilothouse, including a light rounding of the corners of plywood and cleats so that there are no sharp edges. Now two coats of marine epoxy. Photo here is after first coat of epoxy. For your safety and lung health you must wear a respirator when sanding and working with fine wood dust and epoxy materials and additives.
Pilothouse roof is 9mm Joubert Marine Grade Plywood, bent into a curve over the pilot house structure. I screwed the roof down the ridgeline into the ridge beam. then I evenly bent opposing edges down bit by bit until the roof was fully bent down. This took quite a bit of force, and I don't want this preloaded force in place when I do the final assembly so I will try to relieve the tension along the top of the roof with boiling water, see below.
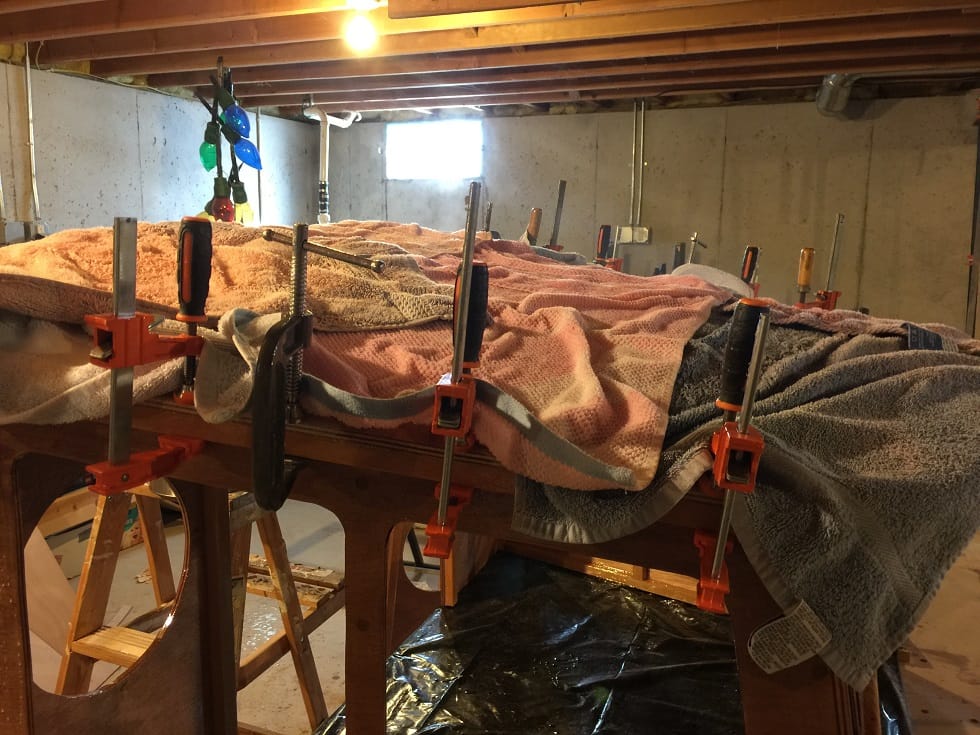
Bending the marine plywood pilothouse roof: With the plywood roof bent and clamped in place, I covered it with towels, and then poured three tea-kettle of boiling water over the towels. There was minimal spillage, and what there was I cleaned up with a spare towel. You might be able to see the steam rising off the towels in the photo. I will leave it clamped in place for about a week and come back to the project next weekend. I am hoping the curve is permanent even after unclamping. Then I will screw in the top, and epoxy fillet the roof joints on the inside of the roof.

The prebending operation worked well. After leaving the roof clamped in place for a week, I removed the clamps, sanded surfaces to be joined, cleaned them, applied silica thickened epoxy, and then screwed the roof on. All screw holes had been pre-drilled and countersunk. Next I applied epoxy fillets to all internal and external joints between the roof and the pilot house walls.
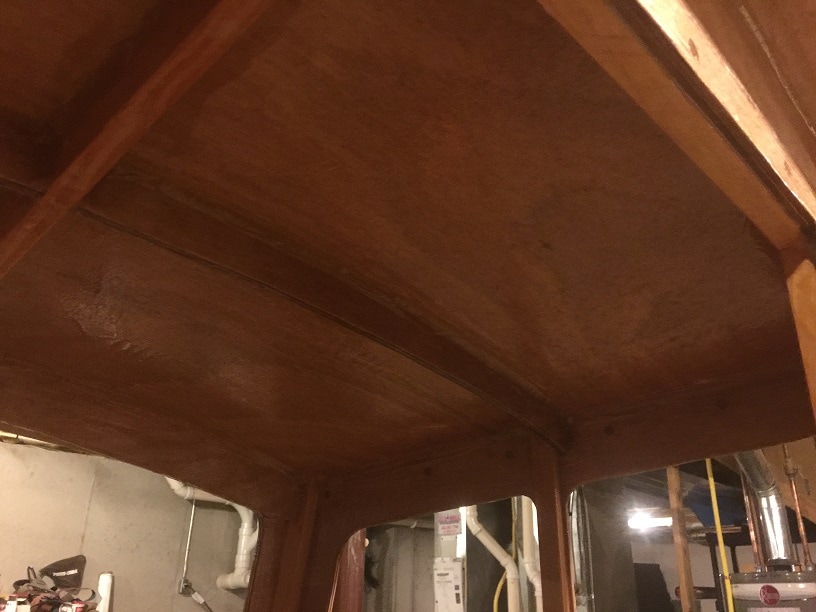
Let the fillets cure a bit, then applied a coat of epoxy to the entire roof and fillet joints.
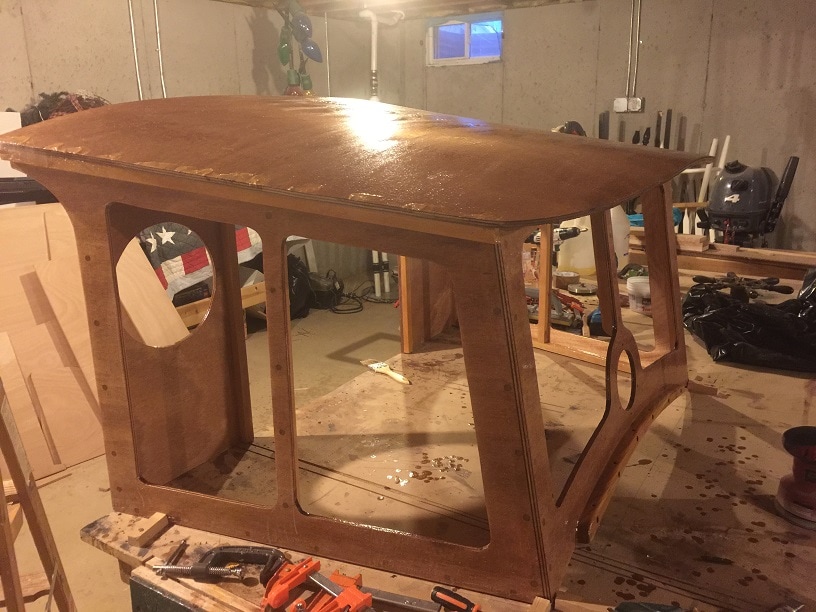
Pilot house is assembled and epoxied, and ready for final sanding and finishing.
Epoxying a doubler where the steering wheel will attach. Remember to always sand cured epoxy surfaced before painting or gluing together. If the previous coat of epoxy is still "green" then you can epoxy coat it or epoxy glue to it without sanding, check manufacturer instructions (if available....)
Prefitting door hardware. It will be removed for varnishing. Also note the wood strips that I epoxied to the portside door, these will overlap the starboard door when both doors are closed. Also note the cleats that are now installed along the bottom edge of the back wall on the port and starboard sides. These are screwed and epoxied on, and will be used to bolt the back wall to the existing bulkhead at the back of the boats cabin.
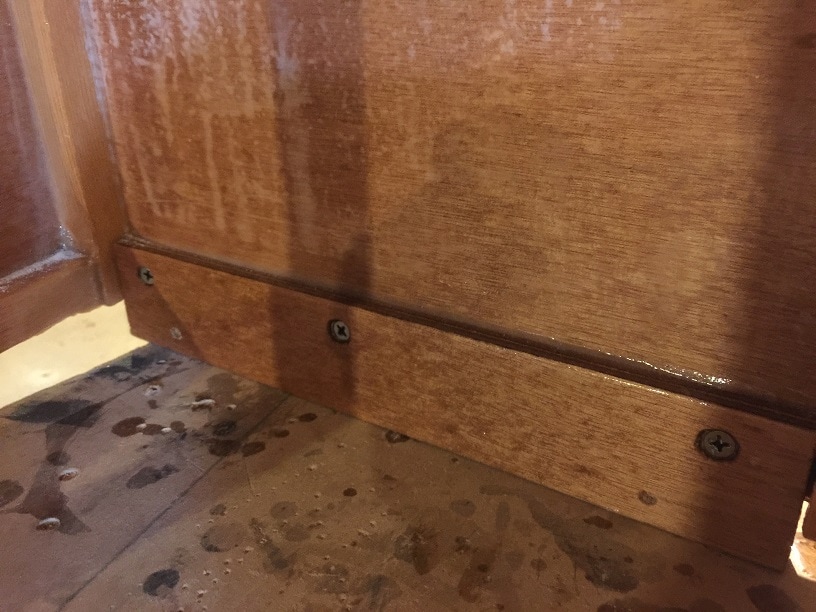
Close-up of the back-wall cleats that will be used to secure the rear wall of the pilothouse to the rear wall of the boat's cabin.

Pre-fitting 1/4 Plexiglass windows. These will be through-bolted and bedded in silicone.
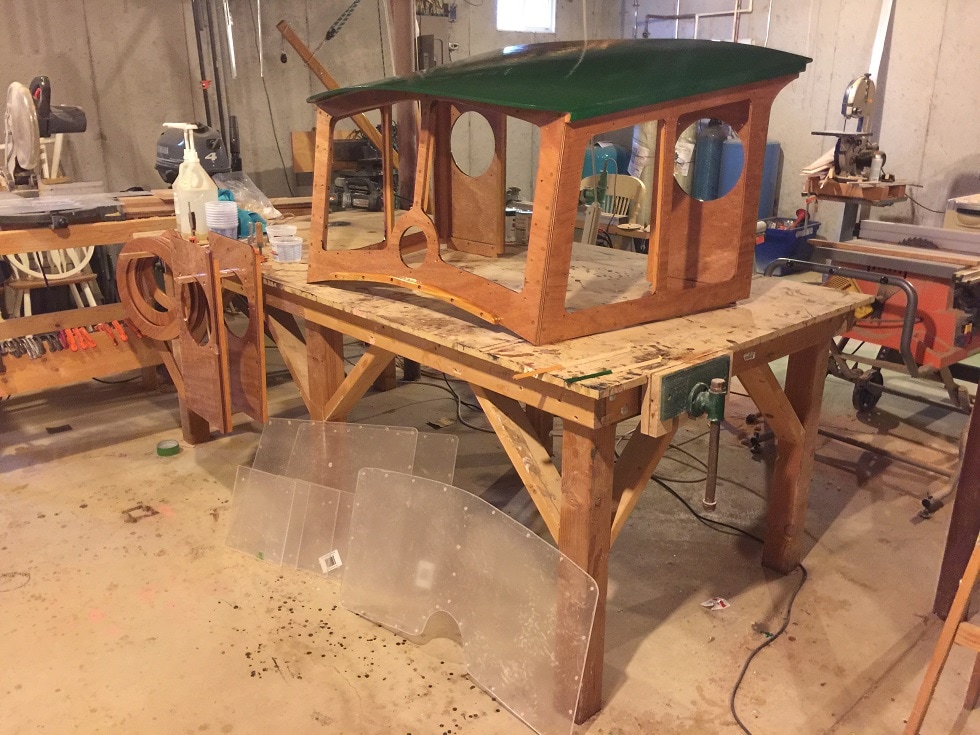
The windows are all cut out and drilled, with pilot holes drilled into the pilothouse as well. The best way to drill holes in the plywood would be to drill an oversize hole, fill it with epoxy, then drill your pilot hole into the epoxy. As these windows will be through bolted, I drilled a very slightly oversize hole and will seal the id of the hole and then bolt on the windows. The pilothouse is sanded, and this is the first coat of dark green rustoleum on the roof and spar varnish everywhere else.
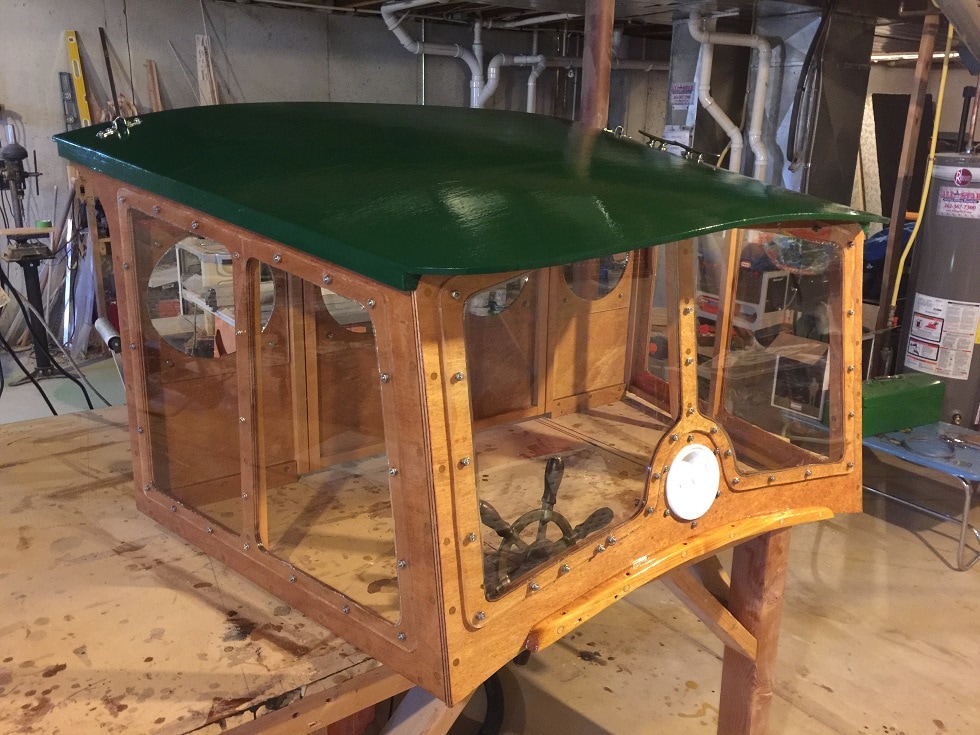
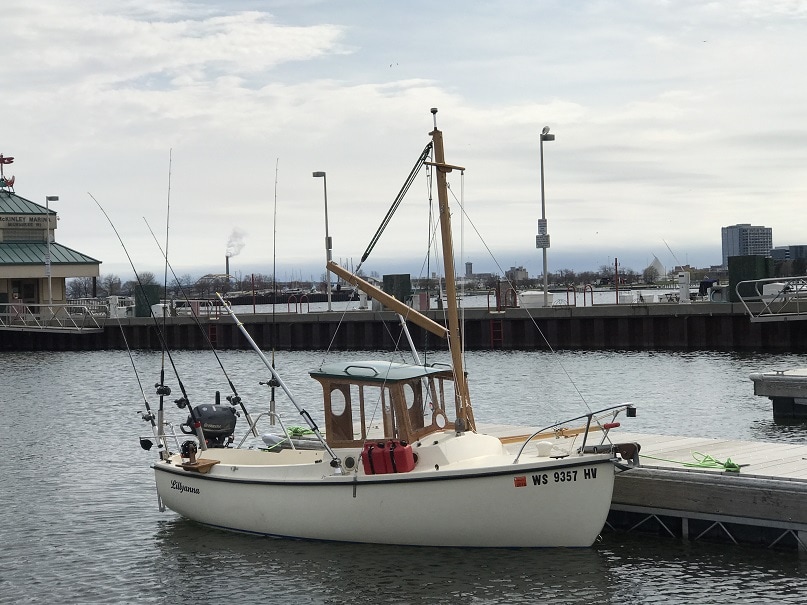
Completed Compac 16 Pilothouse, windows and access port installed.
Below you can see the finished boat; note the handrails mounted on the top of the pilot house. I drilled oversize holes in the pilothouse roof, filled the holes with epoxy, then drilled the 1/4" machine screw holes for mounting the stainless steel handrails.