The Compac 16 fishing trawler "Lillyanna" will have two downriggers and two outriggers. The downriggers will run perpendicular to the boat, and will be installed on custom wooden platforms that are made to fit exactly over the cockpit coaming. I purchased two well-used and fairly old Big Jon outriggers on ebay at a low price. The low price was definitely justified, because when they arrived I found out that the spools were completed seized and wouldn't spin, the boom-end pulleys were also seized. I will describe below the process I followed to rebuild them. These are high quality downriggers, and as such, can be rebuilt. After rebuilding, I will have excellent downriggers at a fraction of the price of buying new ones.
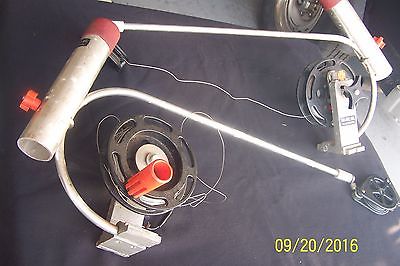
Big John Manual Downriggers, as received. The boom, base, brakcet, rod holder and spindle are all aluminum. The spool and handles and boom-end block, are plastic The plastic was all in good shape, the main challenge was the seizure of the spools on the shafts.
- Unscrew spool handle and remove
- Unscrew rod holder and remove
- Unscrew and remove depth counter (the screws were corroded and just snapped off when I put pressure on them)
- Disassemble boom-end pulleys. I pulled the sideplates of these pulleys apart, cleaned all the parts, applied light white grease and reassembled them, they now spin nicely again.
- Now is when it gets tricky....the spools are retained by compression pins that are pounded through the shaft on either side of the spool. I pounded out the pin on the tightening knob side of the bracket, which would allow the shaft t be removed out the other side, but the shaft was so seized up that even with hard pounding it would not budge. I think it I hit it any harder something would have broken. Tried penetrating oil....no luck.
- Ground the shaft off flush with the bracket. It is a 1/2" aluminum shaft. I then drilled the shaft out of the bracket and spool and removed the spool. Be careful to keep the washer, bellville washers, clutch disc, and clutch pins (there are four bronze clutch pins in the spool)
- Sanded and painted the cast aluminum base and bracket piece.
- Drilled new mounting holes for the counters, cleaned up the counters and reinstalled with self tapping stainless screws.
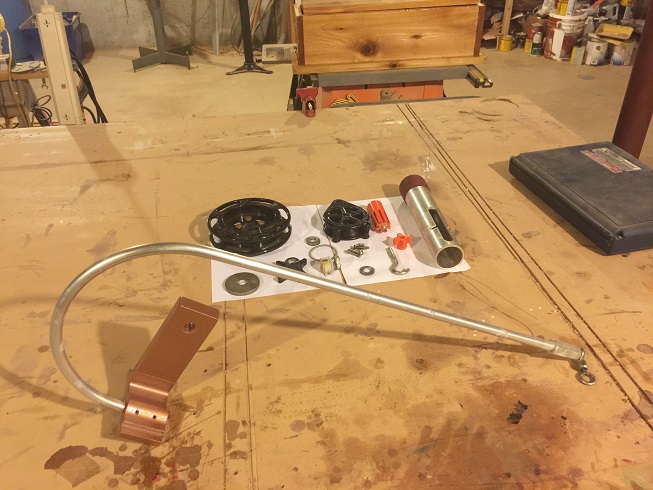
All the parts of the downrigger (except the spool shaft, which needed to be drilled out from the spool and bracket). You can see the cleaned up and painted main bracket also.
Making new shafts for the downriggers:
The OEM shafts were made from aluminum. I made replacement shafts from scratch with 1/2" aluminum rod, by drilling pin holes for the tension pins and by threading the O.D. of the rod with 1/2" fine threads. This worked reasonably well, and can be done cheap if you have some 1/2" rod around. That said, the 1/2" rod I purchased needed to be reduced in diameter in order to fit exactly into the downrigger, also, I found that the plastic tightening knob on the downrigger would not bite well into my home cut threads on the od of the aluminum. For these reasons, I recommend building the shaft as noted below, which is my second version of making a replacement shaft.
The OEM shafts were made from aluminum. I made replacement shafts from scratch with 1/2" aluminum rod, by drilling pin holes for the tension pins and by threading the O.D. of the rod with 1/2" fine threads. This worked reasonably well, and can be done cheap if you have some 1/2" rod around. That said, the 1/2" rod I purchased needed to be reduced in diameter in order to fit exactly into the downrigger, also, I found that the plastic tightening knob on the downrigger would not bite well into my home cut threads on the od of the aluminum. For these reasons, I recommend building the shaft as noted below, which is my second version of making a replacement shaft.
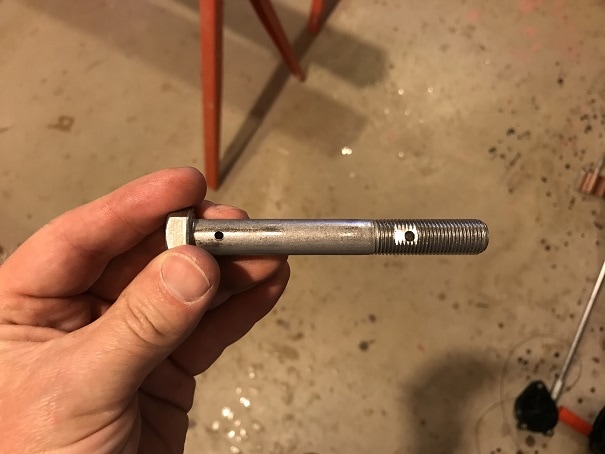
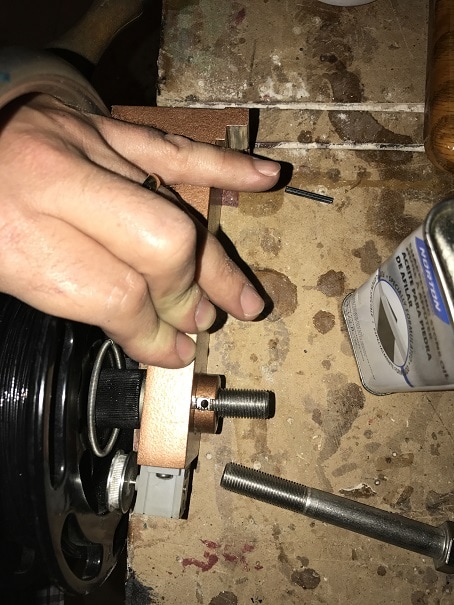
STEP 1. Start with a stainless steel 1/2" x 4" bolt with fine threads. File a small flat area where your 1/8" tension pins need to be and then drill 1/8" diameter holes for the tension pins. These holes need to be the exactly correct distance from each other and from the bolt head end, so measure and drill carefully. I won't share dimensions because there are many different models of downriggers and I don't want to give incorrect dimensions. Drill the stainless steel at a slow speed and high pressure on the bit, and use some cutting oil as you go.
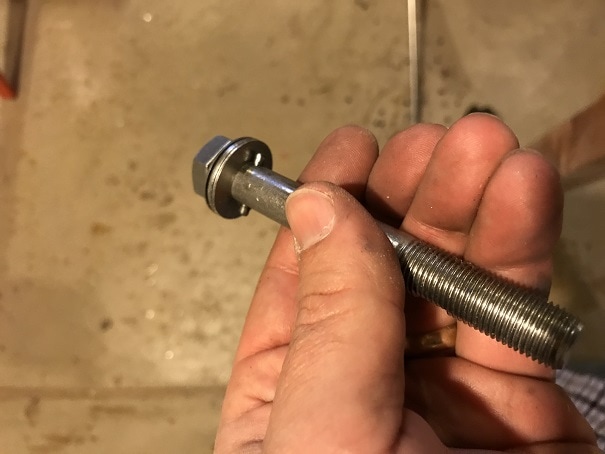
STEP 2: Stack up your belleville washers, ensuring they are in the correct orientation to each other, and then drive in a 1/8" x 3/4" tension pin as shown.
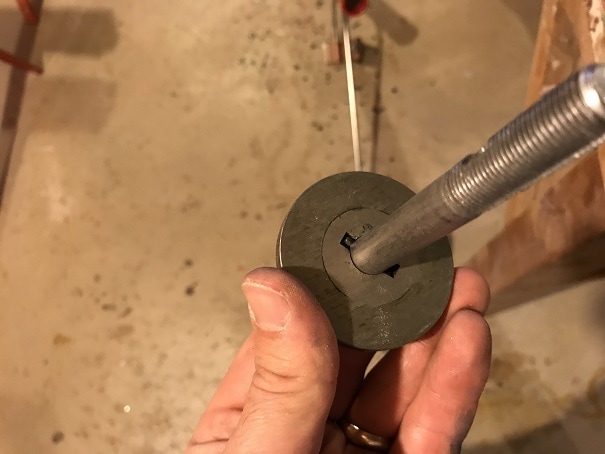
STEP 3: Drop on the clutch disc, and be sure that the tension pin fits correctly into the openings in the clutch disk. This arrangement locks the clutch disc and keeps it from spinning with the spool.
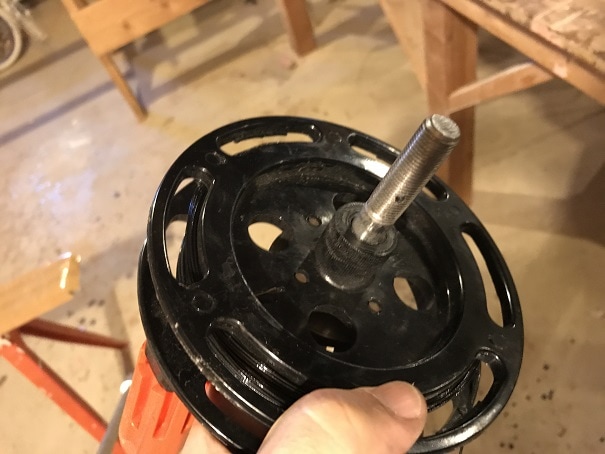
STEP 4: Place the spool onto the shaft, ensuring that the handle is on the right side. The 1/2" stainless steel bolt fit perfectly into the spool.
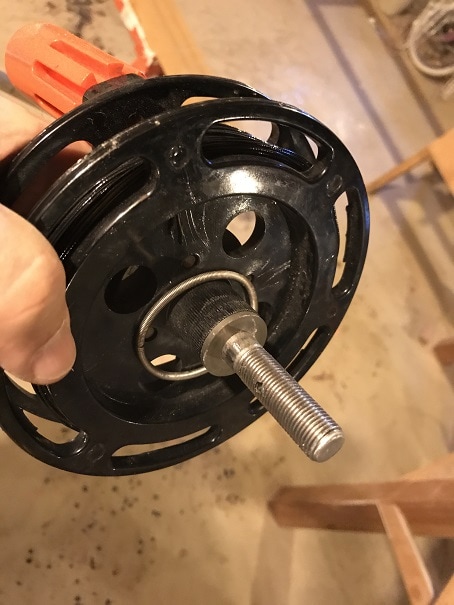
STEP 5: Slide the counter spring and the steel thrust bushing onto the shaft.
STEP 6: Slide the shaft end into the base frame of the downrigger. You can see why the hole distance accuracy is so important, the second pin location need to be right in this slot on the other side of the base frame from the spool. It is not important for the two pin holes to be aligned perfectly, radially, with each other, but they do need to be the correct distance from the bolt-head end, and from each other.
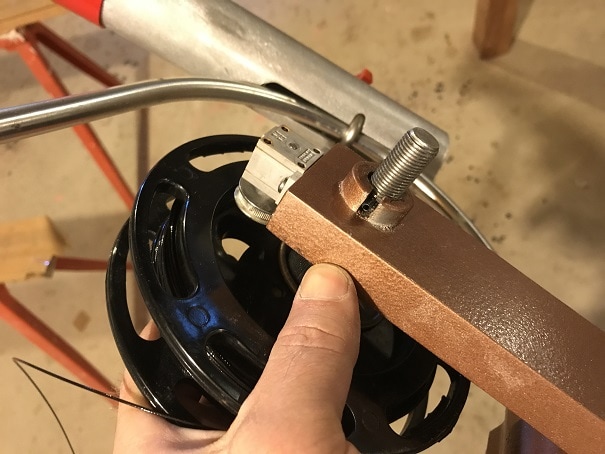
STEP 7: Pound in a 1/8" x 1" tension pin into the second pin hole as shown.
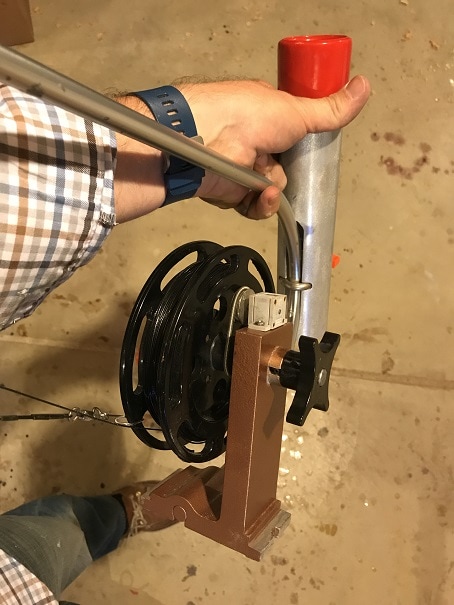
STEP 8: Thread on a large plastic tightening knob (I ordered mine from Big Jon). You're done!
Photo's of finished product below including new rod holder caps and new clutch tightening knobs. I have one with the custom aluminum shaft, and one with the stainless-steel bolt-based shaft. Using the stainless steel bolt was quicker and easier and the threads are better....in my opinion.
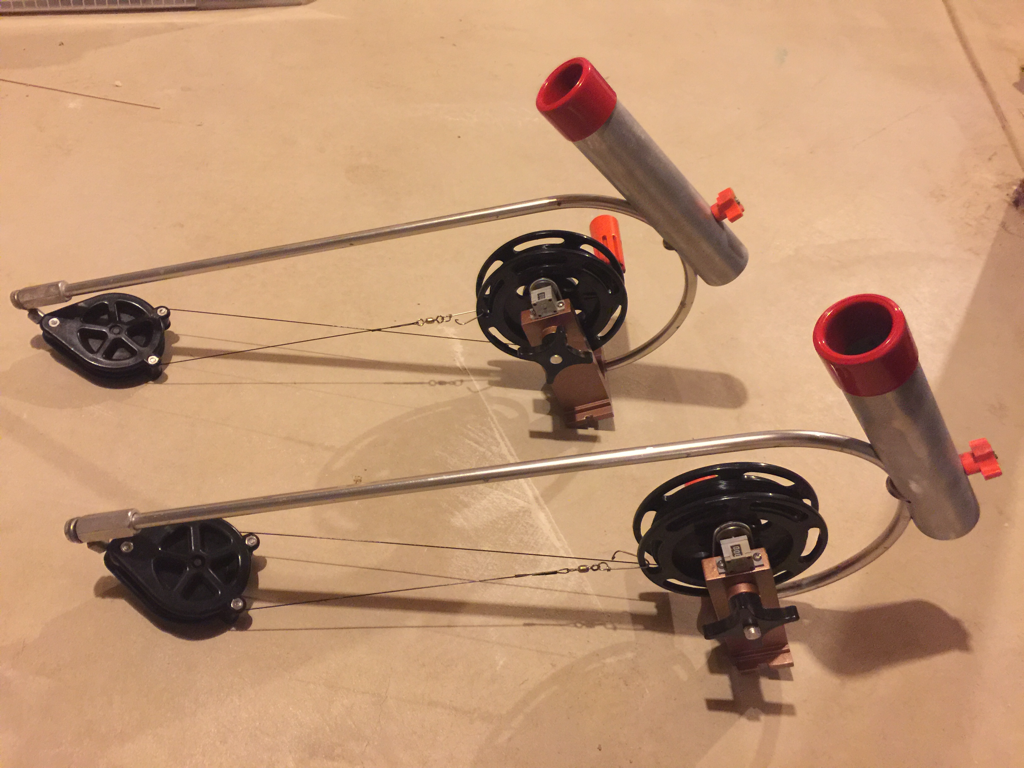
Rebuilt Big Jon Manual downriggers, including new knobs and rod holder caps. New nylon coated downrigger line and clips are installed.