This is a reliable and easy recipe that produces a wonderful end-product.
Thanks and credit to Mary Carlin; the recipe I use is from her book "Artisan Cheese Making At Home". This recipe is based on a cheese made famous by Laura Chenel, a great US goat cheese maker. I get any special cheese making ingredients or equipment from www.thecheesemaker.com.
STEP ONE: Gather up required ingredients and equipment.
- Pot to warm the milk in
- "Crottin" molds, these are cylindrical plastic cheese molds with holes in the sides and bottom
- A good thermometer that reads acurately in the required temp range in this case 75degrees F, measuring spoons, cups, whisks, and a supportive rack to set the cheeses on
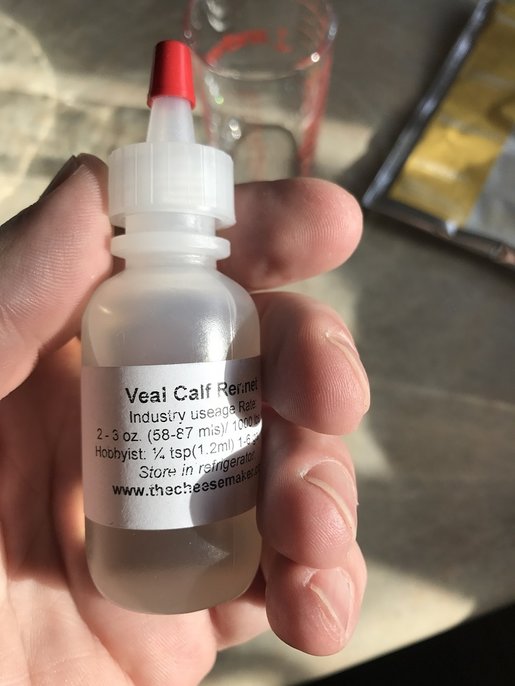
- Liquid rennet
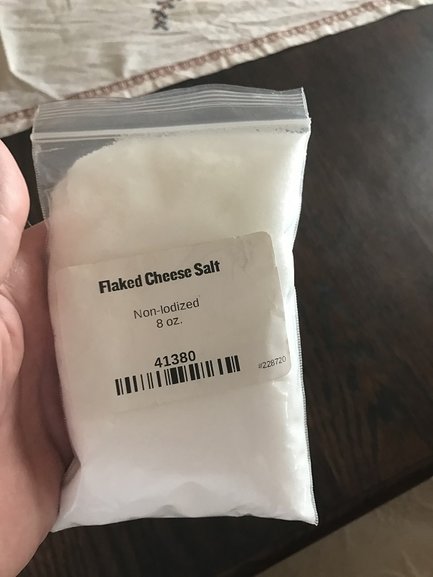
- Cheese salt
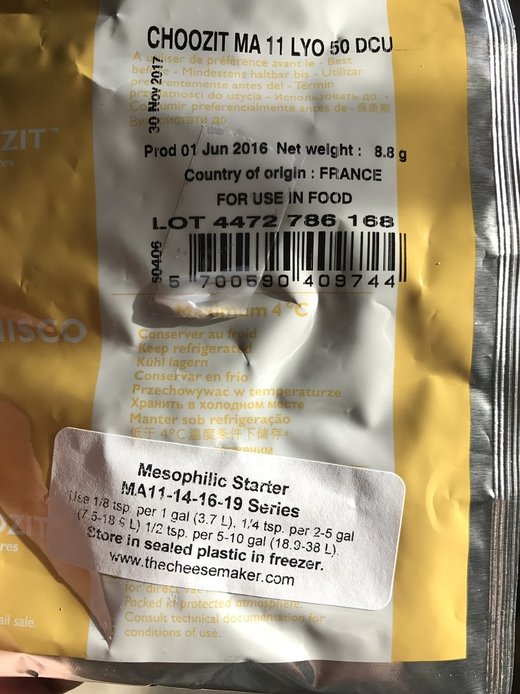
- MA 011 powdered mesophilic starter culture
- Pasteurized whole goat milk, 2 quarts
- Olive oil and peppercorns and herbs for the marinade

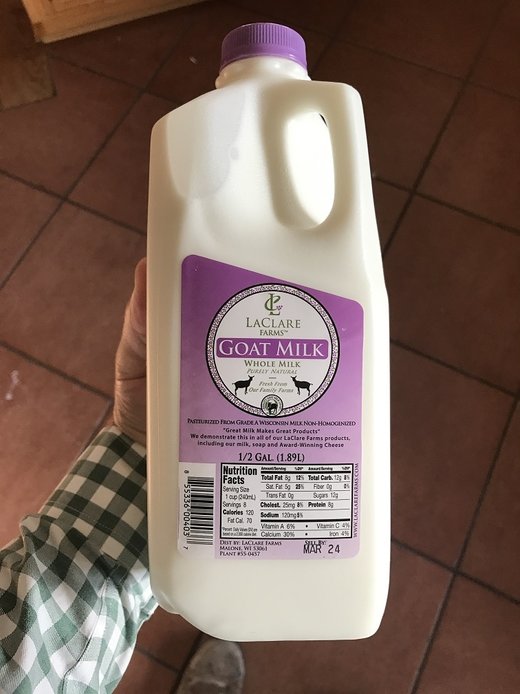
I use whole goat milk from LaClare farms in Wisconsin. It is pasteurized, but not homogenized. Do not use ultra-pasteurized milk.
STEP TWO: CLEAN AND STERILIZE EVERYTHING THAT WILL COME INTO CONTACT WITH THE CHEESE, INGREDIENTS, This includes countertops, hands, all utensils, pots, cups and measuring spoons. I used starsan. The most important part of making any food is to be a good janitor so no one get sick.
STEP THREE: Warm up two quarts of the goat milk to 75 degrees F. You're supposed to do this with a water-bath, but I just heat it up on the stove.
STEP THREE: Warm up two quarts of the goat milk to 75 degrees F. You're supposed to do this with a water-bath, but I just heat it up on the stove.
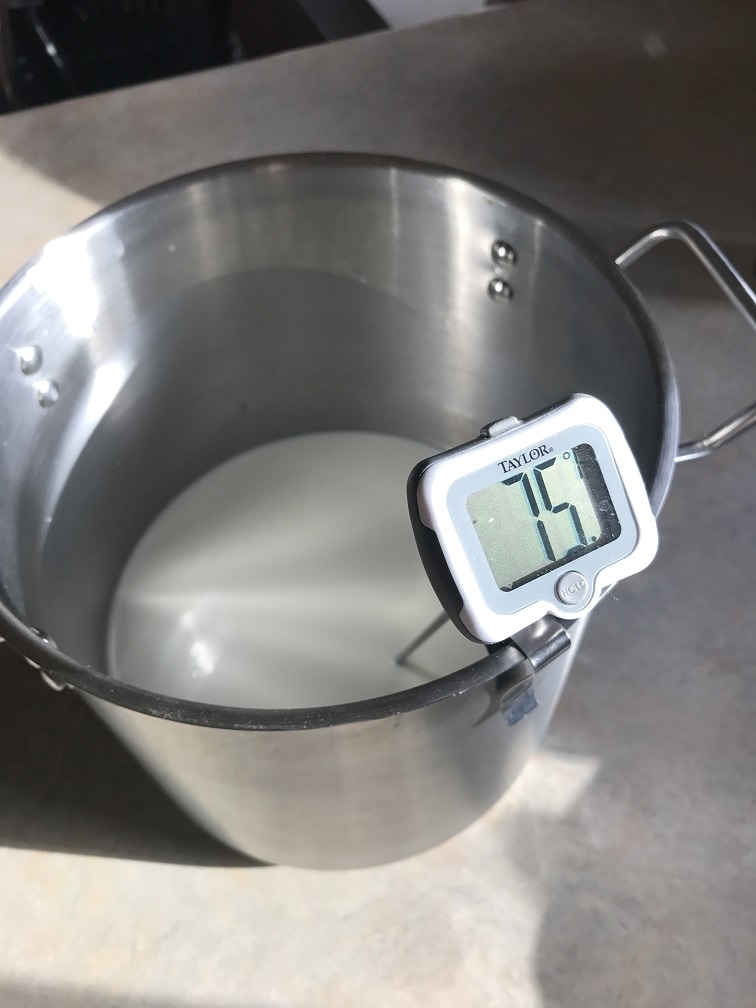
STEP FOUR: Remove from heat, in fact, I would remove from heat before it gets to 75deg. If you remove it when it's at 75deg, the heat in the pot will continue warming the milk and you will shoot past 75degF. Sprinkle 1/4tsp of MA011 starter culture on the milk surface and let rehydrate for a couple minutes. Then stir it in thoroughly with a big spoon or whisk for a minute. I don't go crazy fast with the stirring; a nice slow thorough mixing is needed, so I stir slow and thorough for a minute
STEP FIVE: Drop one drop of liquid calf rennet (comes from the stomach of a calf) into 5 tablespoons of lukewarm water, then add this diluted rennet into the milk and stir as you did the starter culture. There are non-calf based rennets for vegetarians that don't want to utilize calf products. The starter culture will add flavor and the rennet will cause the milk to separate into liquid whey and solid curds.
STEP SIX: Cover the pot with a clean paper towel, and let sit, undisturbed at 72deg for 18 hours. I just set the house at 72 deg for this time period. The curds and whey will form.
STEP SEVEN: After 18 hours, scoop the curds into 4 crottin molds. The whey will flow out of the holes in the crottin molds, so be sure to have the molds on a stable grate, and to have a tray to catch the whey so that it doesn't make a mess. Everything needs to be foodgrade sterilized material. Fill the crottin molds to the top.
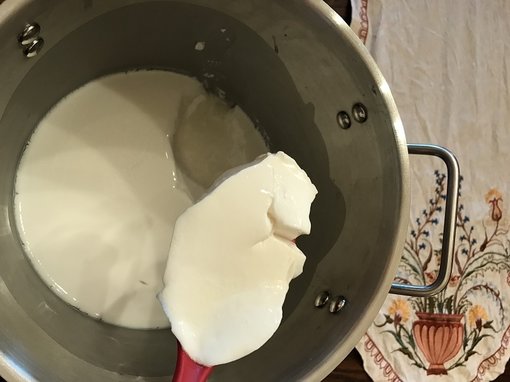
The milk has formed curd
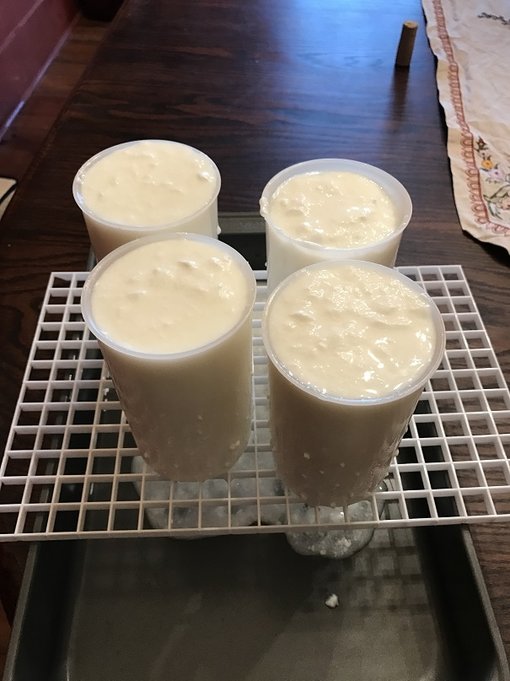
Four crottin molds filled to the top with curds and whey, you can see the whey draining out into the pan below. I use a food-grade plastic grate to set the molds on.
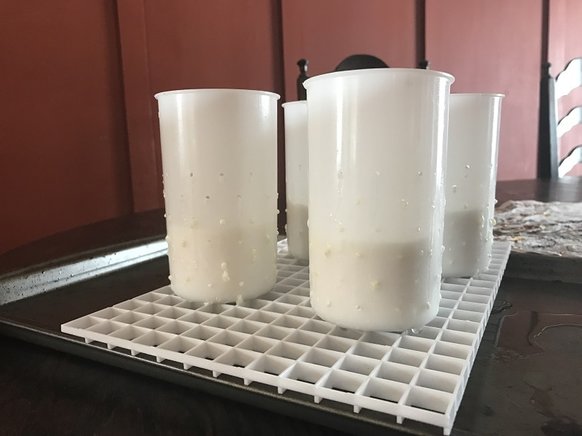
STEP EIGHT: Cover the molds with a clean piece of paper towel, and let sit for 2 days at room temp. The curds will be pressed by gravity and they whey will be pressed out. After two days you should be left with a short hockey puck of cheese at the bottom of the mold.
STEP NINE: Carefully tip the molds upside down and tap them to remove the cheese. It will be soft and still wet, so be gentle. I set the cheeses on a bamboo mat. Sprinkle 2 teaspoons of cheese salt over the cheeses (not 2 teaspoons of salt per piece of cheese), coating all sides. Then set the cheeses in the refrigerator for 2 days to let them dry, don't freeze them. Flip them over once a day.
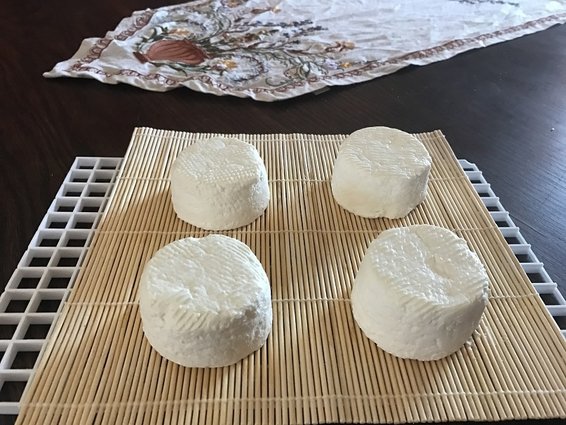
Cabecou, after two days of flipping, drying and aging in the refrigerator.
STEP TEN: Enjoy the cheese on some nice bread! You can keep it in the refrigerator and eat it as-is at this point. Or you can marinate it in an olive oil marinade of your choosing. I put two cheeses into a wide mouth glass jar that has olive oil, peppercorns, lavendar, oregeno, and a bay leaf in it. Cover the cheeses completely with olive oil. I let the cheese and spices sit for a day in the olive oil at room temperature, then I put them into the fridge. The olive oil will cloud-up and solidify in the refrigerator, so when you want to eat the chease, take it out a little early and the olive oil will quickly return to normal liquid olive oil, and you can extract the cheese and enjoy it! I still use the olive oil after the cheese is eaten.
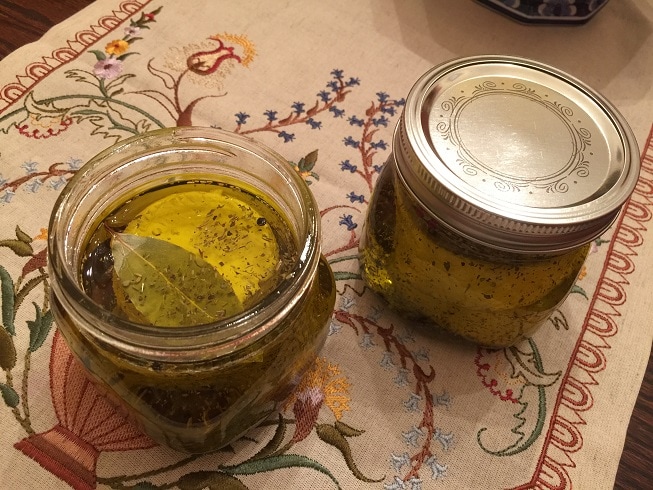
Marinated Cabecou Goat Cheese