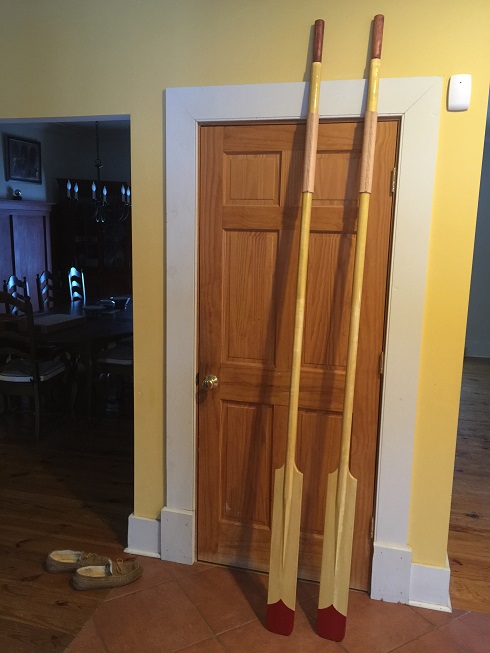
Building Wooden Oars for a Small Sailboat
Oars are priceless on a small sailboat. They are reliable, quiet, and can be called-on almost instantaneously (as long as they are in the oarlocks or very easy to access) to avoid calamity if it arises. Oars provide excellent propulsion if the wind or motor fails, and are a wise safety addition to a small sailboat whether out on a day trip or longer voyage. They are peaceful and enjoyable to use, and are also fun to build. It is surprising how much force is put into the oarlocks, so be sure to make a very stout installation of the oarlock socket on the boat. Below, you will find a guide on how I built my oars.
Many sources are available online to calculate the proper length of oars. From www.Woodenboat.com and www.shawandtenney.com, we have the following information:
Shaw & Tenney Oar Length Formula for Correctly Fitted Oars
I decided to build oars 8 feet long, not because of a proper-length formula, but because that is what will fit in my boat. The primary propulsion will be wind, and when needed I think the 8ft oars will serve well and in my experience, even if they may be a bit short, they will be handier than a paddle. I recognize this is a matter of preference and personal decision. I use 8' oars on my 16' heavier sailboat and they are very handy.
Shaw & Tenney Oar Length Formula for Correctly Fitted Oars
- Inboard length of the loom equals ½ the span between the oarlocks + 2″
- Total length of oar equals 1/7 of inboard length multiplied by 25
- Distance from the center of leather to end of grip equals 7/25 of the total length of the oar
- Oars measured according to this formula will have a leverage ratio of 7:18.
I decided to build oars 8 feet long, not because of a proper-length formula, but because that is what will fit in my boat. The primary propulsion will be wind, and when needed I think the 8ft oars will serve well and in my experience, even if they may be a bit short, they will be handier than a paddle. I recognize this is a matter of preference and personal decision. I use 8' oars on my 16' heavier sailboat and they are very handy.
- My oars built here are based on a design found at: http://bateau.com/free/simple_oars.html
- 28 inch long paddles
- 1 1/2 inch loom diameter (a bit small I think...)
- Paddle sides are made from 2" wide strips glued to the loom, making the paddle 5 1/2" wide
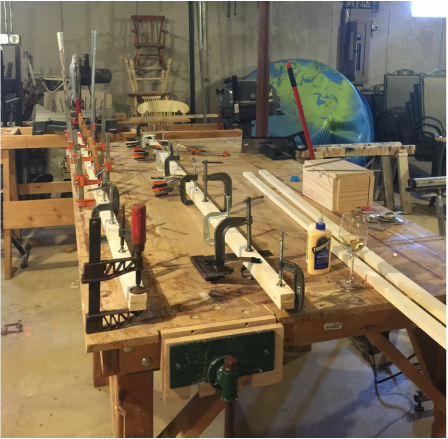
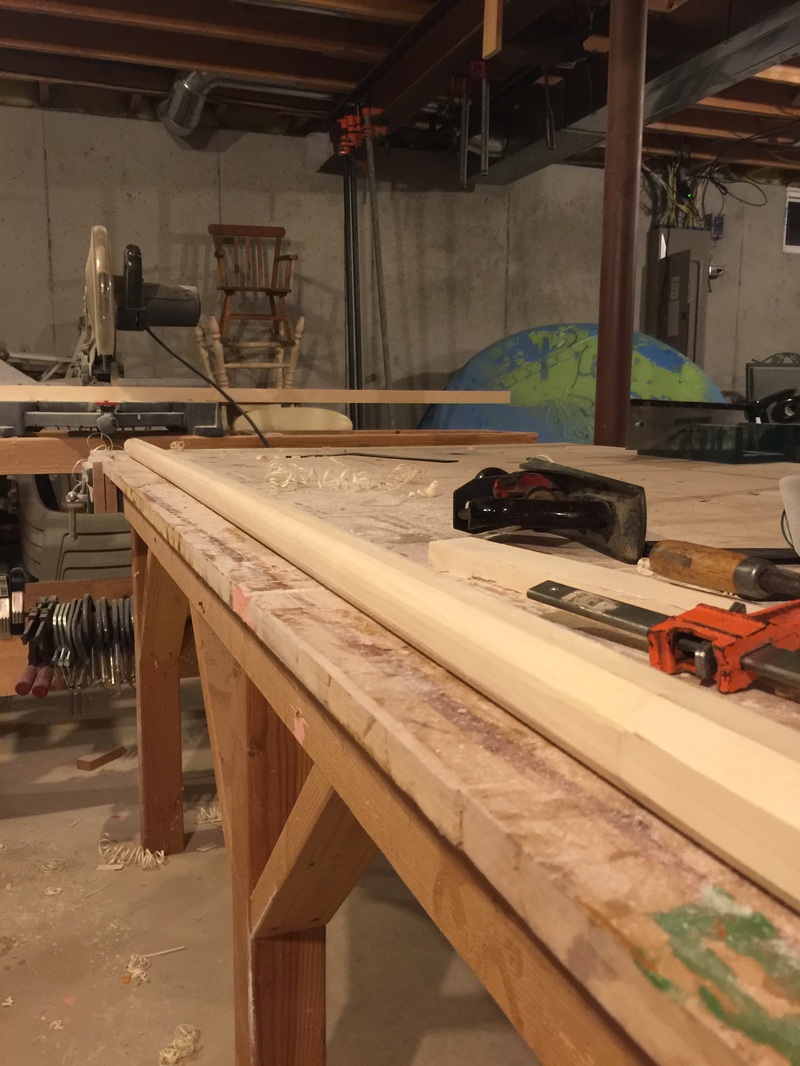
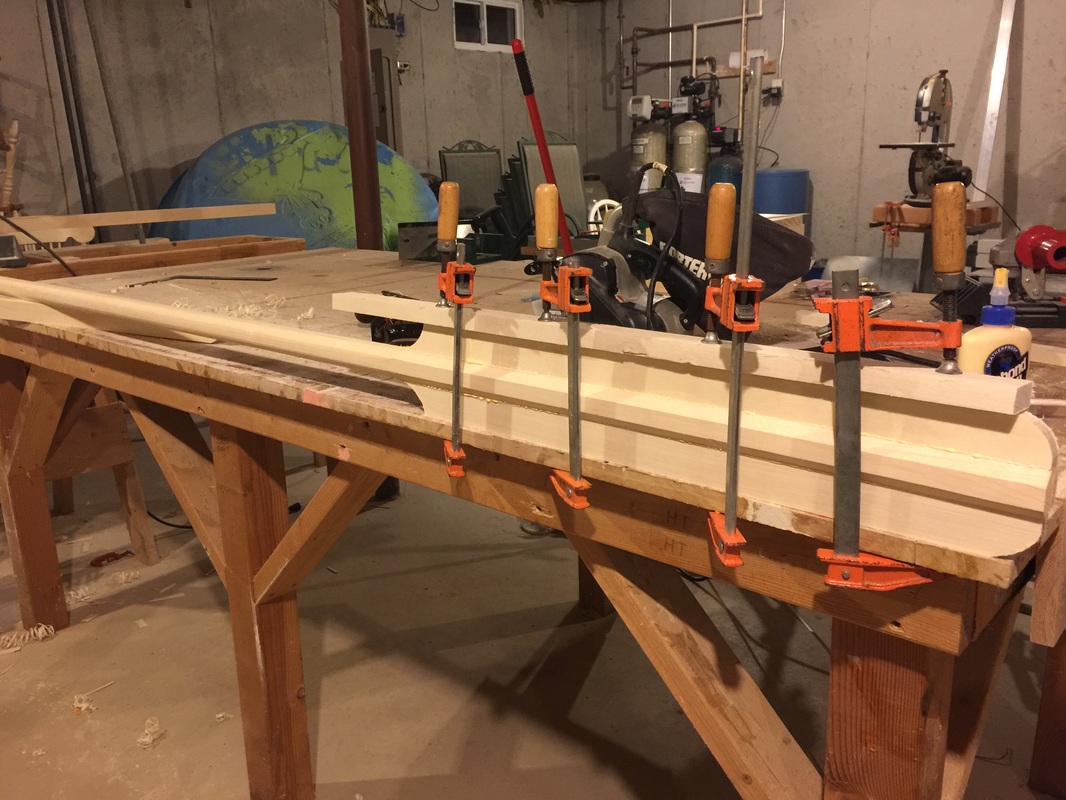
- Built up the looms by gluing together 2 pieces of 3/4" thick material. I used tightbond, but epoxy would be a good or maybe better choice.
- You will need many clamps, at least every 6 inches
- Careful not to dent the wood with the clamps, use a protective piece of wood if neccessary
- I used Aspen, which I found for a good price and which was very clear and straight-grained. That said, Sitka spruce would be a better choice as the Aspen may be a bit weak. Strength of woods can be found by following this link: http://workshopcompanion.com/KnowHow/Design/Nature_of_Wood/3_Wood_Strength/3_Wood_Strength.htm
- Even though I think Aspen wasn't the best choice for oars, it is mentioned in the old fundemental epic tale, the Kalevala, of Finland....."eagerly the merry maidens bend the aspen oars in rowing".... so at least I know I am not the first person to use this siren temptress wood to build his oars......
- I decided to add Oar-leathers and chafe protection at the oarlock, details below.
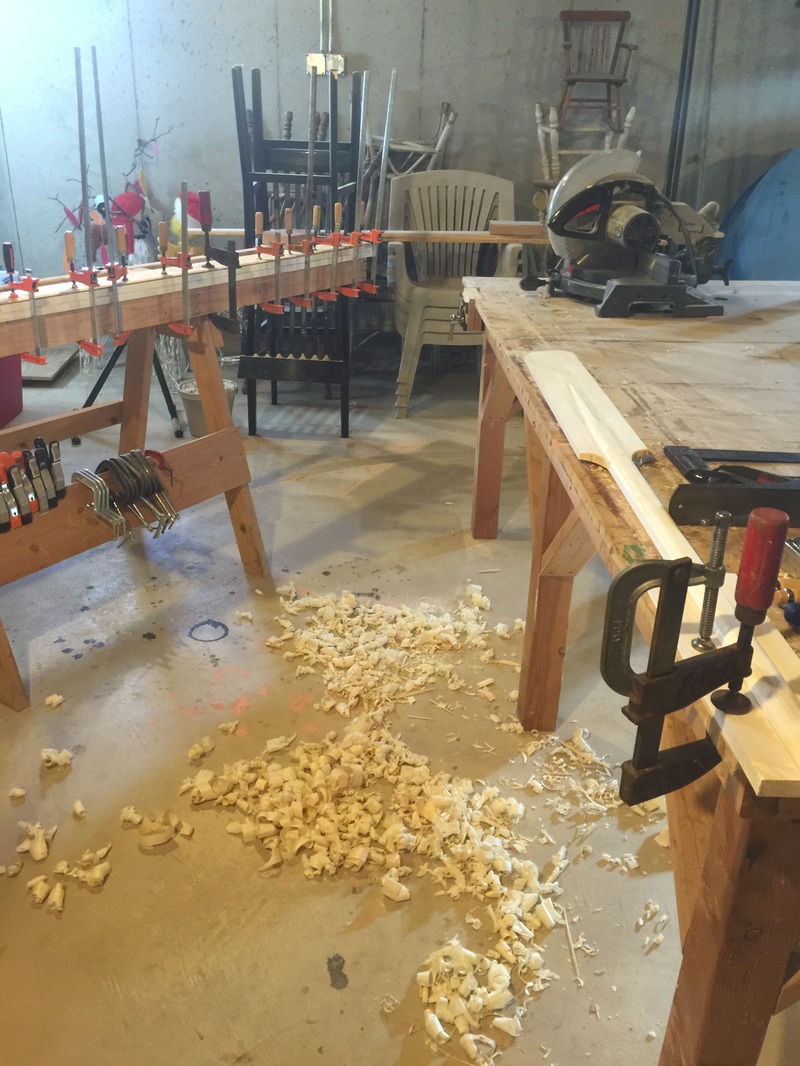
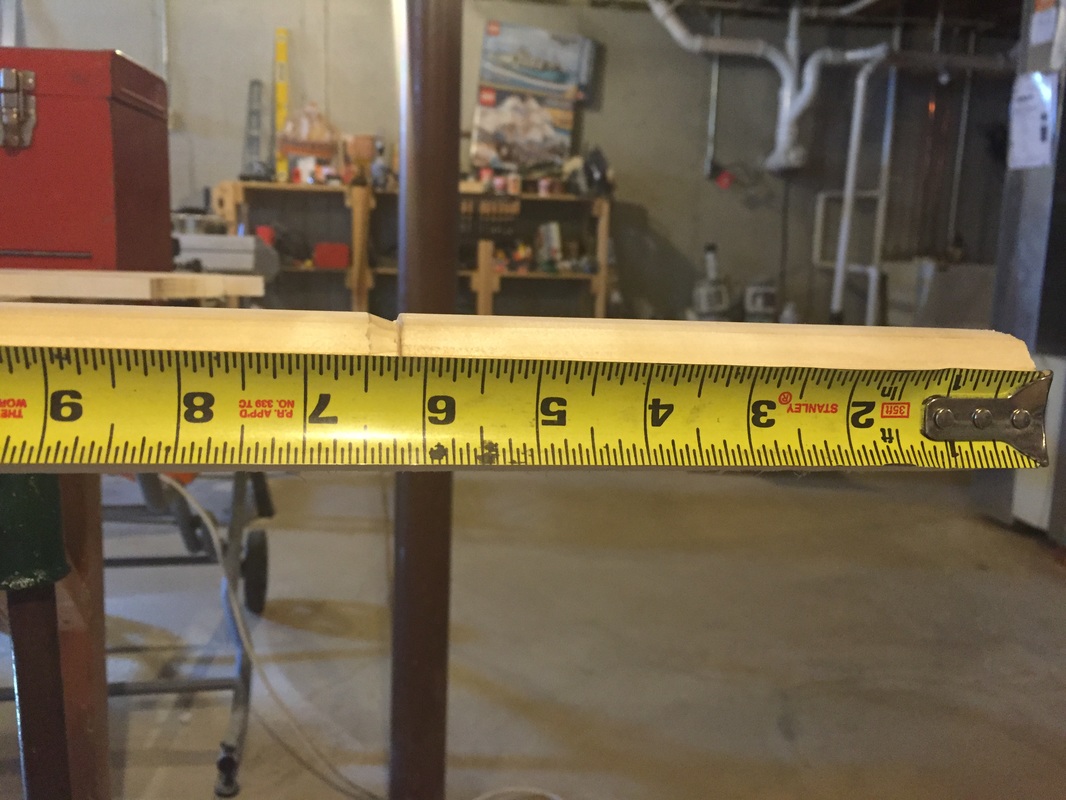
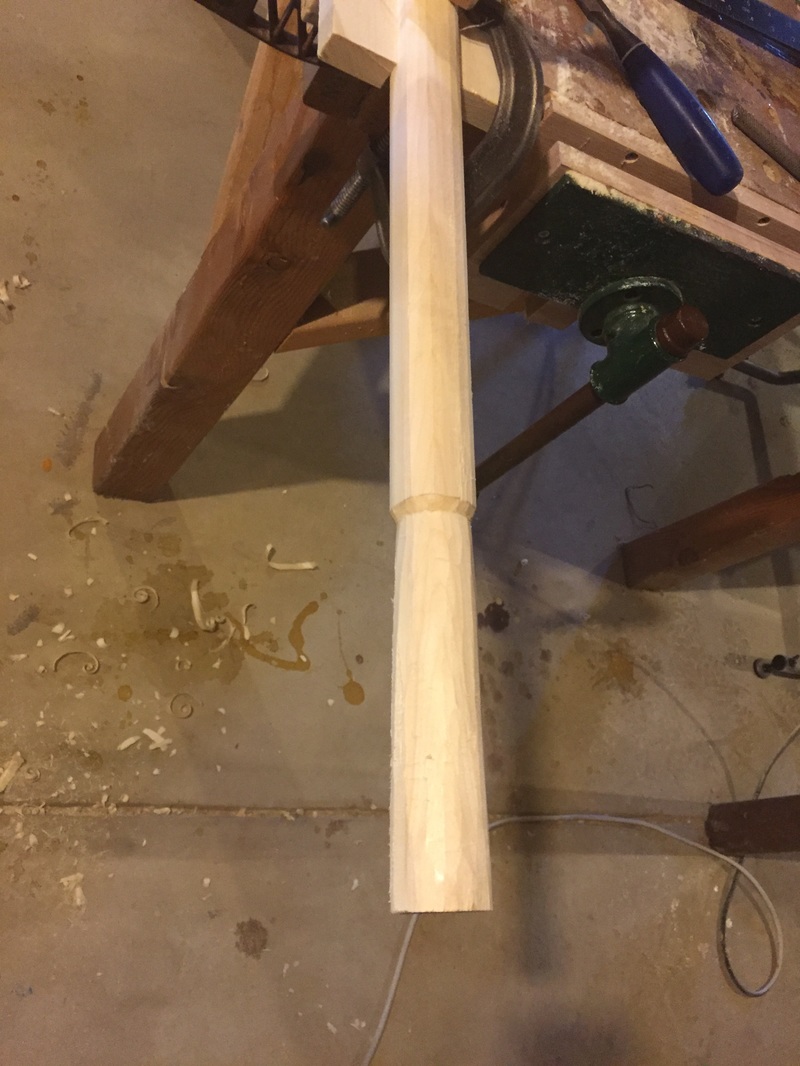
- Used a thickness planer to make a 1.5" square cross-section after the glue was dry
- Used the table saw to shape the oar loom into an eight sided cross-section
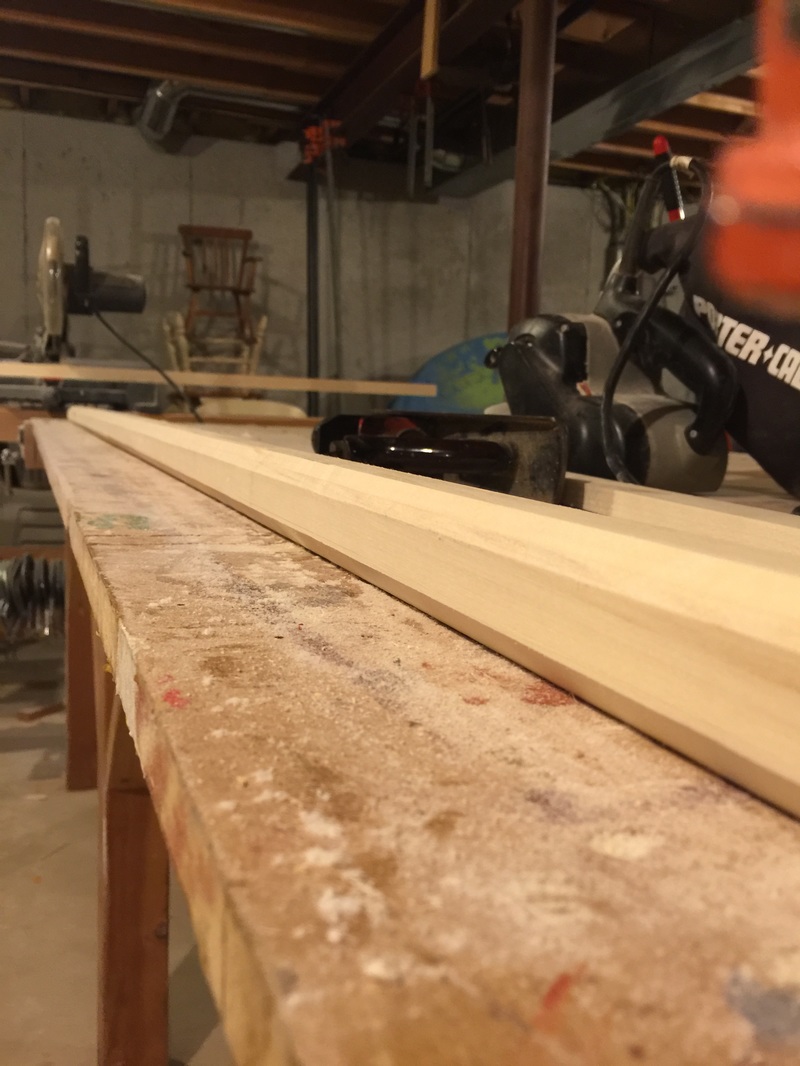
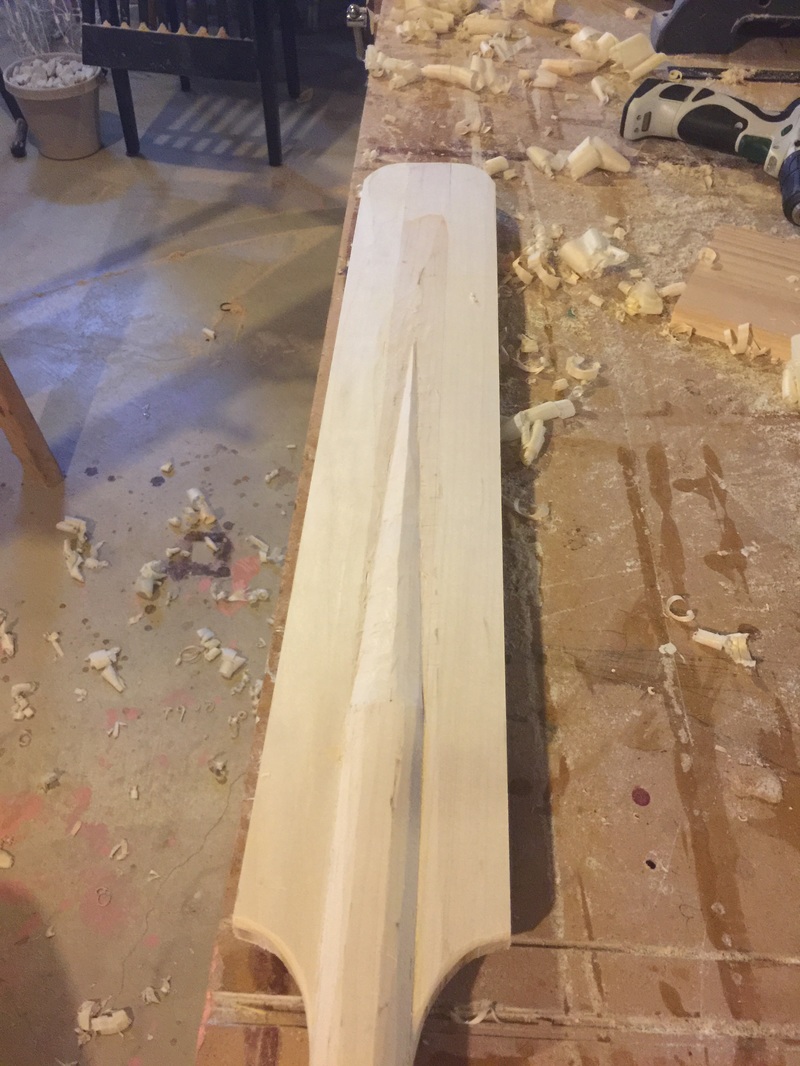
- Then used a hand-plane to create a round cross section from the eight sided blank. EXCEPT for the 28" length at the bottom of the oar where the paddle sides will be glued on
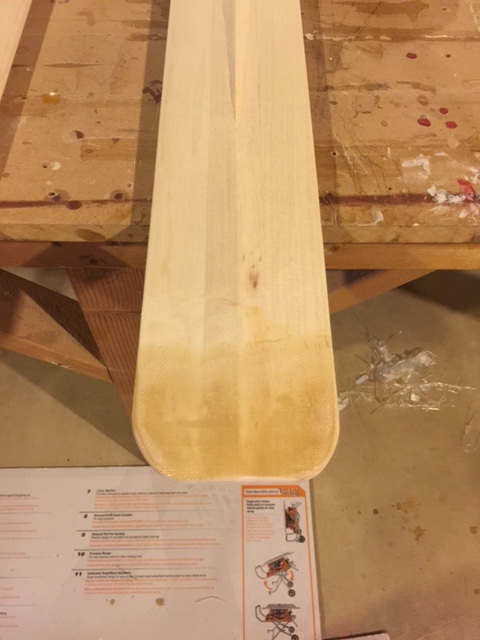
- Glue the paddle-sides onto the loom
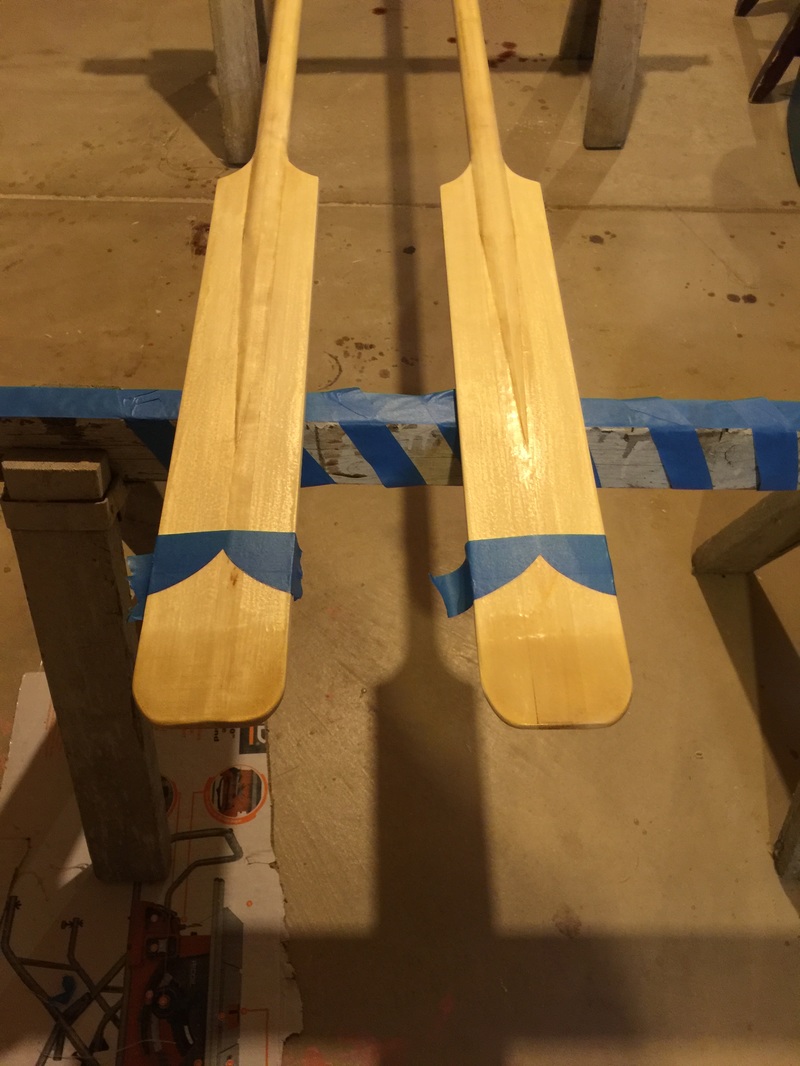
- Then, I used a hand-plane, spoke shave, and chisels to taper the paddle blade and carve the paddle. The paddle tapers towards the bottom tip and towards the side edges, to about 3/16" or 1/4"
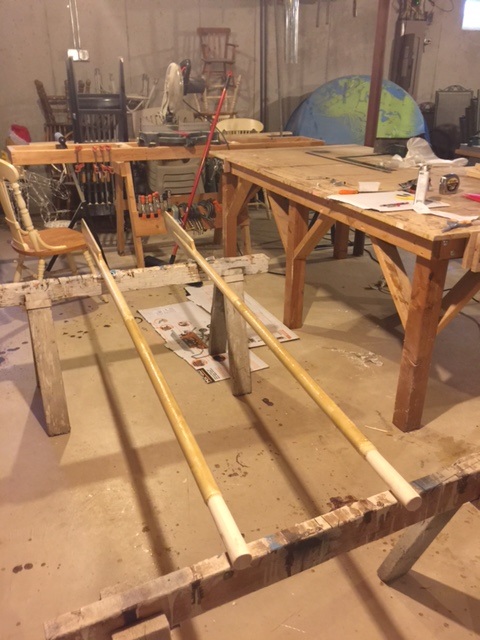
- Next carve the handle, I went for a simple tapered shape, carved with a chisel.
- Then sand the whole oar with 60 and then 100 grit sandpaper. Some people probably go finer than that.
- Then I reinforced the paddle-tip with fiberglass on both sides

- Then trim and sand the fiberglass smooth and give it another coat of epoxy
- Two layers of fiberglass were applied to circumference of the first three feet of the oar loom up to the handle, to support the area where the oarlock will be. I added the two layers of fiberglass because I think the 1.5" diameter is a bit light, heavy oars are overkill in many cases, but weak oars would be worse. I became concerned as I looked at the 1.5" diameter loom, so I added this double reinforcement of fiberglass on the first 3 feet.
- Then I gave the entire oar a coat of epoxy, except the handle
- Used painters tape to create a stencil on the tip of the oar
- Painted the tip of the oar a nice dark red with gloss rustoleum
- Stained and oiled handle but did not epoxy or varnish handle
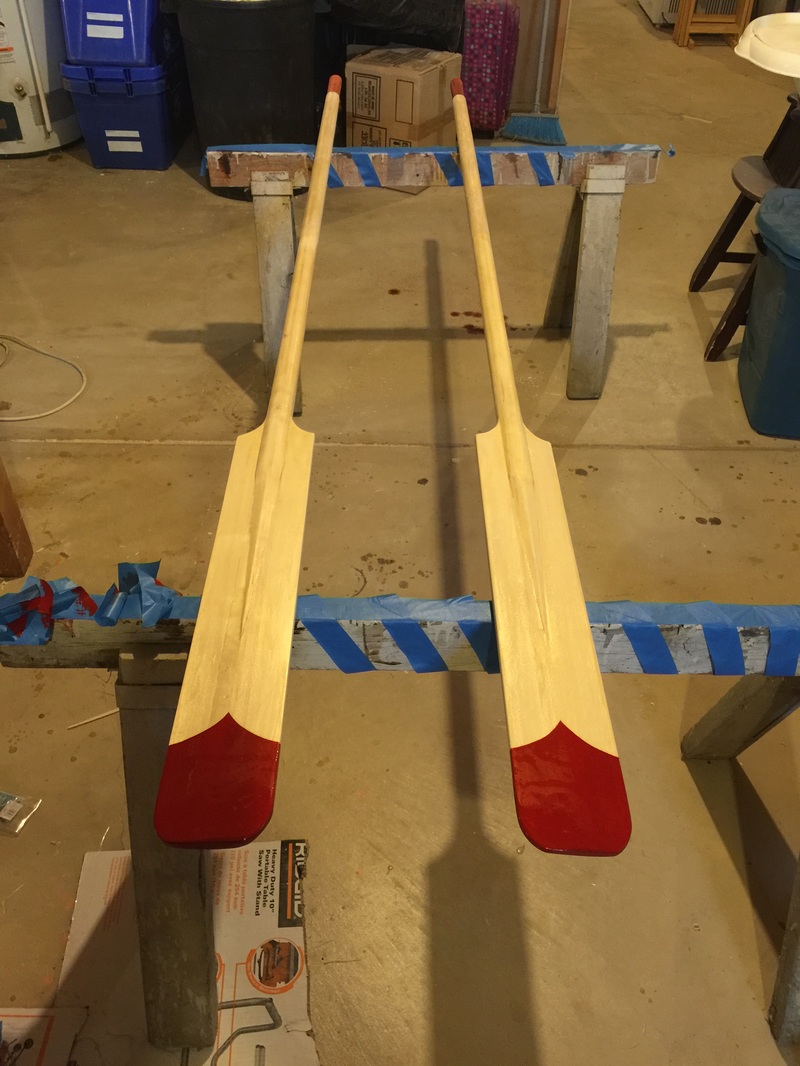
- Then three coats of spar varnish over everything except the oiled handle
- Handles stained and lightly oiled:

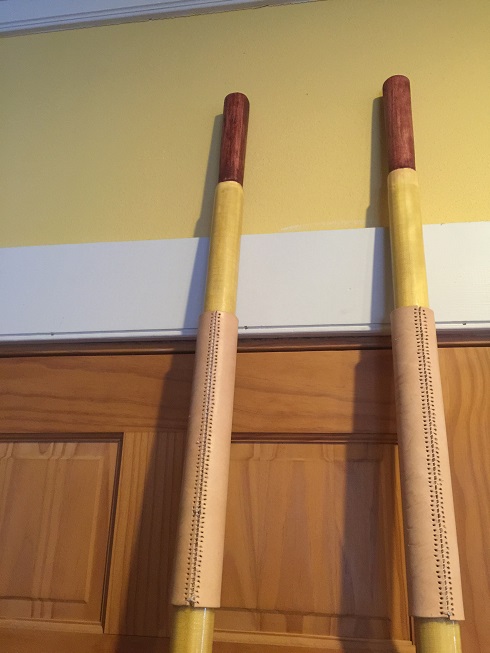
Leathering Oars:
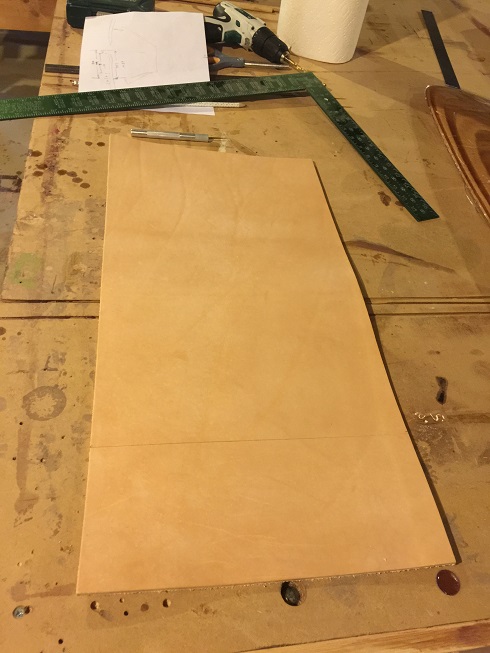
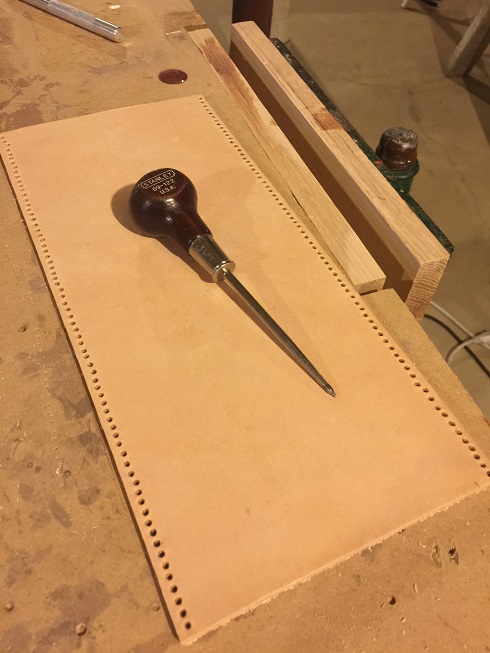
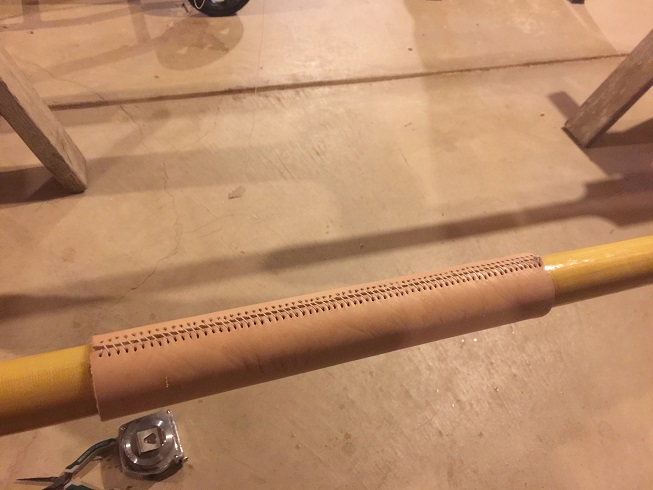
- Purchased a couple sheets of 8-9oz vegetable tanned leather. See photo below, it was a aroudn 3/16" thick. Very nice clear leather. NOTE FROM AFTER USING THESE OARS: THIS THICKNESS OF LEATHER LOOKED GREAT AND ABRASION RESISTANT, BUT WAS TOO THICK AND DIDN'T HAVE ENOUGH CLEARANCE IN THE OARLOCK. IF YOUR OAR IS THE DIAMETER OF MINE, I RECOMMEND USING A THINNER LEATHER.
- I cut a piece with a razor, 12" and just big enough to wrap around the loom of the oar. I cut it about an 1/8 - 1/16" small to allow for stretching the leather tight around the loom.
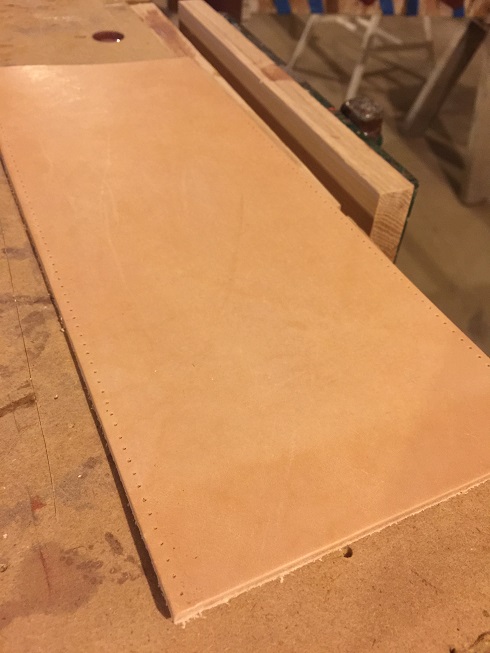
- Marked out stitch holes every 1/12" along both sides
- Made holes using a awl and hammer
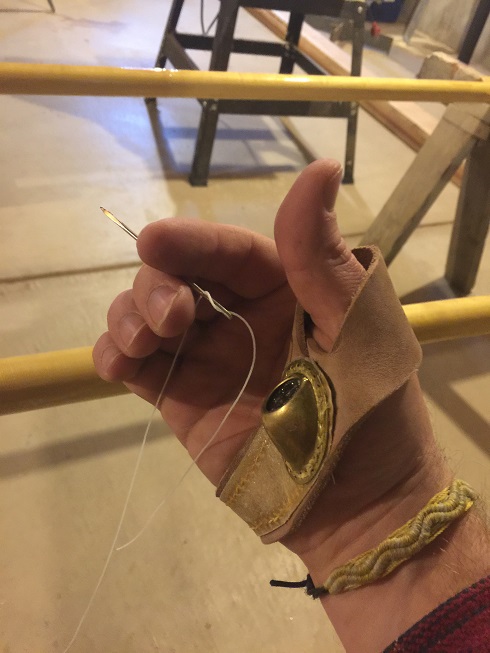
- I used a parallel type stitch as this was my first effort at oar leathering, and I think my materials are all strong and well done; but having learned about this, I would use a "baseball" stitch to stitch up the oar-leathers next time. I used a "baseball stitch" on all the other spars of my boat.
|
|
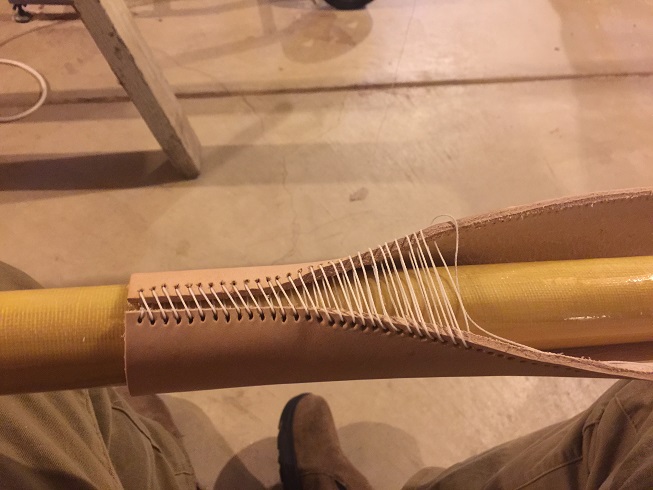
- Chamfered the inside edge of the leather a bit with the razor to help the seam pull up tight when cinched
- Stiched the leather onto the oar with 0.8mm three-strand waxed sail thread/twine and a sailing needle. Tried both circular needles and a straight needle with a sail stitching palm, the straight needle.sewing palm worked best.
- After completing all the stitched, I tightened up the whole seam in a couple successive tightenings working from left to right down the whole seam.
- I used a perpendicular stitch on these oars, but I used a herringbone, "baseball" type stitch on the mast, boom, and yard leathers. I think the "baseball stitch" is better, and if I leather the oars again I will use a baseball stitch.
Finished Oars!