A bit of research led me to a very low cost forge concept that I could build myself. Here I will share how I built my brake drum forge, which I use for small scale blacksmithing projects in the backyard. I burn coal in this forge.
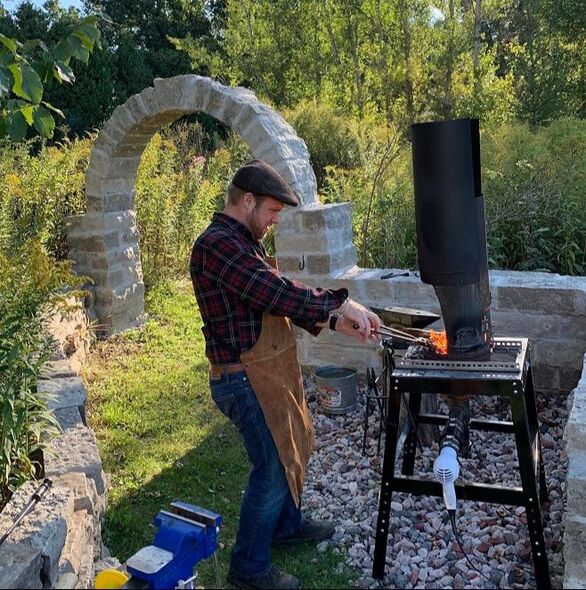
Outdoor Blacksmith shop in my backyard in Wisconsin.
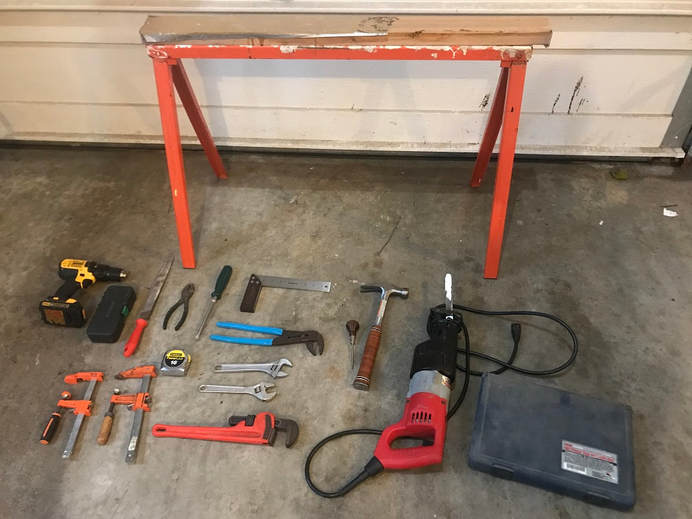
Tools I used: Drill and high-speed drill bits, files, pliers, screw driver, tape measure, clamps, wrenches, hammer, Sawzall with metal-blade, tap and die set.
Components for brake drum forge
My parts list for making the brake drum forge:
- Brake drum: the inner dimensions of my drum are 9" ID x 2" deep. From what I could gather, bigger is not necessarily better when it comes to the size of the brake drum, so I selected a somewhat small size. I do not intend to be heating 3/4" thick material, so my forge and anvil will be sized accordingly. I built this over a couple hours on a Sunday afternoon and I was unable to find a junkyard open. My plan was to go get one from a scrap yard, but I bought this one at a parts store for $34. Total cost of this forge, which was made from brand new parts, was about $80. Could be done with salvaged parts for half that.
- Two pieces of 1" x 1" x 36" steel angle. I bought pieces that had holes pre-perforated along them.
- 2" steel threaded pipe flange, I did not use galvanized pipe for anything
- 2" steel pipe, 5" long threaded both ends
- Two pieces of 2" steel pipe, 6" long, threaded both ends
- 2" steel pipe threaded T-fitting
- 2" steel pipe end cap, threaded
- Four 1/4" nuts and bolts to bolt the brake drum to the pipe flange
- Four 1/4" nuts and bolts to bolt the steel angles to the metal stand.
- Two 1/4" thumb screws to secure the brake drum to the steel angles
- Grate to cover the hole in the bottom of the brake drum. This allows air to be blown up through it into the forge, but limits coal falling down out of the forge.
- Rubber flap-type 2" sump pump check valve
- Full size hair dryer with two speeds (got mine from Walmart for $12)
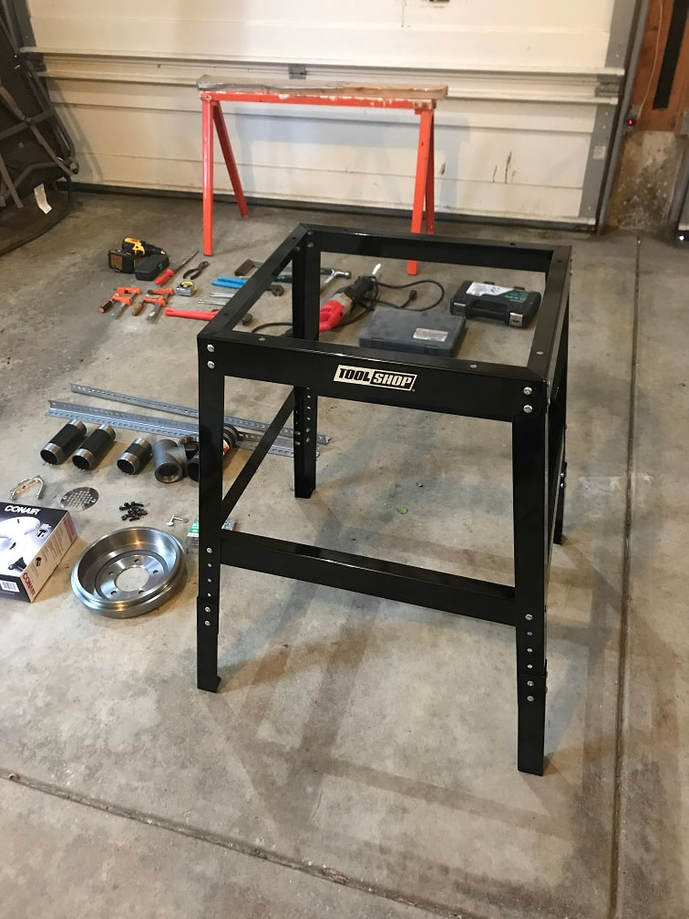
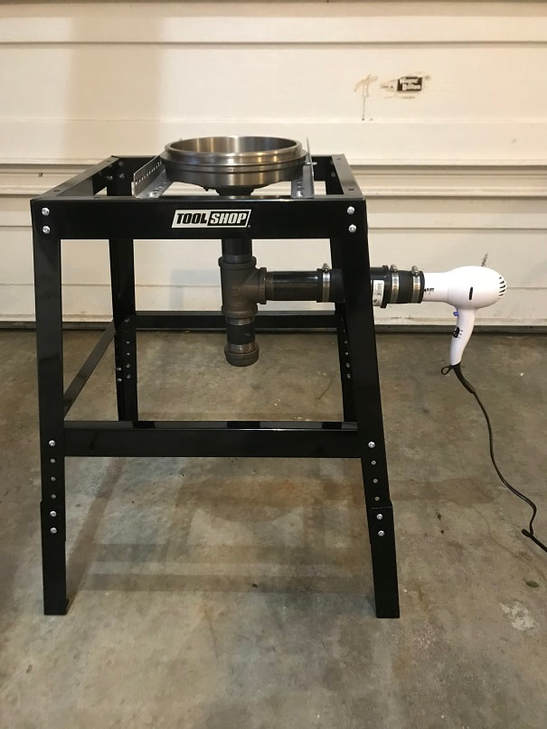
- I built my forge on a steel stand kit made by "Tool Shop" that I bought at the hardware store for $24, it has a 500lb weight limit. The kit came in painted steel pieces and I bolted it together to look like what you see above. You could find or build an stand for your forge. There are hundreds of possibilities.
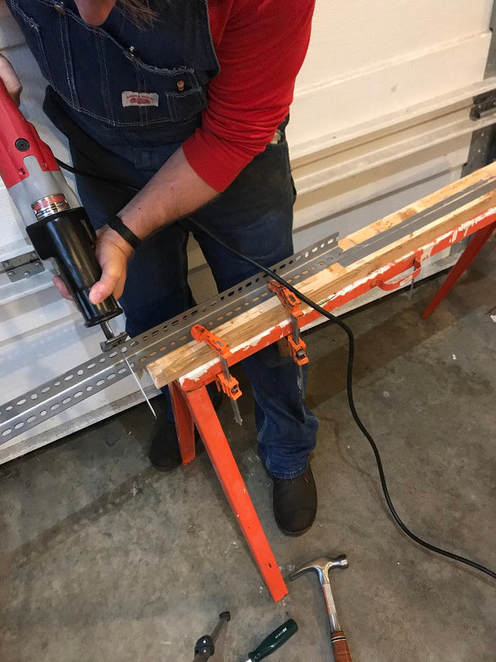
Steel angle measured and cut to the distance across the top of the metal stand.
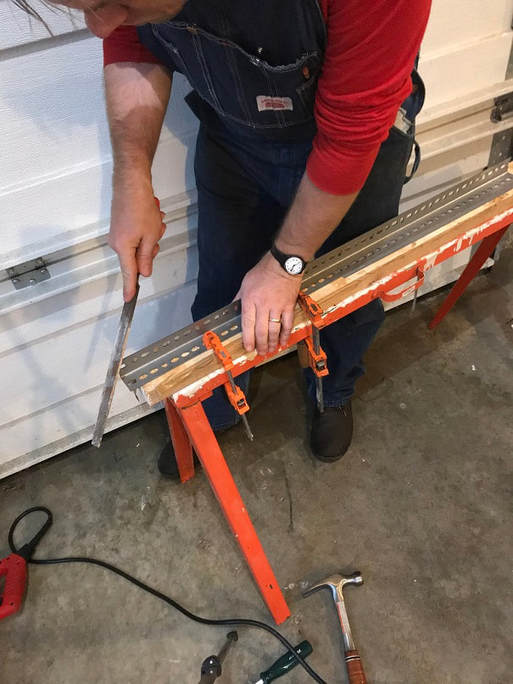
Using a file to smooth the corners and edges cut with the Sawzall.
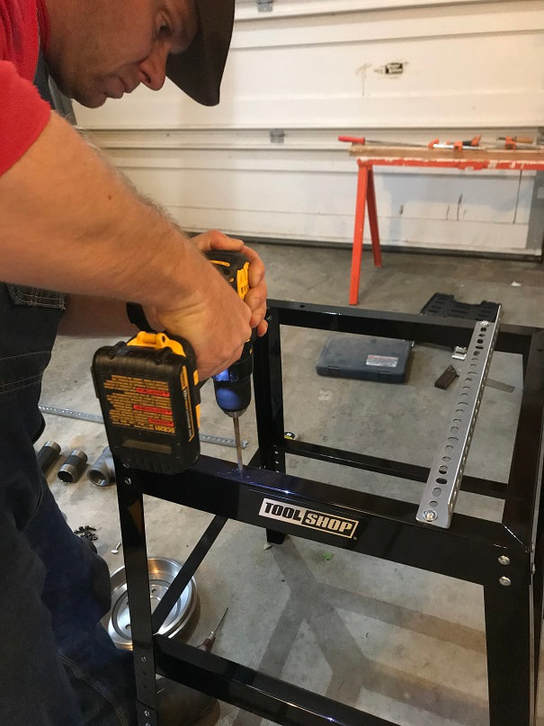
Mark and drill holes in the top of the stand to bolt the steel angles onto the top of the stand. The brake drum with rest on and between these angles. I bolted them down with 1/4" nuts and bolts.
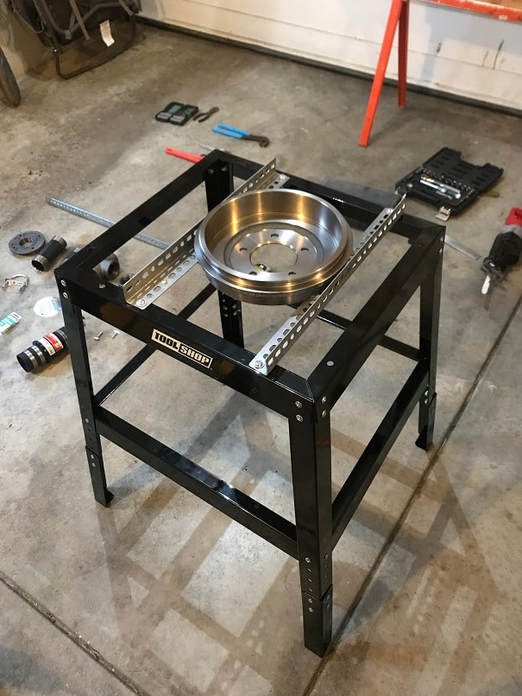
Here is how my brake drum will rest on the angles.

I marked a location where I will attach a thumb-screw through the angle, into the side of the brake drum.
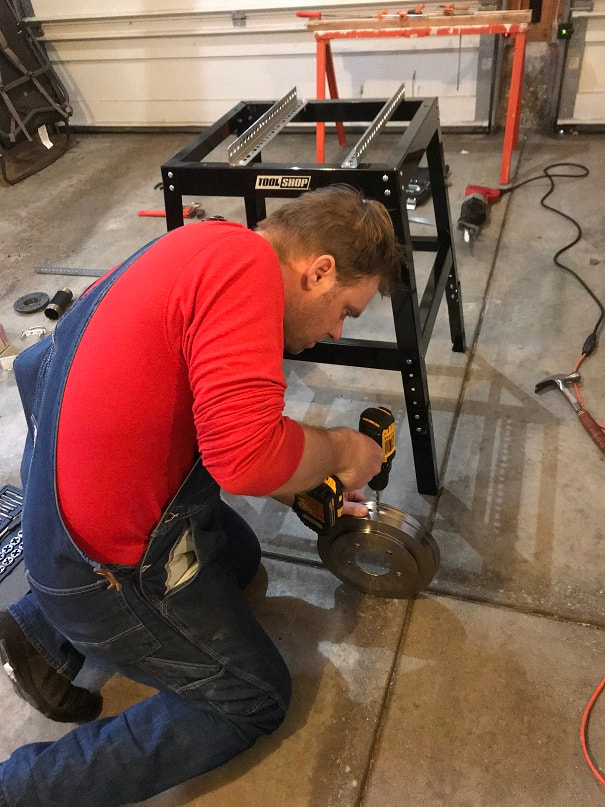
Predrilling holes in the side of the brake drum, which I will tap with 1/4" threads.
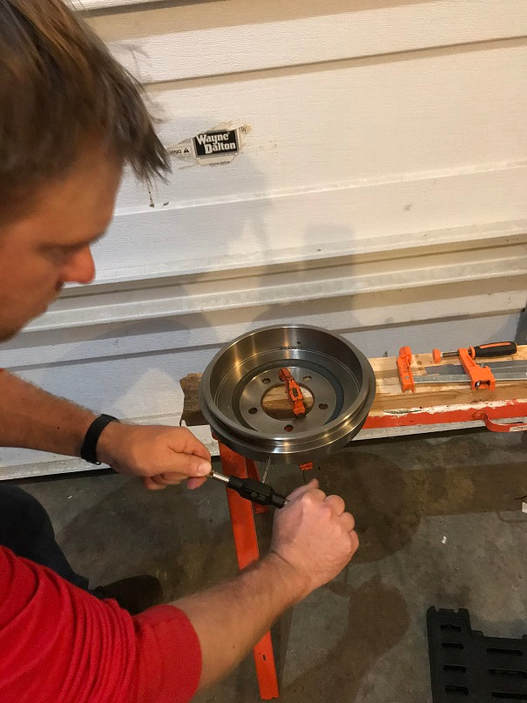
Tapping 1/4" coarse threads into the brake drum.

Lay out the 2" pipe flange onto the bottom of the brake drum so that the flange covers up the holes that are in the brake drum. Mark onto the brake drum, where the flange mounting holes are.
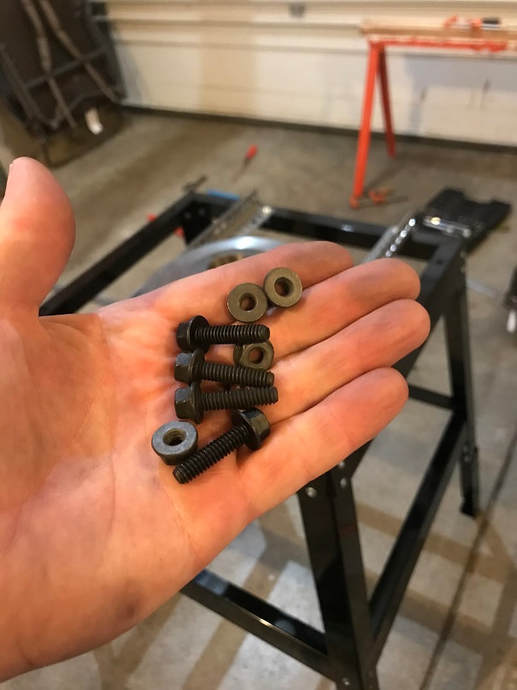
These are the nuts and bolts I selected to attach the flange to the base of the brake drum.
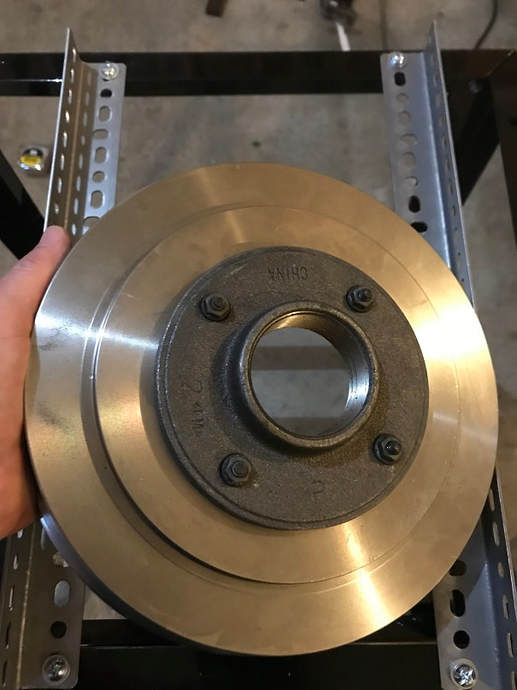
2" pipe flange mounted to bottom of the brake drum.
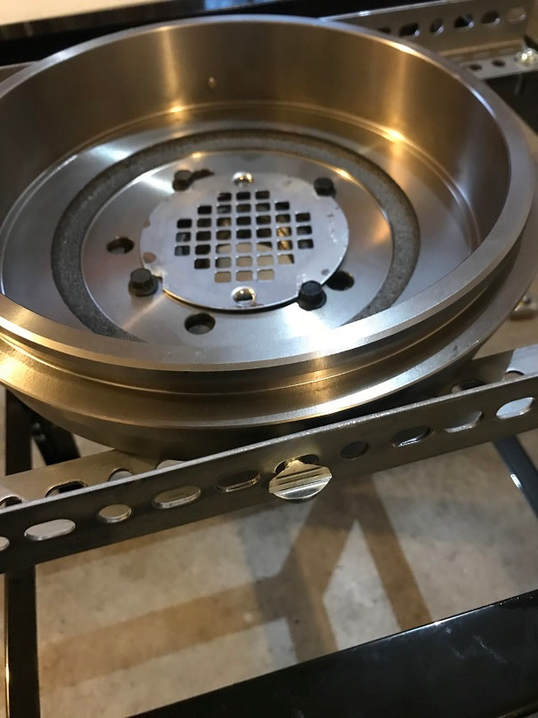
Stainless steel grate, trimmed to fit over the hole in the bottom of the brake drum forge. Here you can also see the thumb screw that is holding the brake drum in position on the steel angles. There is one other thumb screw on the opposing side, I coated them lightly with high-temp grease prior to installation.
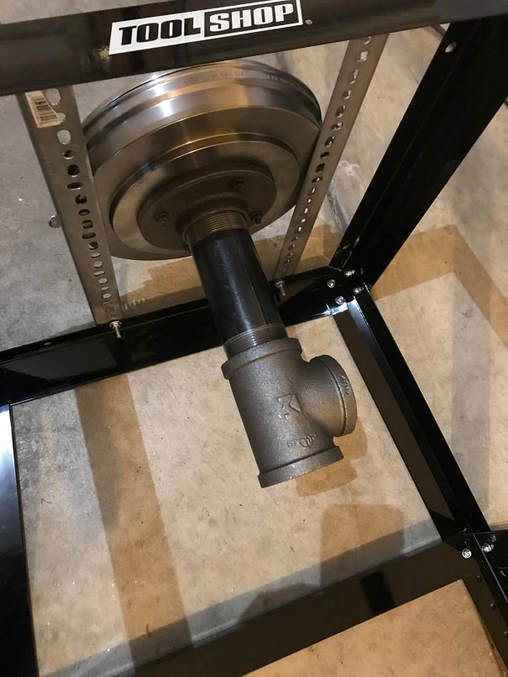
6" pipe threaded into the 2" flange, 2" T-Fitting threaded below the 6" pipe.
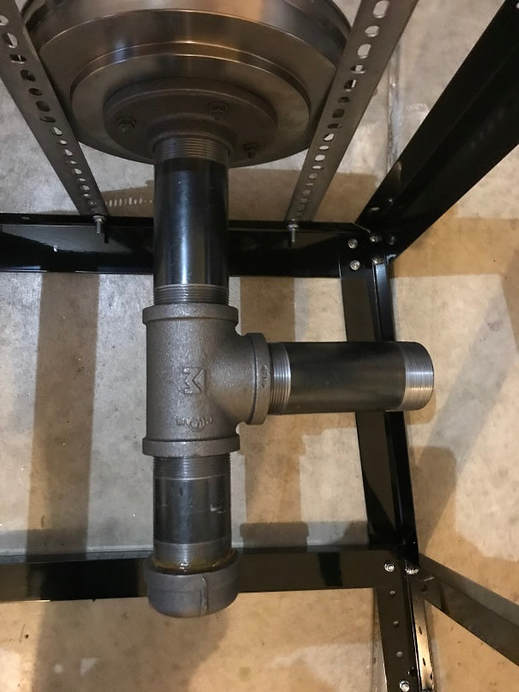
6" length of pipe threaded horizontally into the T-fitting. 5" length of pipe threaded vertically below the T-fitting. Cap threaded onto the very bottom. The cap can be removed to clean out ashes that fall down from the forge. I put a thin film of high temp grease on the threads of the cap; it should not be threaded on tightly.
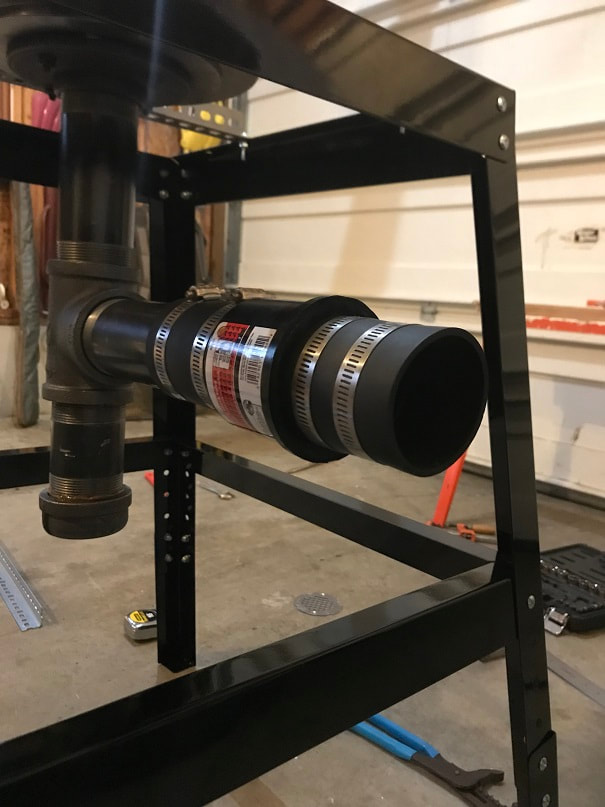
This rubber check valve allows air to be blown into the forge but prevents material or air from falling back out. I tightened it on with the supplied hose clamps. I oriented the attached part of the flap at the top of the valve so that the check-valve flap hangs down.
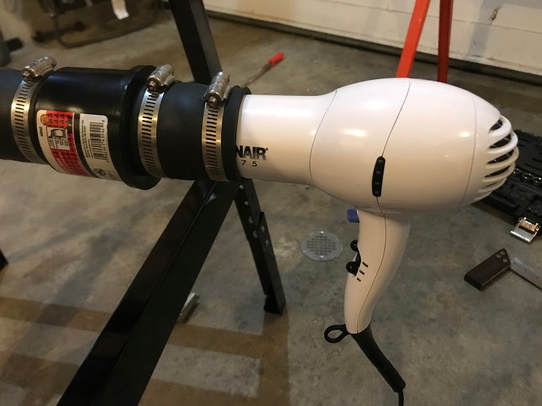
Here is the hair-dryer installed into the rubber end of the check valve. It does not need to be tightened, just snug it up so that the hair-dryer can be pulled in or out with a twist.
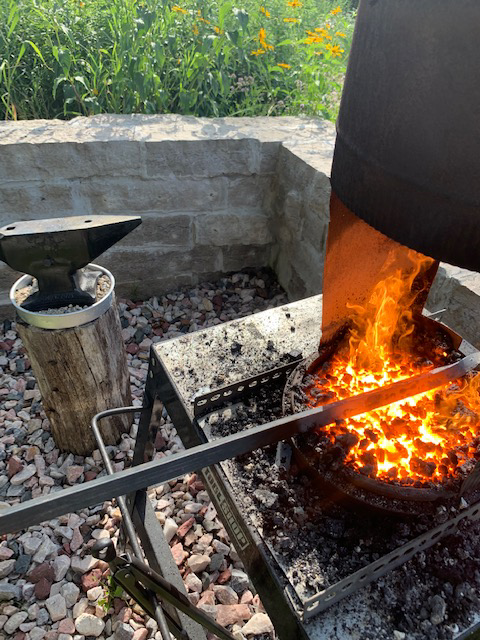
Completed brake drum forge.
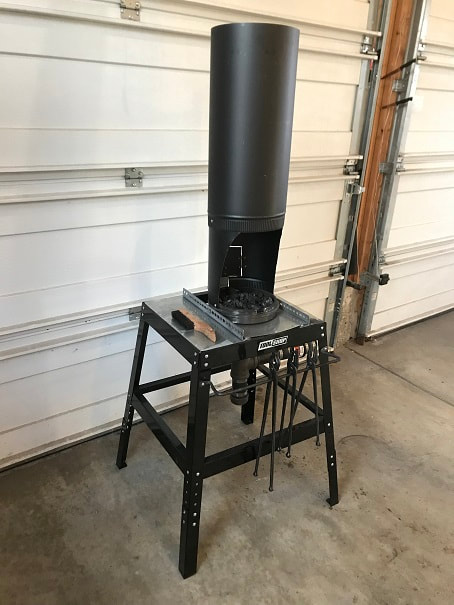
I spent another $20 on: 1. Chimney which will also serve as a windbreak. It is a two part chimney, so I can adjust the height of the opening at the front of the forge. 2. Tool rail bolted to front 3. Notch added to the front of the brake drum to allow stock to be entered more horizontally into the forge. 4. I riveted sheet metal over the open parts of the top of the forge stand.
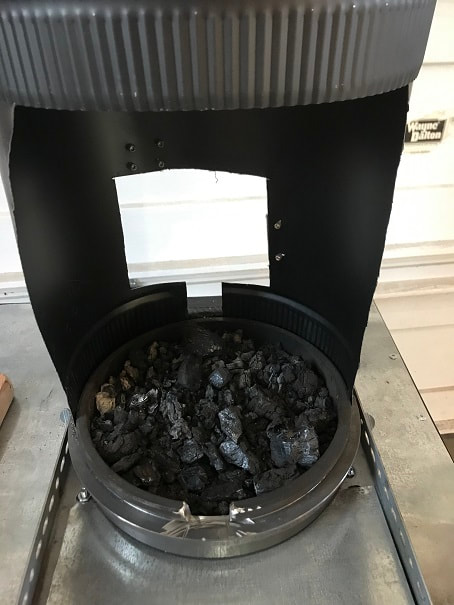
Here you can see the notch cut into the front of the brake drum and I included a door at the back of the chimney to allow me to pass long pieces through, in case I need to heat them in the middle.

View of the back of the forge chimney door.
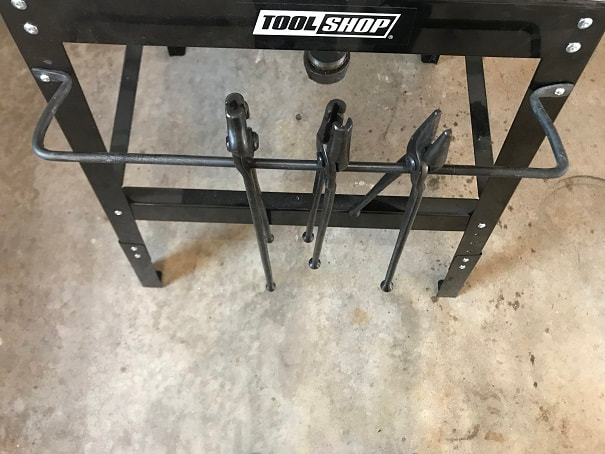
This simple tool holding rack is one of the very first things I made using the forge itself.
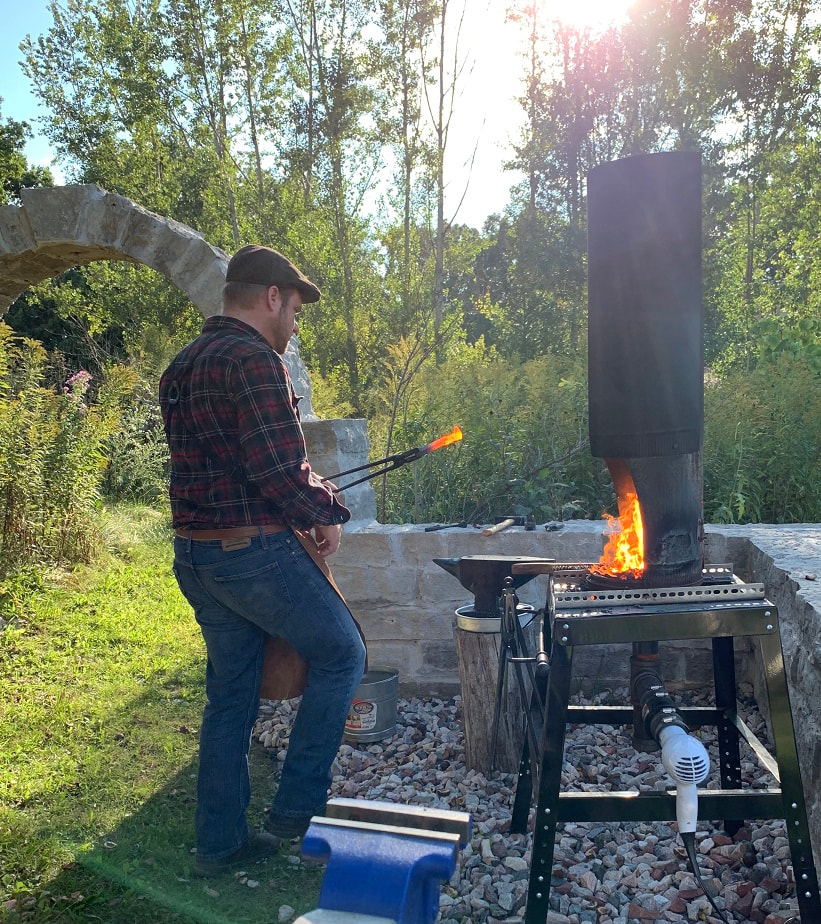
Brake drum forge in operation
I have used this forge to heat up to 3/4” mild steel stock. It gets plenty hot; even with 5/8” stock, if you don’t pay attention it will burn and melt the steel, which I have made the mistake of doing when I had too many irons in the fire. This forge and it’s chimney present limitations regarding the size and shape of pieces that can be forged; for my hobby uses and goals it has worked great.
Heating 3/4 bar that will be twisted and the bent into a handle for the roasting spit
Lighting the Brake Drum Forge
I burn coal in my brake drum forge. The method below has worked for me to get 'er going:
- Have a nice little pile of dry hardwood kindling ready. For my forge size, I use a small hatchet to prepare hardwood kindling that is about 4" to 6" long. Have your coal and dry paper ready also.
- Bunch up some newspaper or brown paper grocery bag paper , and start the bunches on fire in the center of the forge
- once it is burning place the hardwood kindling on top of it in a logical way that will start the kindling on fire and provide enough air flow to keep things burning.
- Once the kindling is burning on its own, start the hair dryer on the low airflow level, with the heat on. The fire will grow rapidly with this.
- Place your bed of coal over the burning fire and crank the hairdryer up to high airflow to get the coal burning.
- Start blacksmithing! Enjoy!
Real time video...3:45 minute video of lighting a brake drum forge: